This document demonstrates how to set up a database integration using an Agent. In order to integrate a database using an Agent, first create an Agent along with the data source, initial catalog, user ID and password values for the database connection. After an Agent is downloaded, installed and registered the integration process can be set up.
Example
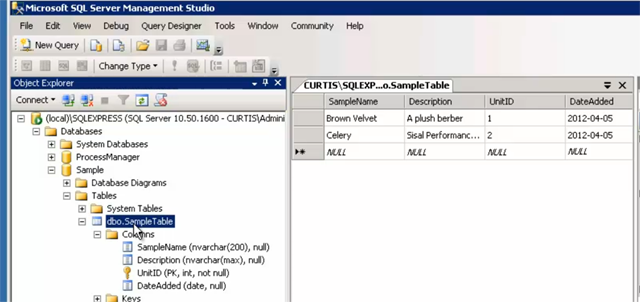
For this example integrate with an example SQL database. The example database used in this document is named "Curtis" as shown below:
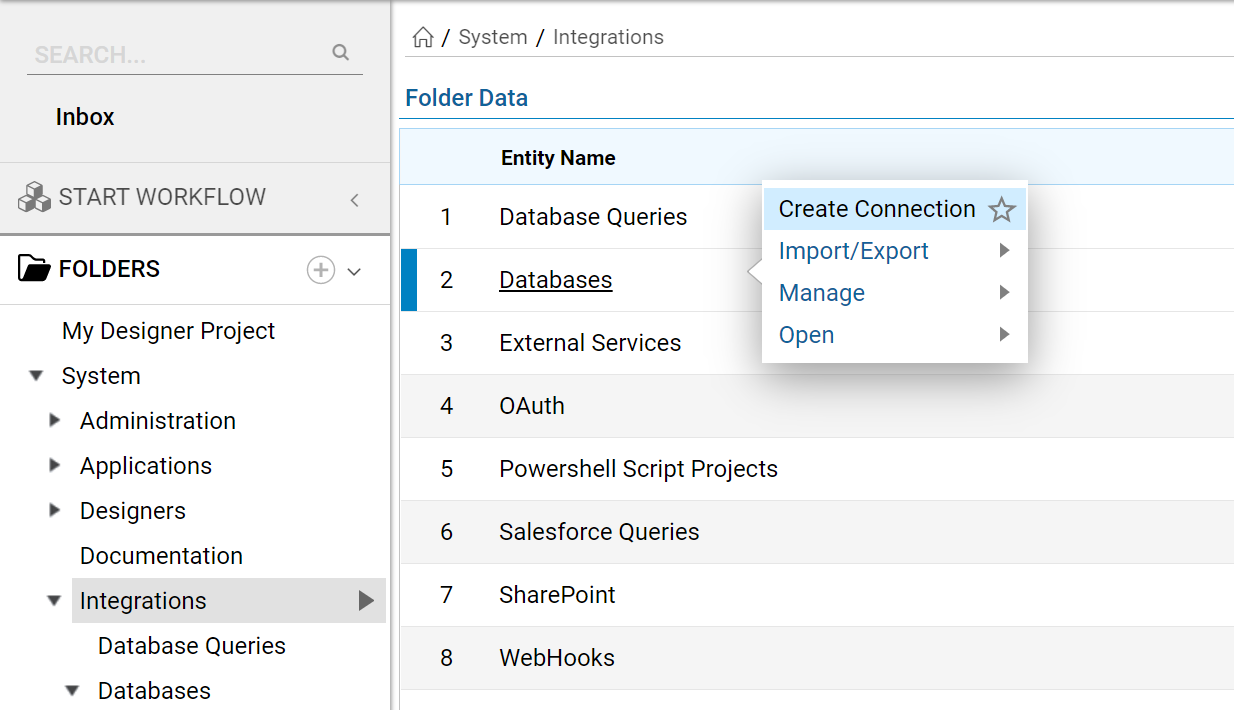
- Begin by navigating to the Folder System > Integrations > Databases.
- Right-click Databases, then select Create Connection.The example requires an Agent to be registered and installed prior to integrating with the SQL database.

- When the Agent is installed, use it to integrate with the sample database.
- Navigate to the Folder System > Integrations > Databases right-click and select Create Connection.
- Right click on the Entity name and then select Create Connection from the Action Menu.

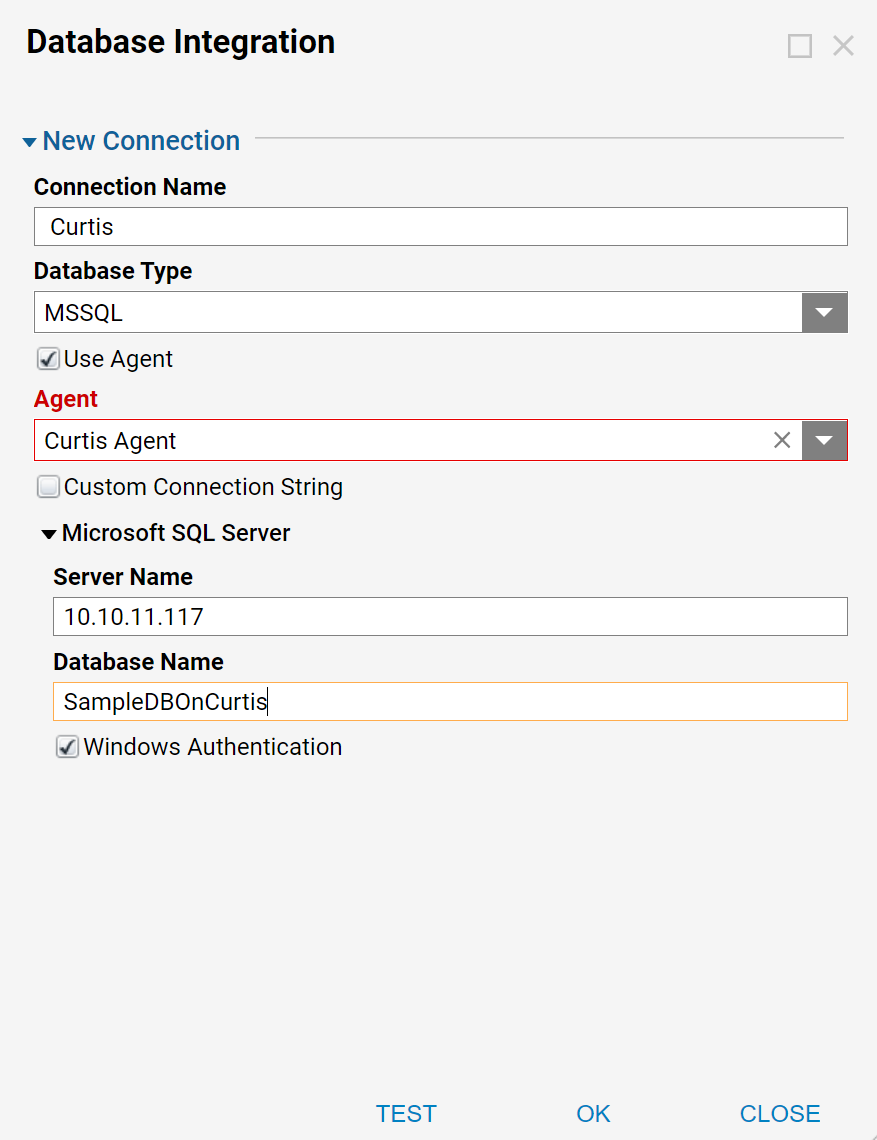
- In the Database Integration settings, configure the properties under Agent and select the Registered Agent from the drop down.
- Test the connection and select OK when finished.

- After an Agent is installed and the database connection is integrated, navigate to services in Windows.
- Locate the service name called Decisions Management Agent.
- Right Click to view the properties and change the log-in information.

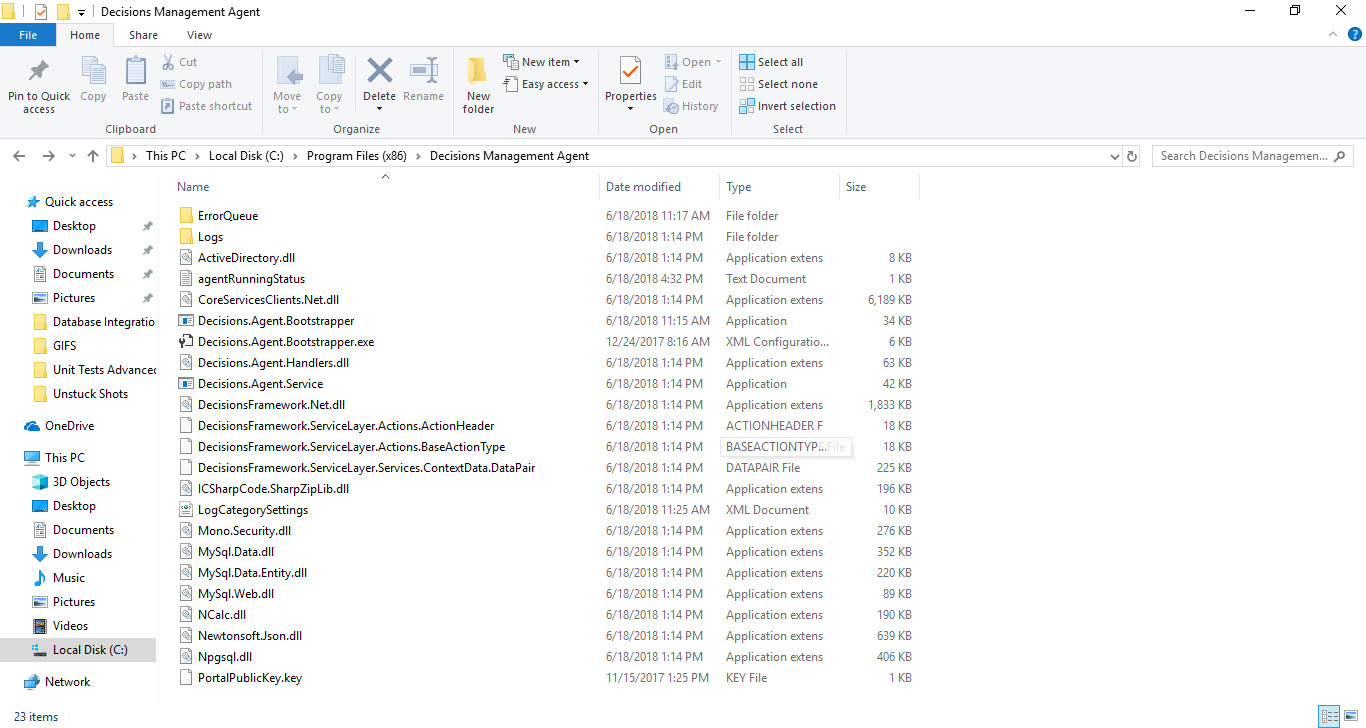
- The configuration file can be located at This PC > Local Disk > Program Files (x86) > Decisions Management Agent.
