Overview
Portal Pages can display dynamic Page content with the use of Tile components. Tiles can be placed on any Portal Page, but the Tile content must be generated via a Flow. To display dynamic content, a user must create a Flow that outputs a Tile Return data object which contains the desired content. The following article will demonstrate how to generate dynamic Page content with the use of a Simple Tile component.
Example
In this example, a previously created Folder Extension Data Structure [Vehicle] is used, please navigate to Folder Extension Data Structures for more information.
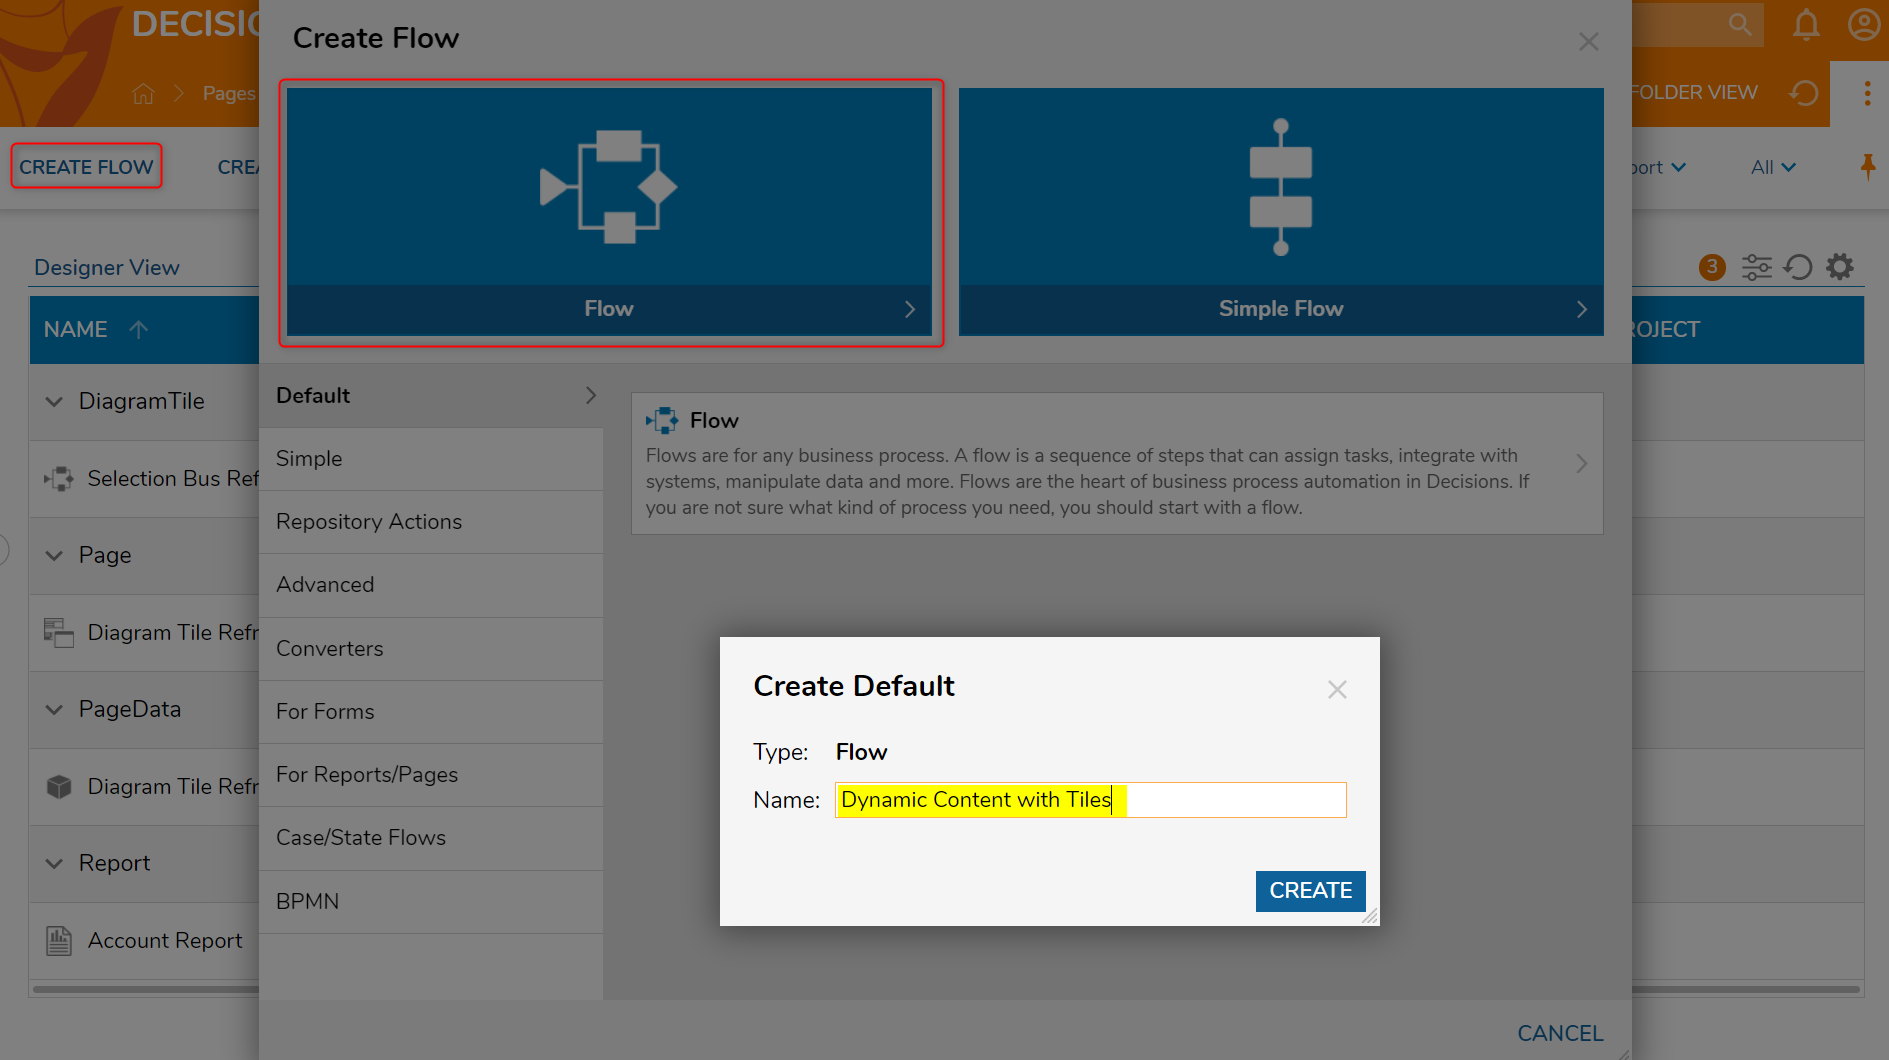
- Begin in a Designer Folder, navigate to the Global Action Bar and select CREATE FLOW.
- In the resulting Create Flow window, select and name the default Flow [Dynamic Content with Tiles]. Click CREATE to open the Flow Designer.
- In the Flow Designer, select the Start step and locate the Properties panel > FLOW INPUTS > Flow Input Data selector. Click SHOW EDITOR.
- In the Flow Inputs window, add the Data Definition "FolderID" into the NAME value field and select String [Text] from the TYPE drop down list.
- Save the Flow Inputs.

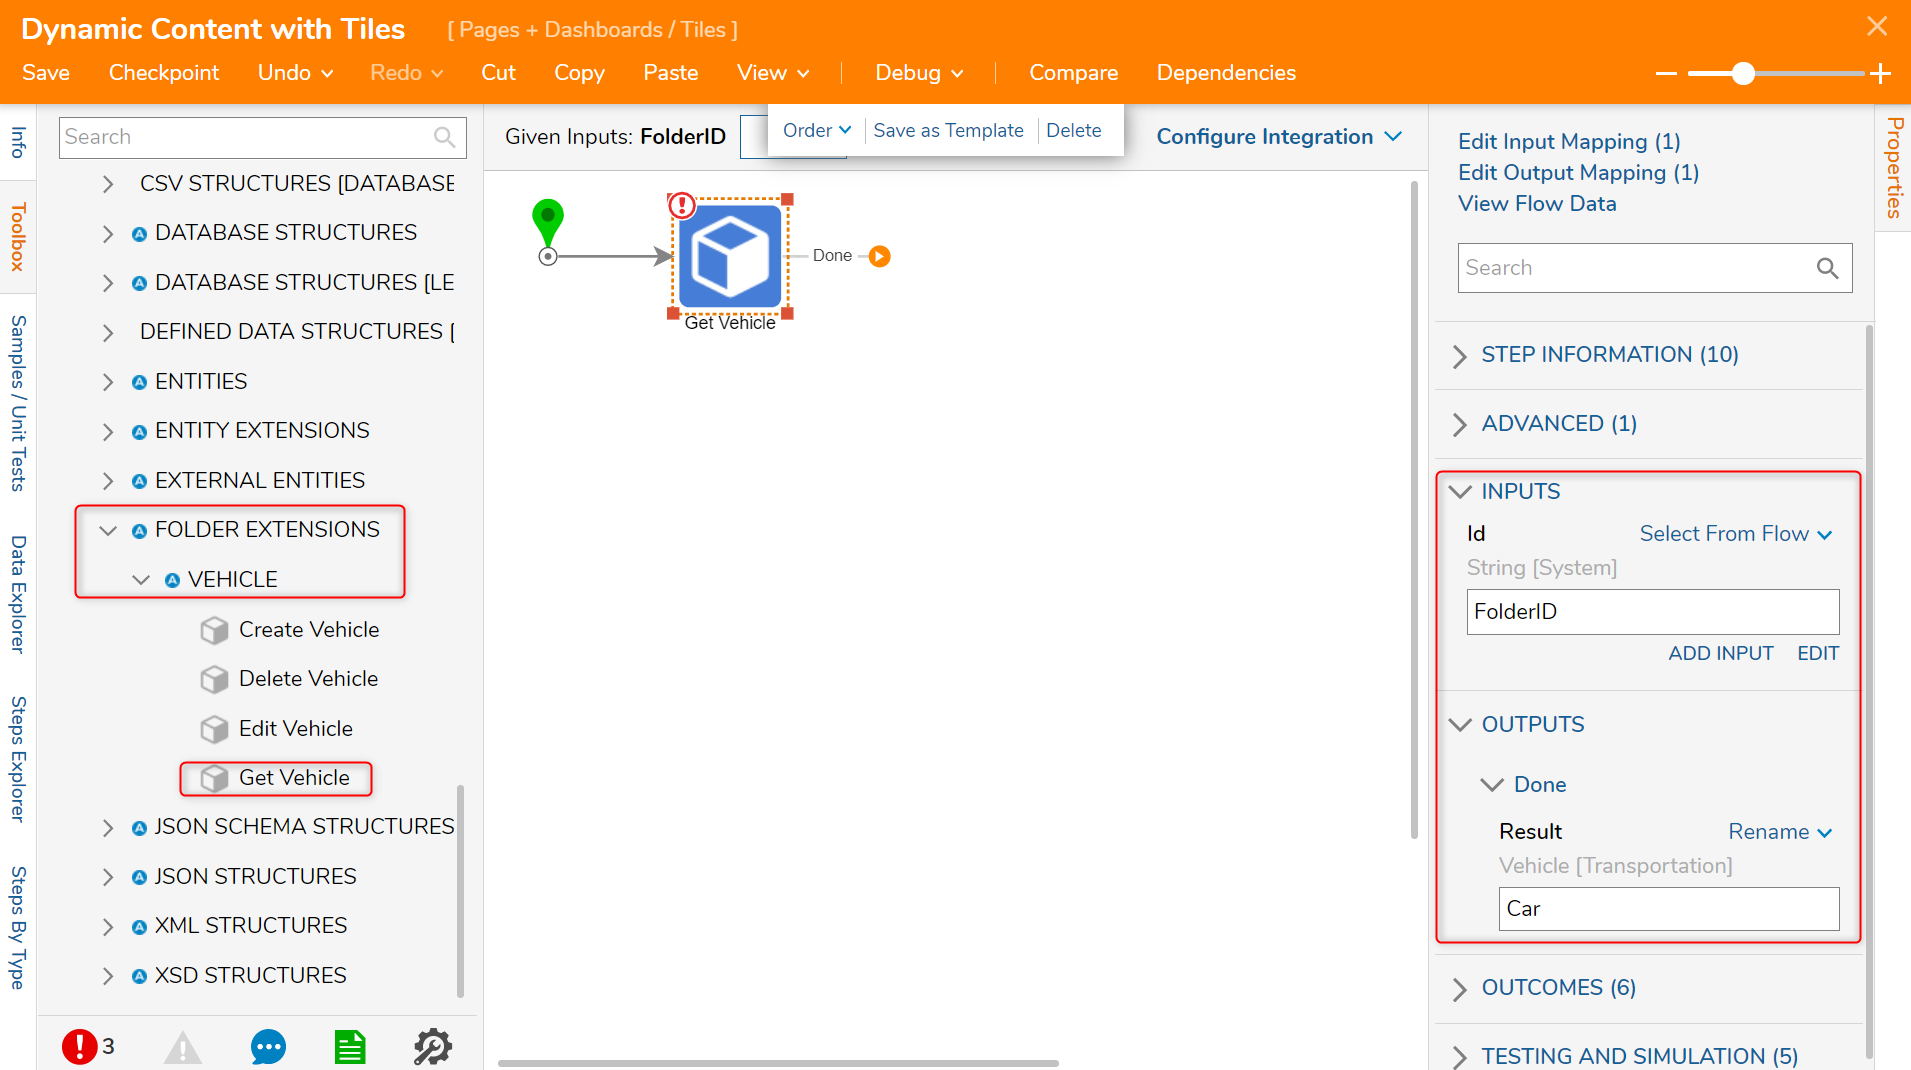
- Navigate to the Toolbox > USER DEFINED TYPES > FOLDER EXTENSIONS > VEHICLE category and drag and connect a Get Vehicle component to the Start step.
- With the Get Vehicle component selected, locate the Properties panel > INPUTS > Id value field and change the input mapping to Select From Flow, and select FolderID.
- In the OUTPUTS > Done > Results value field, change the value to Car.
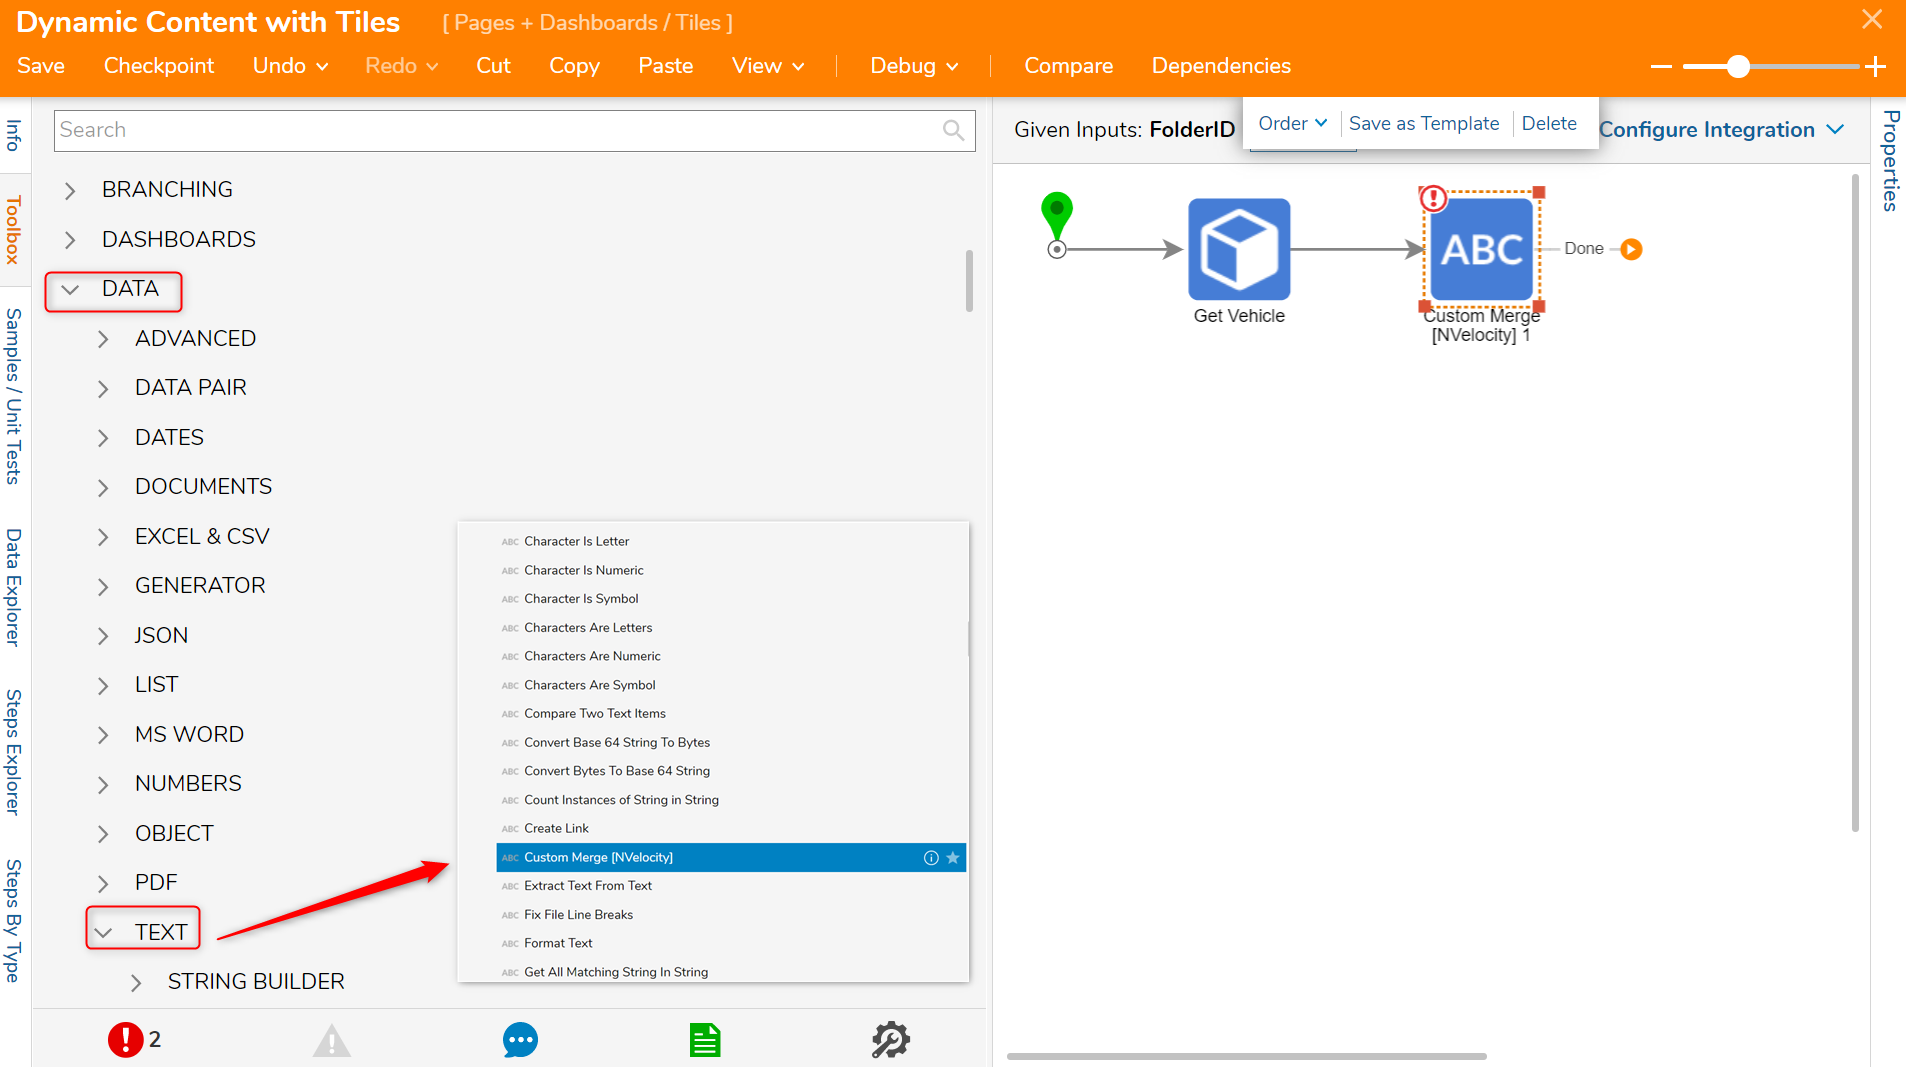
- Navigate to the Toolbox > DATA > TEXT section and drag and connect a Custom Merge [NVelocity] step to the Get Vehicle step.The details of the Car folder need to be turned into HTML to display on the Tile, that is why the Custom Merge [NVelocity] step is necessary.
- With the Custom Merge [NVelocity] step selected, navigate to the Properties panel > MERGE SETUP > Template value field and input the HTML code below.
<html>
<body>
<p>Make: $Make
Model: $Model
Year: $Year
Color: $Color
The $FieldName syntax helps to define the dynamic variables of the Tile. - Next, once the HTML code has been entered within the Template value field, the Custom Merge [NVelocity] step will immediately detect the dynamic variables and create corresponding INPUTS.
- Set each input to a Select From Flow mapping and drill down to the corresponding value (e.g. INPUTS > Color will have a Car.Color value).
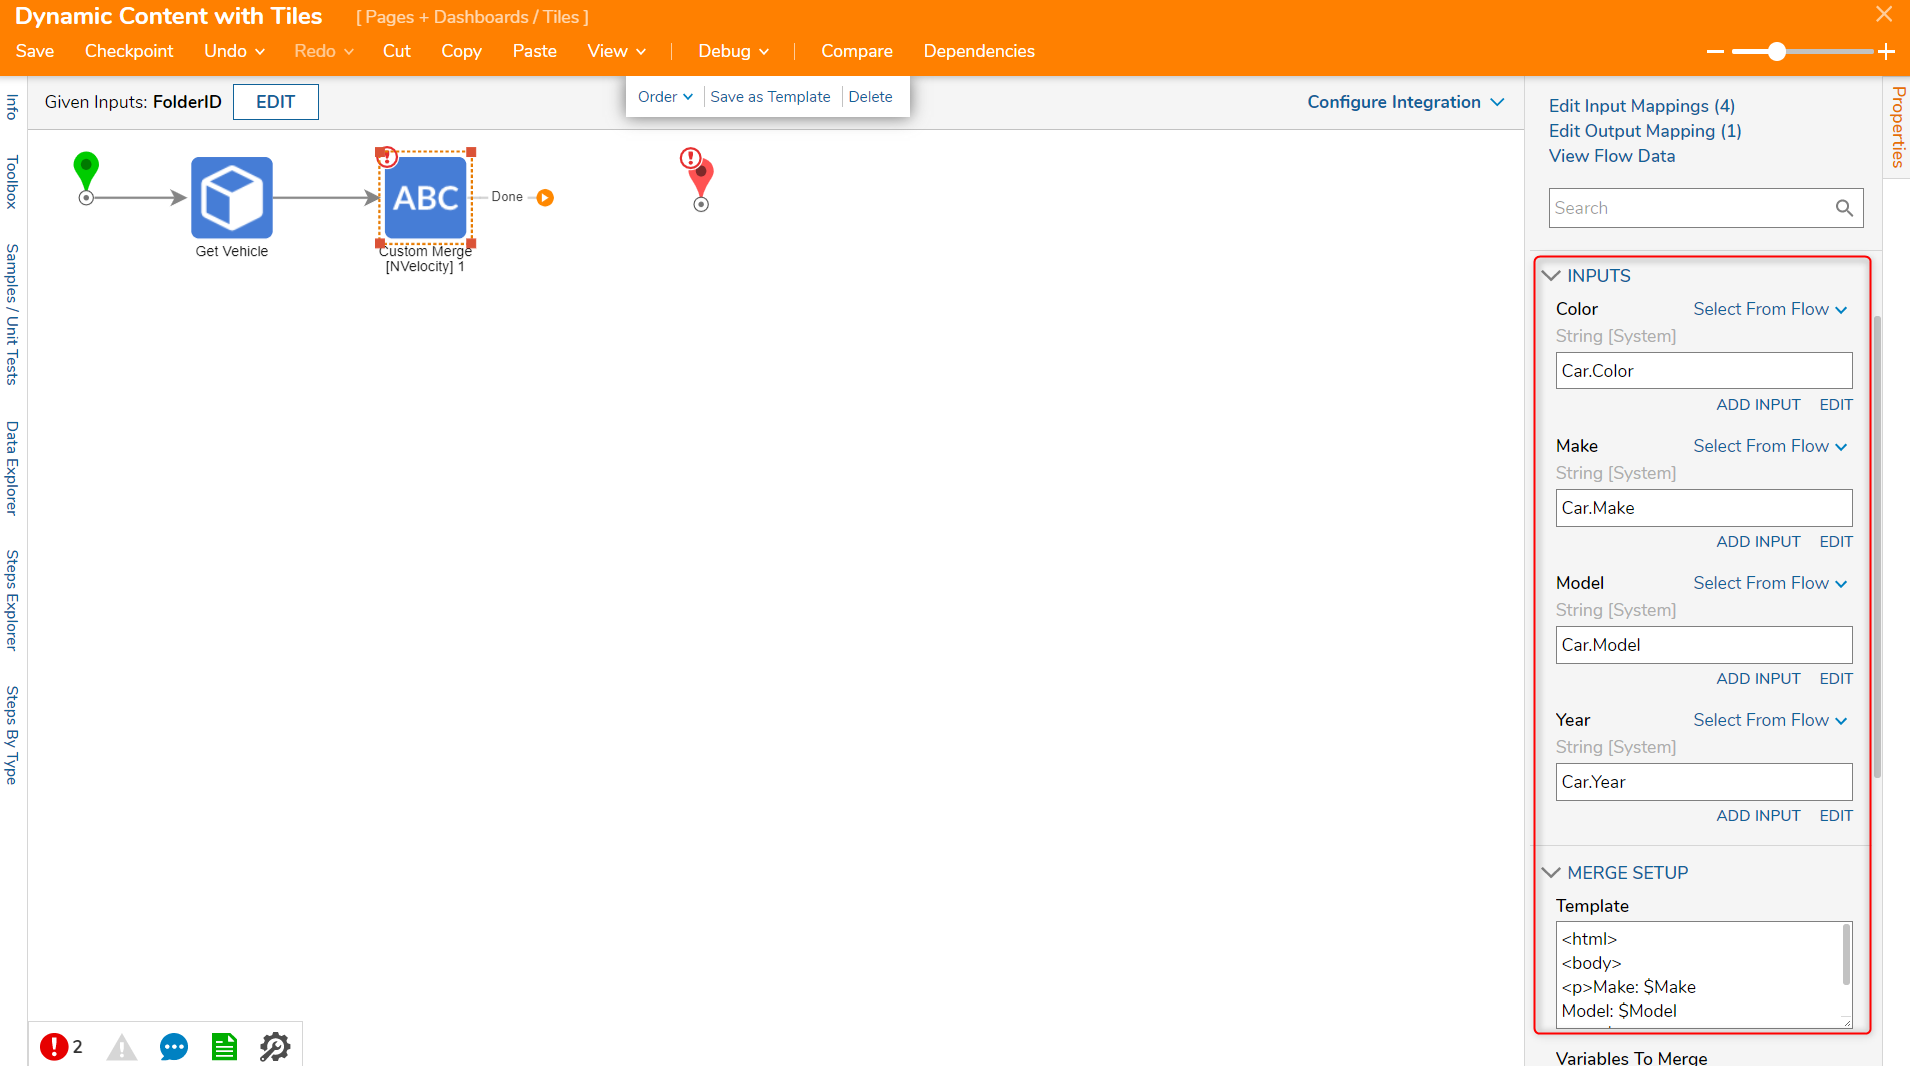
- Set each input to a Select From Flow mapping and drill down to the corresponding value (e.g. INPUTS > Color will have a Car.Color value).
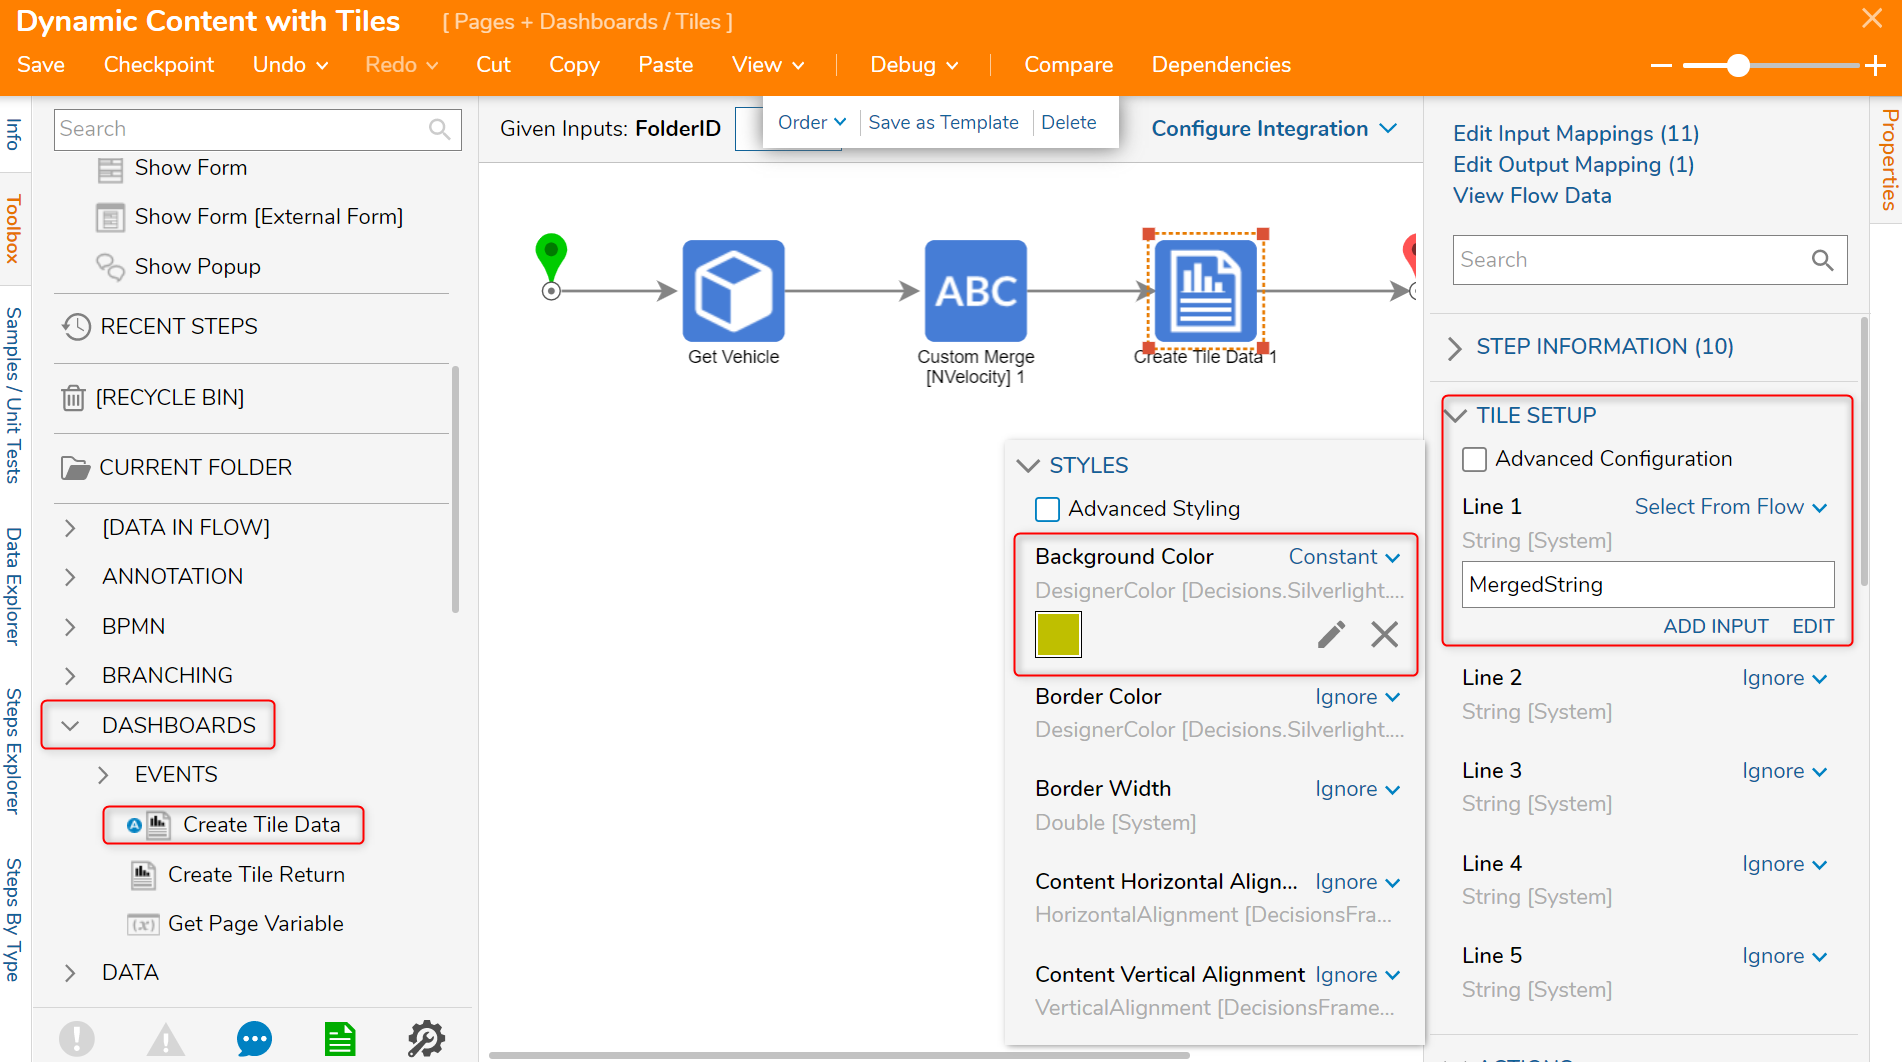
- Navigate to the Toolbox > DASHBOARDS category and drag and connect a Create Tile Data step to the Custom Merge [NVelocity] step and End step.
- With the Create Tile Data step selected, locate the Properties panel > TILE SETUP > Line 1 value field and change the input mapping to Select From Flow, and selecting the Merged String output from the Custom Merge [NVelocity] step.
- Next, navigate to STYLES > Background Color and change the input mapping to Constant and click the pencil icon to select a color.In this example, the selected color will be sage green.
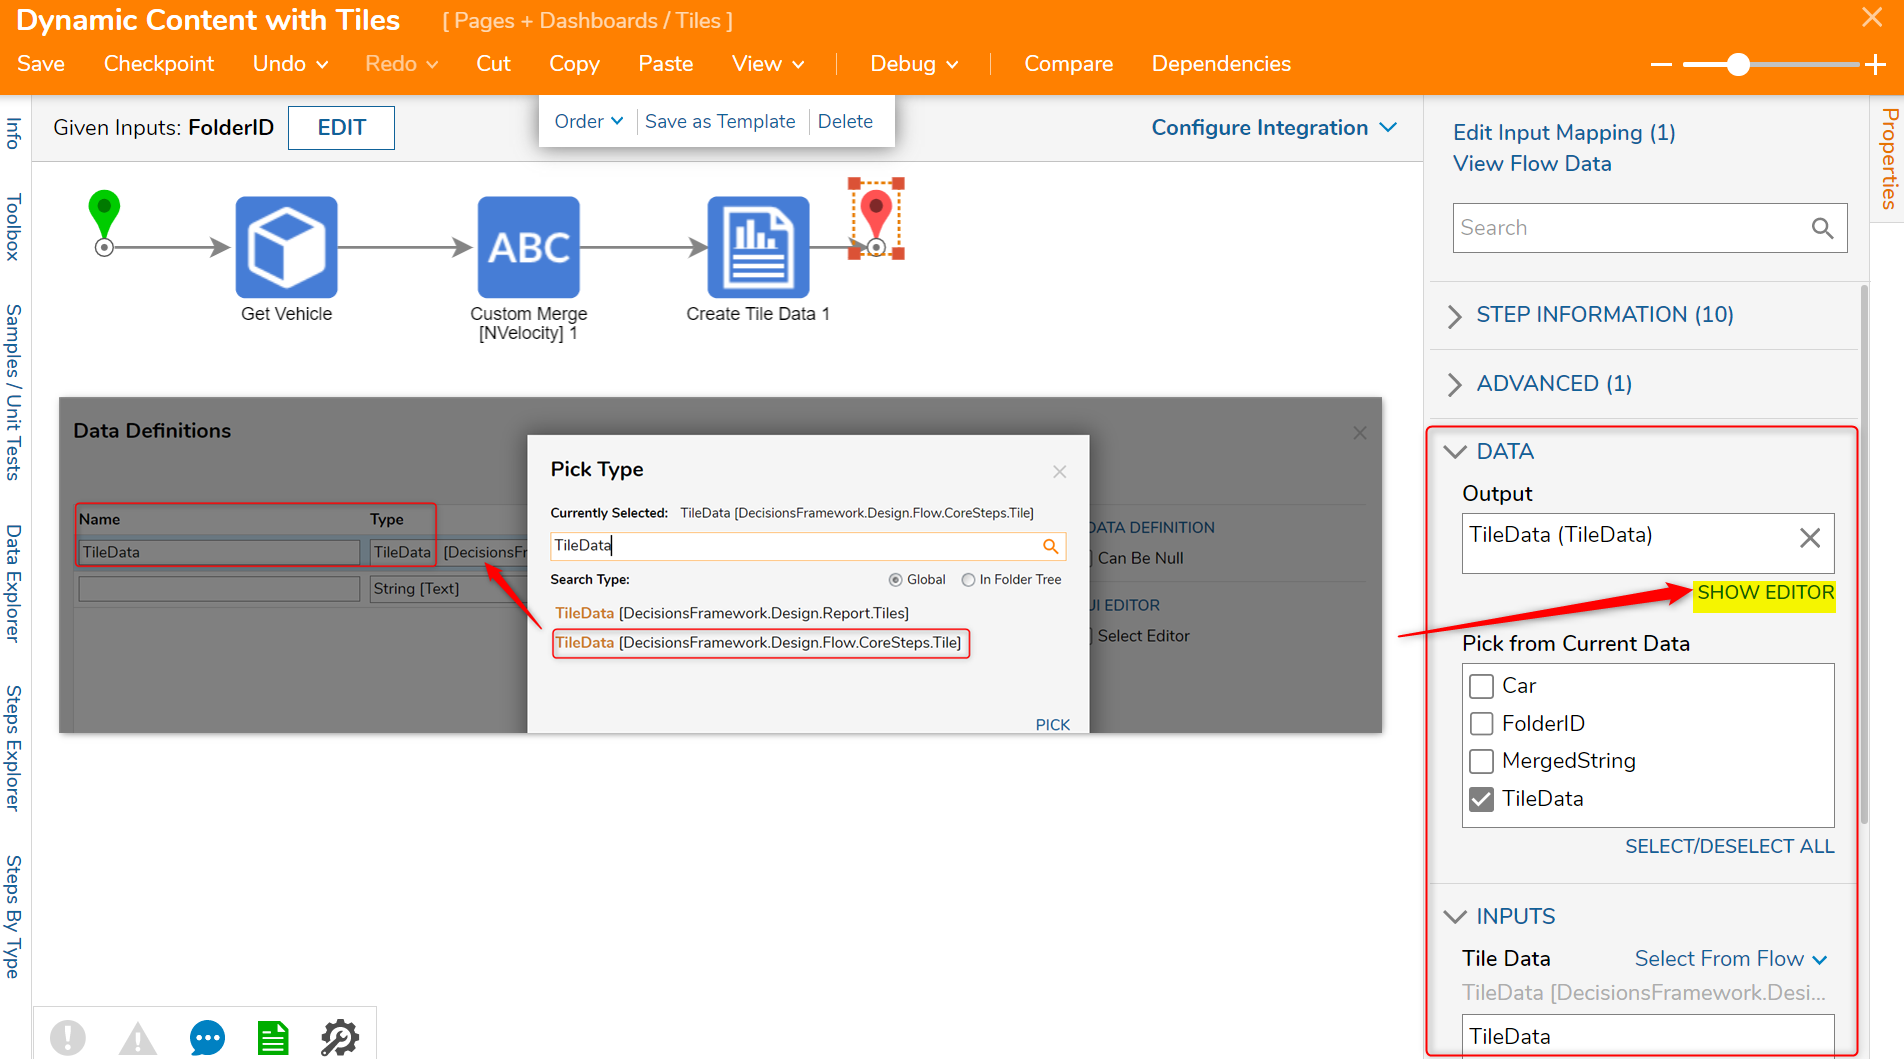
- Select the End step and navigate to the Properties panel > DATA > Output selector and click SHOW EDITOR.
- In the Data Definitions window, input TileData into the Name field and search TileData in the Type drop down list.
- Select the second option. Close when complete.
- Navigate to the Properties panel > INPUTS > Tile Data and change the input mapping to Select From Flow and choose TileData.
- Save and Close the Flow Designer.
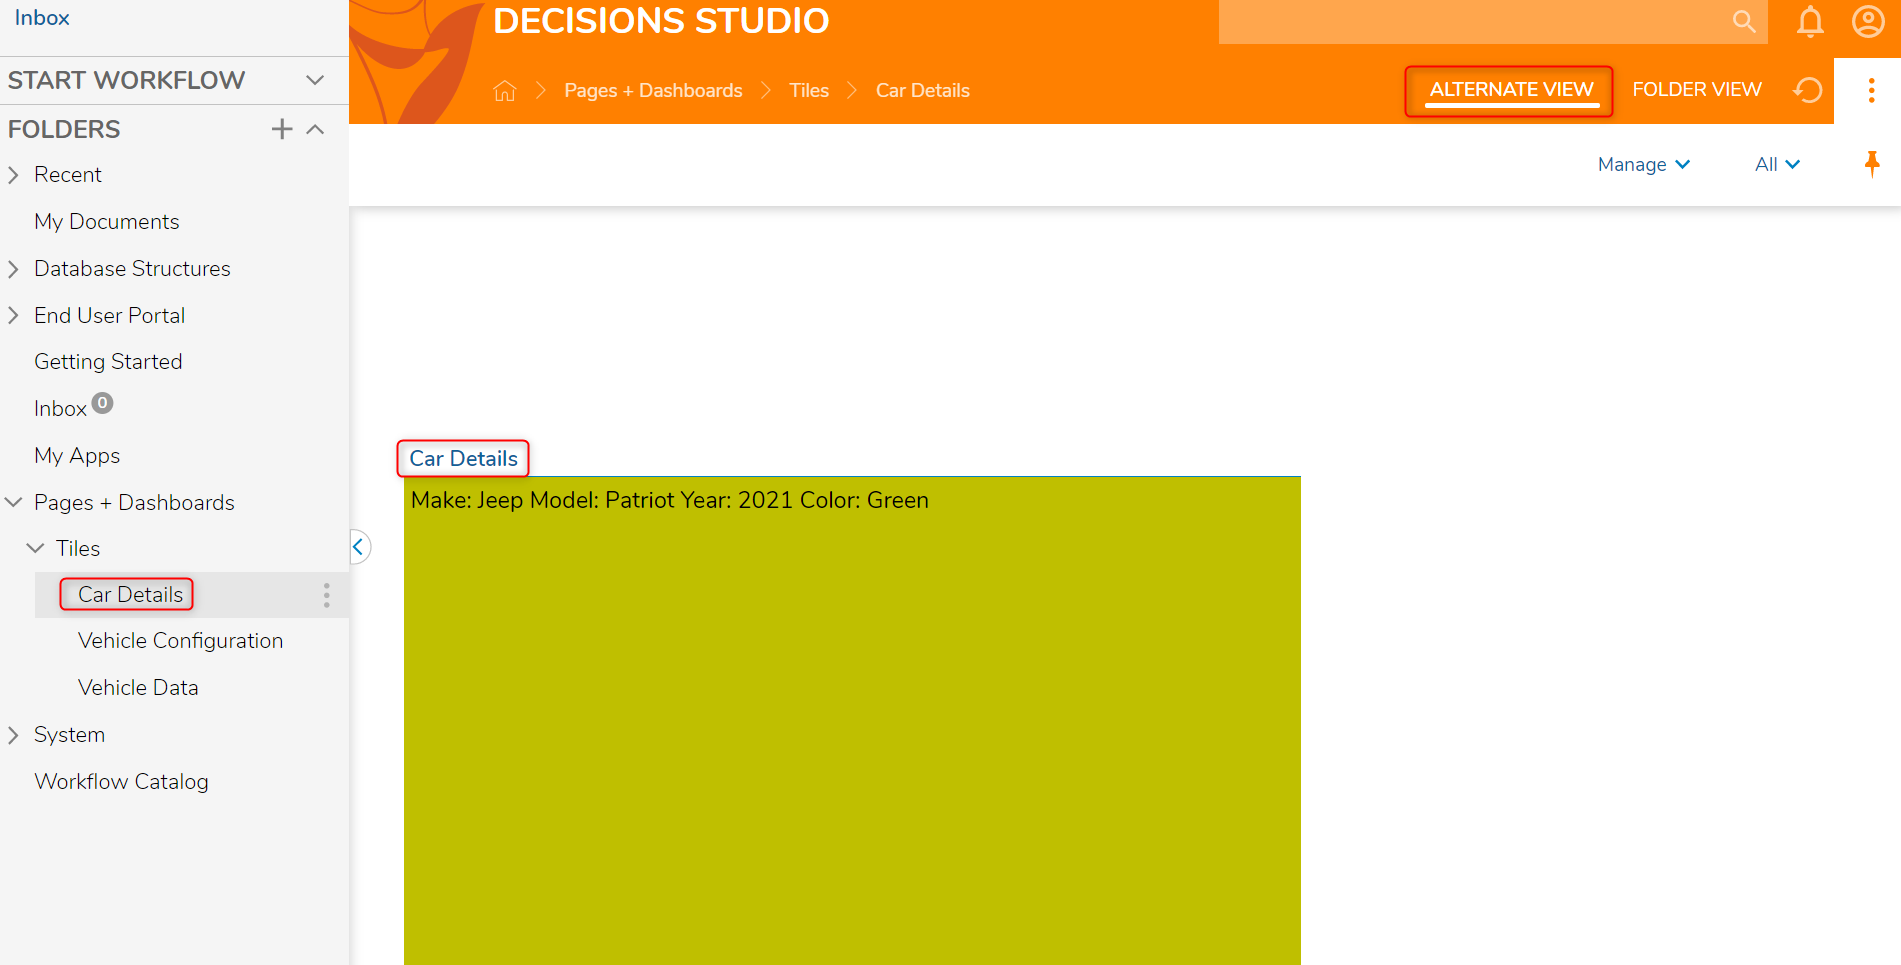
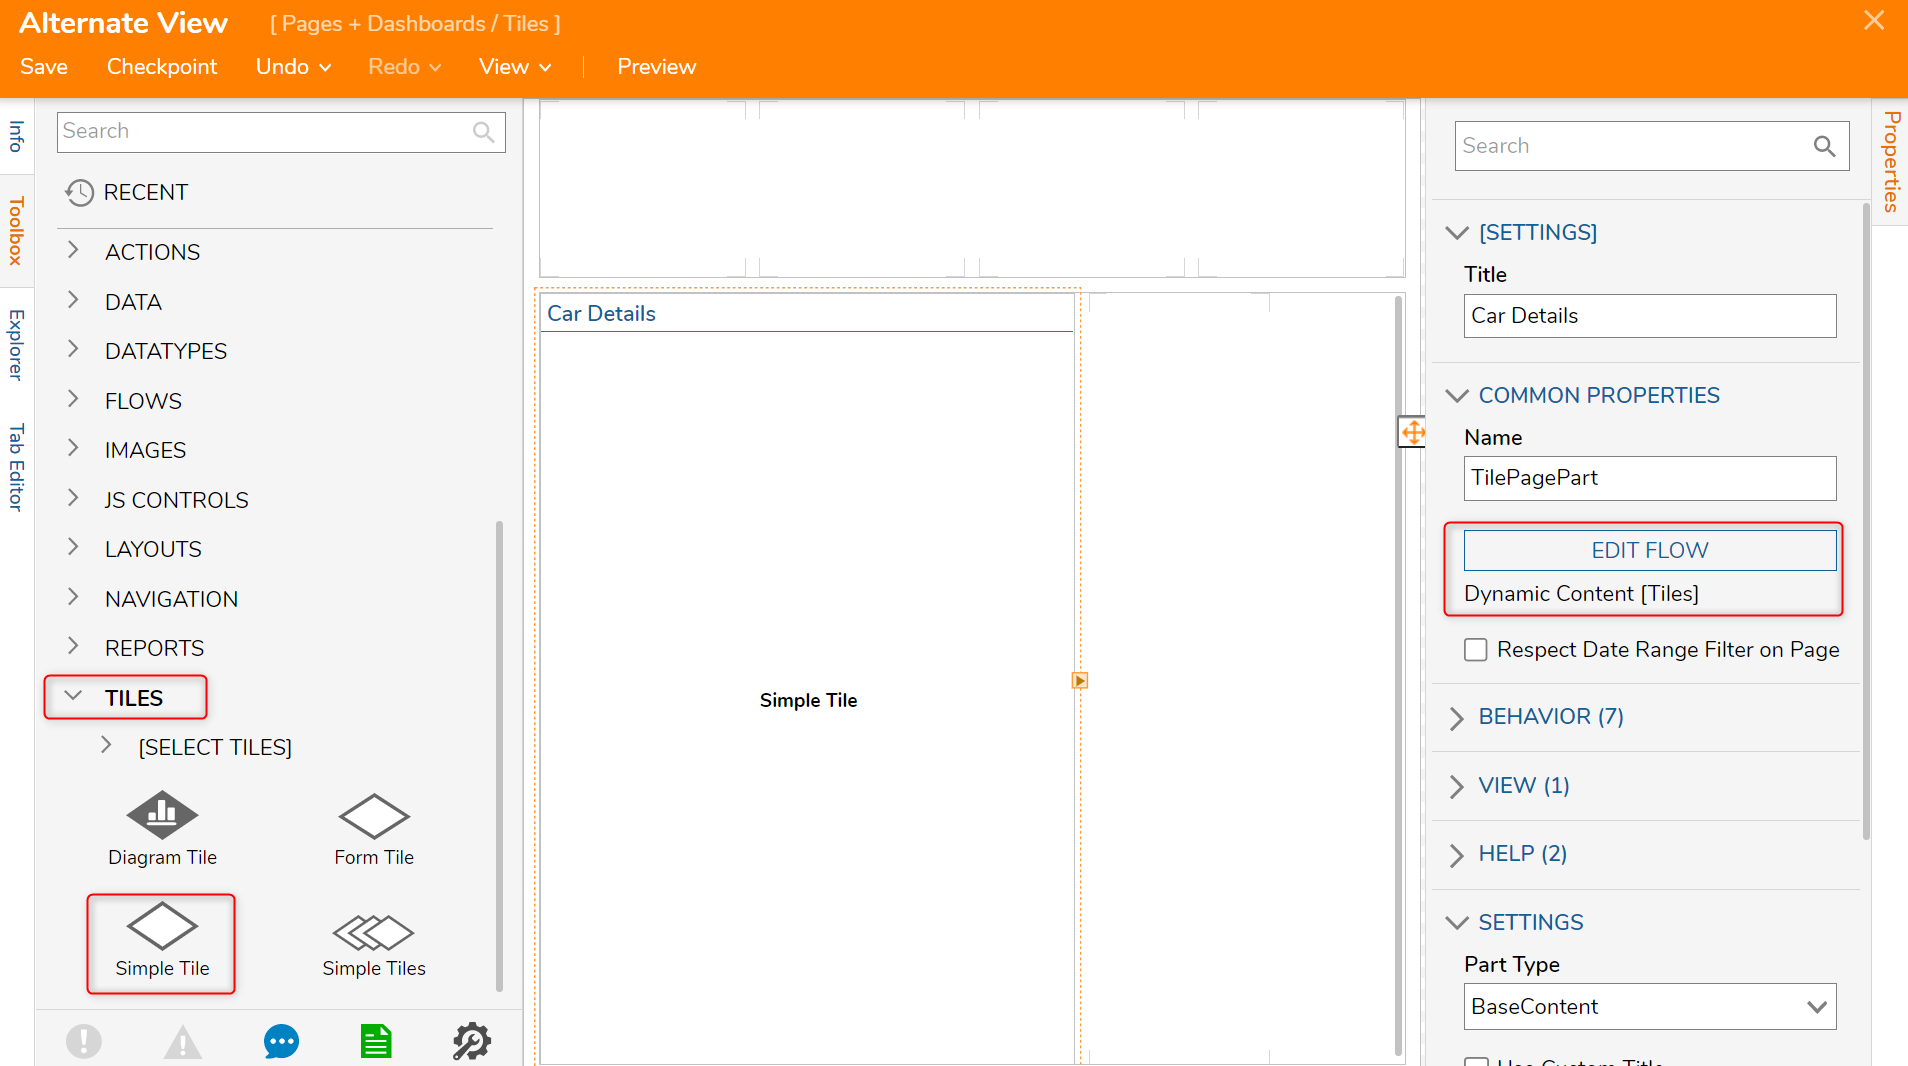
- Next, navigate to the Page Designer of a Portal Page.The Portal Page in this example is named Alternate View.
- In the Page Designer of the Portal Page [Alternate View], from the Toolbox > TILES category, add a Simple Tile component to the page.
- In the Properties panel > COMMON PROPERTIES section of the Simple Tile component, select PICK FLOW and PICK the Flow [Dynamic Content [Tiles]] that was just created.
- Save and Close the Page Designer.
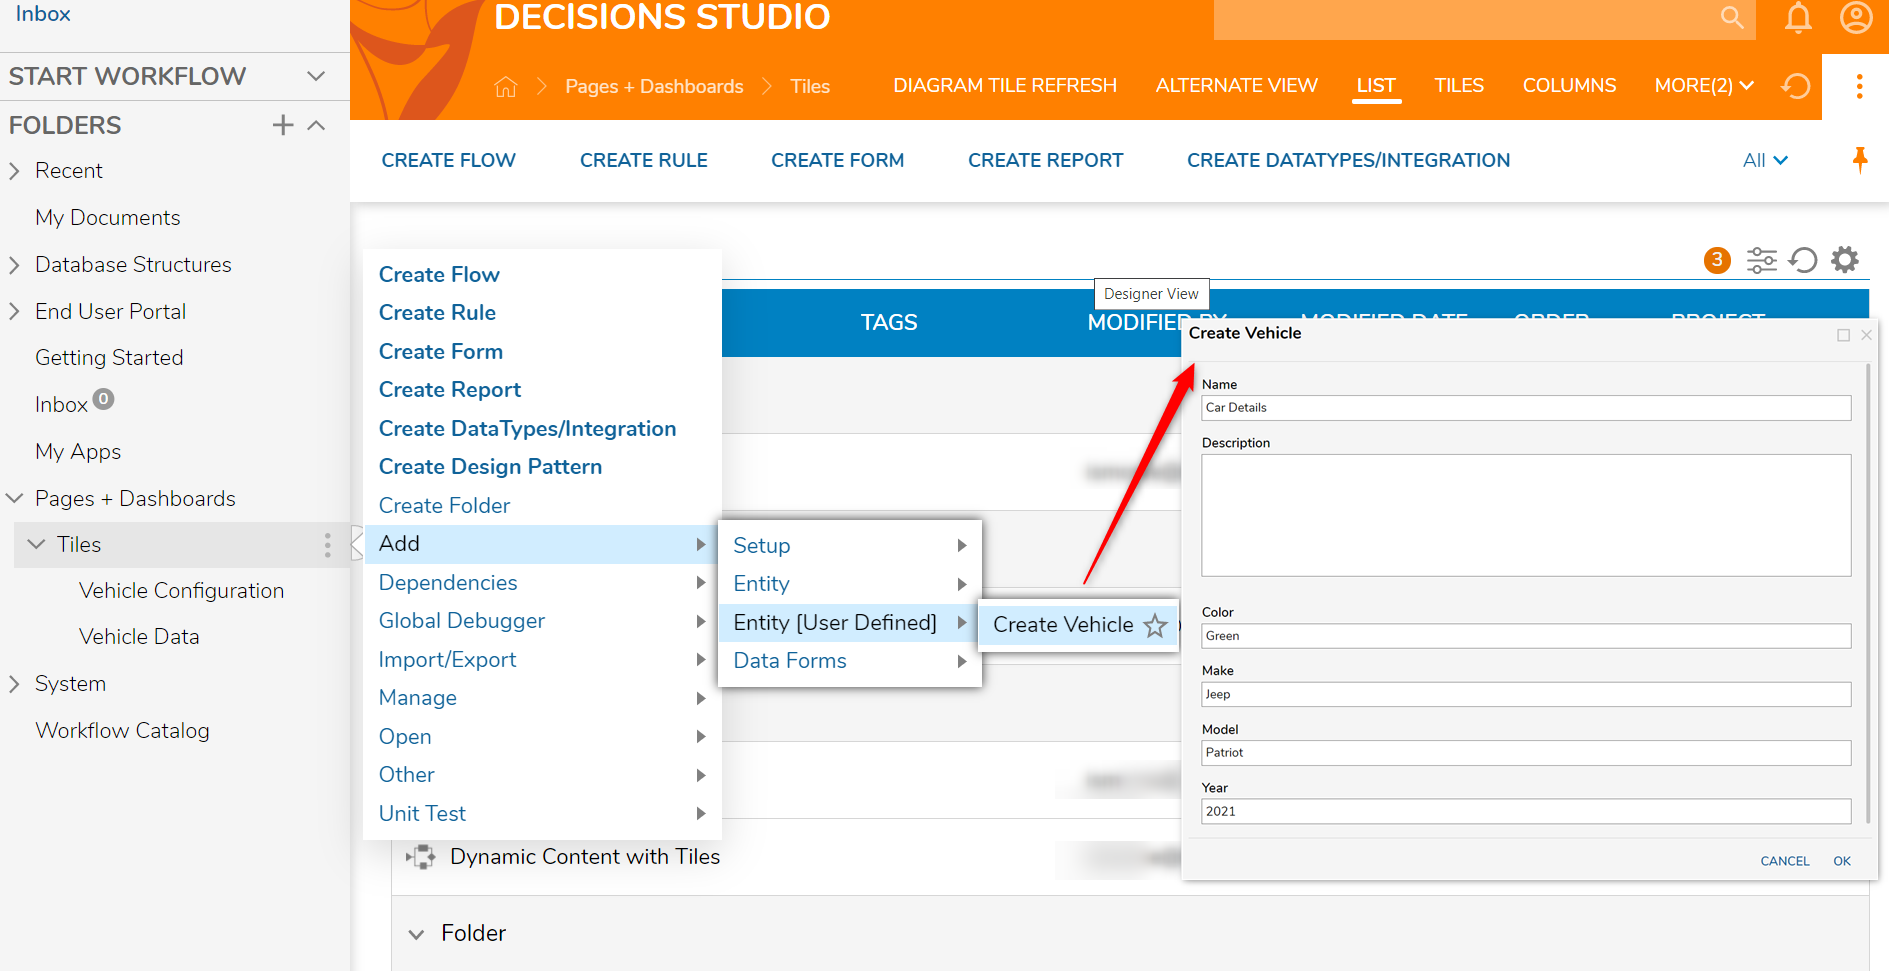
- In the Folder Tree, navigate to the Folder where the Folder Extension Data Structure [Vehicle] is located, right-click and navigate to Add > Entity [User Defined] > Create Vehicle in the Action Menu.
- In the resulting Create Vehicle window, in the Name value field insert "Car Details". In this example, the value fields reflect a 2021 Jeep Patriot that is green.
- Next, the Folder [Car Details] has appeared. The Tile will display with the HTML information from the Flow on the Portal Page [Alternate View].