Overview
Assignment Roles are used for defining user responsibilities such as Designer, Analyst, Manager, etc. Each of these roles is comprised of groups and users. Decisions Objects like To-Dos, Forms, Reports, Pages, or Service Catalog items can be assigned to different Assignment Roles as well. The use of a Process Folder is required when utilizing Assignment Roles to properly store execution information.
Example
In the Designer Studio, navigate to System > System Data > Assignment Roles. Click on the arrow to the right of Assignment Roles and select Create Assignment Role from the Action Menu.
- Navigate to System > System Data > Assignment Roles.
- Select the arrow to the right of Assignment Roles and select Create Assignment Role from the Action Menu.
- Enter a Name in the corresponding text box.
- Under Default Accounts, select Add New. Choose the default accounts for this Assignment Role.
- Under Default Groups, select Add New. Choose the default groups for this Assignment Role.
- Click CREATE once the Role Data has been defined.
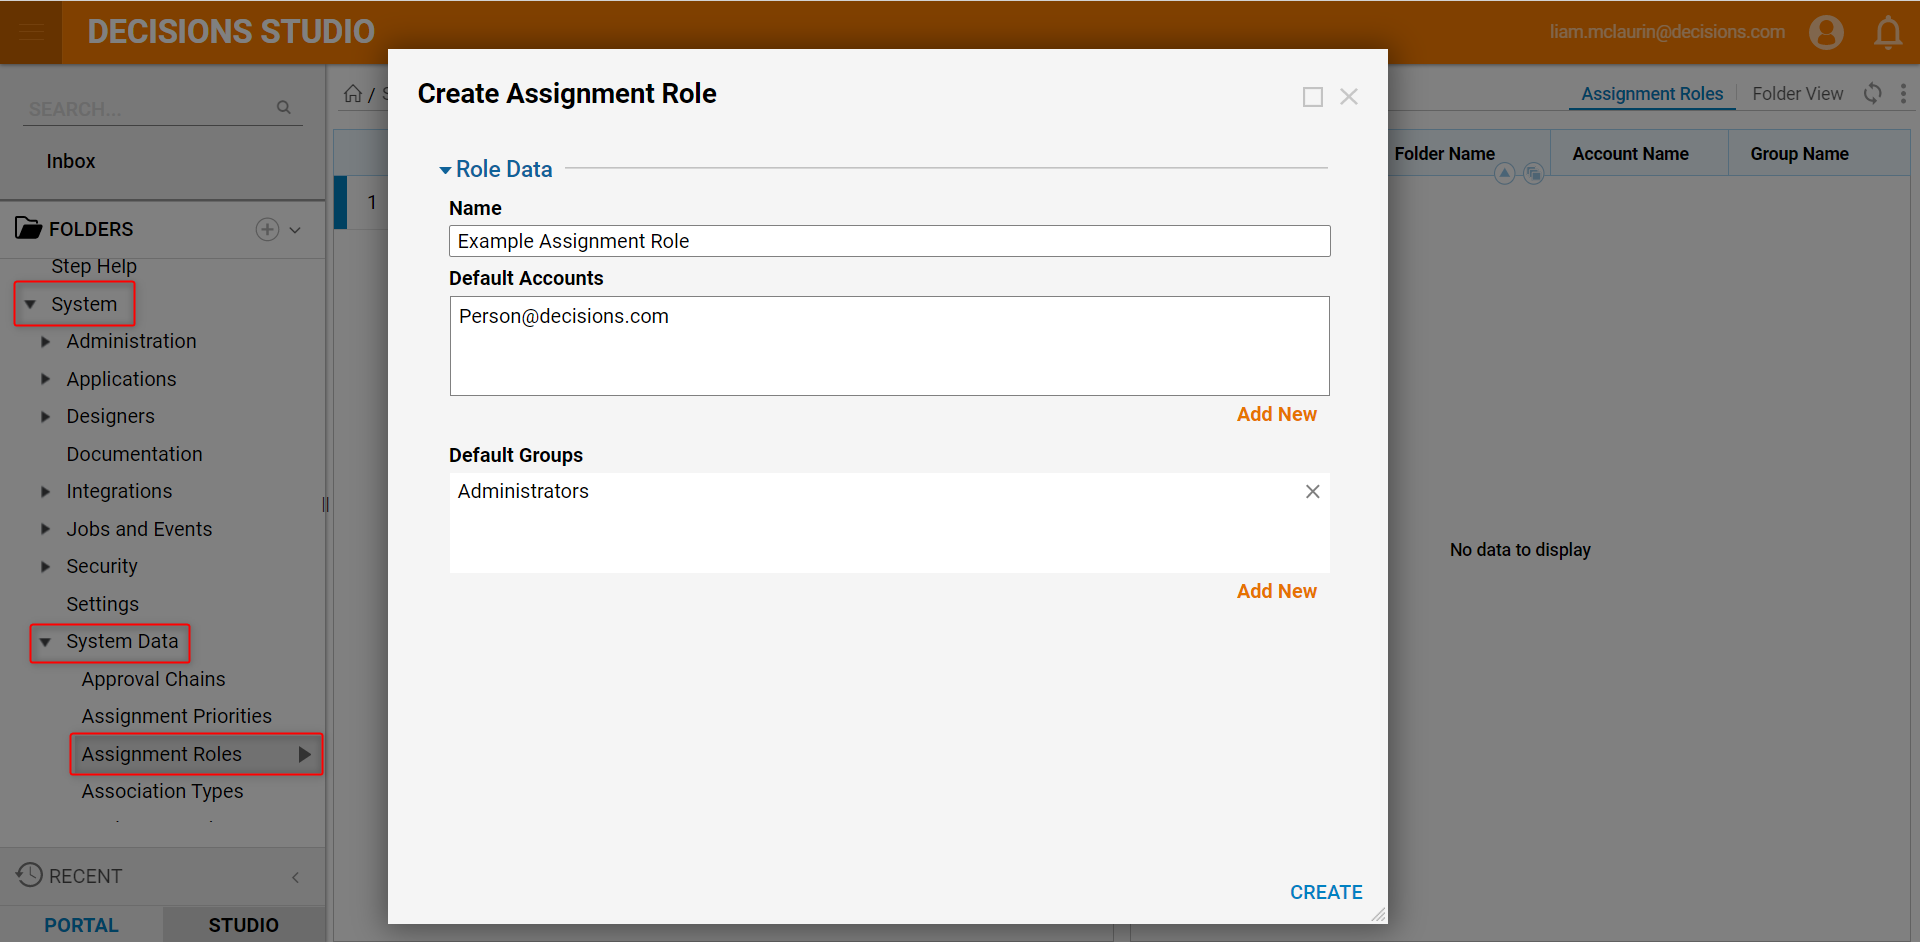
- The Assignment Role now appears in the Assignment Roles folder.
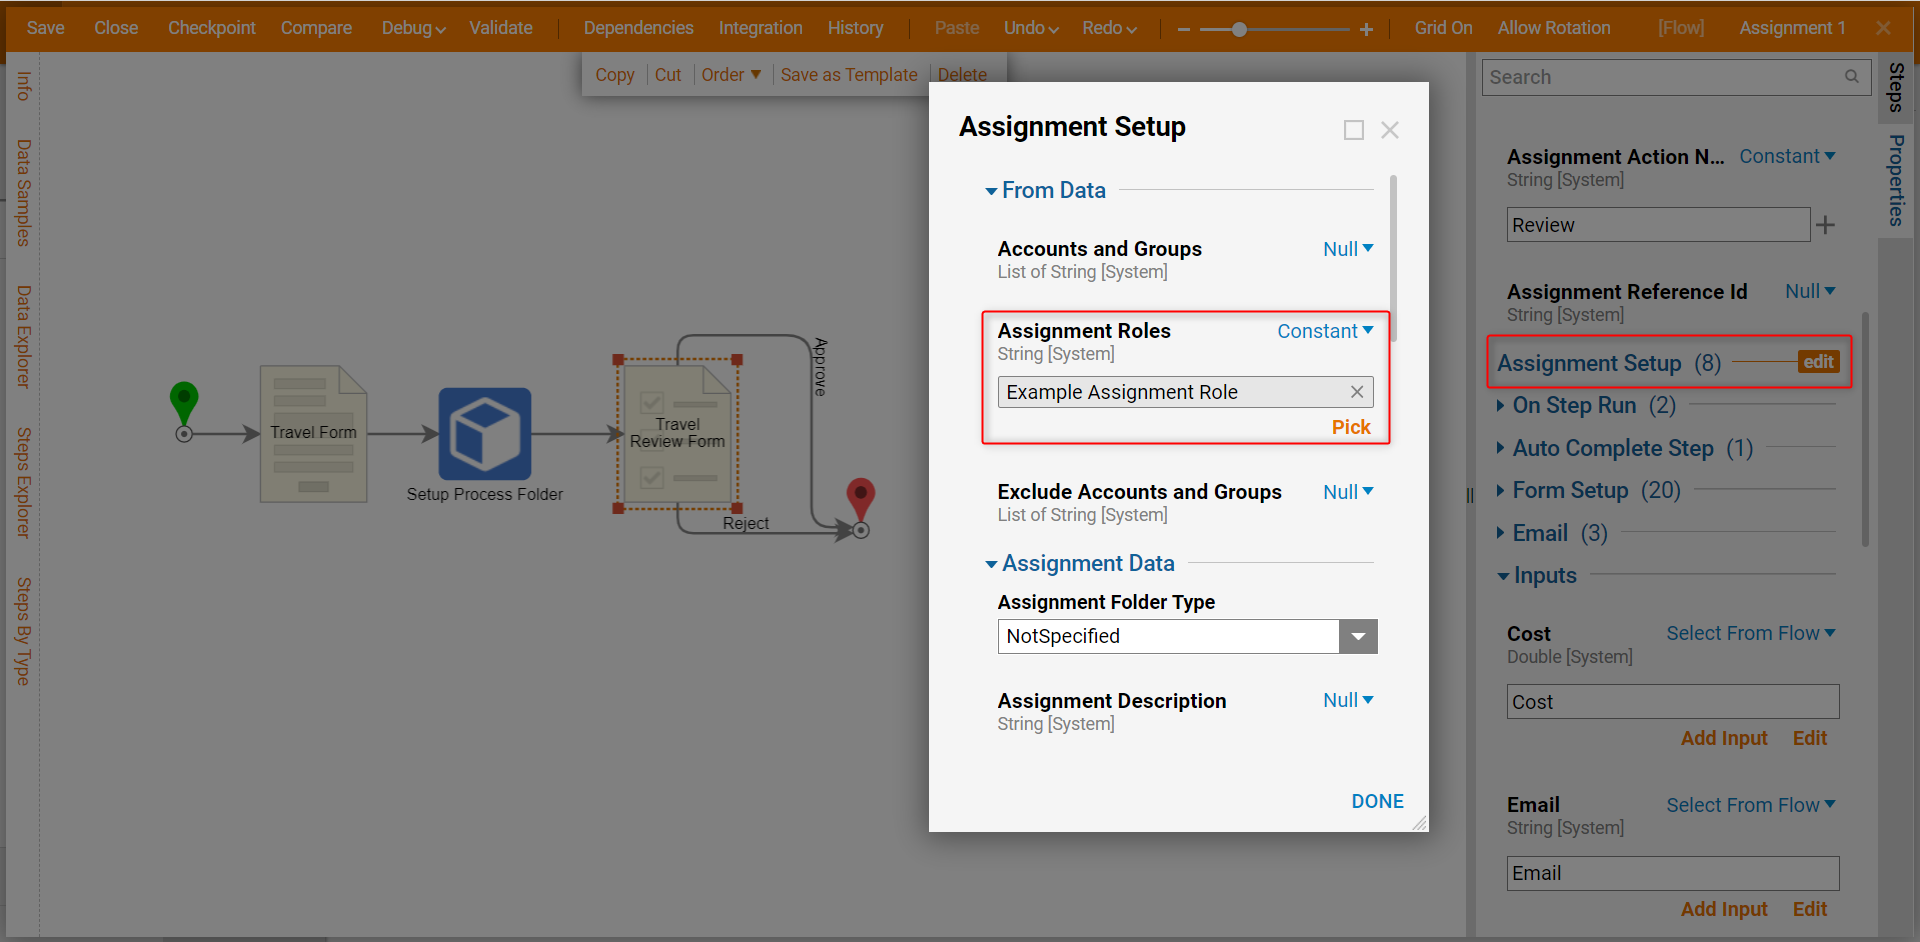
- In a Flow, use a Setup Process Folder step and an Add Task step to create an Assigned Form.
- on an Assigned Form, navigate to Assignment Setup and select Edit.
- Under Data > Assignment Roles, select the Assignment Role that was just created.
Adding A To Do
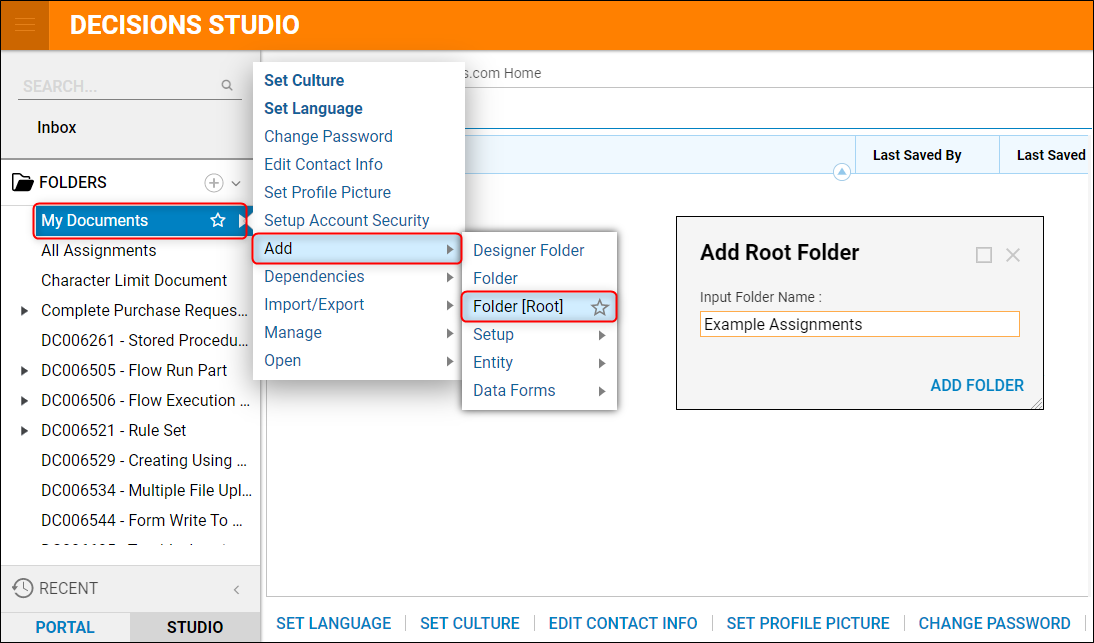
Locate the My Documents folder in the Designer Studio and click the arrow to the right of the folder name, then navigate to Add > Folder [Root]. When the Add Root Folder window appears, enter a Name for the folder and click Add Folder.
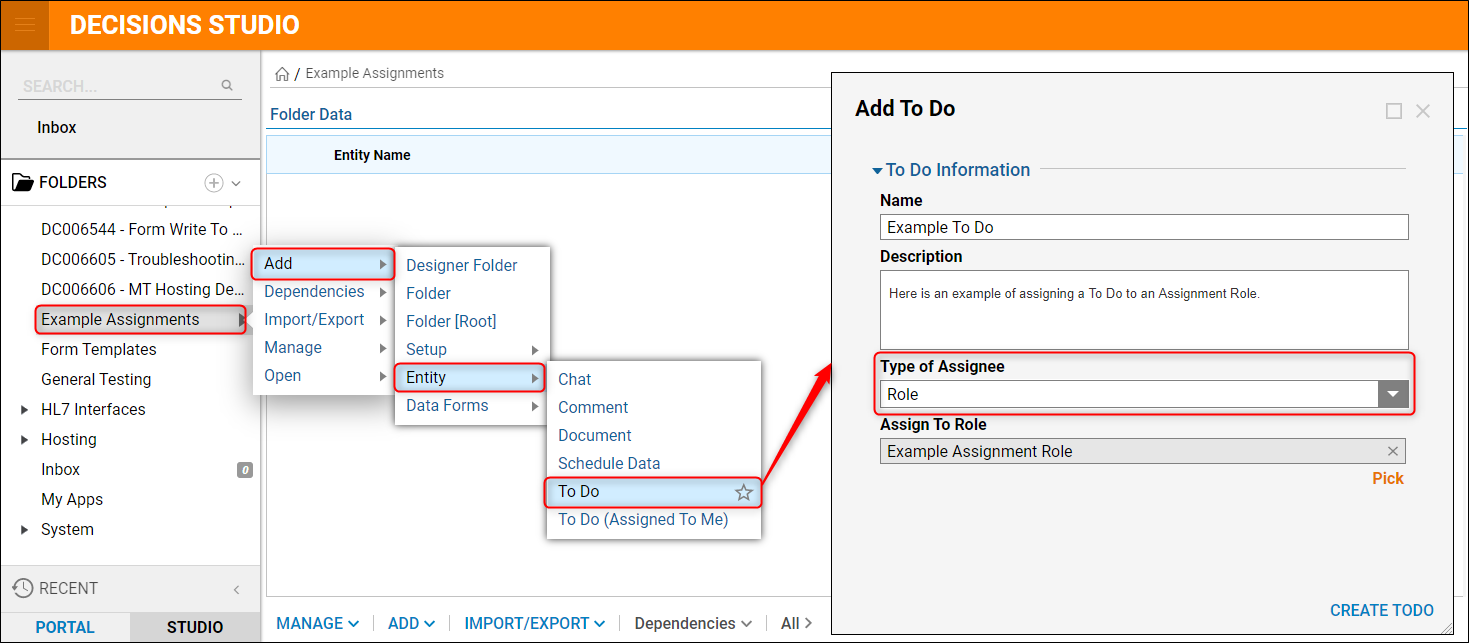
- Click the arrow next to the Example Assignments folder name and navigate to Add > Entity > To Do.
- When the Add To Do window appears, define the Name and Description under the To Do Information section.
- Expand the Type of Assignee list and select Role from the four options. The other options are for a specific account or assignees of a Group/Folder.
- When Role is selected, the Assign To Role box appears. Select the Pick option and choose the Example Assignment Role, then click Create TODO.
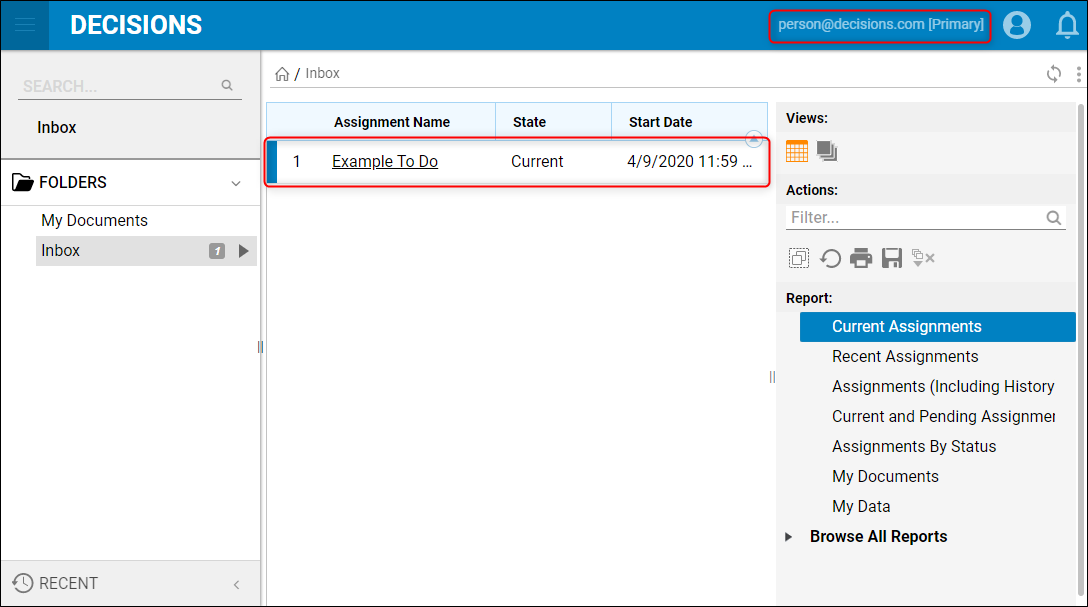
Log in to the Decisions environment with the user account that was set as the Default Account for this Assignment Role. The To Do will appear in the Inbox of this account.
Adding Assignment Roles To A Folder
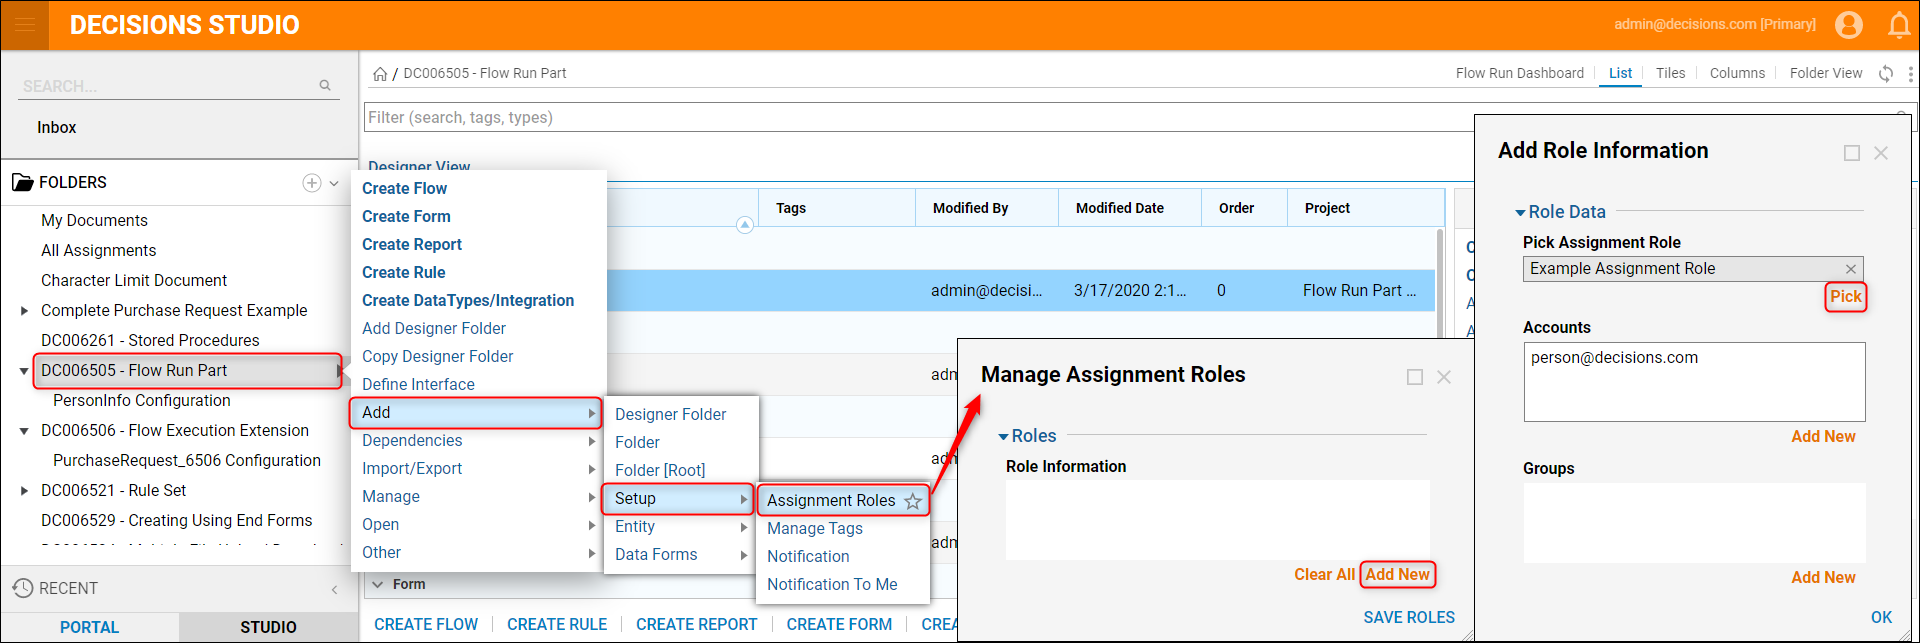
- To add an Assignment Role to any Folder, meaning that any assignment related to this Folder will be associated with the accounts/groups in the Assignment Role, click the arrow next to the designated Folder name and navigate to Add > Setup > Assignment Roles.
- When the Manage Assignment Roles window appears, select the Add New button under the Role Information box.
- When the Add Role Information window appears, click Pick and select the desired Assignment Role from the list.
- Click OK and Save Roles.
