This tutorial demonstrates how to connect to a MySQL database. MySQL functionality requires manual installation of the MySQL connector.
MySQL Install
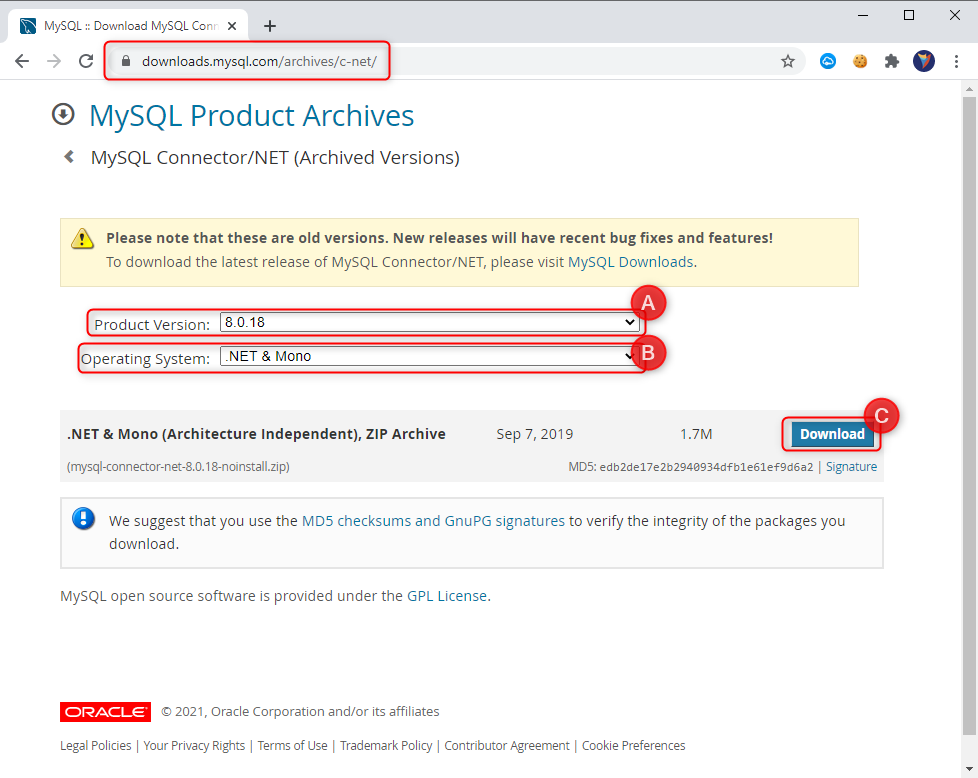
- After installing Decisions using MS SQL, visit the MySQL Product Archives page.
- Select product version 8.0.18 or below. Versions above v8.0.18 are not supported for Decisions v6. Set the OS to .NET & Mono then click Download. An Oracle Login is not required.

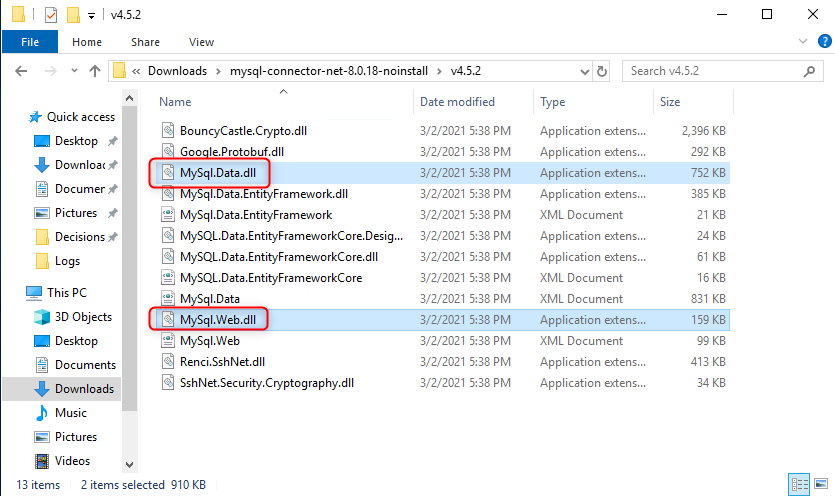
- Extract and open the downloaded .zip file.
- Within the v4.5.2 folder, locate and copy these two files: MySql.Data.dll and MySql.Web.dll.

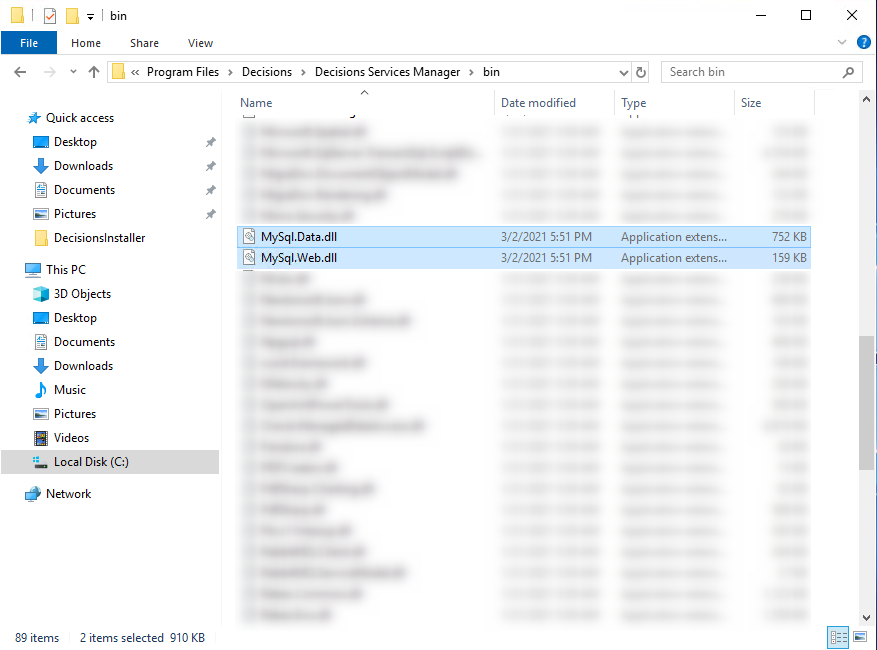
- Paste these files into C:\Program Files\Decisions\Decisions Services Manager\bin\ .

- Restart the Service Host Manager.
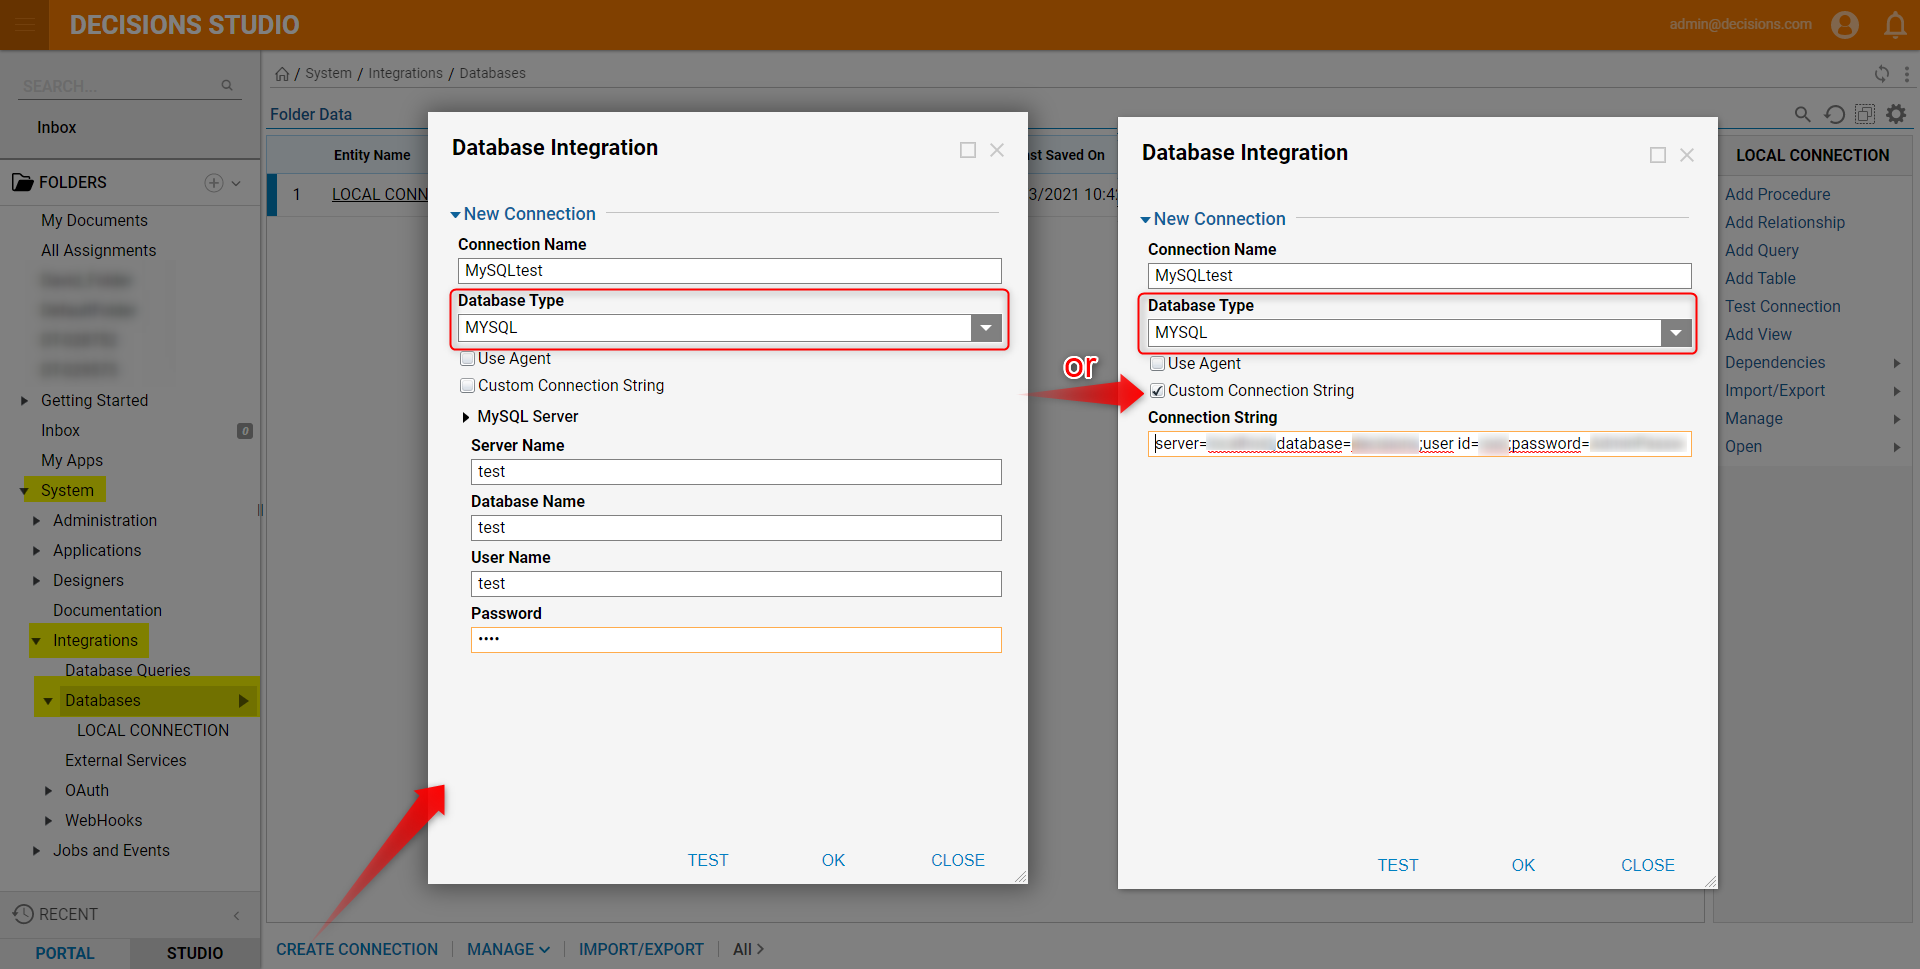
- Upon reconnecting to the Studio, navigate to System > Integrations > Databases. Click CREATE CONNECTION in the top action bar.
- In the Database Integration panel, specify a Connection Name e.g. "MySQLtest" and set the Database Type to MYSQL.
Configure the connection via MYSQL Server fields or Custom Connection String.
- Click TEST to confirm successful connectivity, then click OK.