Overview
In ordered to handle the need for a collaborative, work environment, the Decisions Studio may be configured to facilitate use by multiple different teams. This is commonly accomplished by establishing a Folder structure and Permission hierarchy. By doing so, Administrators are able to limit which files can be viewed or altered, and by which Groups as to avoid any potential errors. The following document discusses how to establish permissions on a basic Folder structure in the Decisions Studio to allow for a multi-team environment.
Establishing Groups
To help structure a multi-team environment, it may prove beneficial to have separate Groups for specific tasks or for each work team. These Groups can then be used to divide work or resources according to how the Administrator sees fit. To establish this hierarchy:
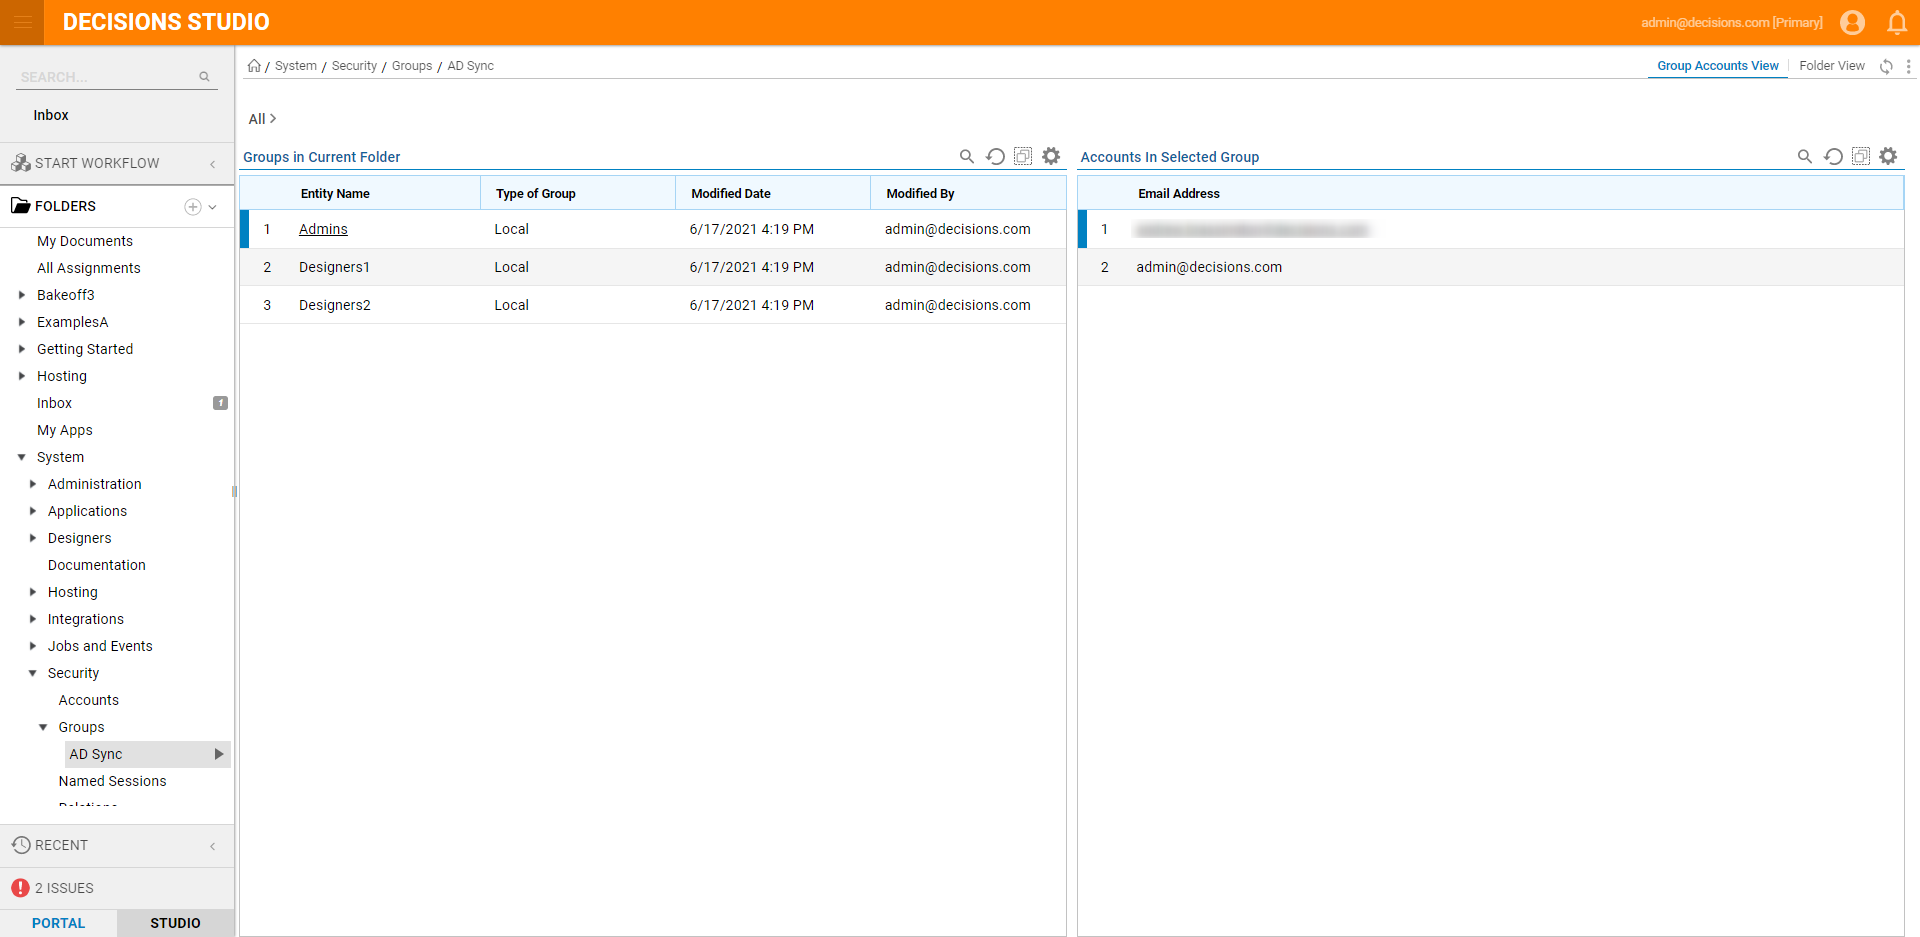
- From the Decisions Studio, navigate to System > Security > Groups > [ADGroupName]. Additional InformationFor this example, the AD Group servers as the All Users Group
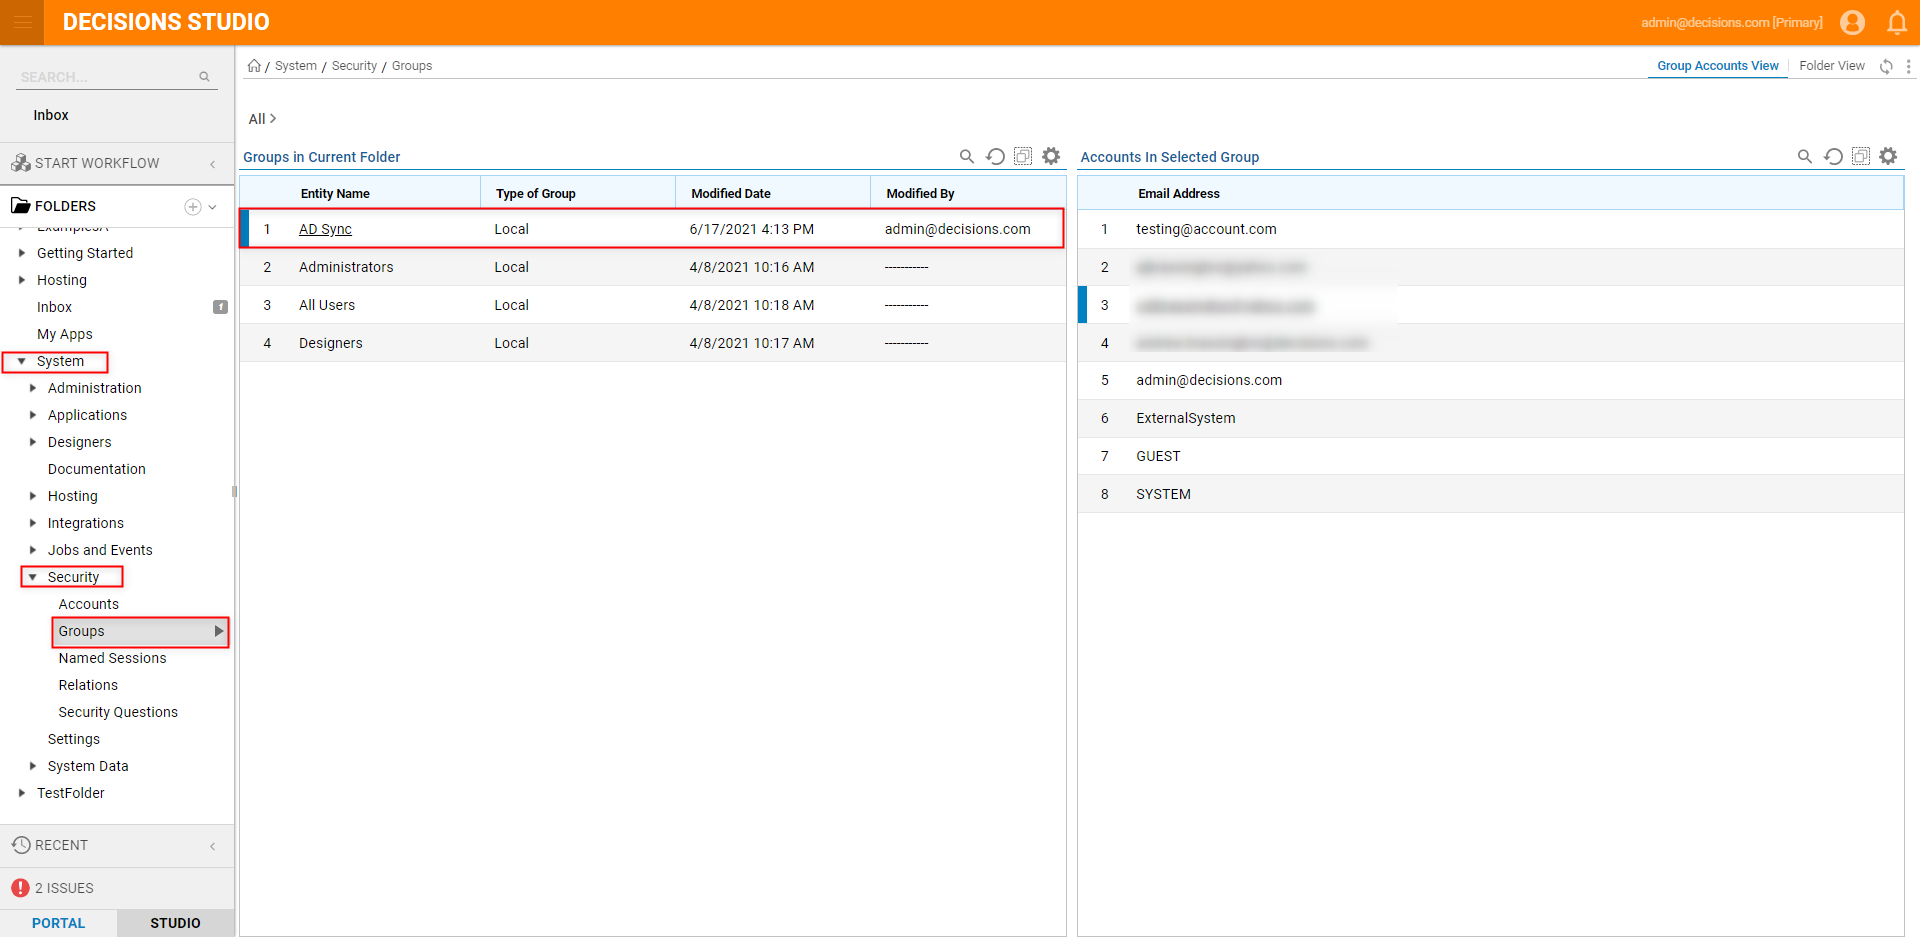
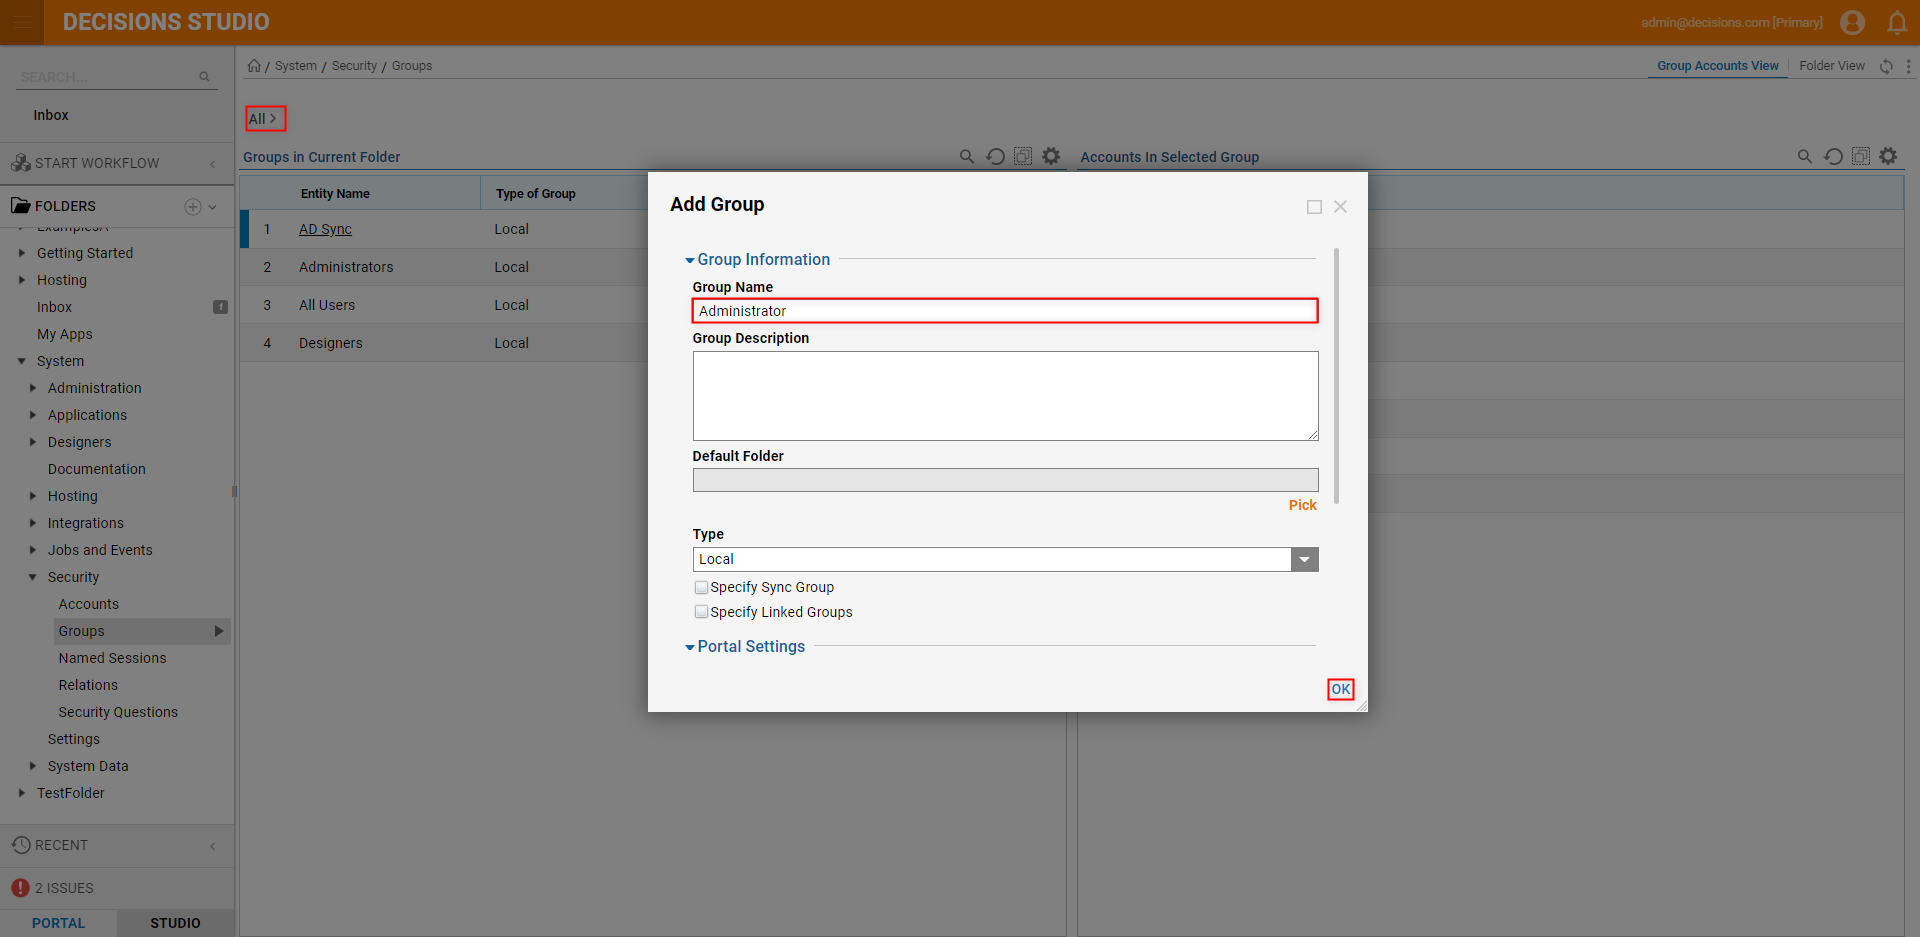
- From the Group Folder, click All and select Add Group. From the Create Group window, provide a Group Name that reflects the Group's role (ie. Admin, Designers, etc...) then click OK.
- Right-click the new Group, select Add/Remove Accounts and ADD the desired Accounts for the respective job role. Additional Information on GroupsFor more information on creating Groups, see Create a Group.
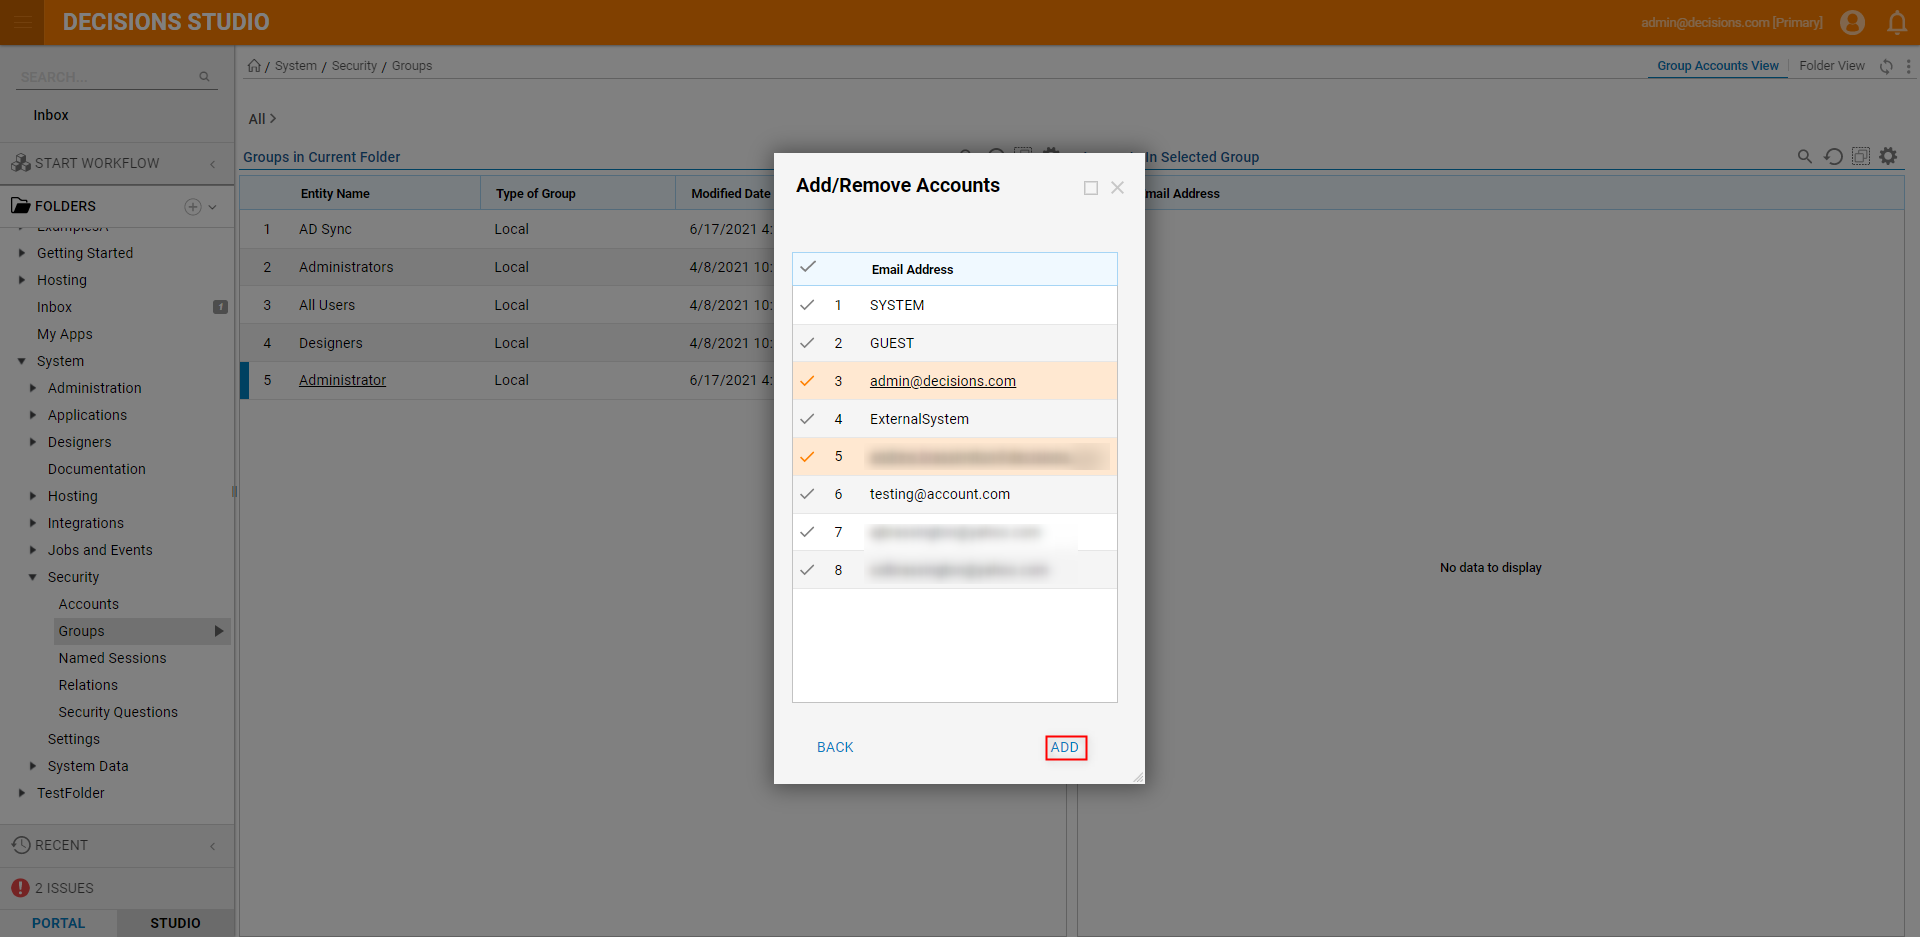
Repeat the process until the desired number of Groups for each Team is reached. For this example, a single Admins Group, and two separate Designers Groups.
Folder Structure and Permissions
After creating and establishing the needed number of Groups, it is important to set up a basic Folder structure. Separating projects and items into Folders with defined Permissions allows Admins to control what each Group has access to.
To do so:
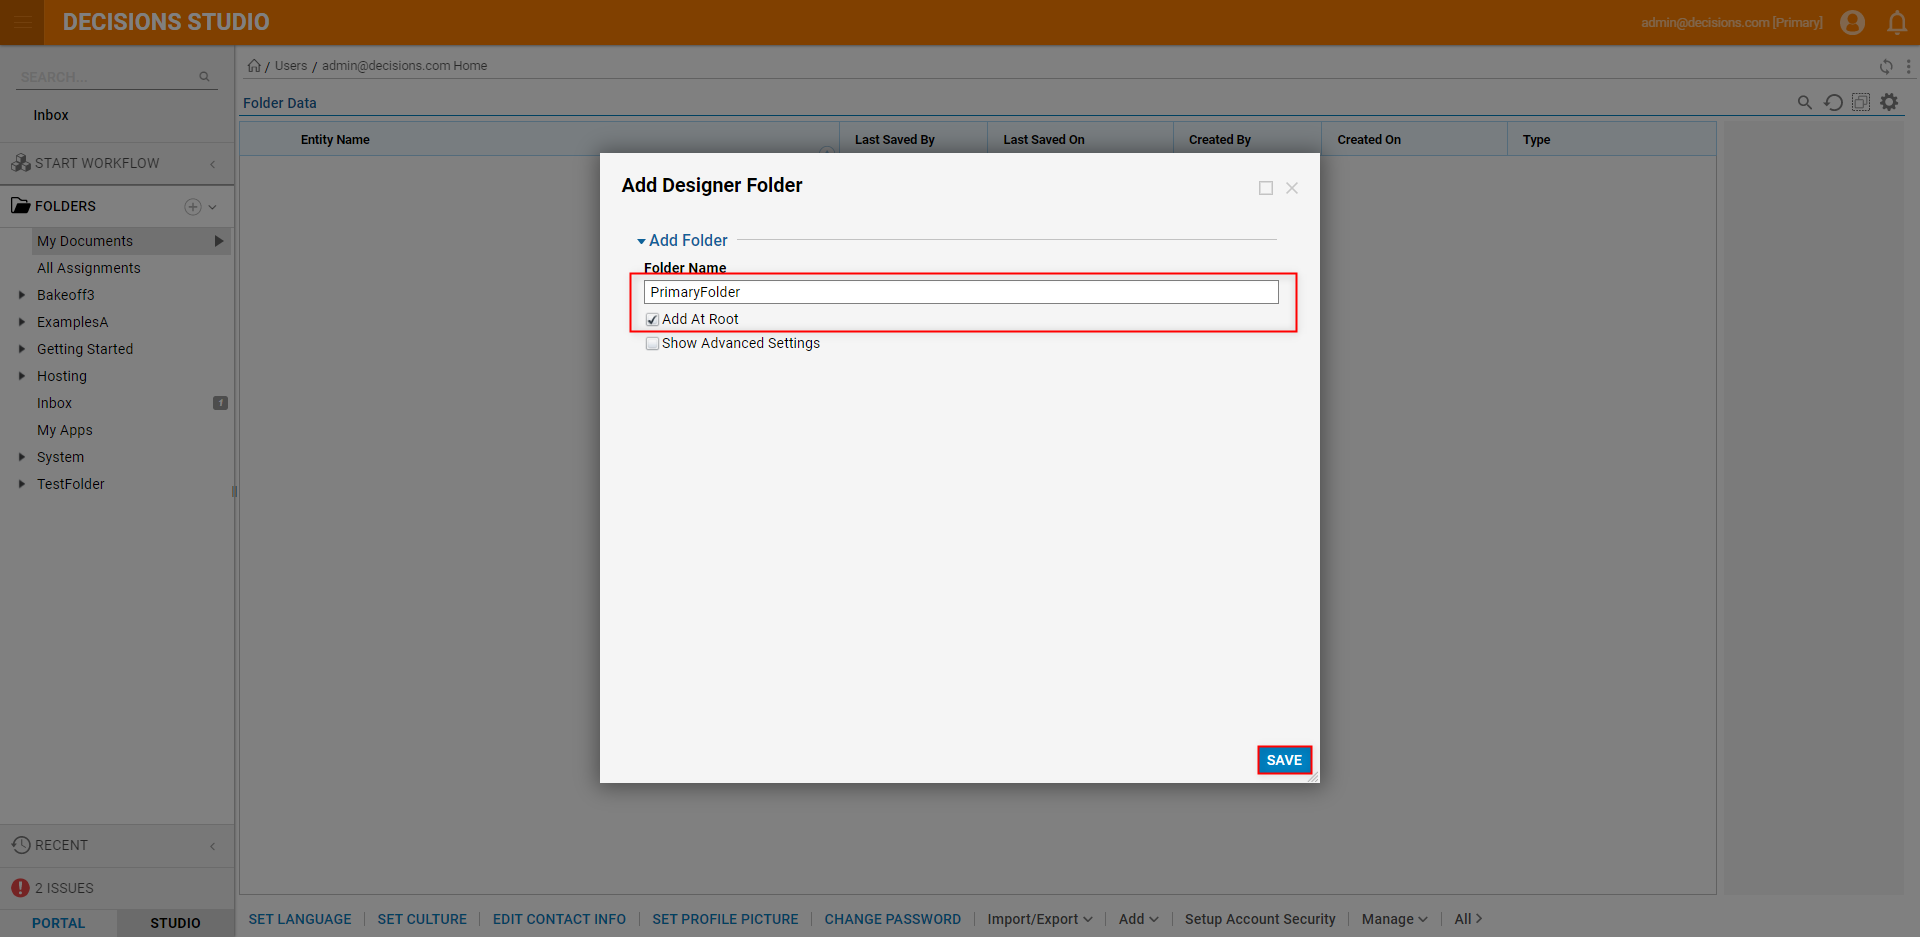
- From the Decisions Studio, in the Folder Tree on the left, Then, Name the Designer Folder, select At Root, and click SAVE. About Designer FolderThis Designer Folder will serve as the root Folder for this organization.
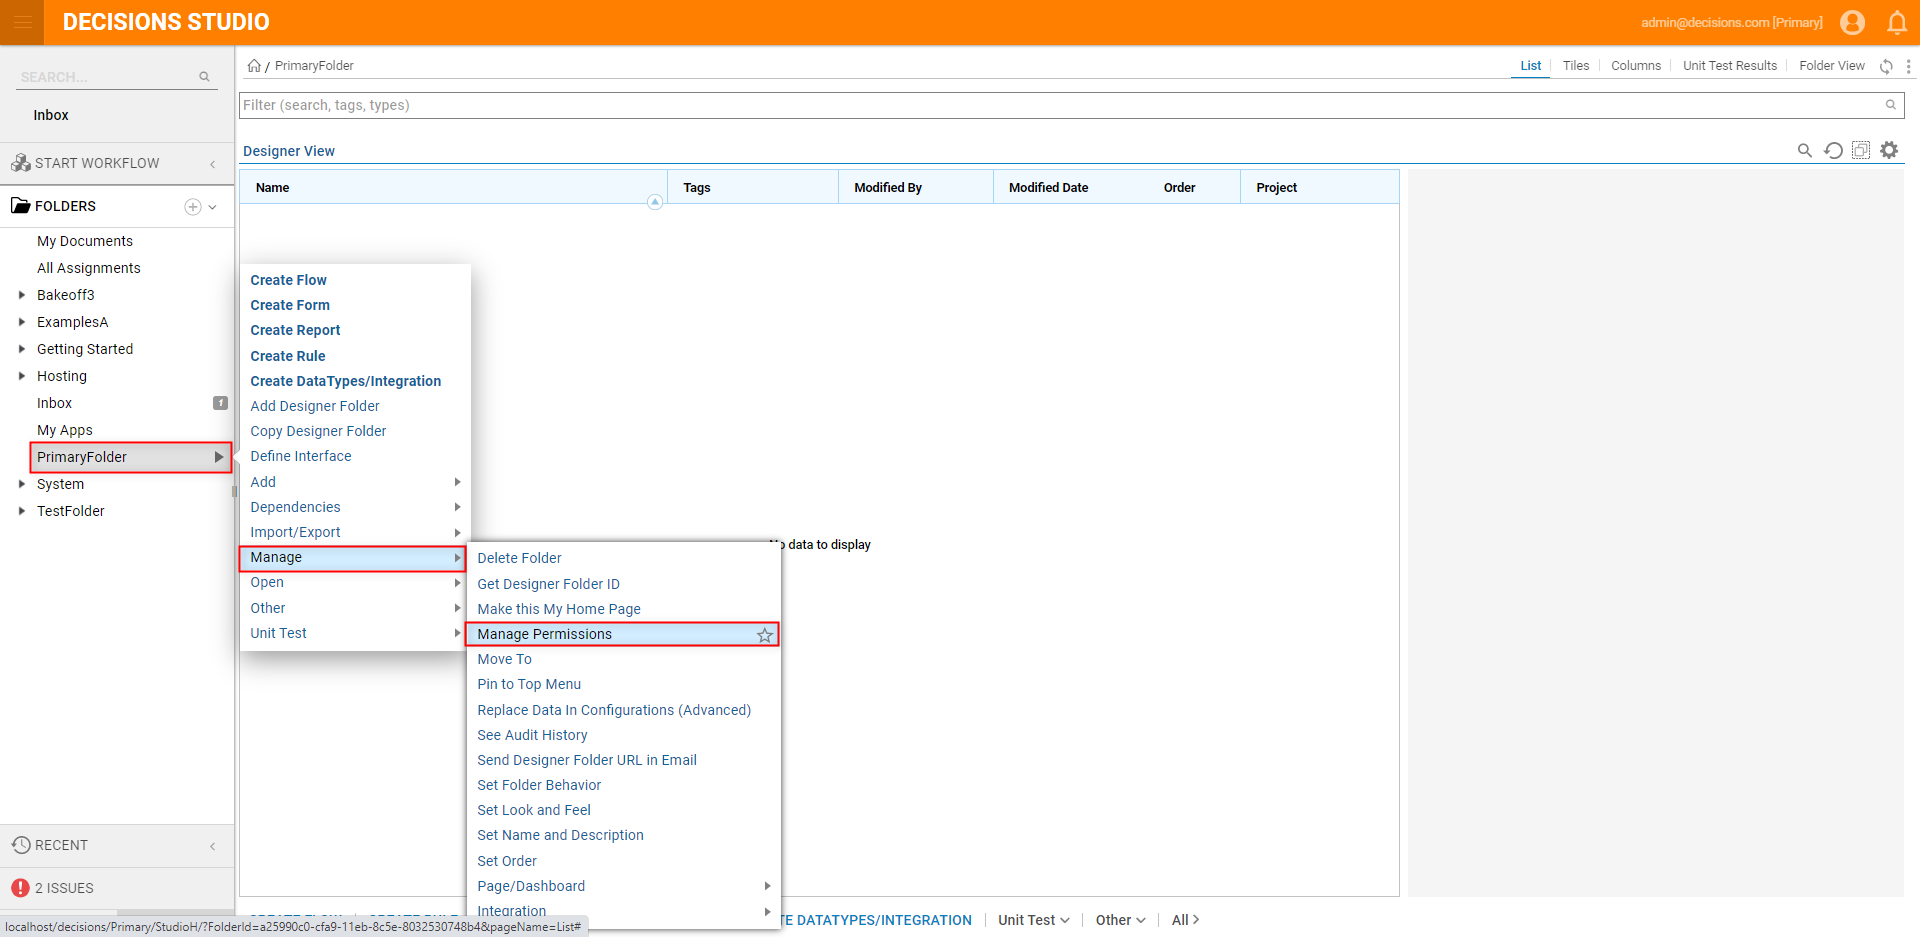
Once the Folder has been created, right-click it from the Folder Tree and select Manage > Manage Permissions.
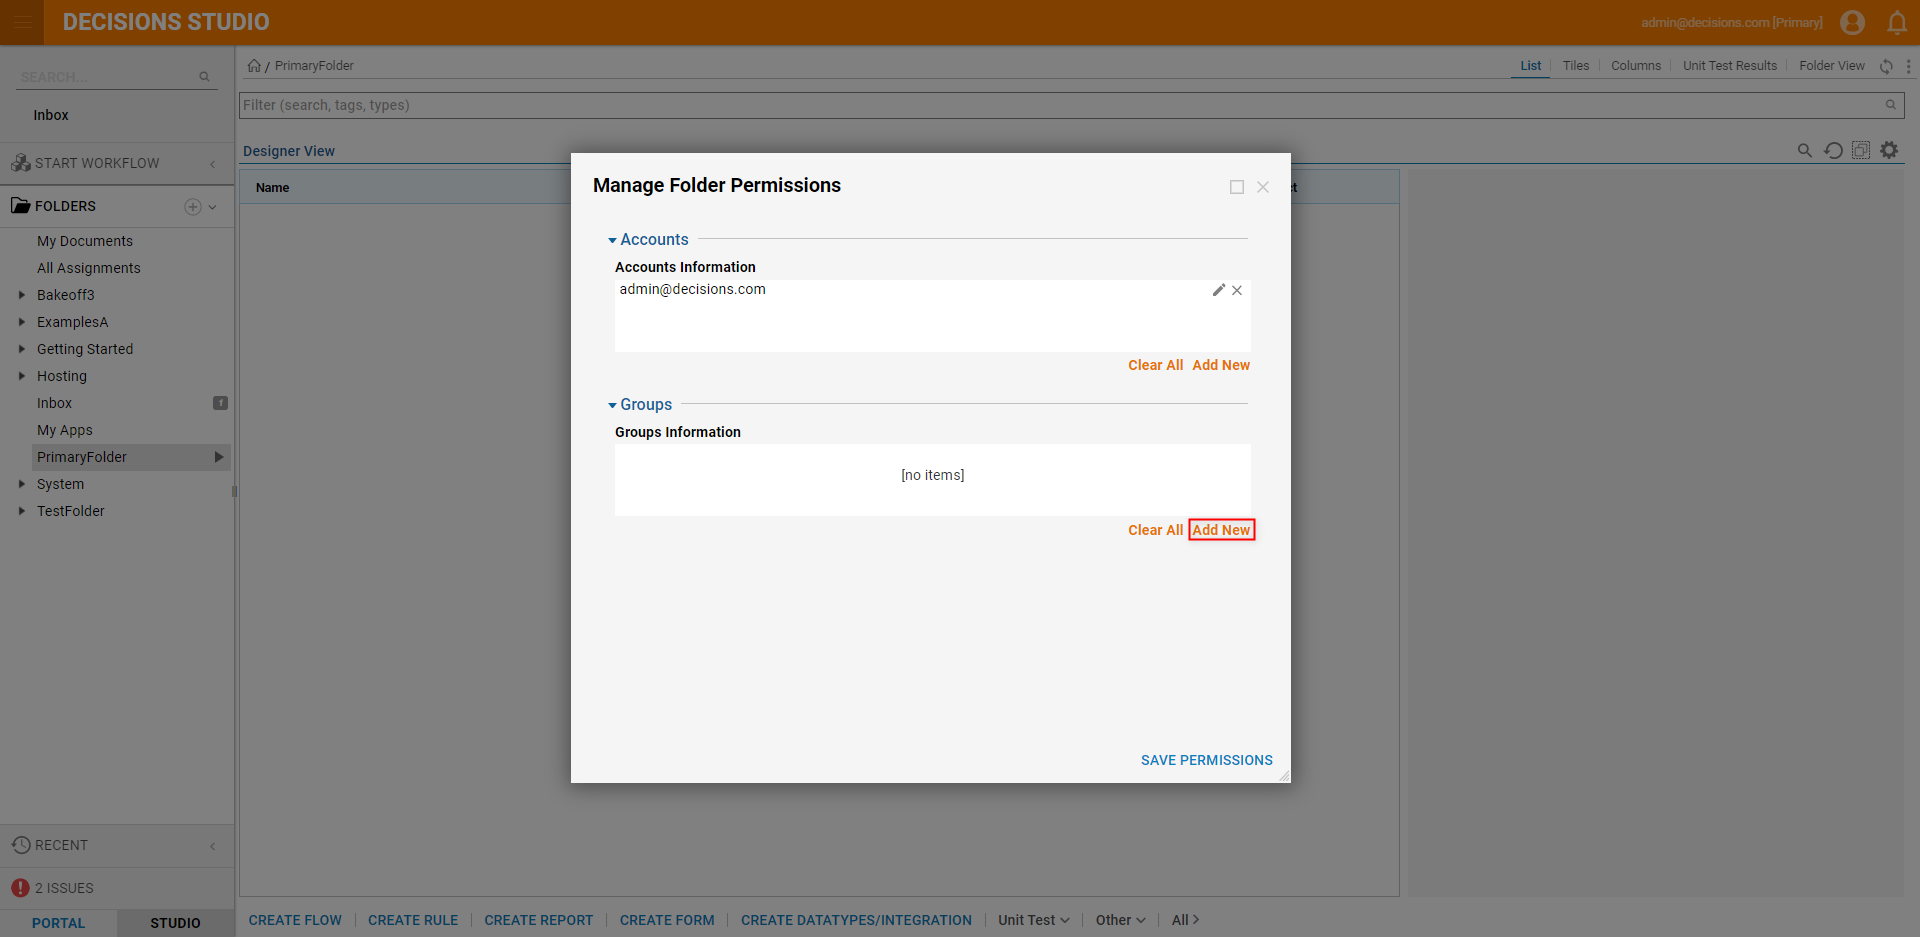
From the Manage Folder Permissions window, under GROUPS > Groups Information, click Add New.
From the Add Groups Information window, Pick the AD Group and select the desired options under Permissions, then click OK and SAVE PERMISSIONS.
Additional Information on PermissionsNote; these Permissions may be adjusted as desired. For more information on Folder & Portal Permissions, see About Folder & Portal Permissions.
Note that for the Admin Group, users should enable ALL Permissions via the Manage Permissions window on each Folder/Designer Folder.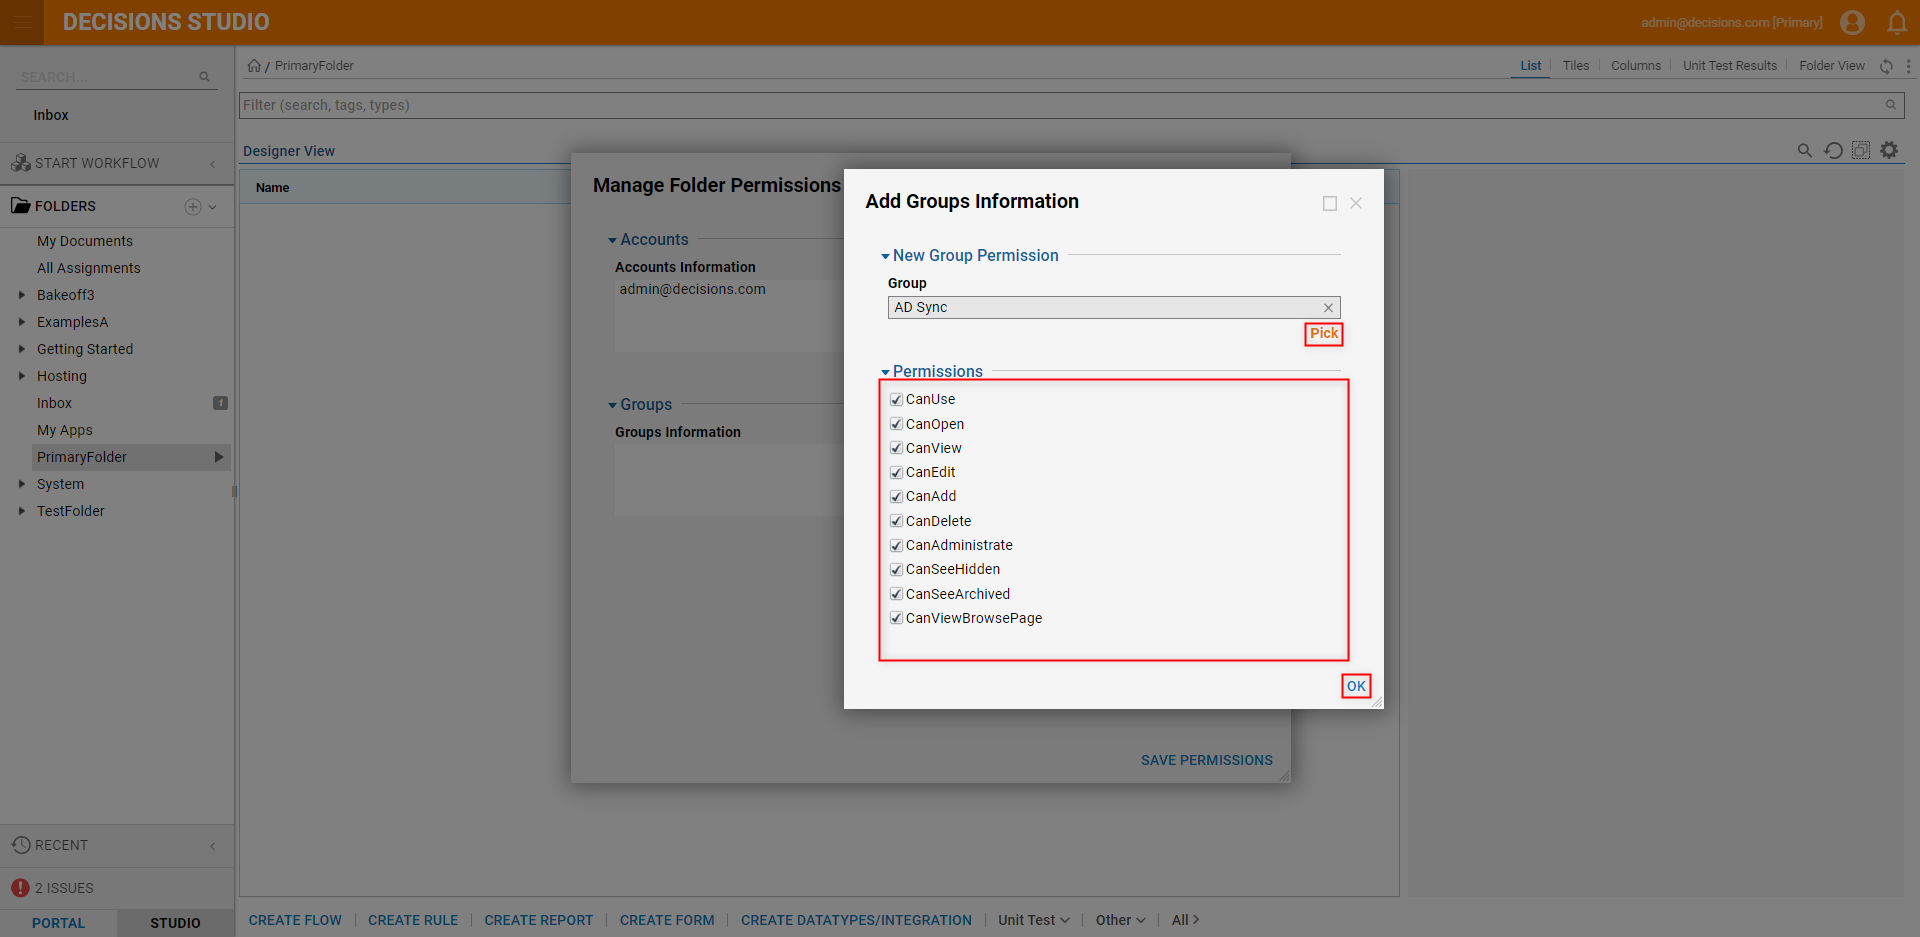
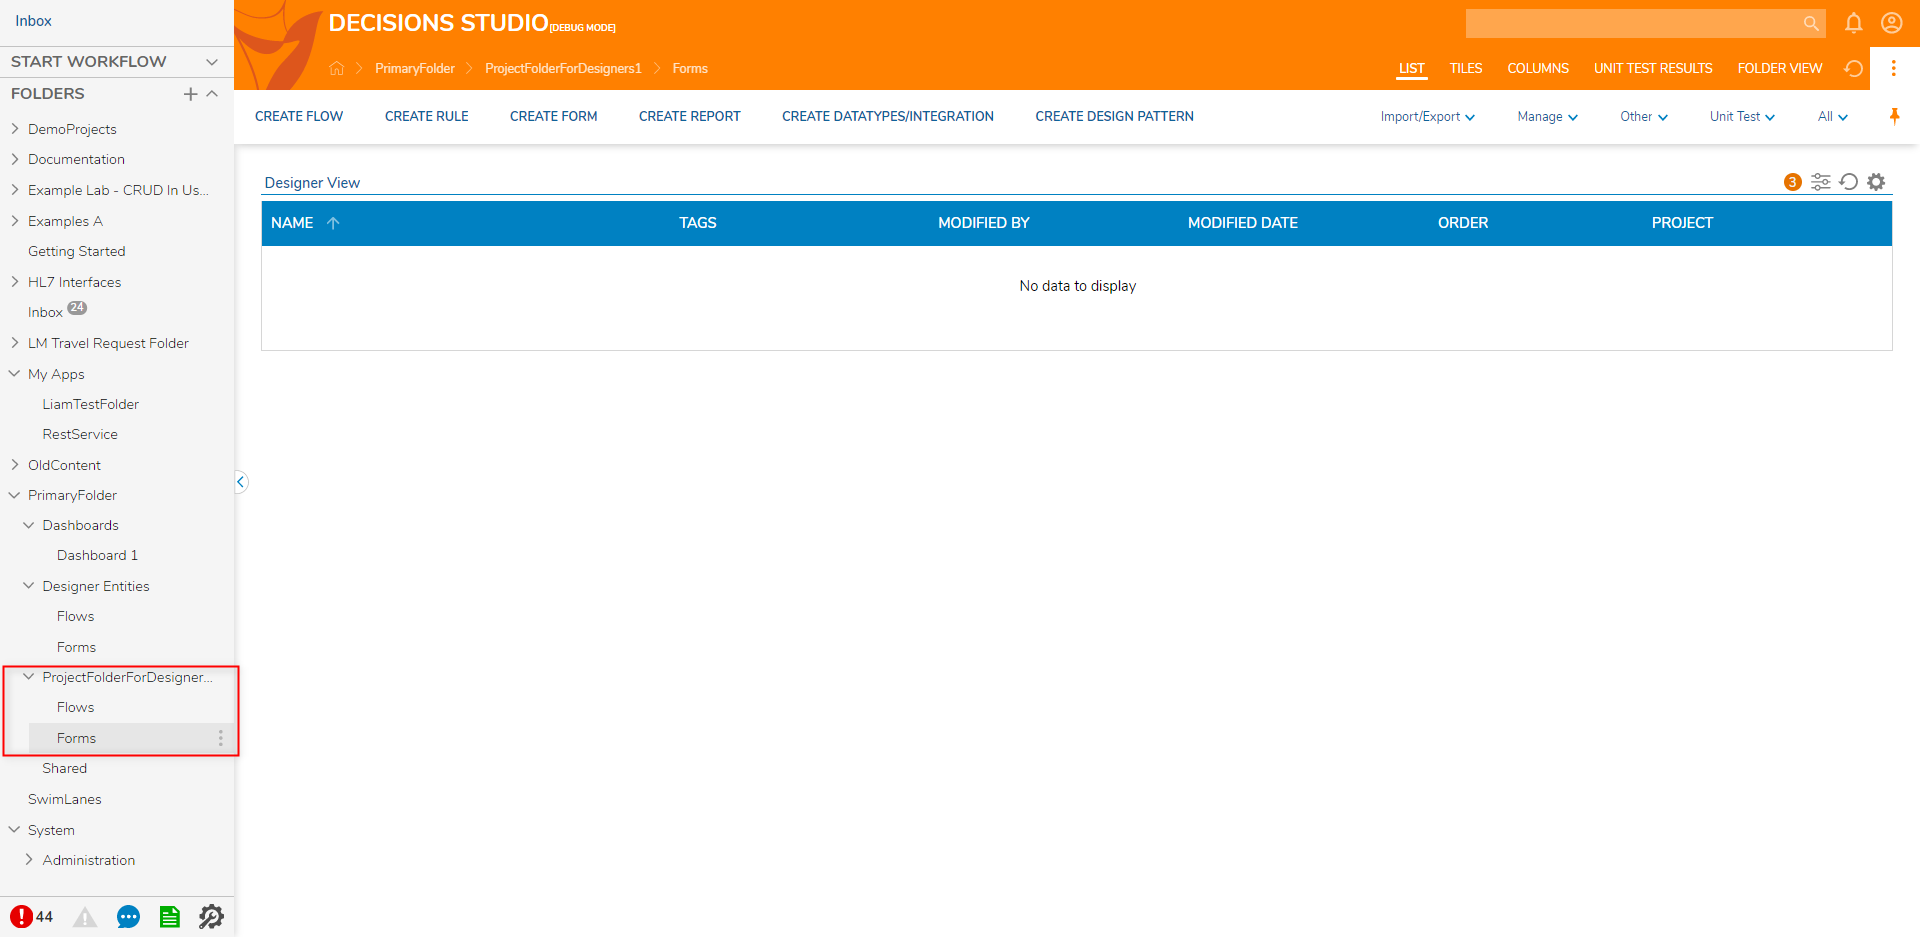
Right-click the Primary Folder and select Create Folder, then select Add > Designer Folder. Name the Folder "Designer Entities".
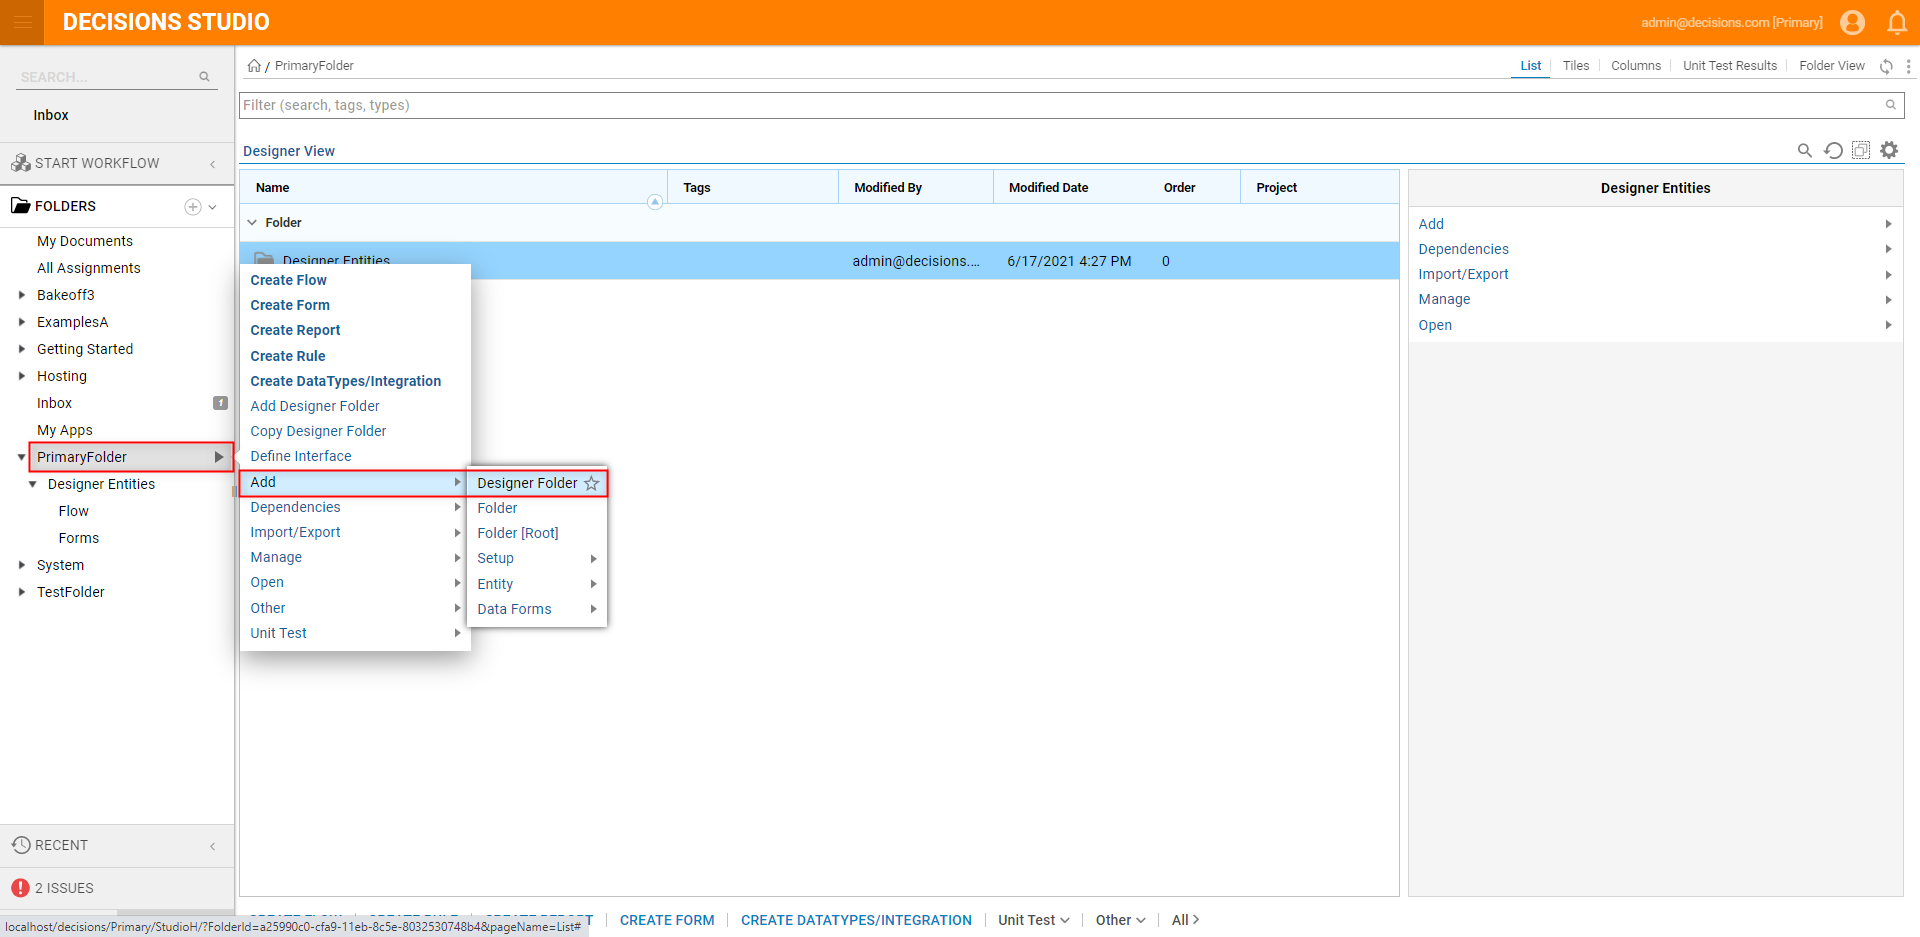
Right-click the Designer Entities Folder and Add another Project Folder, name the Folder "Flows". Then create an additional Designer Project called "Forms", under the Designer Entities Folder.
Additional Information on Designer Entities FolderThe Designer Entities Folder is used as a root Folder for any Designer Projects and Designer Elements such as Flows, Forms, etc...
By adding additional Sub Folders in the Form of Designer Projects, Admins can separate bodies of work by type of Designer Element.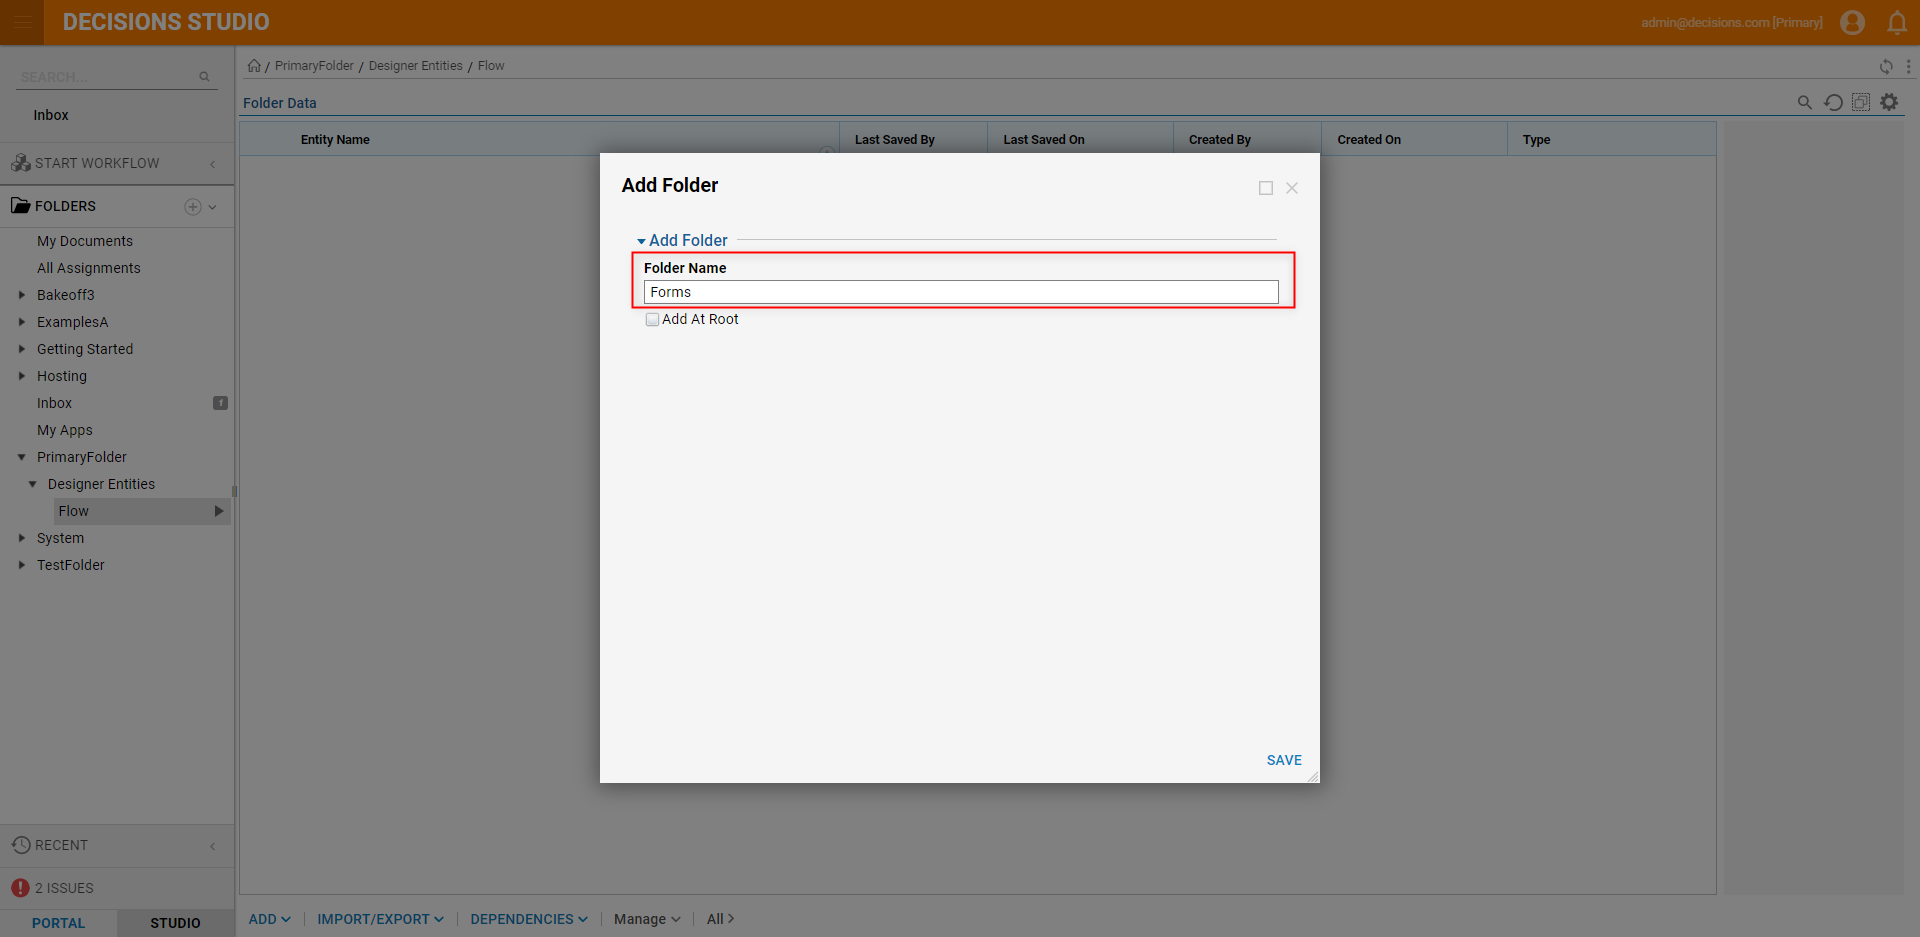
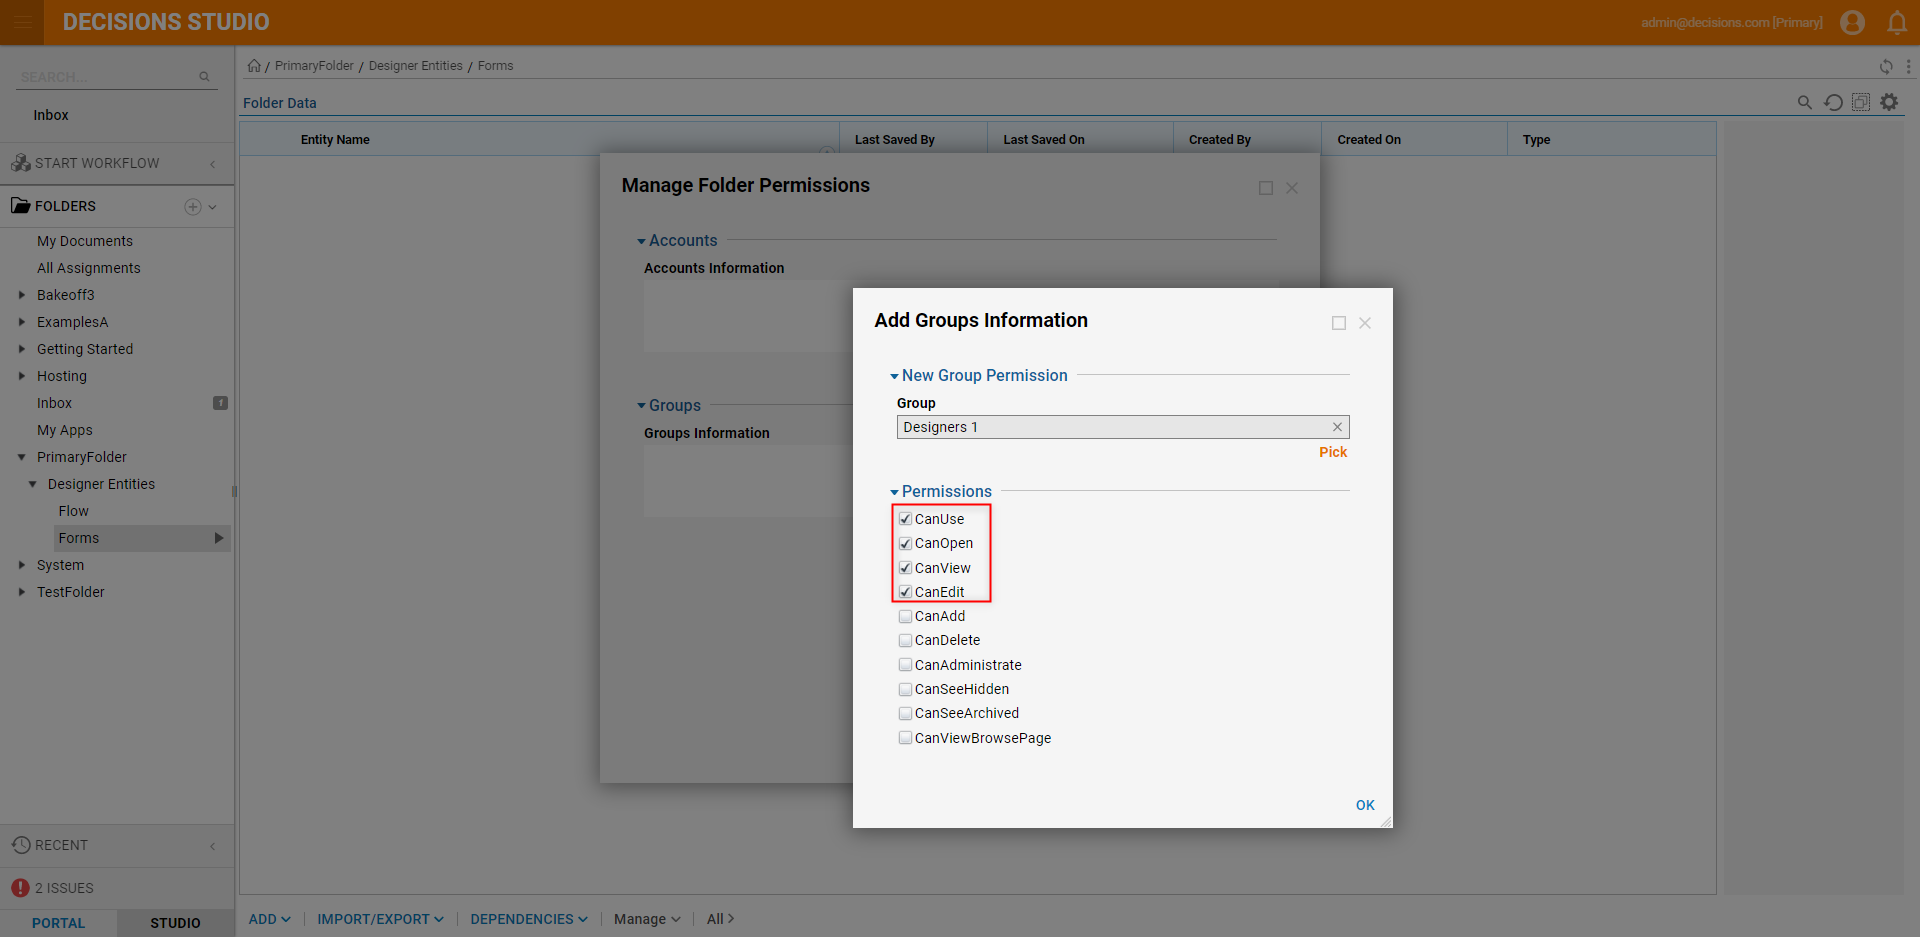
- For each Designer Entities Sub Folder, right-click them and select Manage > Manage Permissions. Add the desired Designers Group and select the desired Permissions.
If Permissions are desired for any other Group, Add them and select those desired Permissions, then click OK and SAVE PERMISSIONS.Additional Information on PermissionsWhen creating a Designer Project for a Designers Group the following Permissions should be utilized.:- CanUse: Allows the user to run objects in the Folder.
- CanOpen: Allows the user to navigate the Folder.
- CanView: Displays the Folder in the Folder Tree.
- CanEdit: Allows the user to edit the Folder.
Right-click the Primary Folder, select Add > Folder, provide a Folder Name, then click SAVE. .
Add an additional Folder under Dashboards called "Dashboard 1". Apply the Permissions CanUse, CanOpen, and CanView for the desired Groups. Add additional Dashboard Folders as desired.
Additional Information on Dashboard FoldersThe Dashboard Folders will serve as homes for each Dashboard. With the proper Permissions, Admins can allow end users to access these Dashboards from the User Portal.
For more information on Dashboards, see Adding a Page/Dashboard to a Folder.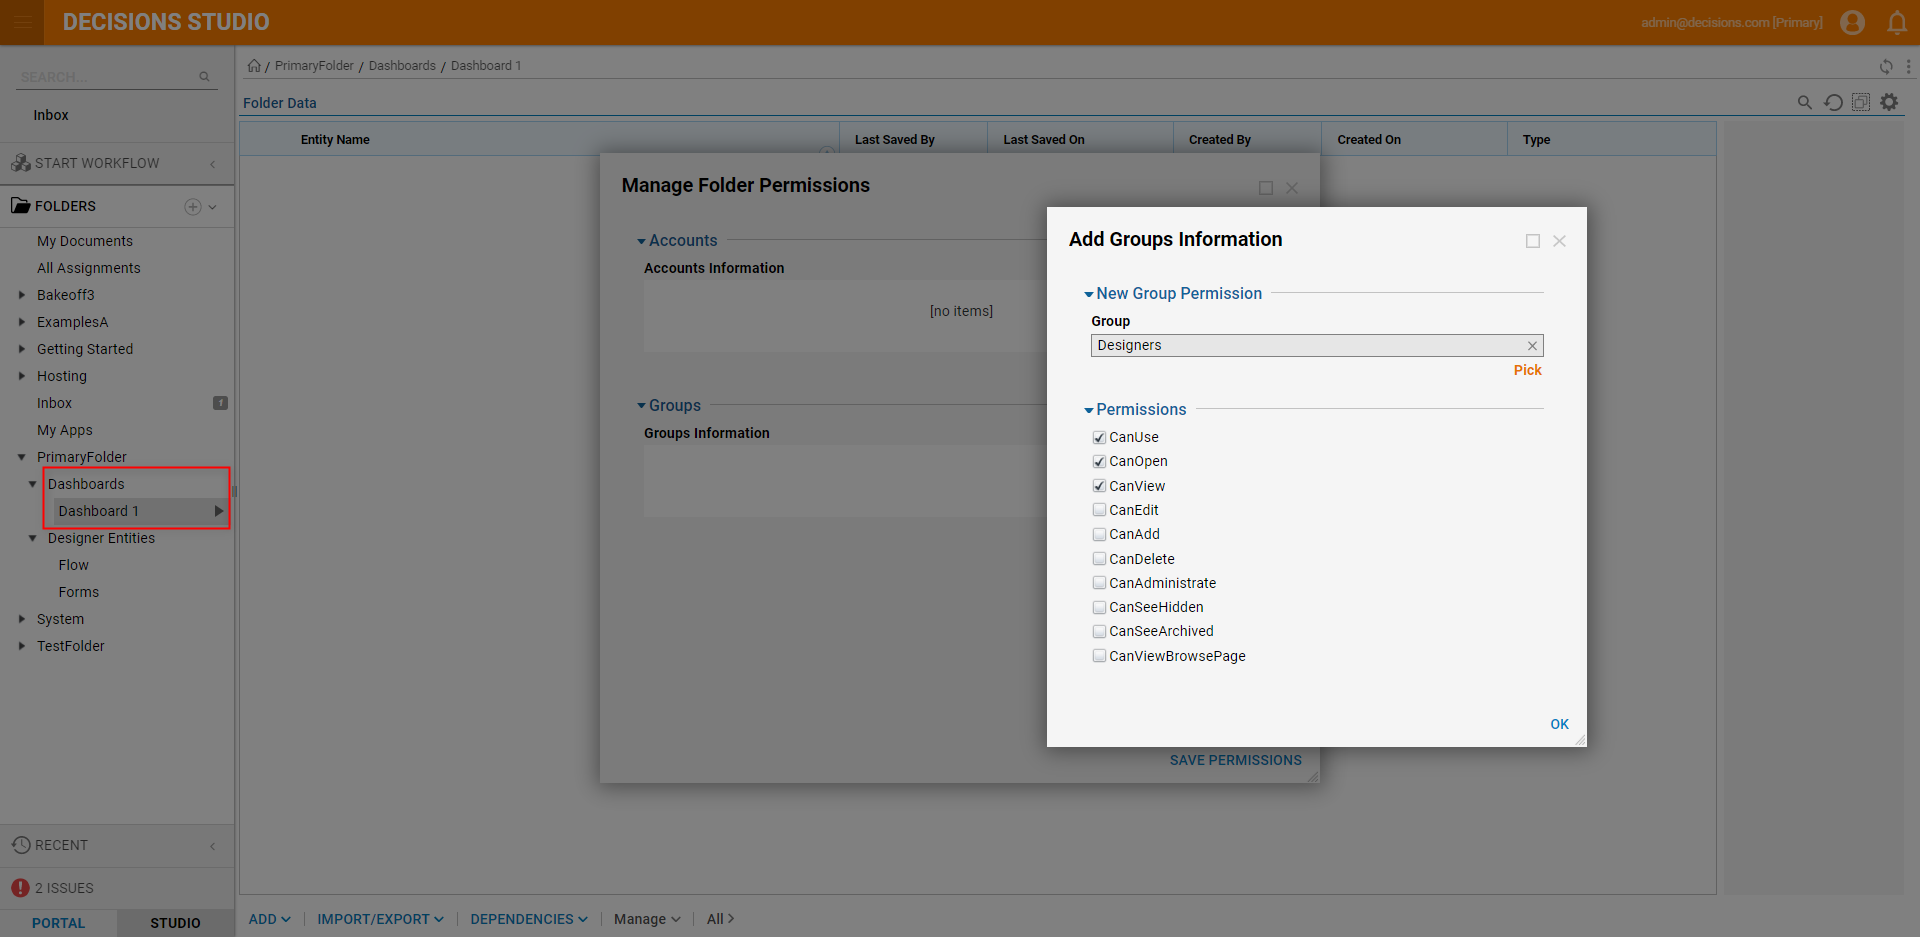
Creating a Shared Project Folder
To give all Accounts access to elements without providing the ability to Edit or Delete them:
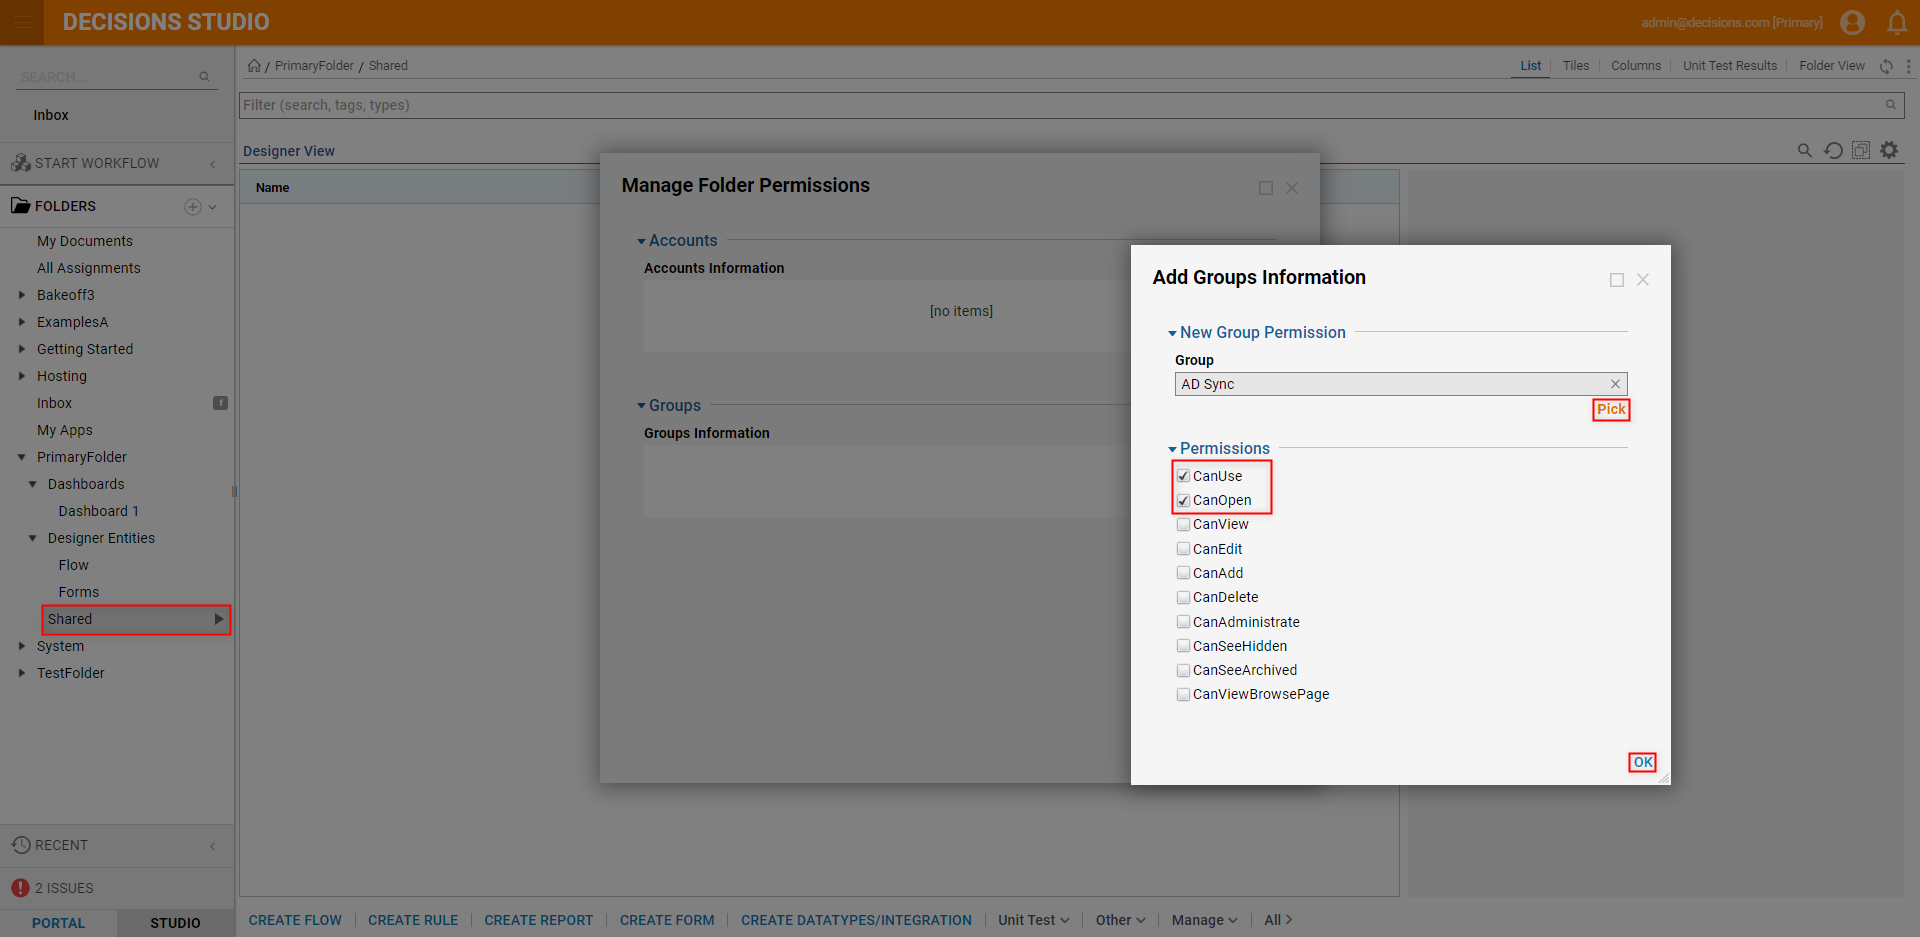
- Add an additional Sub Folder (Designer Folder) under their Primary Folder, named "Shared".
- Right-click the Shared Folder, and select Manage > Manage Permissions. Click Add New under Groups, then select the AD Group, and enable the CanUse, CanOpen PERMISSIONS. Click OK, then SAVE PERMISSIONS.
Creating a Team Specific Folder
After creating a basic Folder structure, it may be helpful to create additional Sub Folders (Designer Folders) under the Primary Project Folder. These Folders could represent different sections for team-specific tasks.
After establishing any additional Designer Folders for each team, apply the desired Permissions for each respective Group. This allows each team to have its own work environment independent of other Groups/teams.
Further Folder structuring can then be applied to organize each Group's Folder as desired. 