Overview
When configuring the Repository SSO, it is important to know when to use REPOSITORY SSO authentication account types versus SSO authentication account types. If it is only necessary for the user to be able to check in or check out from the client machine without having the ability to login via SSO on the Repository Server to modify the environment, then a REPOSITORYSSO authentication account type is needed. If it is necessary for the user to be able to check in or check out with the ability to manage the Repository Server by logging in via SSO, then an SSO authentication account type is needed.
If the user does not have an account on the Repository Server and is checking in from the client machine for the first time, the account is created on the Repository Server as RESPOSITORYSSO (REPOSSO) type. This user will not be able to sign in via SSO on the Repository environment directly because the account is not a SAML/OpenID. This user can ONLY check-in/check-out from the client machine.
If the user first directly signs in on the Repository Server to have the SSO account created, then the user will be able to sign in via SSO on the Repository Server and use the REPOSSO feature on the client machine. The account will be either SAML/OpenID authentication type on the Repository Server.Example
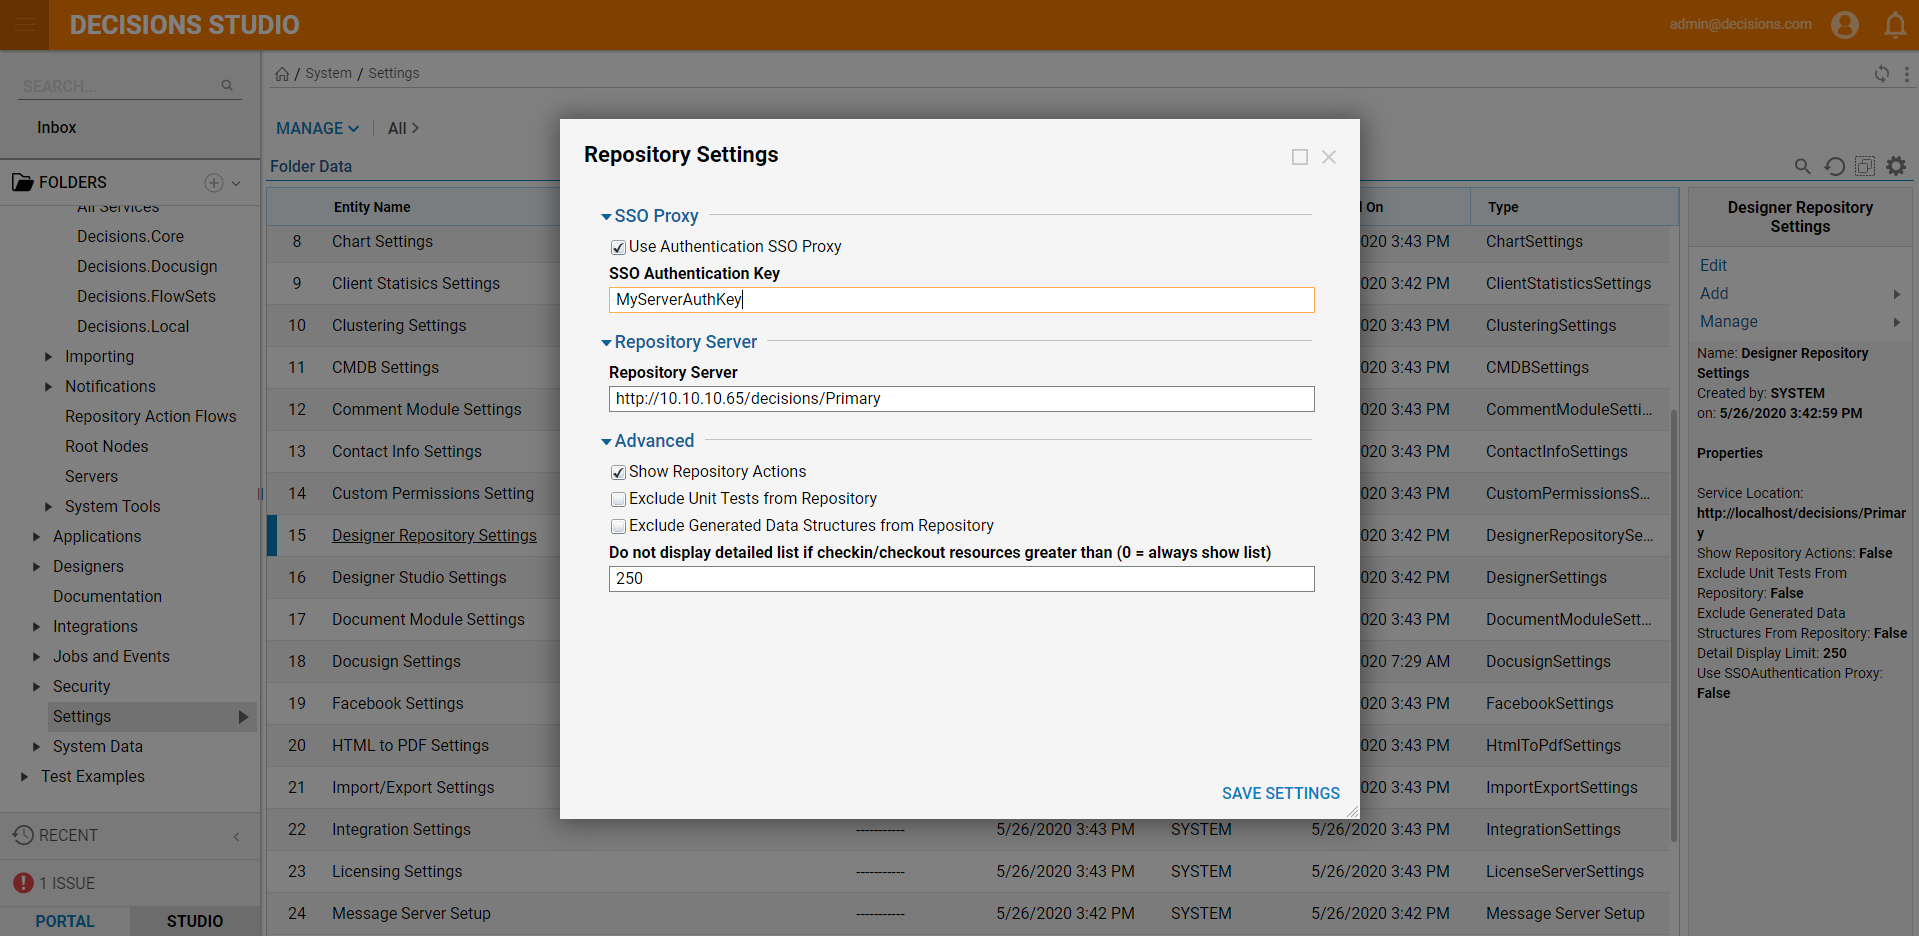
- The first part of the setup is to check the "Use Authentication SSO Proxy" setting located in System > Security > Settings Folder and click on "Designer Repository Settings."
- Configure the settings in the Repository Settings as follows:
- SSO Authentication Key: Which can be set to any user-declared string.
- Repository Server: This must be the IP or DNS name of the Repository Server.

- After the client servers have been configured, switch over to the Repository Server.
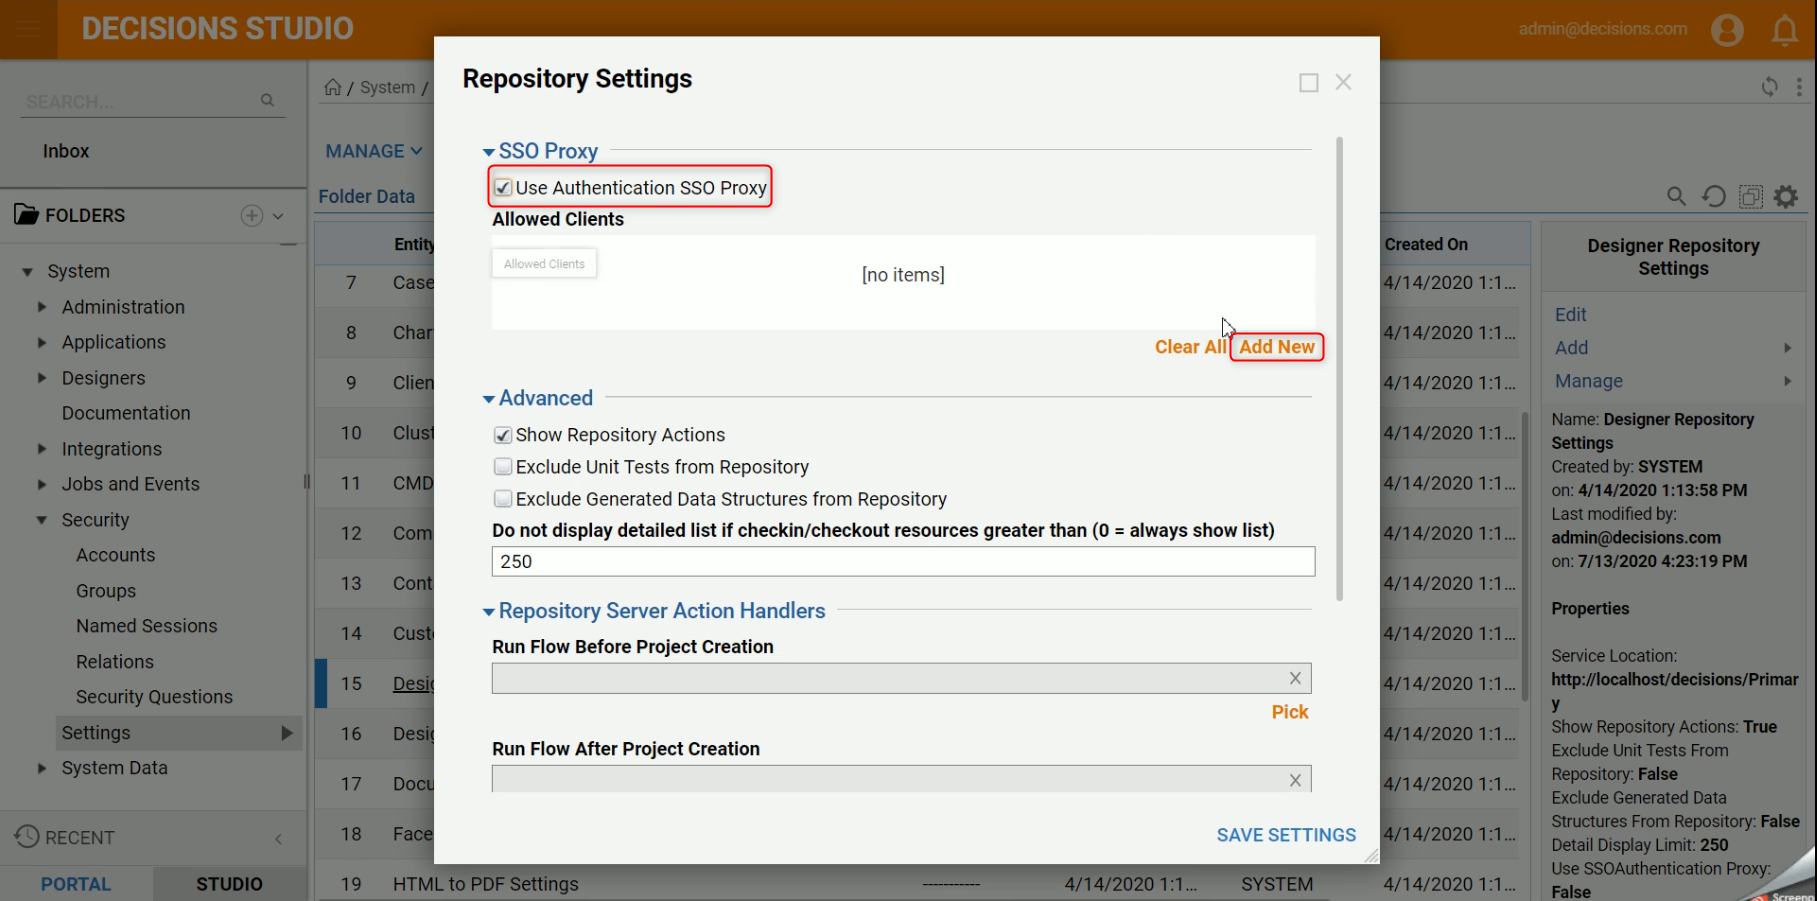
- On this server, navigate to the System > Security > Settings Folder and click on "Designer Repository Settings". Since this server was configured to be a Repository, there will be different settings.

- Next, check the box "Use Authentication SSO Proxy" and then click "Add New."

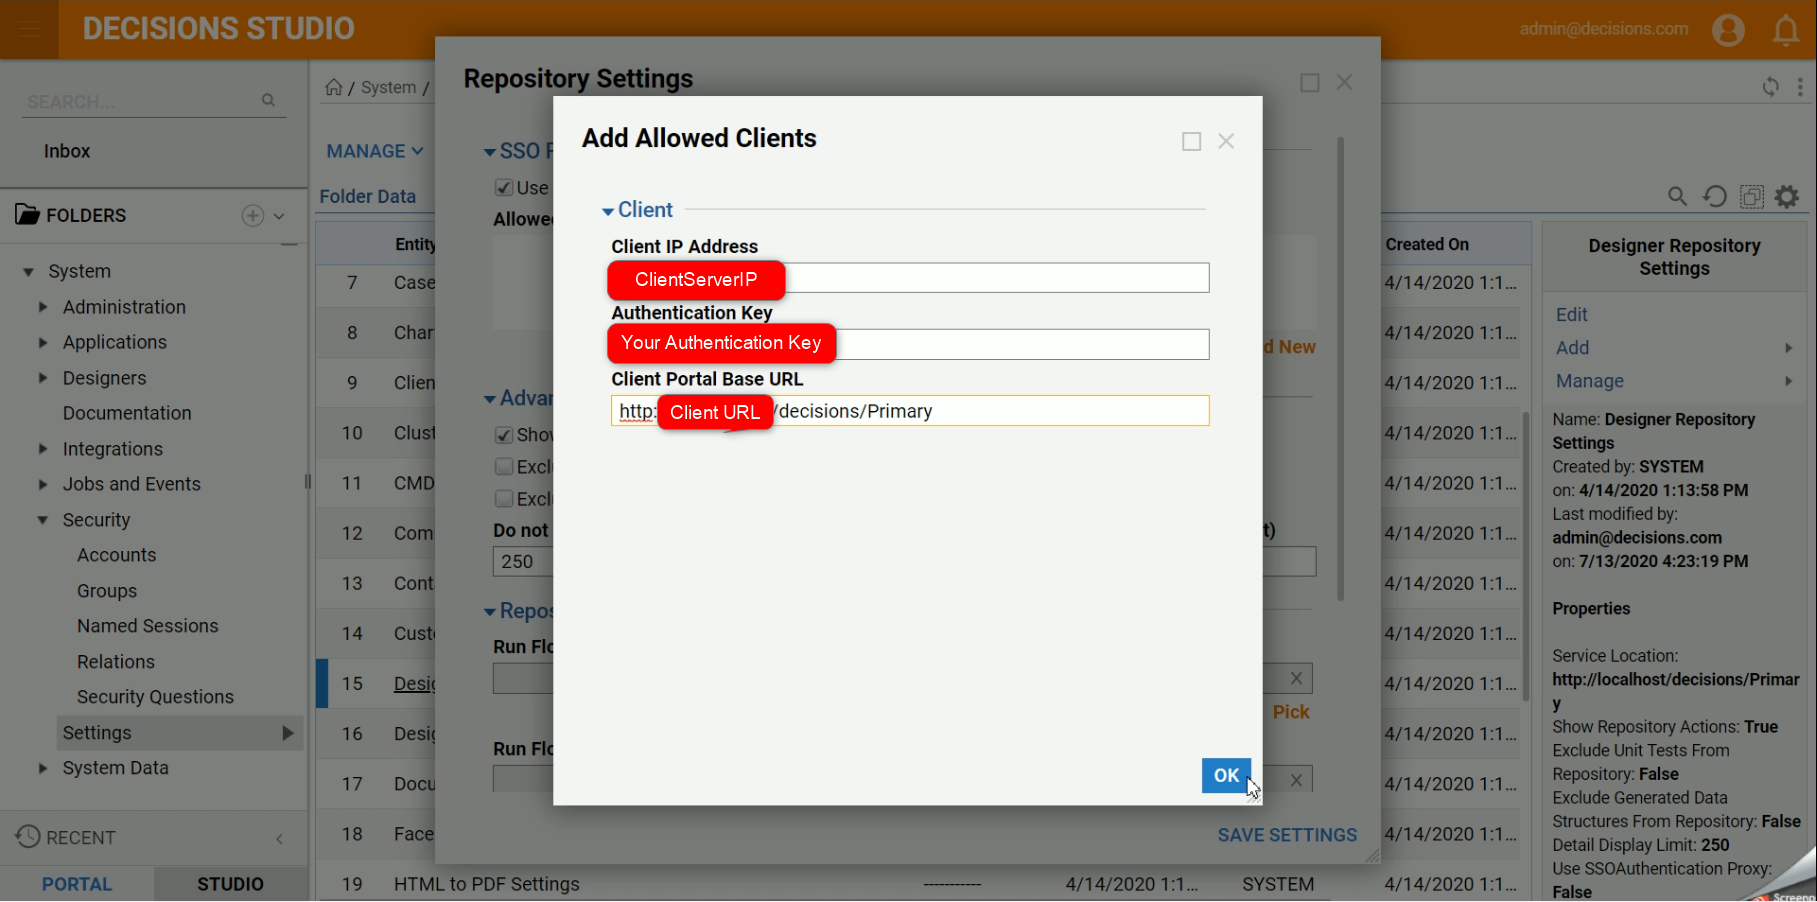
- After clicking the "Add New" button a new configuration form will be displayed, and it will ask for the Client IP Address, Auth Key, and Client Base Portal URL.Repeat For Each Decisions ServerEach Decisions server that will be checking Projects in and out of the Repository, will need to be added to the Repository Server's "Allowed Clients."
Setting Name Purpose Client IP Address The IP address of the server that will be accessing the Repository Authentication Key User declared key on the client-server Client Base Portal URL Base Portal URL of the server accessing the repository 
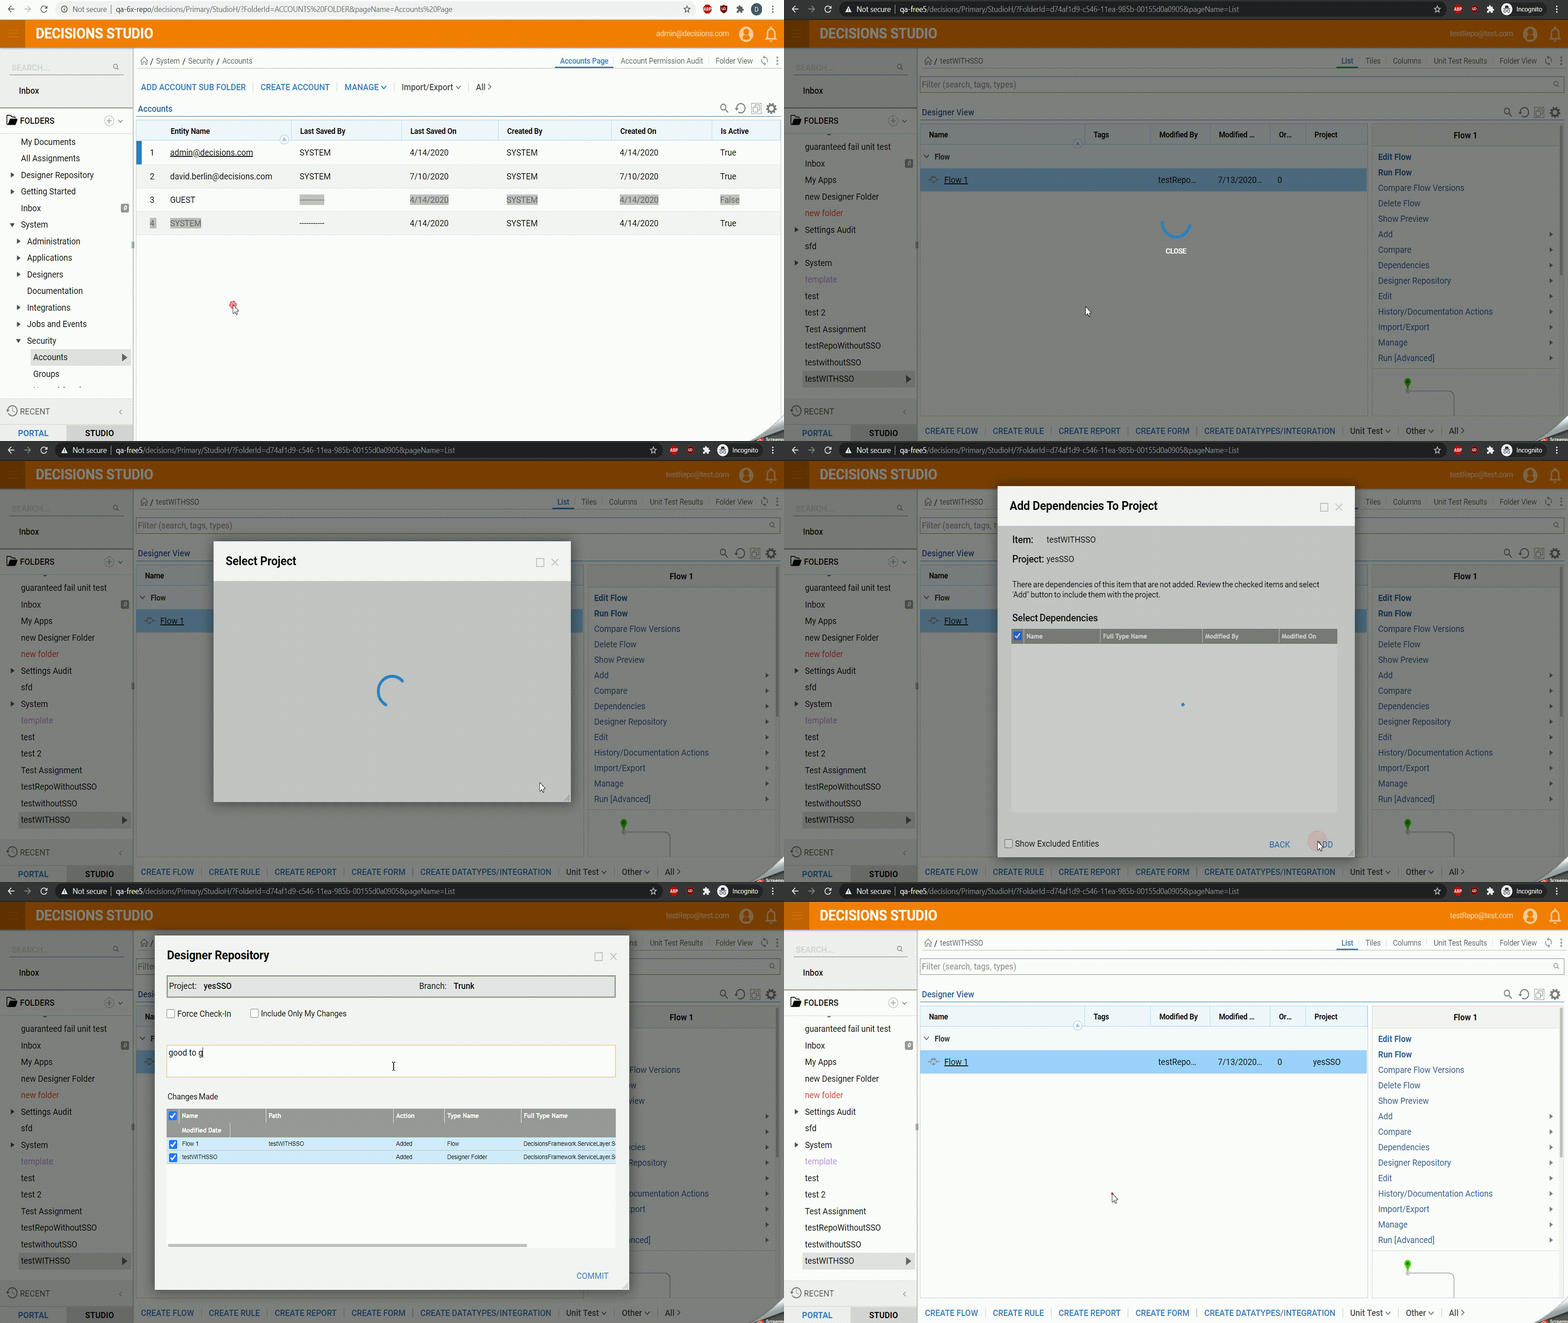
- Once these settings have been configured, users will be able to interface with the Repository Server without getting prompted for a username or password. Notice in the gif below there was no UAC prompt.
