Overview
Deployment Images are an image of a staging environment, and acts as an ‘import’ of an entire Decisions build. The Deployment Image will write over any elements not included in the image. They are typically used for highly controlled environments and are highly restricted by nature. These are typically used in government or medical applications, where security is paramount. In addition to the project, Deployment Images will also contain instance configurations which are system settings, portal settings, and AD settings.
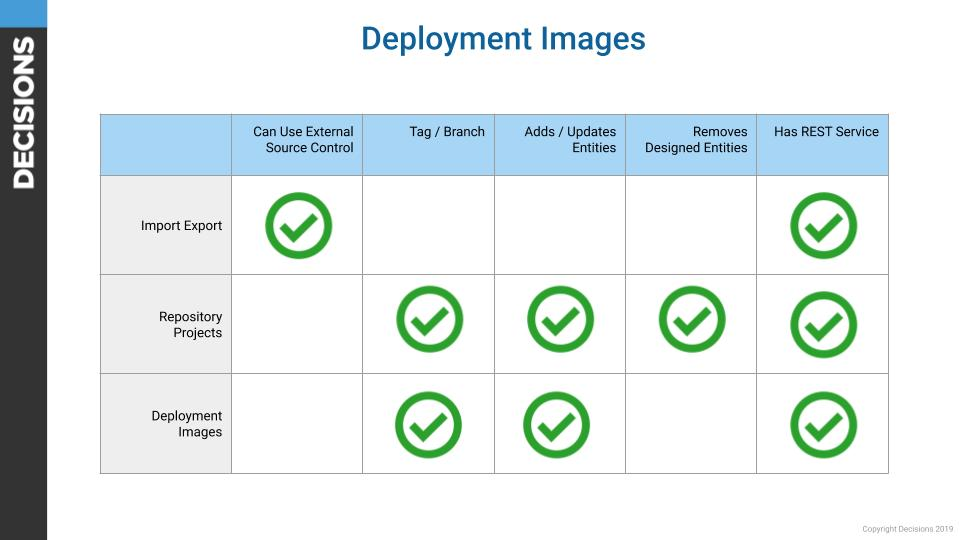
Deployment Images have several limitations (by design) in comparison to a standalone or a repository install. The chart below shows this in an easy to understand format
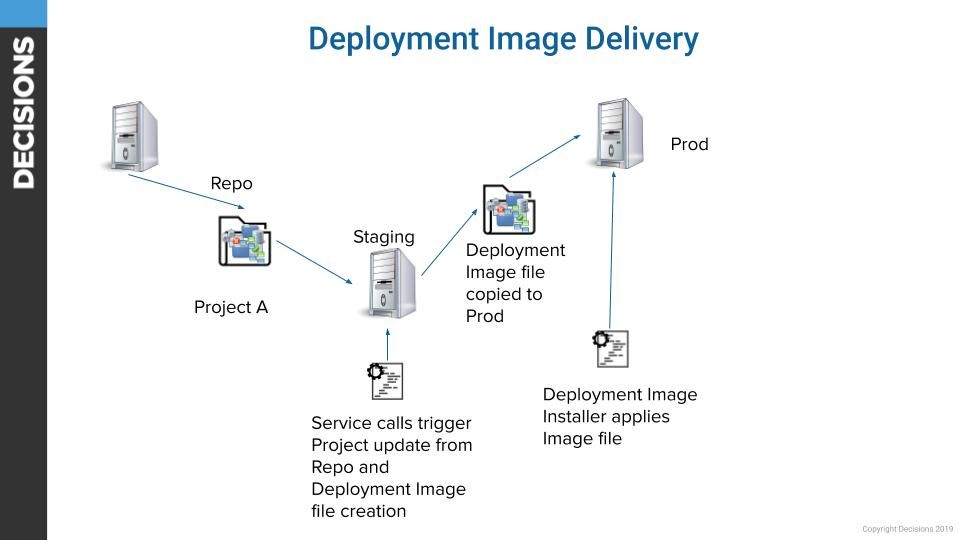
Below is a diagram of how a deployment image is created and deployed to a production server
Deployment Images contain only the following elements:
- All project resources
- All designer folders
- All element registrations (flows, forms, etc.)
- Database Connections & Integrations
- Scheduled Jobs
- Message Queues
- Message Queue Handlers
- Work Queue Types
- Work Queue Workers
- OAuth Providers
- OAuth Tokens
- Named Sessions
- Multi-tenant contracts
Creating a Deployment Image
- Navigate to System > Administration > Deployment Images
- Select the "Create Deployment Image" action. This may take some time to run.
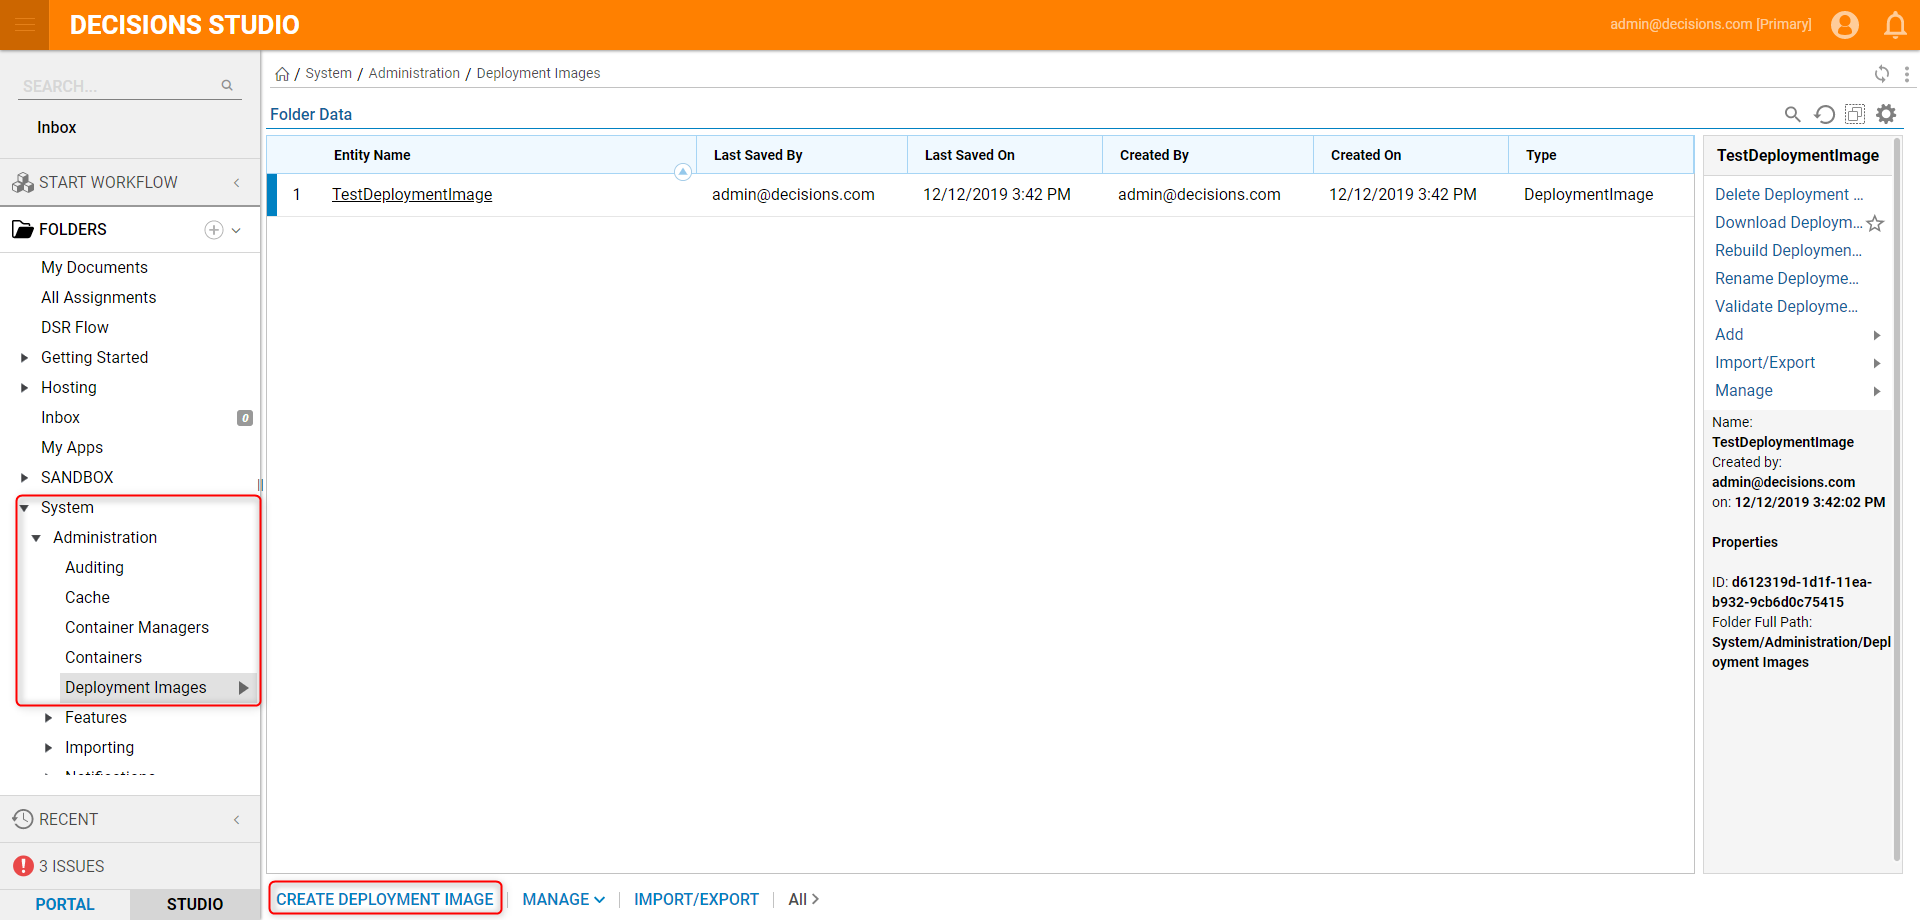
- When complete, the deployment image will appear. This image can be redownloaded and used as many times as needed.
- Download the ZIP and copy the file to the destination server. A brand new install of the exact same version of Decisions can be used, but the image can be installed on top of an existing Decisions server.
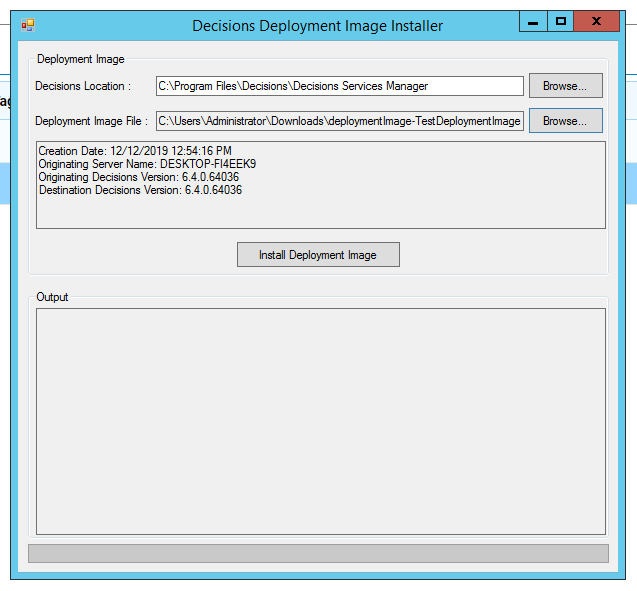
- On the destination server, run (as admin) the DeploymentImageInstaller.exe located in ‘C:\Program Files\Decisions\Decisions Services Manager’.
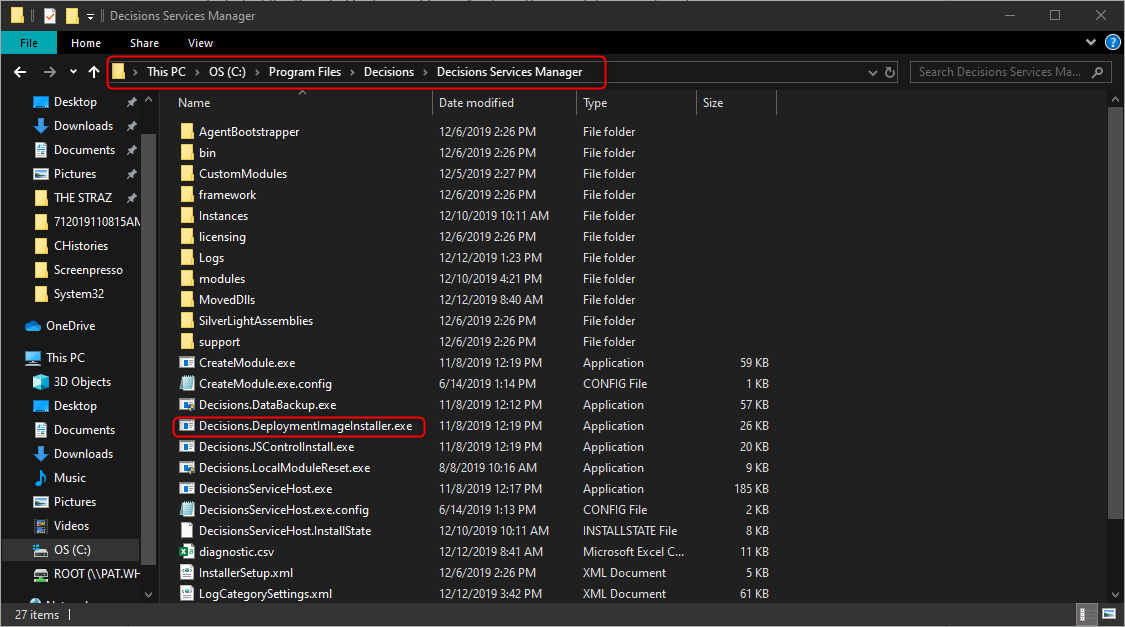
- Load the ZIP file
- Click the Install button. The installer will create a deployment image of the current contents of the server as a backup, and then apply the contents of the new ZIP file. SHM will be restarted automatically as new DLLs, modules, and files to import are involved.
