Introduction to the API
There are many API services in Decisions. The most common use of the API is running rules and flows. You can learn how to run rules and flows via their specific API options here: https://documentation.decisions.com/docs/rest-handling-services
The API can also be used for many other things with a few simple examples being:
1. Provisioning Users
2. Setting up Folders or Projects
3. Setting Branding
4. Discovering Rules and Flows
Calling any method or service in the Decisions API world requires a User Context. User Context allows Decisions to grant access, check authorizations for specific activities, govern access to specific data, and audit the actions taken in the product. Calling methods without a User Context will result in a 403, forbidden error.
Creating a User Context is straightforward in examples, but may require more thought when your application and Decisions need to share an understanding of a user.
Authenticating to Decisions API
All authentication to Decisions API can be done by sending an appropriate HTTP Header with your request. The header values may be different based on your type of user context as explained below.
If you are familiar with using user id or session values in the URL parameters, or the POST body of a call to Decisions you should note that these options for authentication have been retired and can no longer be used.
User Contexts [ v 5.11 and up ]
- User Id and Password (Basic) [Supported since Decisions 5.9]
- Session (Session) [Bearer keyword and JWT will be introduced in 5.12 & 6.1]
- Named Session (Session)
- Custom Named Session (Session or Custom)
User Id and Password
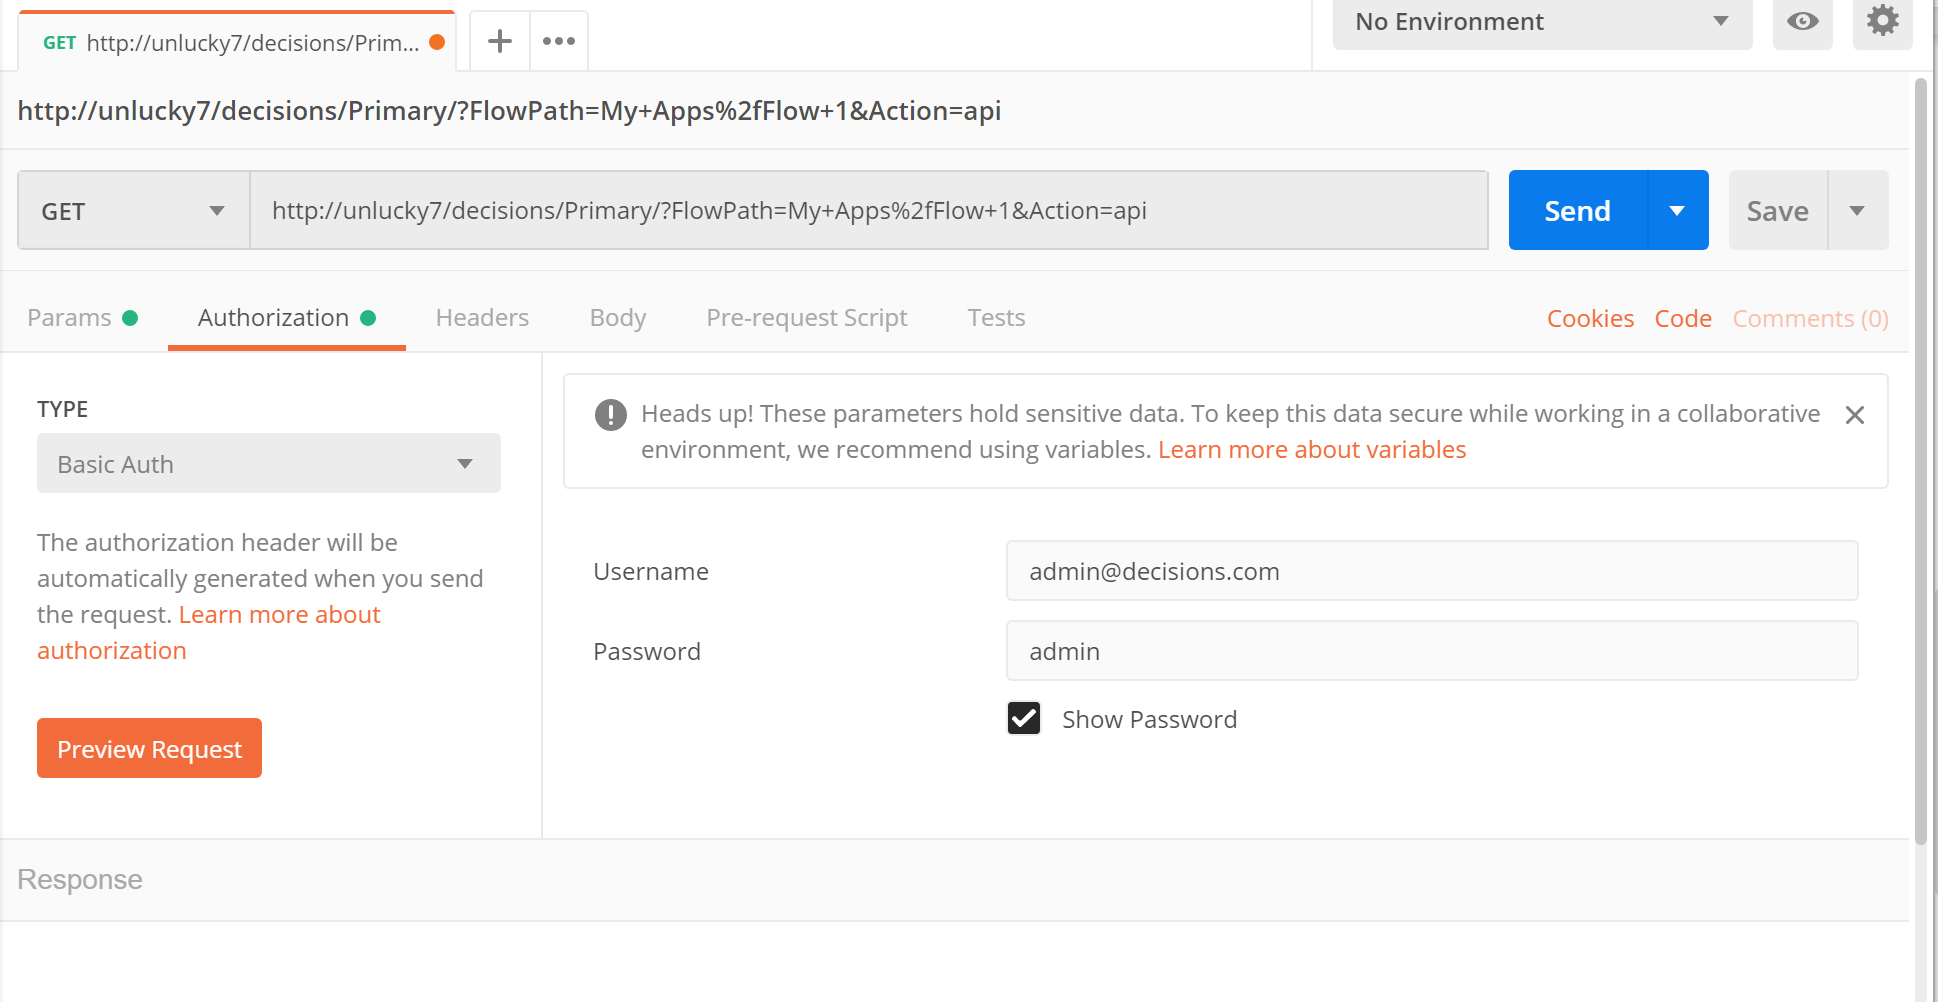
User Id and password are passed to the services as a Basic Authorization. User Id and Password should only be used for simple, periodic API calls. In most API uses, the User Id and Password are used to create a Session and the Session is what is used for subsequent calls.
To send the user id and password you need to combine them with a colon (:) character and then base64 encode the result. This is placed in the header with the ‘Basic’ keyword.
string merged = $"{userName}:{userPassword}";
string toSend = Convert.ToBase64String(System.Text.Encoding.UTF8.GetBytes(merged));
HttpClient client = new HttpClient();
client.DefaultRequestHeaders.Authorization = new System.Net.Http.Headers.AuthenticationHeaderValue("Basic", toSend));
client.GetAsync(“http://unlucky7/decisions/Primary/?FlowPath=My+Apps%2fFlow+1&Action=api”);
Session
A session should be returned from userid / password as a JWT token. This can then be used with a “Bearer” keyword to authenticate to services. You can use the unencrypted SessionId as a string using the “Session” keyword instead of Bearer.
To get a session id for a user you can call the Account Service method “LoginUser” like this:
URL: "http://{ipOfDecisions}/{VDIR}/Primary/REST/AccountService/LoginUser"
Post Body: { "outputtype" : "Json" }
Http Header: Authorization: Basic (Base64 String as described above)
Once you have the session id you can make the remaining calls to the services as follows:
To get JWT token you need to make a call to the Account Service method “LoginAndGetJWTToken” like this:
http://{ipOfDecisions}/{VDIR}/Primary/REST/AccountService/LoginAndGetJWTToken?outputType=JSON&userName=admin@decisions.com&password=admin
Once you have the JWT token you can make the remaining calls to the services as follows:
URL: http://{ipOfDecisions}/{VDIR}/Primary/?FlowId={flow-id/report-id/rule-id}&Action=api&outputtype=JSON
Http Header: Authorization: Bearer (JWT token)
Named Session
A named session is a long term pre-established session that can be used by API callers without having to authenticate with user id and password. This is most often used by a “worker” type account that an external application uses to make ALL API calls into Decisions. Named Sessions can be bound to a specific Allowed IP List by using the Allowed IP settings on the account that is associated with the Named Session.
Custom Session
With Decisions SDK you can specify, using .NET code, a custom way to handle session data. When the API receives the request and finds an HTTP Authorization Header with the “Session” keyword, we will use the following logic to handle the session data that follows the keyword.
1. If the session data starts with a prefix that matches a registered handler via the SDK: run the custom handler code.
2. If the session data starts with NS- check for a valid named session and authorize accordingly.
3. Otherwise assume this is a uniquely identified session and process it accordingly.
As you can see, if you specify a new prefix and register your handler code, you can pre-empt all Decisions session validation logic with your own.
Implementing this in the SDK involves implementing this interface:
ICustomSessionHandler
Once created you must register this handler with the core engine: CustomSessionRegistration.AddSessionHandler(this);
using DecisionsFramework.Data.ORMapper;
using DecisionsFramework.ServiceLayer;
using DecisionsFramework.ServiceLayer.Services.Accounts;
using DecisionsFramework.ServiceLayer.Utilities;
using System;
using System.Collections.Generic;
using System.Linq;
using System.Text;
using System.Threading.Tasks;

namespace Decisions.Salesforce
{
    public class DELETEME : ICustomSessionHandler, IInitializable
    {
        public int Order {
            get {
                return 0; // Higher order are run after lower order ones.
            }
        }

        public Account GetAccountFromSession(string session)
        {
            // This is where your code goes.
            // it is important to have SOMETHING in the session
            // that identifies it...
            if (session.StartsWith("THOMAS---X1.5")) {
                // Call Enertia.
                // Make sure this is ok.
                // Get the right account from decisions now.....
                ORM<account> aORM = new ORM<account>();
                return aORM.Fetch(new WhereCondition[] {new FieldWhereCondition(
                    "user_identifier",
                    QueryMatchType.Equals,
                    "WHATEVER YOU THINK.")})[0];
            }
            // Or fall through to next named session handler.
            return null;
        }

        public void Initialize()
        {
            // Must register it for it to be put in the login stack
            CustomSessionRegistration.AddSessionHandler(this);
        }
    }
}
</account></account>