Overview
In some instances, adding a column to a Report is necessary to display more information to the end-user. At runtime, this option will allow the end-user to pick and choose which columns will be displayed on a Report. The following tutorial will demonstrate how to configure this feature.
Example
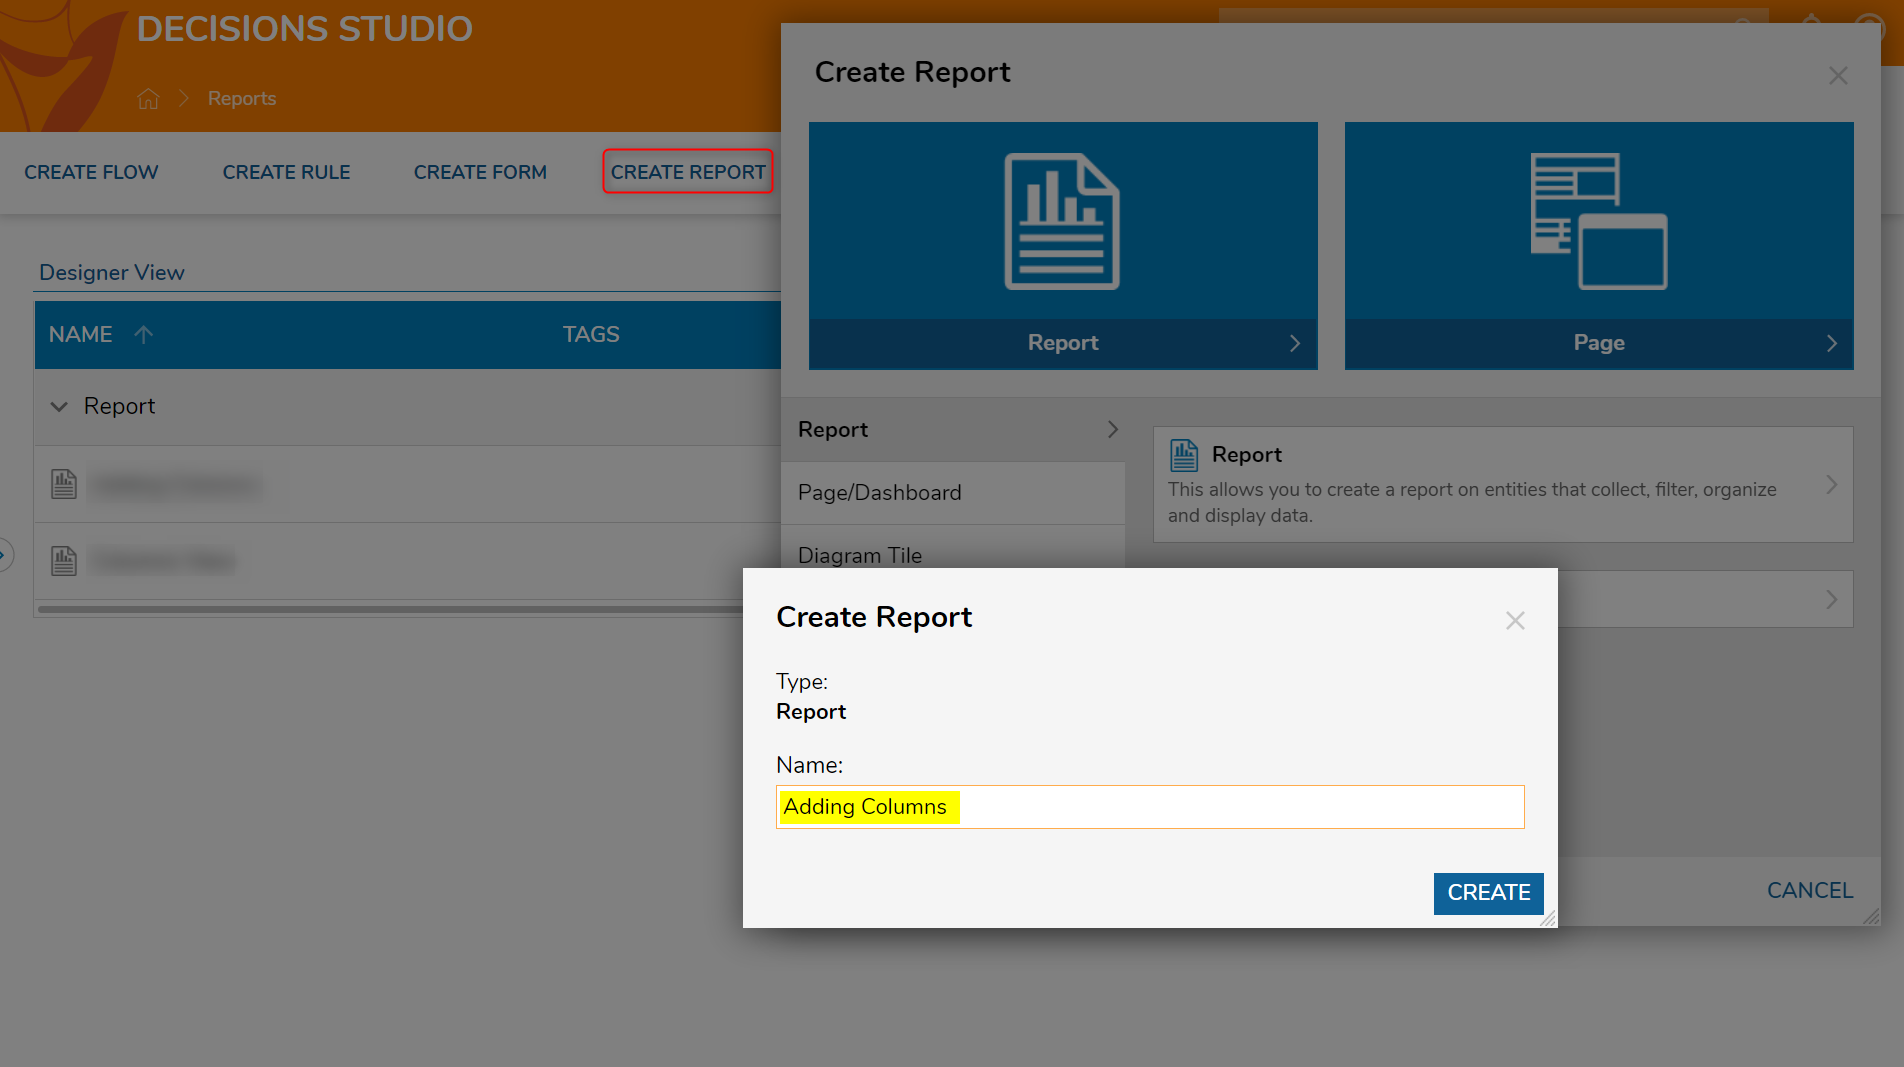
- In a Designer Folder, select CREATE REPORT. Select and name a default Report [Adding Columns]. Click CREATE.

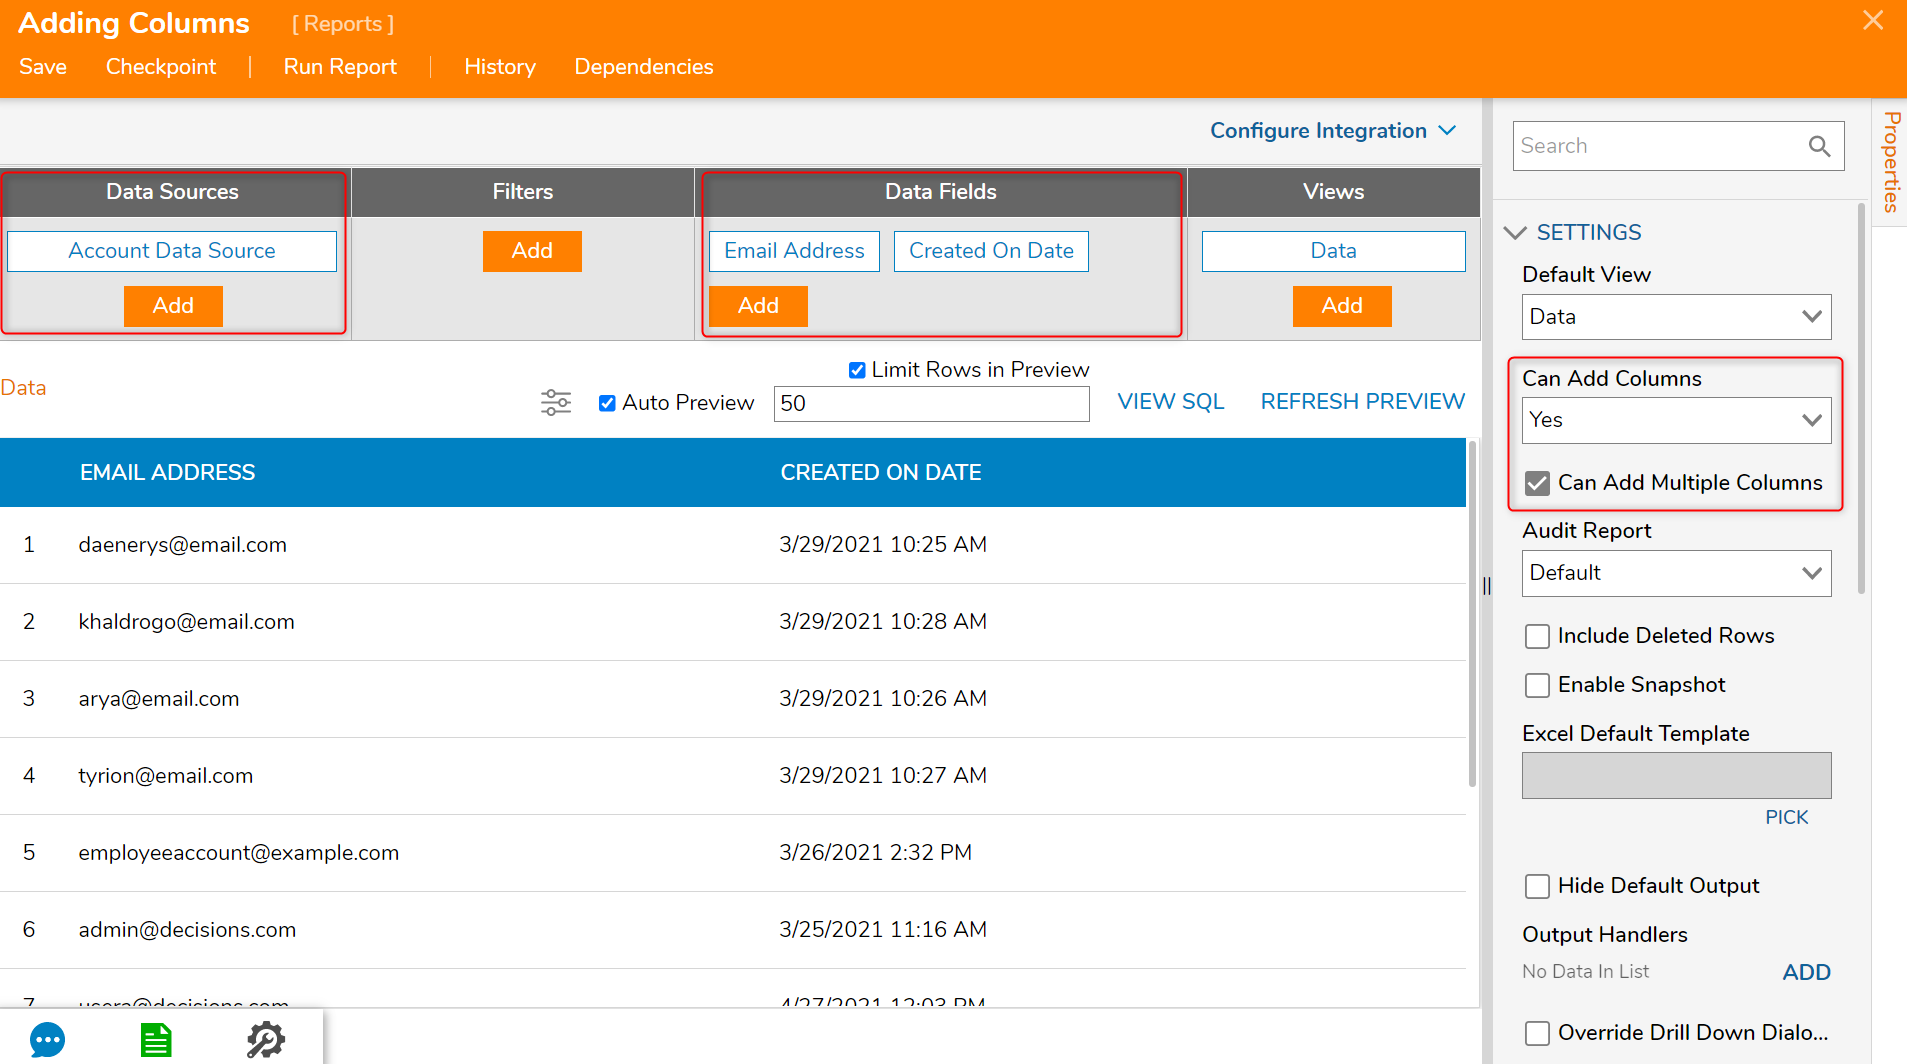
- In the Report Designer, click Add under Data Sources.
- Locate and select Account Data Source.
- Next, click Add under Data Fields.
- Locate and select Email Address and Created on Date.
- Next, navigate to the Properties panel > SETTINGS > Can Add Columns drop-down list and select Yes.
- Then, enable the Can Add Multiple Columns boolean.

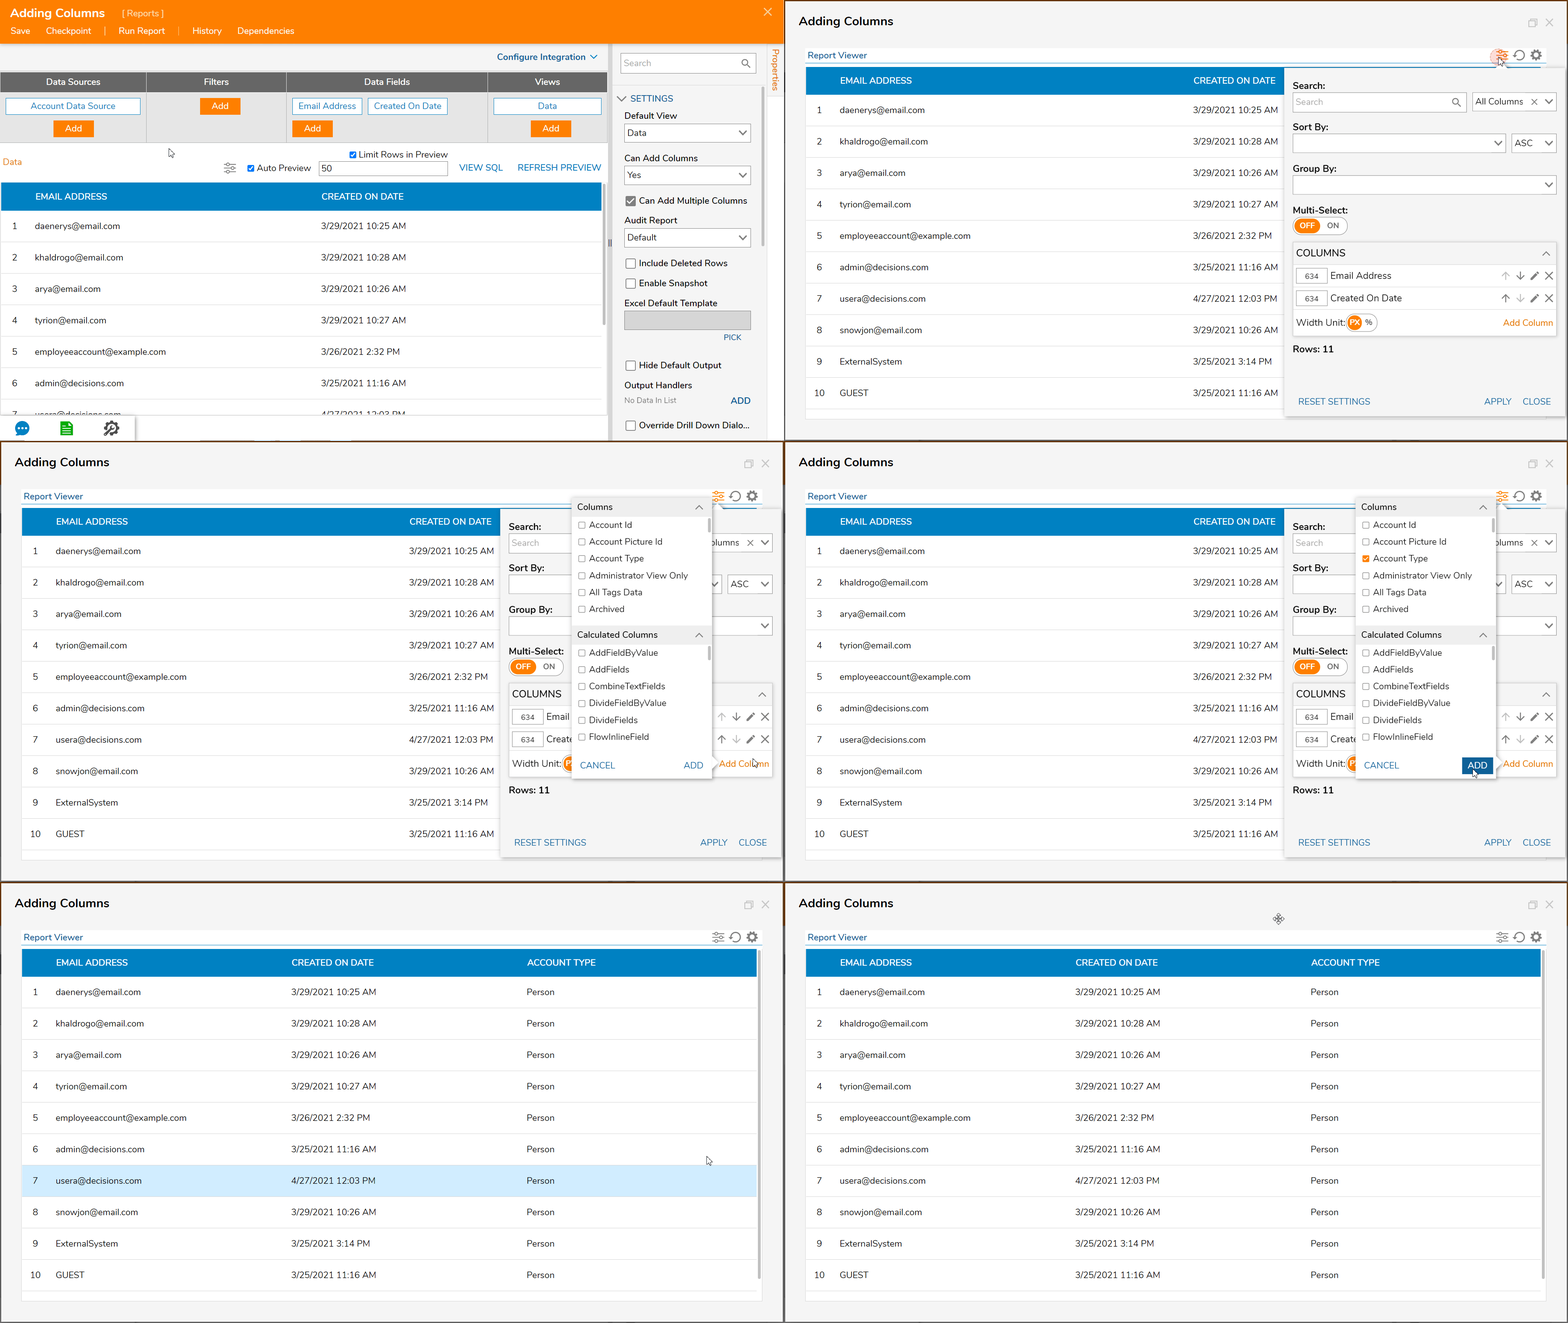
- Select Run Report from the top action panel; this will automatically save the Report.
- Navigate to the abacus icon on the Report Viewer.
- Select Add Column; this will allow the end-user to add multiple columns to an existing Report. Click ADD.
- APPLY the changes when desired.
