Overview
The Amazon Web Services (AWS) module allows users to integrate with AWS's Simple Queue Service (SQS) Message Queue.
Prerequisites:
- Installation of the AWS module. To learn how to install a module, see Installing Modules in Decisions.
- Active AWS account and application
Example
This example will demonstrate how to integrate SQS in Decisions using the AWS module.
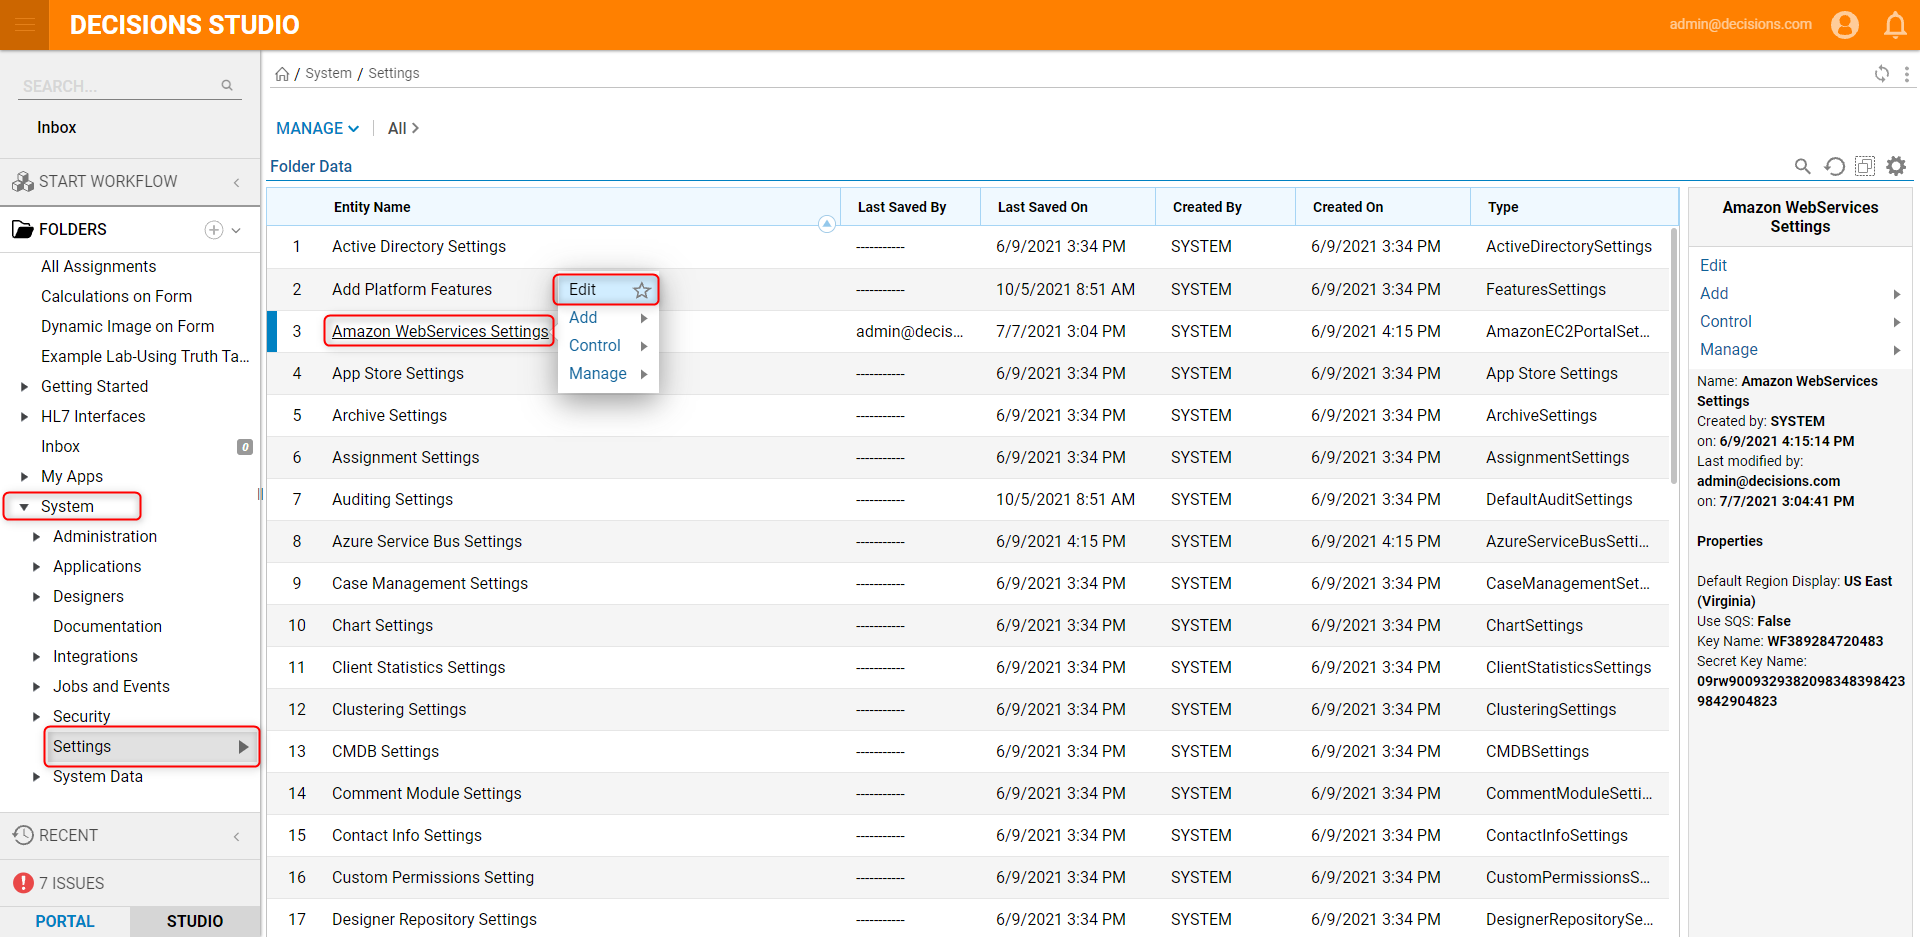
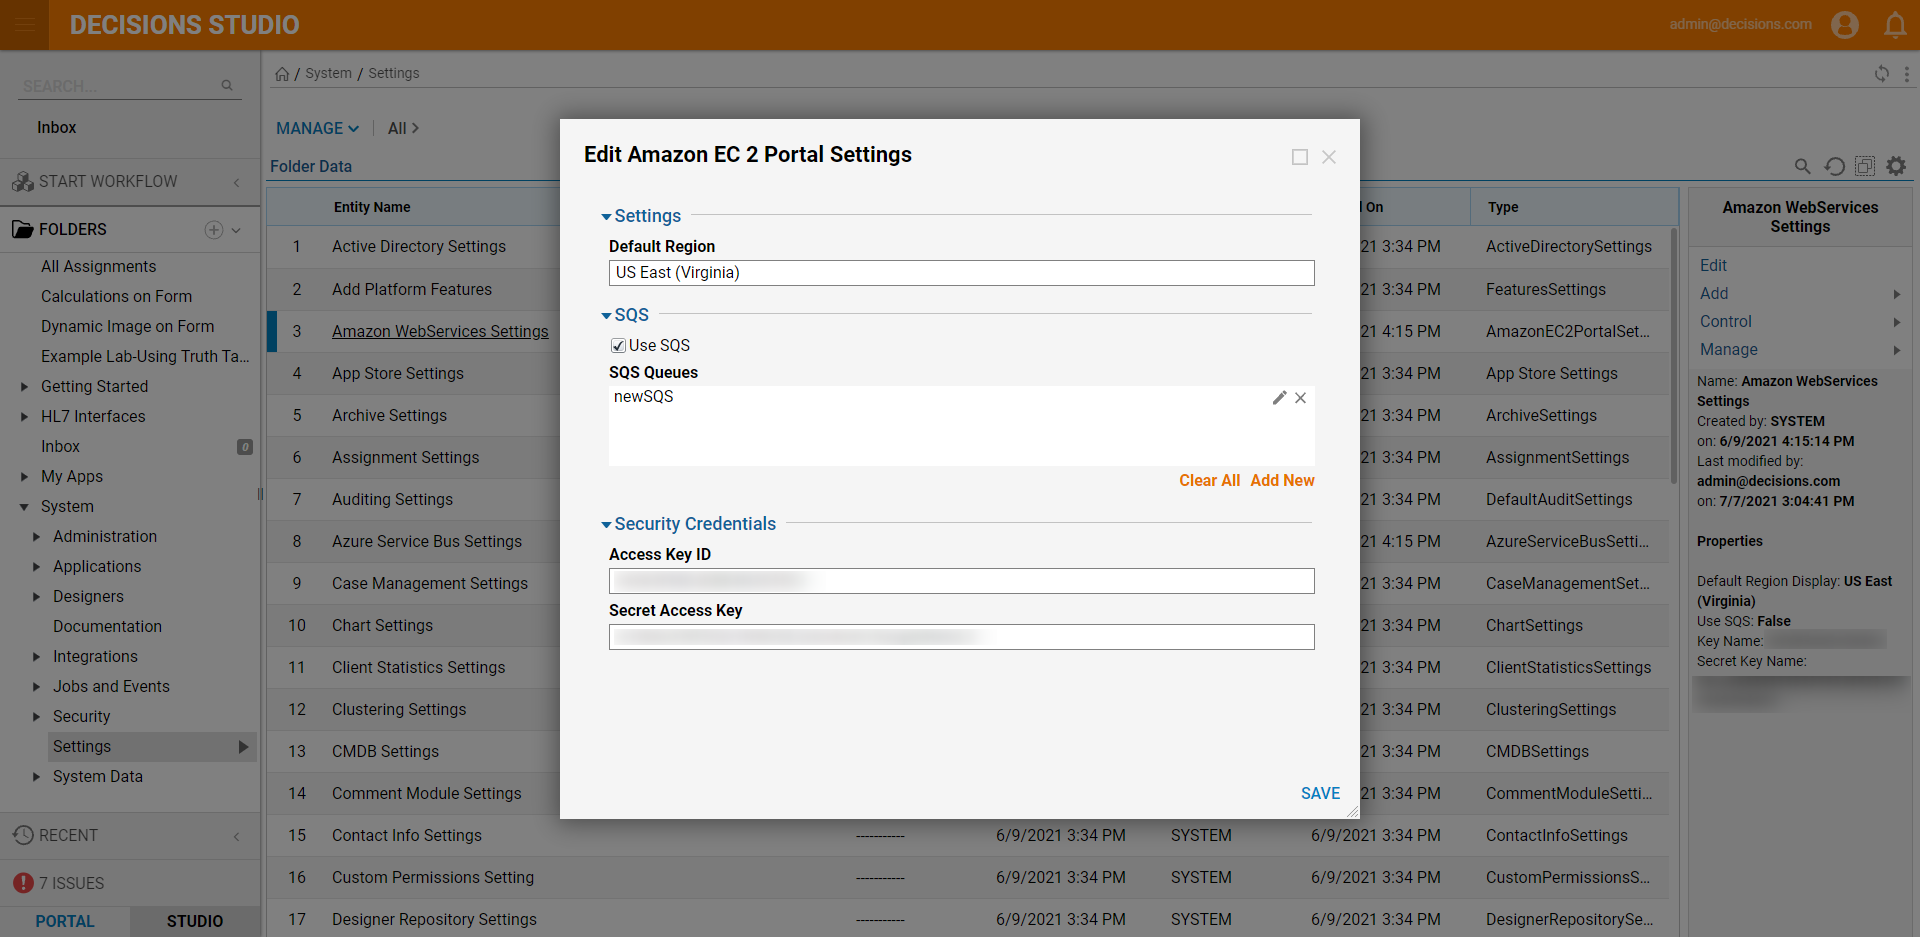
- In the Decision Studio, navigate to System > Settings. Right-click Amazon WebServices Settings and select Edit.
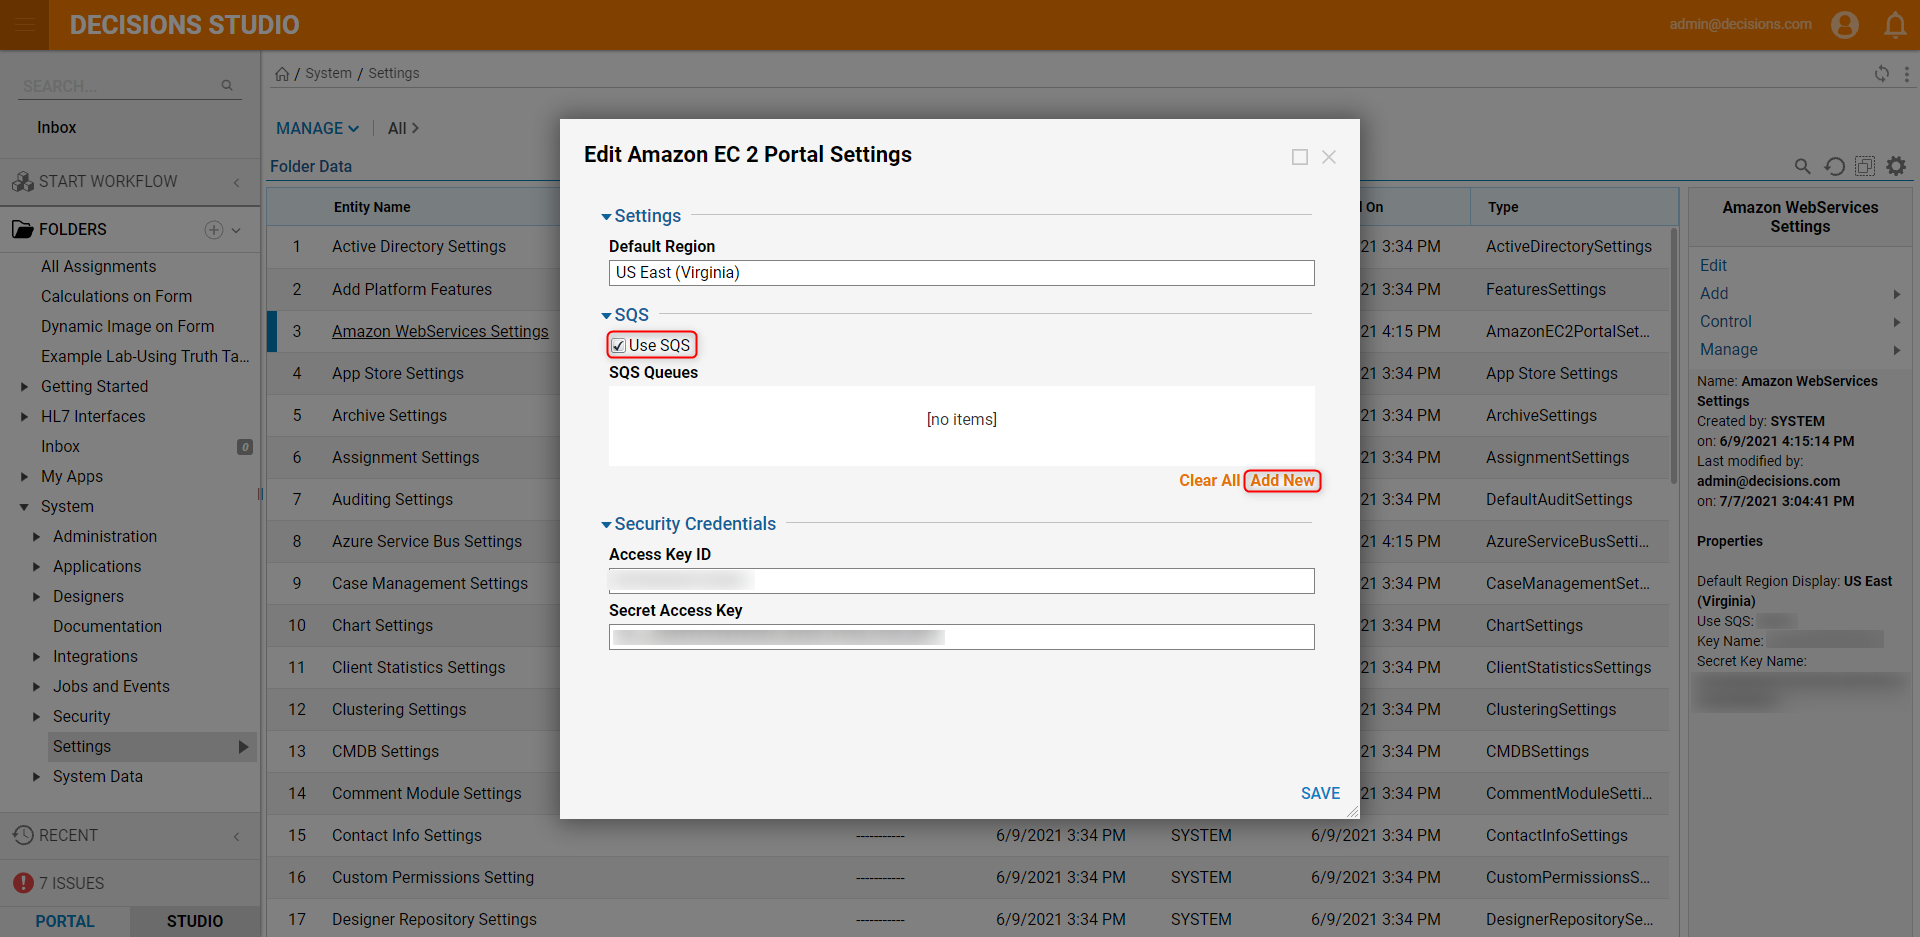
- On the Edit Amazon EC 2 Portal Settings, select the Use SQS option. Click Add New under SQS Queues.
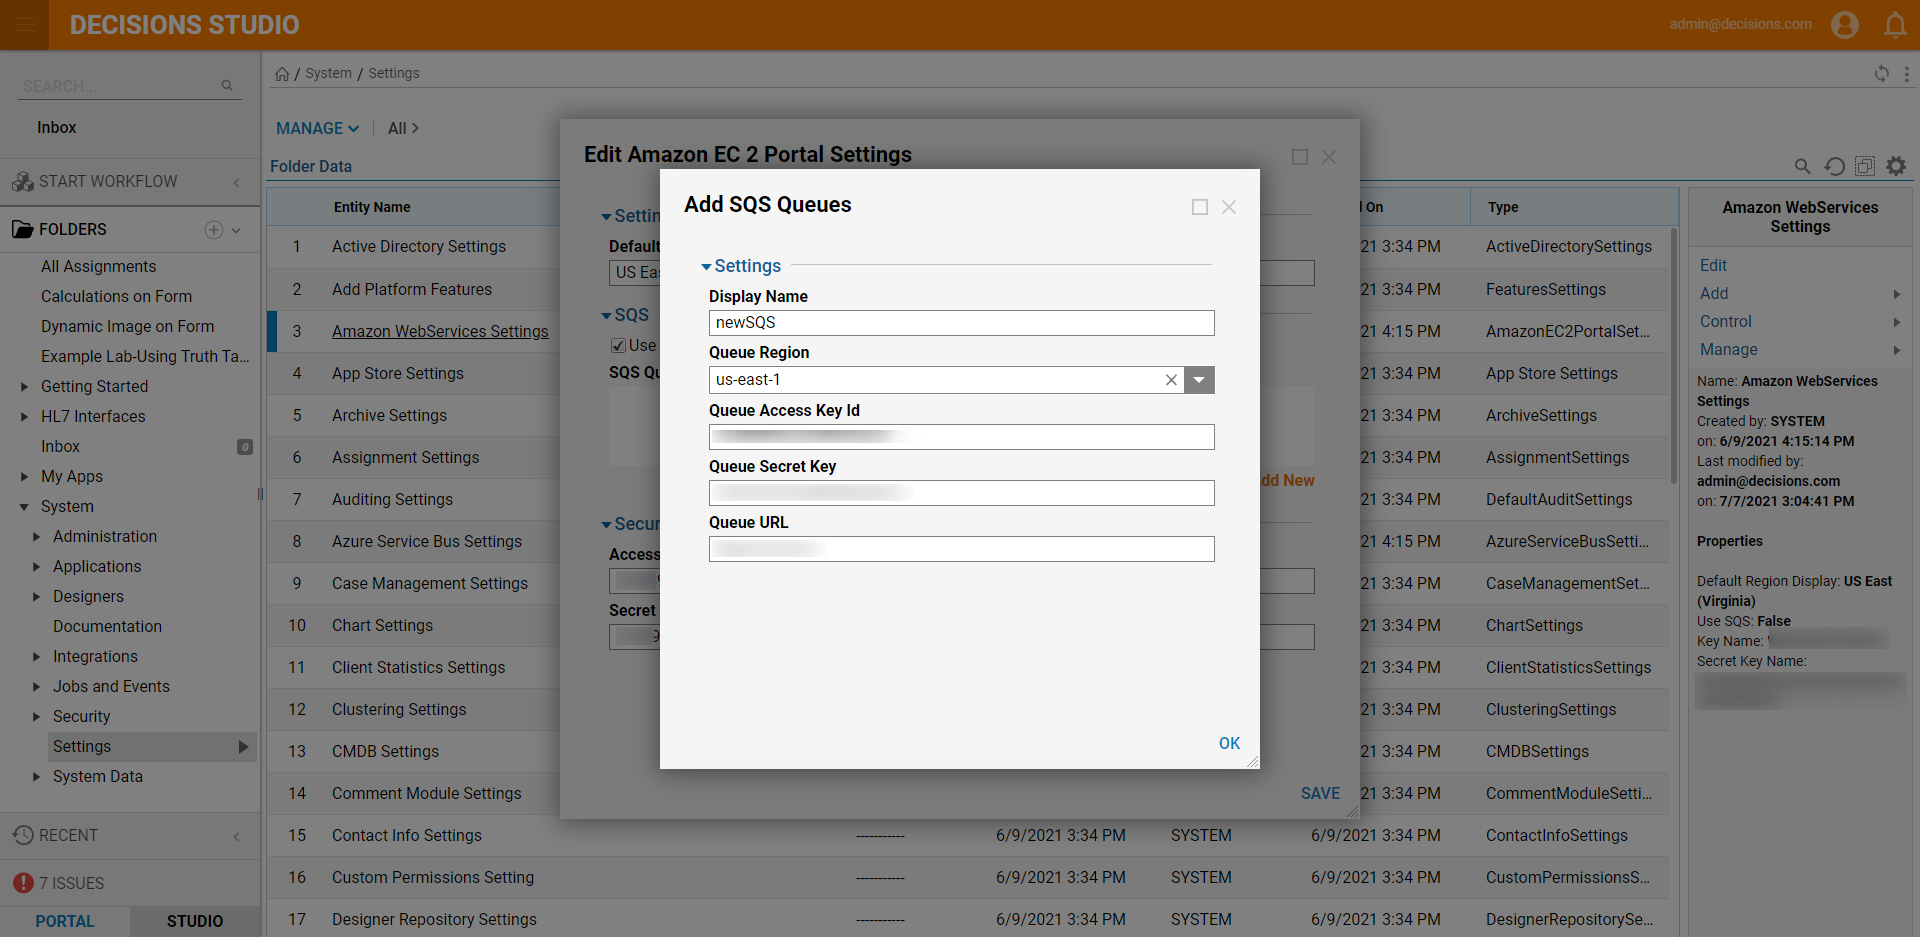
- On the Add SQS Queues window, enter the SQS Display Name, select the Queue Region, and enter the Queue Access Key Id, Queue Secret Key, and the Queue URL from the AWS SQS service page. Click OK when done.
- Enter the correct Access Key ID and Secret Access Key for the active AWS account. Click SAVE.
Posting to SQS Message Queue
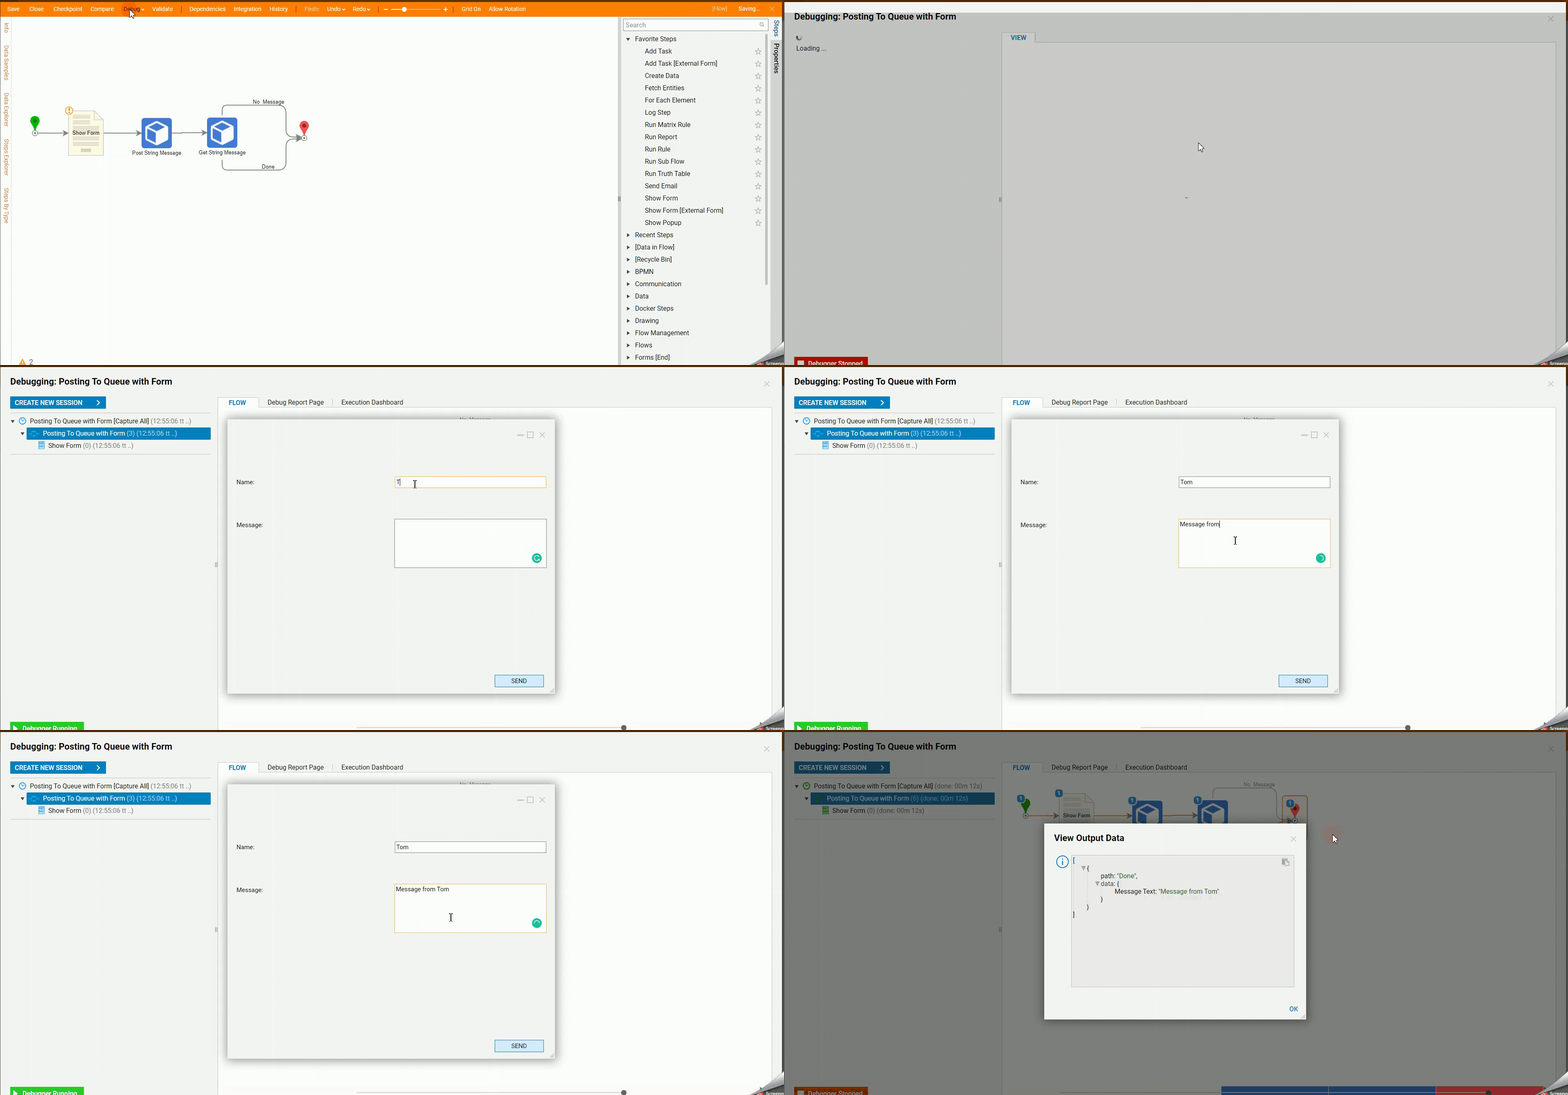
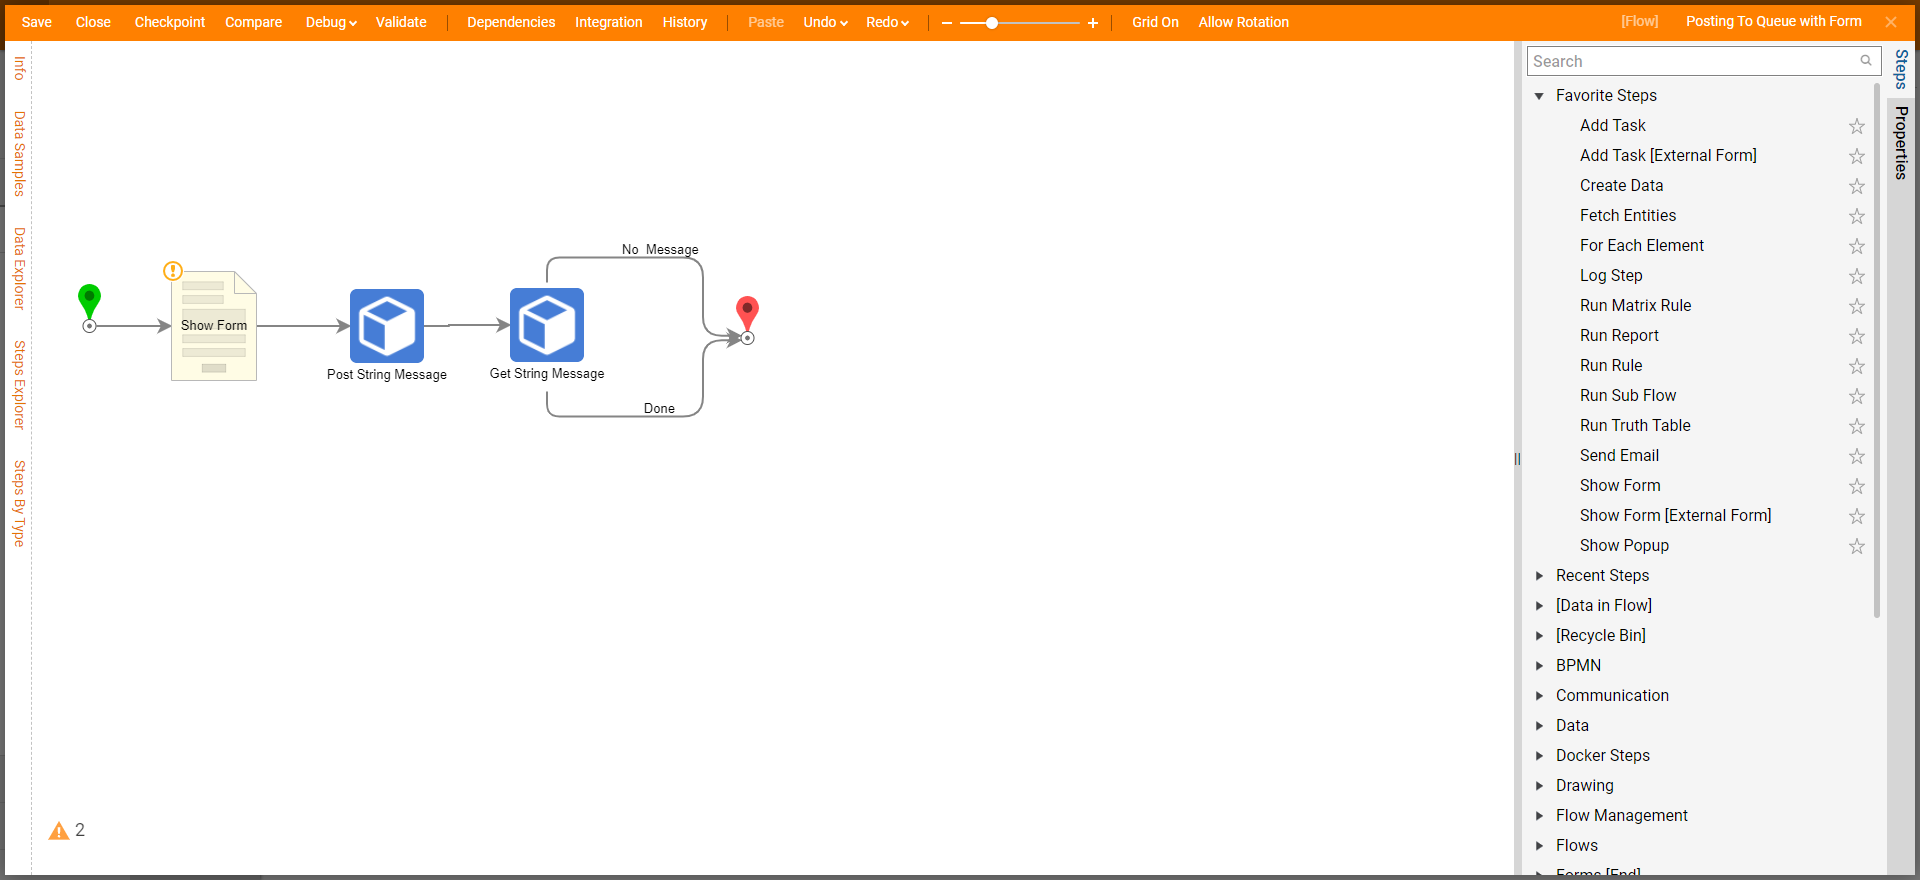
In this example, a Form will take in a name and message from user. After clicking send, the message will post to the SQS queue. The message sent will then be retreived.
- In a Designer Project, click CREATE FLOW, select Default, and click CREATE. Name the Flow and click CREATE.
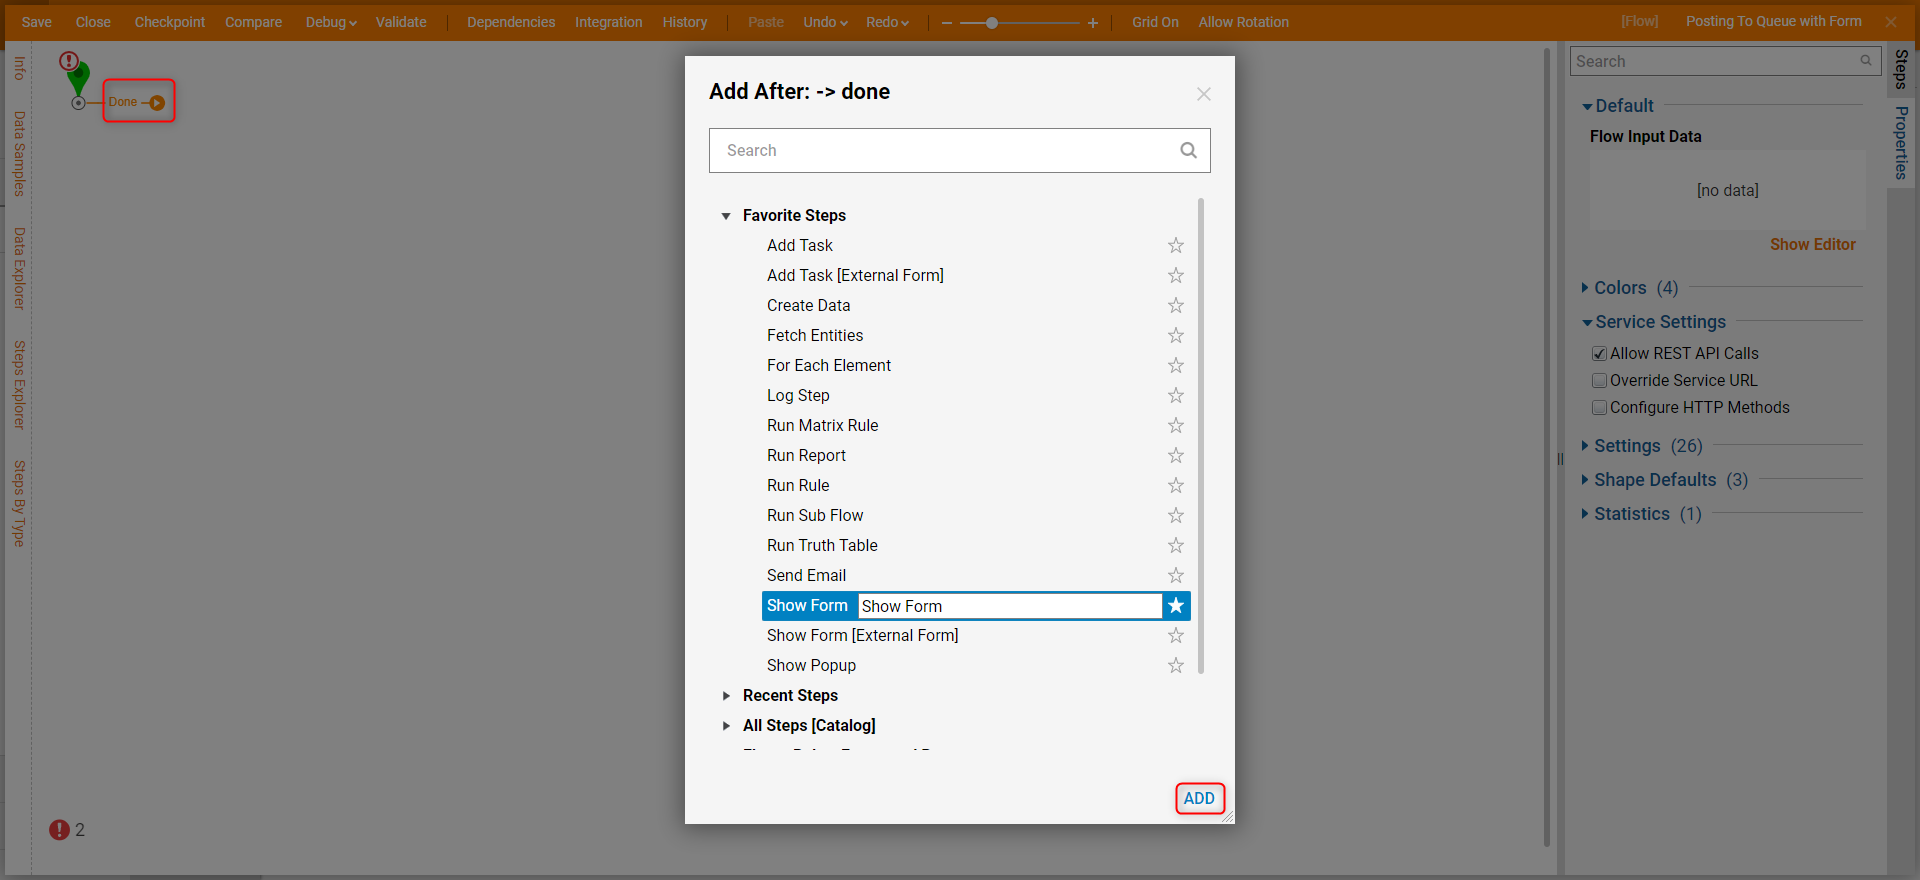
- Click the Done path of the Start step. Select the Show Form step and click ADD.
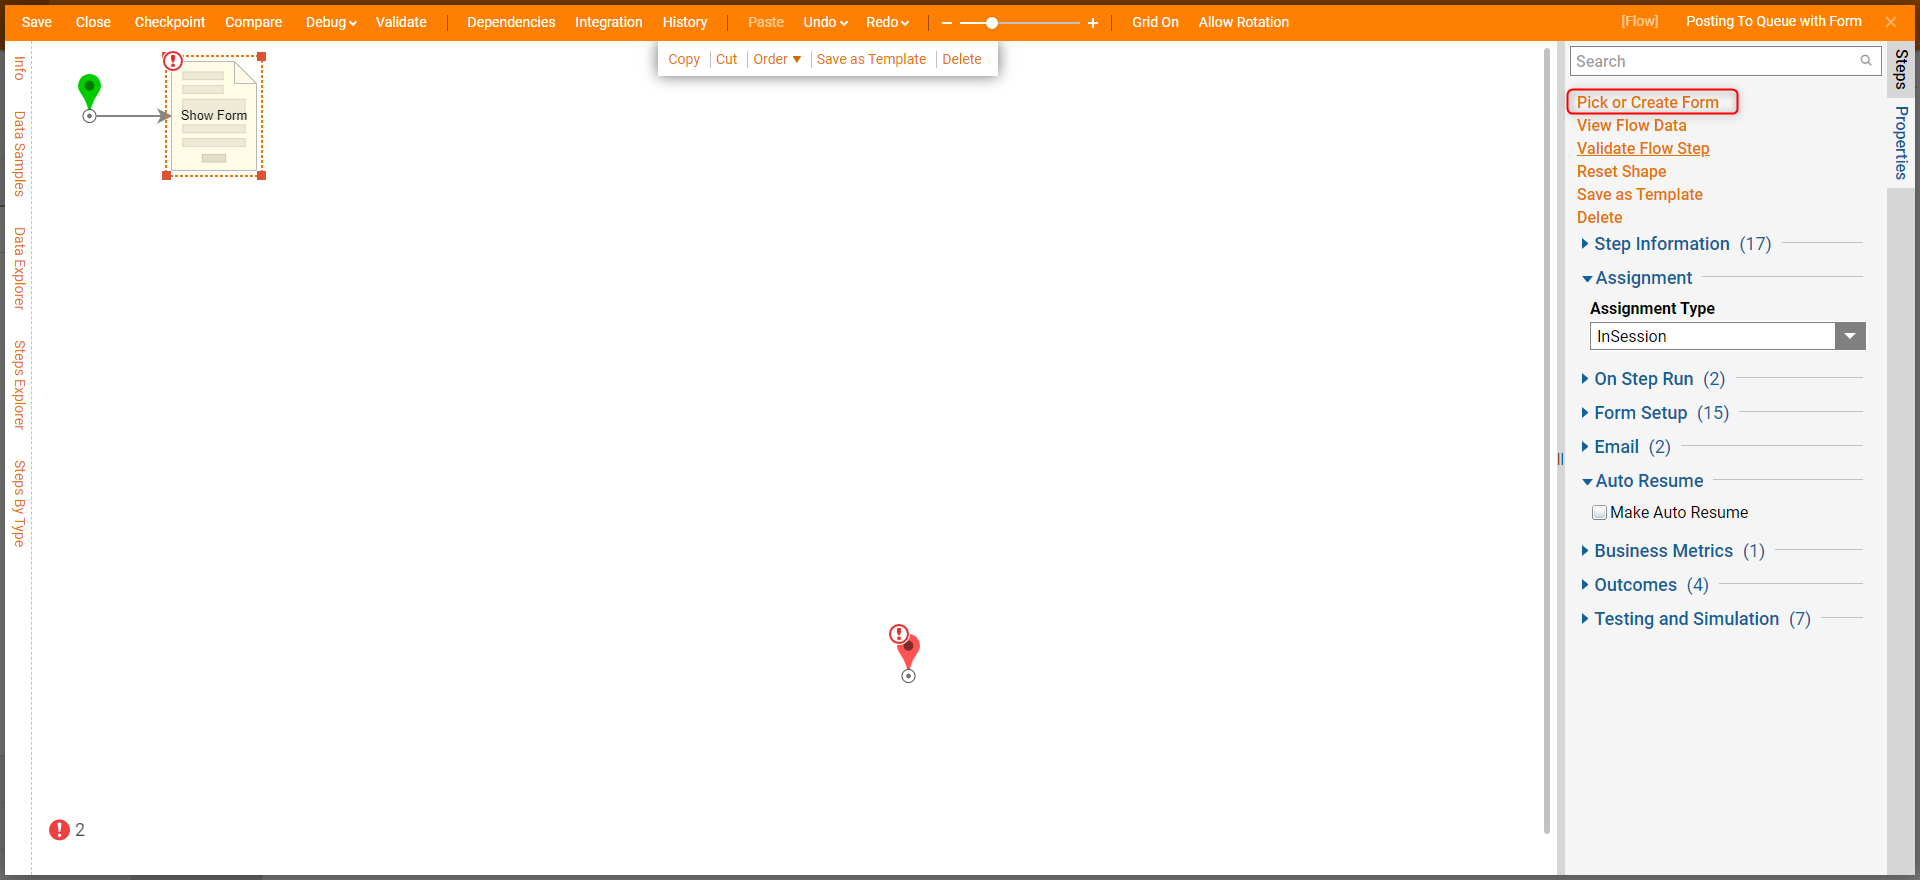
- Click Pick or Create Form. Name the Form and click CREATE.
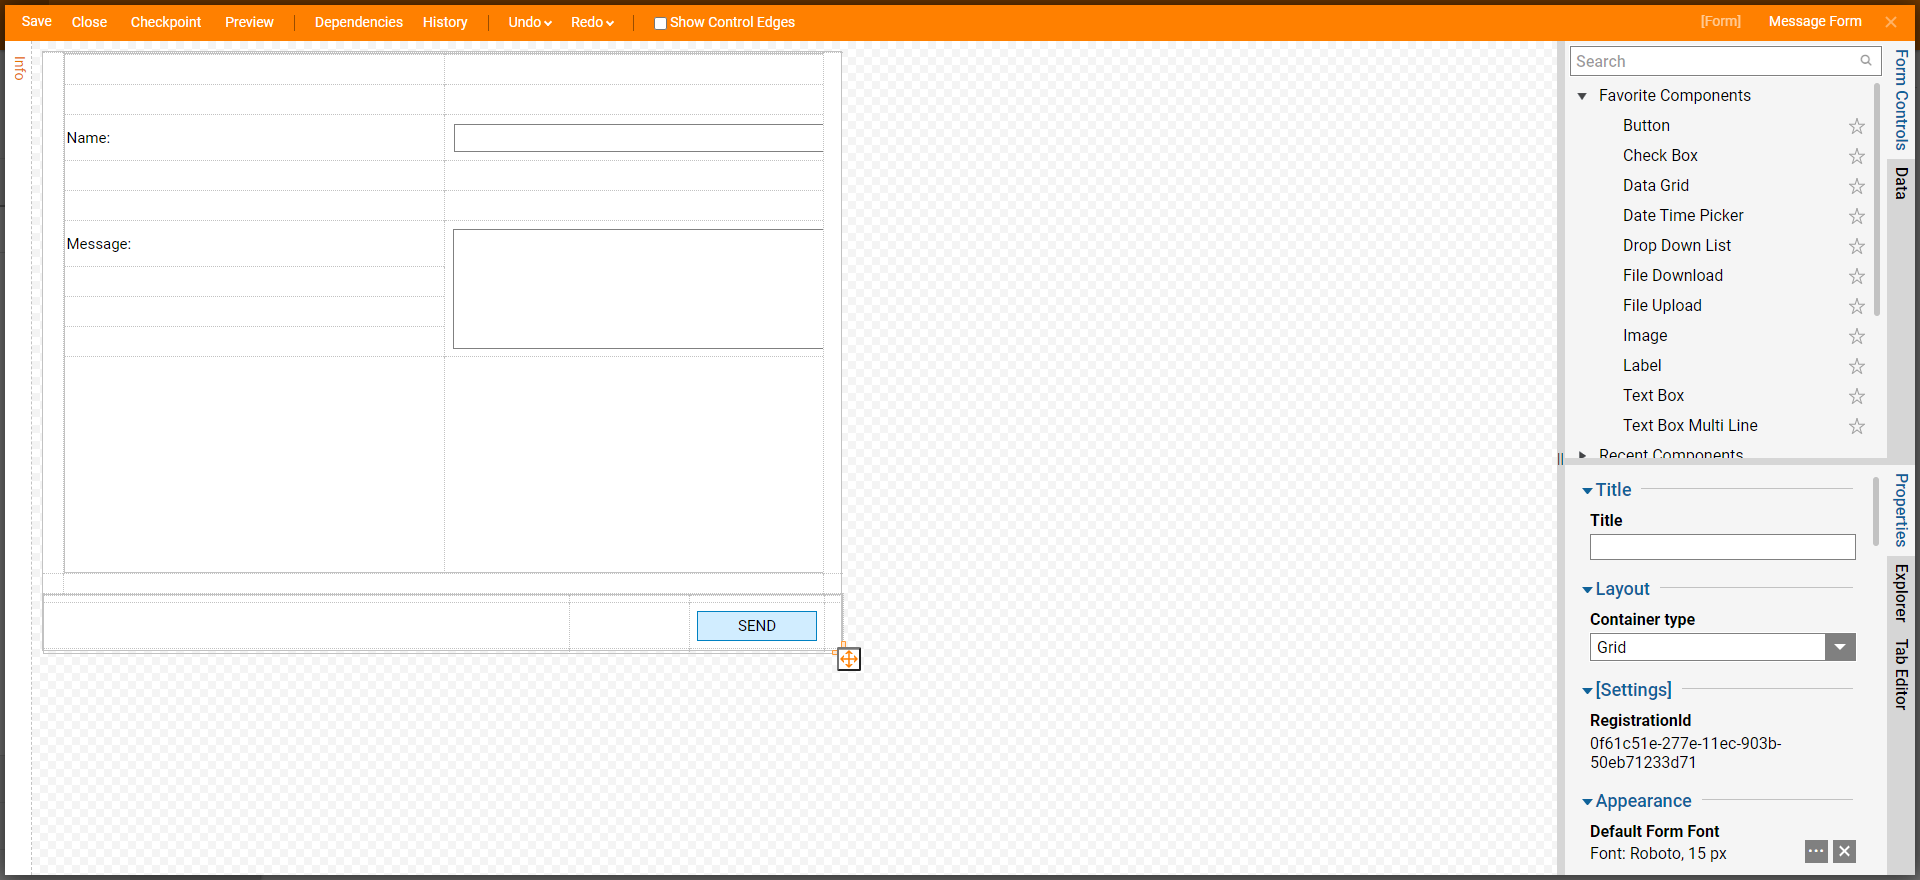
- Configure the Form to include Labels (Name, Message), a Text Box (Name), a Text Box Multi Line component (MessageToPost), and a Button (SEND). Click Save and close the Form Designer.
- Click the SEND path. Navigate to Integrations > All Integrations > Message Queues. Select the Post String Message step and click ADD.
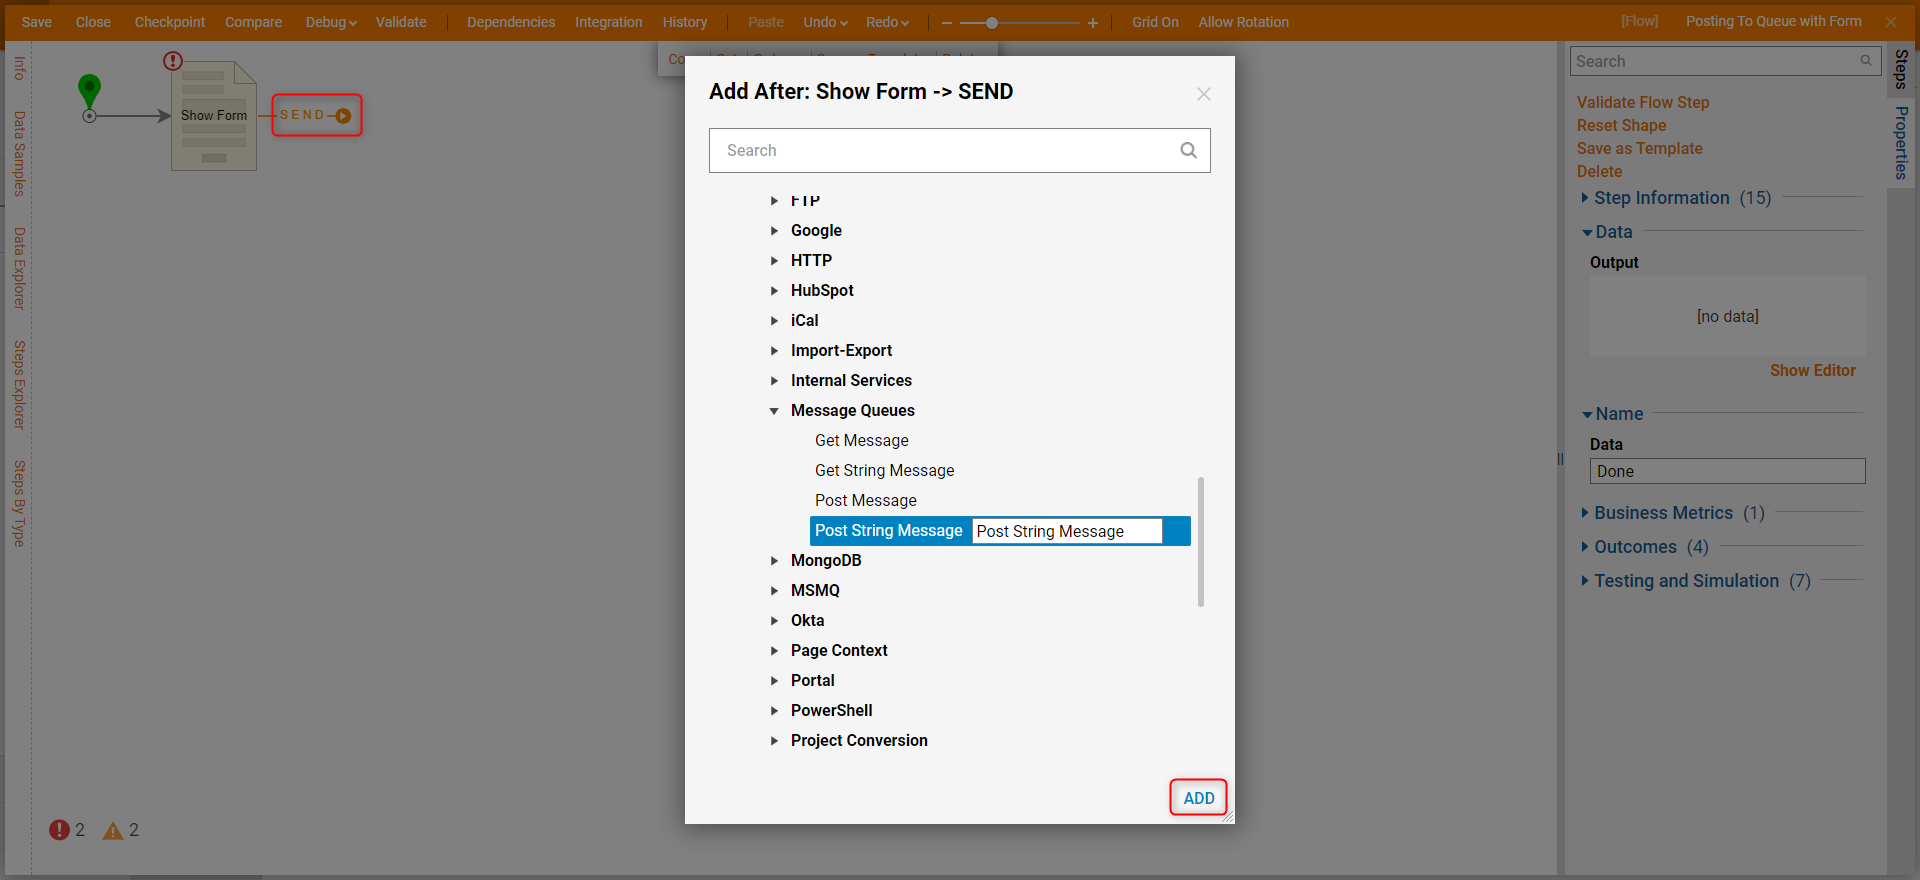
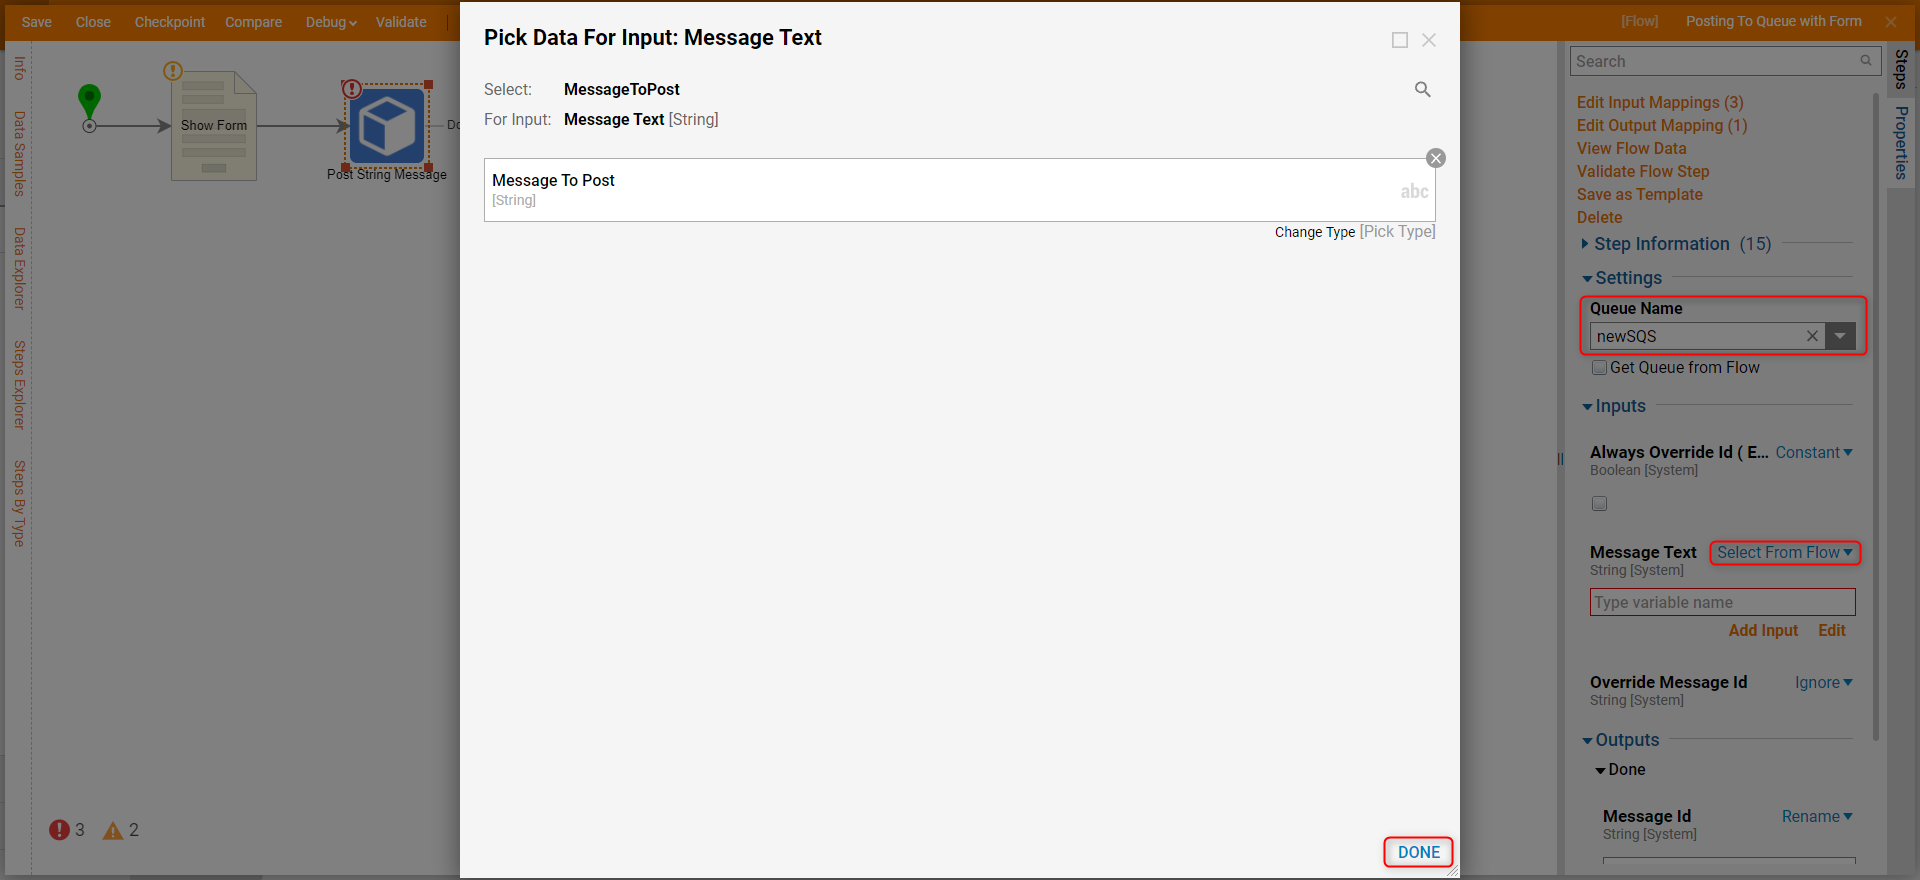
- On the Properties panel, select the SQS Queue under Queue Name. Click Unknown next to the Message Text field and select Select From Flow. Select Message To Post and click DONE.
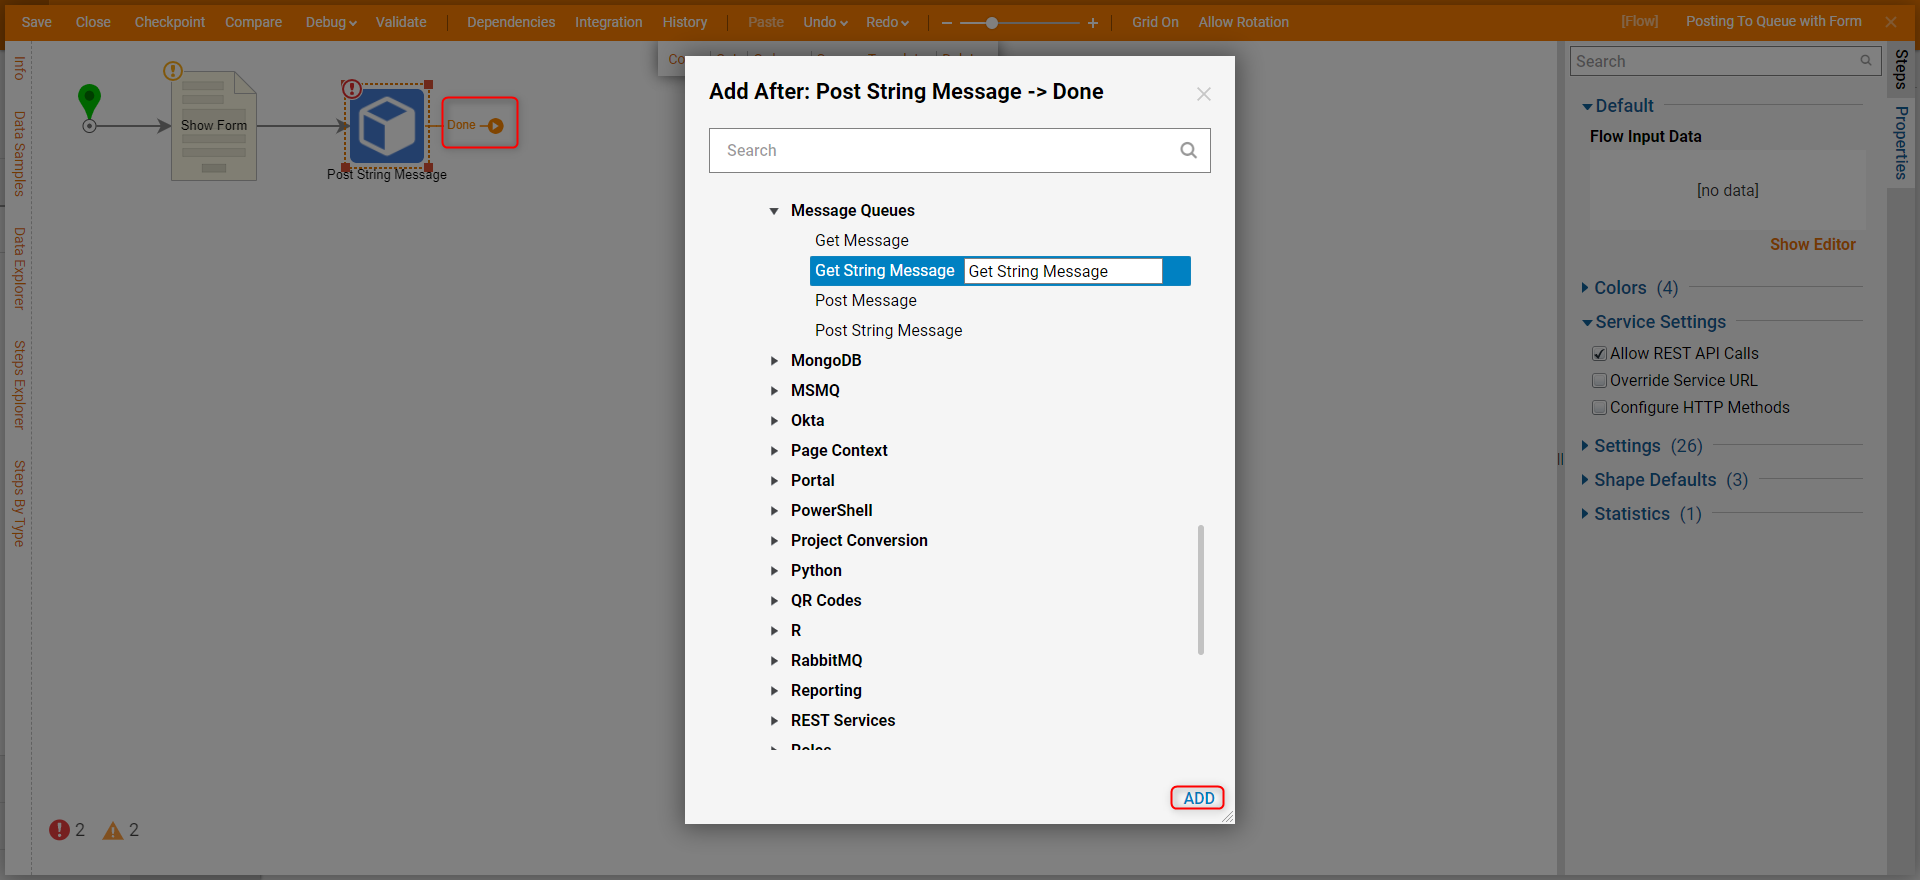
- Click the Done path. Navigate to Integrations > All Integrations > Message Queues. Select the Get String Message step and click ADD.
- On the Properties panel, select the SQS queue under Queue Name.
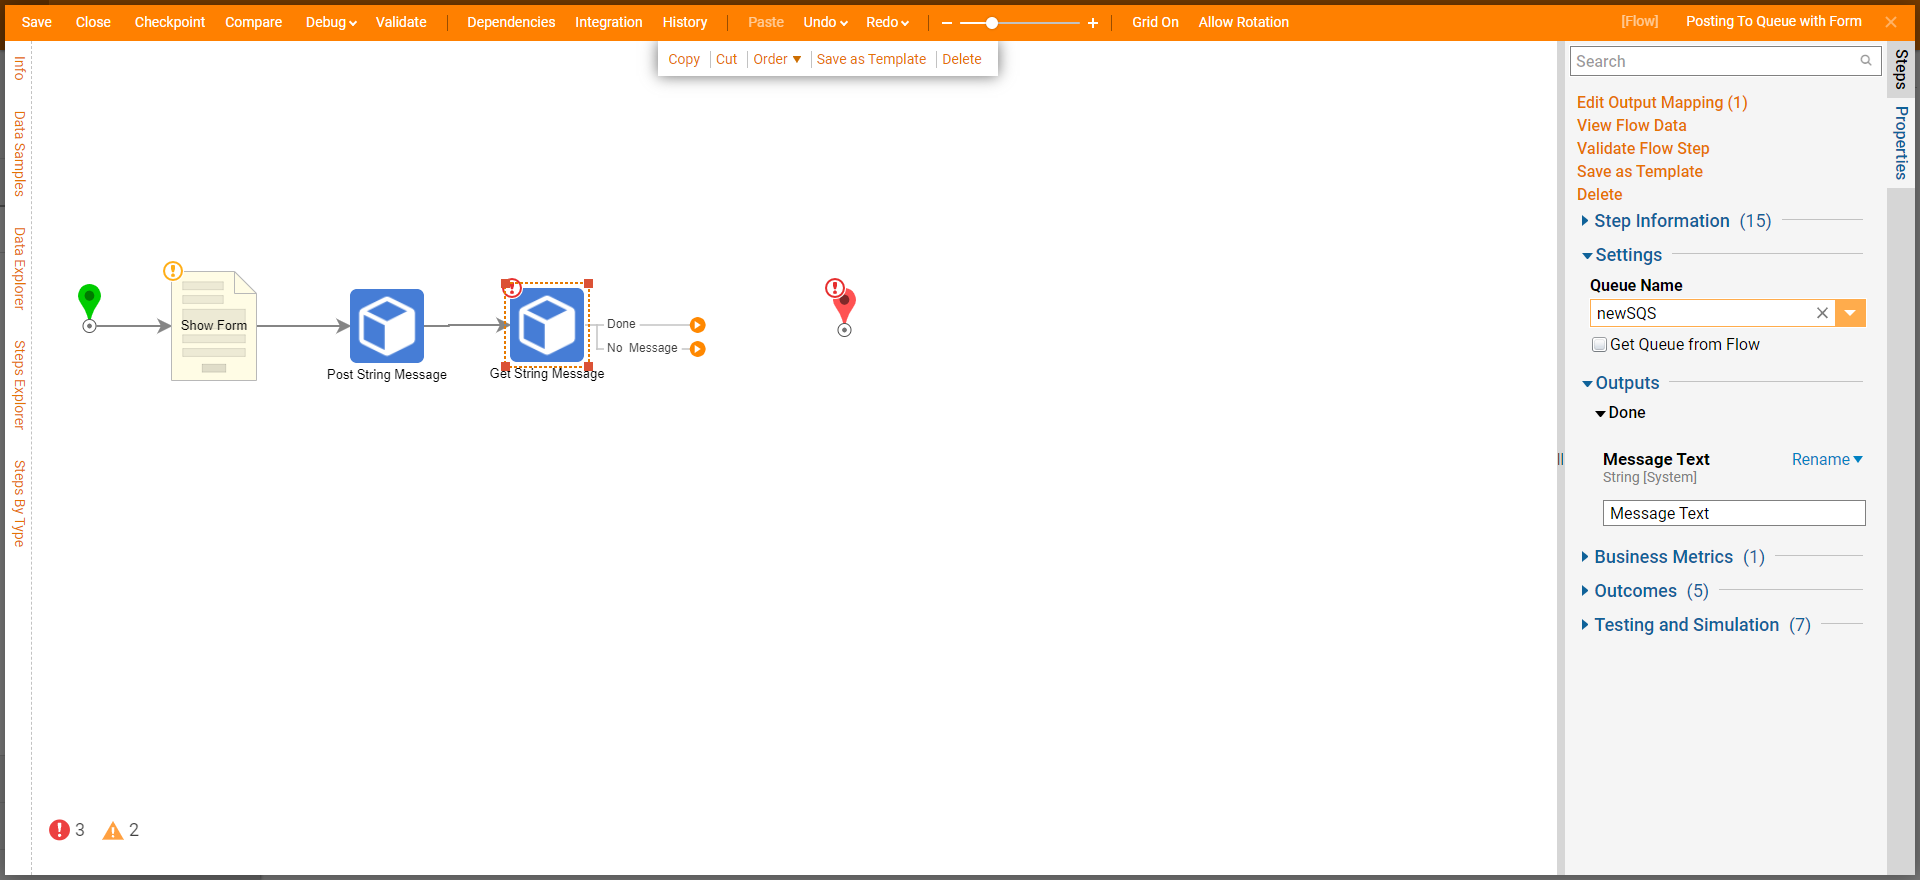
- Connect the Done and No Message path to the End step. Click Save to save all changes.
Debug
- On the top action panel, click Debug. Click FULL.
- Fill in the Form and click SEND. After the debugger runs, right-click the Get String Message step, select Execution 1, and select View Output Data.
