Overview
Simple Forms are a type of Form built for quickly constructing basic functions with a sleek, modern design. The Simple Form Designer contains the most commonly used Form components. Users must consider if a Simple Form supports the correct component to either collect their desired data type(s) and perform the desired functions with or upon them.
Creating a Simple Form
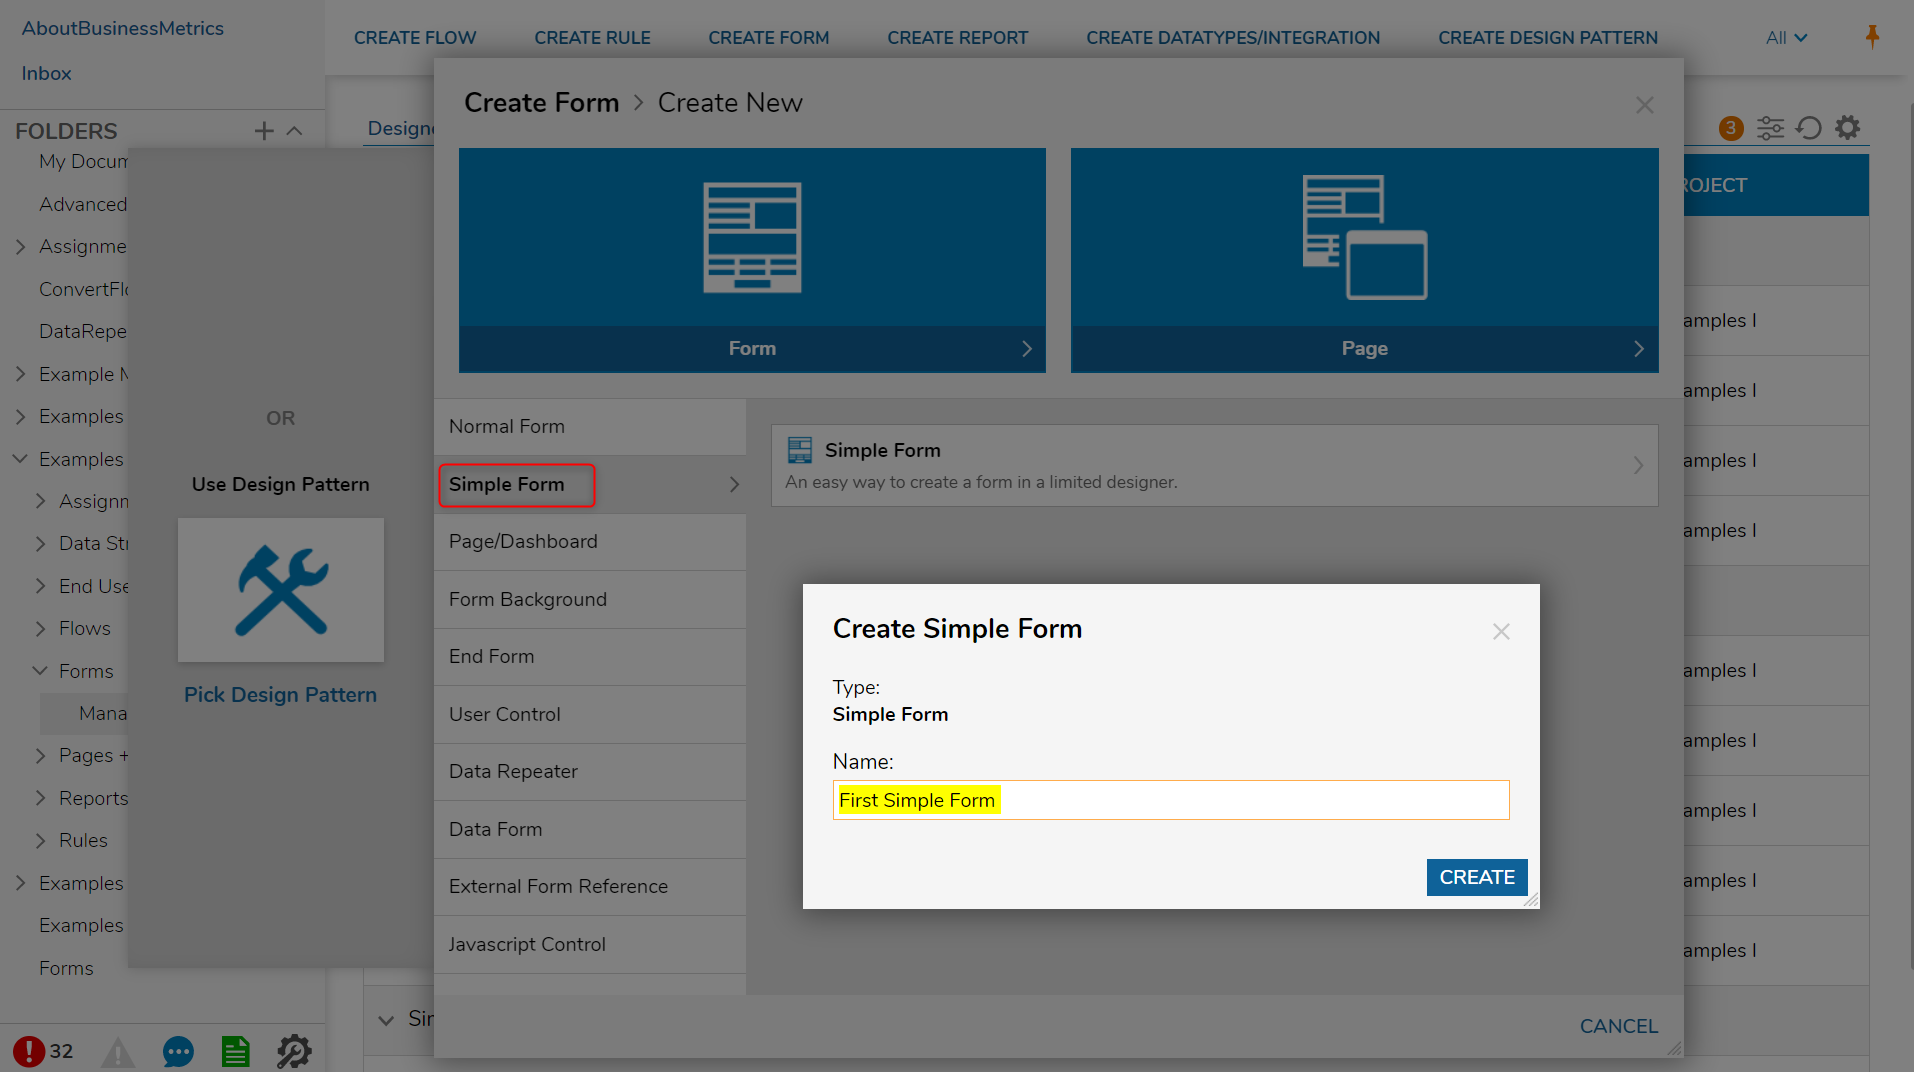
- In a Designer Folder, select CREATE FORM.
- Navigate to and select Simple Form, name the Form. Select CREATE.

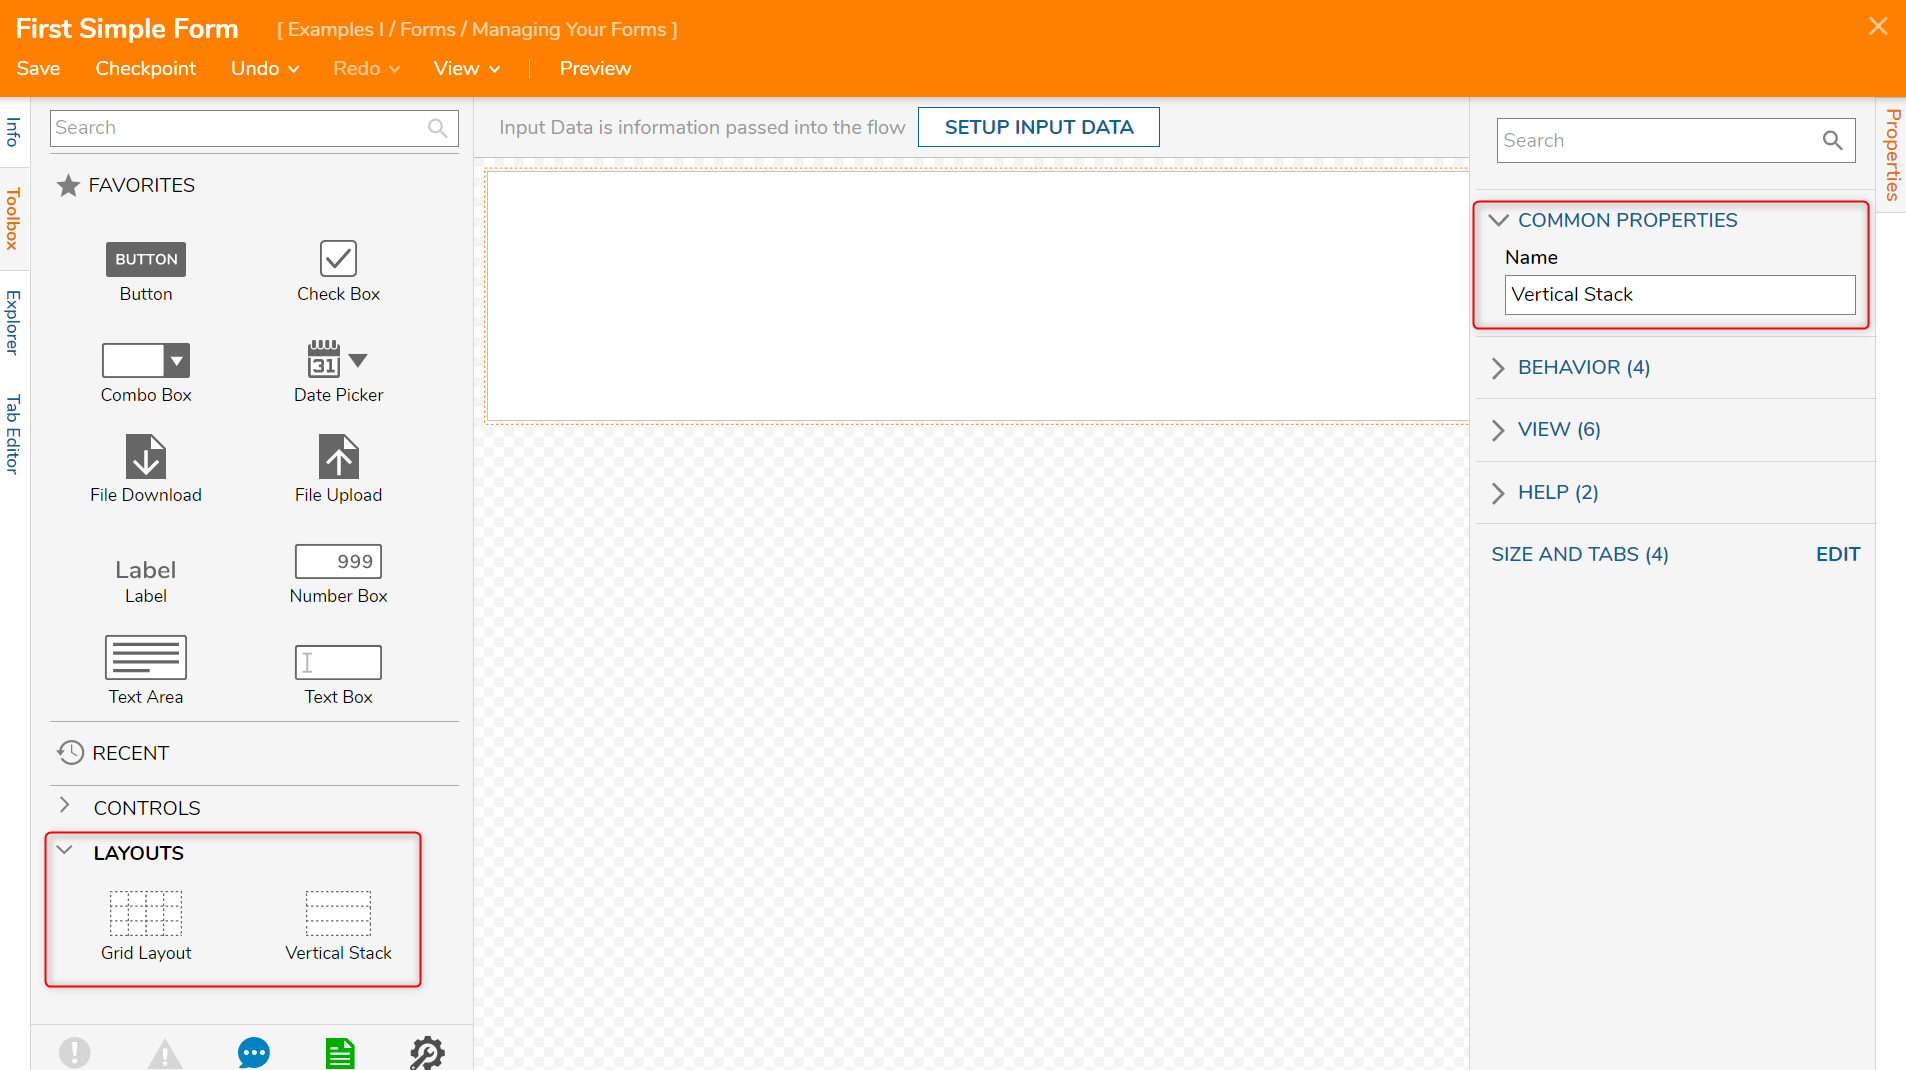
- In the Simple Form Designer, notice there are two options for the Layout, Grid Layout and Vertical Stack. Leave the Layout as Vertical Stack for this example.

- Drag and drop different controls onto the Form. The Form in this example has a Date Picker (DOB), two TextBoxes (Name and Email Address), a File Upload component, and two Button components (one labeled OK, and one CANCEL).
- As the control is dropped, a dialog will appear to give the control a Data Name and Label. Once the control is named, a Label will automatically appear above the control. Name this component Resume Upload.
- Navigate to the Properties panel > LABEL PROPERTIES > Static Input and disable the boolean.
- Input Properties panel > Label DataName as the text to be displayed when viewing the Form.
- Save and Close the Form.
.gif)
Debug
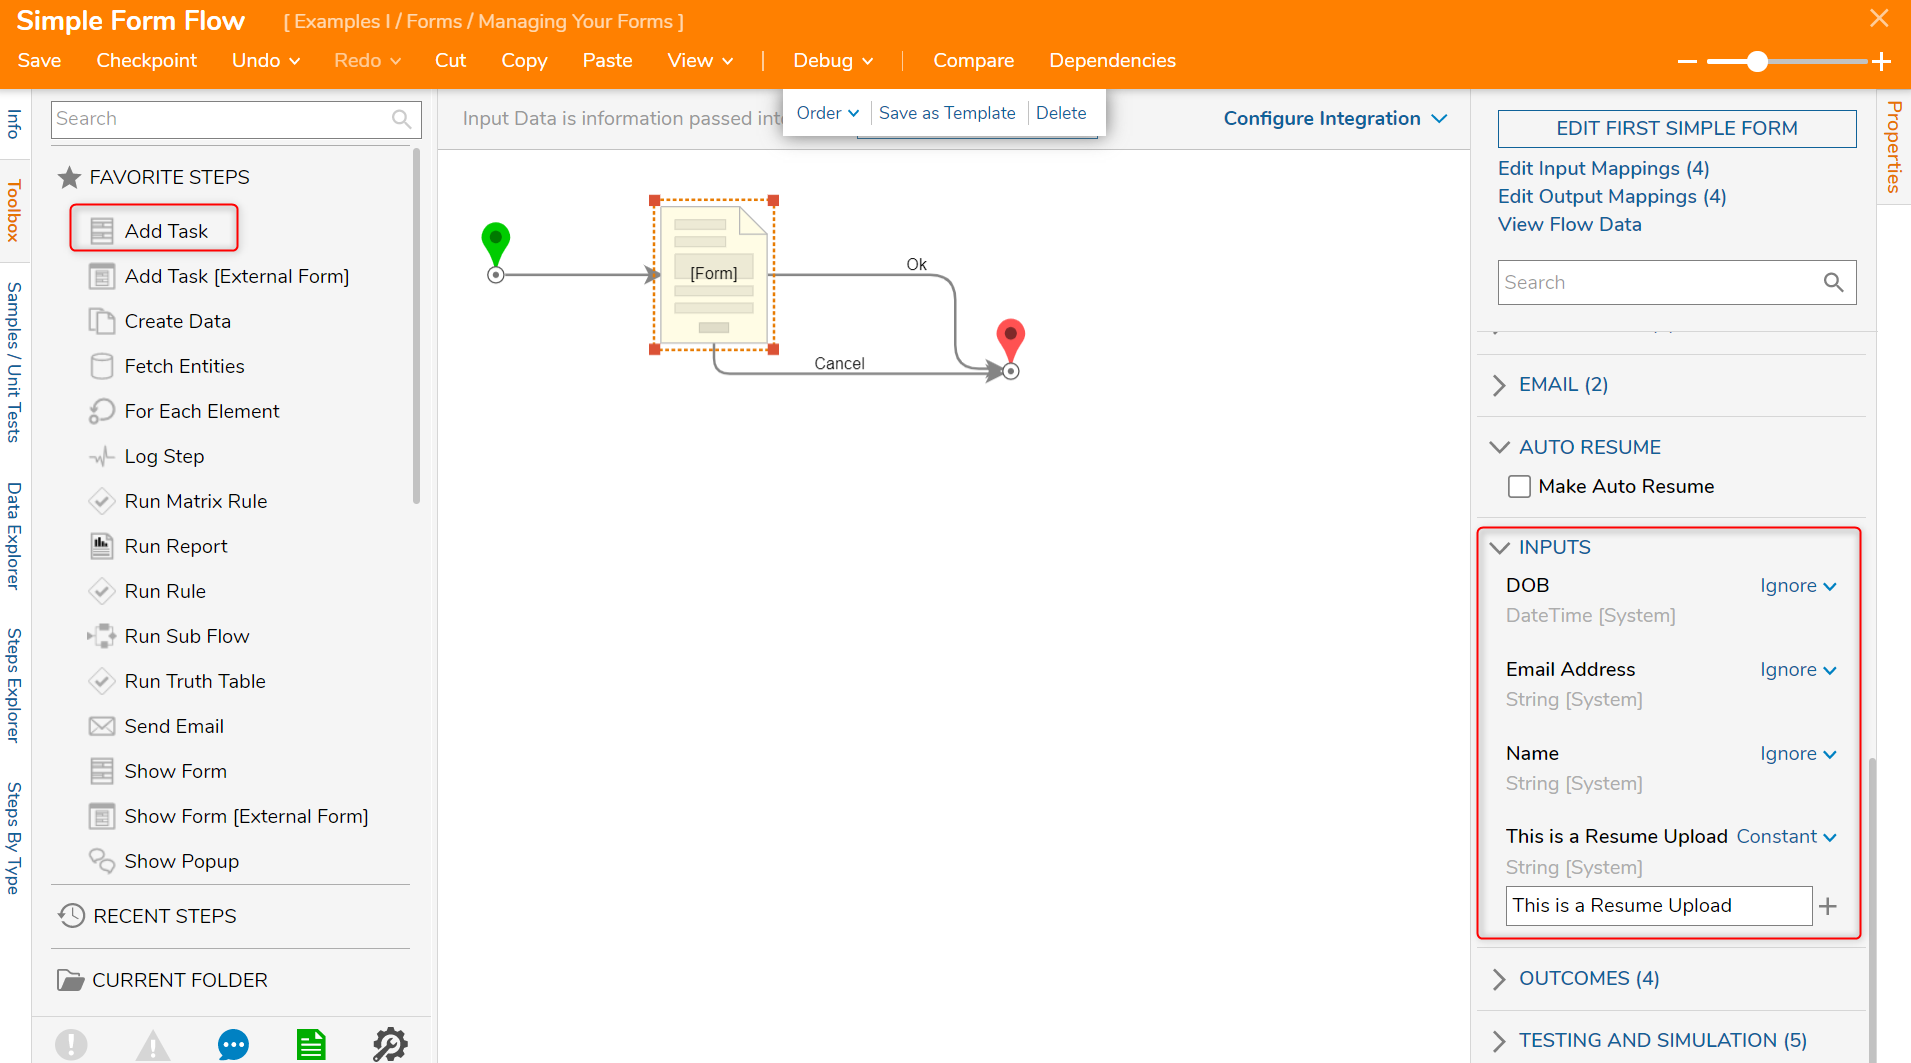
- Save and close Form and add it to a Flow as an Add Task step from the Toolbox > FAVORITE STEPS section.
- Connect the step to the Start and End steps.
- In the Properties panel > INPUTS > This is a Resume Upload change the input mapping to Constant.
- Input a value to change the Label to.Note: The text here should match the DataName input at Form creation.

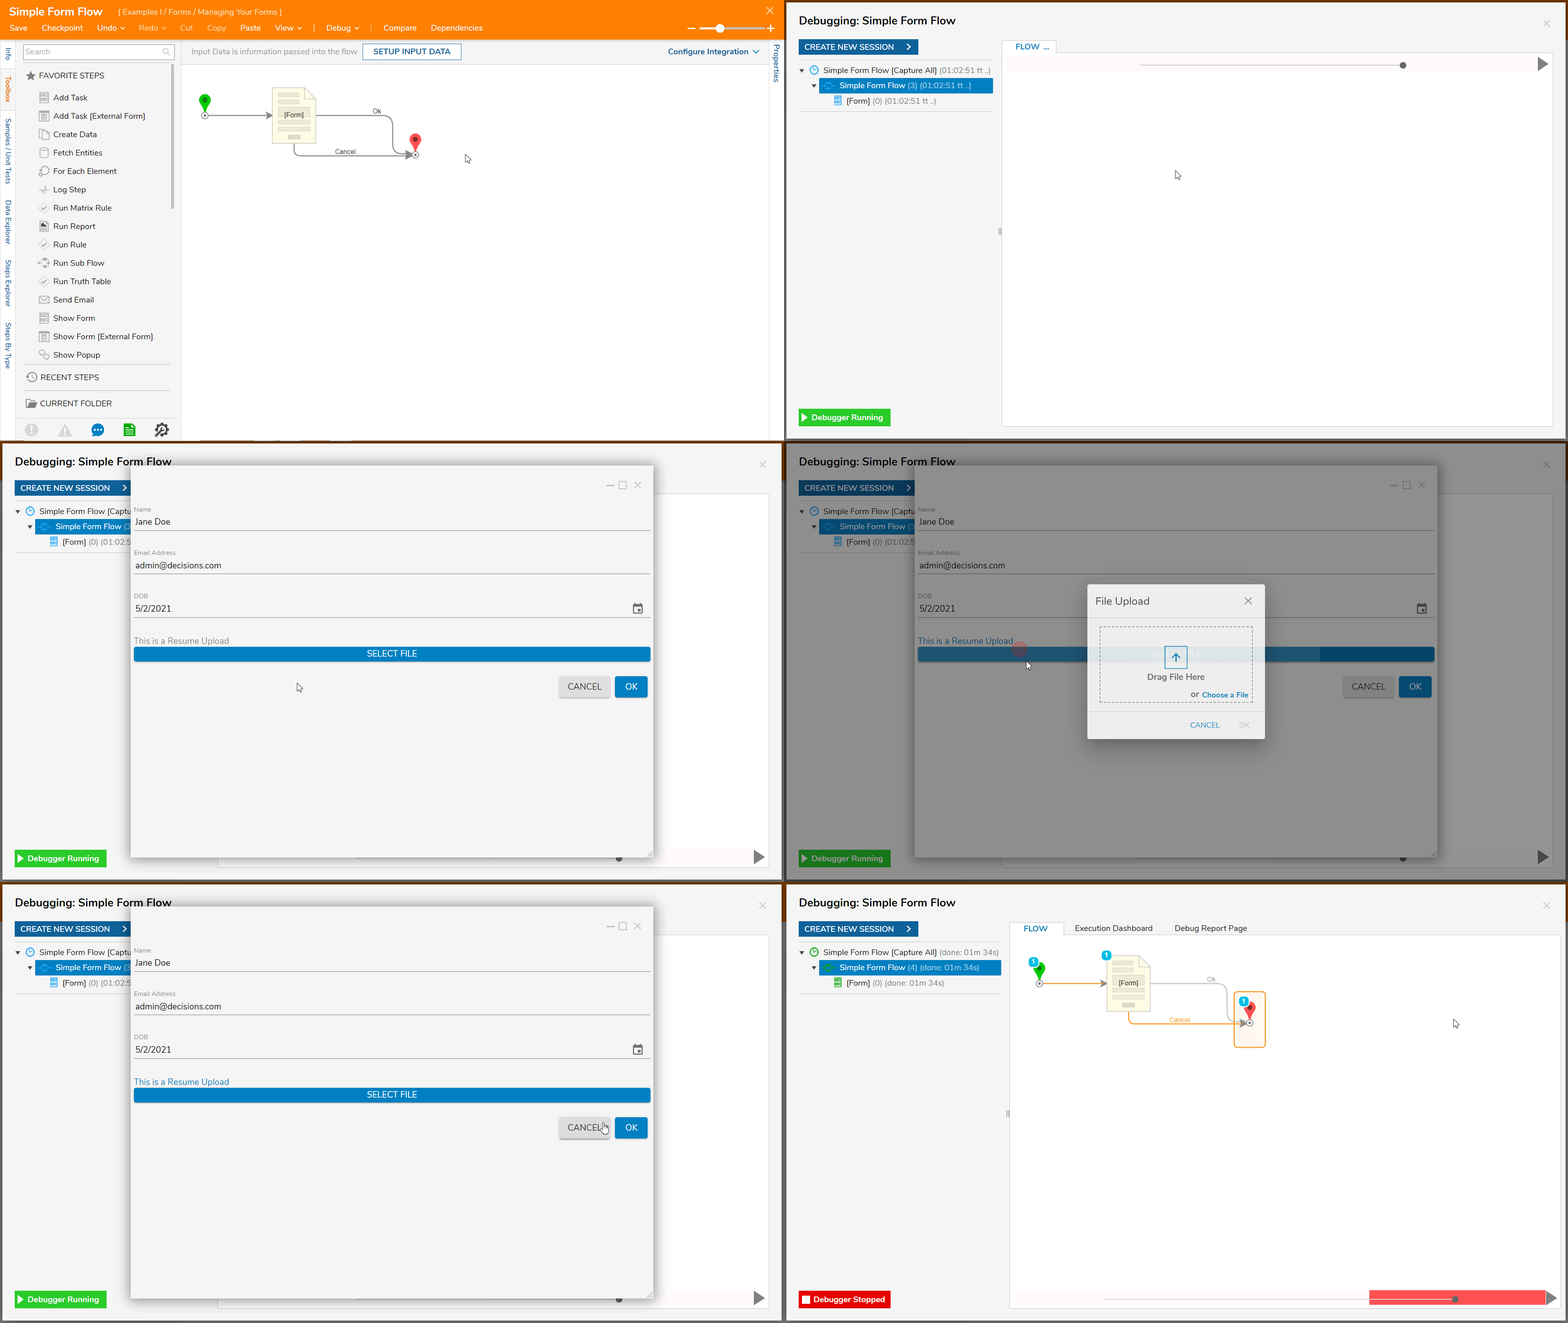
- Select Debug from the top action panel; this action will automatically save the Flow.
- As the Debugger runs, notice the Label change. The Flow is successful.
