Overview
When using a Branch For Each Step, a common avoidable error occurs only when Forms are added into the Flow following the Branch ForEach Step. The Validation Warning for this reason, displays the message reading "A linked Flow Step must Follow the Branch For Each".
This means that any Form following a Branch For Each Step must not exist within the Parent Flow. The Forms either need to be encapsulated into a Linked Flow or a Sub Flow and then called by the Flow using the Branch For Each step.
Example A: Form Sub Flow
The following example demonstrates how to create a travel request agreement process that uses a Branch ForEach step to send a Form to each employee; upon distribution of the Forms, all employees must agree before the Flow can Merge and continue.
- From a Designer Project, select the CREATE FLOW button, click Flow, Name the Flow, and then click CREATE.
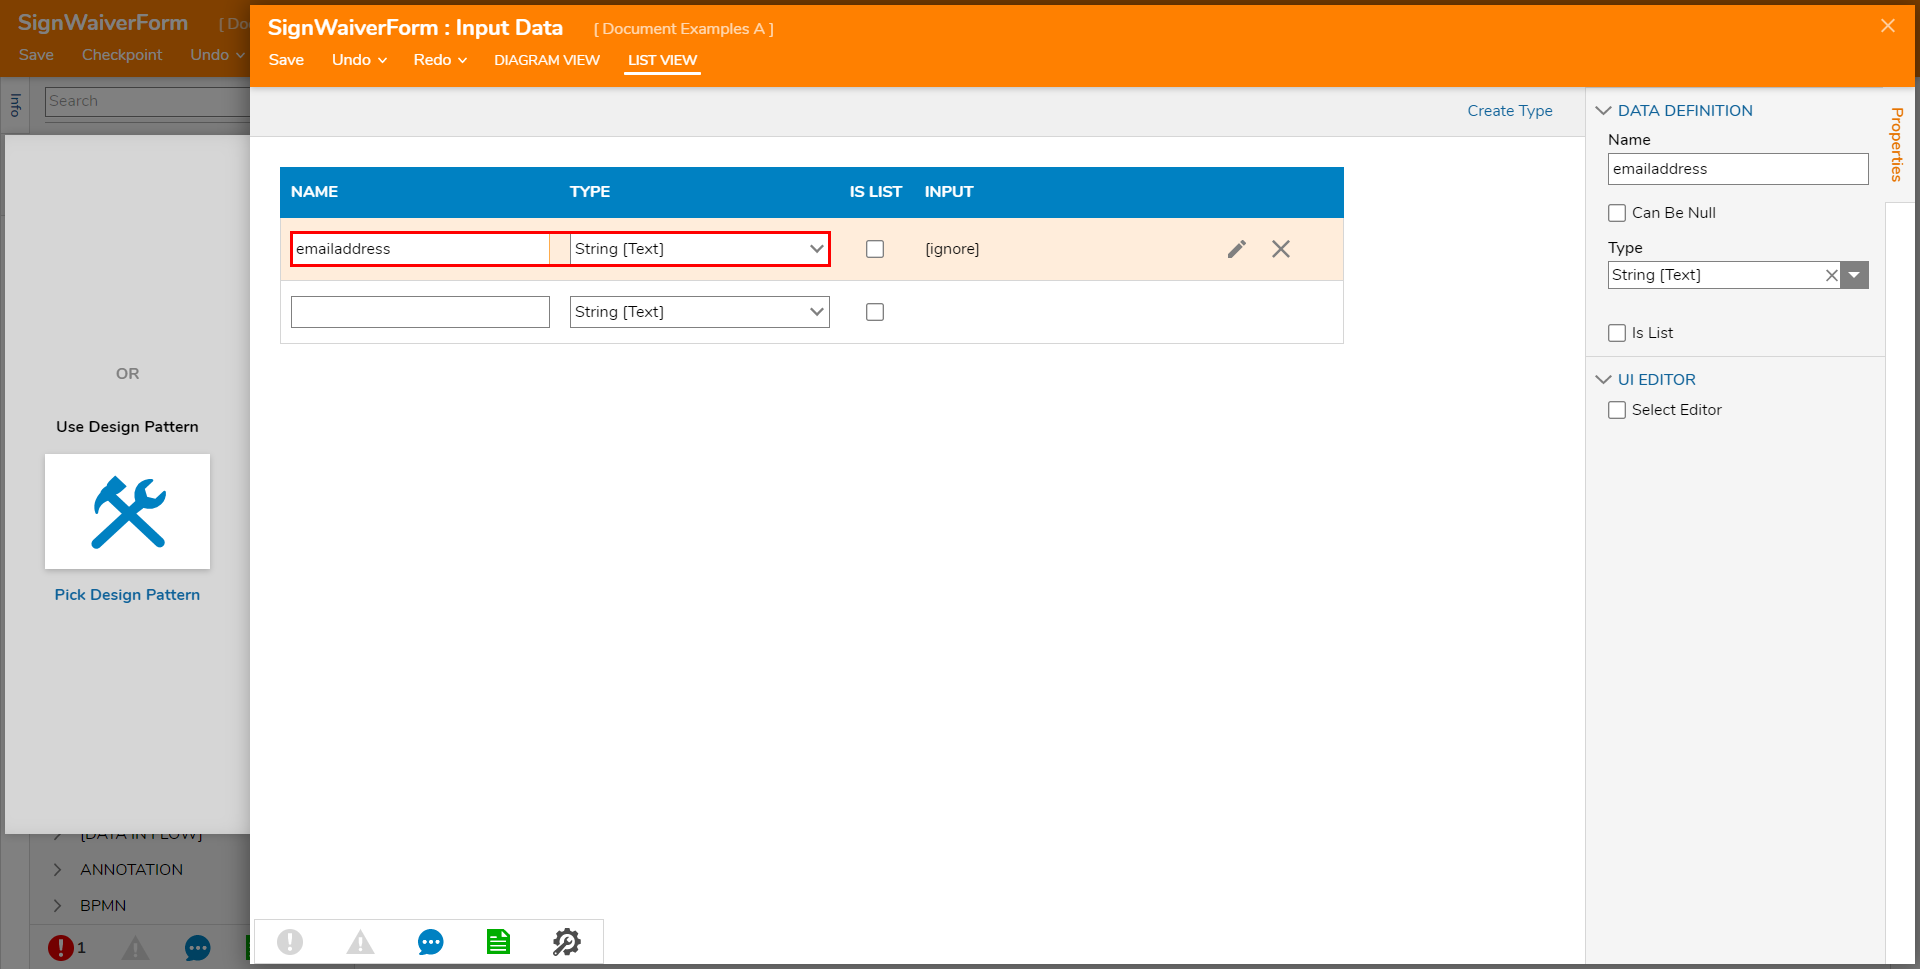
- Click the SETUP INPUT DATA button from under the Top Action Bar and then DEFINE. Then, NAME the Data "emailaddress", select String from the TYPE dropdown, Save the Input Data, then close via X.
- Attach a Show Form step from FAVORITE STEPS to the Start step.
- Select the Show Form step.
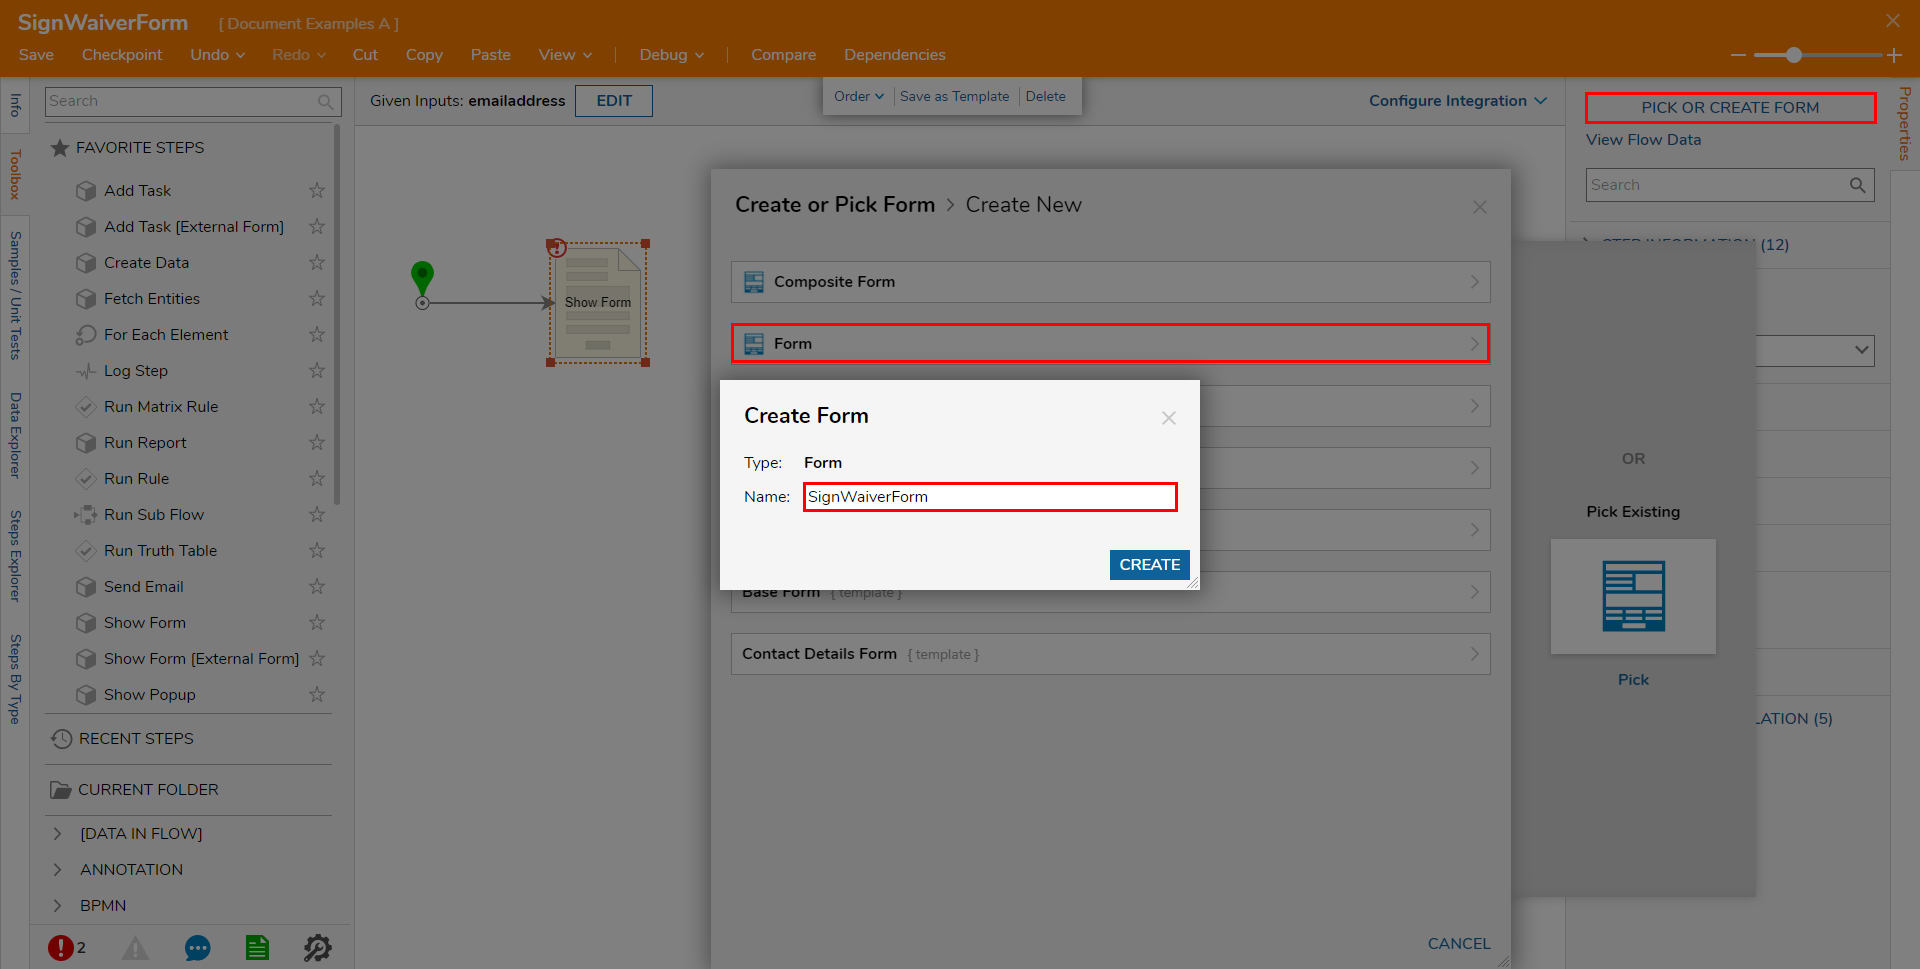
- Click the PICK OR CREATE FORM button, select CREATE, click Form, provide a Name, and then click CREATE.
- Add a single Button component and a Text Box from the FAVORITES category of the Toolbox. Name the Button "Sign Waiver". Then, add the Text Box and provide a Label that says Email. When adding the Text Box, type in the Name for the component and press Shift + Enter to place the label directly above the component.
- Save and close the Form.
- Back in the Flow Designer, connect the Sign Waiver path to the End step.
- Select the Show Form step and map the emailaddress Input to Email.
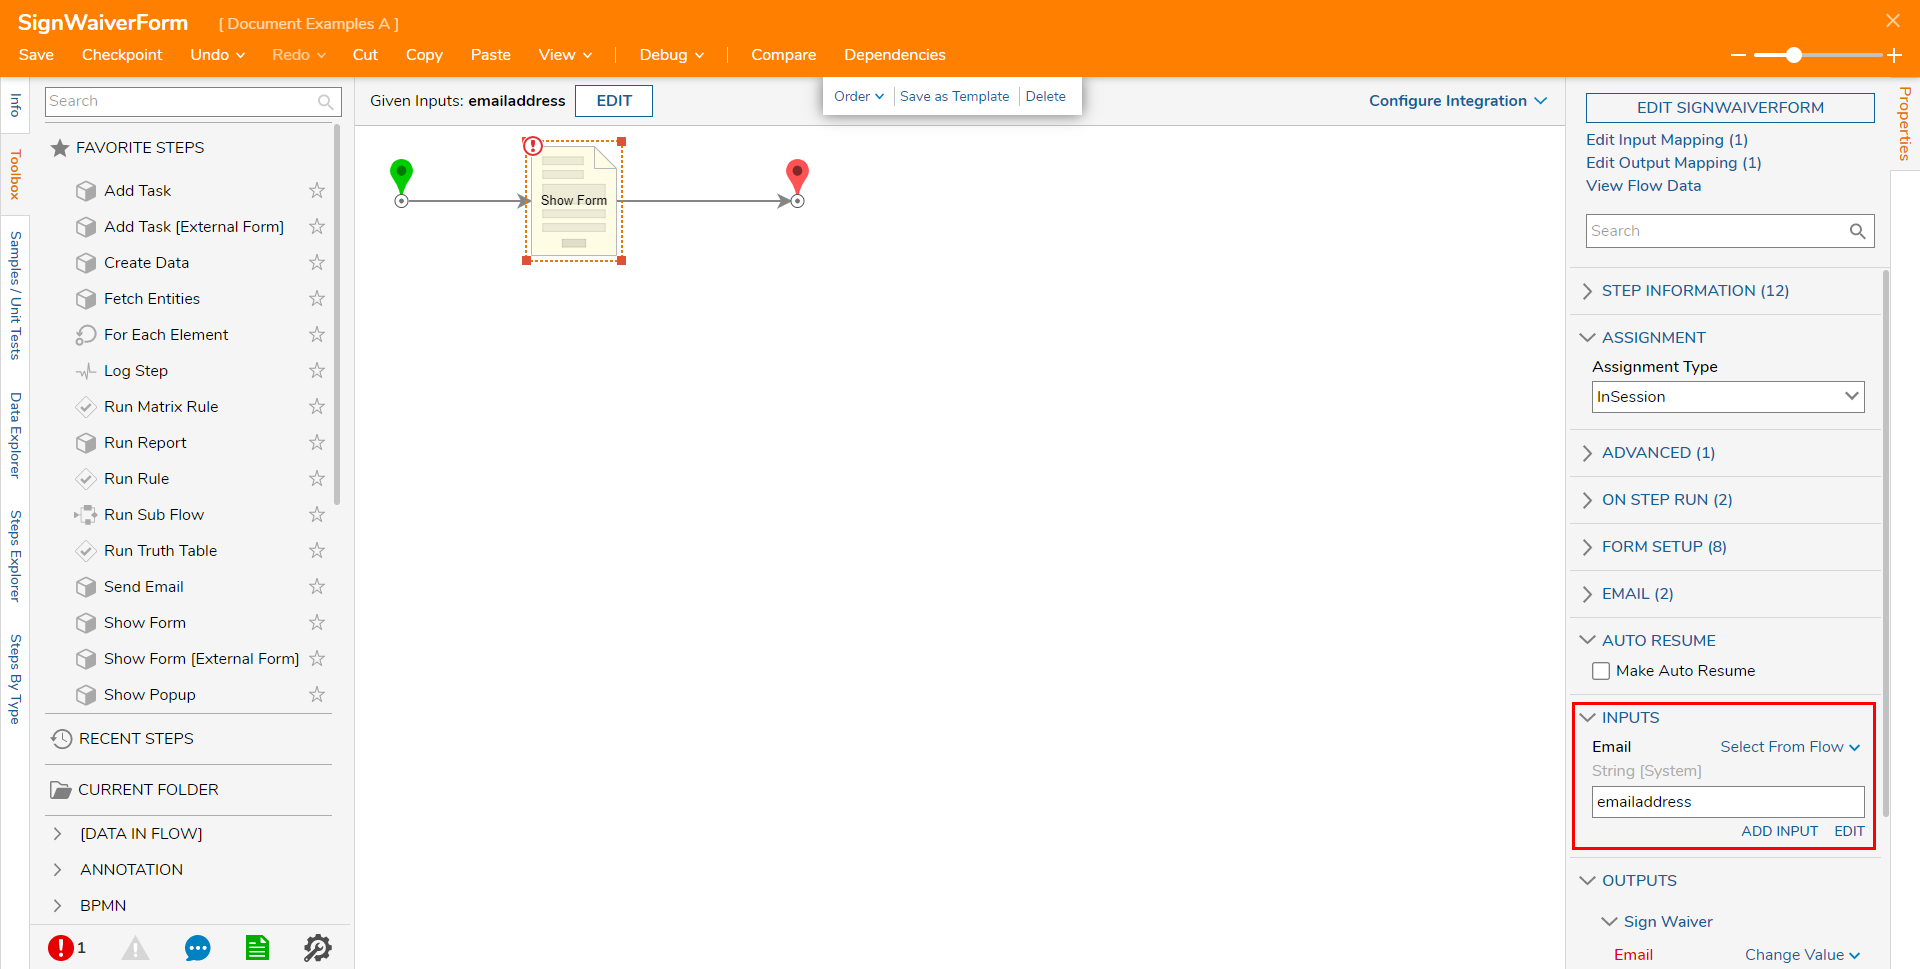
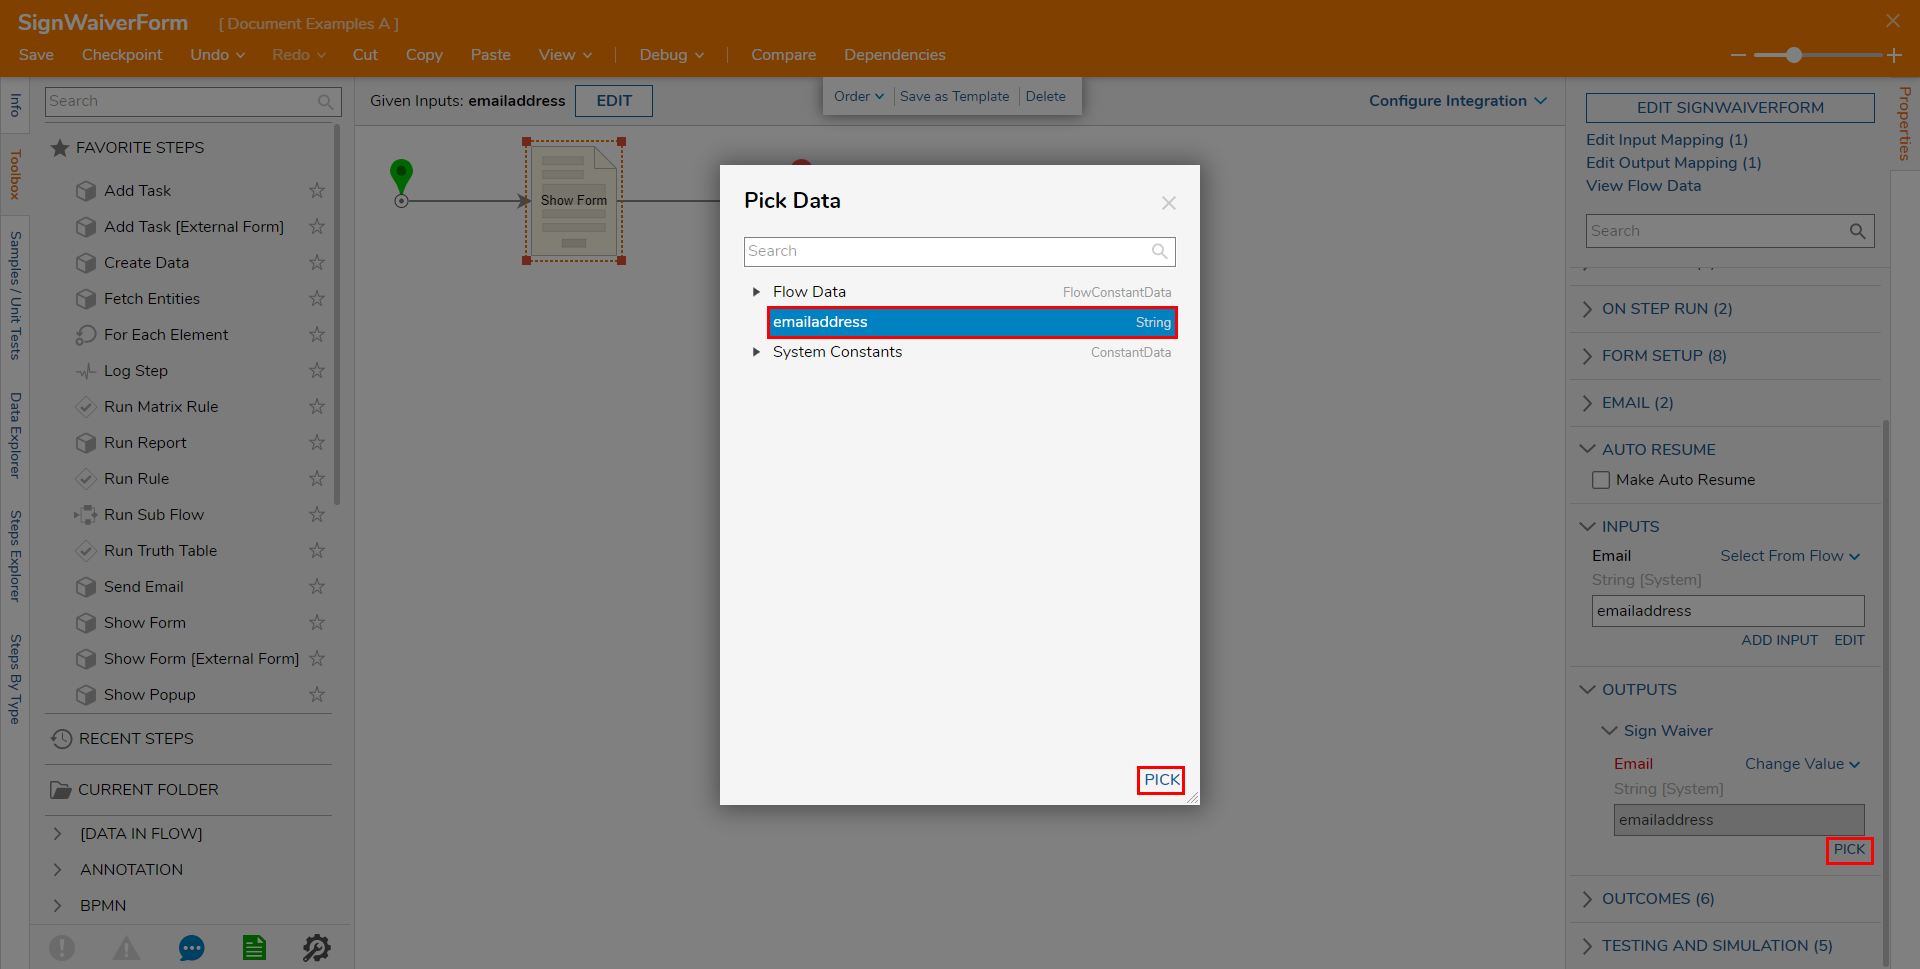
- Under OUTPUTS > Email PICK emailaddress.
- Save and close the Flow.
Example B: Main Flow
- From a Designer Project, CREATE another Flow.
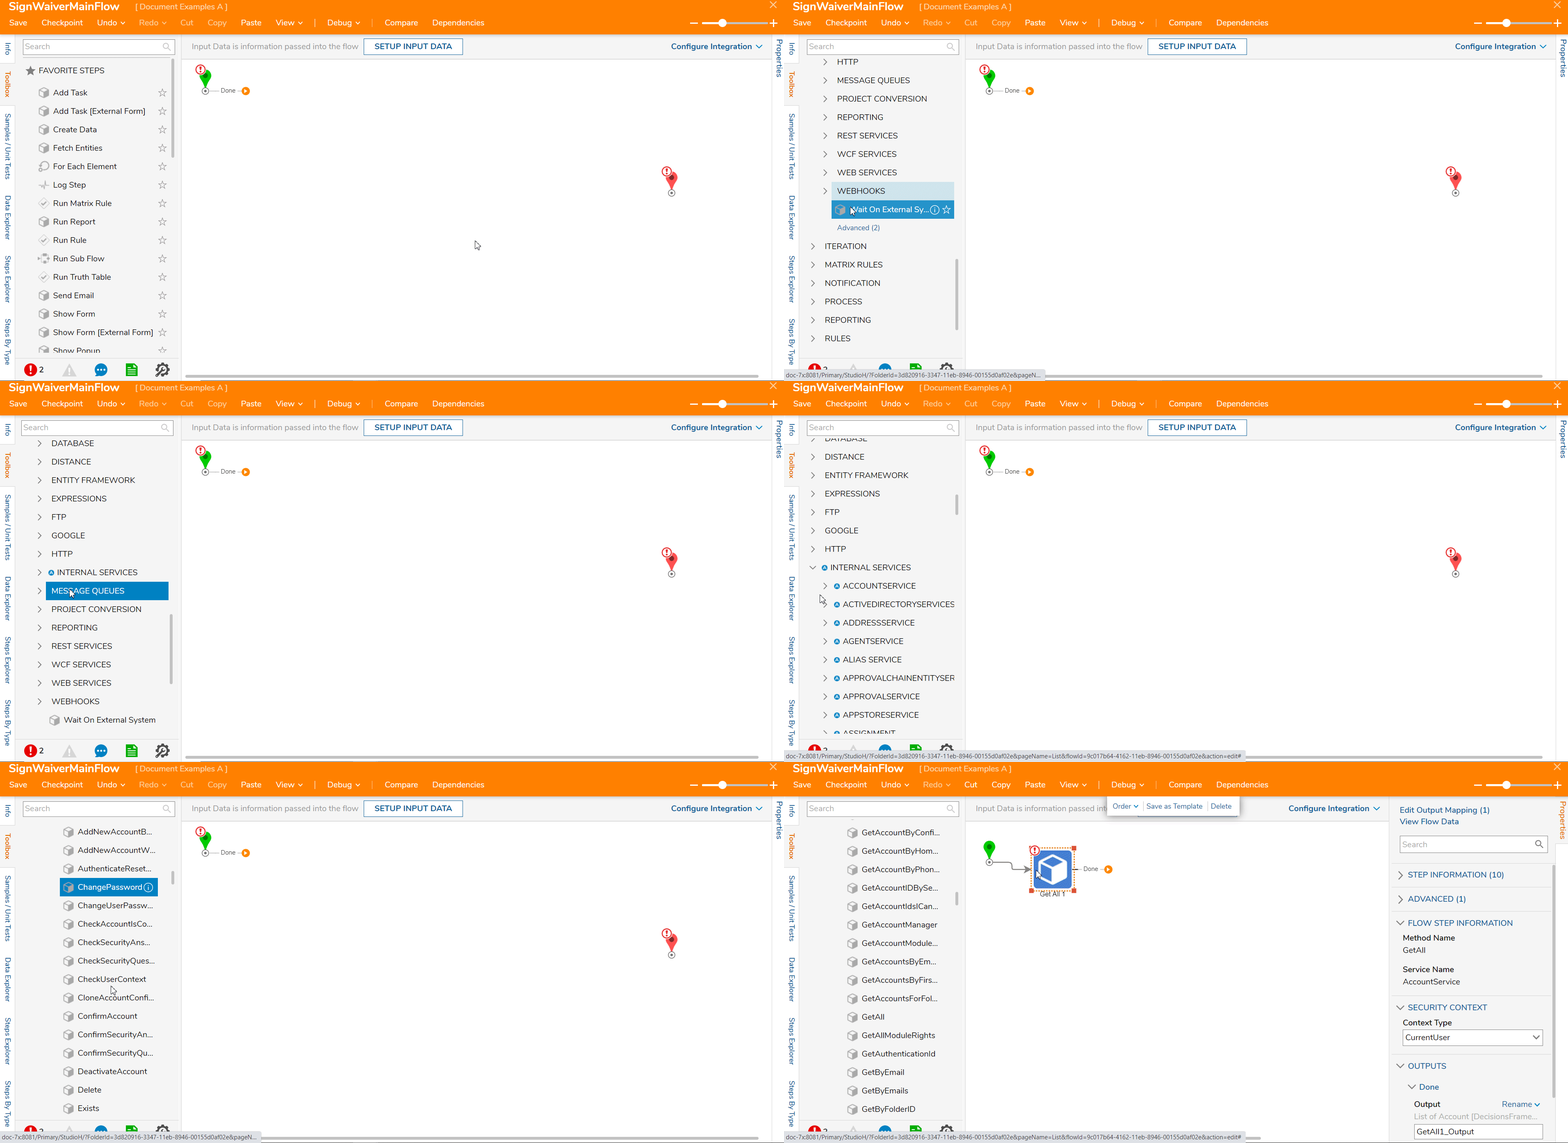
- Add in a GetAll step from INTEGRATION > INTERNAL SERVICES > ACCOUNTSERVICE category in the Toolbox.
- From the INTEGRATION category click the Advanced link then expand the INTERNAL SERVICES Folder. From the INTERNAL SERVICES Folder, click the Advanced link once more, then find the step in the ACCOUNTSERVICE Folder.
- Attach a Branch ForEach Step from the Toolbox > BRANCHING, then select that step. Select Account from the COLLECTION > Type dropdown menu and Select From Flow map GetAll1_Output to INPUTS > Collection.This step is used to iterate through each Account and send a value to the Form's Text Box.
Once the Collection is defined, access to the For Each path becomes available.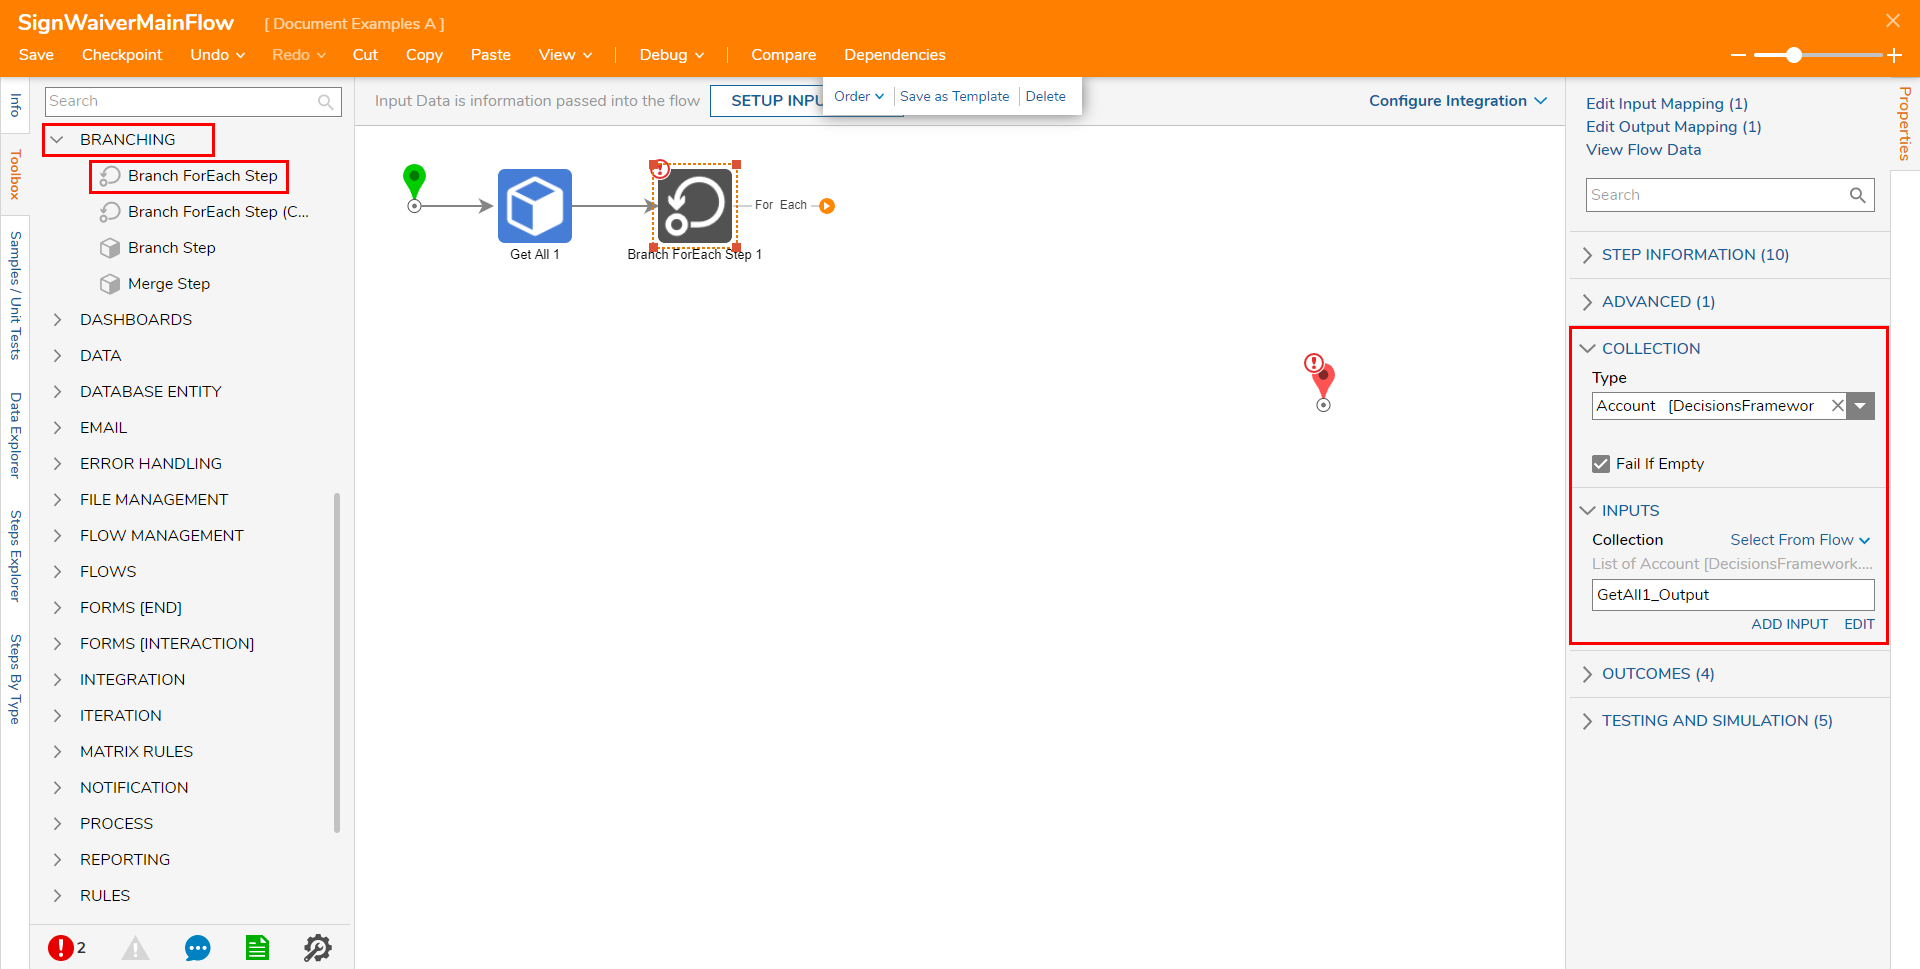
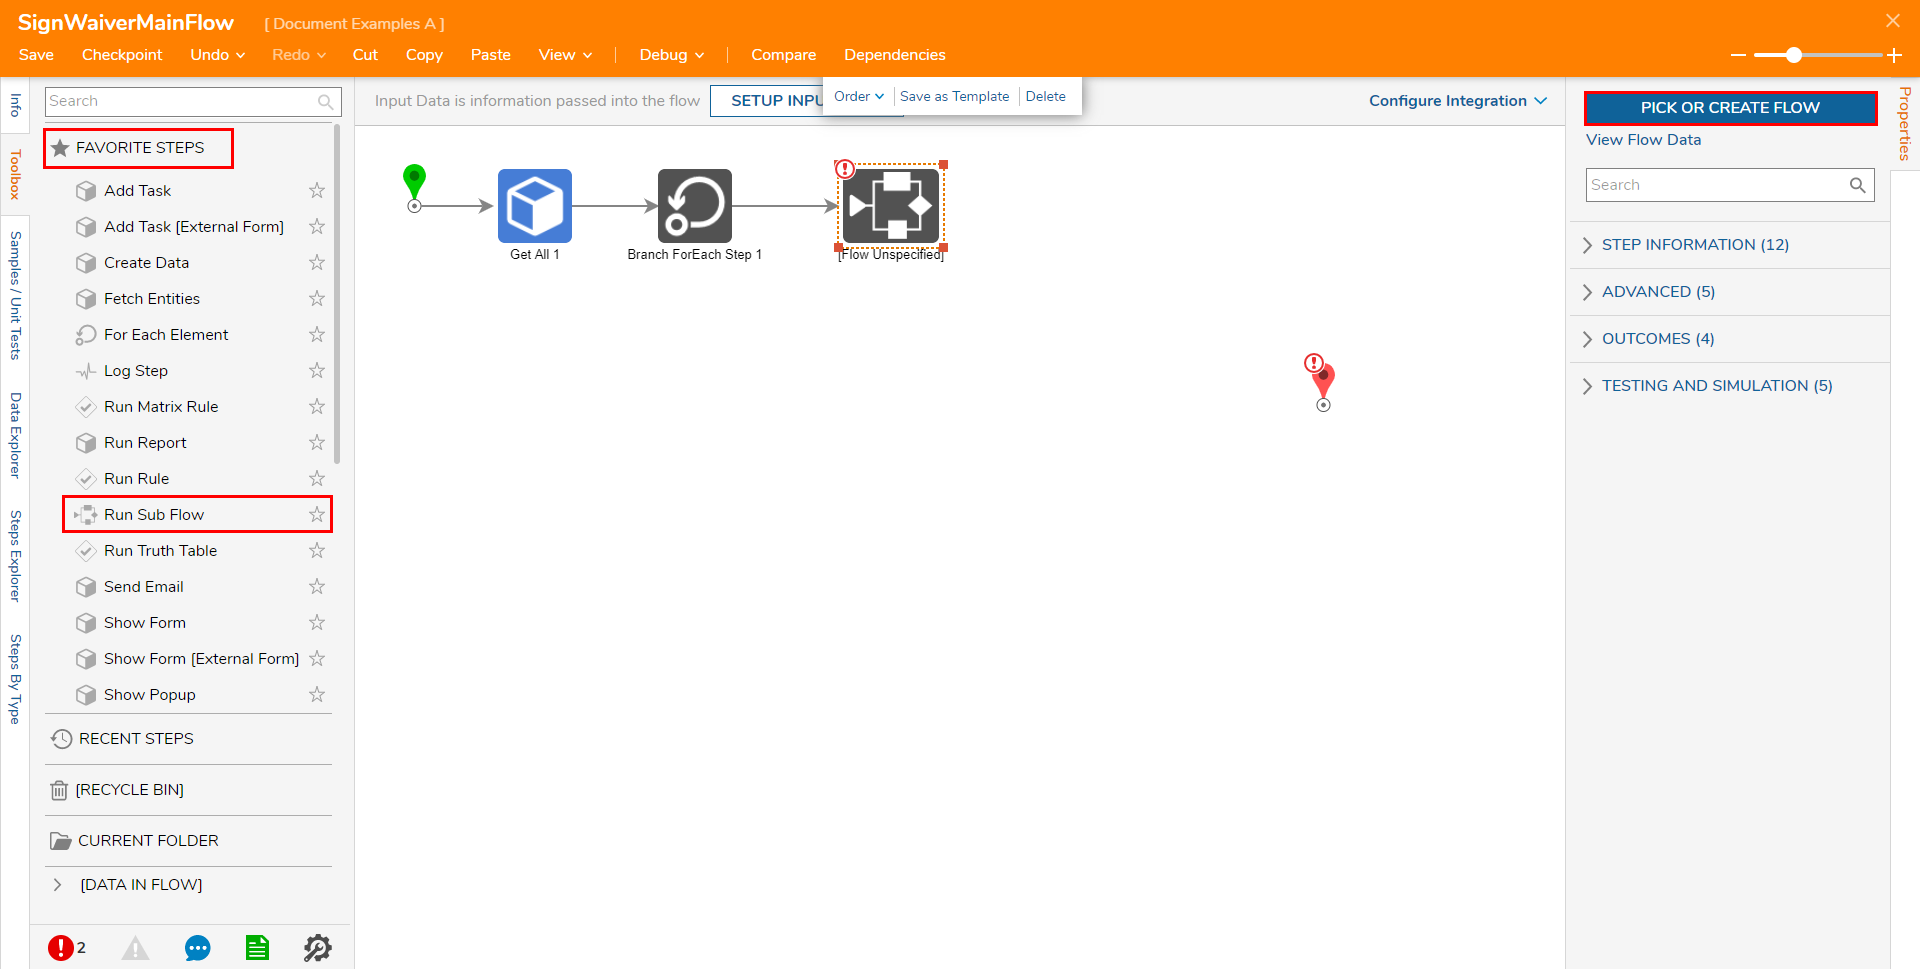
Add a Run Sub Flow step from the FAVORITE STEPS category in the Toolbox tab.
Attach the For Each path to the Run Sub Flow step.
Select the Run Sub Flow step; from the Properties tab click the PICK OR CREATE FLOW button.
Click PICK, then click RECENT, select the Sub Flow containing the Form, and click PICK.
Attach a Merge step from Toolbox > BRANCHING to the Done path of the Sub Flow.
Connect the Done path of this step to the End step.
Note that even with all the steps connected, the Run Sub Flow step still contains a Validation Warning. Without proper configuration of the Input data for this Flow, none of the Branched Flows can progress.
For the Flow to progress, the Sub Flow must source a valid Input from the Main Flow.Under INPUTS > emailaddress, Pick Item.EmailAddress.
Sourcing an Input from Item will populate the field with each iterated item, in this case, each Account.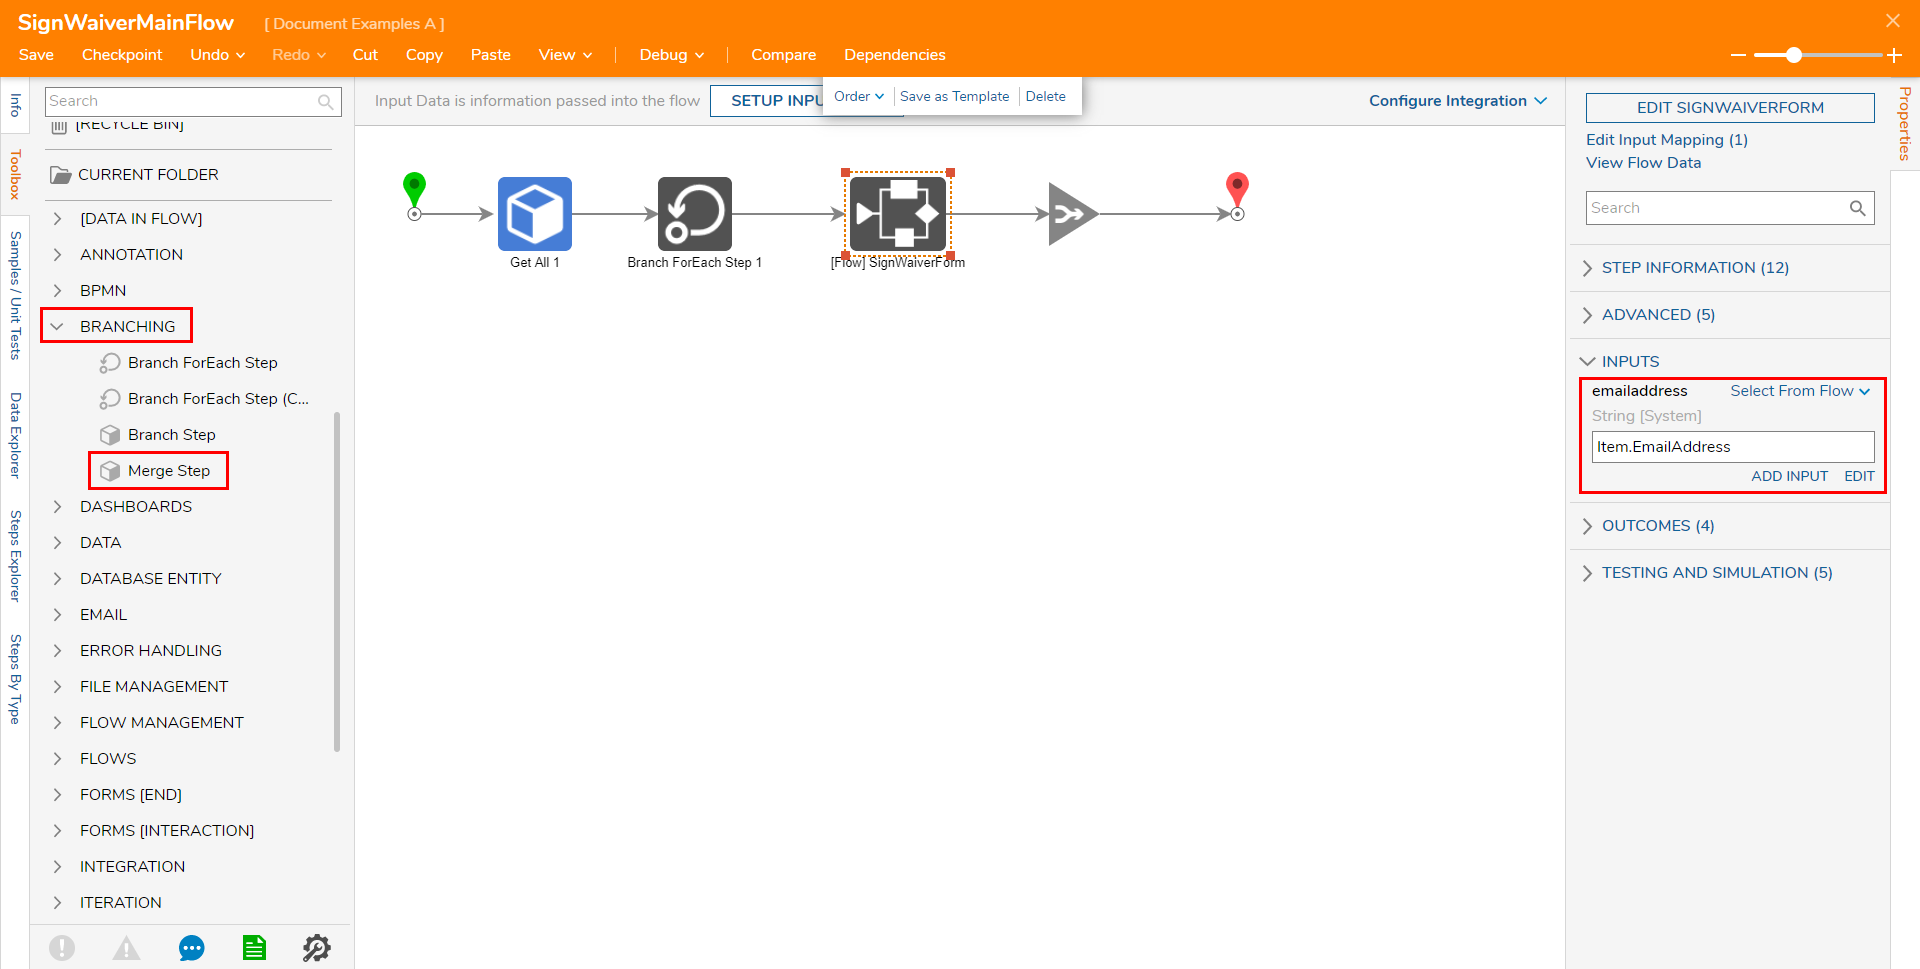
Save the Flow, then X if desired.
Debug
- From the Flow Designer, click the Debug link from the top Action bar.
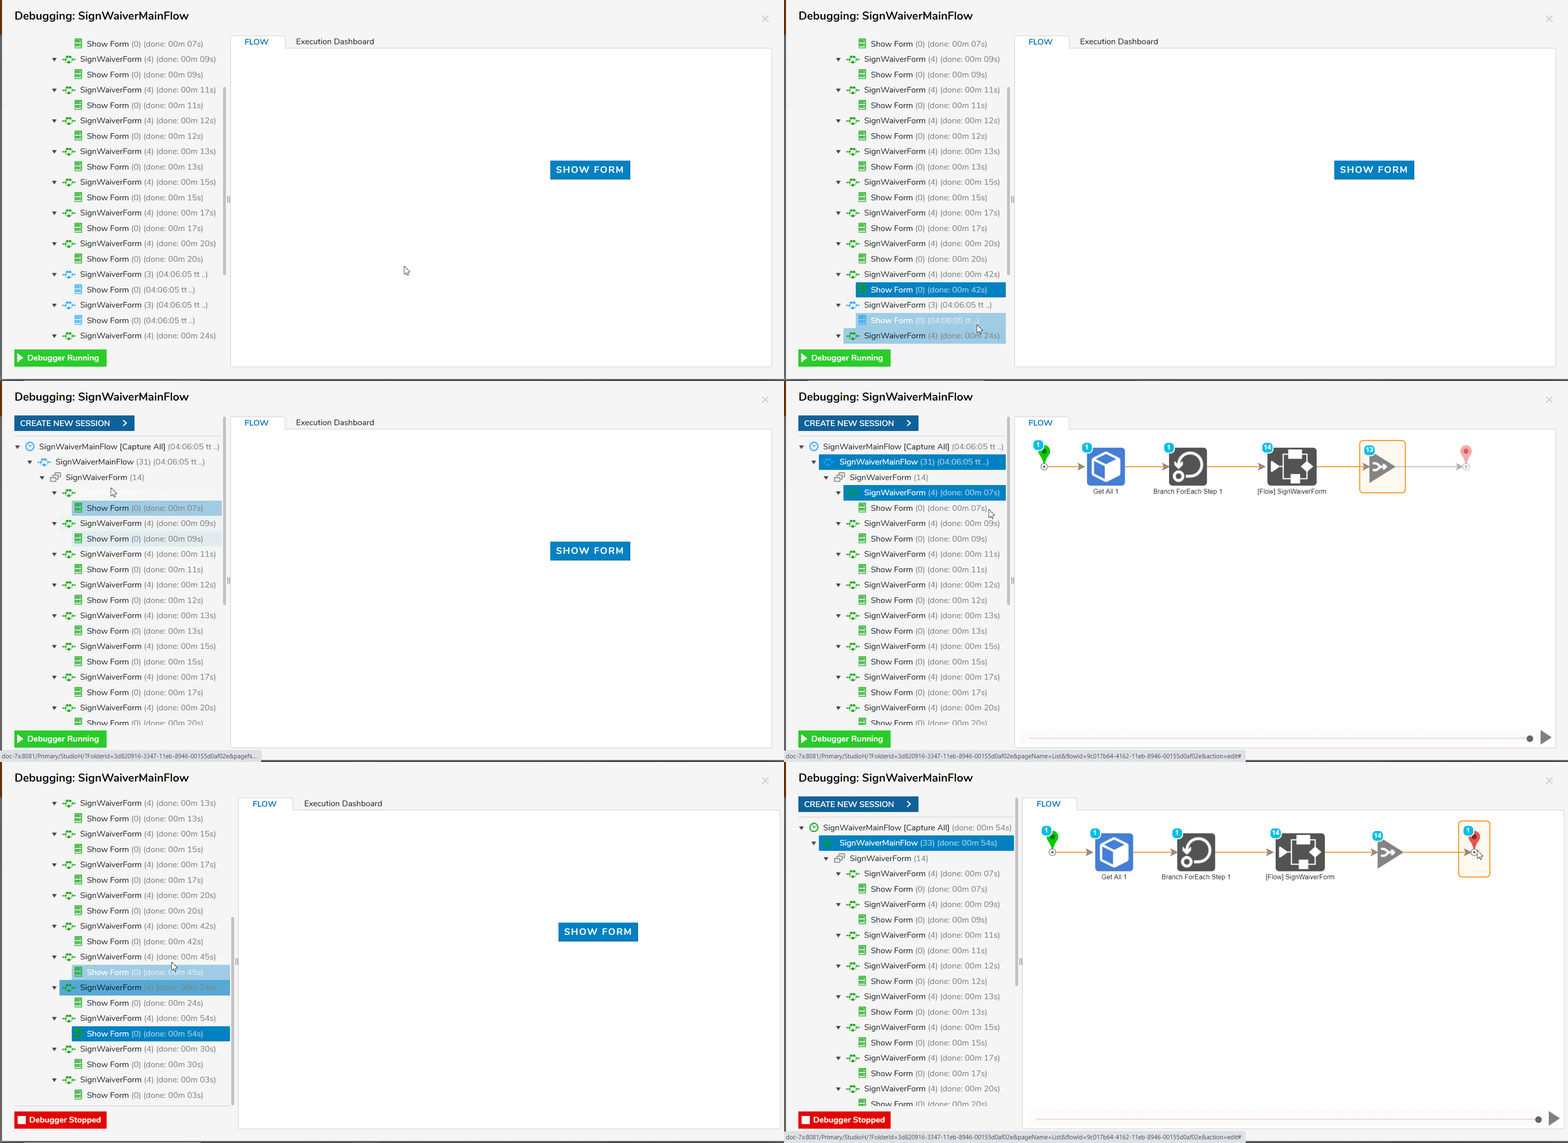
- Click the START DEBUGGING button.The Flow will run through and branch off into multiple instances of the Sign Waiver Flow.
Each Flow displays the Form with each Email Address found in the System.
The Flow is able to run because the Form following the Branch step exists outside of the Main Flow and has properly configured Input data sourced from the primary Flow. Test each Flow by expanding the SignWaiverForm tree on the left to view each iteration of the Form containing each individual Account as an Input.
Click Sign Waiver on each Form to complete and Merge all the Flows.
