Overview
Webservice references are web services that can be integrated into a Flow. To add a web service, navigate to the desired project Project > Settings > Integrations > External Services and click the ADD WEB SERVICE REFERENCE button, then supply the necessary details.
To call a web service method part of a Flow, in the Flow Designer, locate the appropriate component under Integration > External WebServices > [WebService Reference Name], and place it in the Flow's workspace.
- To generate a Web Service Reference, please install .NET Core 6.0 SDK and initiate a machine restart for proper configuration.
- The platform currently does NOT support creating integrations with Web Services protected using Basic/Windows Authentication or Web Services over HTTPS that use Self Signed Certificates. For both cases, using an SDK is the best practice.
The following table describes all the settings to configure the External Web Service.
| Setting | Description |
|---|---|
| Name | This is a user-defined name for the external web service reference. Steps with this name will be available in the toolbox under Integration > External WebServices. |
| URL | The URL is the Uniform Resource Locator of the external web service. It specifies the address where the application will send requests to or receive responses from the web service. It typically includes the protocol (e.g., http:// or https://) and the domain or IP address of the web service. |
| Share Session | This determines whether the application will share a session with the external web service. If set to "true," the application will maintain a session state across multiple requests to the web service, which can be important for certain types of interactions. If set to "false," each request will be treated independently, and there won't be any session sharing. |
| Specify WSDL | When enabled, it opens three new fields. This setting is used to specify the Web Services Description Language (WSDL) for the external web service.
|
Advanced Settings
| Setting | Description |
|---|---|
| Receive Timeout | The TimeSpan that specifies how long the application has to receive a message before timing out. The default value is 10 minutes. |
| Send Timeout | The TimeSpan that specifies how long the write operation has to complete before timing out. The default value is 1 minute. |
| Use Soap 1.2 | When enabled, the web service will operate using the SOAP 1.2 protocol. |
Example
The following example will integrate an External Web Service to verify if a phone number is valid. A user will input the phone number in a Form, which will serve as input to the web service. If the phone number is valid, the Flow will proceed. Otherwise, the user is redirected back to the original Form.
- Navigate to System > Integrations > External Services and click ADD WEBSERVICE REFERENCE.
.png)
- In the Add External Web Services Reference window, enter a name for the web service reference and the URL for the web service. Because WSDL defines the web service, select the Specify WSDL option. WSDL-defined web services can describe the methods that users can use.
- After selecting the Specify WSDL option, select Url as the Source Type and enter the WSDL URL in the From URL field. Source Type can also be configured to File and a field will open to allow a .wsdl file to be uploaded.
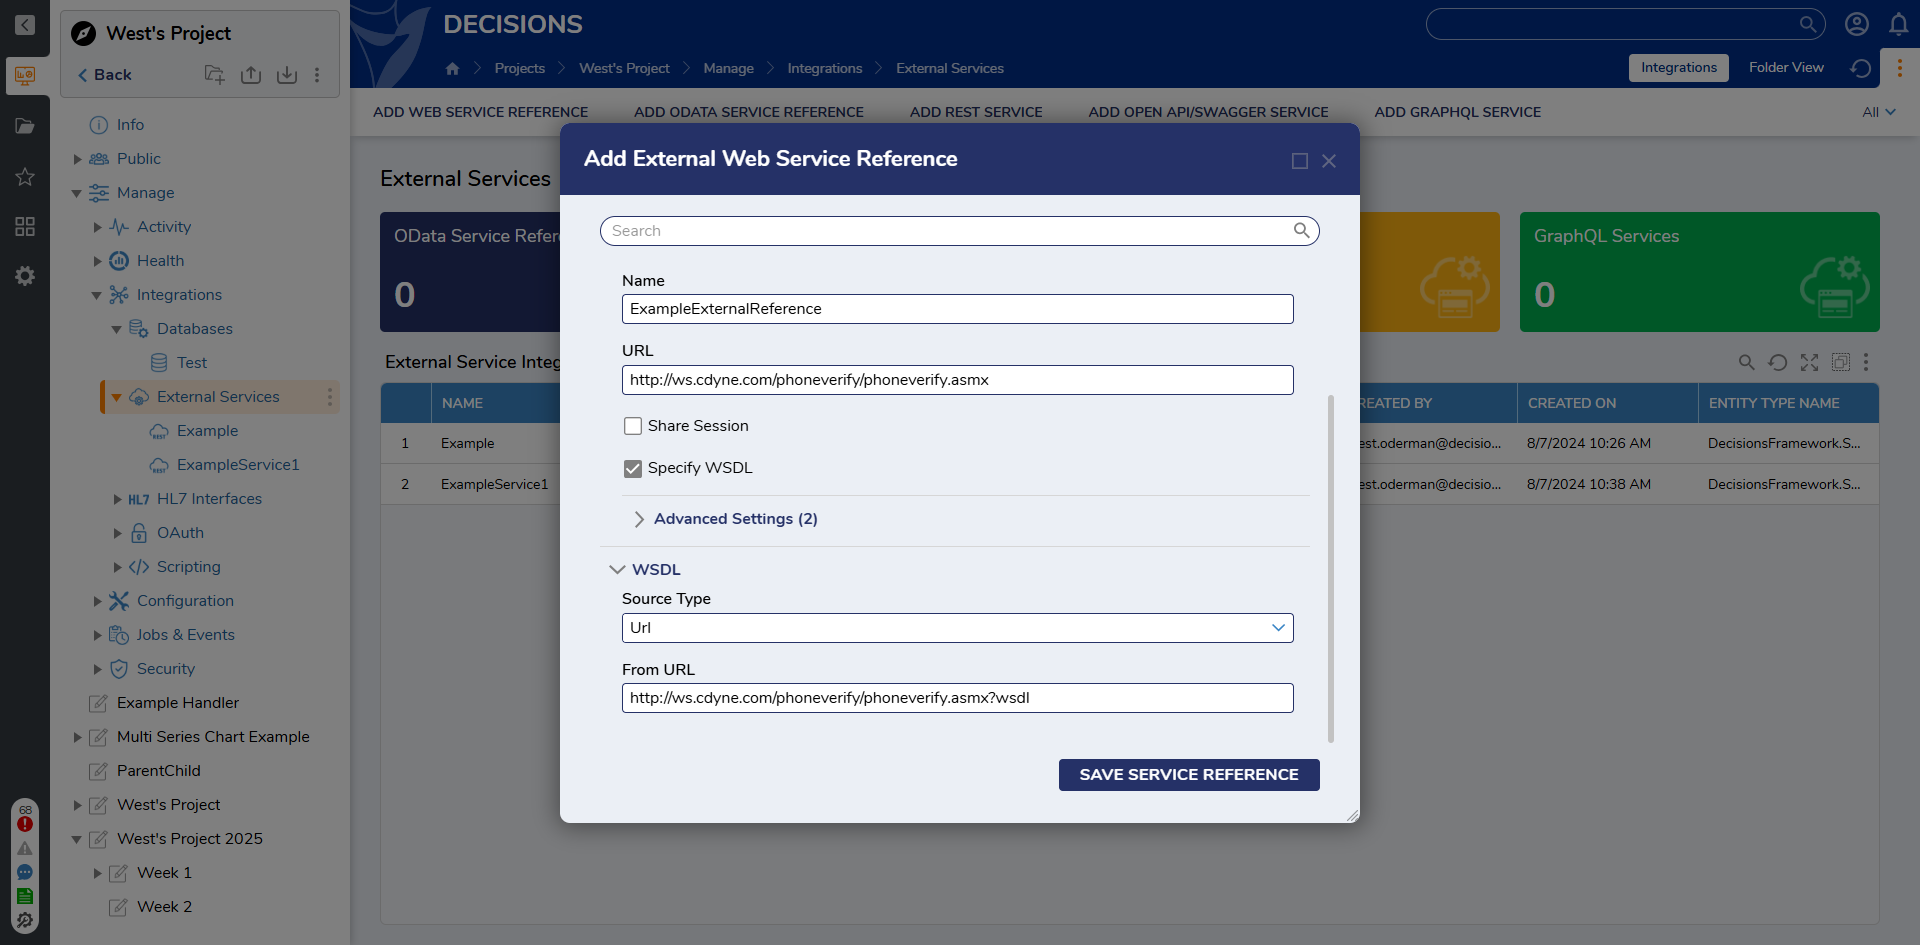
- Click SAVE SERVICE REFERENCE.
- In a Designer Project, click CREATE FLOW to create a Flow.
- Navigate to INTEGRATION > WEB SERVICES. Expand the reference, drag over the CheckPhoneNumber step to the workspace, and connect the step to the Start and End steps.
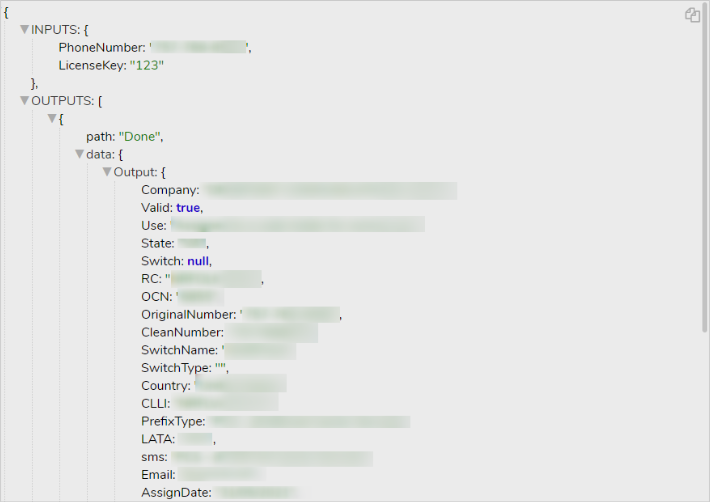
- Enter in constant values for the License Key and Phone Number fields.
.png)
- Click Debug on the top action bar to review the output of the step.
Feature Changes
| Description | Version | Release Date | Developer Task |
|---|---|---|---|
| Added SOAP 1.2 support. | 9.12 | June 2025 | [DT-044770] |