Overview
Reports on a Page can be configured to update filters based on a field from a selected row in another Report. When a Row is selected from the parent Report, the values can be passed to multiple children reports that depend on the row data as a filter.
An example use case for this would be to have two different Reports on a Page, one listing all accounts for a system and another displaying only the available groups/permissions the selected account has.
Parent Report Configuration
This example creates two Reports and then displays them on a Page. The first Report uses Accounts as the Data Source. The second Report populates a list of groups based on a selected row from the first Report.
- In a Project, create a Report.
- Select Add under Data Sources, expand the Common folder, and select Account Data Source.
- Select Add under Data Fields and select Account Id at the minimum; other fields can be added for additional columns.
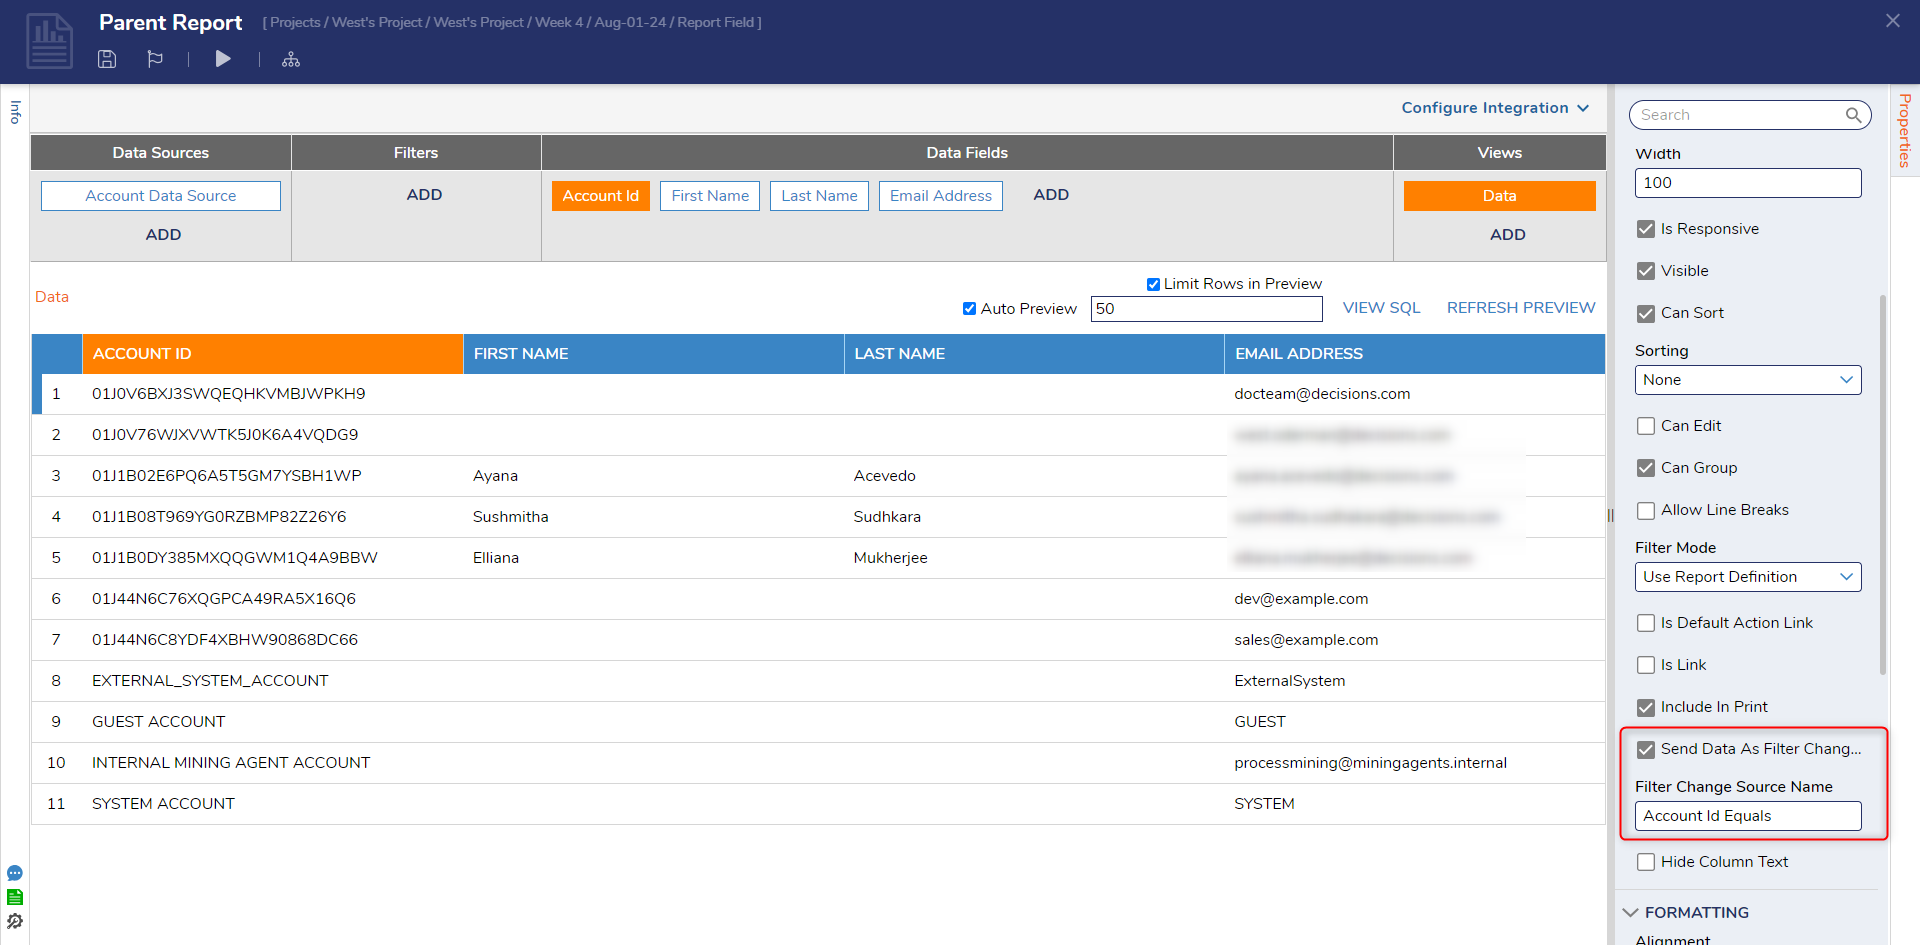
- Select the Account Id tile under Data Fields.
- Under Properties > SETTINGS, select Send Data as Filter Change Source and set the Filter Change Source Name to "Account Id Equals".
- Save and close the Report Designer.
Child Report Configuration
- Create another Report in a Designer Project.
- Under Data Source, search and select Account Group Data Source.
- Add Group Id to the Data Fields section.
- Under Filters, select Add, and in the drop-down, under Field Filters > Account Id, select Account Id Equals.
- With the filter selected under SETTINGS, set the Runtime Behavior drop-down to Get Values From Other Reports.
- Save and close the Report Designer.

Page Configuration
- In a Project, select CREATE PAGE. Open the Page/Dashboard section and create a Page.
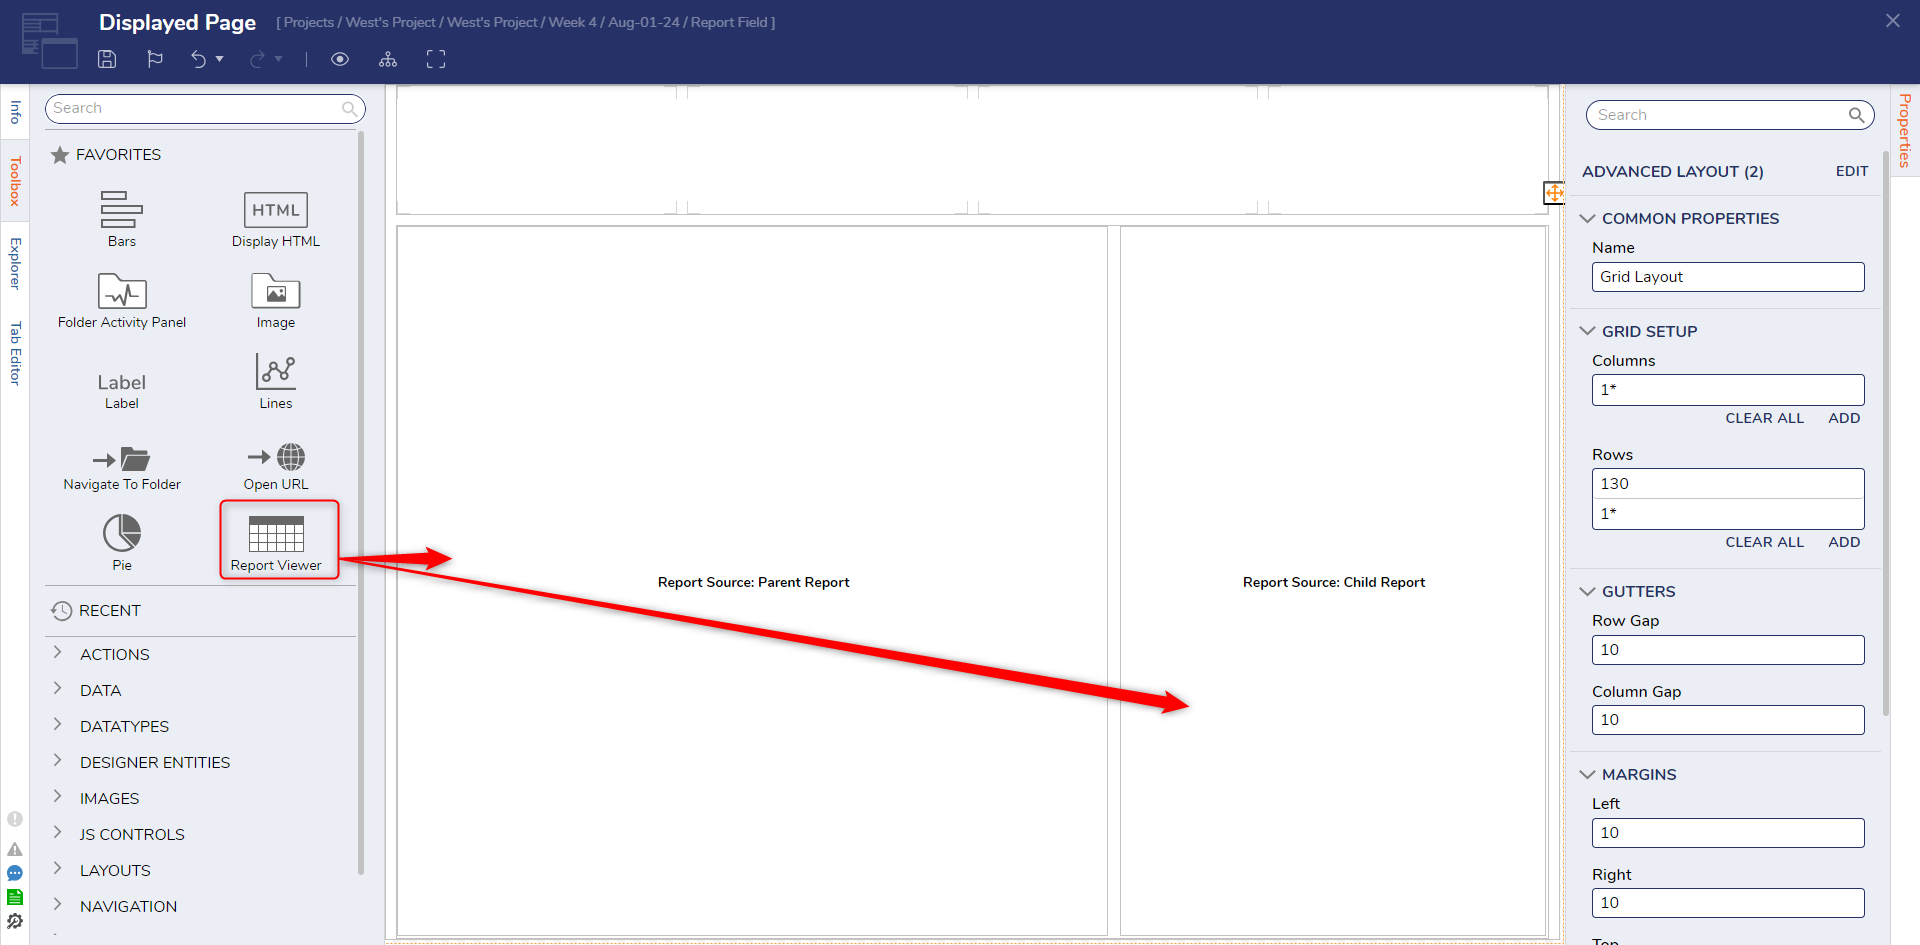
- In the Page Designer, use the FAVORITES section and add two Report Viewer controls to the workspace.
- Select the Report Viewer Control on the left, and in the Properties for the control, select the PICK DEFAULT REPORT button under the REPORT SETUP section.
- Select the Parent Report (containing the Account ID and no filter).
- Repeat for the other Report Viewer control, using the Child Report (containing the Group ID based on the accountid filter).
- Save and close the Page Designer, then right-click the name of it in the Designer Project and navigate to View > Preview Page.
- Select a line item in the Report on the left to see the data filtered based on that selection in the Report on the right.
.png)
For further information on Reports, visit the Decisions Forum.