Overview
Through the ability to Call Internal Services using API Calls, and specifically the Assignment Service, users can update, modify, or add information to an Assignment via API.
The following article and example demonstrates how to use the Process Form Assignment Response Service as to create an Assignment, get the Assignment ID, and gather Integration Details to complete the Assignment via Postman.
Setup Assignment
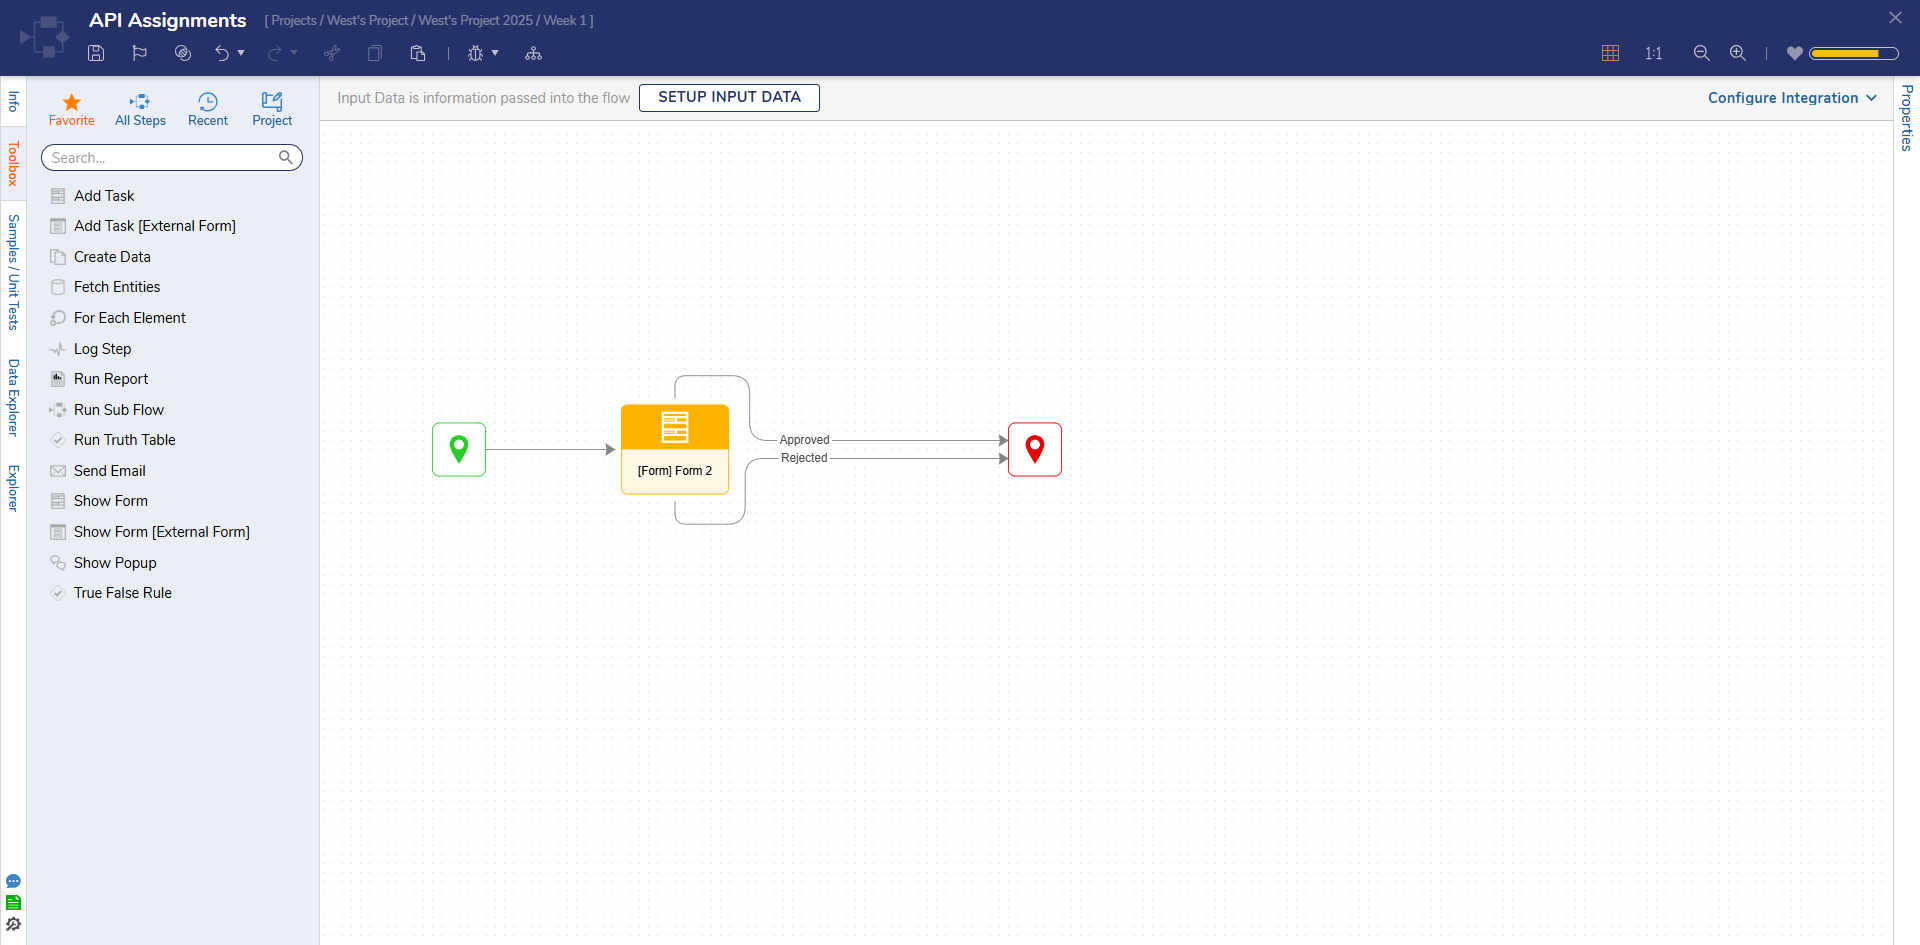
- From the Flow Designer, connect an Add Task step to the Start step, then configure the desired Assign To, Assignment Name, and Assignment Action Name values. Then select PICK OR CREATE FORM, and configure the Assigned Form.Assignment ConsiderationsThe example Assignment utilizes an empty Approval Form that uses a simple Approve or Reject button; note that this Form could be any other Form depending on the desired use case.
It is best practice to dynamically provide values for the Assignment Name and Assignment ActionName with Merge Plain Text mappings.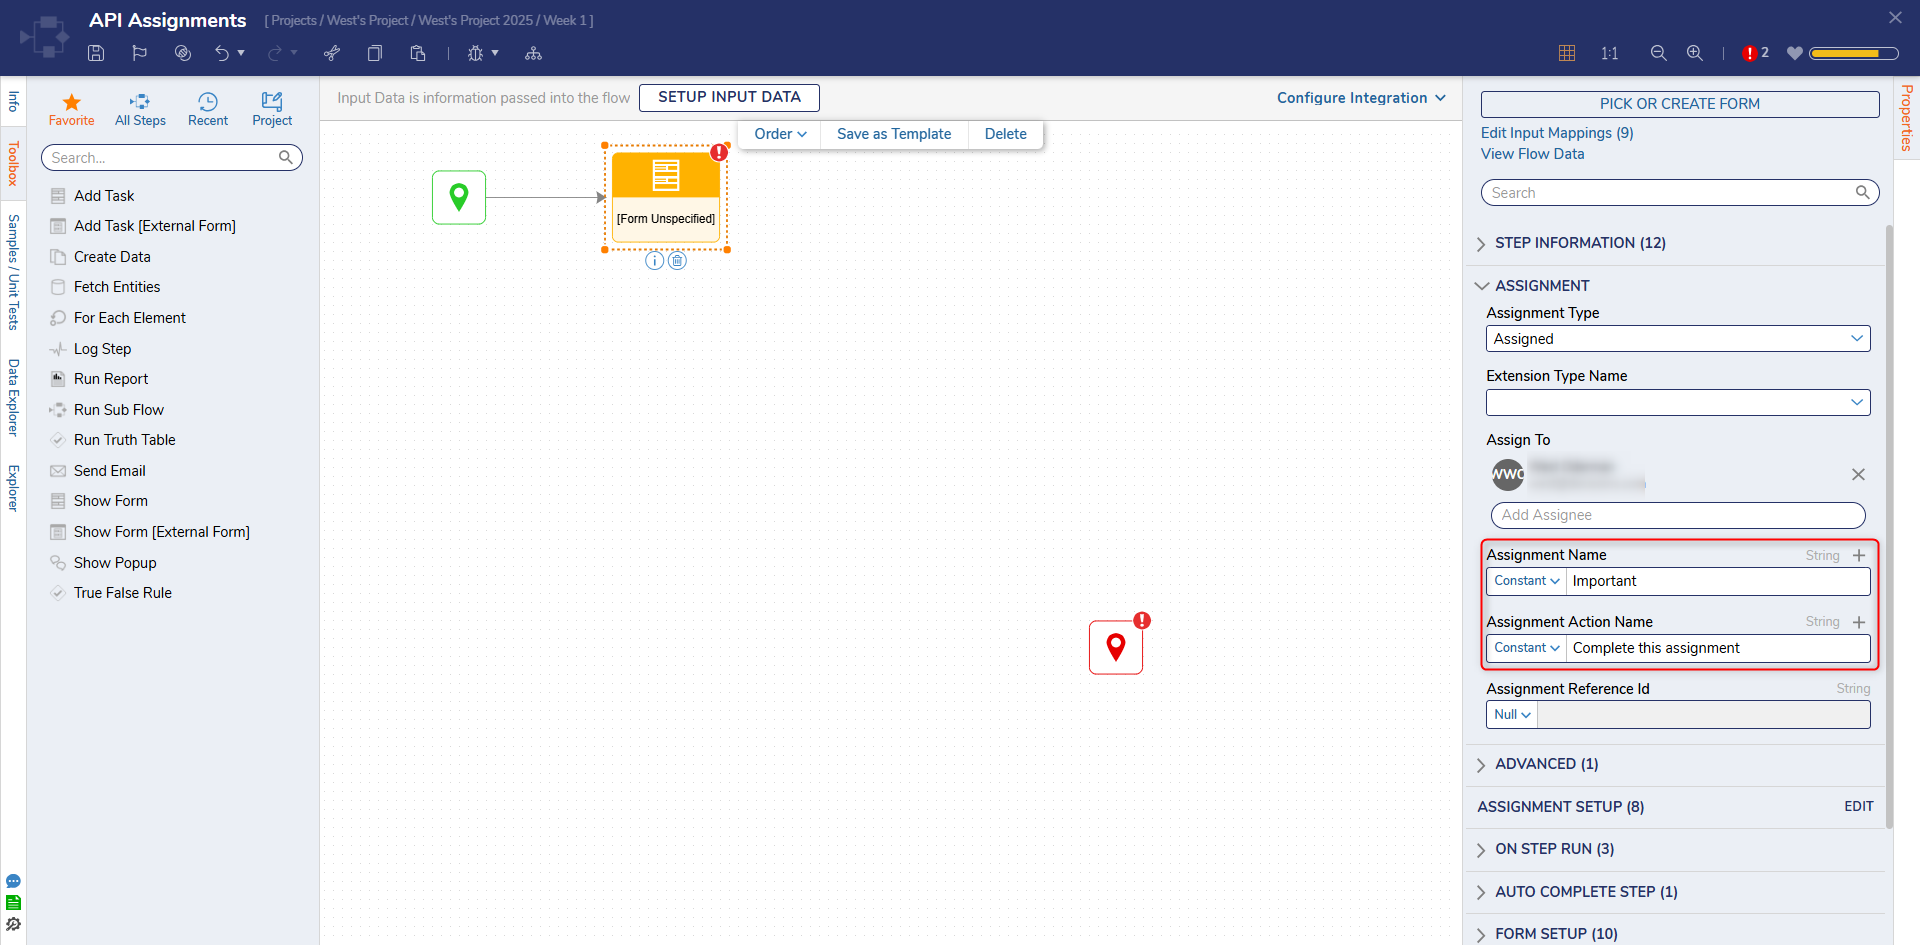
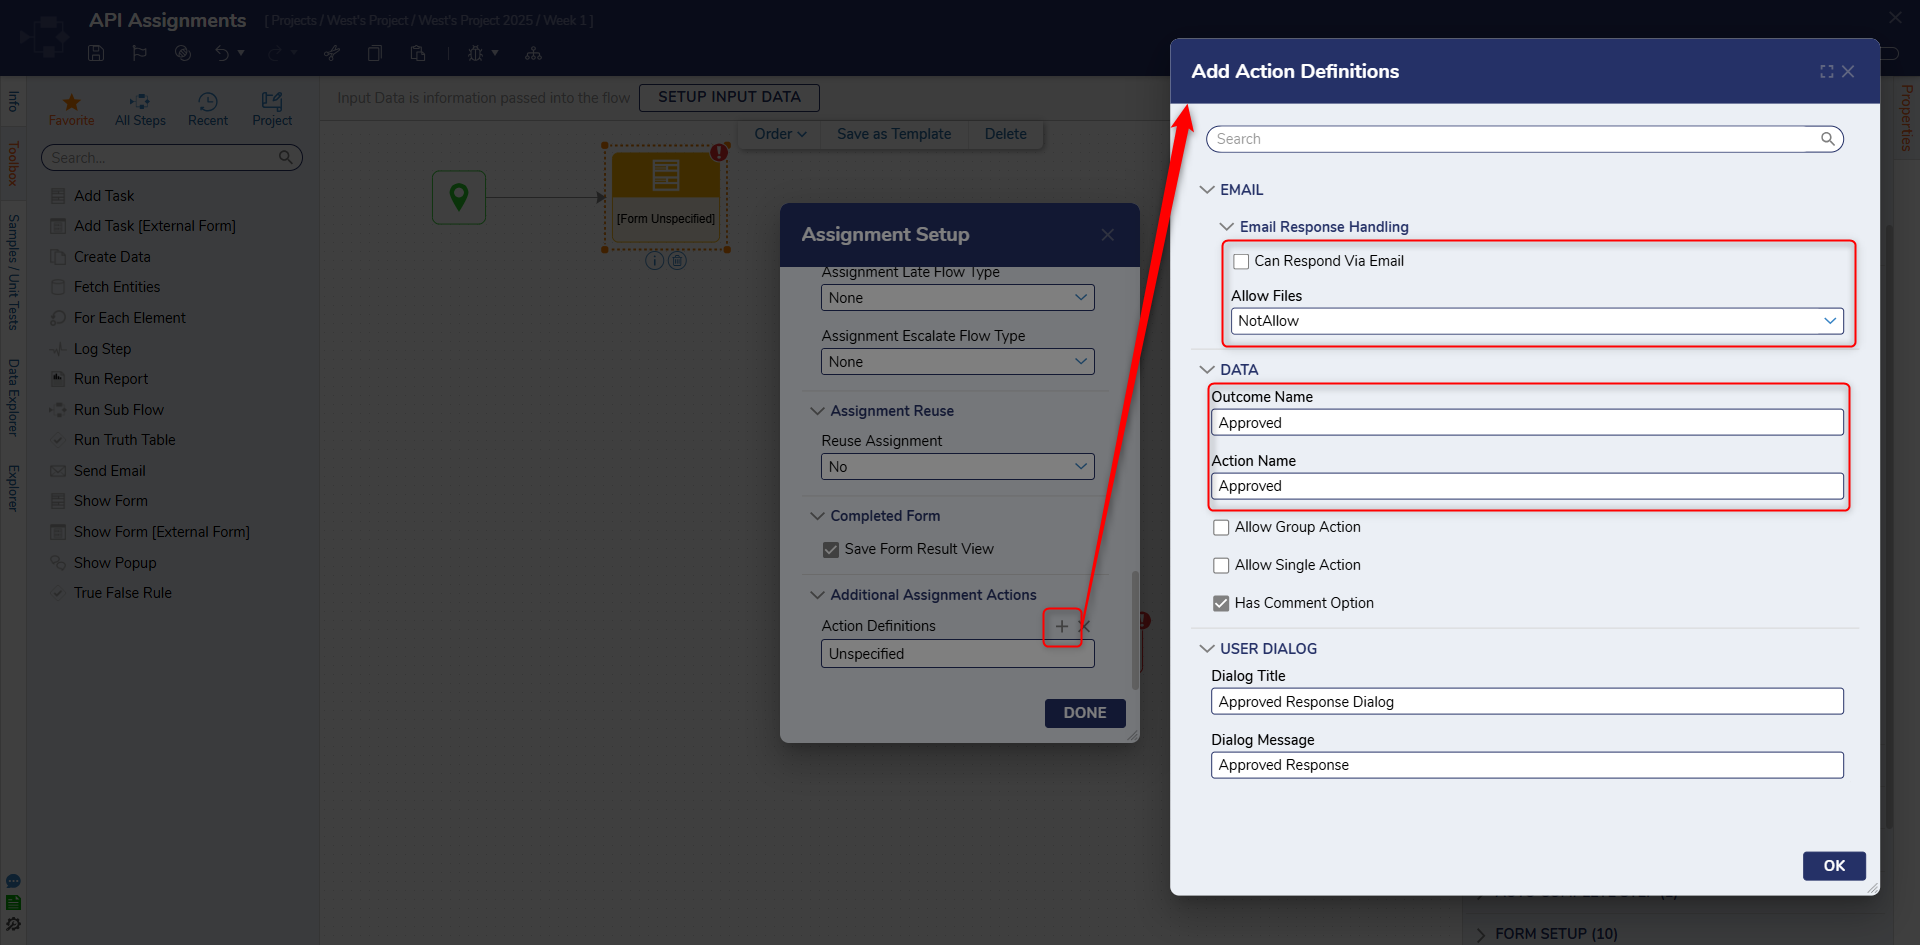
From the Properties tab of the Add Task step, select ASSIGNMENT SETUP > EDIT. Then, locate Additional Assignment Actions > Action Definitions, and click ADD.
In the Add Action Definitions window, uncheck Can Respond Via Email and select NotAllow from the Allow Files dropdown. Then, under DATA > Outcome Name, input "Approved" and click OK.
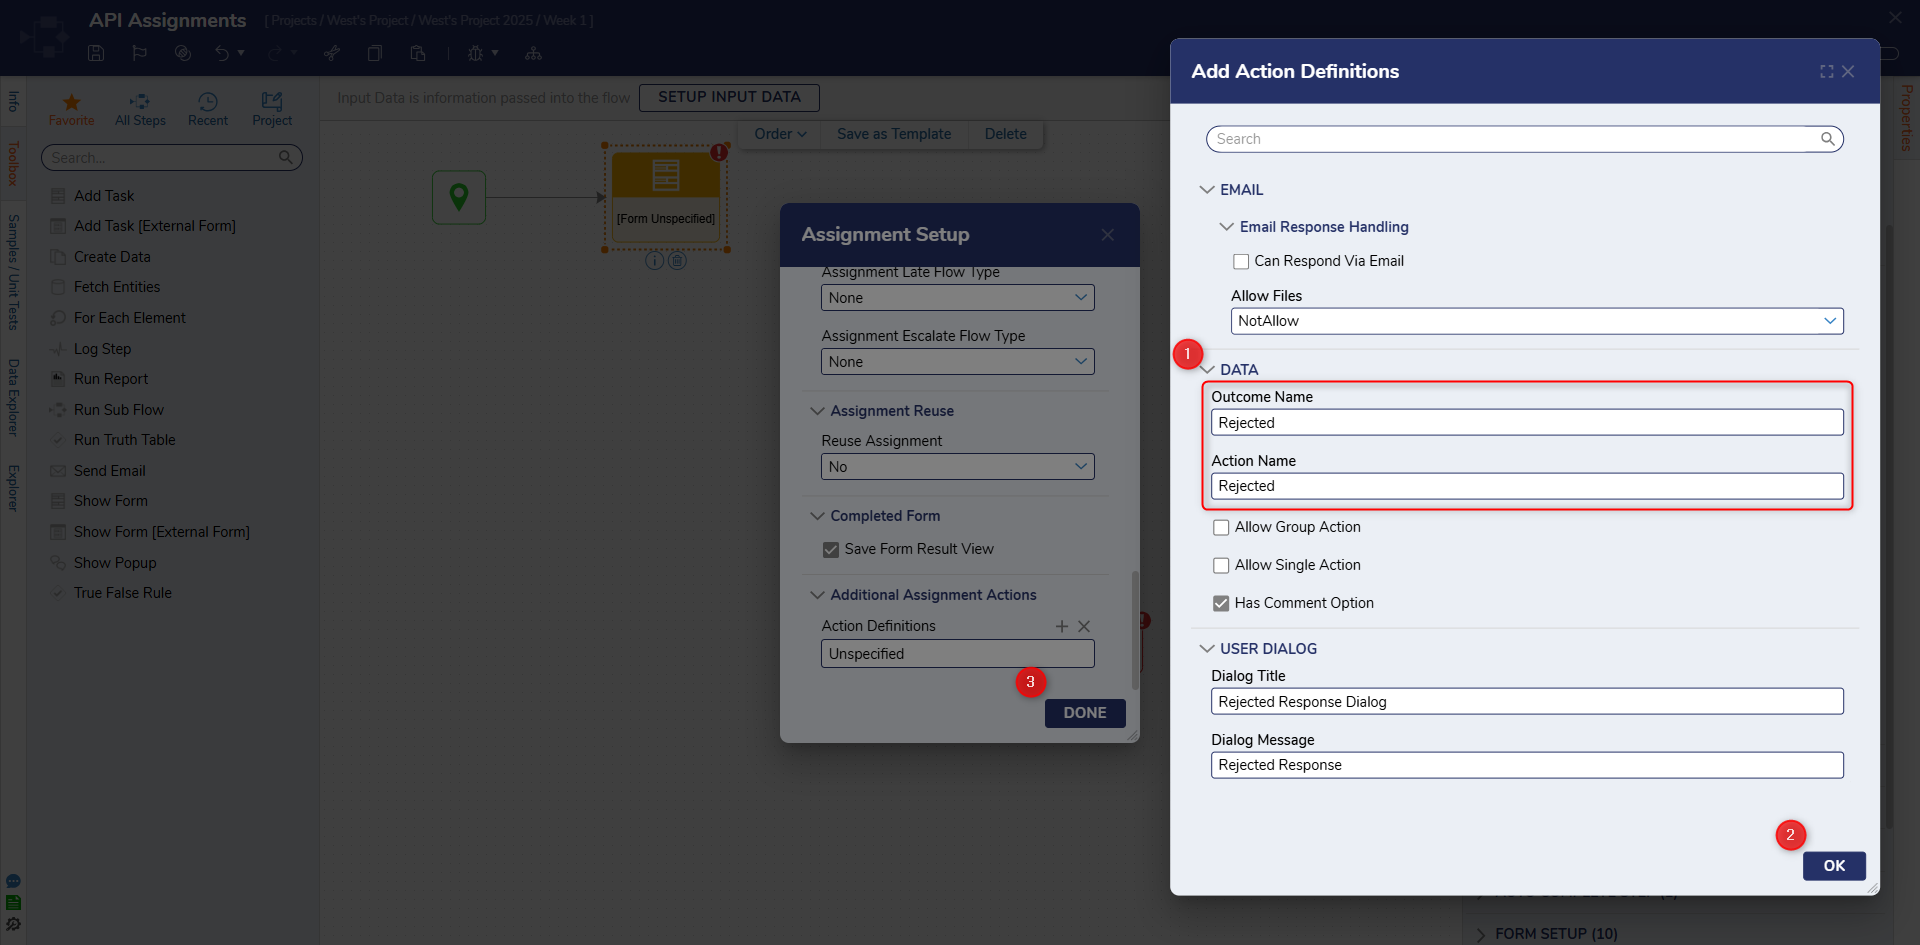
- Back in the Assignment Setup window, define a Rejected Action by repeating the previous steps used to configure the Approved action, then click DONE.
Connect both outcomes of the Add Task step to the End step. Then, Save and close the Flow.
Integration Details
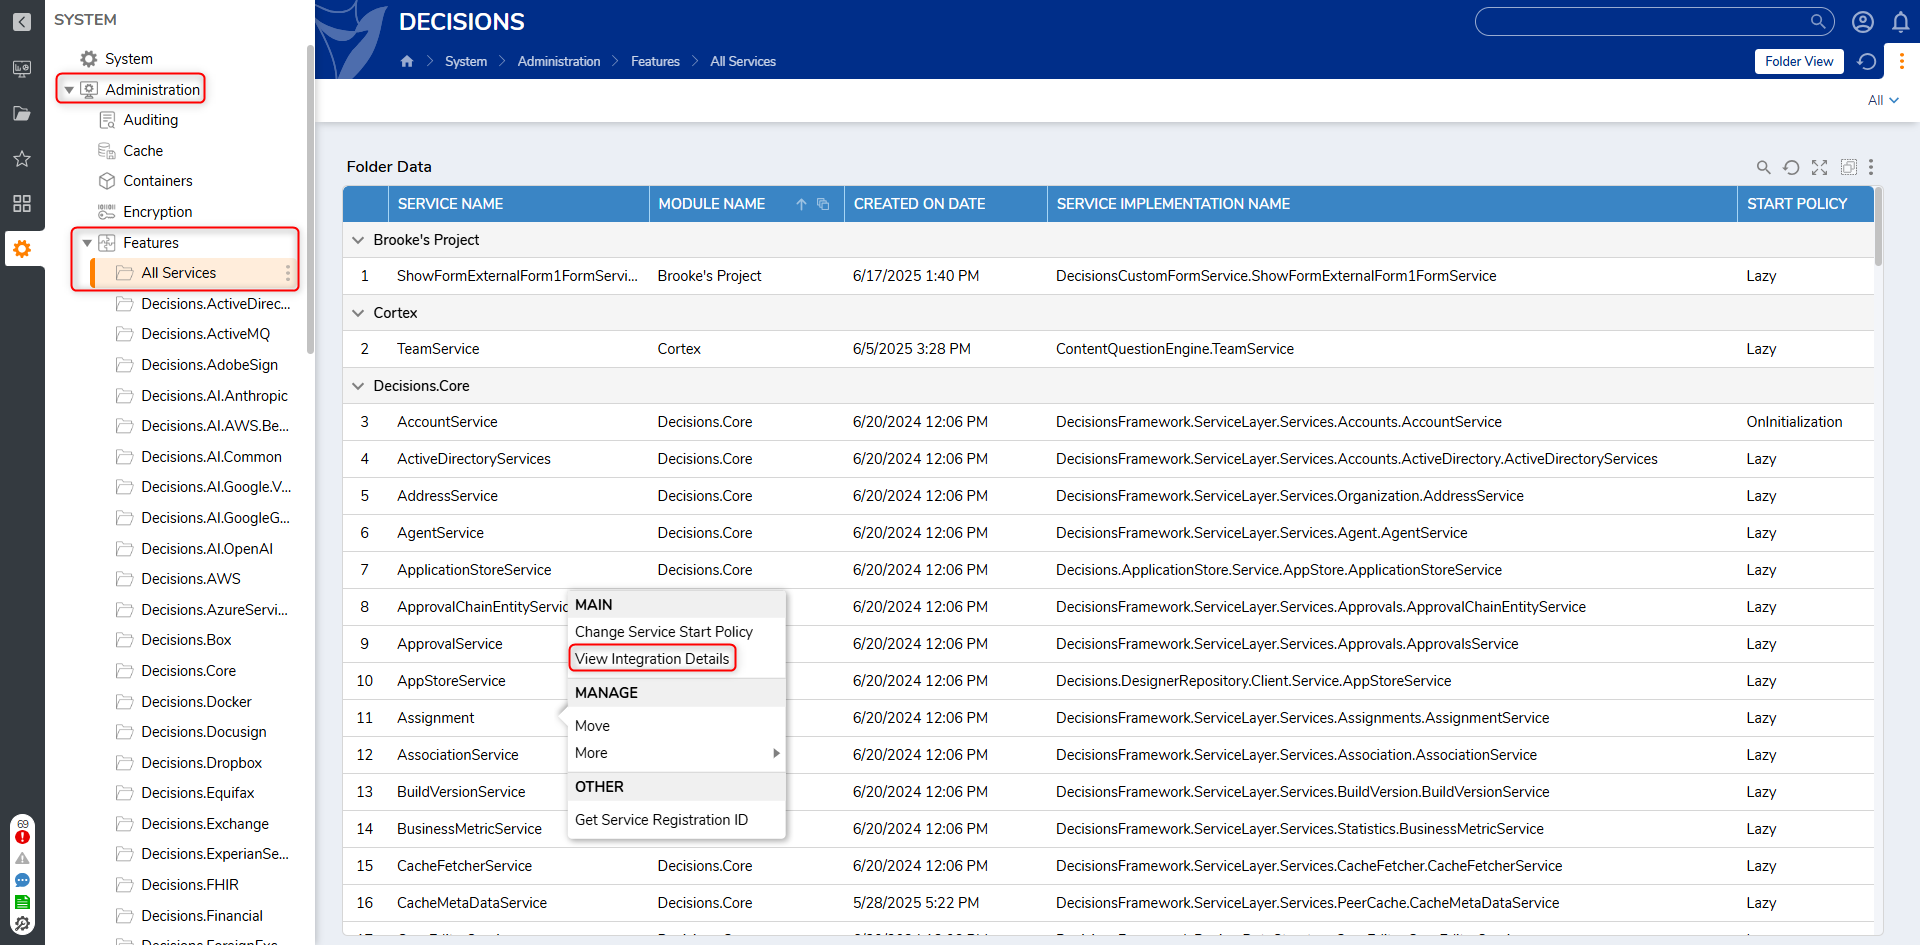
- In the Decisions Studio, navigate to System > Administration > Features > All Services. Then, locate and right-click Assignment and select View Integration Details.
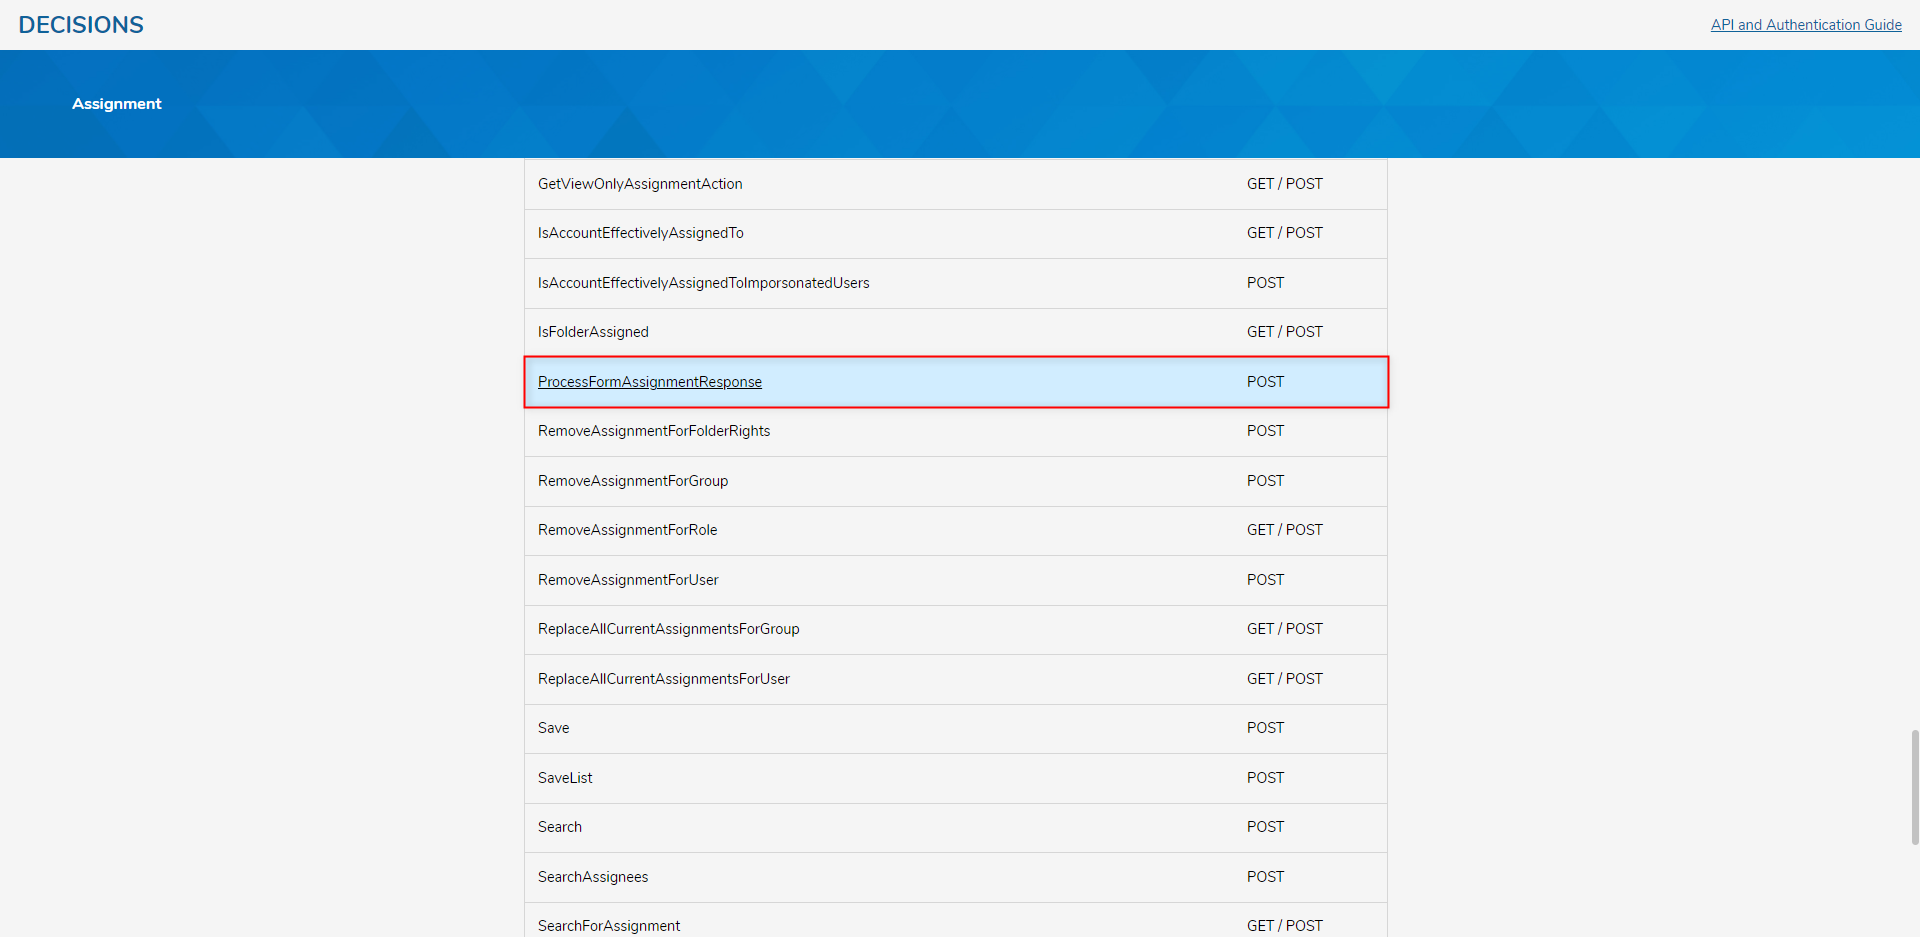
- In the Assignment window, find and select ProcessFormAssignmentResponse from the MethodName list.
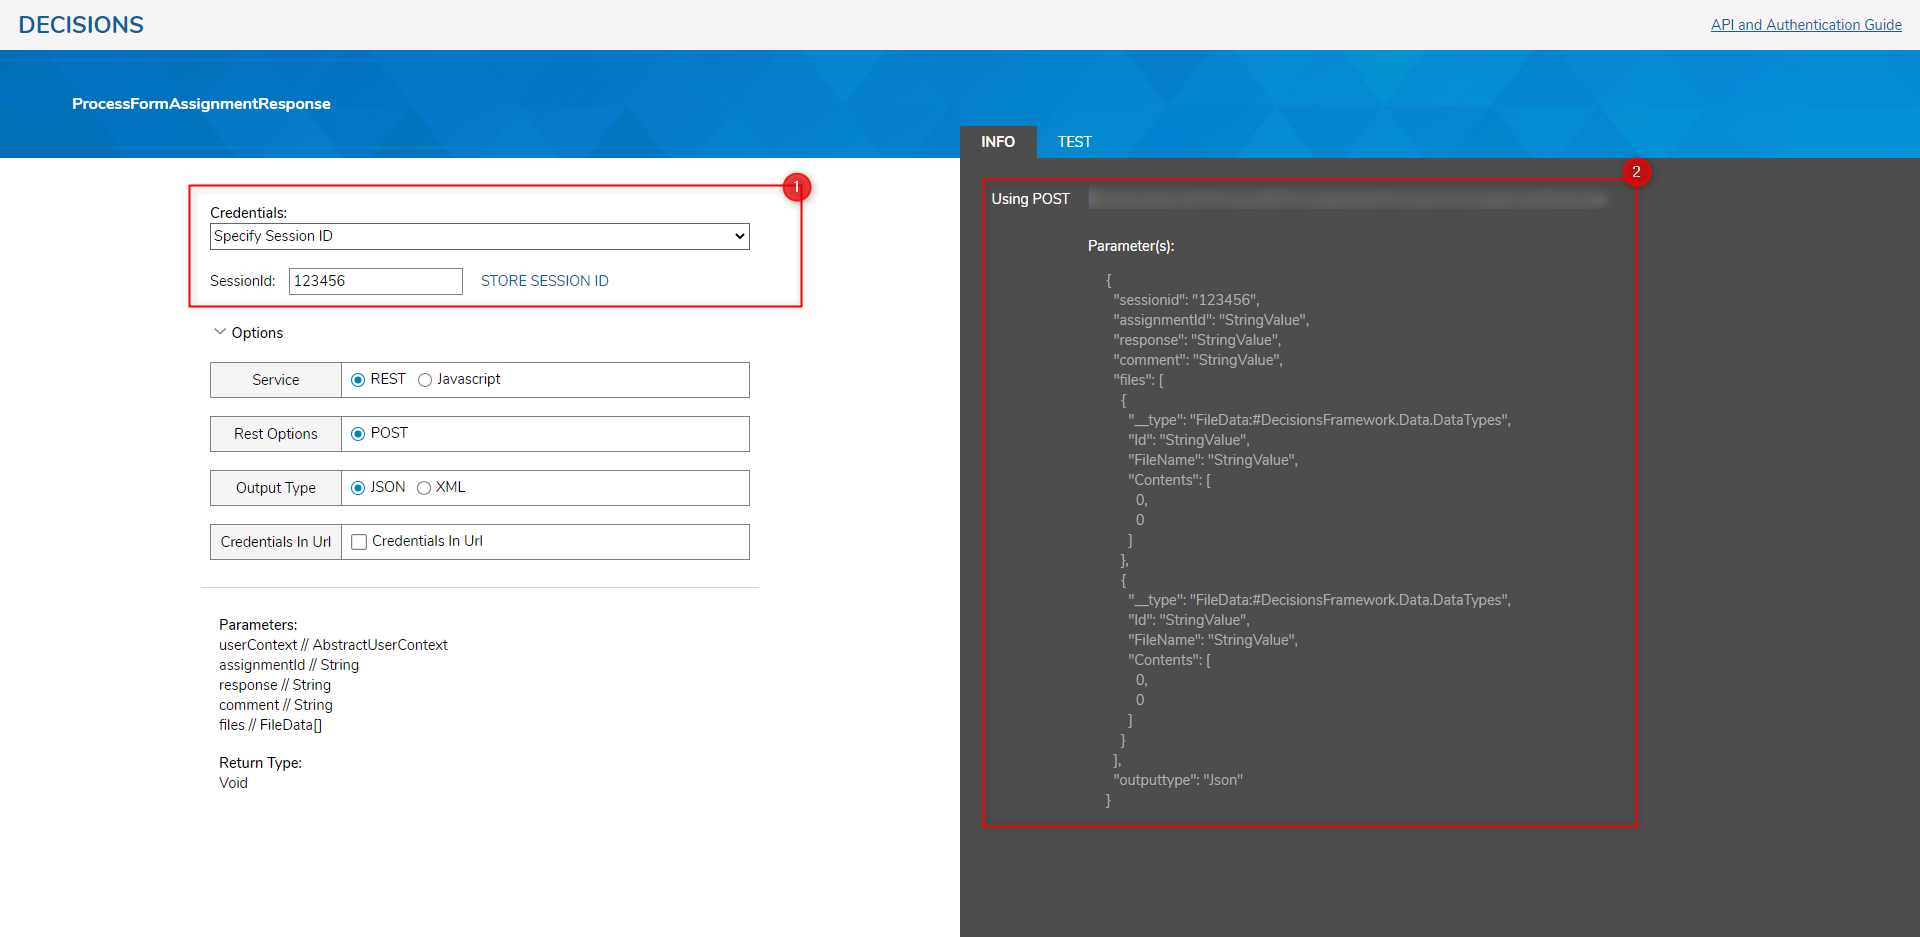
- In the ProcessFormAssignmentResponse window, set up the Integration Details by selecting the desired Credentials and leaving the rest of the values default.
- From the INFO tab, copy the Using POST URL and Parameter(s)text.Storing InformationIf Specify Session ID or Specify User Credentials are in use, be sure to click STORE SESSION ID or STORE CREDENTIALS, to update the Parameters before copying over any of the INFO tab contents.
Setup Postman
- Open Postman and add a new POST Request.
- Paste the URL in the URL box.
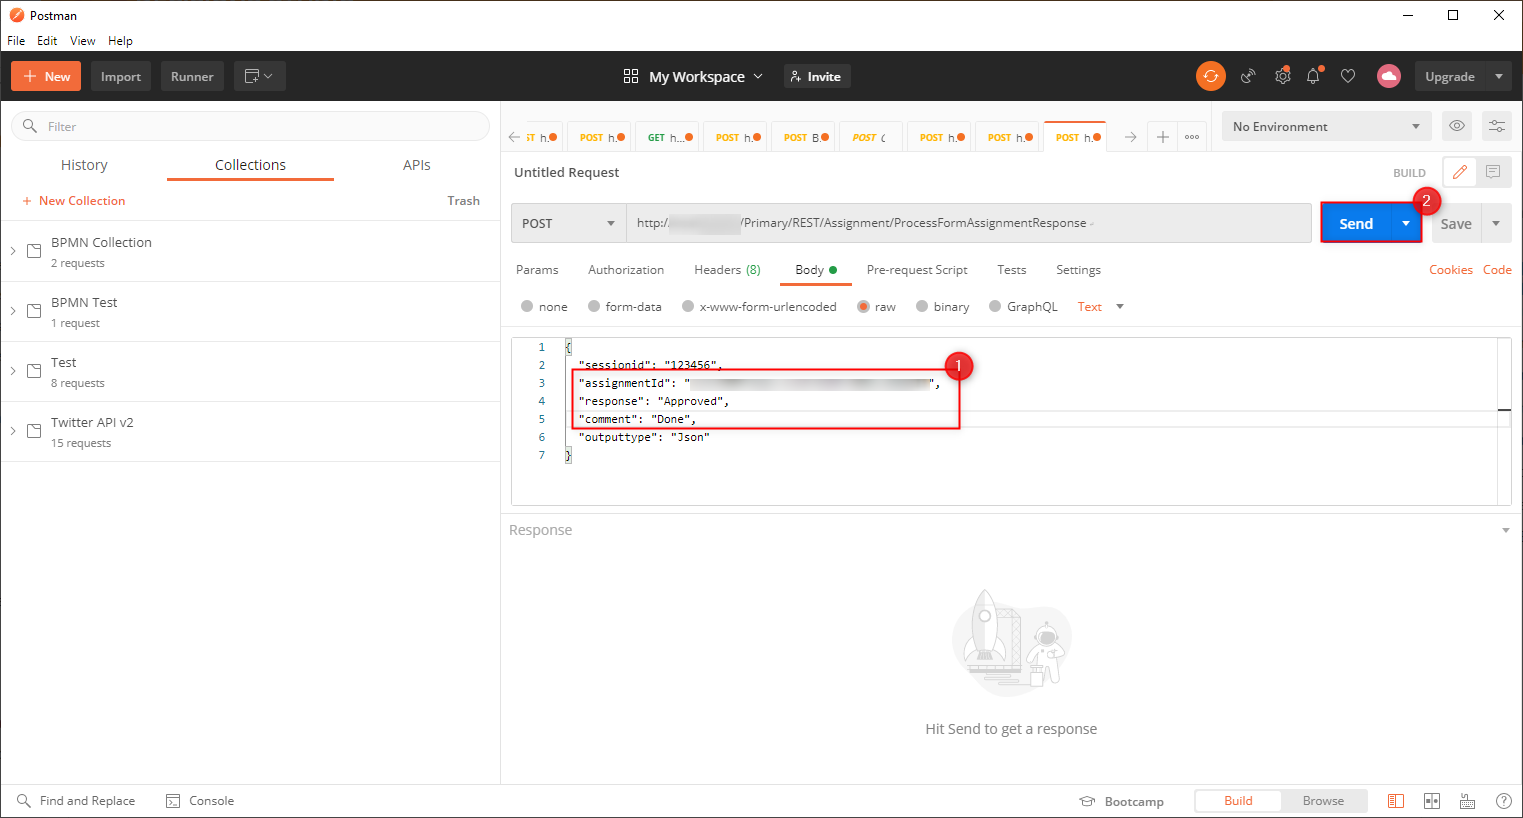
- Format and paste the following code into the Body:Parameter VariationThe following code was sourced from the ProcessFormAssignmentResponse page, but the file portion was removed as this example does not allow files when setting up the Assignment.
Additionally, the first couple of lines may vary depending on if Specify User Credentials, Specify Session ID, or a Named Session was used.{ "userid": "YOUR USER ID", "password": "YOUR PASSWORD", "assignmentId": "StringValue", "response": "StringValue", "comment": "StringValue", "outputtype": "Json" } or { "sessionid": "YOUR SESSION ID VALUE", "assignmentId": "StringValue", "response": "StringValue", "comment": "StringValue", "outputtype": "Json" }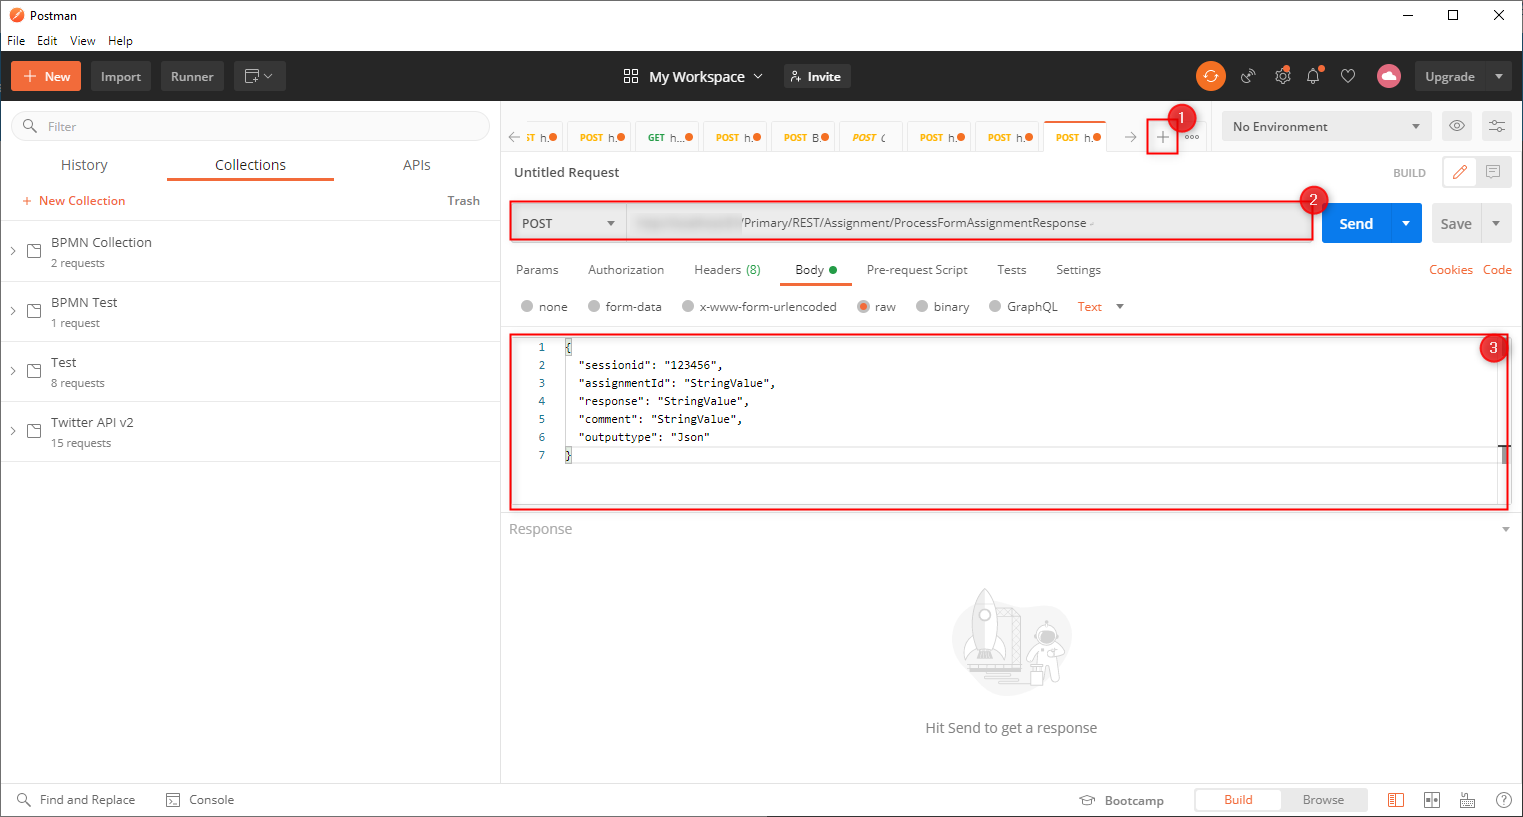
Debug
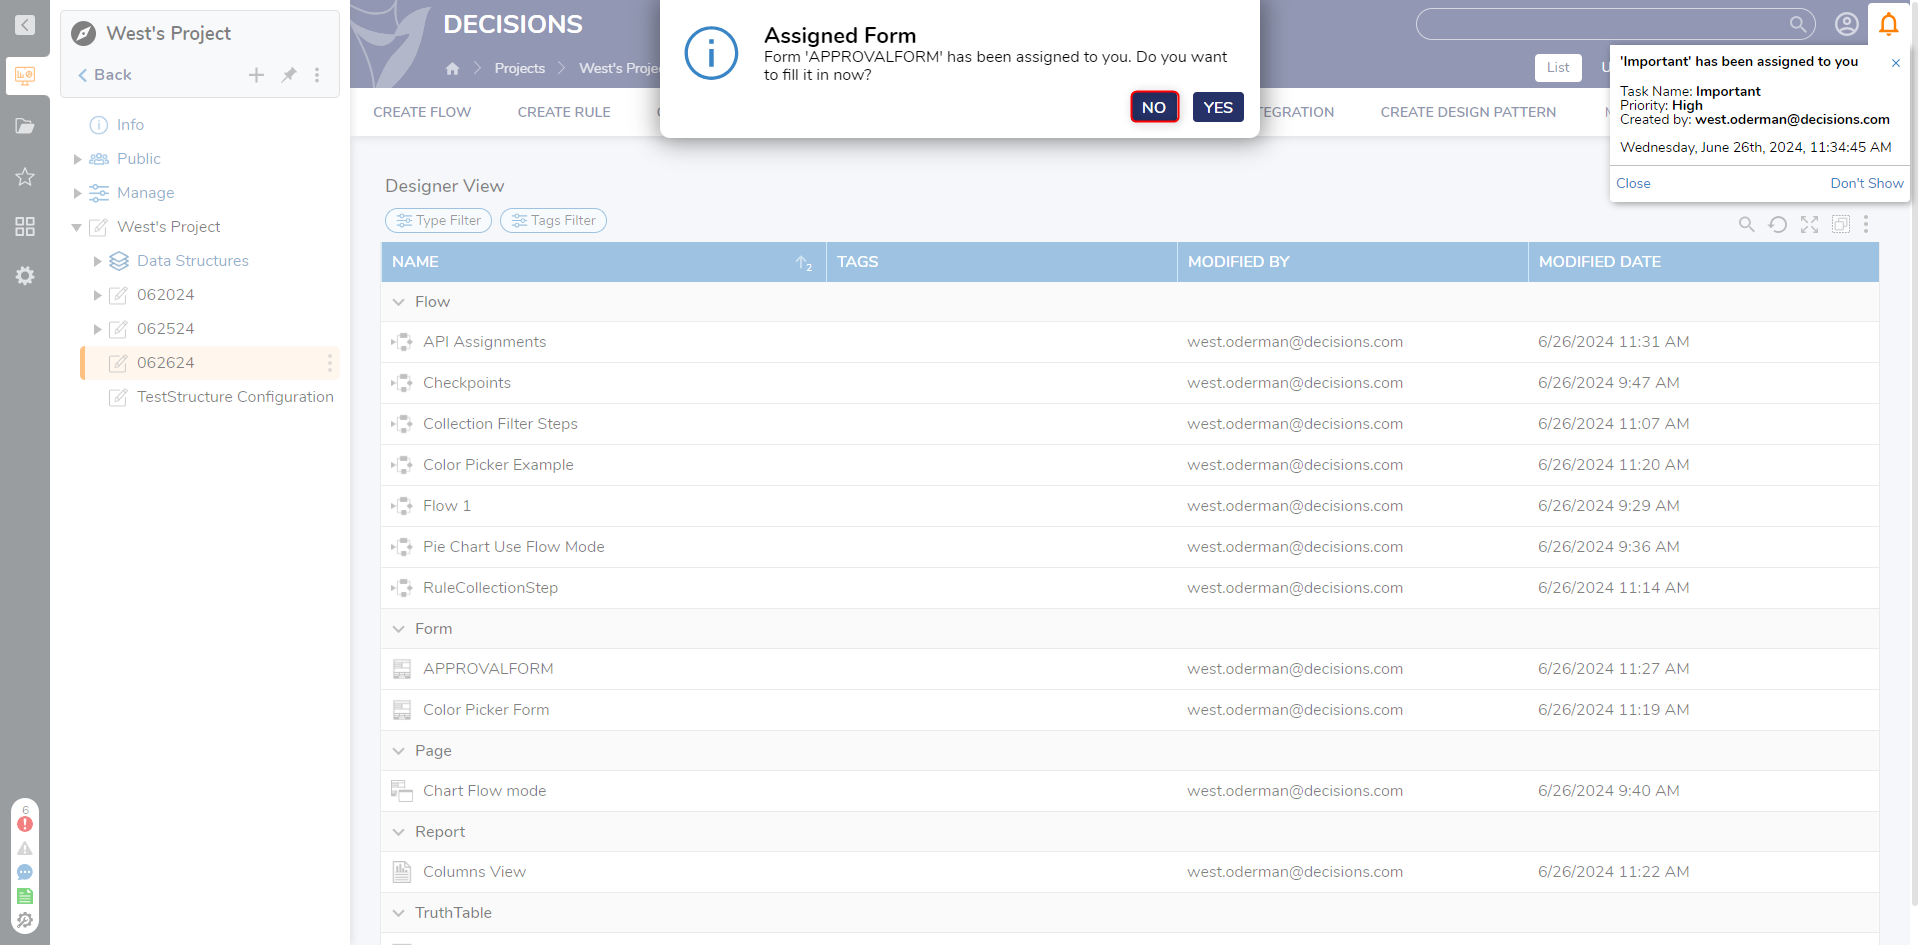
- Navigate back to the Decisions Studio and Run previously created Assignment Flow; if prompted to complete the Assignment, click NO.
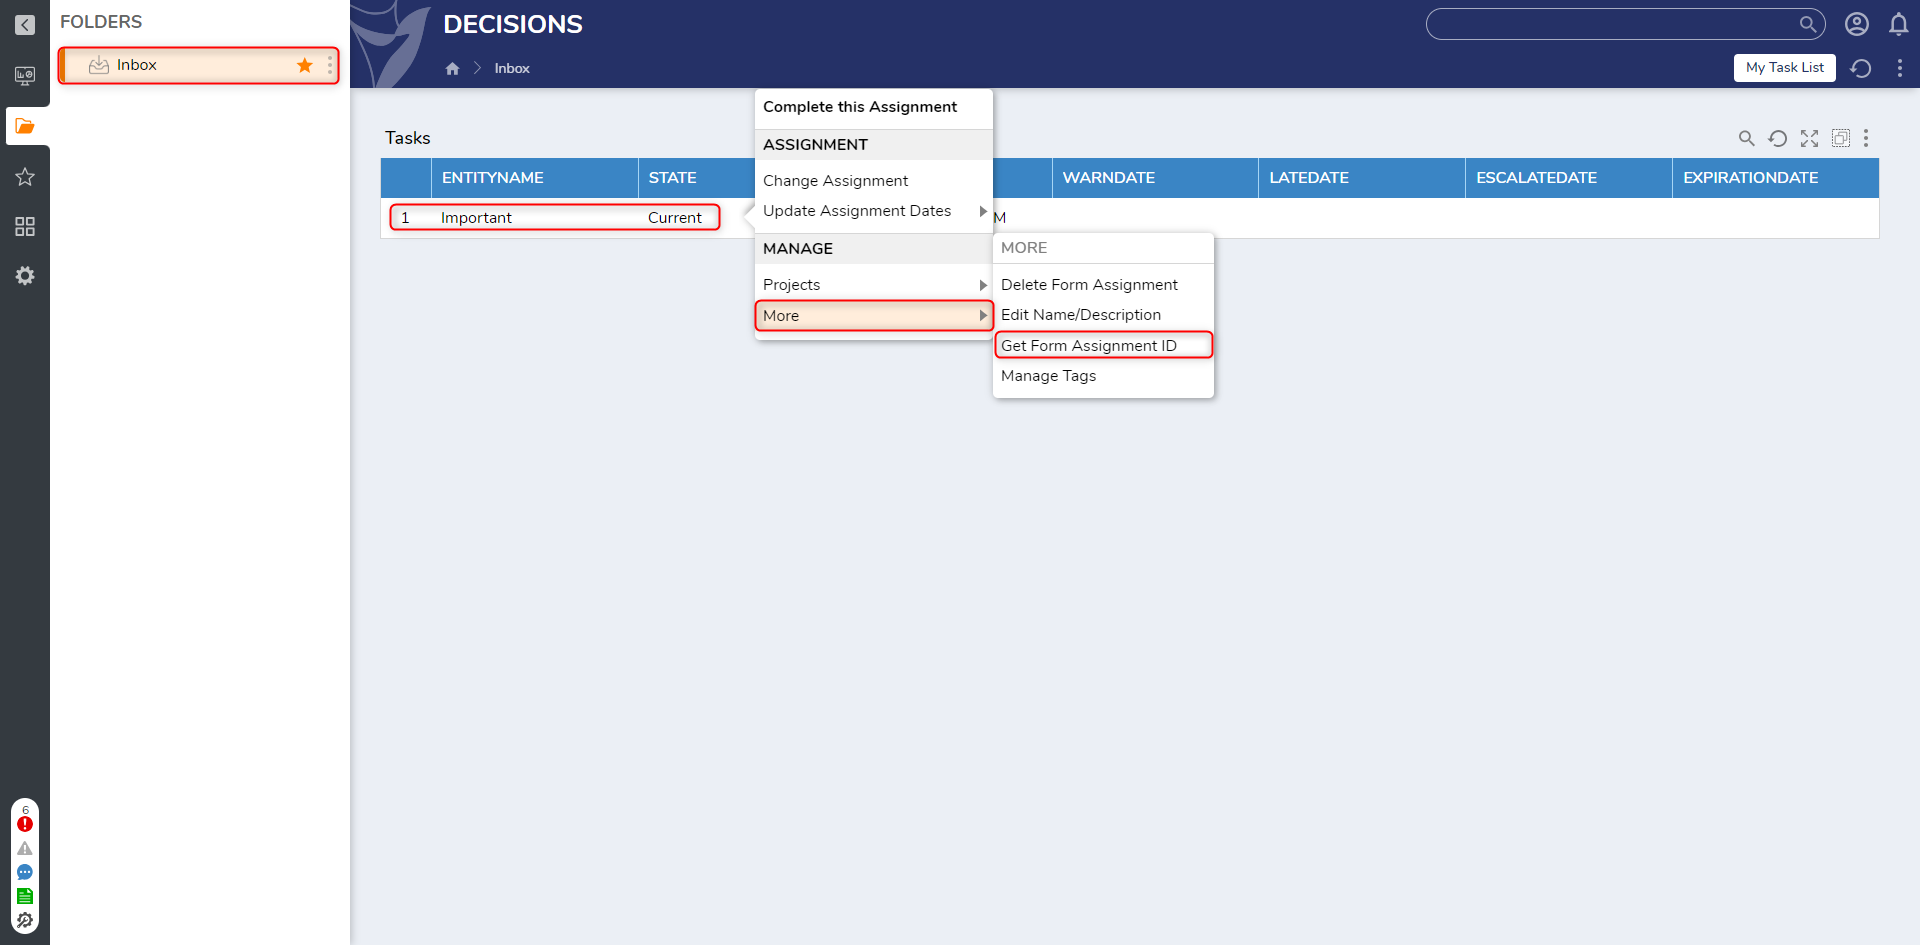
- Navigate to the Inbox; from the Action menu of the received Assignment, select Manage > Get Form Assignment ID.
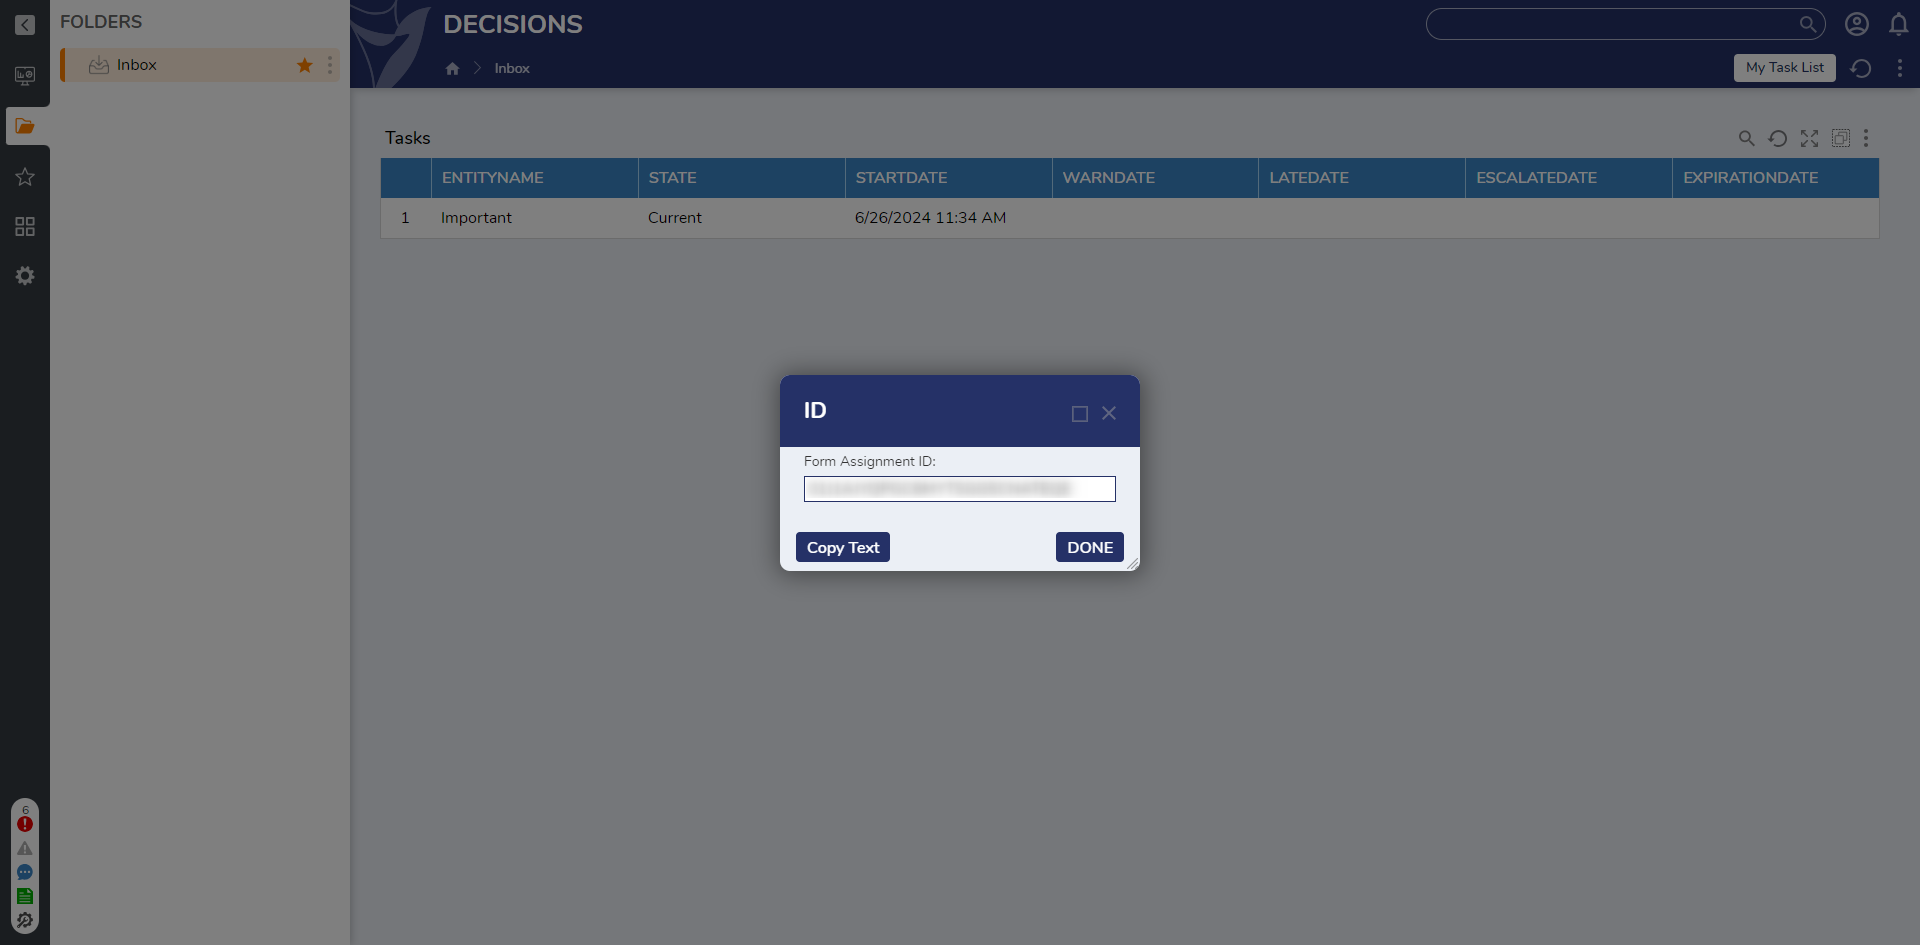
- From the ID window, select Copy Text, then select DONE.
- Return to Postman, and replace the StringValue in the quotation marks for assignmentId with the copied Assignment ID.
- Replace the StringValue for response with "Approved", replace the StringValue for comment with "Done", then click Send.
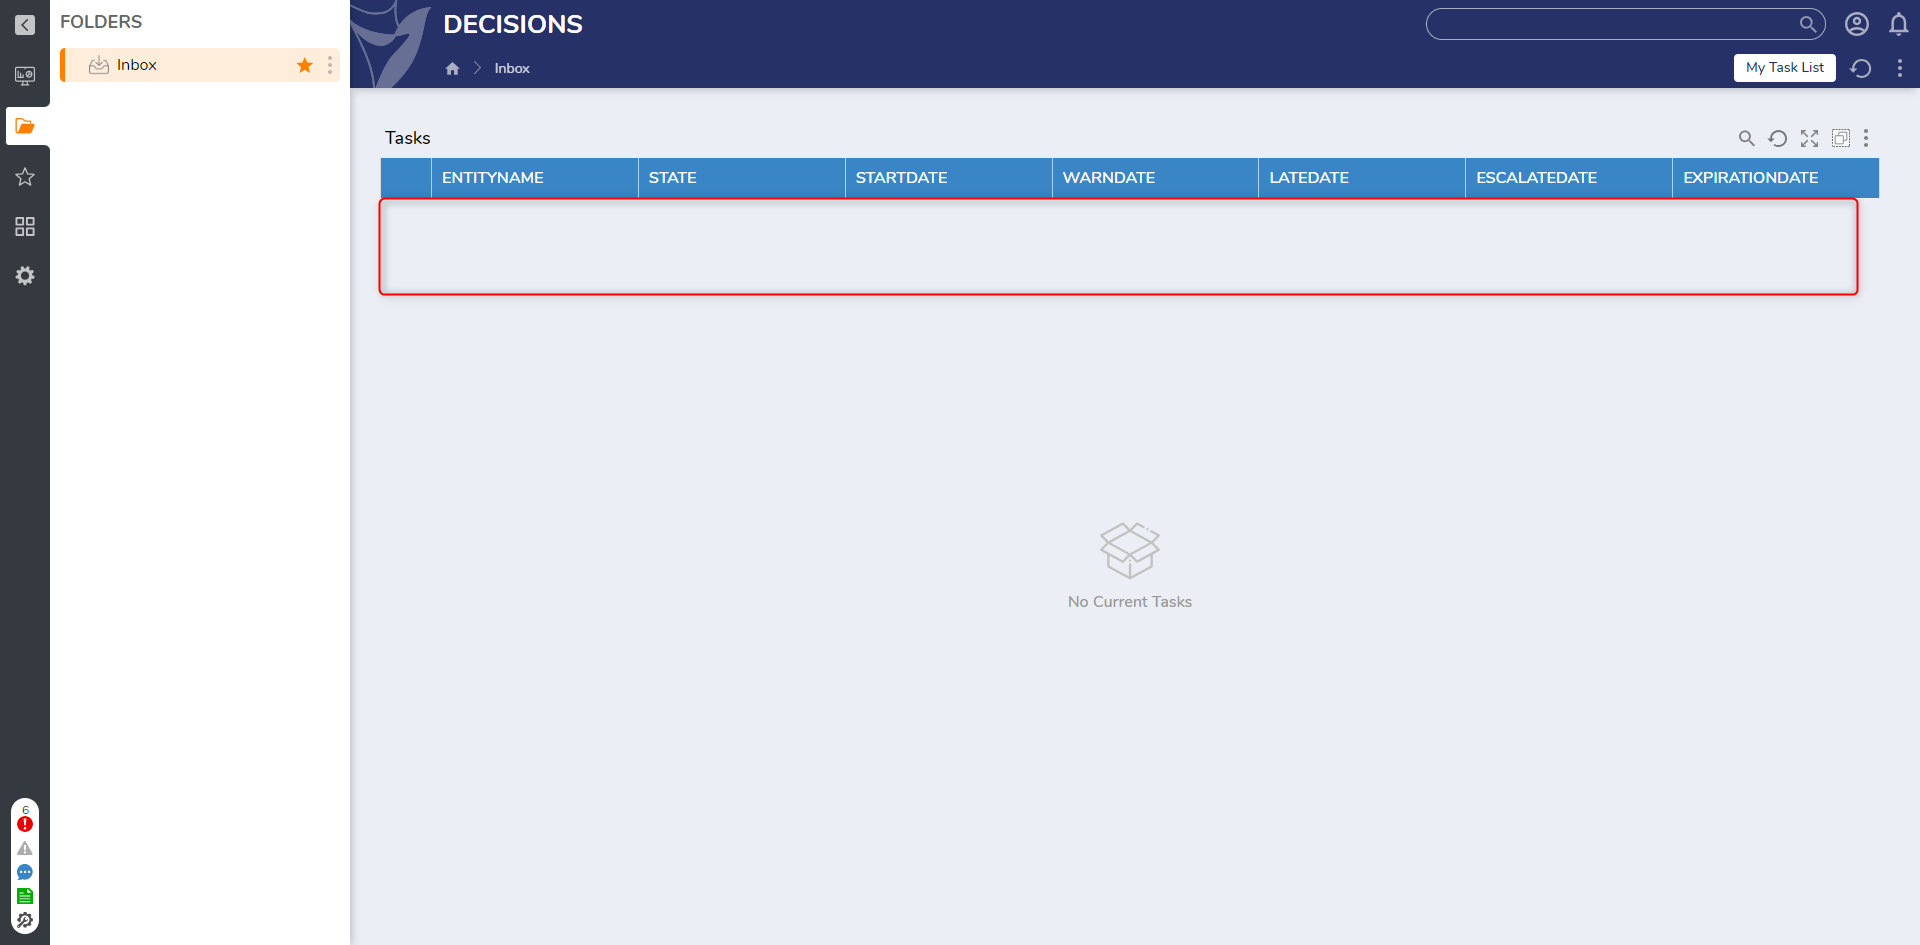
- After receiving the "ProcessFormAssignmentResponseResult": null Response, navigate to and refresh the Assignee's Inbox to confirm that the Assignment was completed via the API, and removed from the Inbox.
