Overview
The AutoComplete Property for Assignments allows the ability to send an Assigned Form down a separate path based upon user-established triggers and parameters.
In establishing such parameters, Assignments can be completed based on a set Timespan, without completion by the Assignee. This would be useful for tracking when Assignments aren't completed within an expected timeframe.
The following document demonstrates how to apply AutoComplete settings to an Assigned Form as a means of Assignment redirection.
Example
- From a Designer Project, CREATE a new Flow.
- From Toolbox > FAVORITE STEPS in the Flow Designer, attach a Show Form step to the Start step. Create a new Form.
- From the Form Designer, design a Form that allows for two separate Outcome Paths by adding two separate Buttons. For example purposes, these Buttons will be labeled "Approve" and "Deny".
Then Save and close the Form Designer.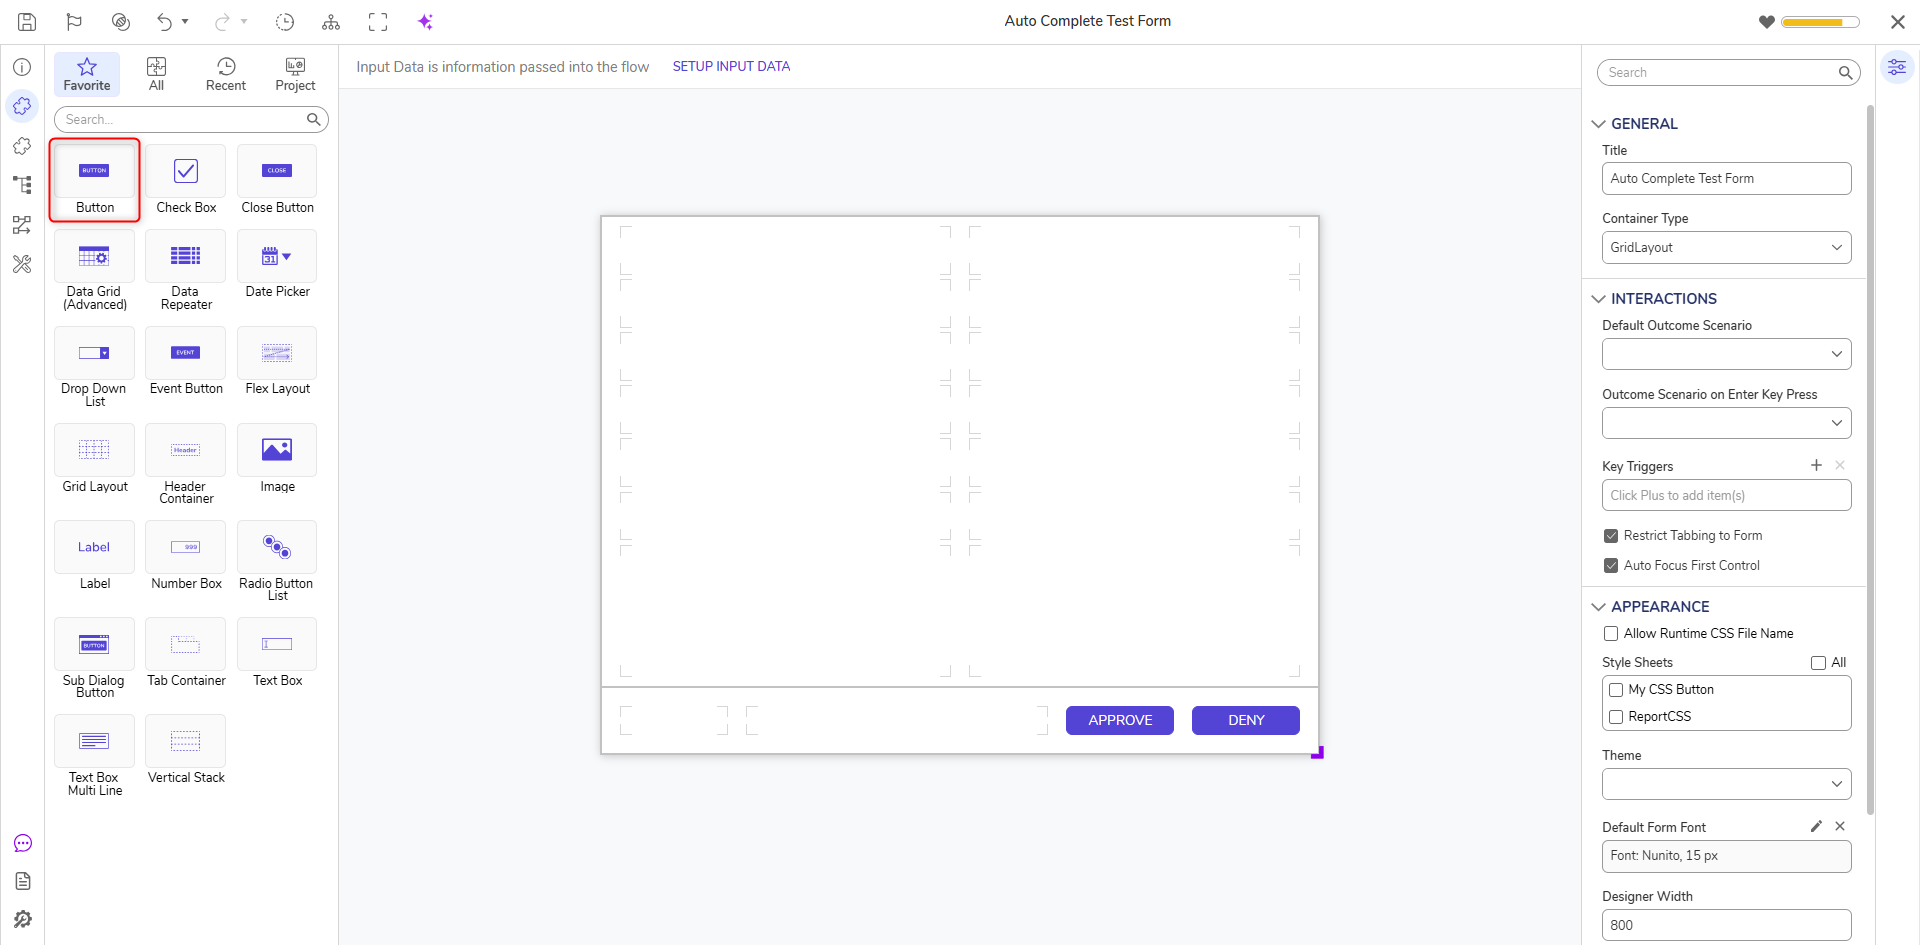
Back in the Flow Designer, connect both Outcome Paths to the End step.
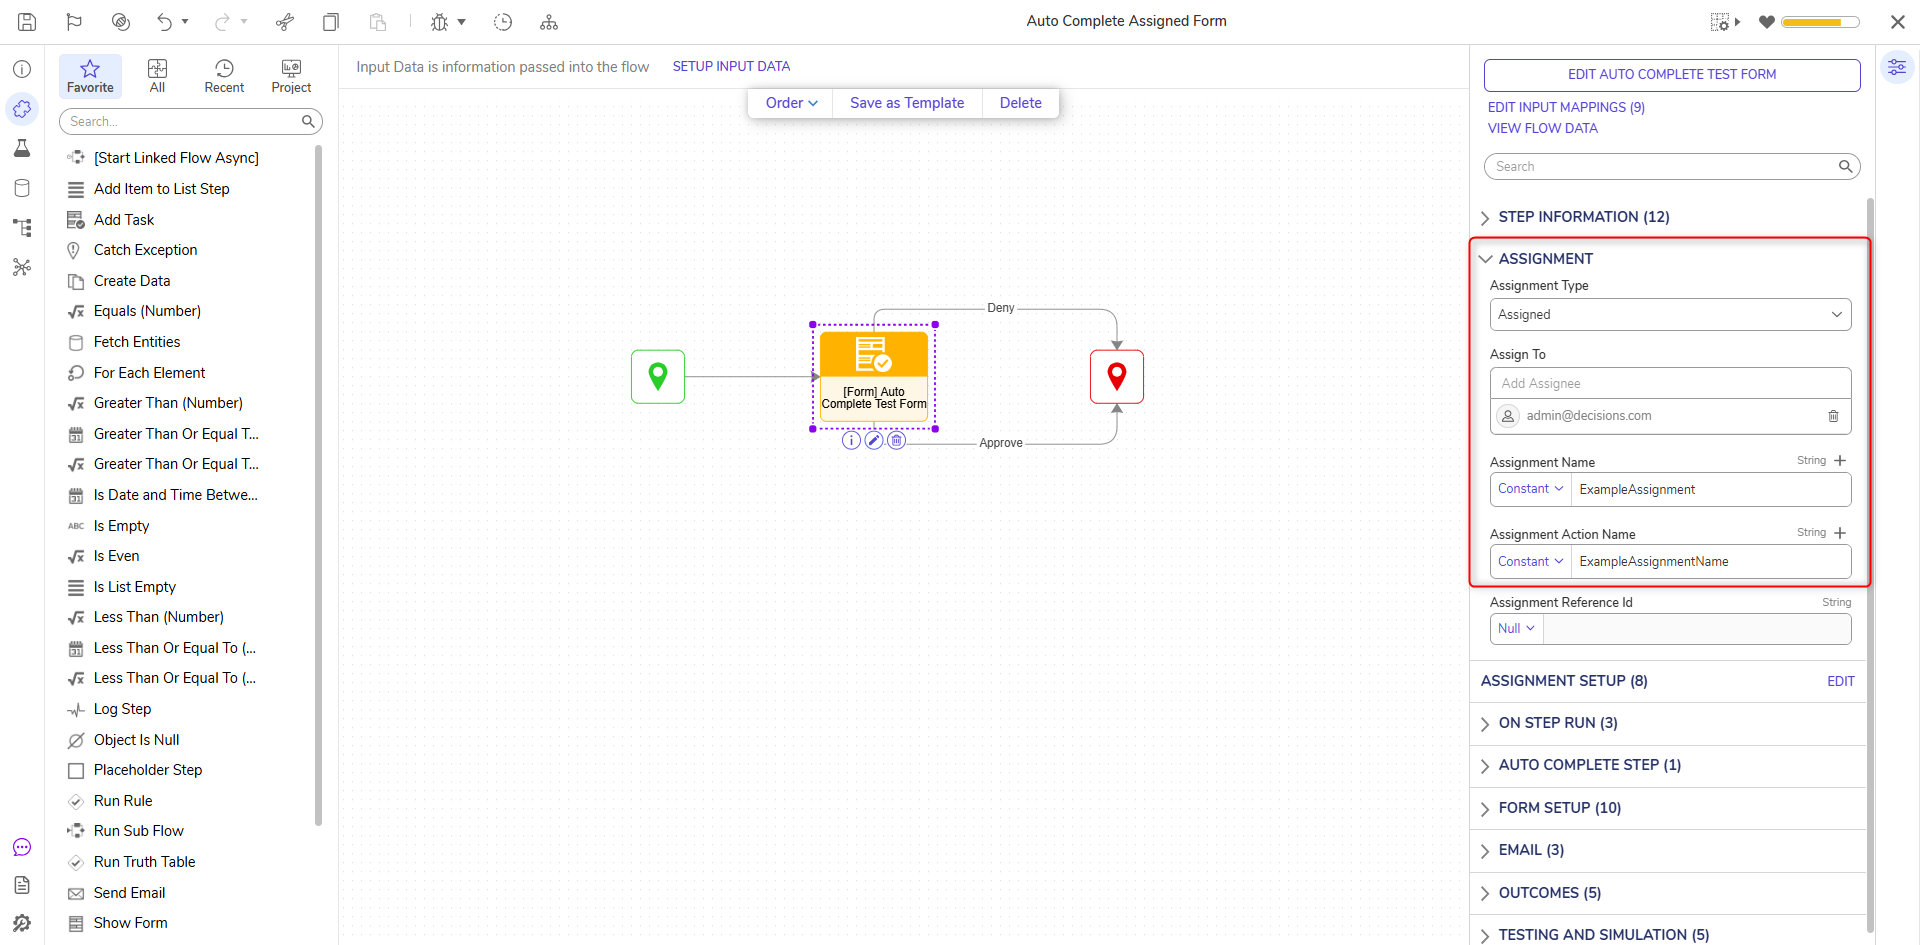
From the Properties tab of the Show Form step, under ASSIGNMENT, select an Assignment Type, and provide an Assignee (via Assign To), an Assignment Name. and an Assignment Action Name.
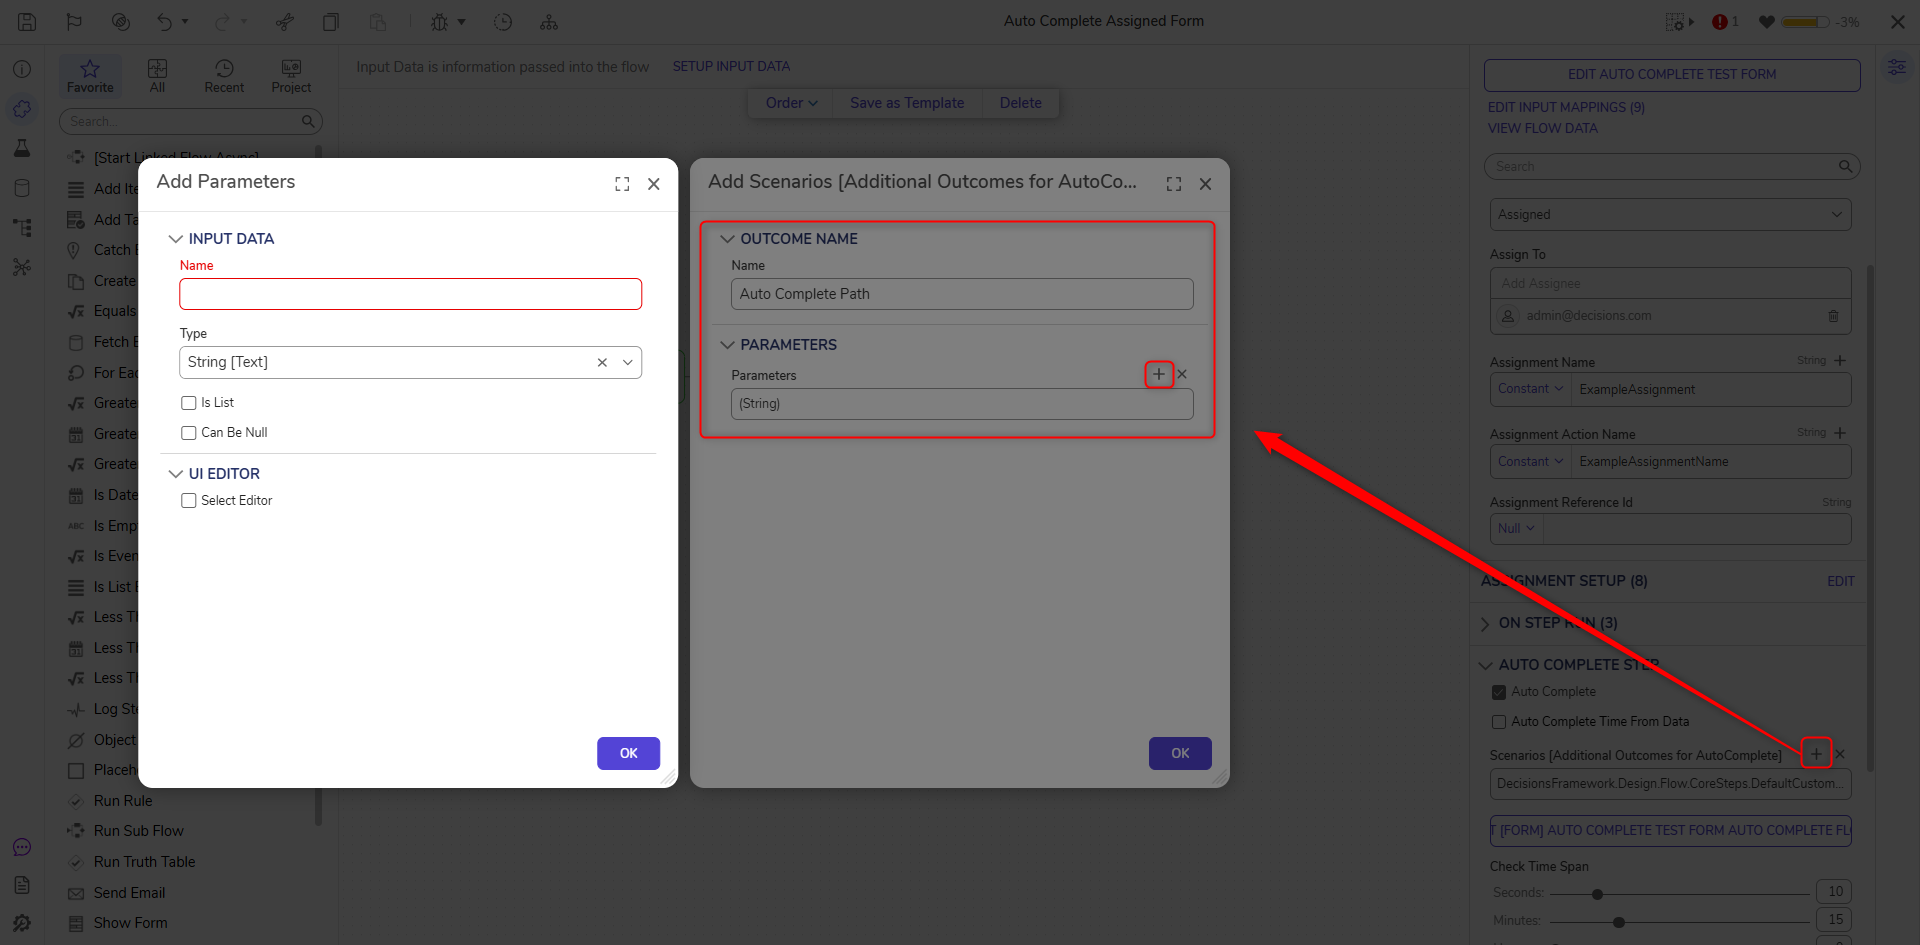
Scroll to and expand the AUTO COMPLETE STEP category, and enable Auto Complete. Then, set the desired timeframe via the Check Time Span sliders.

Under AUTO COMPLETE STEP > Scenarios, click ADD. In the resulting Add Scenarios window, provide an OUTCOME NAME, and if desired, add additional Output Data via ADDing Parameters. Then, click OK.
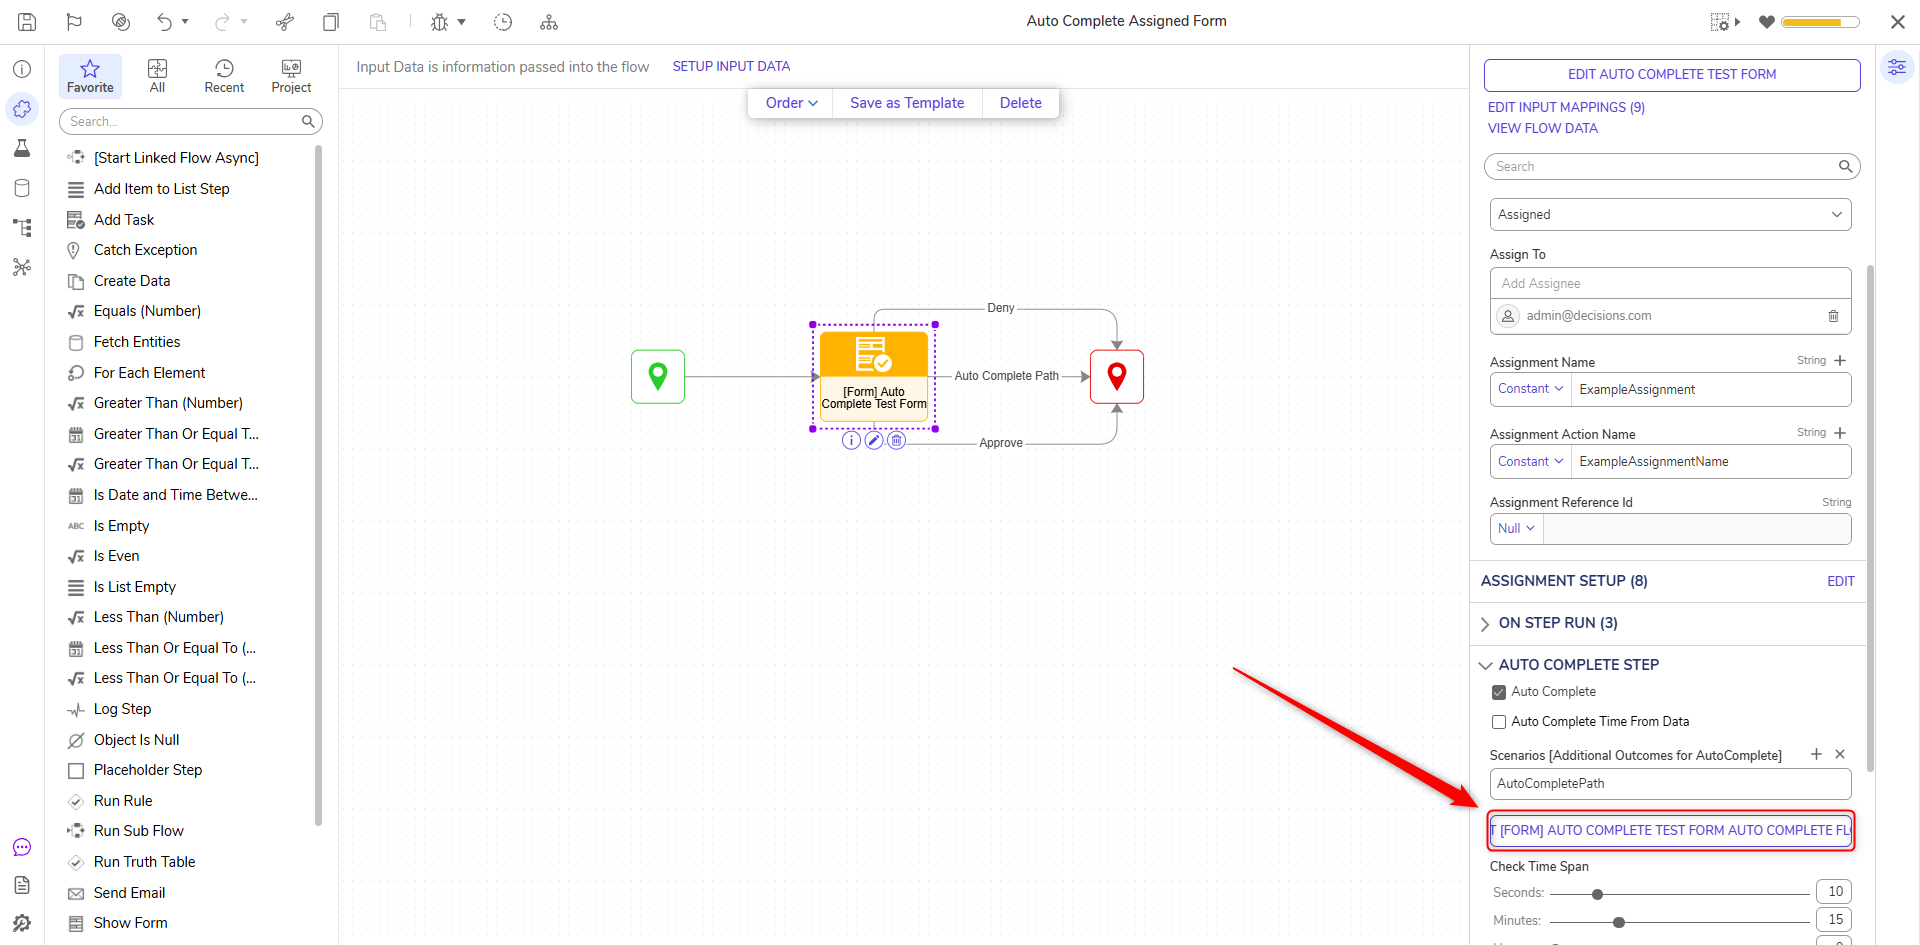
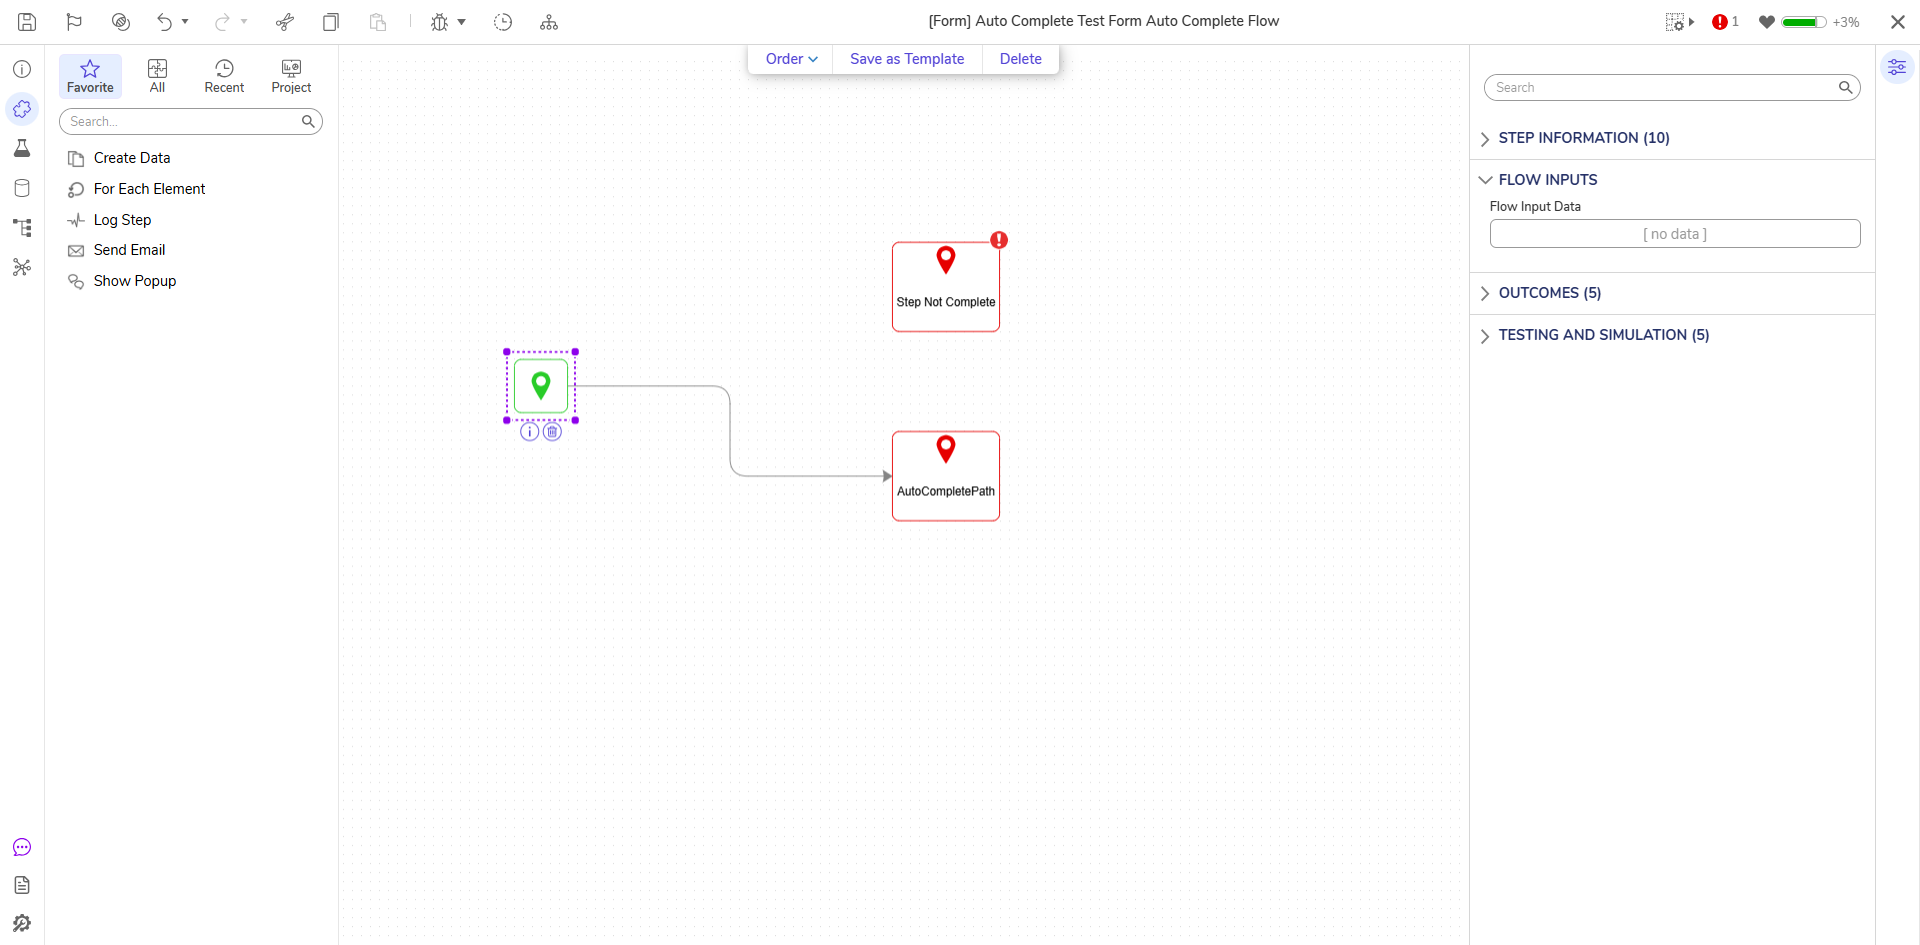
Connect the Auto Complete Path to the End step. Then from the AUTO COMPLETE STEP category of the Form step's Properties tab, click EDIT [FORM] AUTO COMPLETE FLOW.
In the resulting Flow Designer, connect the Done path to the AutoCompletePath step. If desired, configure any additional Flow logic, then Save and close the Flow Designer.
From the primary Flow, Save the Flow, then close the Flow Designer via X.
Debug
From the Flow Designer, select the Debug link from the Top Action Bar. Then, click START DEBUGGING.
Allow the Flow to run and wait the amount of time dictated in Check Time Span.
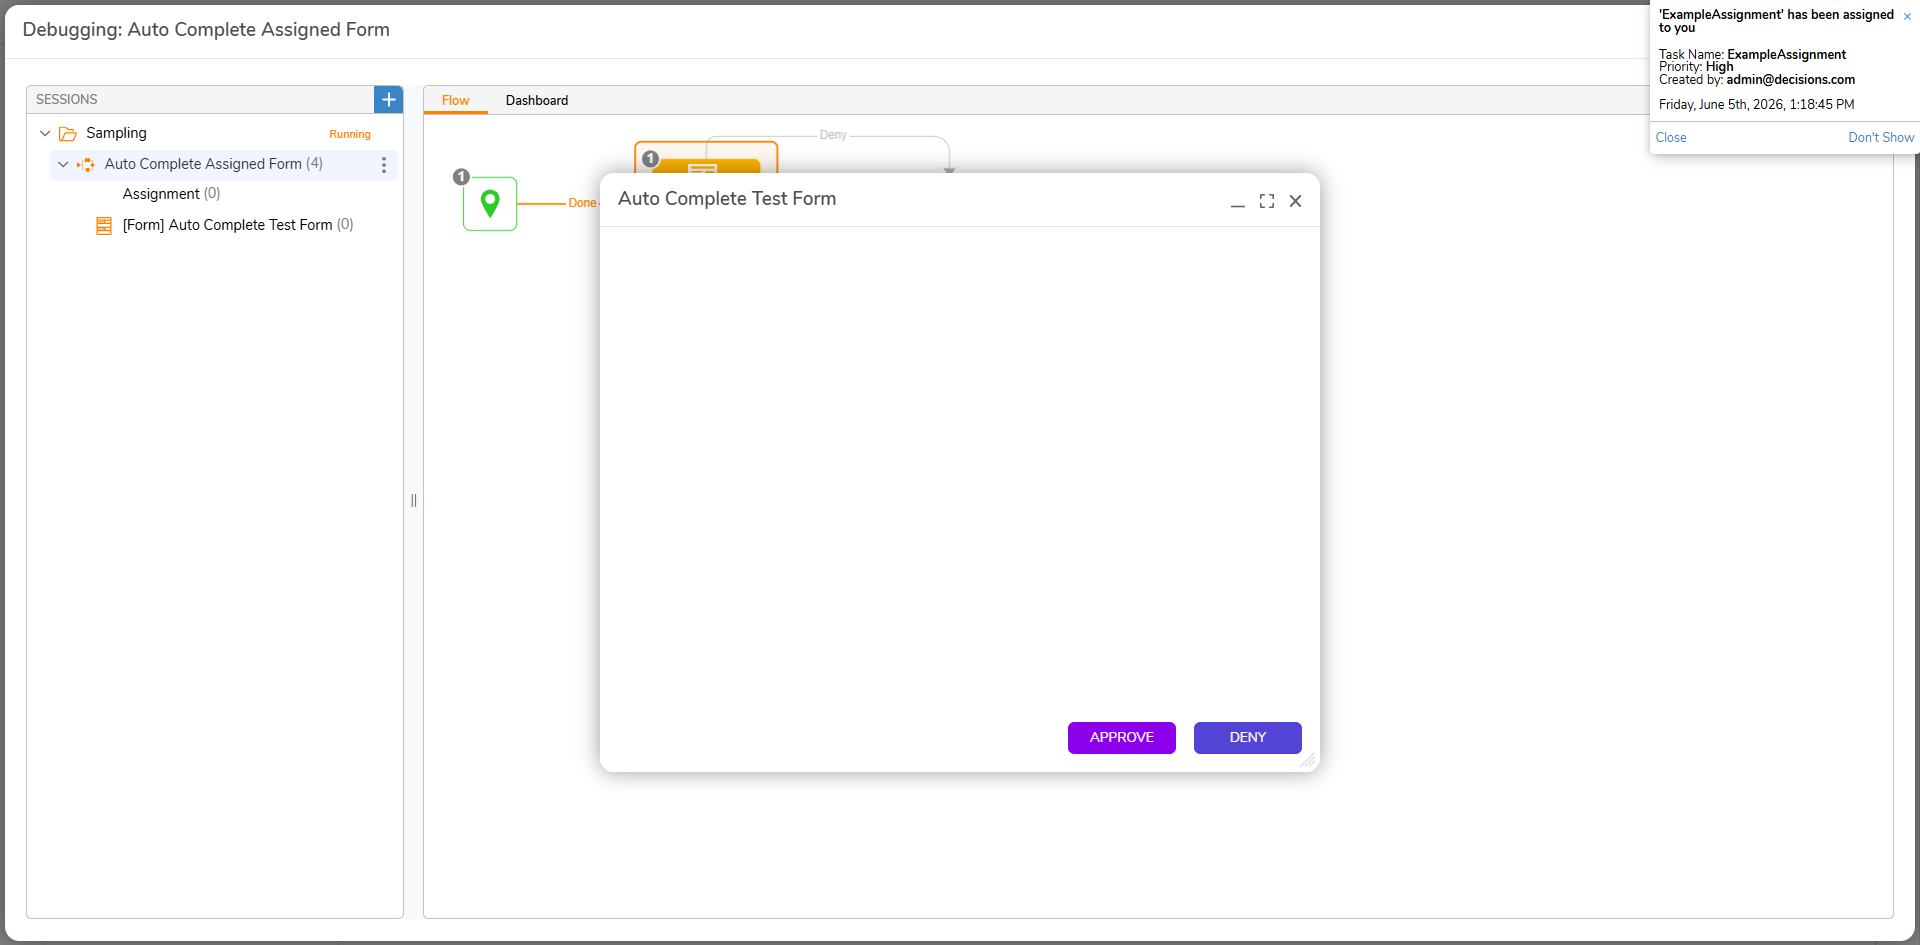
- Ensure that the Flow continues down the Auto Complete Path on its own.