Overview
Introduced in v9.5, the Check-In Wizard is designed to give Users the flexibility to decide what goes into one commit.
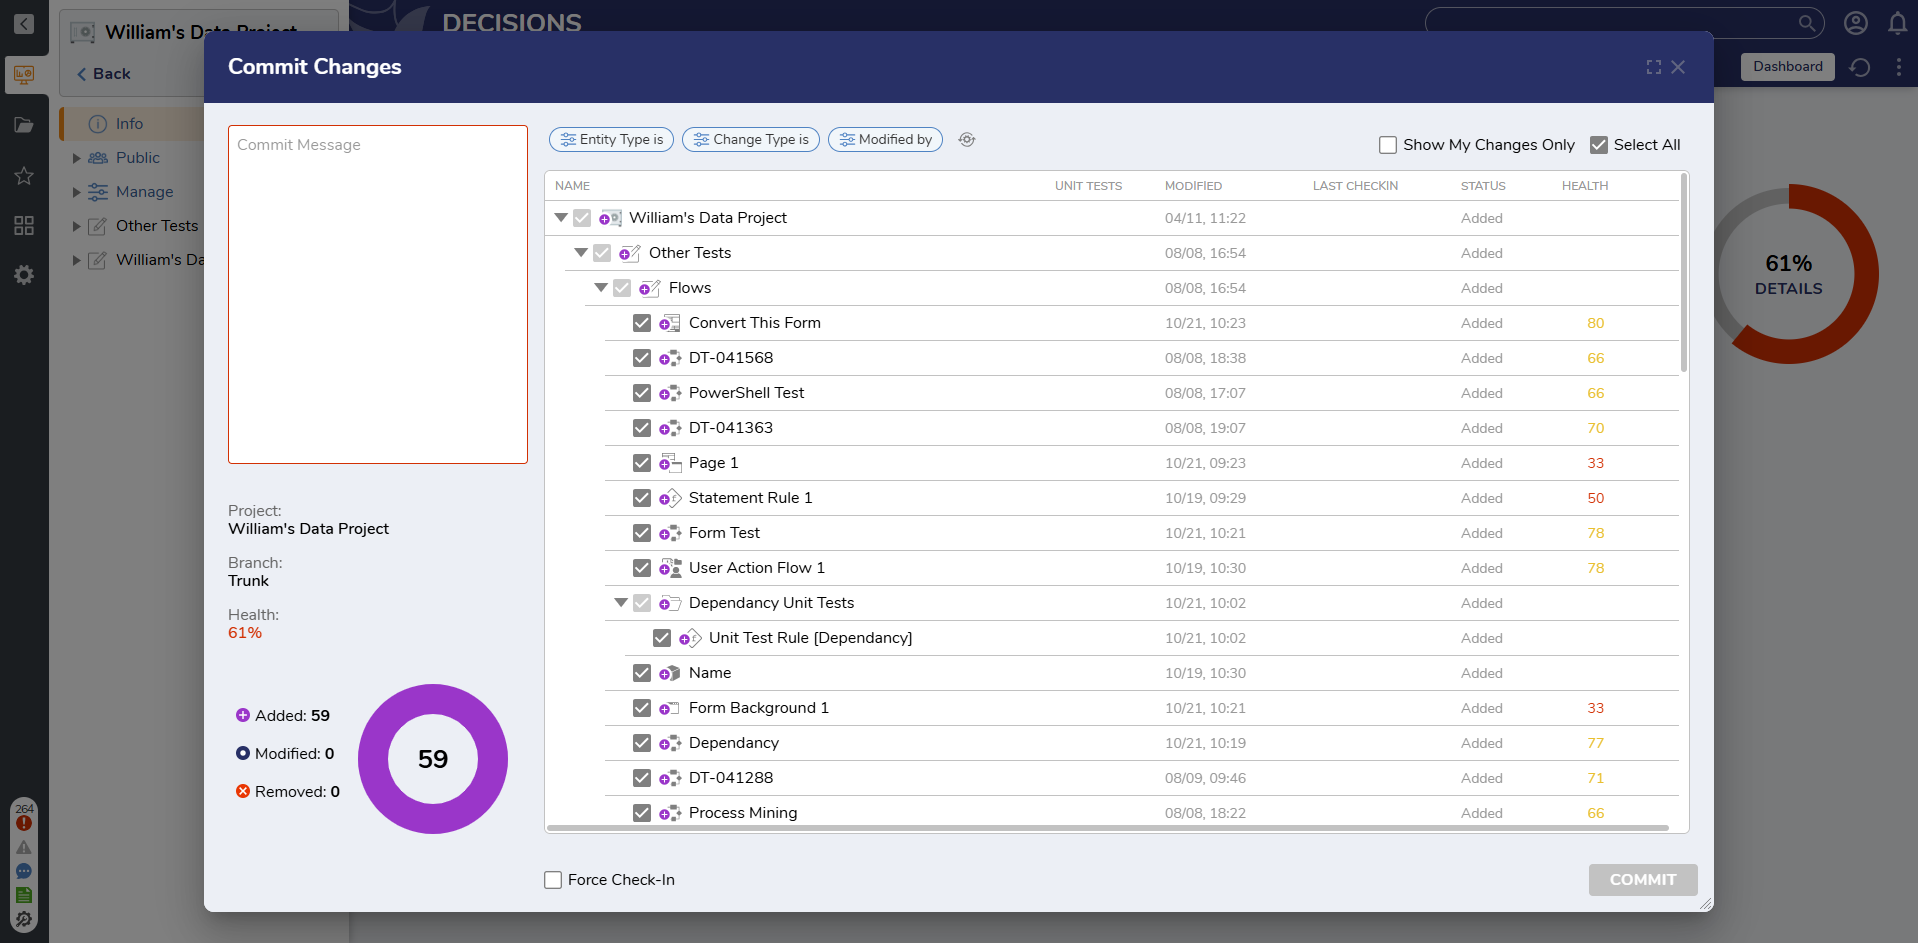
Check-In Wizard
The Check-In Wizard is available when a development server is connected to a repository server. Once that connection is made, each Project will have two icons that appear just under the Project's name.
 The icon with the up arrow will push the Project to the Repository. The down arrow will pull the Project to the development server. Pressing the up arrow icon will bring up the Check-In Wizard.
Left-Hand Side
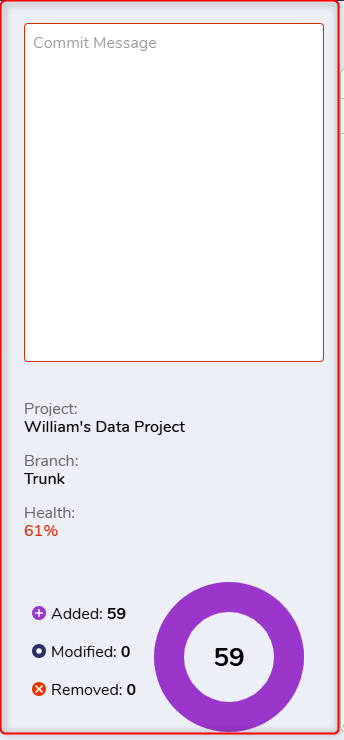
On the left of the wizard is a text box where Users can enter information about the commit.
Below that is the name of the Project being committed, the branch of that project, and the Project's current Health Score.
In the bottom left corner is a ring chart detailing the selected changes being made with this commit. Checking, or unchecking, designer elements will alter the number that appears.
| Icon | Description |
|---|---|
 | These are new additions to the Project. |
 | These are designer elements that have been changed since the last commit. |
 | These are designer elements that are being removed. |
Top
The top section of the wizard includes filters that control which designer elements are shown in the list.
The "Show My Changes Only" filter displays only the items the current user has created, modified, or deleted. Although this appears as a checkbox icon, it acts solely as a filter, it does not affect what is selected for commit. There is no one-click option to select all of a user's changes. However, users can uncheck "Select All", enable "Show My Changes Only" to filter their changes, and then click "Select All" again to select just those filtered items.
"Select All" is checked by default and includes all new, modified, and removed items. It is affected by any active filters and can be used to select only the currently visible (filtered) items.
If filters are active when the COMMIT button is clicked, a confirmation dialog will appear to inform the user that some items may be hidden and, as a result, might not be committed.
Middle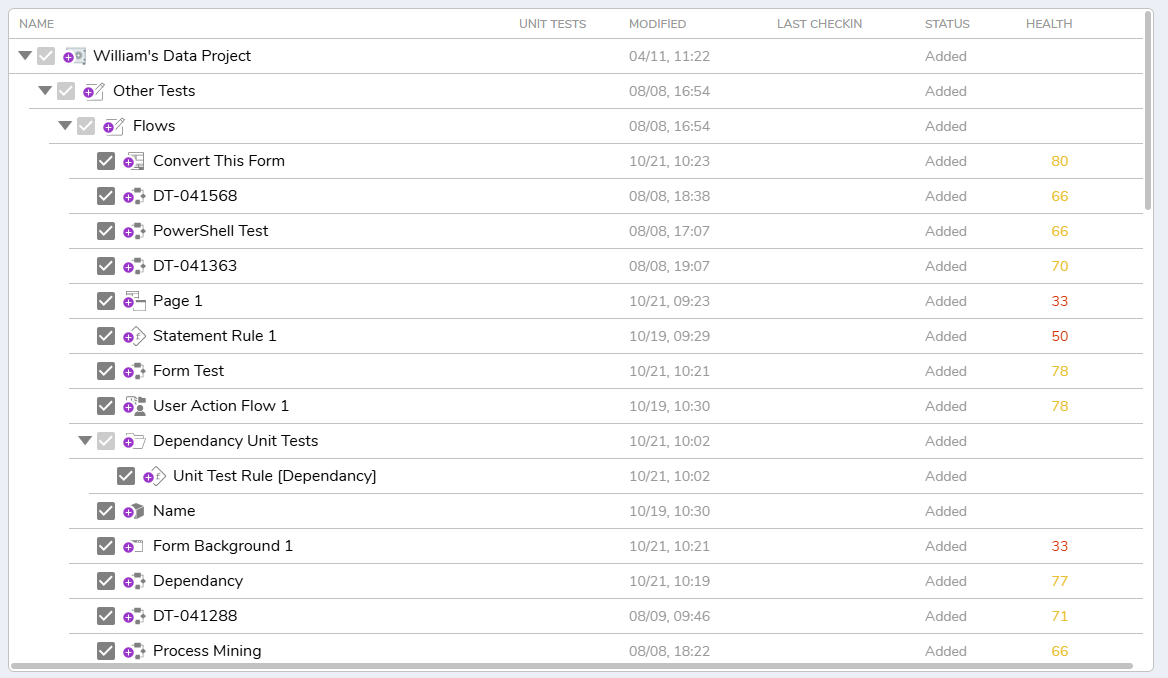
The middle portion of the screen has all the designer elements that are eligible for check-in with the commit. Elements with a grayed-out check box cannot be unselected. Typically these are Folders that contain elements that are being included in the commit.
Elements with a bright check box can be selected or deselected for inclusion in the commit. The type of change - added, modified, or removed is indicated on the icon next to the name of the designer element. The kind of element is also indicated by the icon next to its name.
If the element has an associated Unit Test, that will appear in the second column.
The last date and time the element was modified appears in the third column.
The element's last check-in date and time appears in the fourth column.
The fifth column has the status of the element - added, modified, or removed.
The last column is the Health score of the specific element.
Bottom

At the very bottom of the wizard are two more buttons.
"Force Check-In" will cause elements to be included in the commit even if there are errors.
The COMMIT button will push all of the selected designer elements to the Repository and close the wizard.
Feature Changes
| Description | Version | Release | Developer Task |
|---|---|---|---|
| Added the Check-In Wizard | 9.5 | November 2024 | [DT-041550] |
| Warning Dialog on Commit if Filters Are Applied | 9.11 | May 2025 | [DT-043971] |