Overview
The Advanced Data Grid is a form control used to display and interact with lists of data, like a table or spreadsheet.
Each row represents a single item (such as an Account, Contact, or custom object), and each column shows a field or property of that item (like Email, Status, or Department). What makes this grid “advanced” is the level of flexibility it offers compared to the standard Data Grid control: instead of manually adding columns one by one, configure the grid using a Report Designer.
This means designers can do things like:
- Easily choose which fields to show.
- Add calculated or grouped columns.
- Enable sorting, filtering, and other Report-specific behavior.
You can also control whether users can select rows, edit data directly in the grid, or simply view the information. The Advanced Data Grid is designed to handle dynamic, interactive data in a clean, user-friendly way.
Configuration
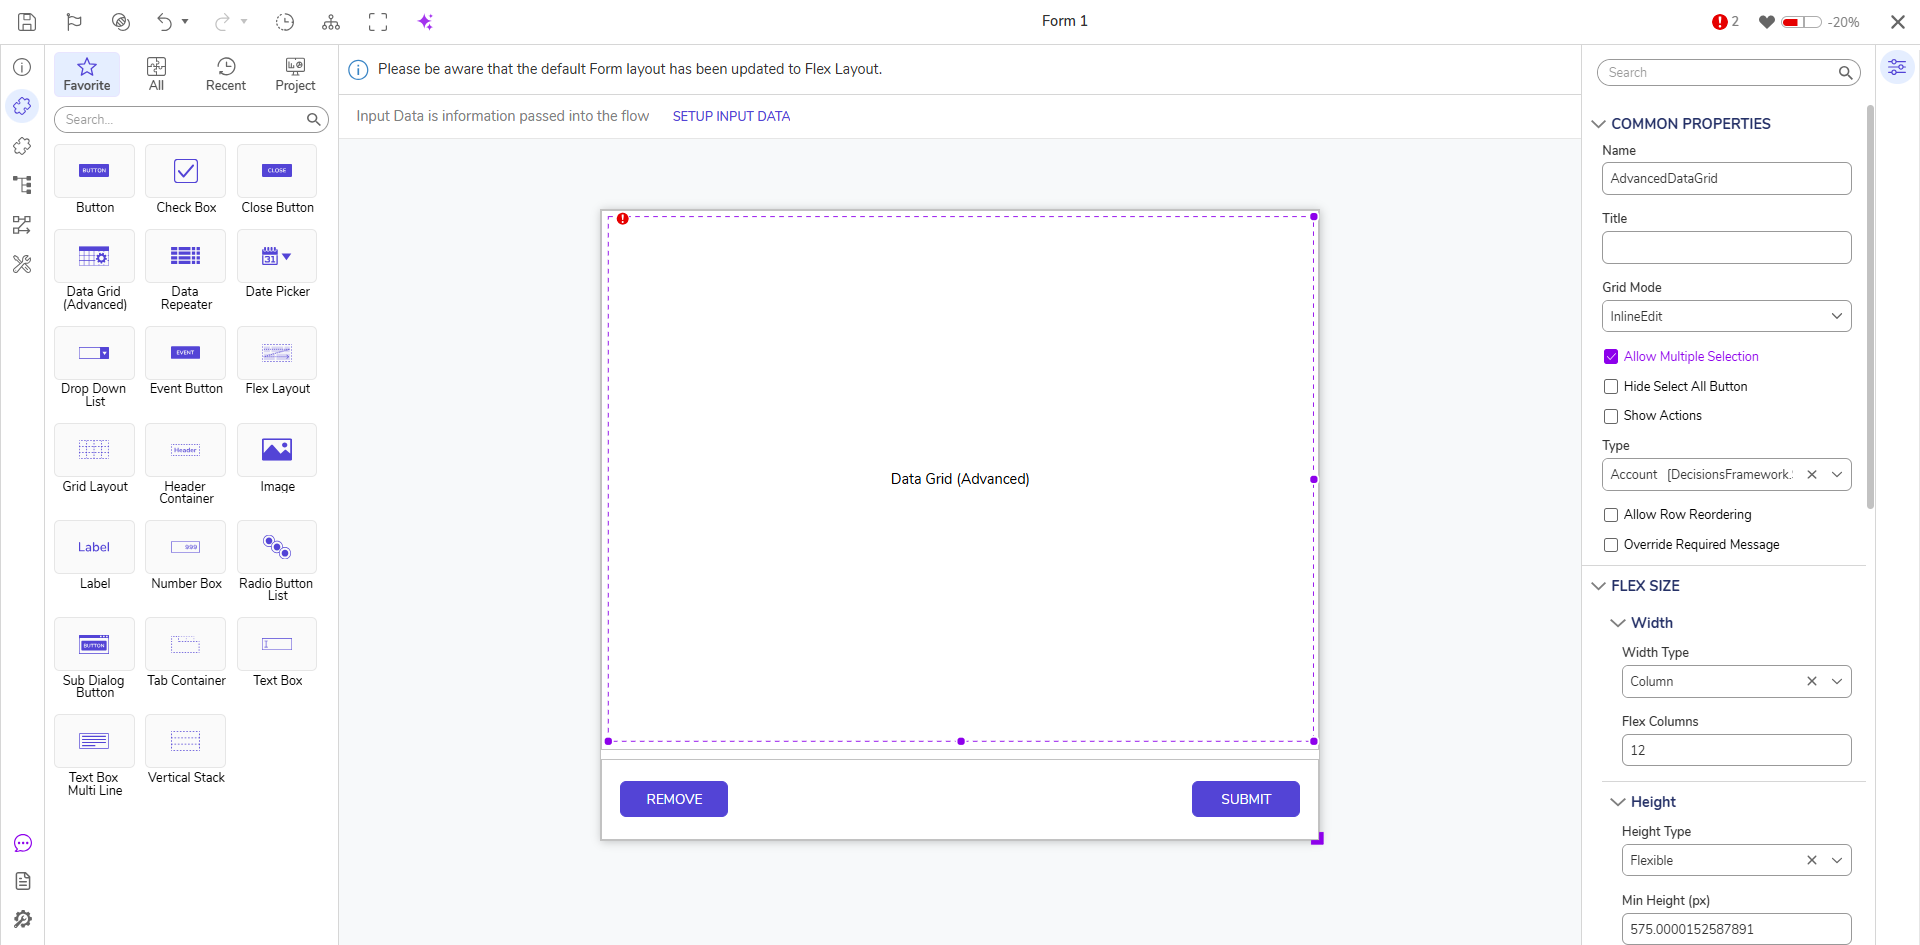
Common Properties
| Setting | Description | |
|---|---|---|
| Name | The internal name of the control. This is how the control is referenced in Active Form Flows and other configuration areas. | |
| Title | Title displayed above the grid, similar to a title in a Report Viewer. | |
| Grid Mode | Controls how users can interact with the grid. | |
| InfoOnly | Default mode. Grid is read-only and used for display purposes only. No output is generated. | |
| SingleSelect | Allows the user to select a single row. The selected row is passed as output. | |
| MultipleSelect | Allows selection of multiple rows. The selected rows are passed as output. | |
| InlineEdit | Allows users to edit data directly within the grid. Data is not saved automatically; designers must use the grid’s output to persist changes elsewhere. This mode also supports single and multiple selections. | |
| OutputAll | Outputs all rows of data in the grid, regardless of user interaction. | |
| Allow Multiple Selection *Only available for InlineEdit Grid Mode | Enables multi-row selection in InlineEdit mode. | |
| Show Actions | Enables right-click context menu actions at runtime (e.g., View, Edit, Delete, etc.). Action visibility can be managed with Entity Action Visibility. Additionally, actions can be overridden with the Overriding Action Context on Reports setting. | |
| Show Delete Action | Displays a delete option in the context menu when the grid loads at runtime. | |
| Type | Select the data source that will populate the grid. | |
| Allow Row Reordering | When the set to true setting allows the end user to reorder the rows within the Adv. Data Grid: This setting disables the ability to group and sort columns. The output of the control will be the newly sorted order. | |
| Override Required Message | Custom message shown when a required grid has no row selected. | |
Input
| Setting | Description |
|---|---|
| Input Data Name | The name of the input variable used to pass data into the grid from the flow. |
Input Data
| Setting | Description |
|---|---|
| Add Button | Assign a Data Grid Add Button to launch a Property Grid for adding a new row. |
| Remove Button | Assign a Data Grid Remove Button to remove the selected row(s) from the grid. |
| Select All Items *Only available for MultipleSelect Grid Mode | Pre-selects all rows when the form loads. |
| Select Default Item(s) | Enables pre-selection of one or more default rows. |
| Select Default Item(s) Data Name | Data name used to identify the default row(s) to pre-select. |
Output
| Setting | Description | |
|---|---|---|
| Output Data Name | Name of the variable that will store the output data. | |
| Output Removed Items | Enables outputting any rows that were removed by the user at runtime. | |
| Output Removed Items Data Name | Name of the variable storing removed items, if enabled. | |
| Output Selected Item(s) *Available for Single and Multi Select, and Inline Edit Grid Modes | Enables outputting selected row(s) from the grid. | |
| Output Selected Item(s) Data Name | Name of the variable storing selected row(s), if enabled. | |
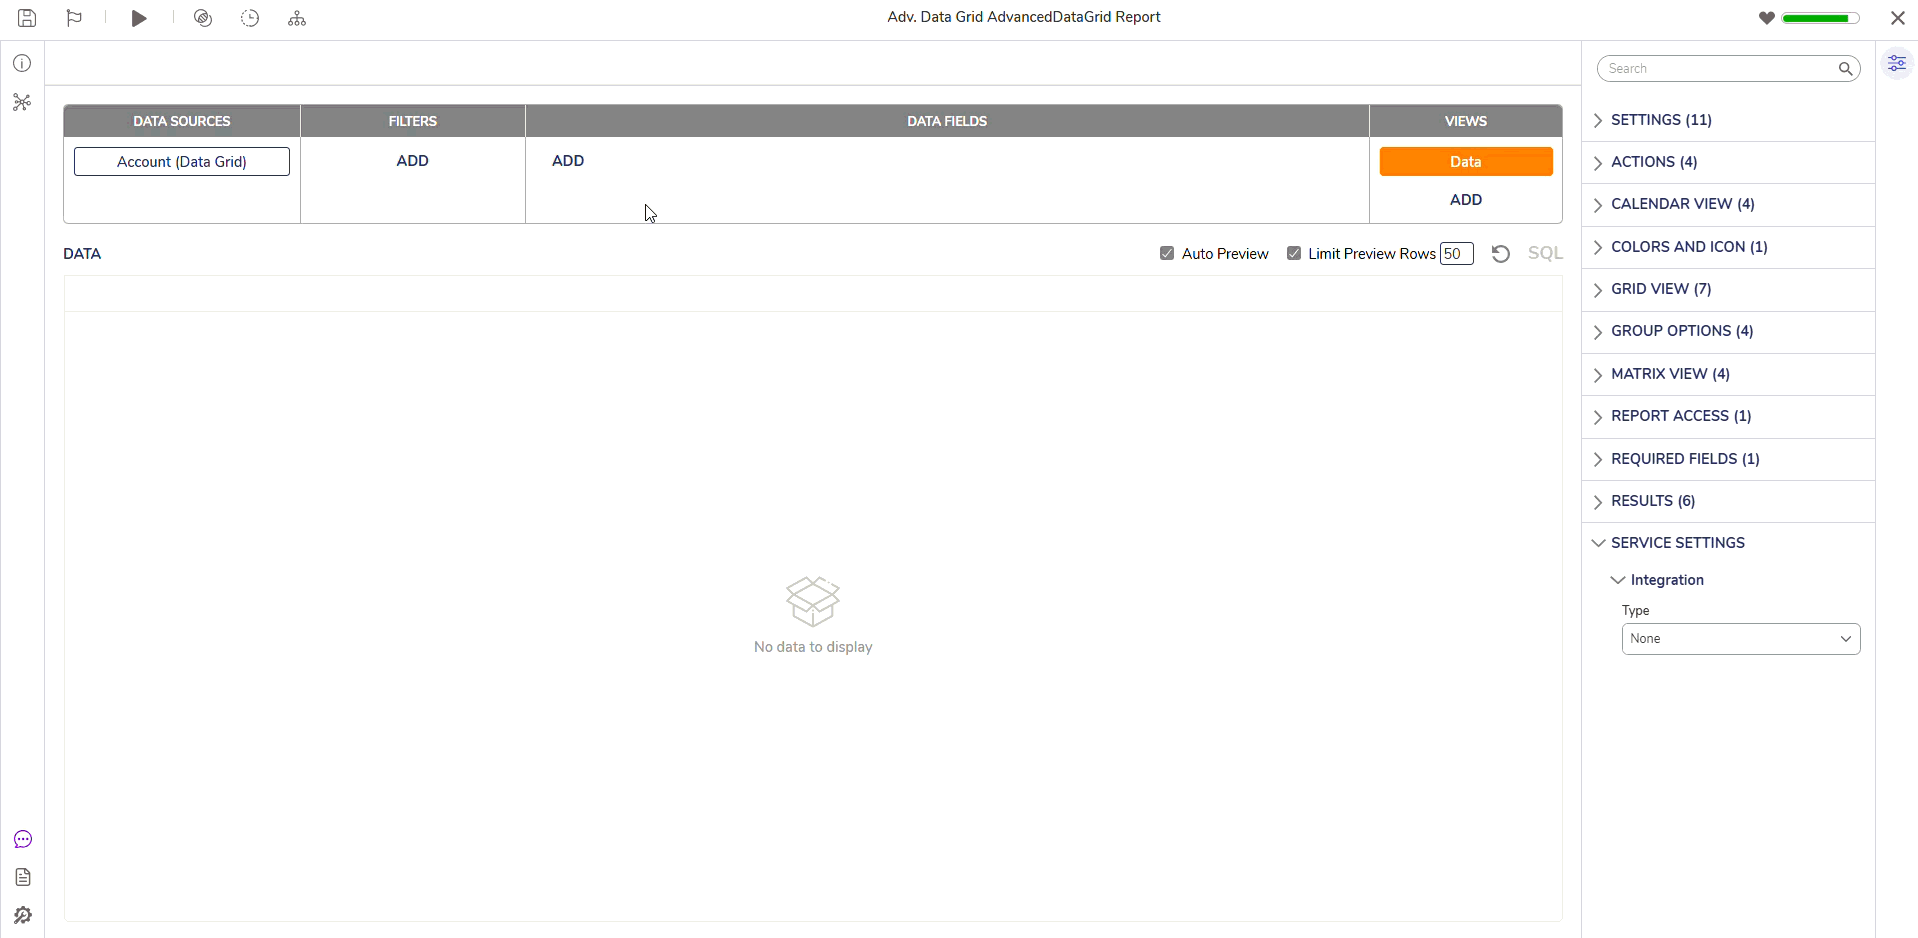
Source
| Setting | Description |
|---|---|
| Edit [Form Name] AdvancedDataGrid Report | Opens the Report Designer used to configure the columns, formatting, and behaviors of the Advanced Data Grid. For InlineEdit mode, make sure the columns you want to allow editing on have Can Edit = True. |
Accessibility
Users can navigate and interact with the search bar, refresh, action menu (three‑dot menu), and inline Run Flow fields using Tab, Enter, and Space. 
Example
- Create a Flow. In the Flow Designer, after the start step, add a Fetch Entities step to fetch a list of Accounts.
- After the Fetch Entities step, add a Show Form step to create a Form.
- Add an Advanced Data Grid control to the Form.
- In the Controls Properties Panel:
- Set the Grid Mode to InlineEdit.
- Set Allow Multiple Selections to True.
- Set the Type to Accounts.
 In the Source section, click Edit [Form Name] AdvancedDataGrid Report to open the Report Designer:
- Confirm that Accounts is selected as the data source.
- Add only the Email and Department columns.
- For the Department column, enable Can Edit.
- Save and close the Report Designer to return to the Form Designer.
- (Optional) Add Data Grid Add and Remove Buttons to allow row additions or subtractions at runtime.
- Set the Output Data Name to UpdatedAccounts to capture edits made at runtime.
- Set Output Selected Item(s) to True if needed for downstream logic.
Debug
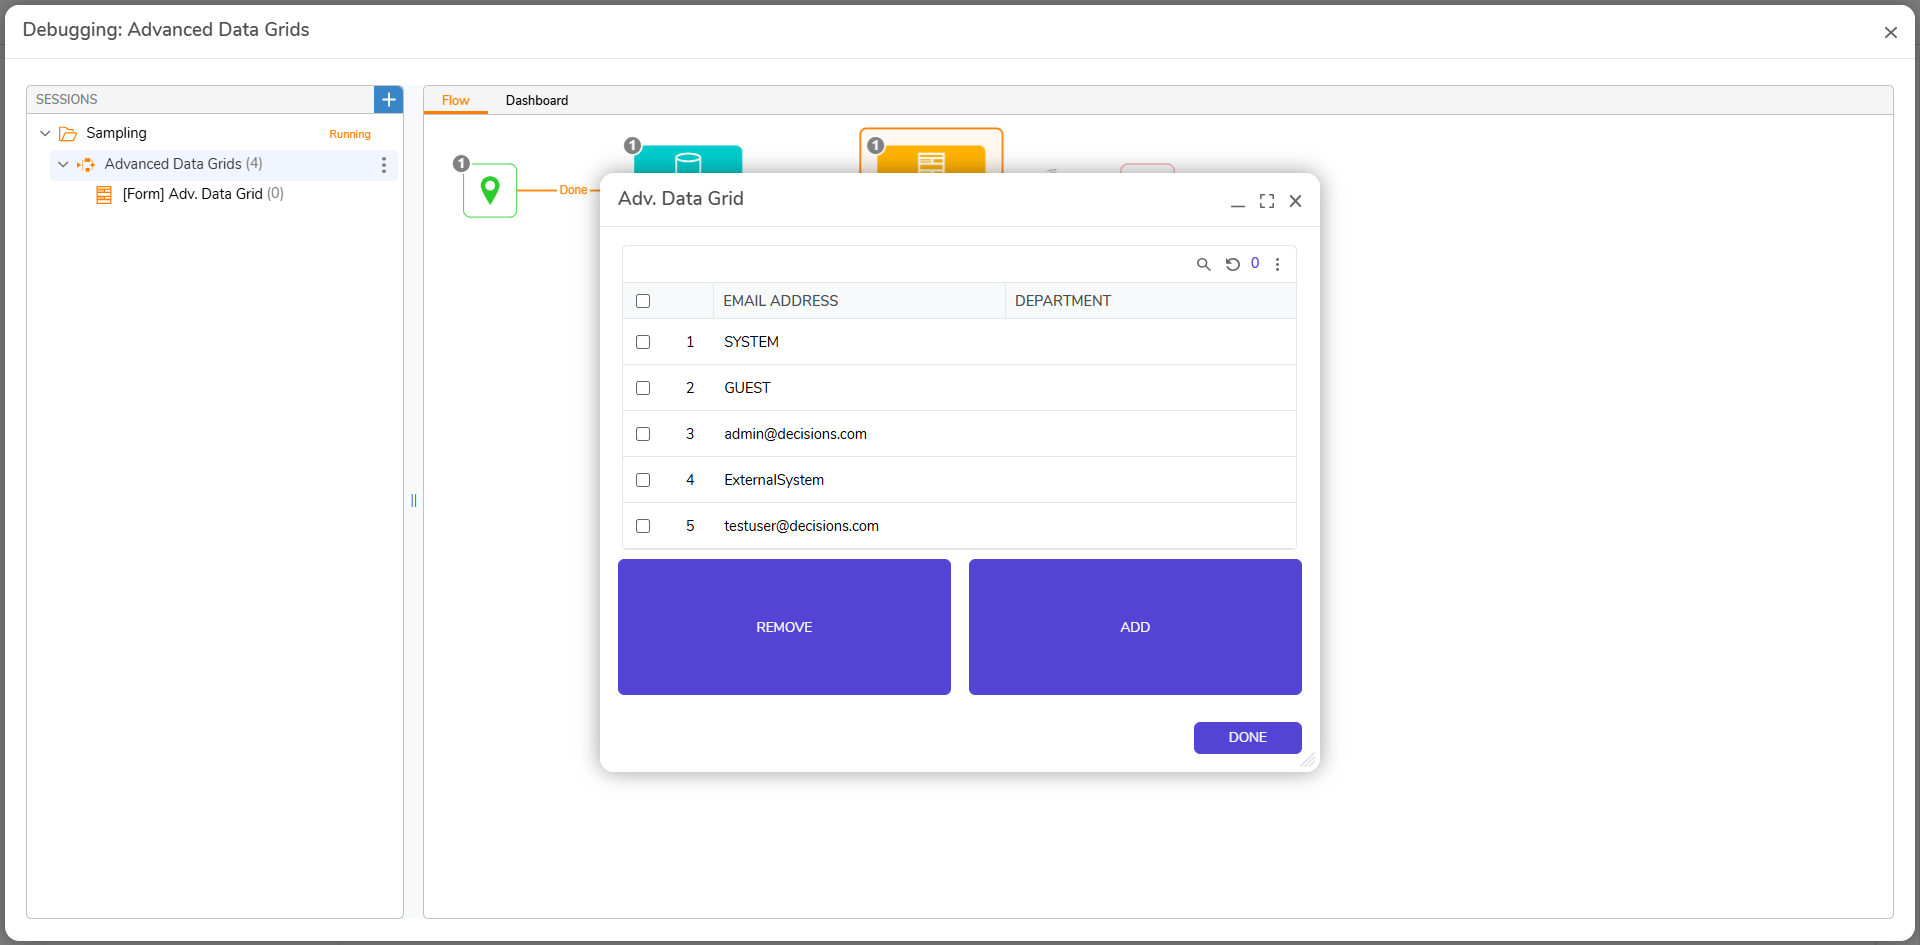
- In the Flow Designer, click Debug.
- When the form loads, the Advanced Data Grid will display a list of Accounts fetched from the Fetch Entities step.
- Users can edit the Department column directly within the grid. Changes will be available in the UpdatedAccounts output variable.
Feature Changes
| Description | Version | Release | Developer Task |
|---|---|---|---|
| Added the 'Hide Select All Button' setting for Multiple Select Grid Mode. | 9.4 | November 2024 | [DT-041893] |
| Moved the Advanced Data Grid control under the Data Grid subsection of Data in the Toolbox. | 9.7 | February 2025 | [DT-037637] |
| Allow Single and Multi-Select when Inline Edit is the chosen Grid Mode | 9.14 | August 2025 | [DT-044067] |
| Added the Allow Row Reordering setting. | 9.16 | October 2025 | [DT-044831] |
| Added keyboard accessibility for Advanced Data Grid properties, allowing Users to navigate and interact with the search bar, refresh, action menu (three‑dot menu), and inline Run Flow fields using Tab, Enter, and Space. | 9.23 | April 2026 | [DT-047139] |