Overview
User stories represent discrete units of work that are typically assigned to developers by users with administrative permissions in Decisions, often project leads granted such access. These are used to plan, track, and complete development tasks, such as building flows, forms, or tests, and are directly tied to the deployment process. Each story provides a structured container for tracking progress, ensuring changes are validated, and organizing work within broader project timelines.
All user stories reside under Projects, which are identified by a unique prefix (e.g., LOD-0001). This prefix helps keep story identifiers unique across the platform. Stories are organized within Sprints, providing a time-boxed view of upcoming or in-progress work, and are associated with Builds, which package the changes for testing and deployment.
The purpose of a user story is twofold:
- For admins: To assign work, capture requirements, and track progress.
- For developers: To receive clear instructions, carry out tasks, and ensure changes are associated with deployments.
Attributes
Each user story includes a set of core attributes that help define the scope of work and track its progress through development:
- Title: A brief, clear name for the story.
- Description: A detailed explanation of the work to be done or the problem to be solved.
- Priority: Indicates the importance or urgency of the task (e.g., Urgent, High, Medium, Low).
- Due Date: The target completion date for the story.
- Estimated Time to Completion: An estimate (in hours) for how long the work is expected to take.
- Assigned To: Each story is assigned to a single developer.
- Acceptance Criteria: Describes what must be true for the story to be considered complete.
- Completion Criteria: Clarifies the definition of “done” from a delivery standpoint.
- Include in Current Deployment (optional checkbox): When selected, includes the user story in the current deployment package.Important NoteOnce "Include in Current Deployment" is set to True and the user story is saved, it cannot be removed from the current Deployment Package. This flag is synced with the Deployment Server and is non-reversible within the current cycle.
These attributes ensure alignment between the stakeholders who assign the work and the developers who execute it.
Deployment Integration
User stories are created and managed on the Development Server and automatically synced with the Deployment Server to ensure traceability and alignment with deployment pipelines.
If the “Include in Current Deployment” checkbox is selected either during story creation or editing and the user story is subsequently checked in to the Deployment Server, a build will be automatically generated on the Deployment Server within the associated Deployment Package.
This automation streamlines deployment planning by ensuring that completed and approved work is automatically packaged for validation, testing, and release.
Requirements
User stories rely on a few foundational elements:
- Projects and Prefixes: Every story belongs to a Project that defines a unique prefix.
- Sprints: Stories can be grouped into Sprints for iterative progress tracking.
- Builds: Completed work is included in builds for validation and deployment across environments.
Creating User Stories
There are three primary methods to create user stories:
Manual Creation
Stories can be created one at a time through the platform UI:
- Navigate to the Development folder, click on the Sprints section, and select the Sprint where the user story should be added.
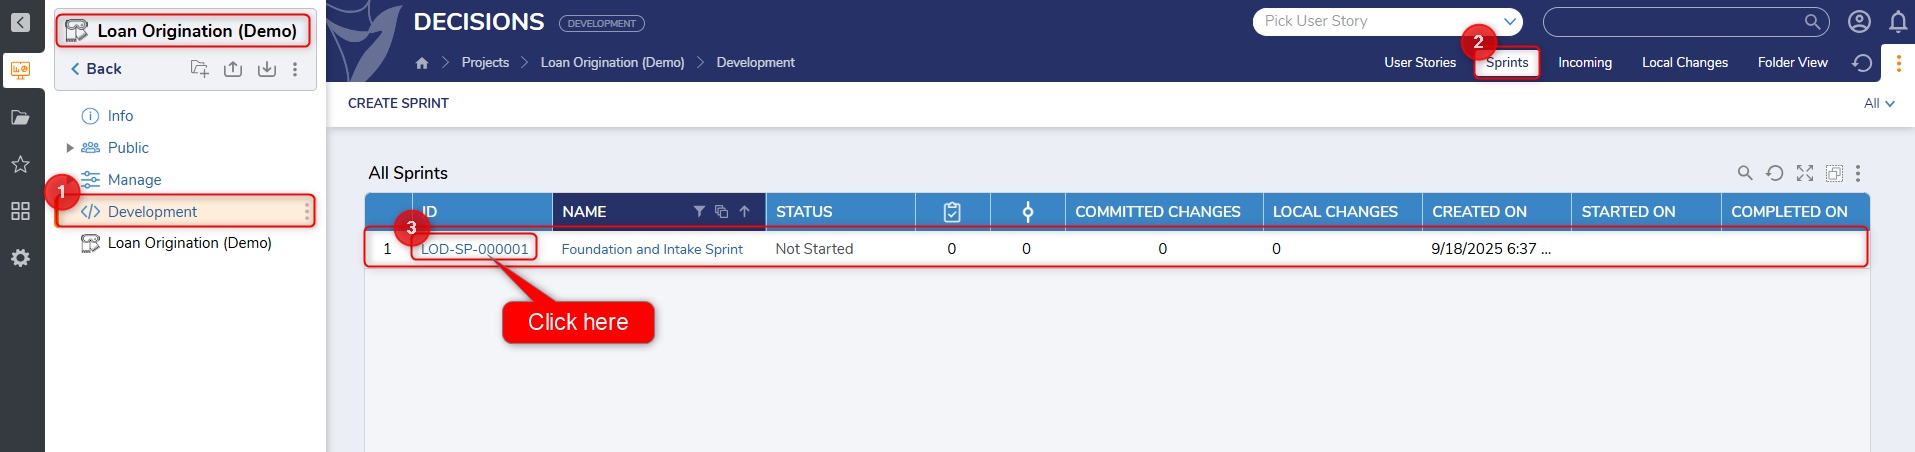
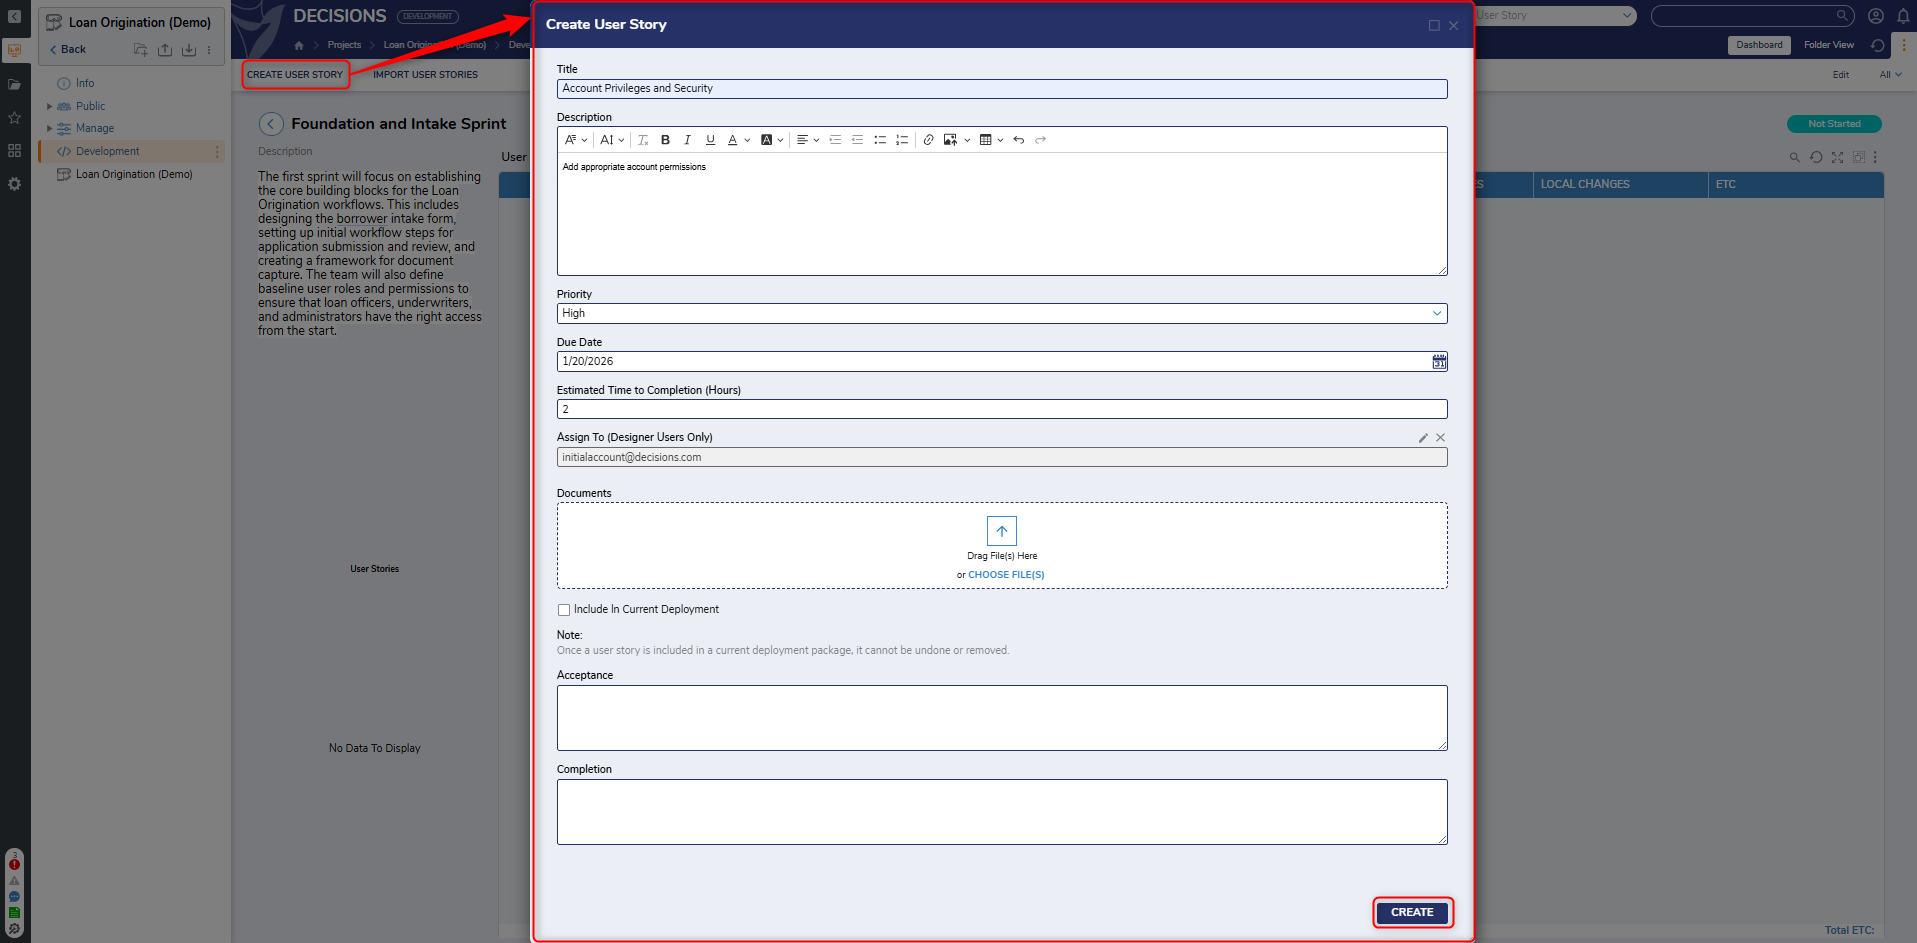
- Click Create User Story.
- Fill in the following details:
- Title
- Description
- Priority
- Due Date
- Estimated Time to Completion (in hours)
- Assign To
- Documents (optional): Attach supporting files while creating the user story, when applicable.
- Include in Current Deployment (optional checkbox)
Bulk Import
Multiple user stories can be created simultaneously using a CSV import wizard:
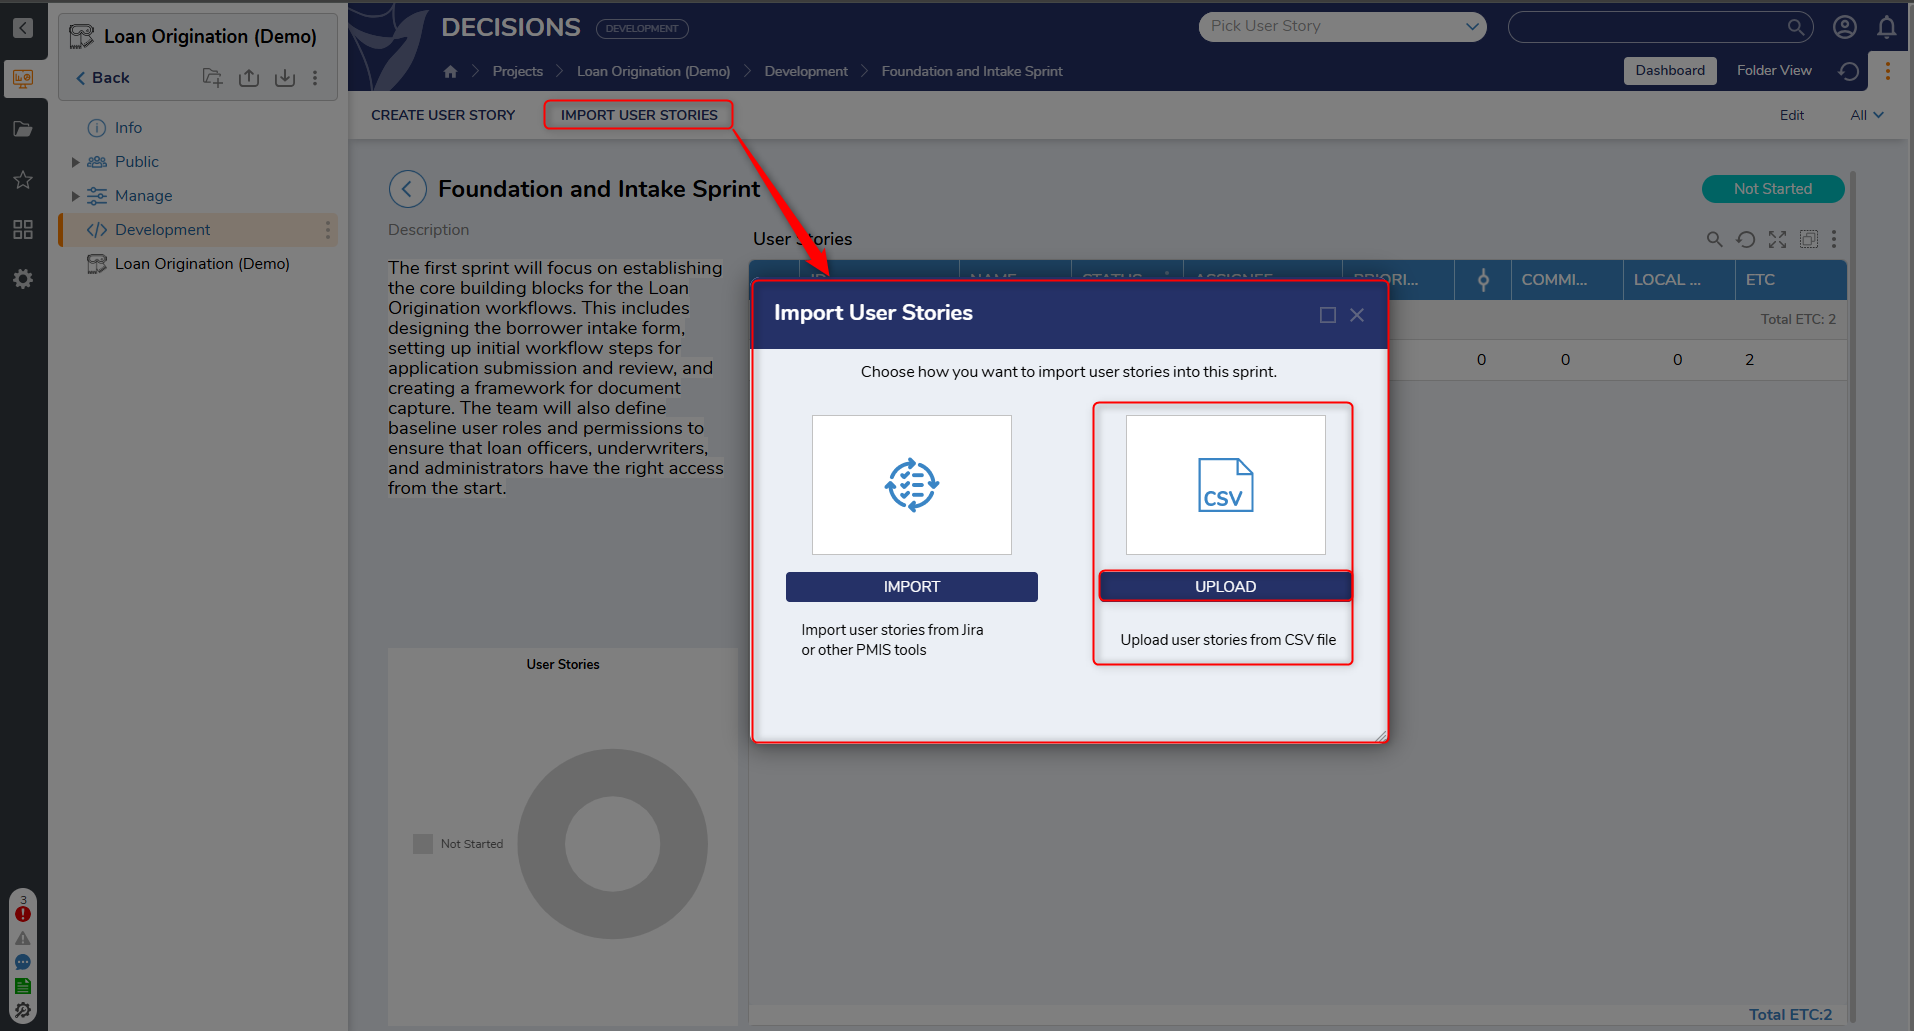
- Navigate to the Development folder, click on the Sprints section, and select the Sprint where the user story should be added.
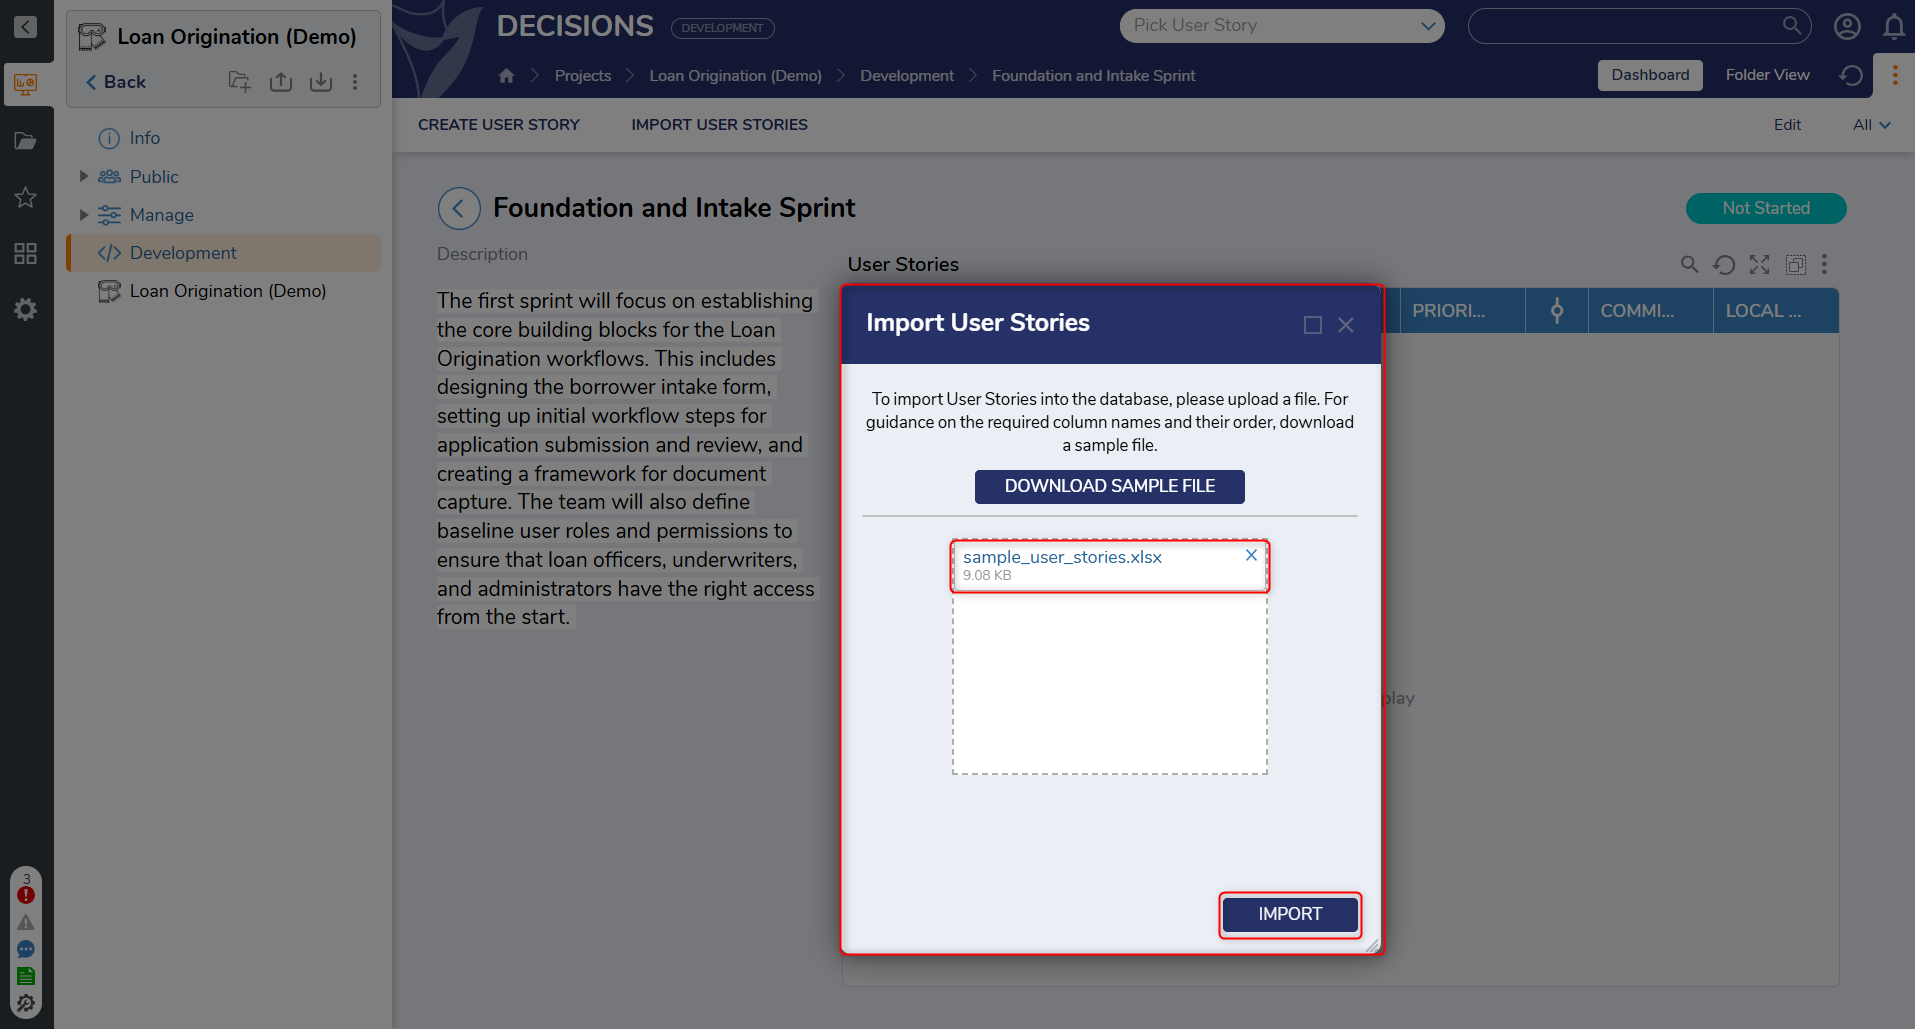
- Click "Import User Stories". This will open the "Import User Stories" dialog.
- Download the sample file.
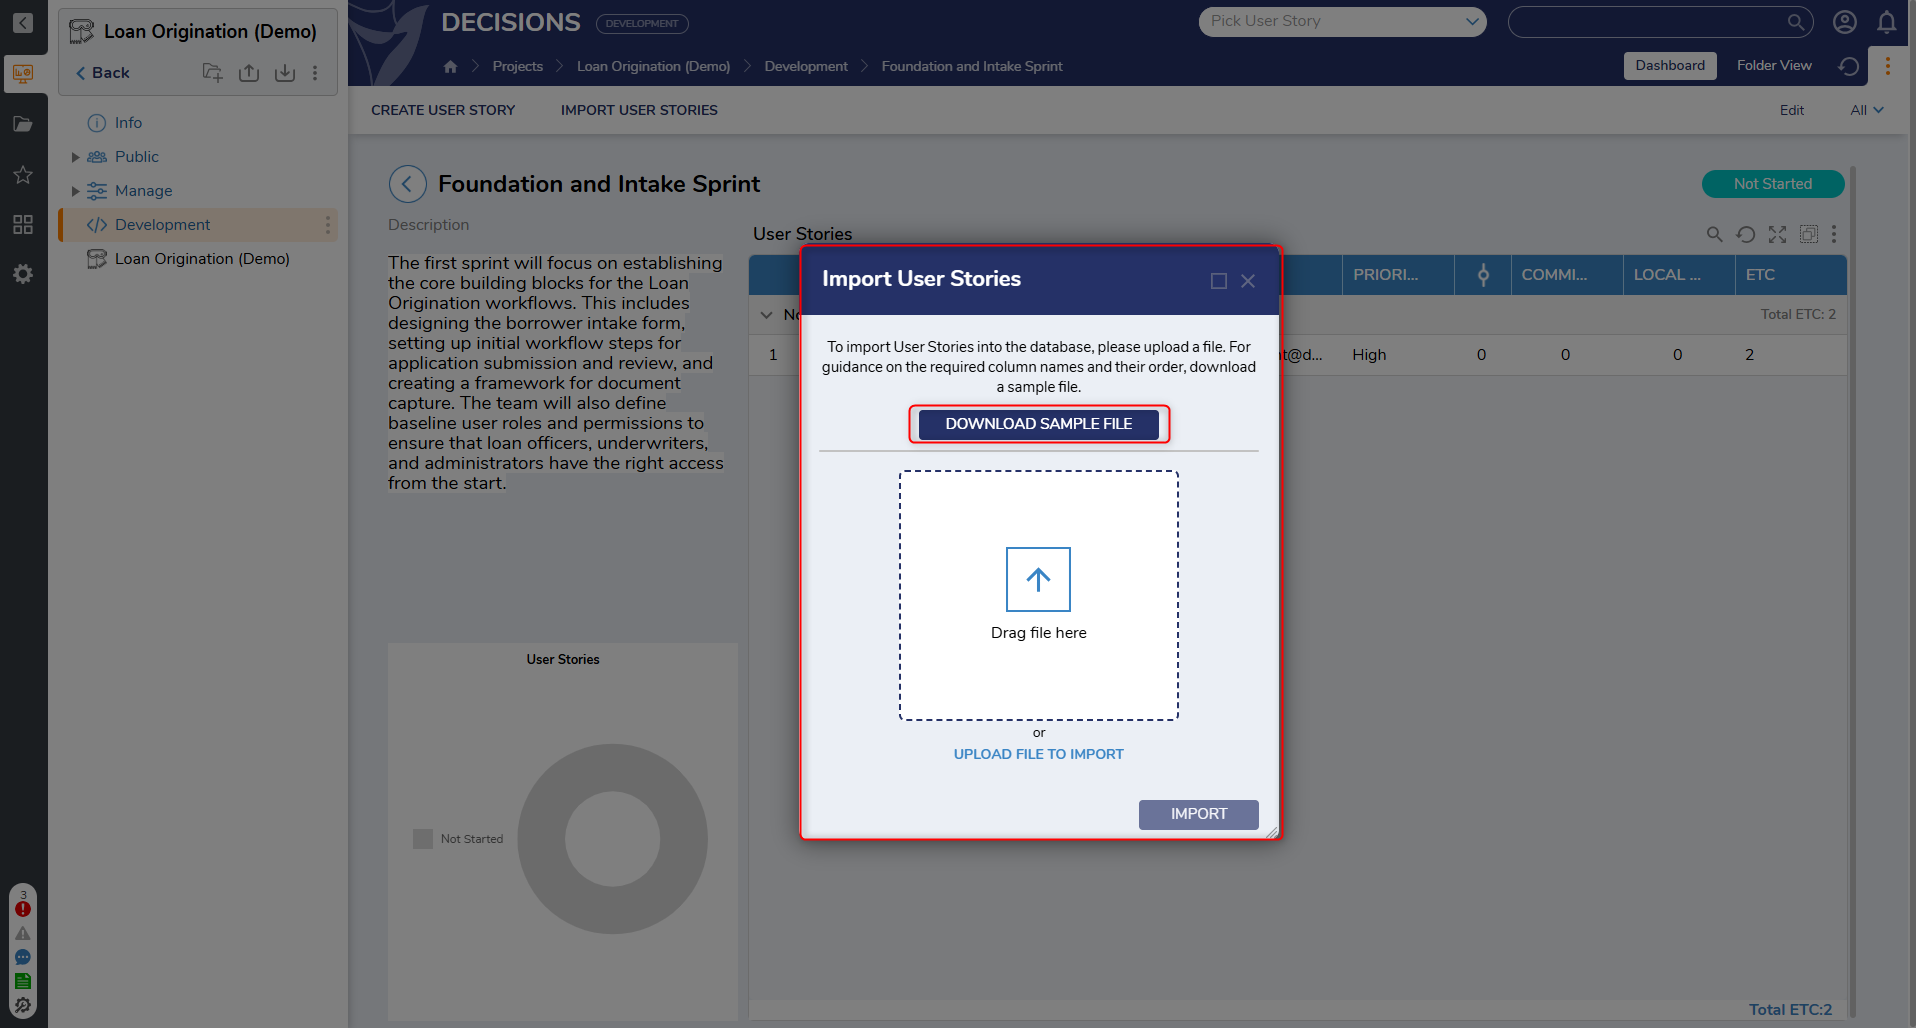
- Populate it with story data (Name, description, priority, etc.).
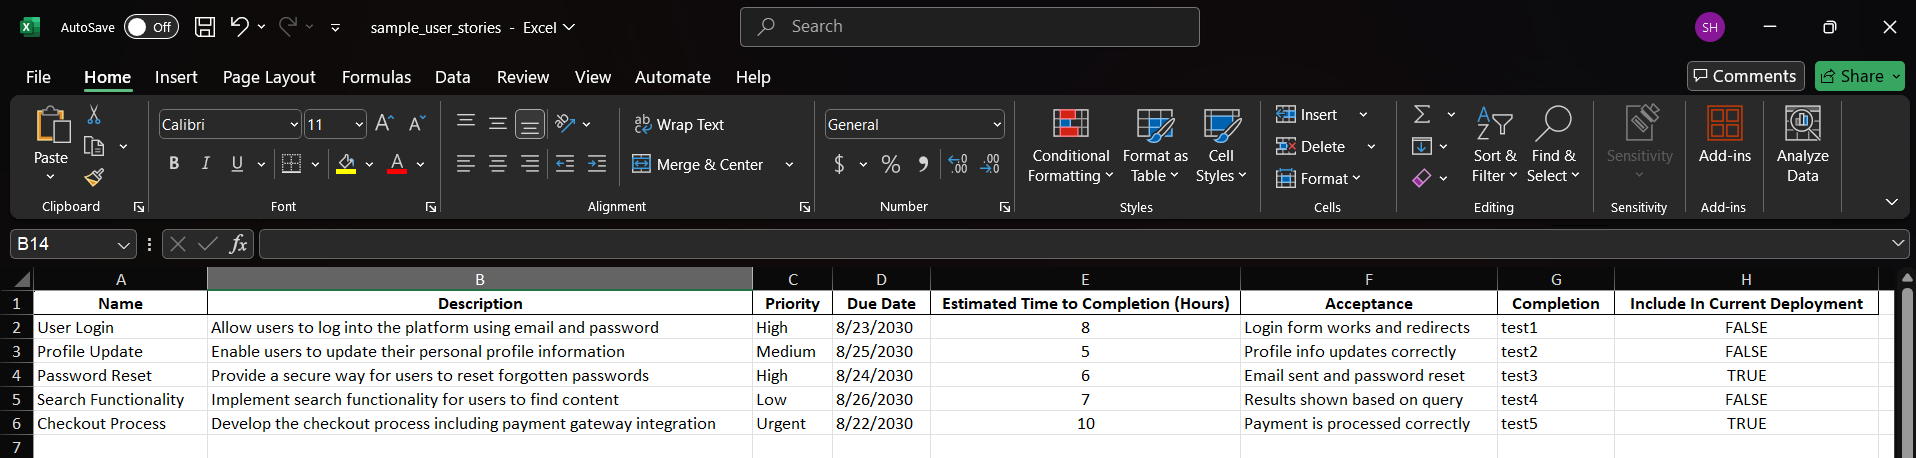
- Upload the file to bulk create user stories and click "Import".
- A dialog will appear allowing inline edits. Once finalized, click "Import" to complete the creation process.
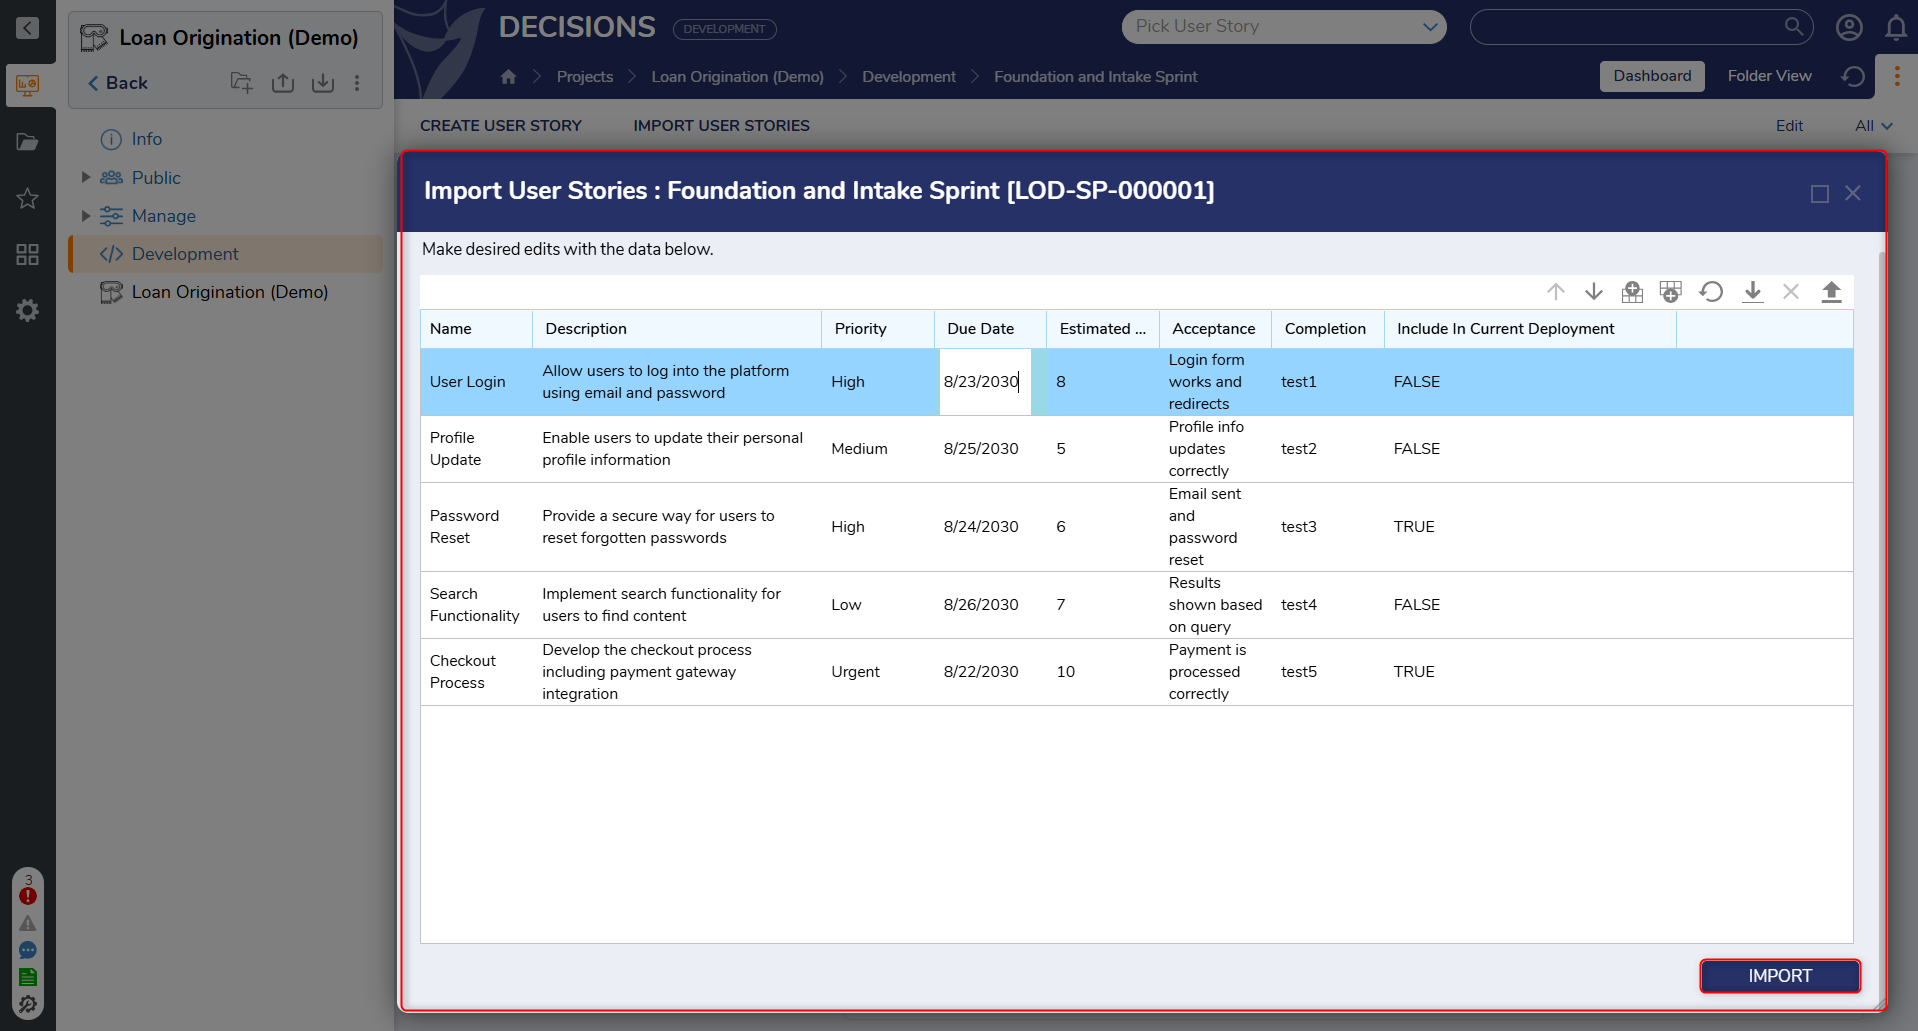
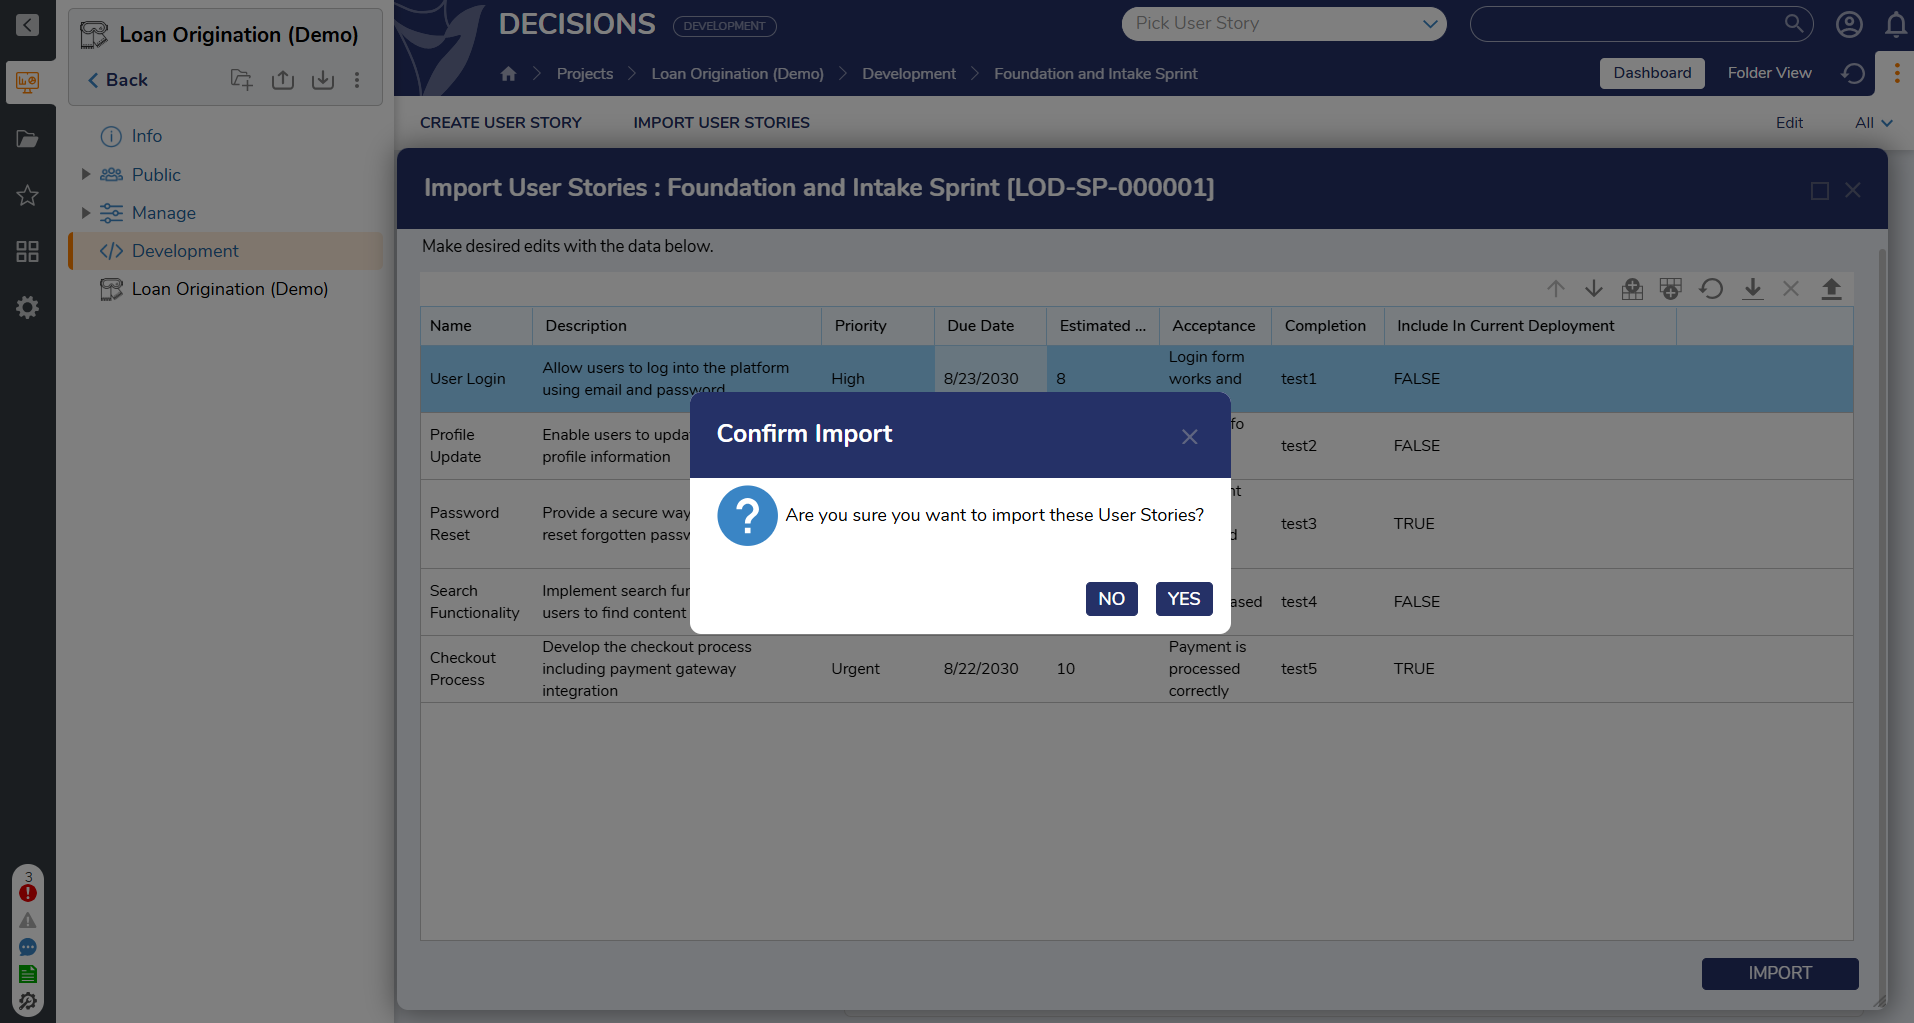
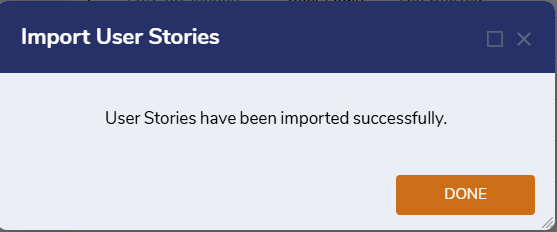
- A dialog will appear allowing inline edits. Once finalized, click "Import" to complete the creation process.
Note: After bulk uploading, the Edit action can be used on individual user stories to modify any information as needed.
Once the user stories are created, all the user stories will appear on the Sprint Dashboard.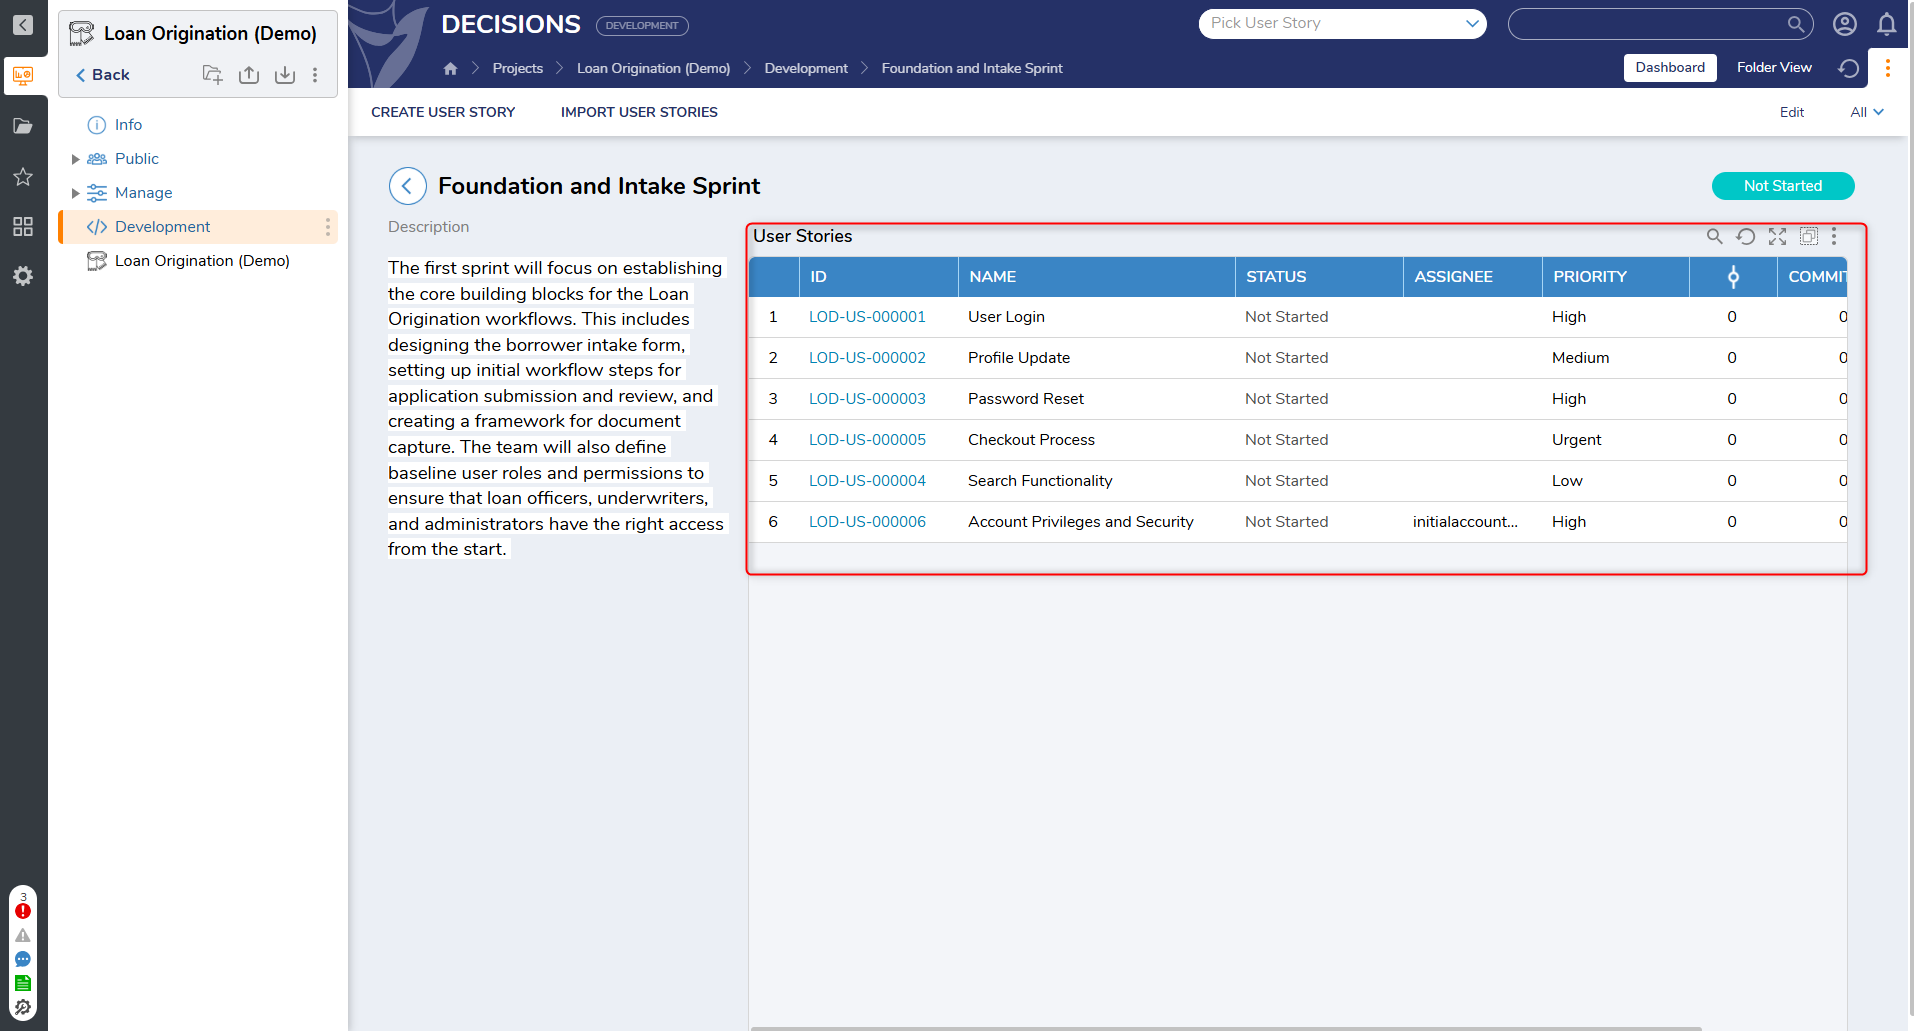
Jira Import
If Jira is used for project tracking, Jira tickets can be imported directly into Decisions and saved as User Stories in the Development environment. This helps align Decisions development with existing project management workflows. 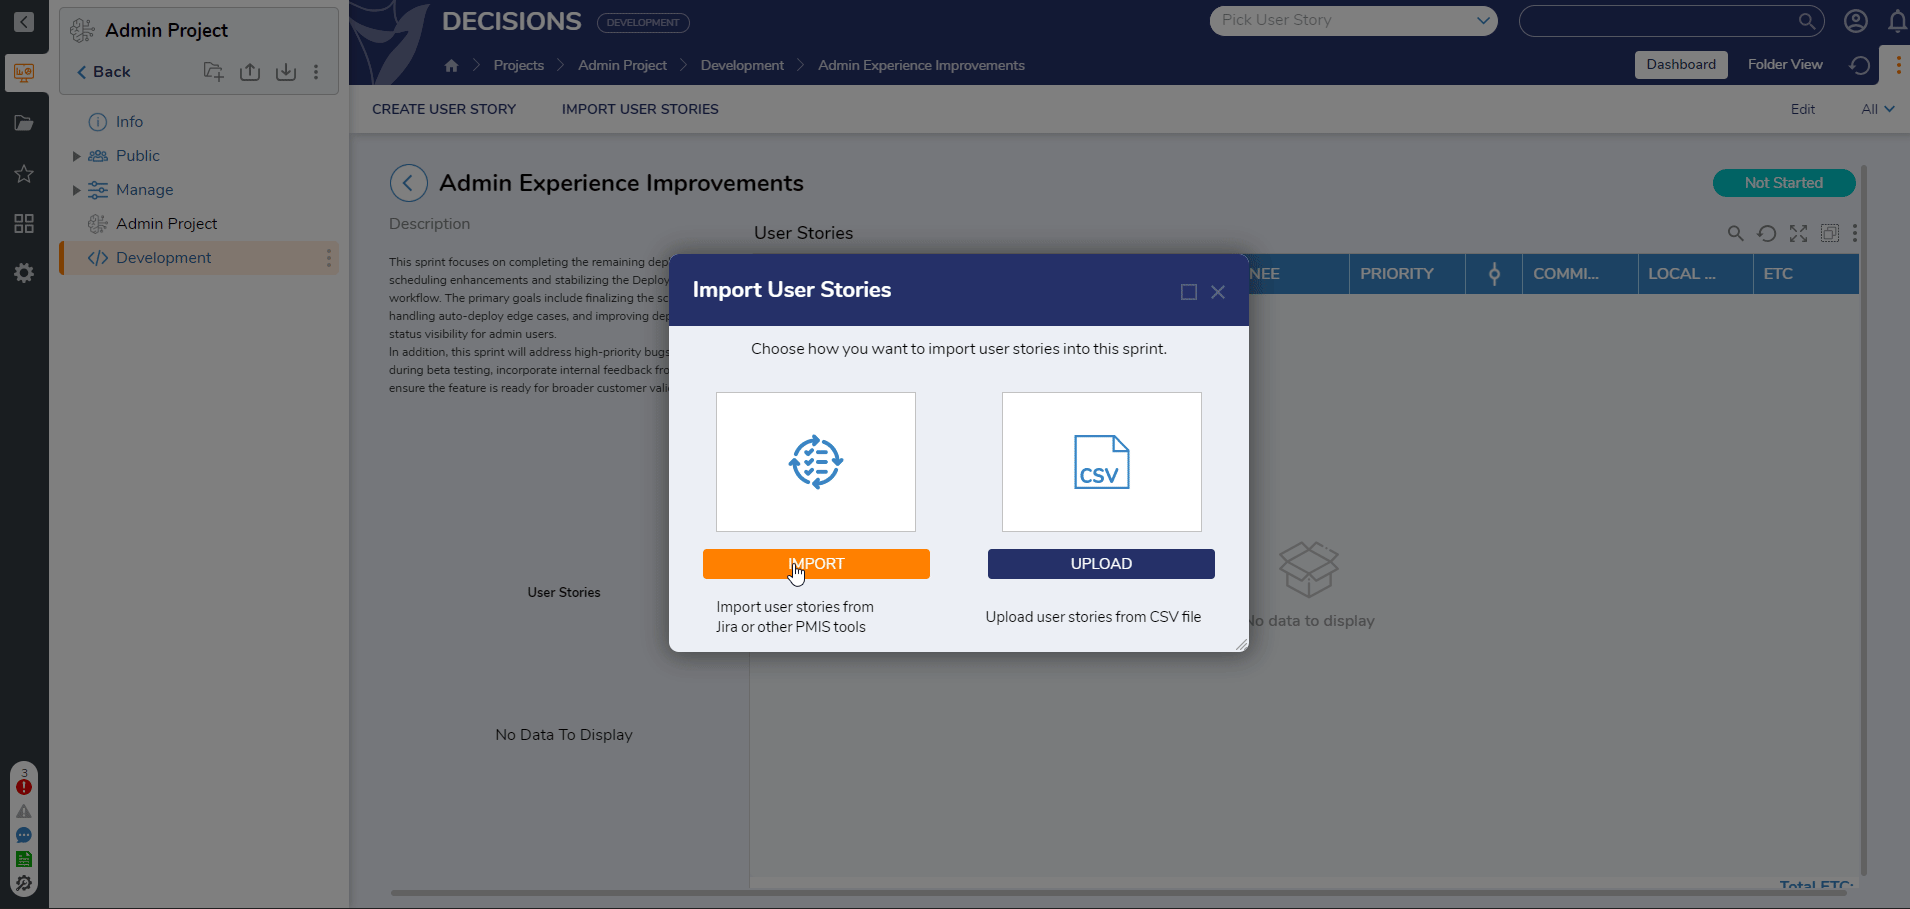
Developer Workflow
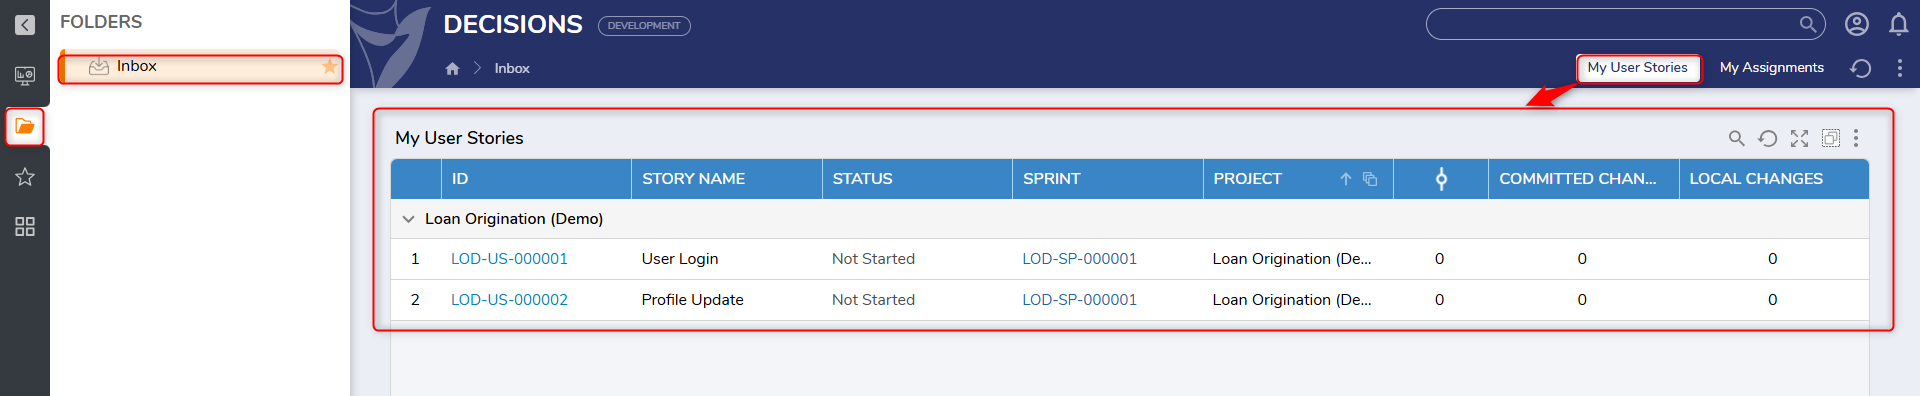
Developers interact with user stories primarily through the Inbox view, which displays a personalized list of stories assigned to them. This enables developers to focus on their tasks across all Projects in one centralized location.
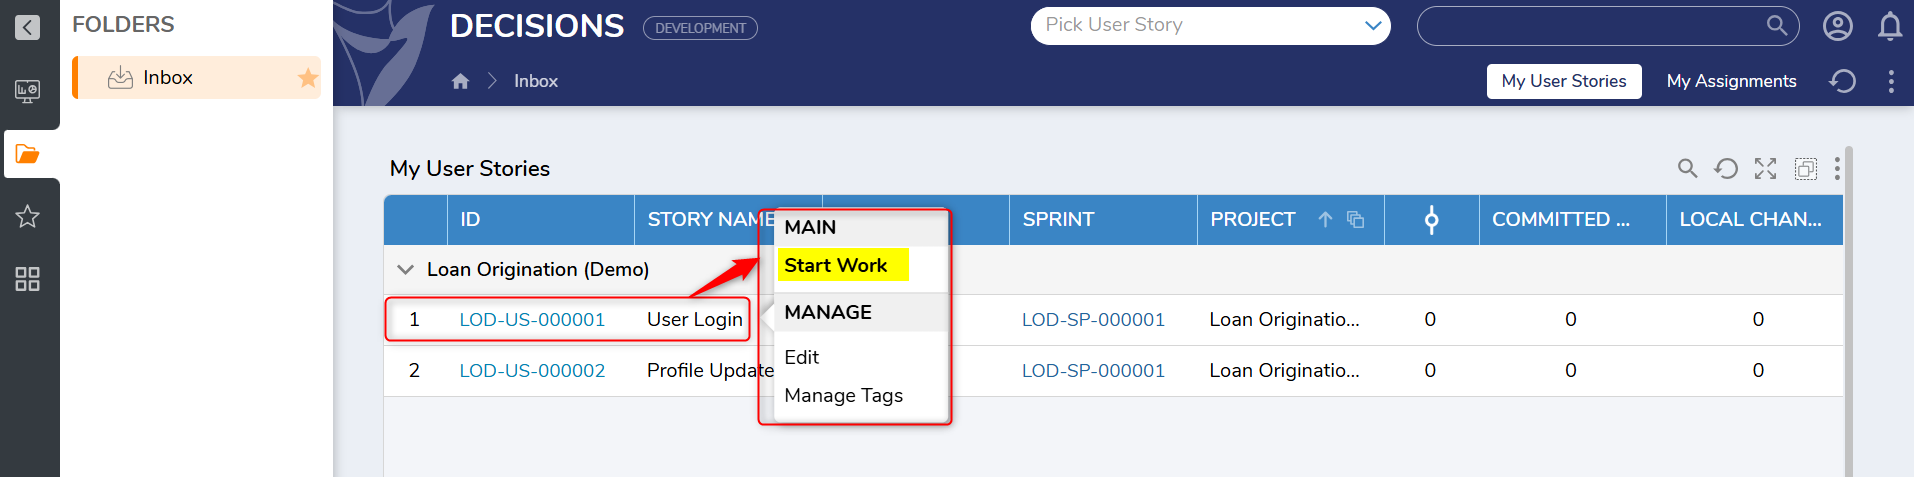
The screenshot below shows the developer Inbox on a development server:
To begin working on a user story:
- Right-click on the assigned user story.
- Select Start Work from the context menu.
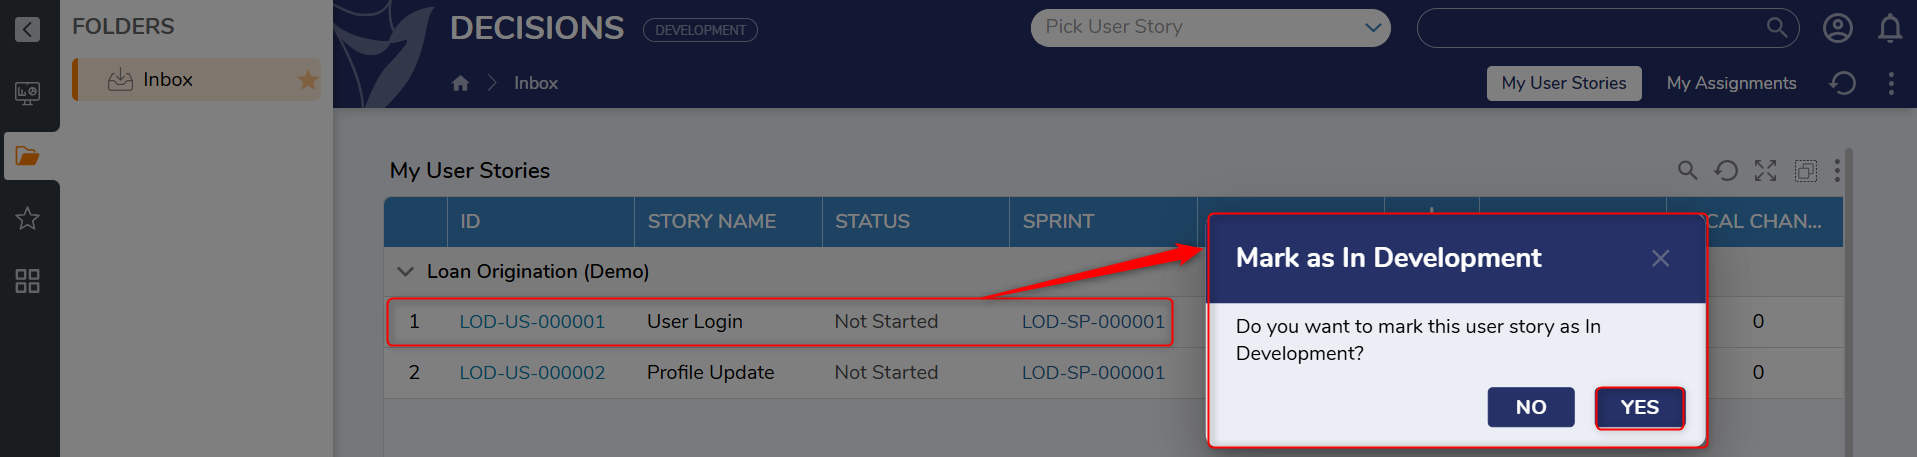
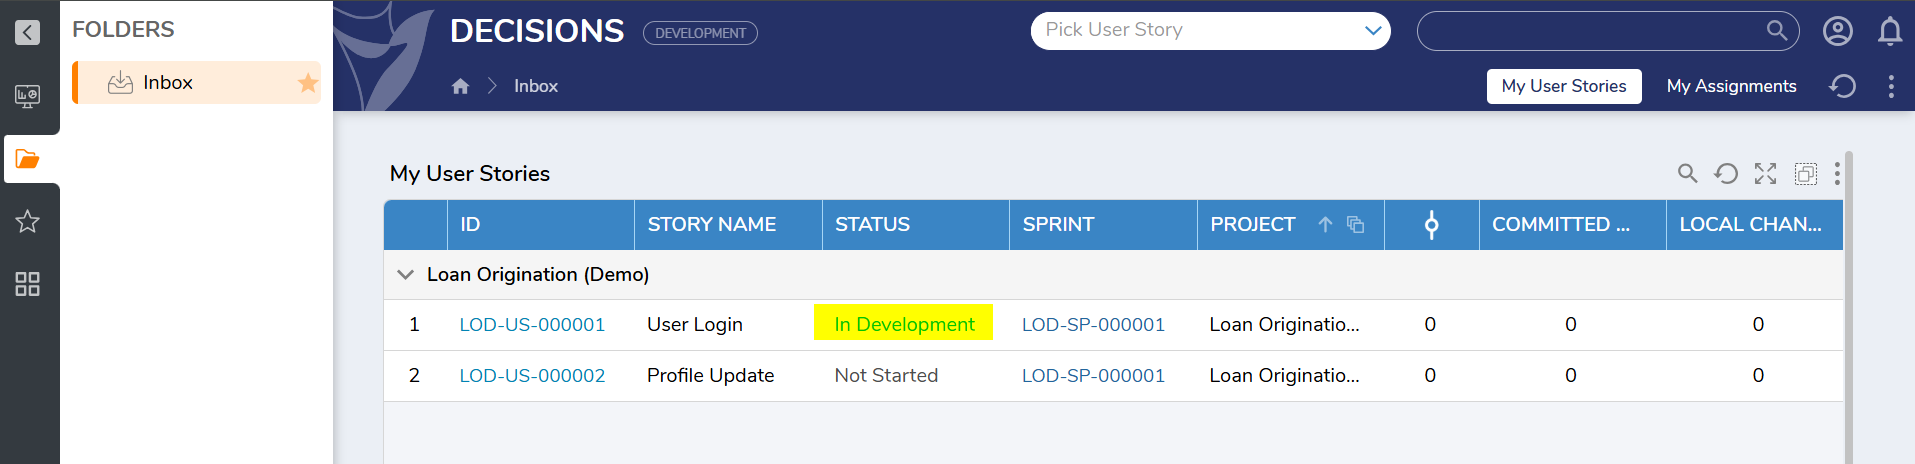
- This action opens a dialog to update the status of the user story to In Development:
- Clicking on a user story (e.g., LOD-US-000001) opens the detailed view, showing the current status and workflow stages of a user story.
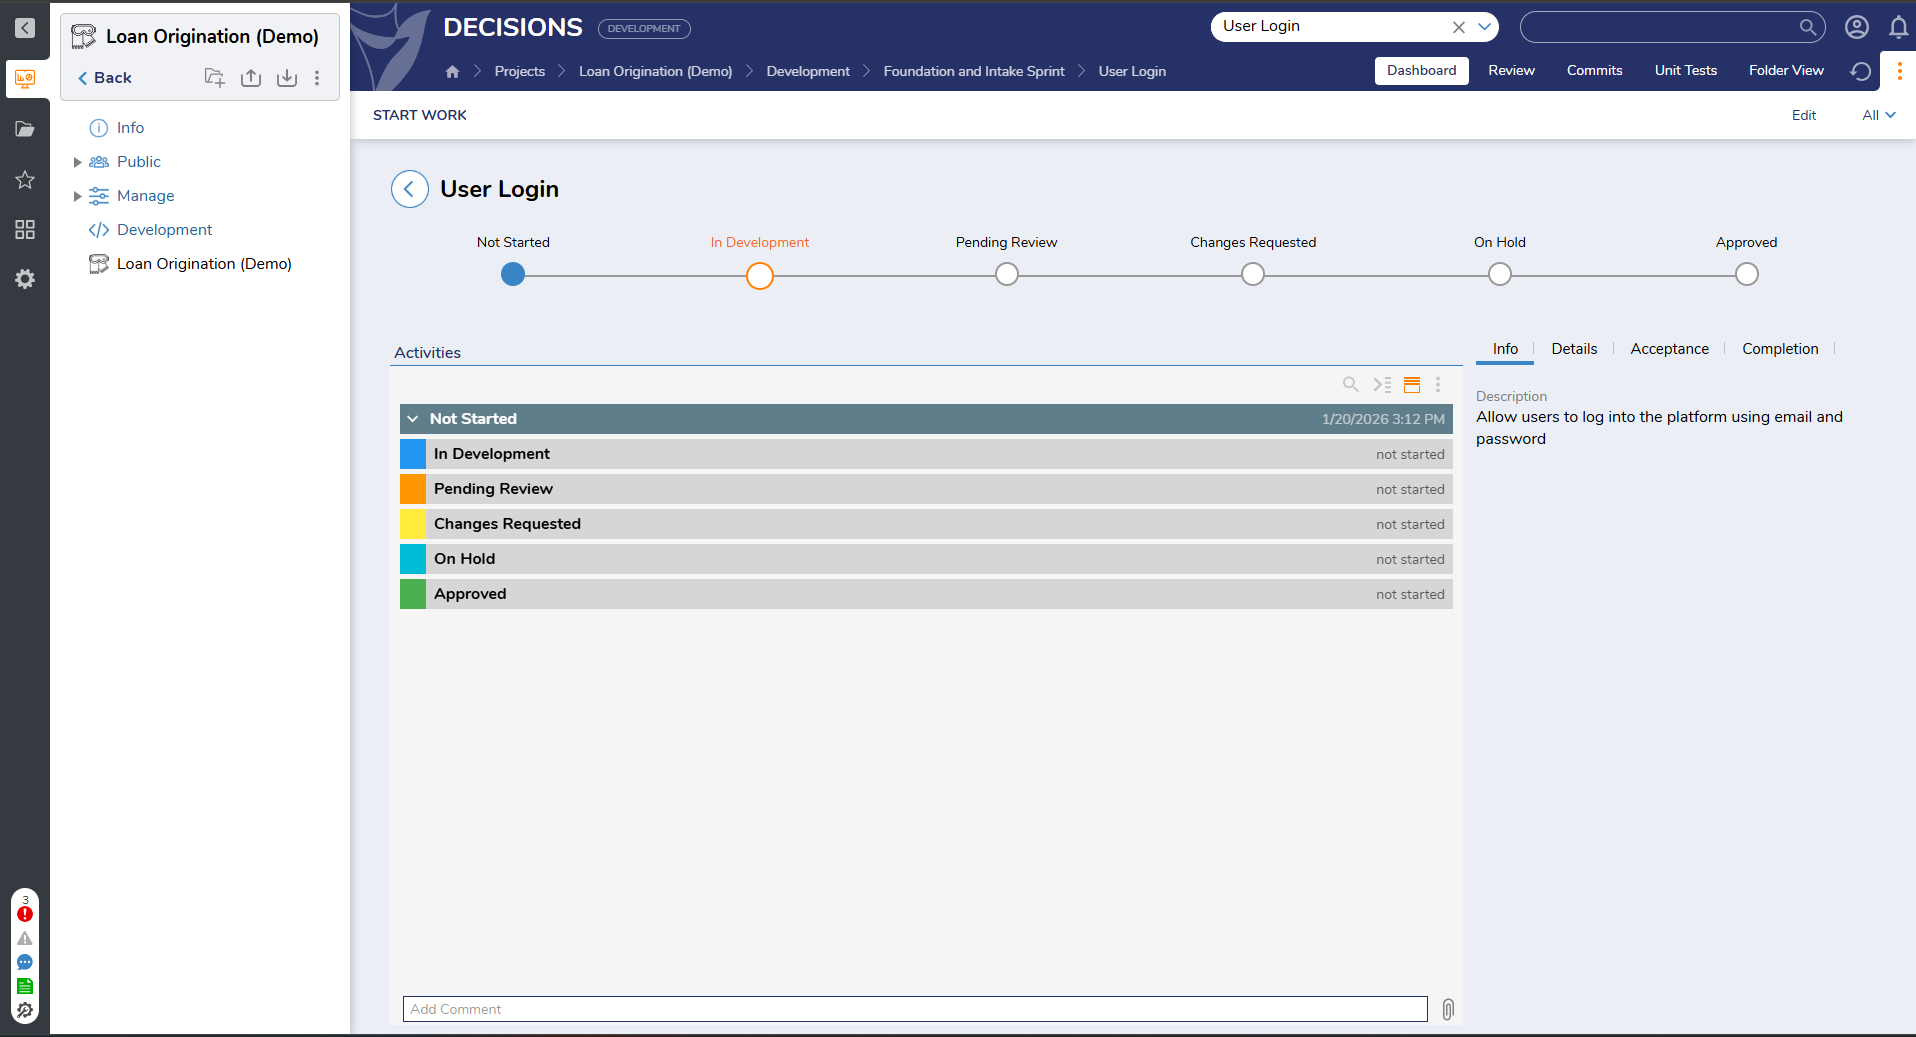
User Story States
- Not Started: The user story has been created, but no work has begun.
- In Development: Development work is actively in progress. Changes made are tracked under this story.
- Pending Review: Work is complete, and the story is awaiting review or approval from the project manager.
- Changes Requested: The reviewer has requested changes. The story is sent back to development for updates.
- On Hold: Work on the story is temporarily paused due to blockers, dependencies, or deprioritization.
- Approved: The user story has passed review and is approved for deployment or further processing.
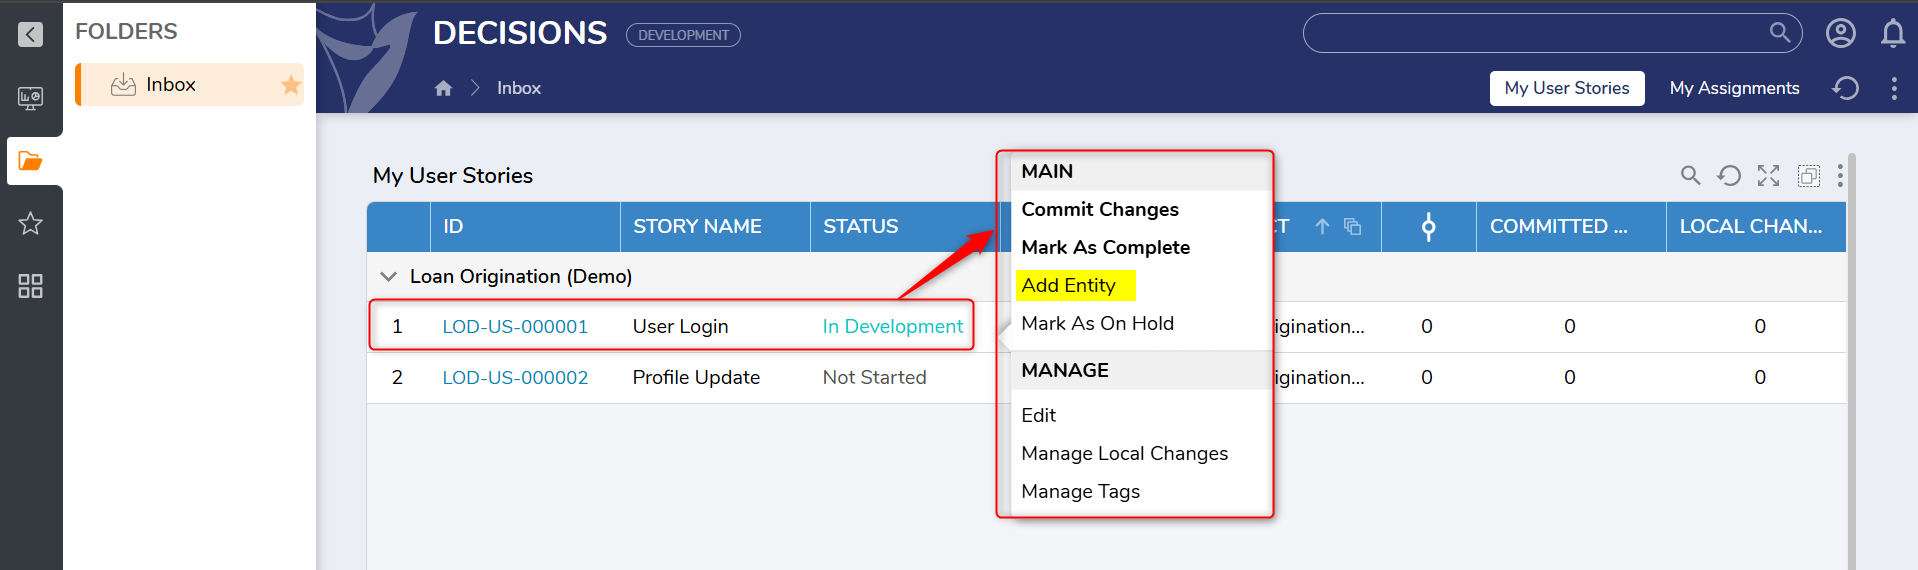
- Once a story is In Development, additional actions become available:
- Commit Changes
- Mark As Complete
- Add Document
- Add Entity
- Mark As On Hold
- Document support: Documents can be attached using the Add Document action on the user story. Documents can also be added from the Activity panel to provide extra context for reviewers (functionality, intent, and logic).
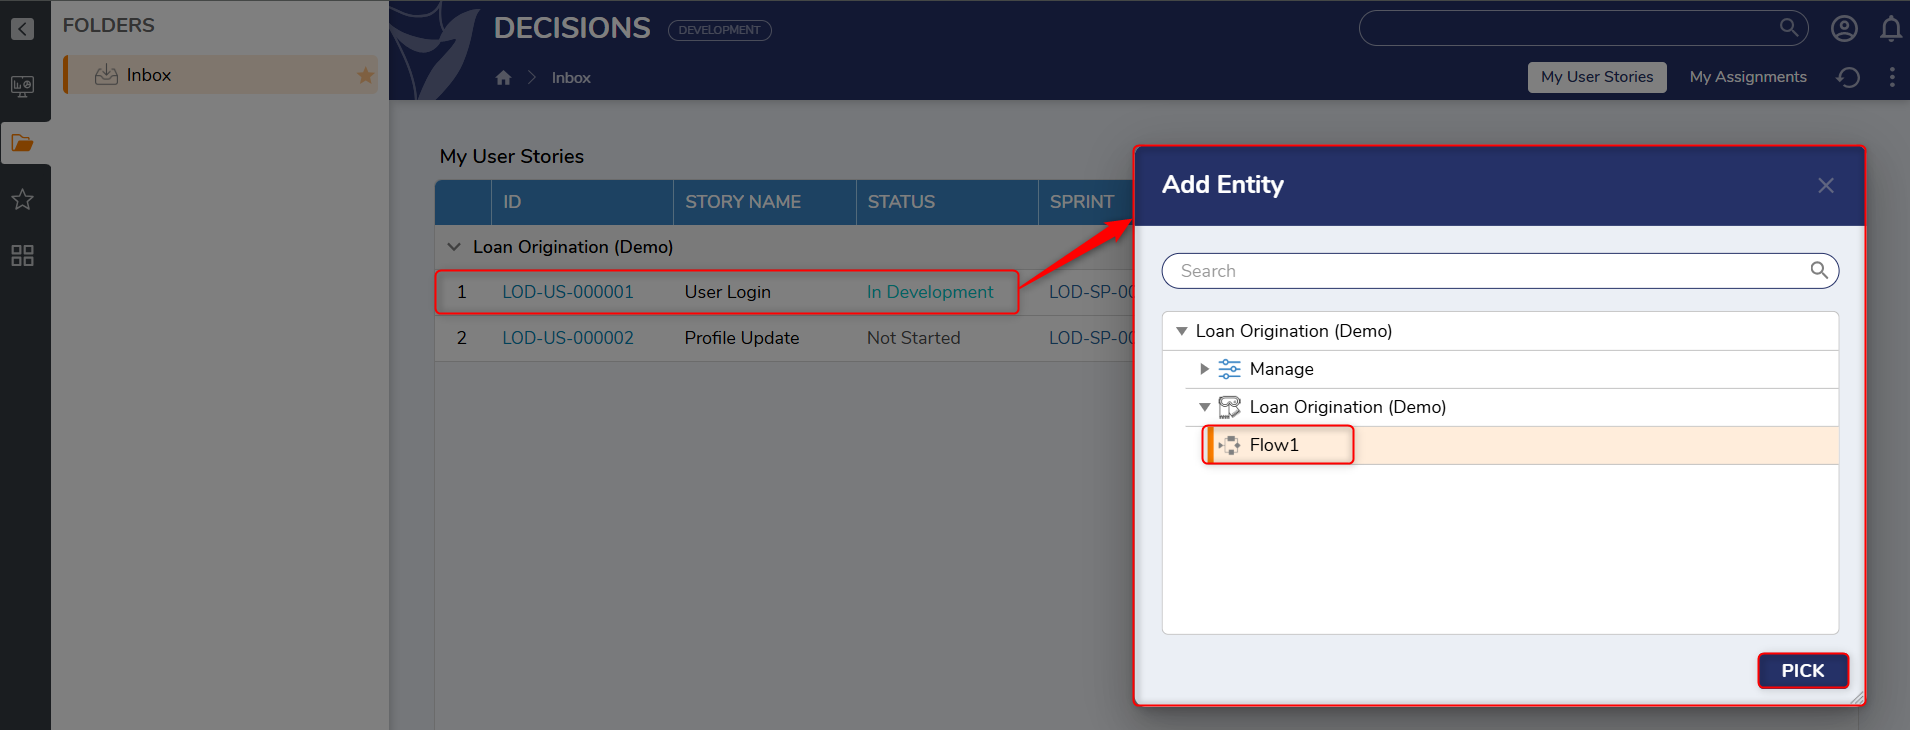
- Select Add Entity to link flows, forms, etc., to the story for traceability.
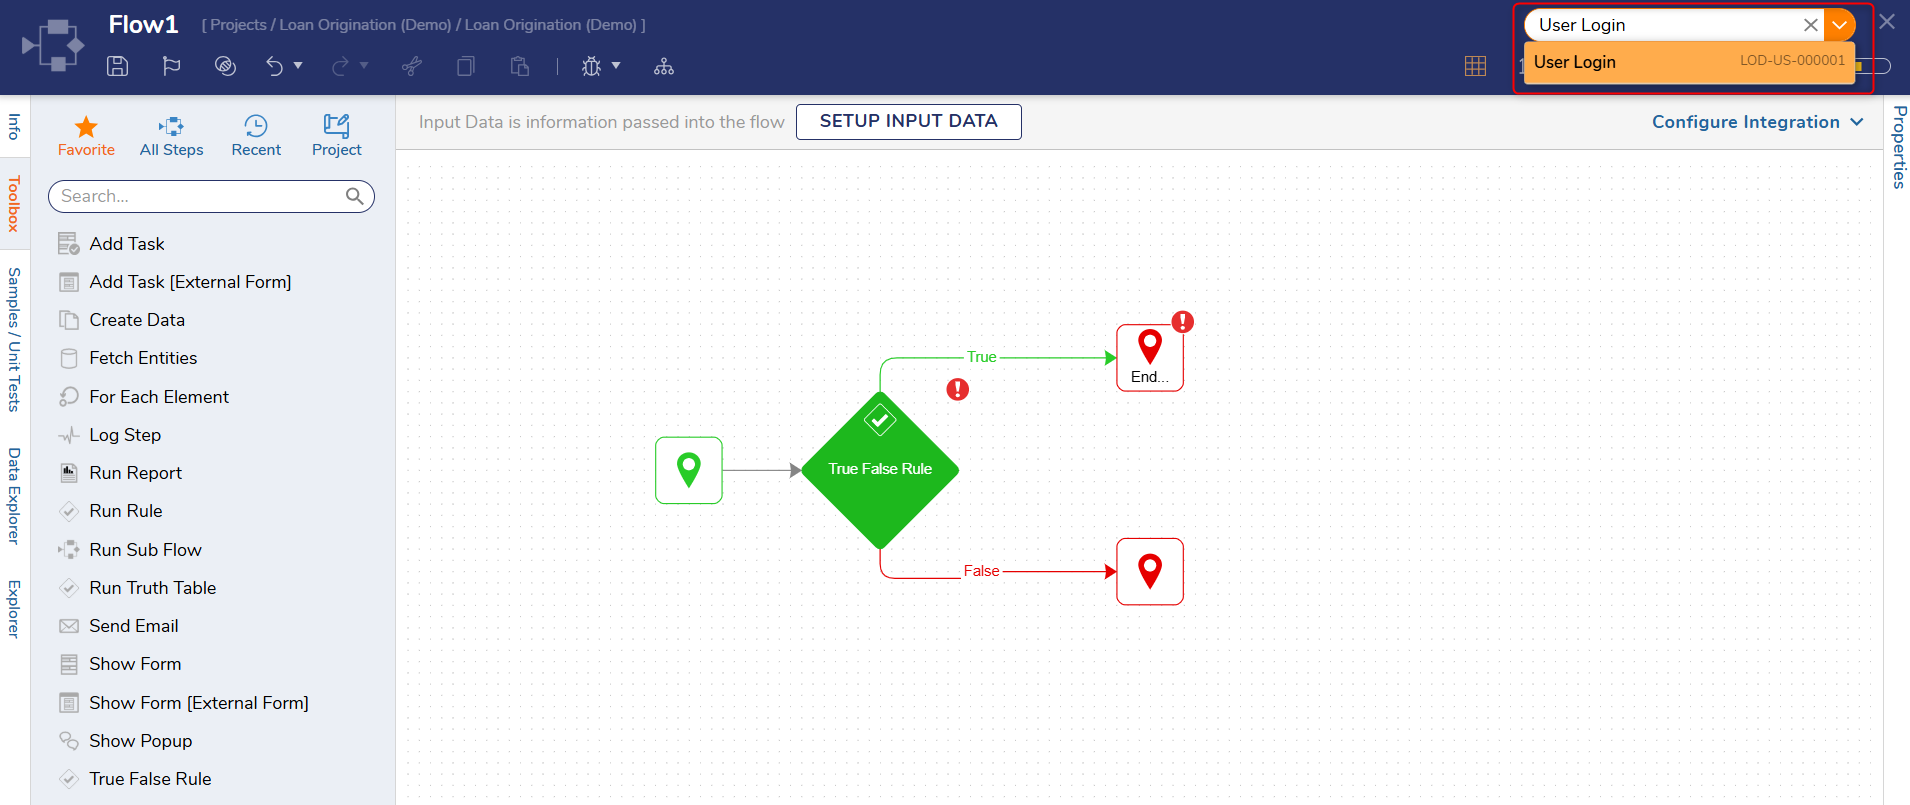
- When work begins, a user story header appears at the top of the development workspace. Any new changes (e.g., flows, forms) are automatically saved under the active story.
- If needed, changes can also be made without associating them with a specific user story. This offers flexibility for quick fixes or exploratory changes that do not require traceability.
- After completing work, right-click the user story and select Commit Changes.
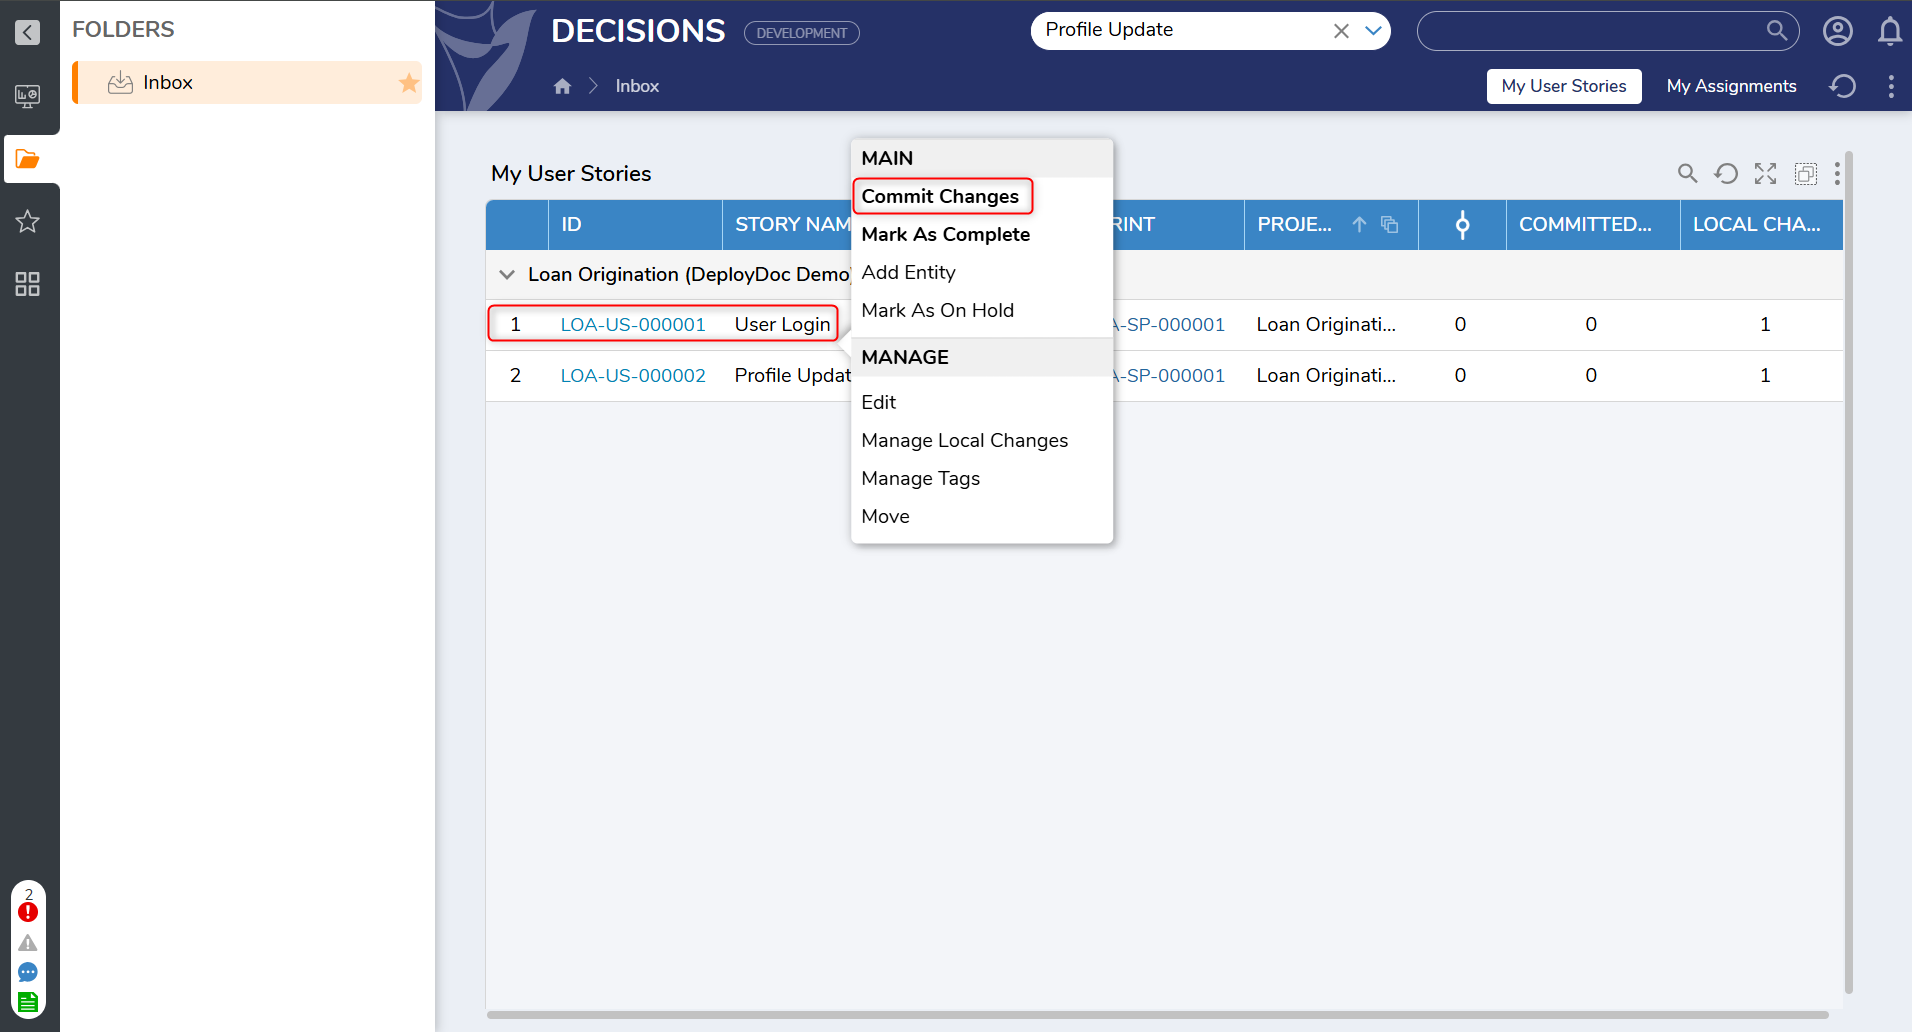
- In the Commit Changes dialog:
- Select the user story.
- Check whether the User Story Is Ready For Review, if applicable.User Story Is Ready For Review
- This checkbox should be selected only if the work is complete and the developer intends for the story to be reviewed.
- If there is still pending work and the developer simply wants to save progress to the deployment server, this checkbox can be left unchecked.
- Add a commit message and click Commit.
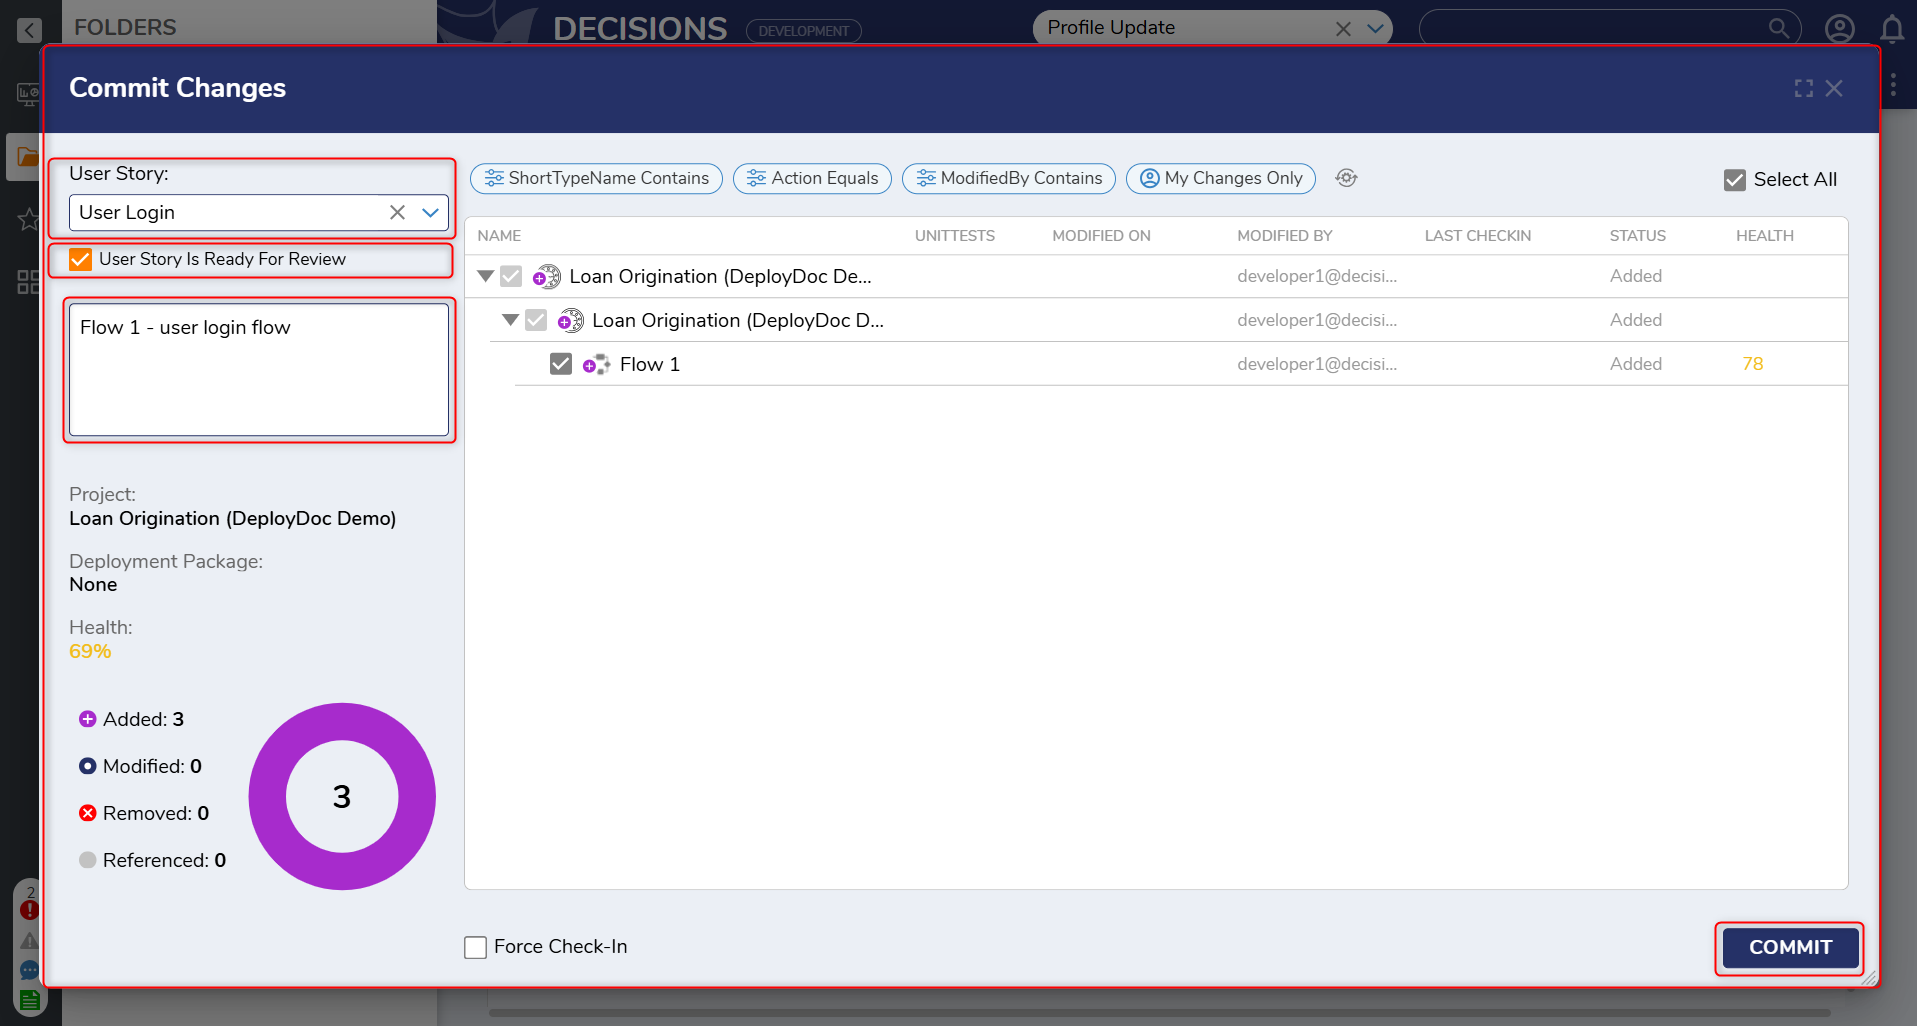
- This updates the user story's status to Pending Review and sends it to the admin (Project Manager) for review.
- Admin can then either Request Changes or Approve the story.
- Once approved, the story is eligible for inclusion in the Deployment Package.
Rollback and Revert
The Deployment Server supports rolling back or reverting commits across environments. This helps teams quickly recover from unintended changes, maintain environment stability, and confidently manage deployments without impacting downstream environments.
- Deployment Server (Projects folder): Revert or roll back a commit from the Projects folder.
- Local environment (User Story folder): Revert or roll back a commit from the User Story folder.
User Story Dashboard:
Each user story includes a dashboard with multiple tabs that provide detailed insight into the work associated with it:
- Review: Displays all entities included in the user story and provides a centralized view for review and validation.
The Review dashboard serves as a centralized hub for user story reviews. It provides a complete list of entities associated with the story, surfaces review context (health, validations, and to-dos), and supports comparison utilities for reviewing changes.
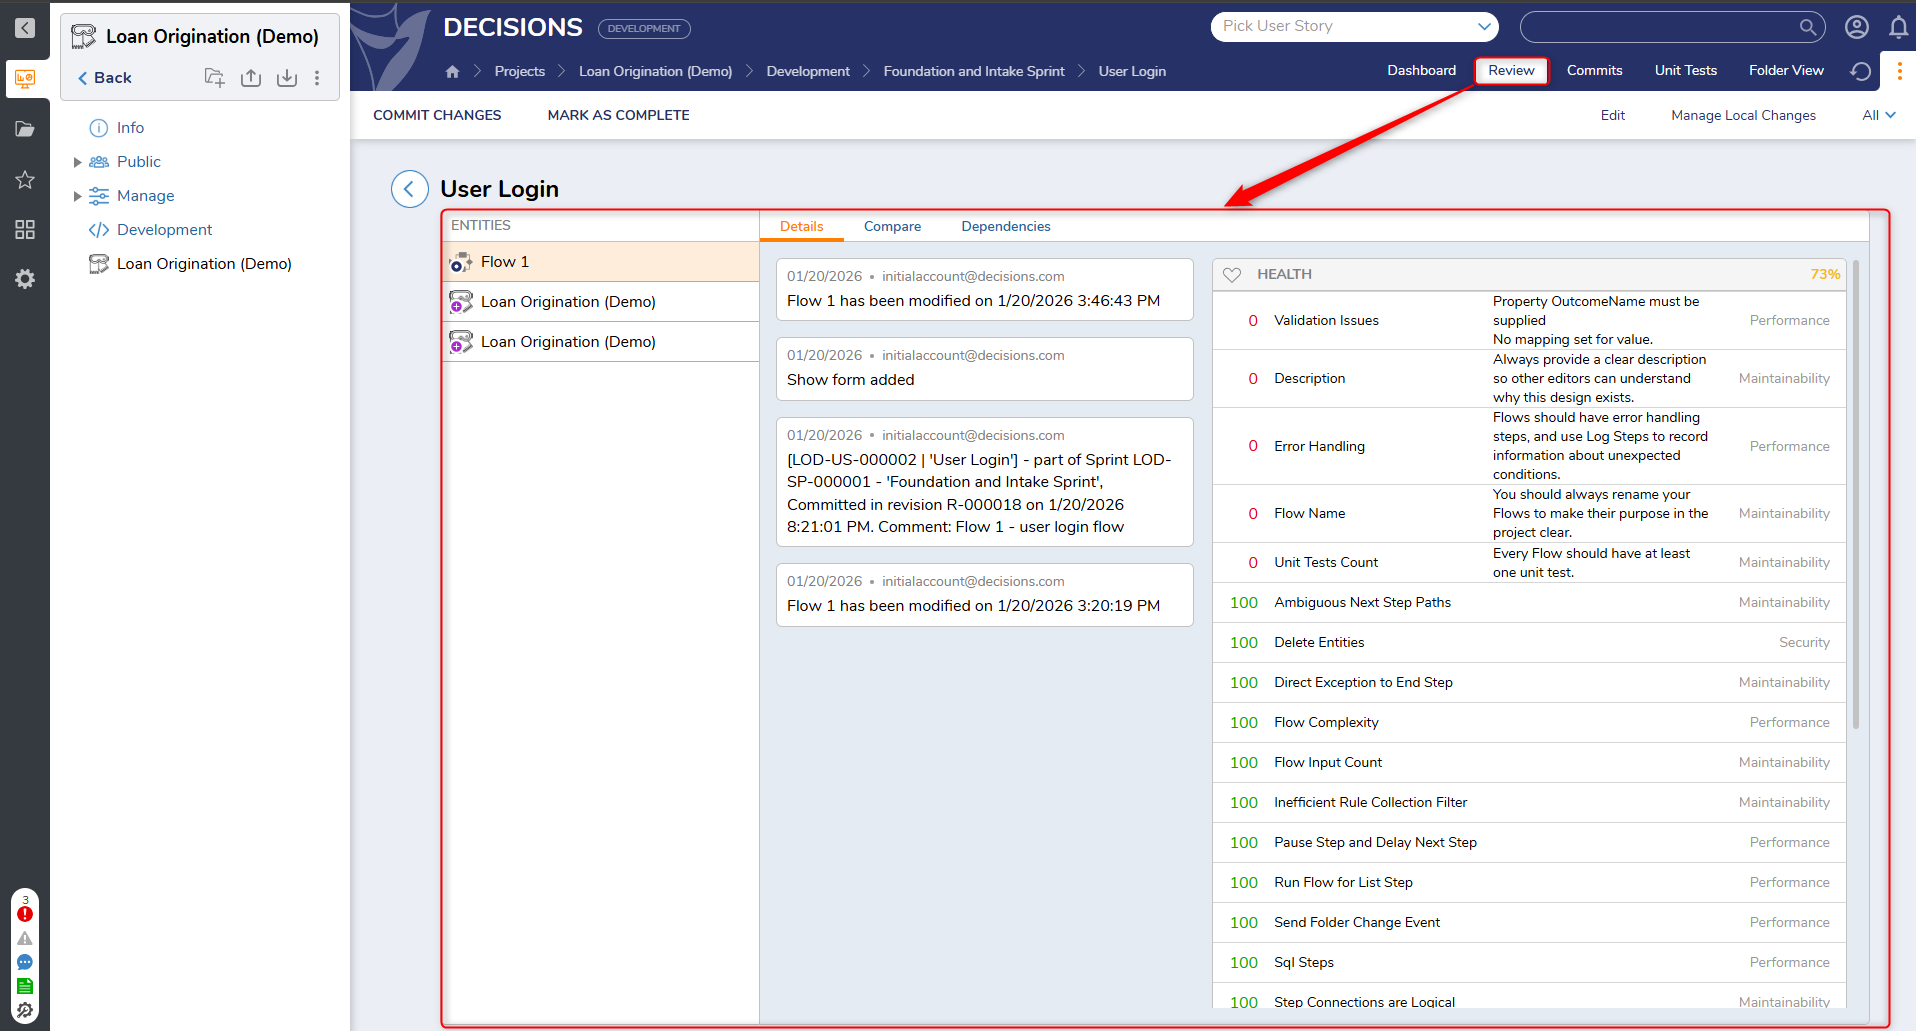
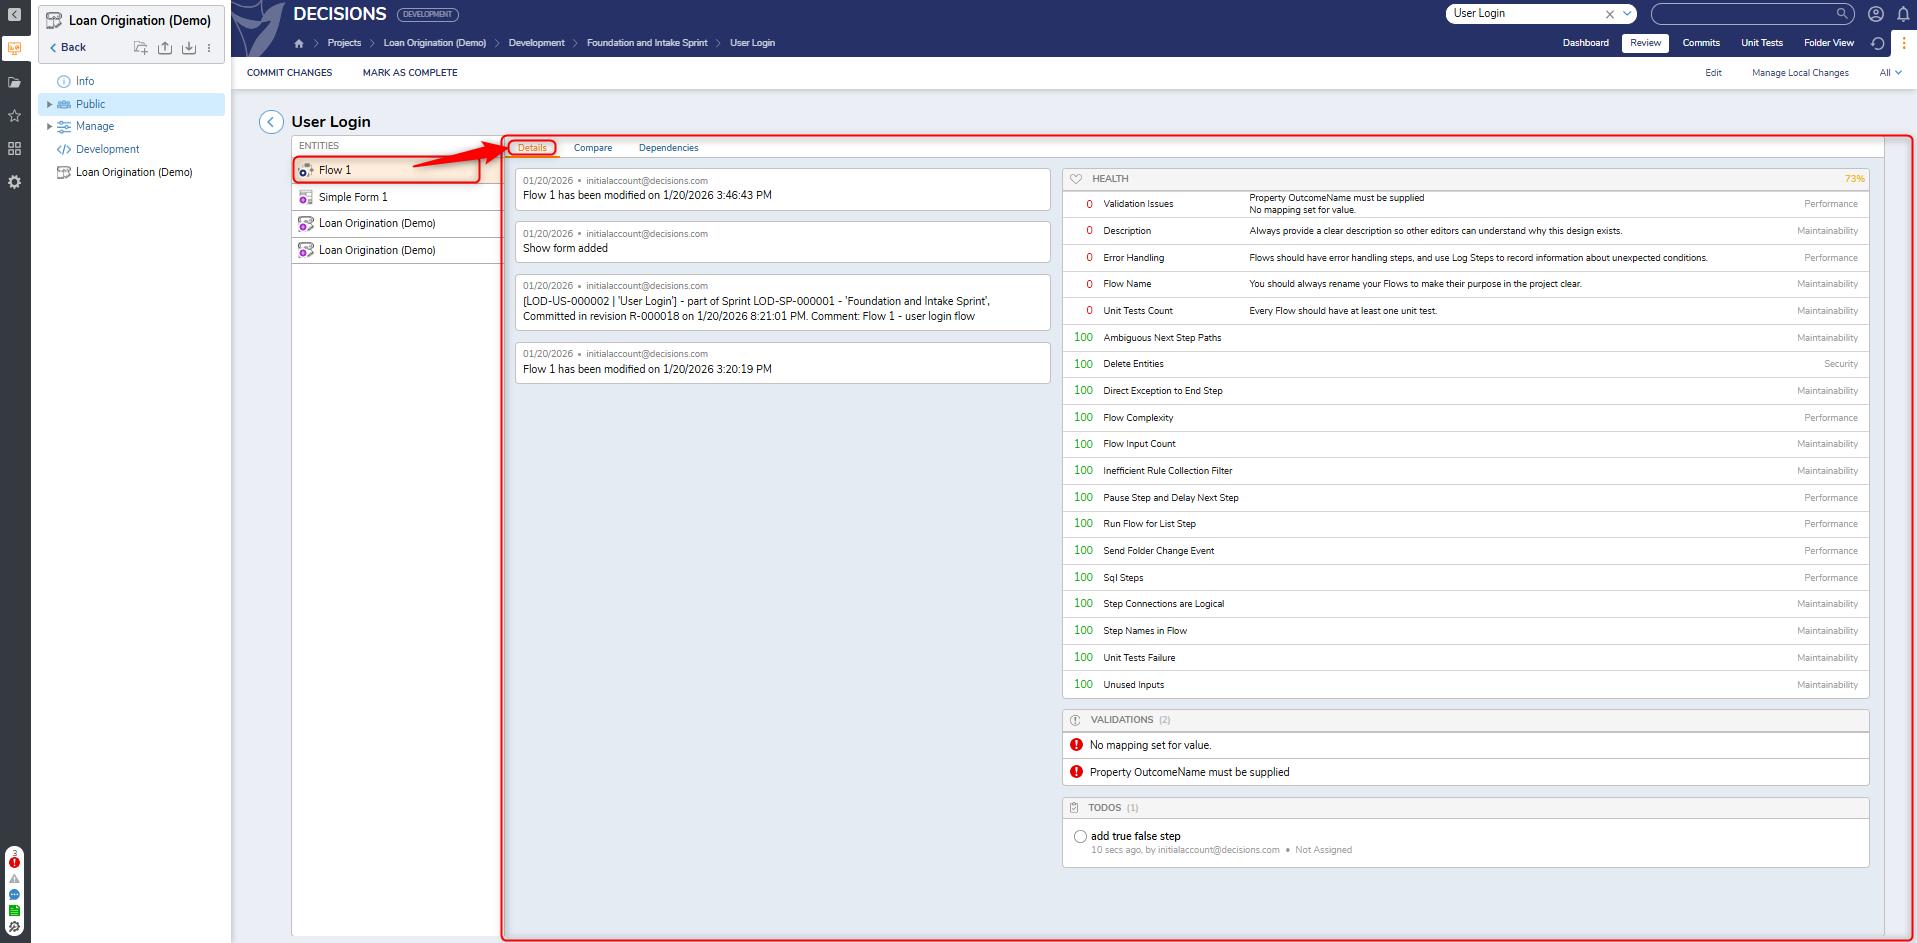
- Details: Displays entity-level information, including:
- History: Shows modification and commit history (for example, who modified/committed, in which revision, entities added to the user story and timestamp for the modified entity).
- Health Score: Displays the entity's overall health status.
- Validations: Displays validation results associated with the entity.
- To-Dos: Displays To-Dos associated with the entity. To-Dos created on entities are visible in the Review dashboard and can also appear in the centralized Info panel.
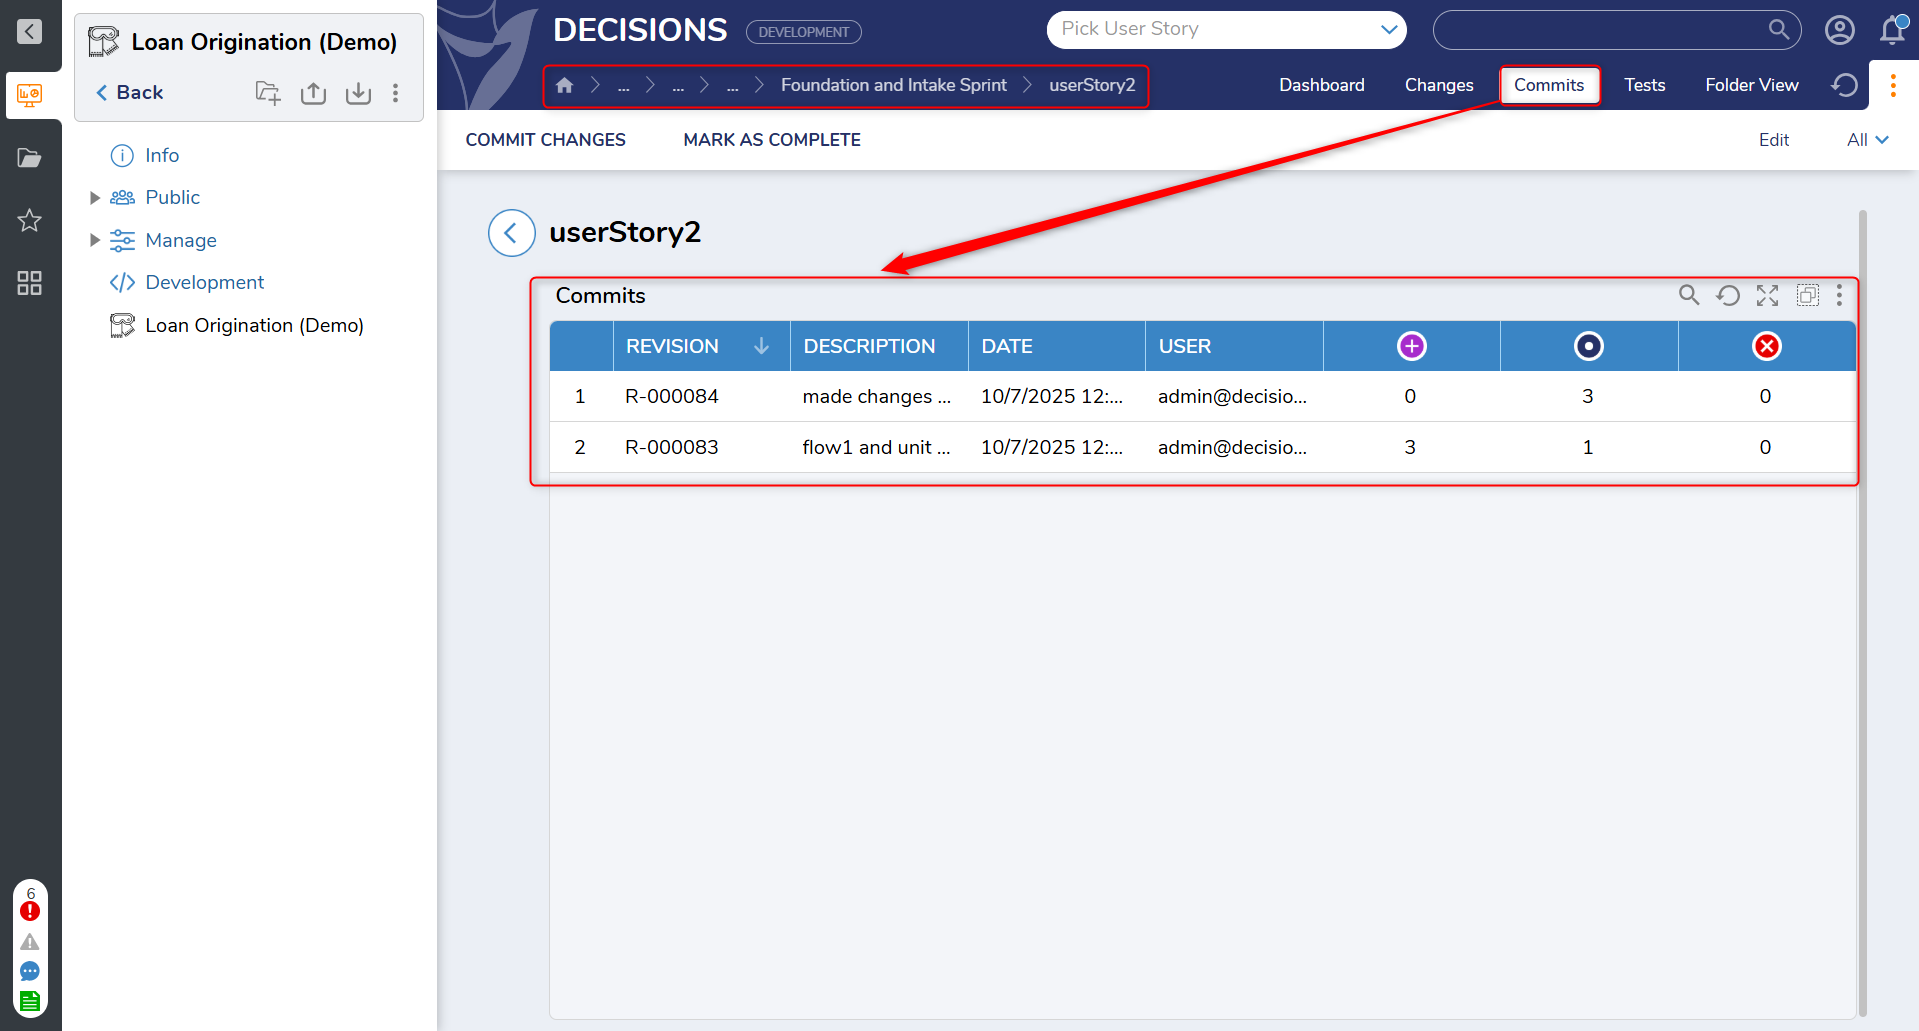
- Commits: Provides access to all commits related to the user story for review and approval context.
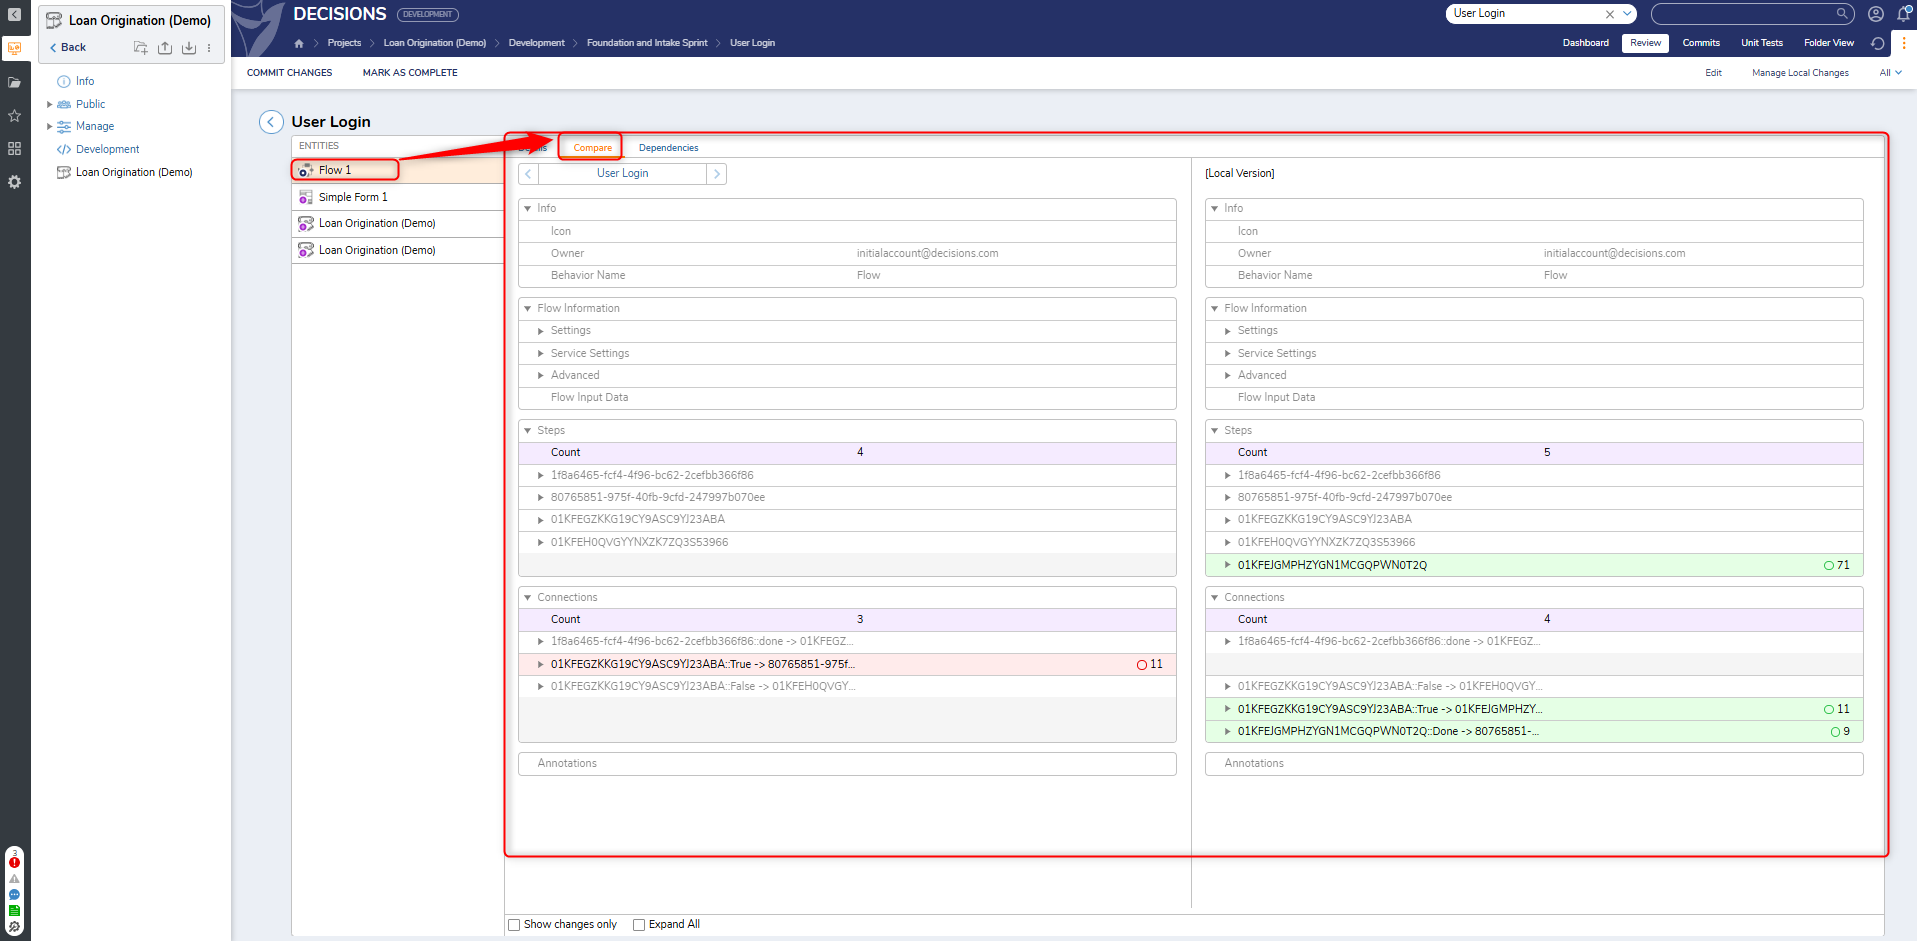
- Compare: Provides comparison utilities to review differences between local and committed versions of an entity. This includes a Textual comparison view. When available, comparisons can also be used to review changes against previously committed work (for example, entities committed under earlier user stories).
- Dependencies: Displays dependencies for the selected entity, when applicable.
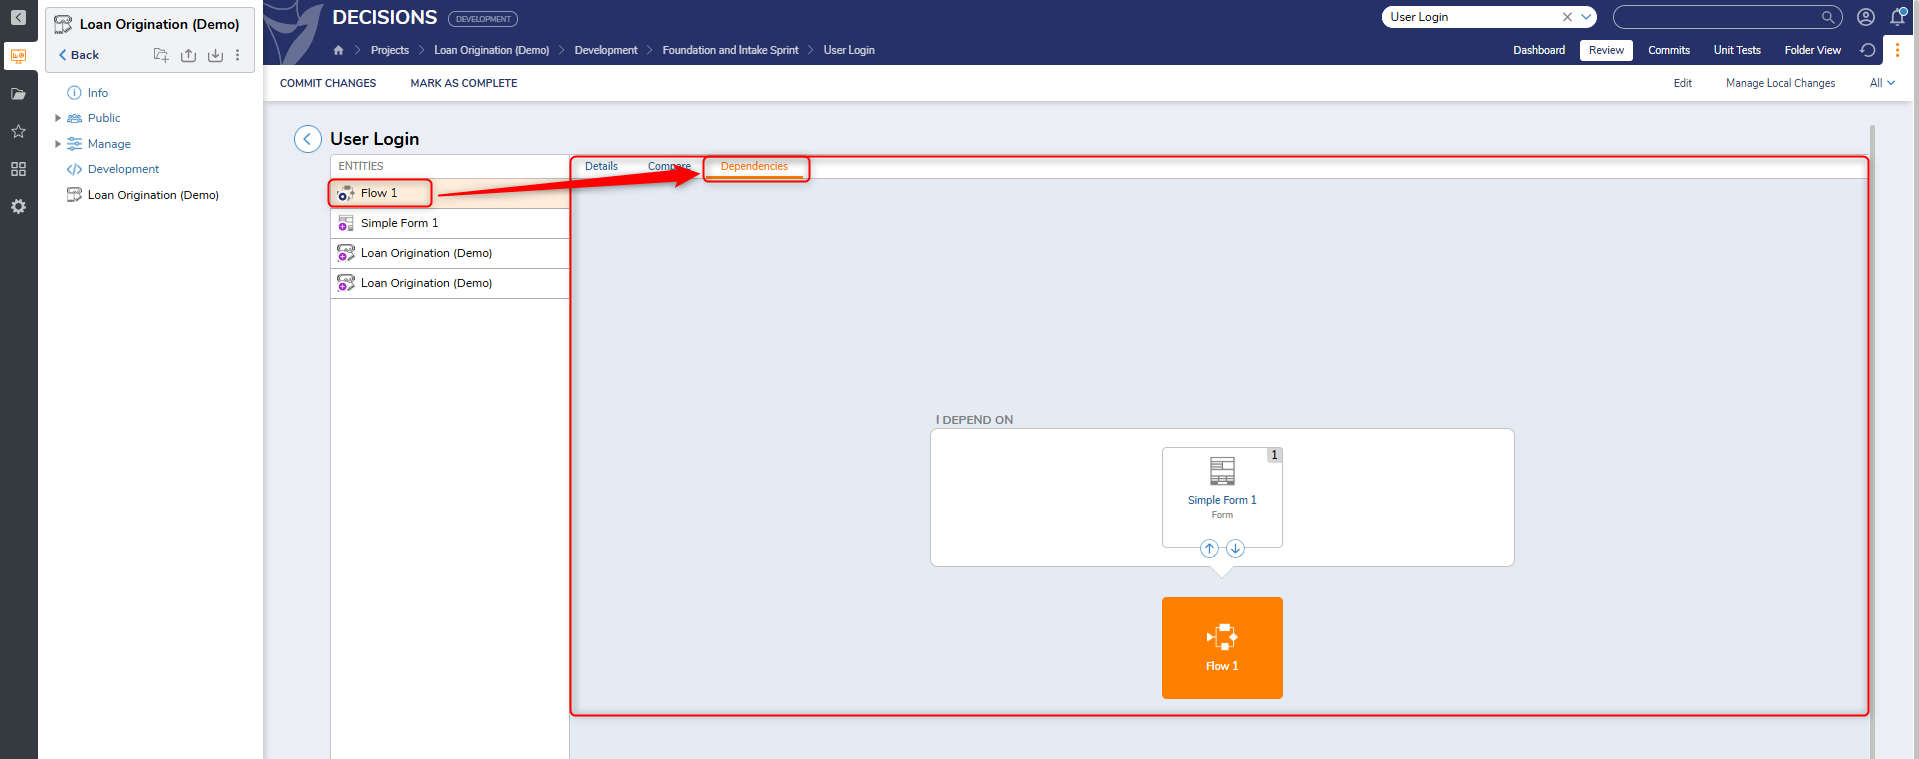
- Details: Displays entity-level information, including:
- Commits: Lists all commits related to the user story. Each entry includes details such as Revision ID, description (commit message), the developer who committed the changes, timestamp, Added count, Modified count, and Deleted count.
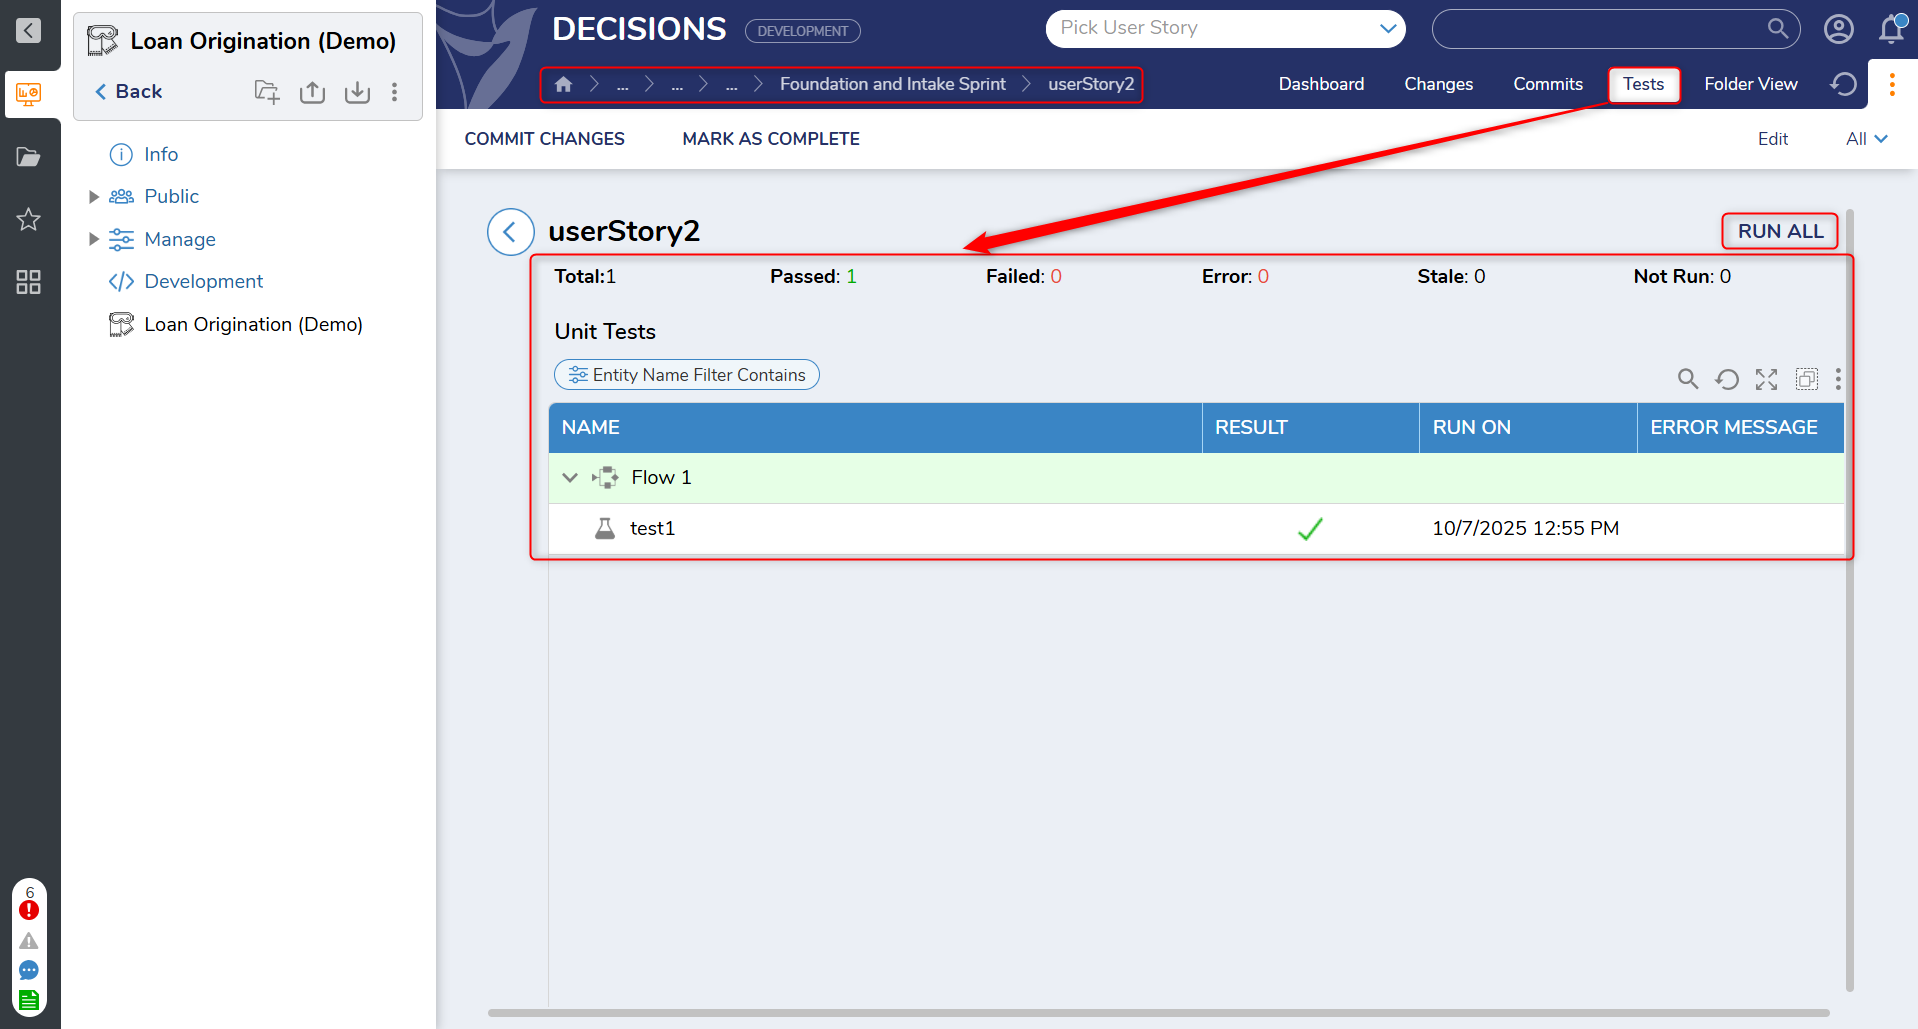
- Unit Tests: Allows running and managing tests specific to entities associated with the user story. This functions similarly to other test folders in the platform. If tests have not already been run and committed manually, they are automatically executed during the user story commit process. Test results are then captured in the build within the Deployment Package on the Deployment Server for validation and reporting.
Key aspects of the workflow:
- Work is logged under the user story header for traceability.
- Edits to flows, entity creation, or configuration updates are tracked under the story.
- A many-to-many relationship is supported:
- One story can be associated with multiple entities.
- Each entity can be linked to multiple stories.
This structure ensures that all development work is:
- Properly scoped and assigned
- Logged and documented
- Linked to a deployment path
It provides visibility for admins, developers, and QA teams into what has changed, who made the changes, and why - supporting smoother deployments and clearer accountability.
Managing User Story Associations on Entities:
Each entity within a Project (such as flows, forms, and rules) includes a Manage User Stories action, accessible from the entity’s action menu. This allows user stories to be linked or unlinked from the selected entity.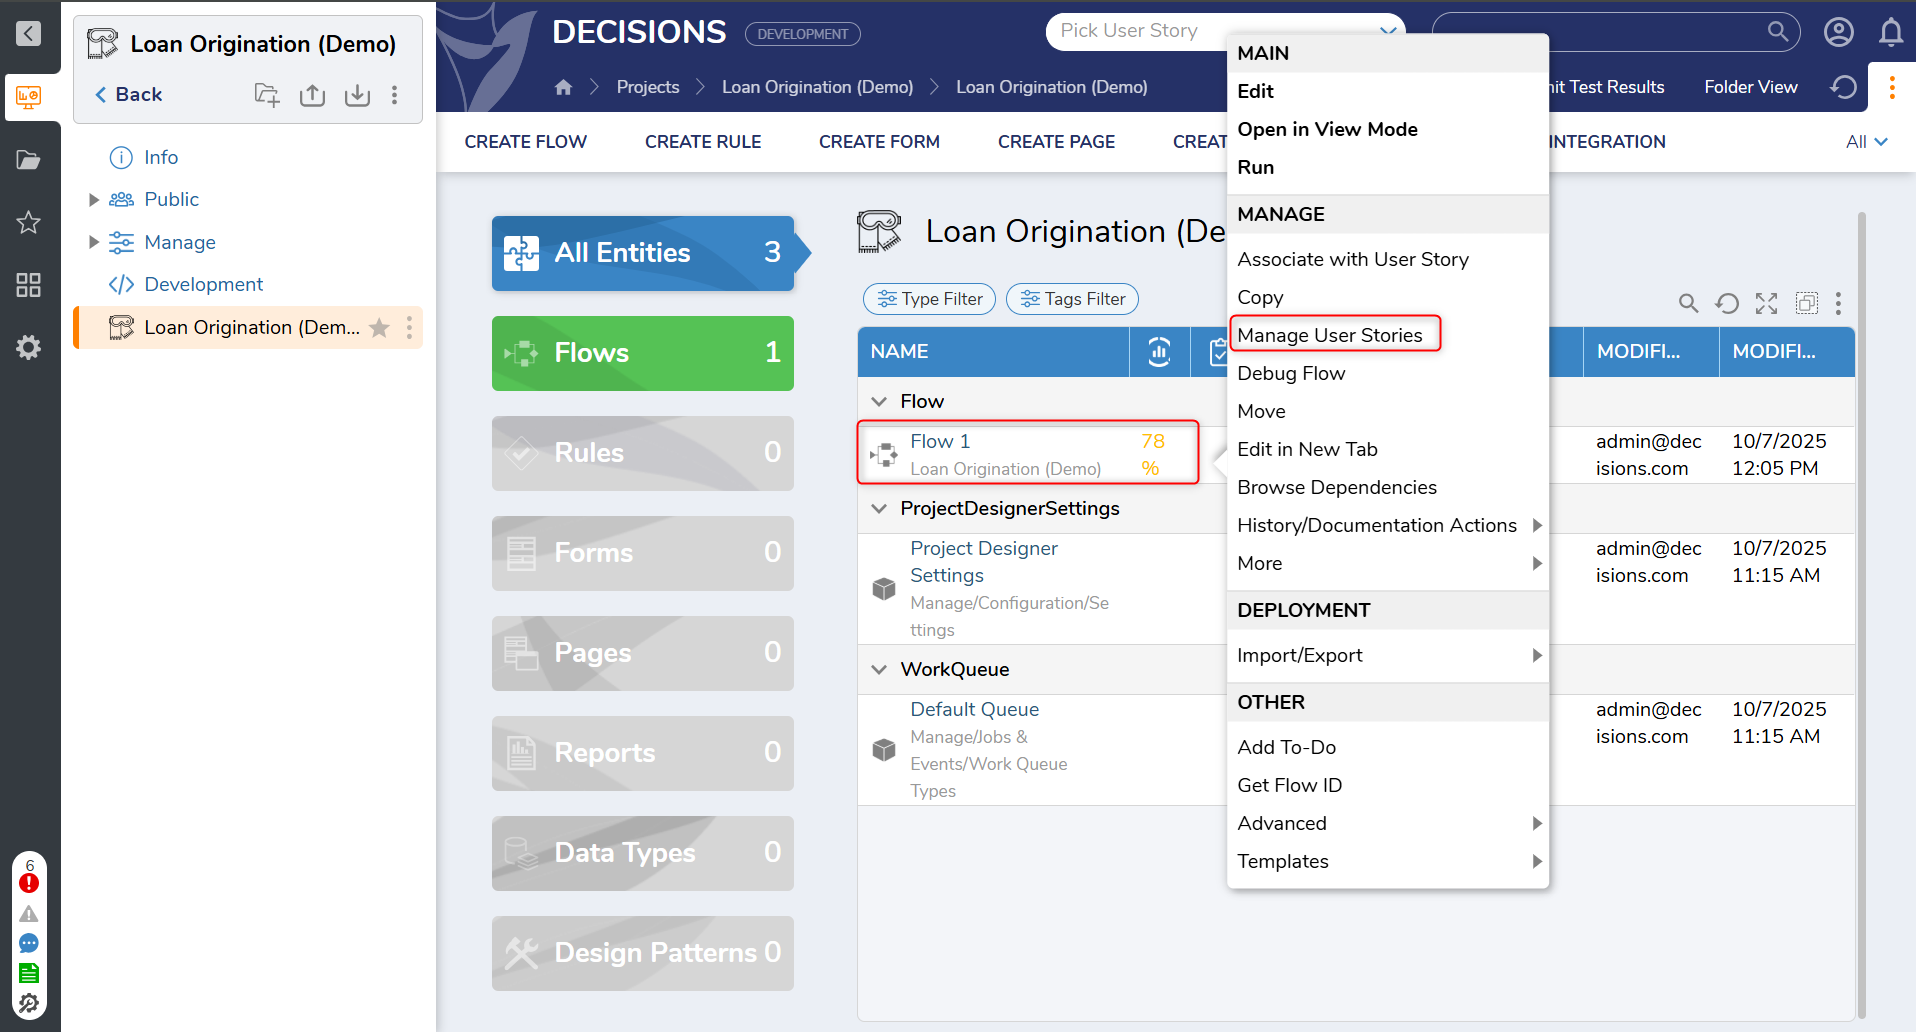
Selecting this action opens a dialog with two reports: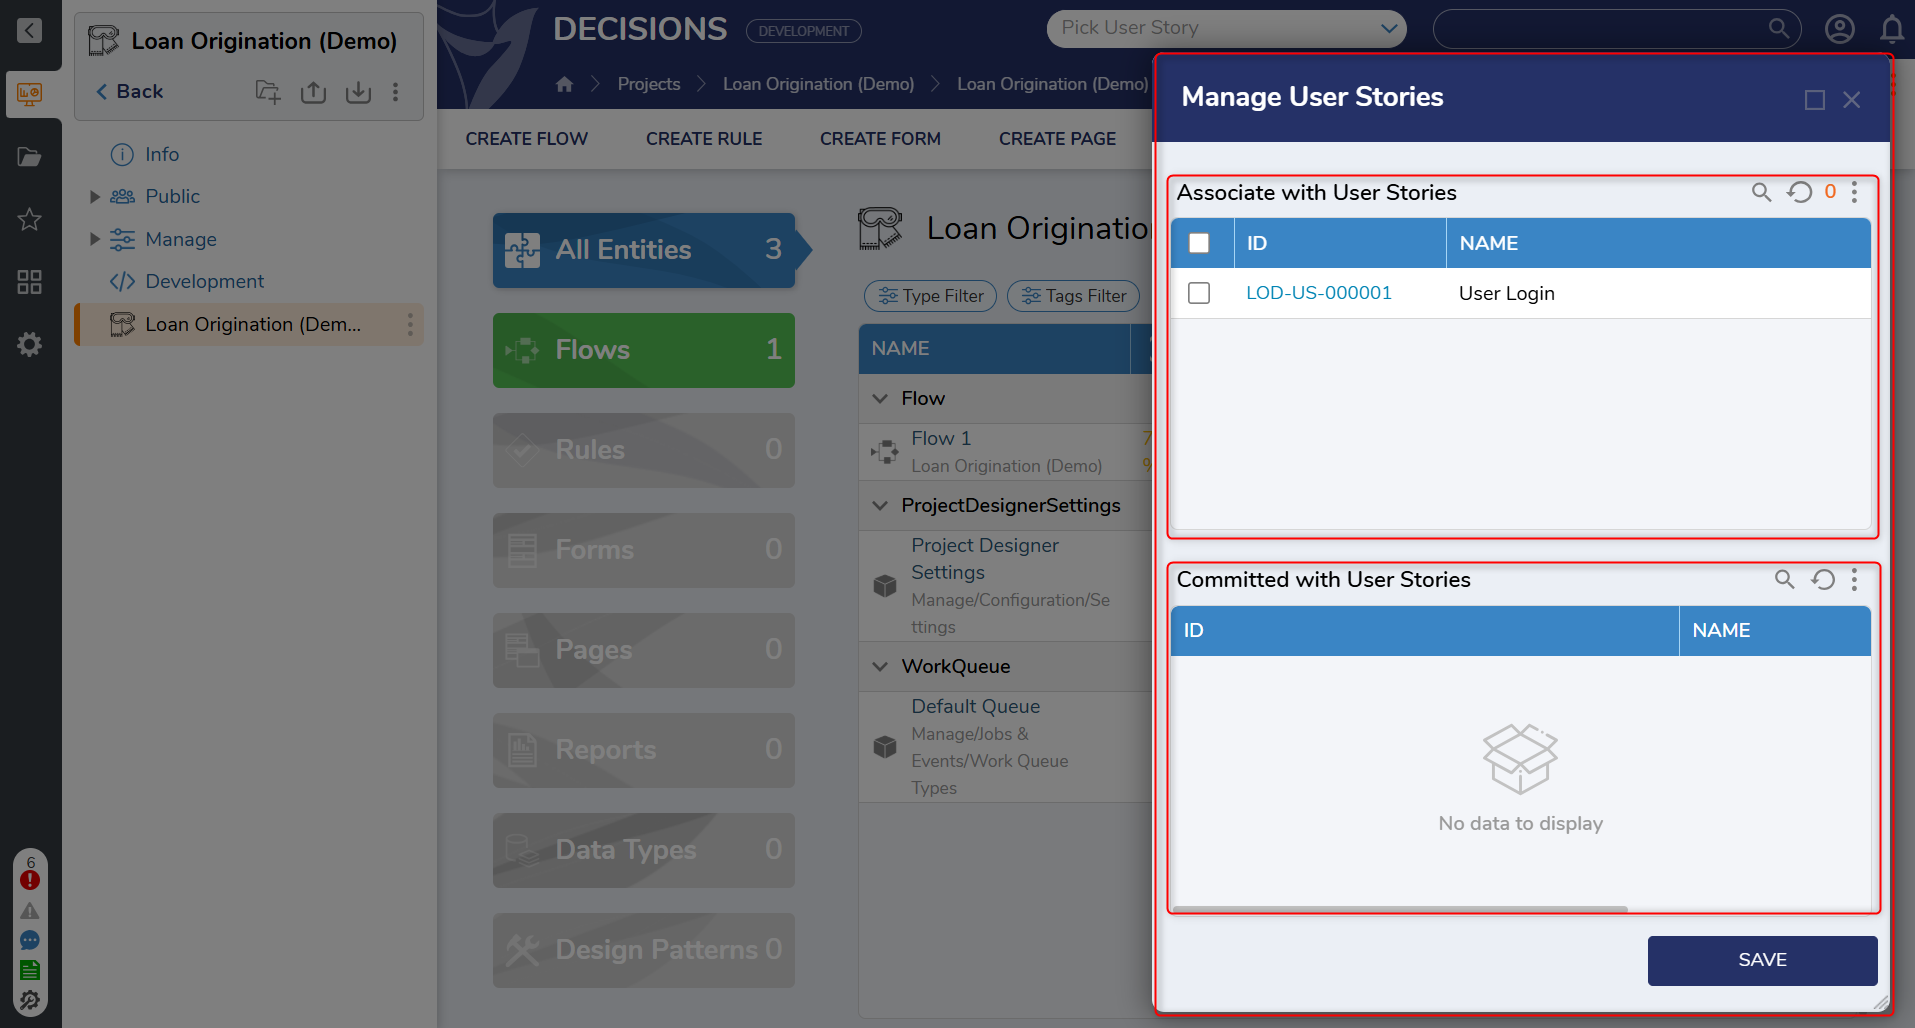
- Associate with User Stories
- Displays user stories currently in "In Development" or "Changes Requested" states.
- Allows associating or disassociating stories with the selected entity by selecting or deselecting checkboxes.
- Click Save to confirm any changes.
- Committed with User Stories
- Displays all user stories that have been committed to the Deployment Server and are associated with the selected entity.
- These associations are locked and cannot be modified, preserving deployment traceability.
This feature ensures complete visibility and control over which entities are tied to which stories, both during active development and after deployment.