Overview
A To-Do is a feature within the Project System that serves as an actionable note, enabling seamless communication, task prioritization, and efficient assignment management. It acts as a centralized hub for teams to organize, track, and collaborate on various tasks.
Use Case:
- Collaboration: Users can leverage To-Dos to delegate responsibilities, assign tasks to specific team members, and facilitate collaborative efforts within a project. This fosters transparent communication and accountability, ensuring everyone is aligned with project goals and responsibilities.
- Project Tracking and Monitoring: The status of various tasks can be tracked. This proactive approach allows for timely interventions and adjustments, ensuring the project stays on track and within the predefined timeline.
Create a To-Do
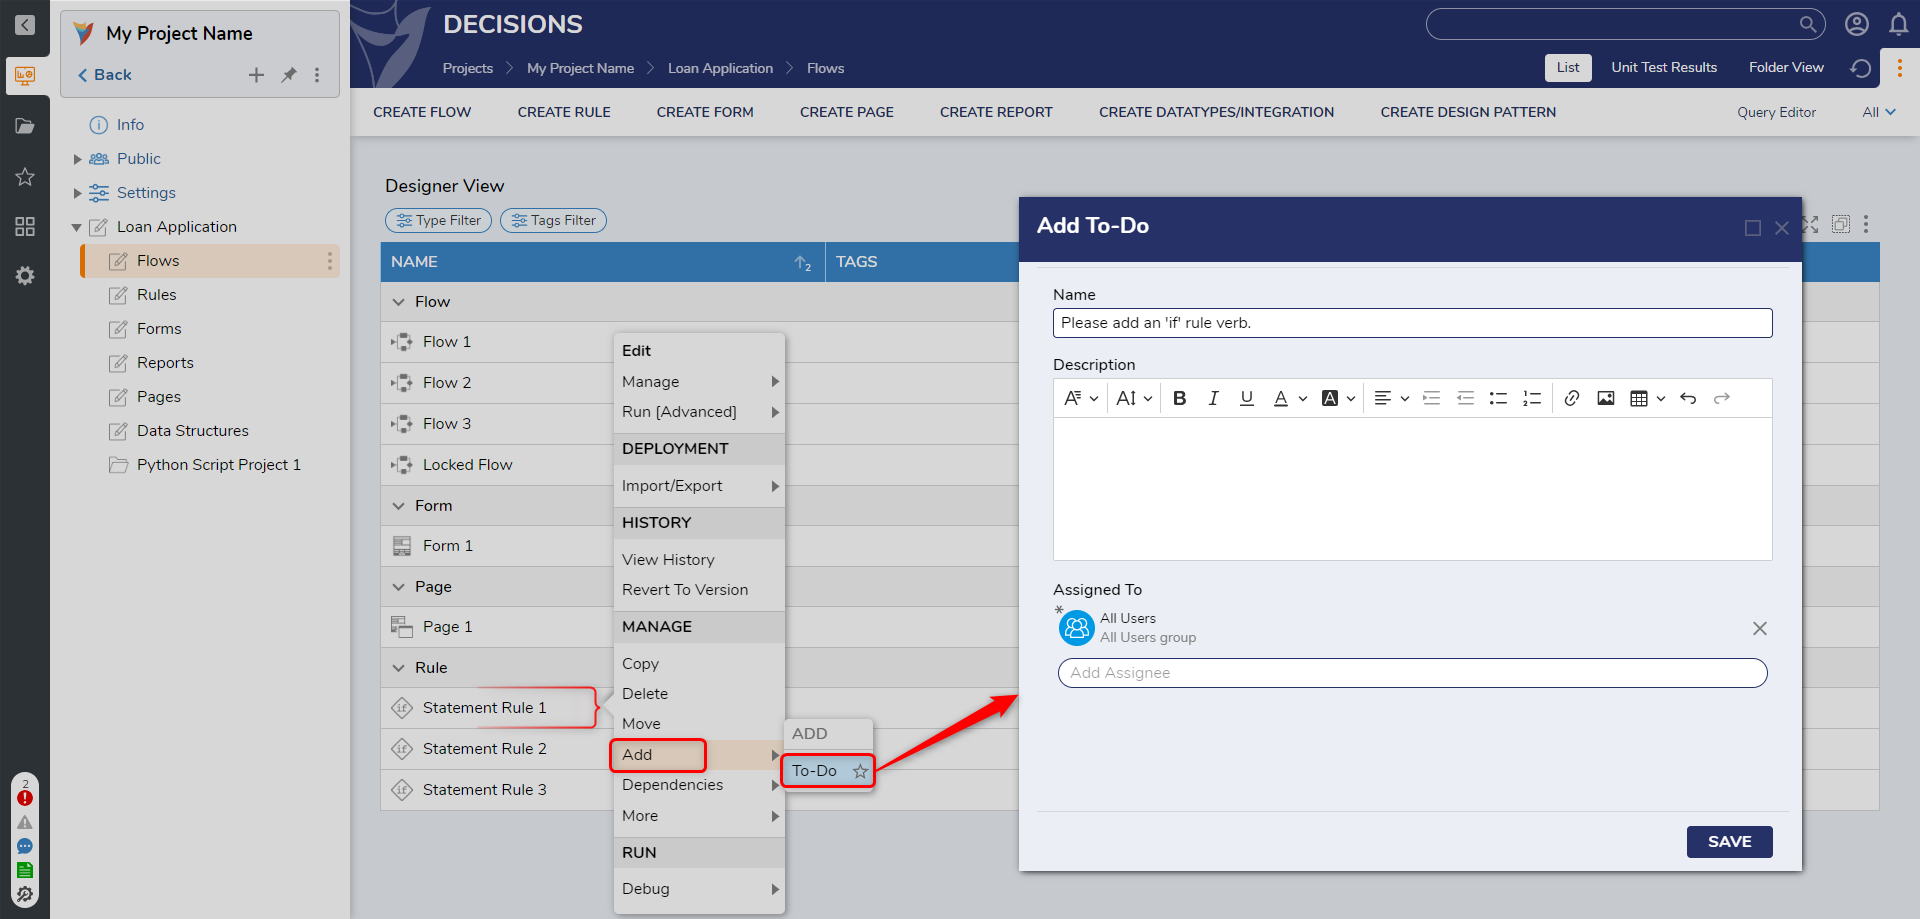
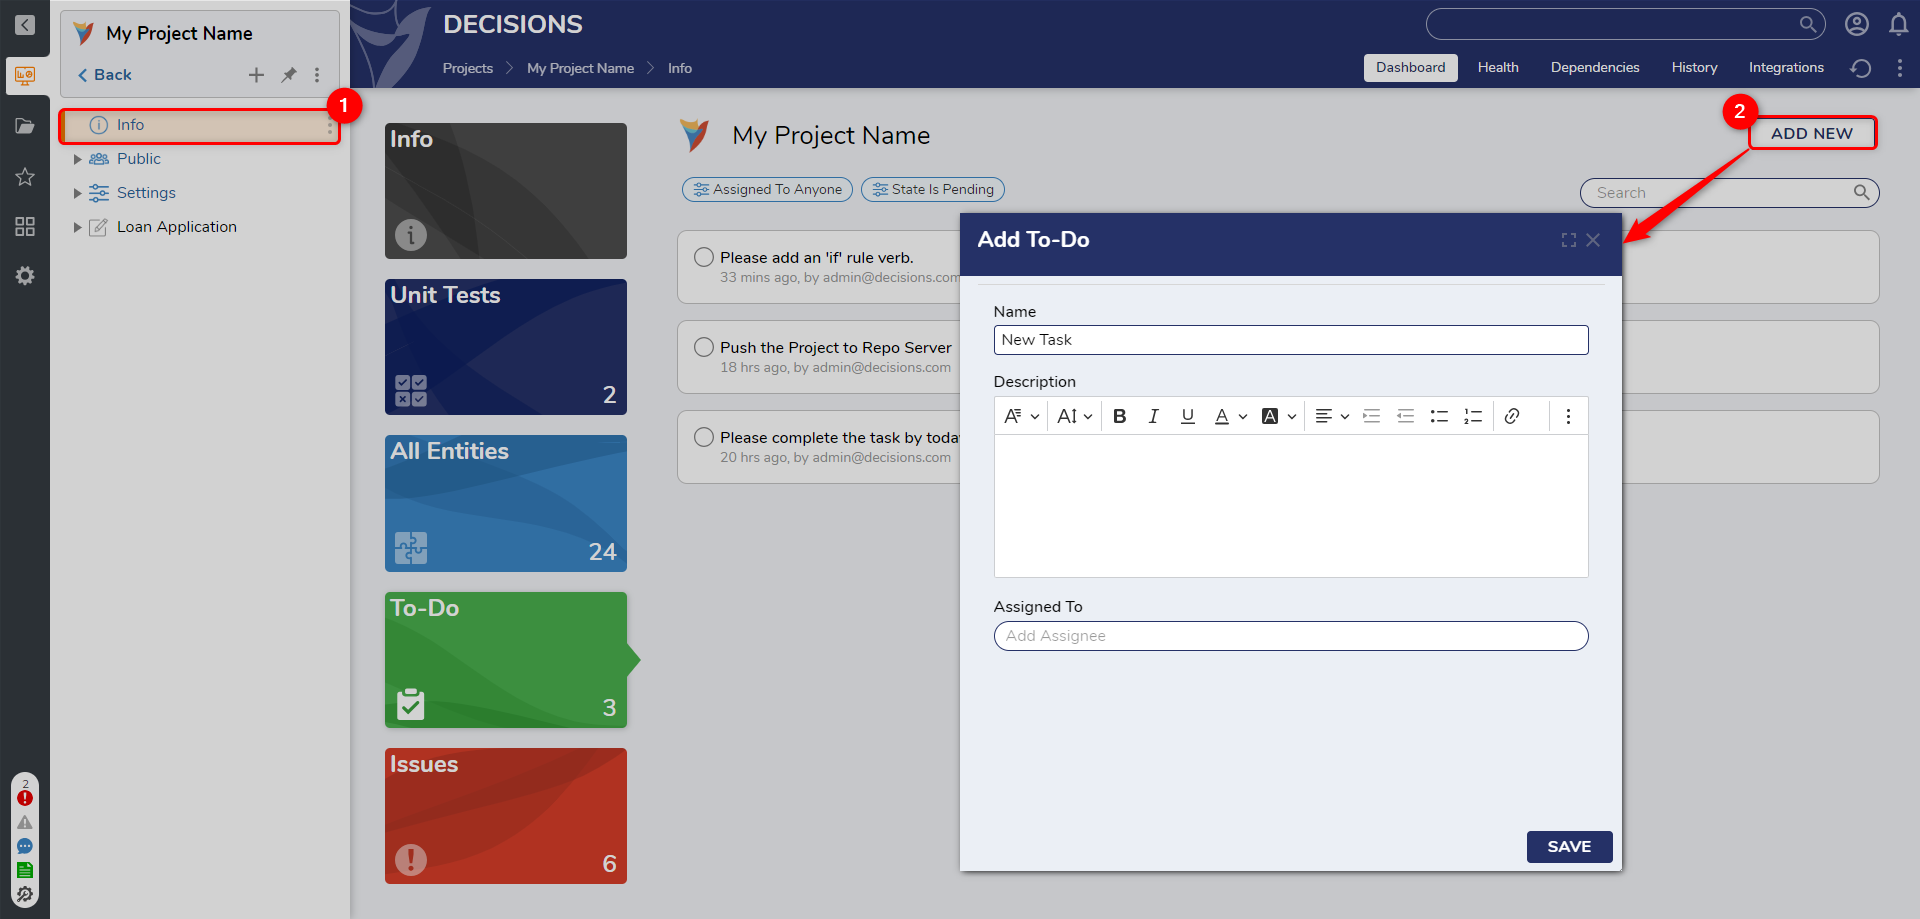
To-Dos can be created directly on a Designer Element to attach the task to a specific Flow, Rule, or other element. Additionally, users can create To-Dos from the To-Do Report on the Projects Dashboard, where they can establish project-level tasks.
| Designer Element | To-Do Report |
|---|---|
| Right-click a Designer Element within the action menu, open Add, then select To-Do to open the Add To-Do dialog. | On the Projects Info Dashboard, select the To-Do tile. Click the ADD NEW button to open the Add To-Do dialog. |
 |  |
Wherever a To-Do is created it can be given a priority and a due date.
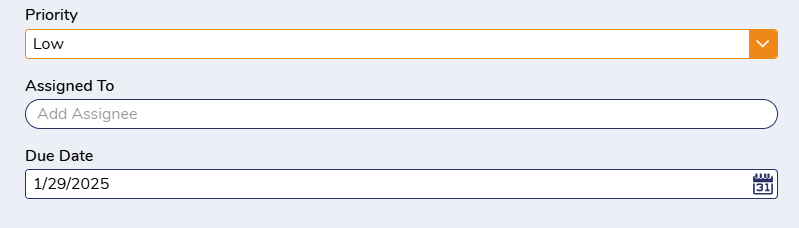 Priority has four options: Low, Medium, High, and Critical.
Manage To-Do Items
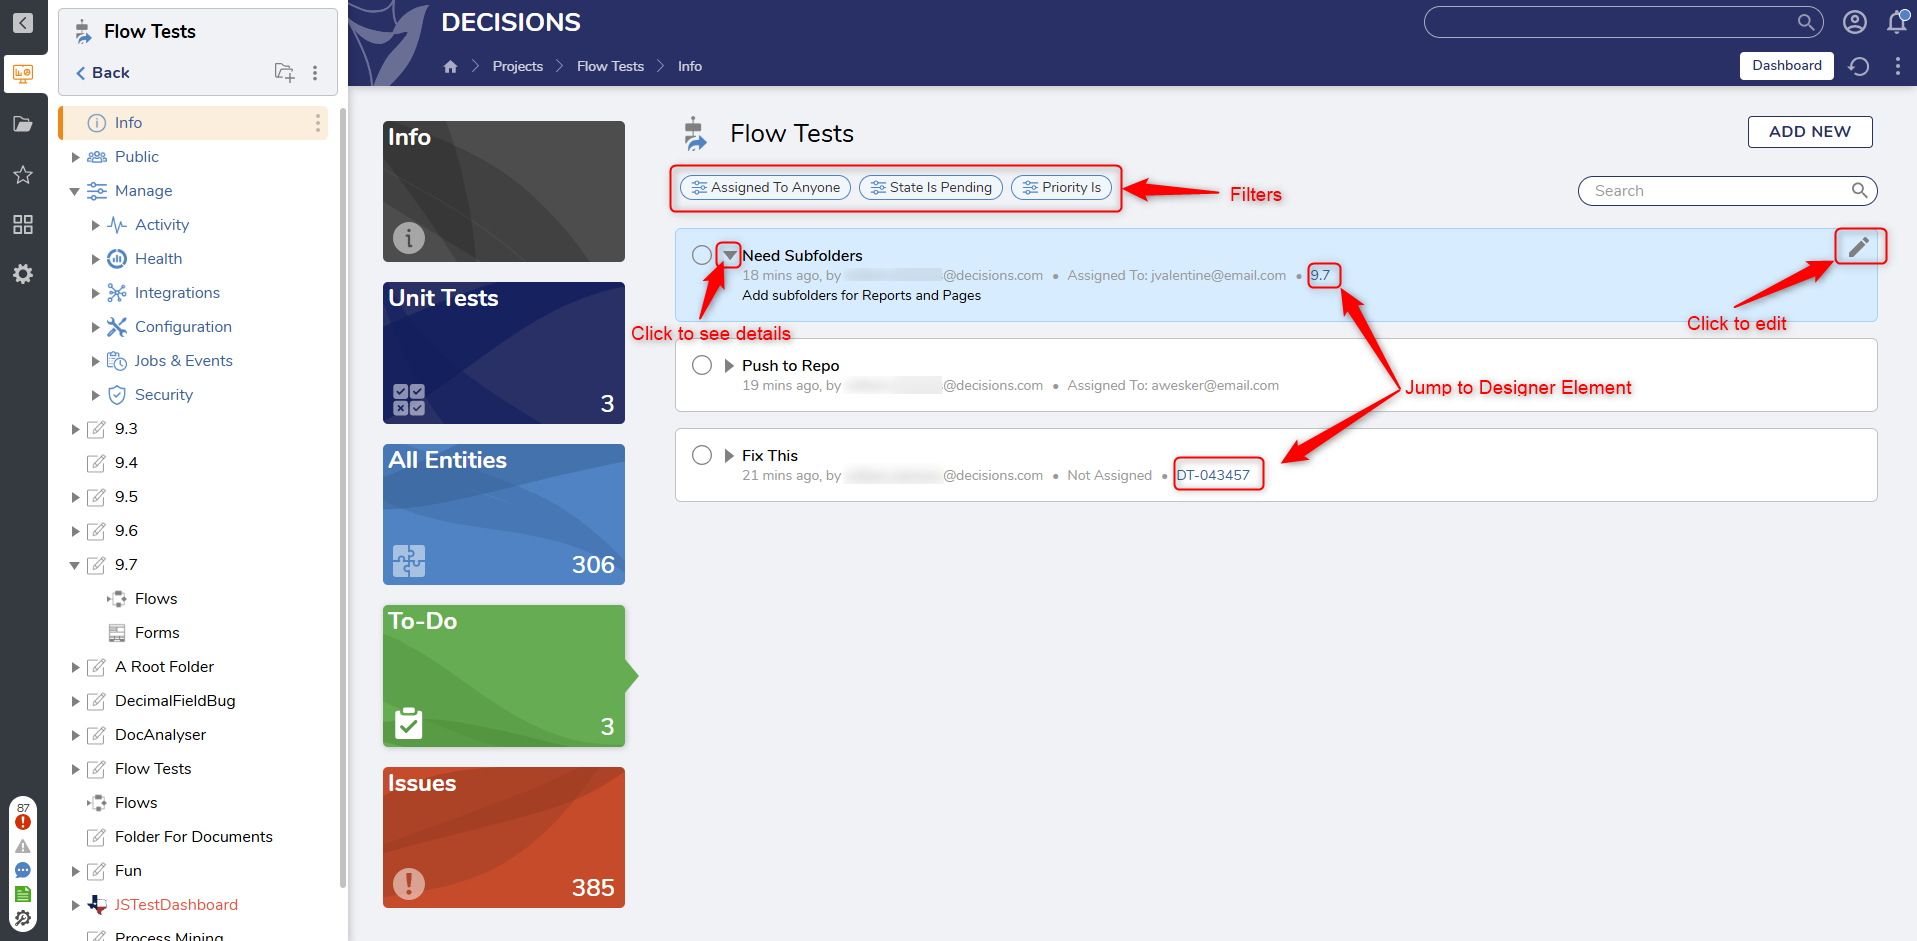
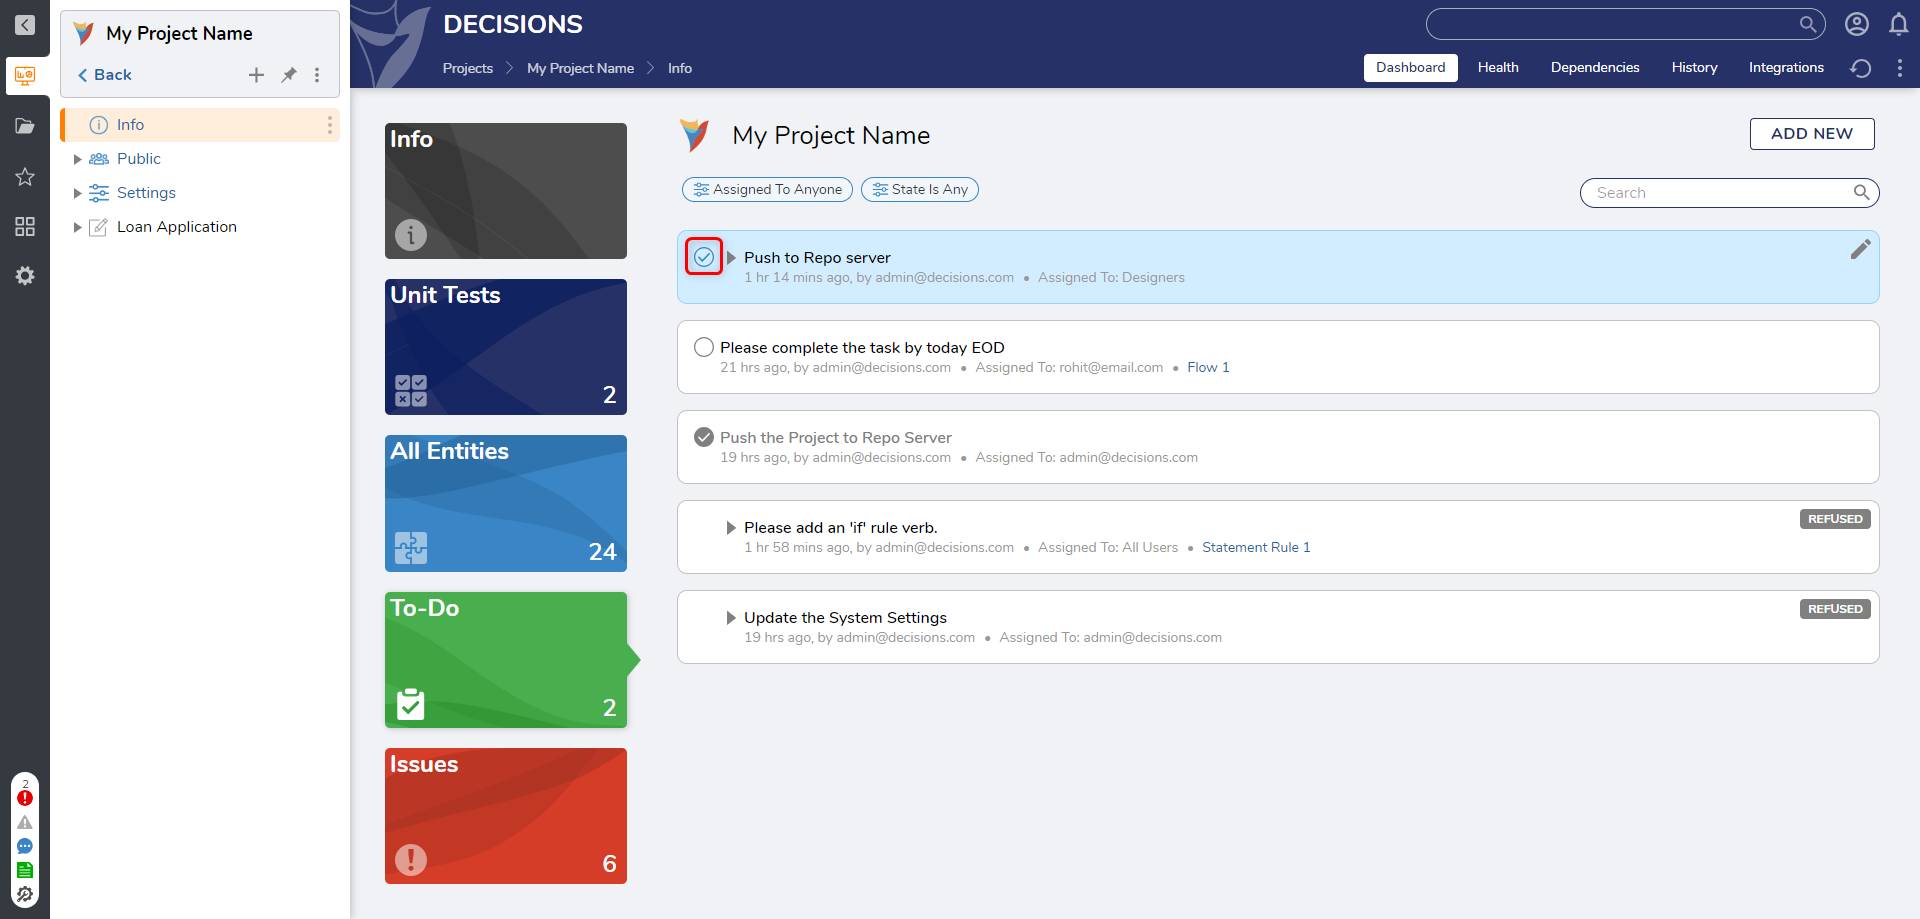
The To-Do Report within the Info Dashboard lists all the To-Do items for a Project. Users can add new project-level tasks, review and work on existing tasks, and filter the Report to display tasks assigned to specific users or groups. They can also filter by priority.
The Report can be filtered by To-Do states, including Pending, Completed, and Refused, providing a comprehensive overview of the task.
In the To-Do Report, tasks will be displayed with various details. How long ago was the task created, who was it created by, who is the task assigned to, and if the To-Do is attached to a Designer Element, a link to navigate directly to that element. The To-Do items can be expanded to display the description.
Complete To-Dos
By marking a task as complete, users ensure that project milestones are met and progress remains on track. This step signifies the successful execution of assigned tasks and showcases the achievement of predefined project objectives.
Complete the task by selecting the checkbox next to the To-Do name. Additionally, select the edit icon when hovering over a To-Do item. In the Edit To-Do dialog, change the State to Completed and select SAVE.
View all completed To-Dos by changing the Report "State is" filter to "Any" or "Completed".
Refuse To-Dos
Select the edit icon when hovering over a To-Do item to refuse the To-Do. In the Edit To-Do dialog, change the State to Refused and provide a Reason. Team members can communicate effectively by providing a comprehensive reason for refusing a To-Do, ensuring transparency, and promoting collaborative problem-solving. Select SAVE to save the changes made.
View all refused To-Dos by changing the Report "State is" filter to "Any" or "Refused".
Feature Changes
| Description | Version | Release Date | Developer Task |
|---|---|---|---|
| Added Prioritize and Due Date properties. | 9.7 | February 2025 | [DT-04 |