Overview
The Drop Down List control allows users to select a value from a predefined list. The list is displayed when the user clicks the dropdown arrow.
Configuration
To configure the Drop Down List, select the control in the Form Designer and navigate to Properties > Input.
| Setting | Function | |
|---|---|---|
| Type | Defines the data type for the dropdown list values. | |
| Display Field | Appears when an Entity type is selected (e.g., FileData, Account, Document). Determines which field from the entity is shown to represent each list item (e.g., FileName for a list of FileData). | |
| List Input Source | Defines origin of list items. | |
| DataName | Binds to a list from the Form’s input data, allowing for dynamic population. | |
| Flow | Retrieves the list from the output of a Flow run within the Form. | |
| Static | Uses manually entered values defined within the control. The Static Default Item(s) setting enables if, or if there is not, a default chosen item in the list. Translate Items allows for the list items to be translated based on the Portal settings. | |
| Disable Typing (v9.6+) | This prevents Users from being able to type values into the Dropdown List. | |
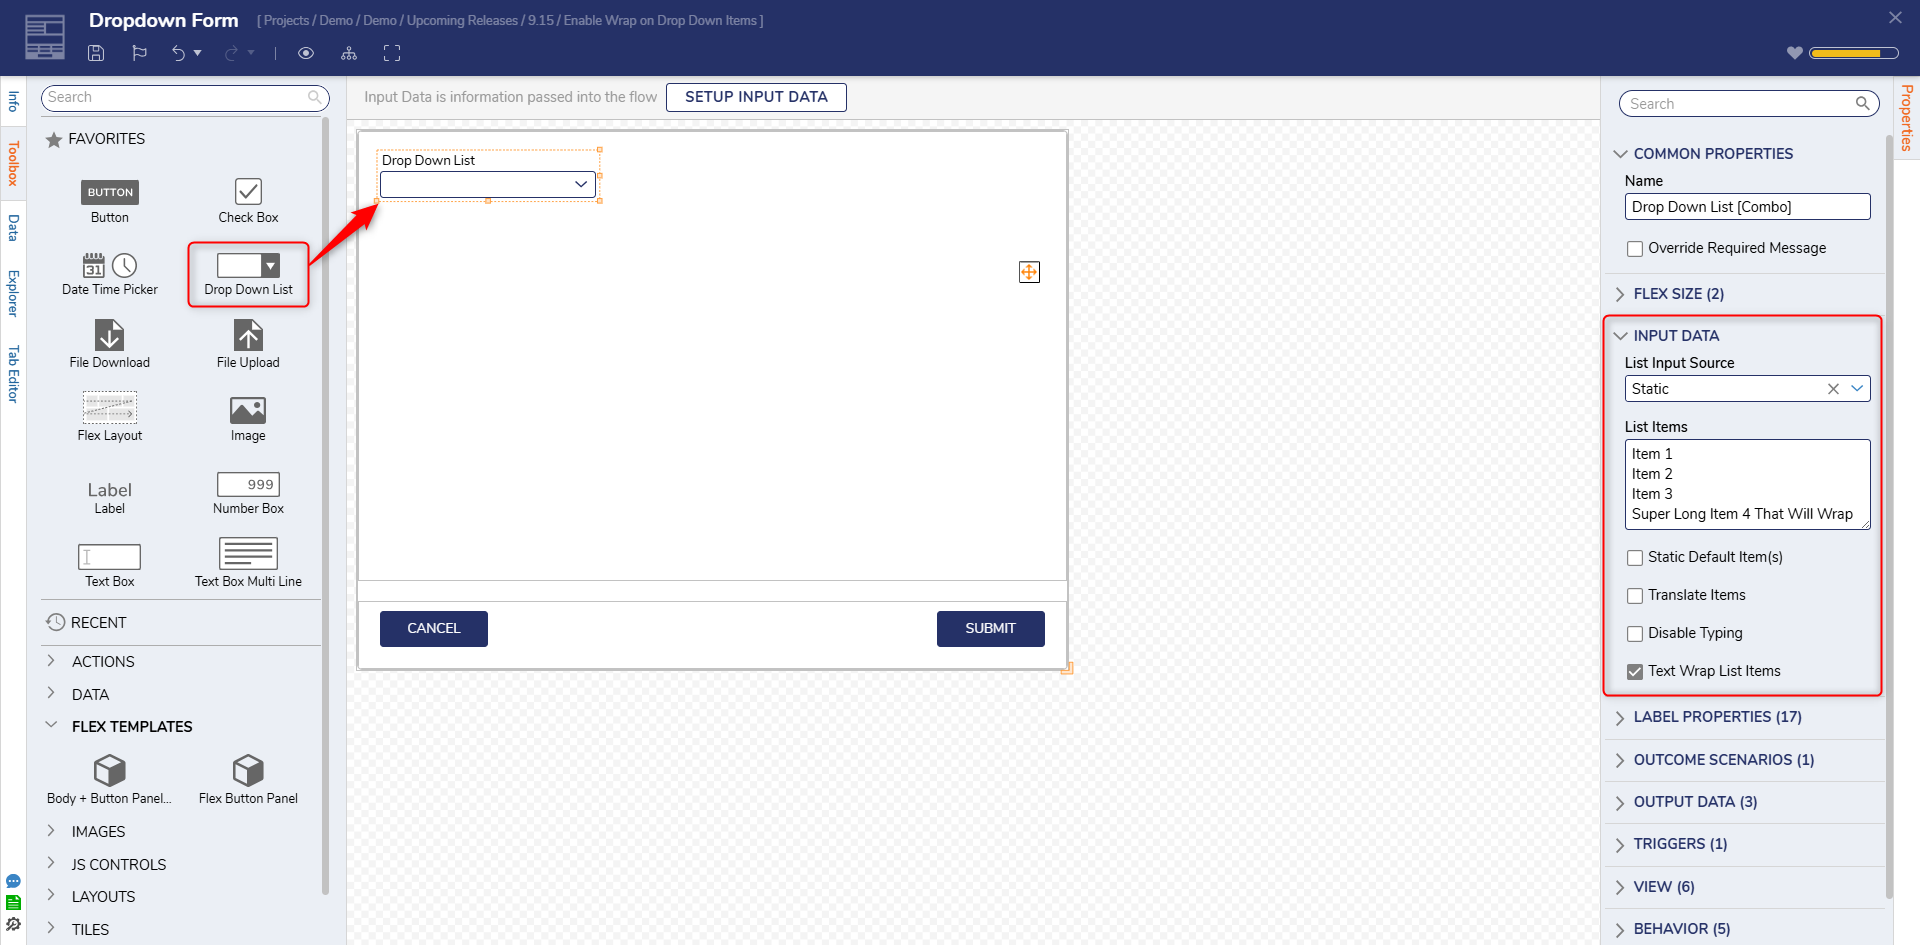
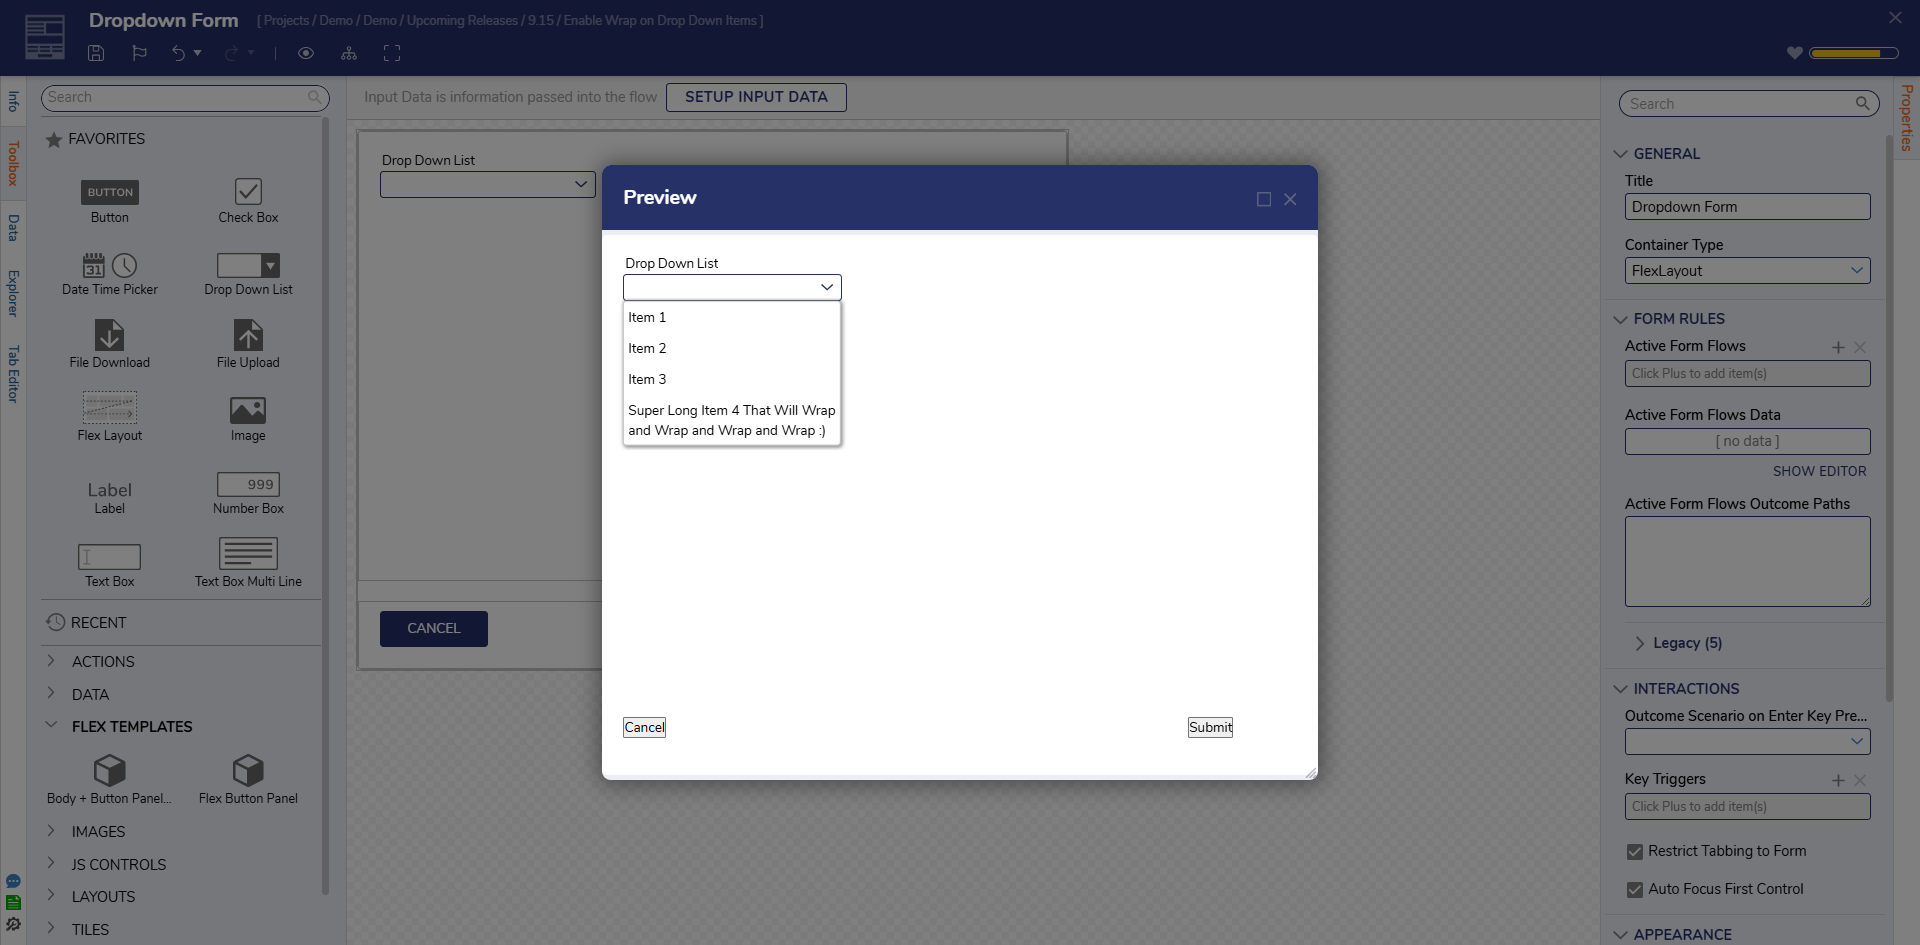
| Text Wrap List Items | Allows list item labels to wrap onto multiple lines when the text is longer than the dropdown width. If disabled, long labels are truncated with an ellipsis (...). | |
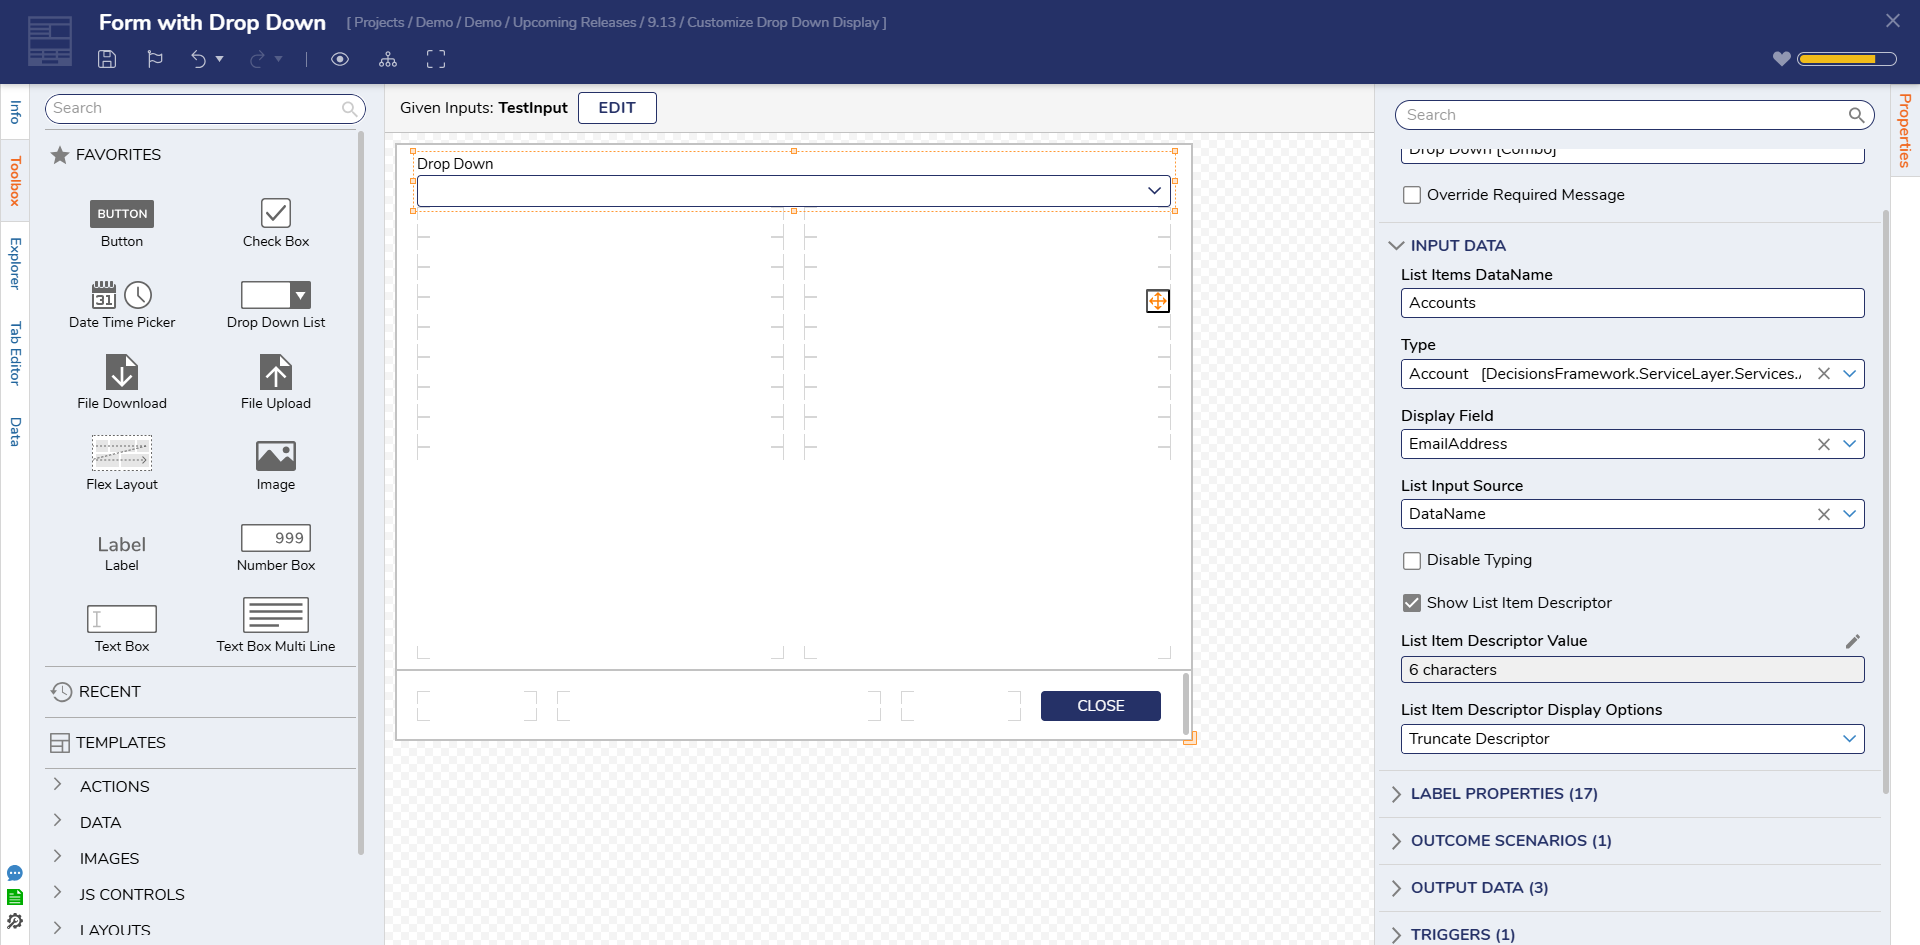
| Show List Item Descriptor | (Only available for DataName list input) Enables display of additional descriptive information alongside each list item to provide better context. | |
| List Item Descriptor Value | A text merge editor used to define what information appears next to each item. Use fields from the selected Entity and Form Input Data. Styling can be controlled using Form Font or custom CSS. | |
| List Item Descriptor Display Options | Provides control over how list item descriptors appear. Options include truncating just the descriptor or both the descriptor and the item label. Truncated text will show fully on hover via a tooltip. | |
Creating a Static Dropdown List
- Open a Form in the Form Designer. Drag and drop the Drop Down List into the Form.
- In the Input Data section under the List Input Source select the desired source.
- Choose Static and add List Items: Item1, Item2, Item3, and a long list item that will wrap or truncate.

- Select Preview in the top action bar to view the List.

List Item Descriptor
The List Item Descriptor feature lets designers display helpful, contextual information alongside each dropdown option, especially useful when items are similar or not easily distinguishable.
Limitations
Descriptors are not currently displayed alongside the selected item after it is chosen, this enhancement is being planned.
Descriptors are for display only and are not included in Form output data.
Example Configuration
- Configure the Drop Down List:
- List Item Type: Accounts
- Display Field: EmailAddress
- List Input Source: DataName
- Show List Item Descriptor: True
- Edit the List Item Descriptor Value and set it as: (Accounts.FirstNameAccounts.LastName - Accounts.Department)
- Style the Descriptor (Optional)
- Under the View section, set Use Form Font For List Item Descriptor to False.
- Customize List Item Descriptor Font Attributes (e.g., set text to italic and color to #adadad).

- Pass Data into the Form:
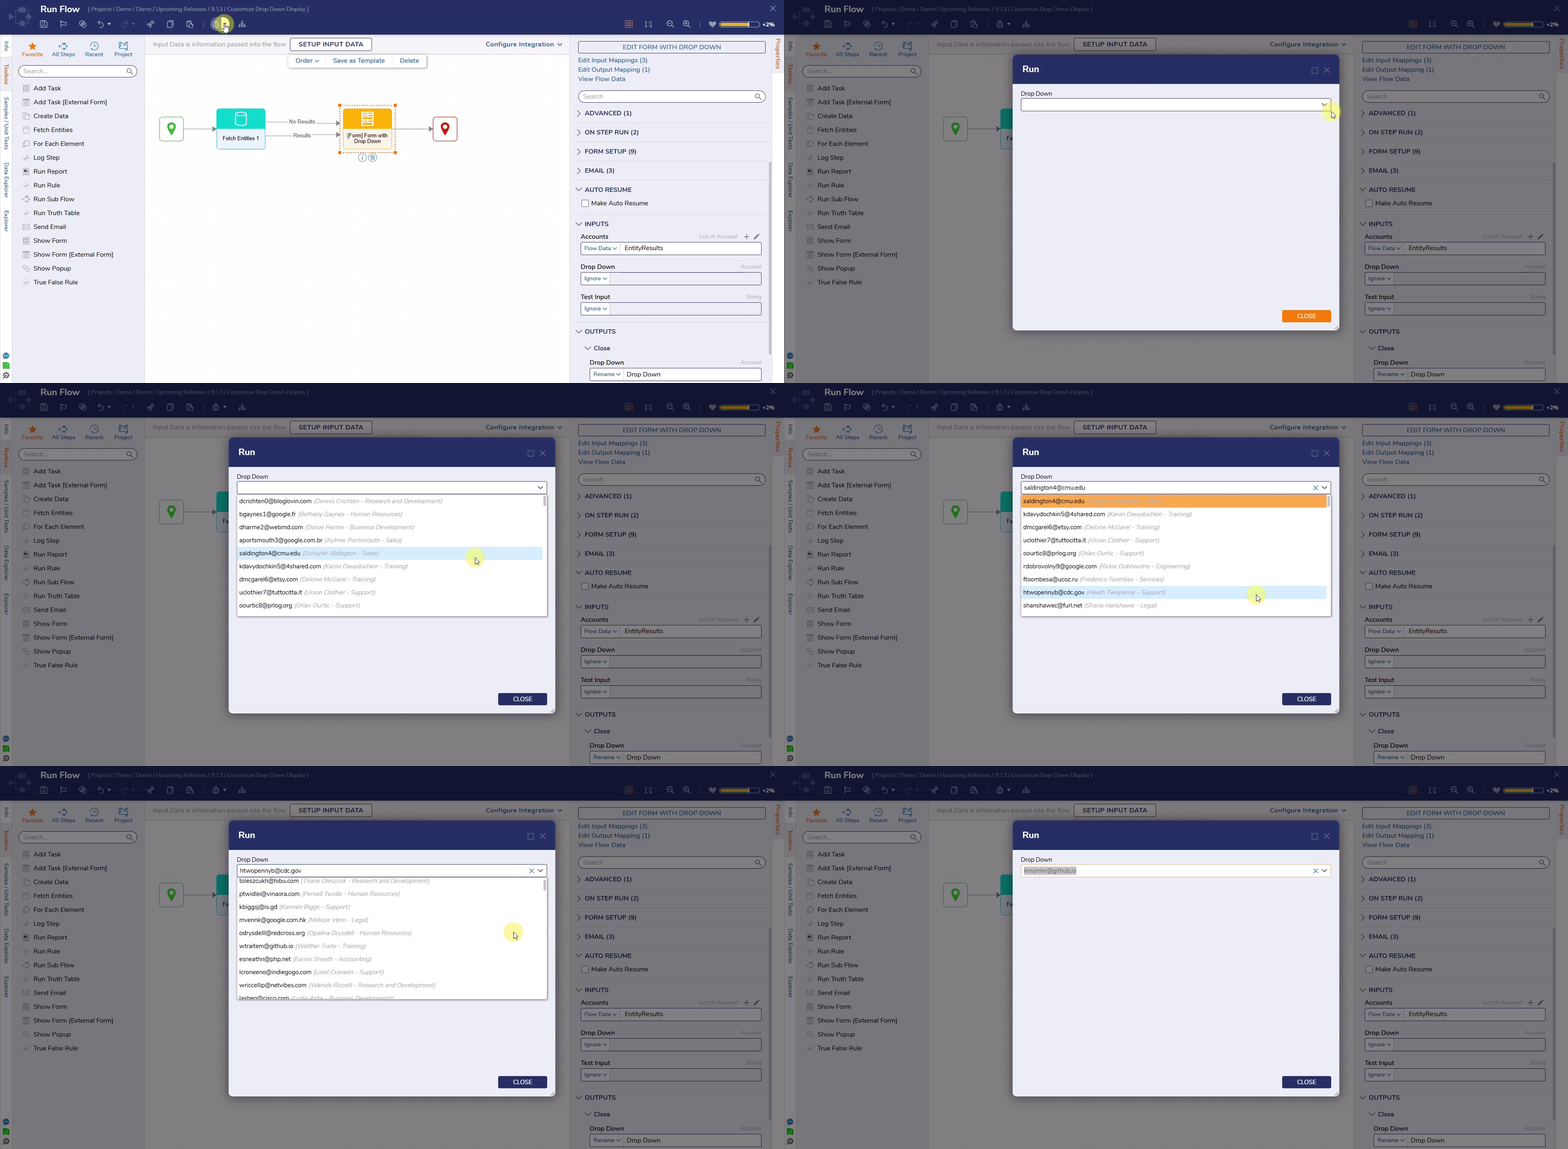
- In a Flow, use a Fetch Entities step to retrieve a list of Accounts.
- Pass the Fetch Entities output into the Form's List Item Data Name Input.
- Run the Flow to view the dropdown with descriptors in action.

Feature Changes
| Description | Version | Release Date | Developer Task |
|---|---|---|---|
| Added the Disable Typing feature | 9.6 | January 2024 | [DT-042659] |
| Added List Item Descriptor | 9.13 | July 2025 | [DT-043987] |
| Text Wrap for List Items | 9.15 | September 2025 | [DT-044291] |