| Feature Details | |
| Introduced in Version | -- |
| Modified in Version | 8.16 |
| Modification Details | Added a new setting on Scheduled Flows: "Run Only on Job Server" |
Overview
Scheduled Jobs is a feature where users can run a Flow, send emails, synchronize Active Directory, or perform other tasks on the scheduled date and time. Using advanced scheduling options, a job may be scheduled for almost any frequency.
Scheduled Jobs in Clustering
In a clustered environment, all Scheduled Jobs run on a single server called a Primary Job Server. For more information, refer to Setting the Primary Job Server for a Cluster.
Accessing Scheduled Jobs
In the Designer Studio, navigate to the System > Jobs And Events > Scheduled Jobs. On the Scheduled Jobs Page, any options listed on the Global Action Bar can be used to create the specific Scheduled Job type. Each Scheduled Job has unique settings that help determine what the Job does.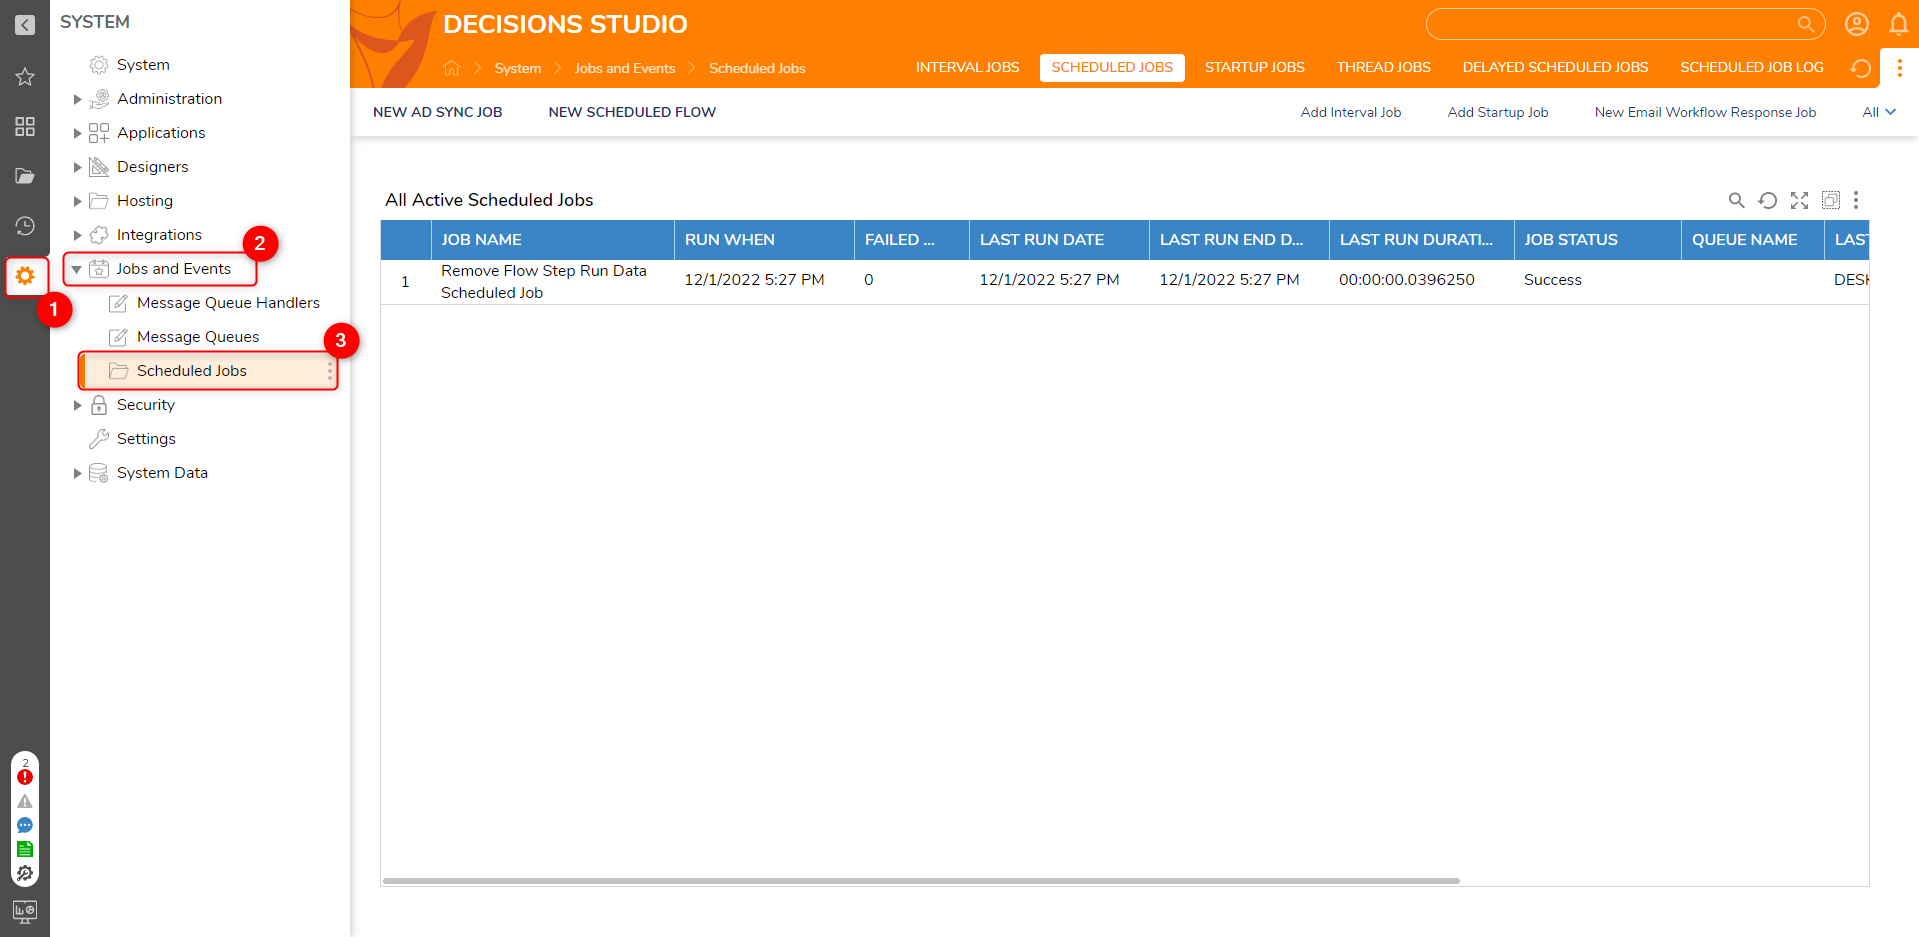
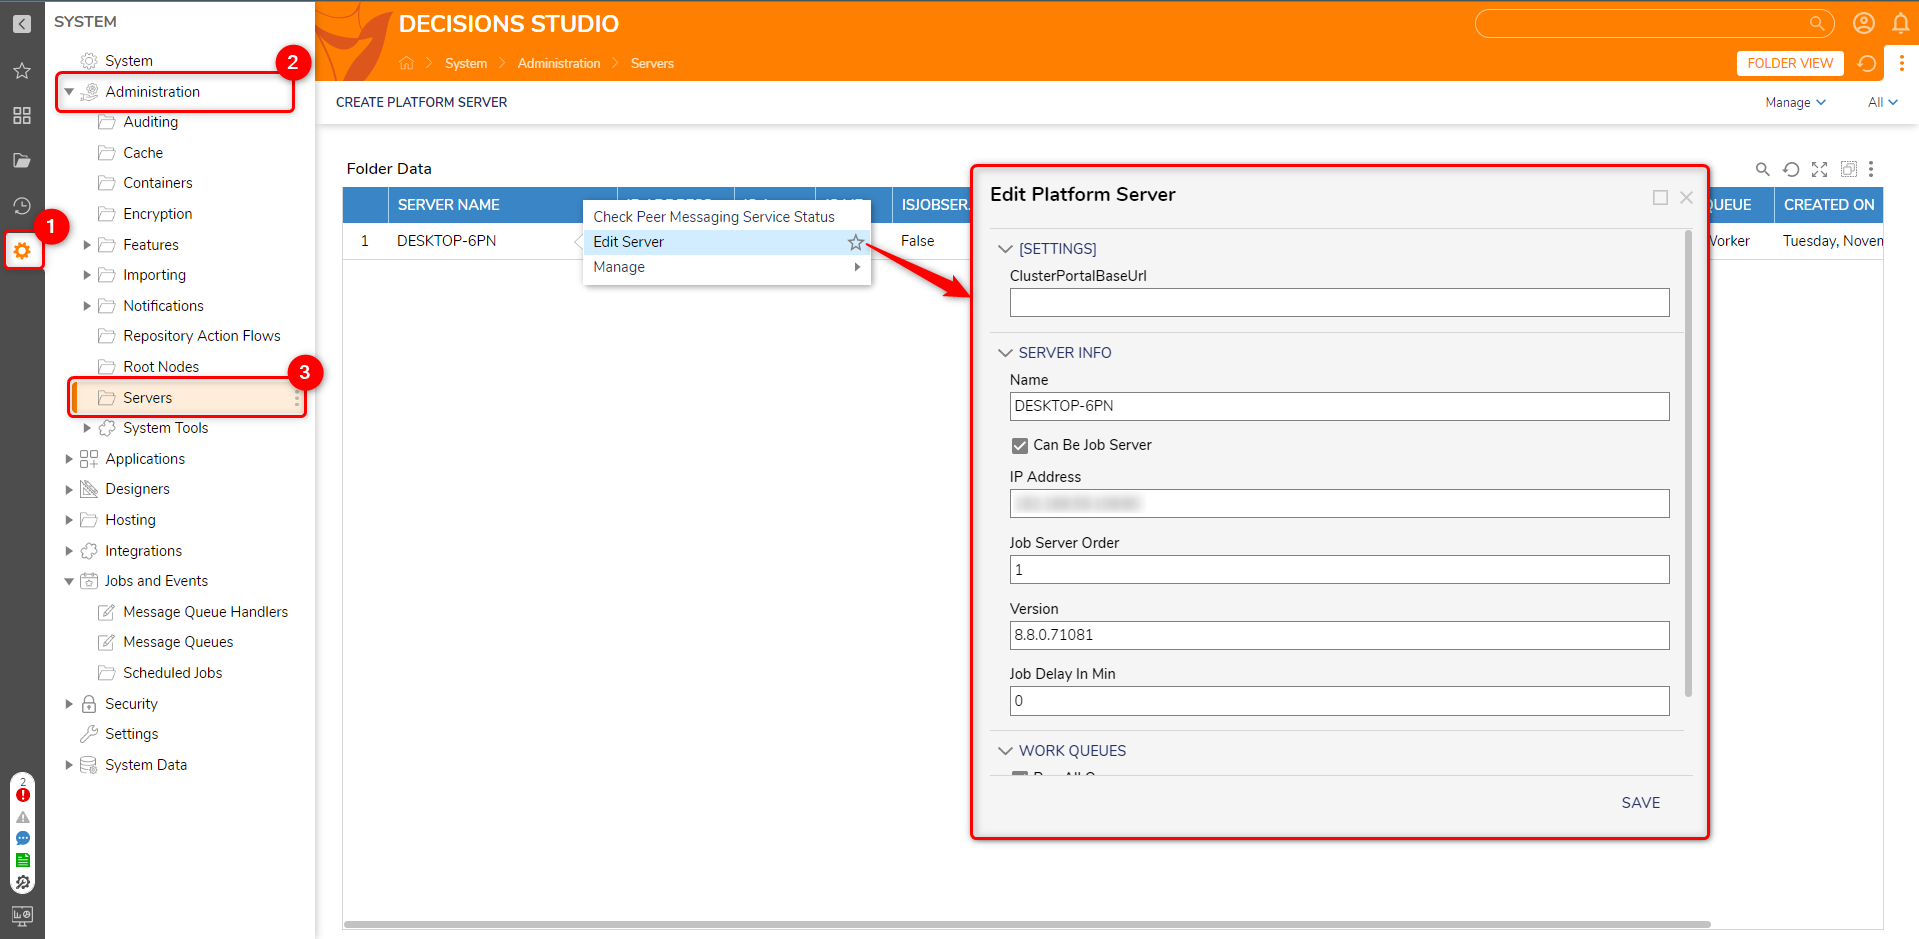
Enable or Disable a Server's ability to run Jobs
Types of Scheduled Jobs
- Scheduled Flows
- AD Sync Jobs
- Interval Jobs
- Startup Jobs
- Thread Jobs
- Email Response Scheduled Jobs
The next section describes all the configurations on all the types of Scheduled Jobs.
| Feature Modifications | |
| Modified in Version | 8.16 |
| Modification Details | Added a new setting on Scheduled Flows: "Run Only on Job Server". |
Scheduled Flows
The New Schedule Flow option will allow users to run a Flow per the required date, time, and span.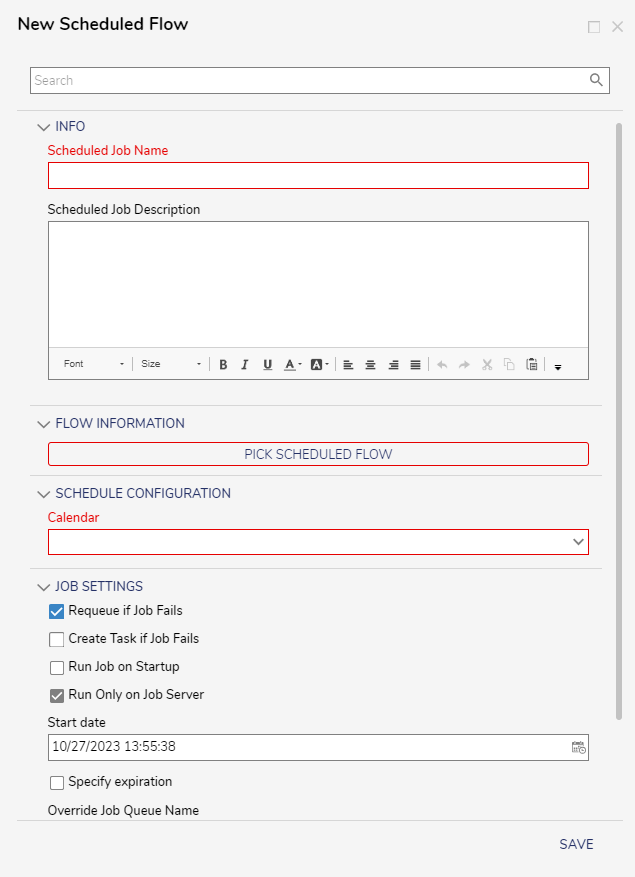
Configurations for Scheduling a Flow
| Configuration | Description | |
|---|---|---|
| Info | ||
| Scheduled Job Name | This will set the Name of the Scheduled Job. | |
| Scheduled Job Description | Allows to give a description to the scheduled Job. | |
| Flow Information | ||
| Pick Scheduled Flow | This will allow the user to pick an existing Flow. Note: From v8.13 and above, users will not be allowed to create a Flow in this field. Users can only pick the already created Flow. | |
| Schedule Configuration | ||
| Calendar | This option allows users to configure the calendar type and its calendar information for precise job scheduling. | |
| Daily Schedule | Allows to run the Job daily.
| |
| First Day of Month | Allows to run the Job on the first or last day of the month, respectively.
| |
| Monthly Schedule | Allows the Job to run once every month
| |
Specified Job Schedule | Allows running the Job at a specific time.
| |
| Time Span Schedule | Allows running the Job at a fixed interval of time span
| |
| Weekly Schedule | Allows the Job to run once every week.
| |
| Yearly Schedule | Allows the Job to run once every year.
| |
| Job Settings | ||
| Requeue if the Job Fails | If the Job fails, this action will restart the Job after completing all the jobs from the same job queue. Job Queue: A Job Queue will contain a set of jobs running one after the other. Consider this as a single basket of Jobs. If a Job gets held up, all scheduled jobs in the same queue will be put on hold until the initial job finishes. | |
| Create Task if Job Fails | This action will allow notifying, creating, and assigning a task for a user if the Job fails. | |
| Run Job on Startup | This will start the Job whenever the Decisions Server is restarted. | |
| Start Date | This will set the date and time to start the Job. | |
| Run Only on Job Server | This setting is clustering-specific. Enabled by default, this setting ensures that the job runs only on the Primary Job Server. When set to false, the Scheduled Job will run on any of the available servers where "Can be Job Server" is marked True. Thus, if the span of the job exceeds the time until the next scheduled run, this will execute the scheduled job on the next server before the current job is completed. | |
| Specify Expiration | This will expose a new field to set the date and time to expire the Job. | |
| Override Job Queue Name | This will allow setting a new Queue Name. Queue Name: If the Queue name is the same for multiple jobs, it will be considered a single Job Queue. So, to run the Jobs in parallel, users need to give a new Queue Name to create a new Job Queue. | |
| Delayed Job | ||
| Notify on Job Delay | When this option is enabled, users can set up notifications for delays in their Job by configuring the relevant details. | |
| Delay Greater than (in seconds) | This is a buffer period before notifications are sent to users regarding job delays. | |
| Add to Logs | This feature allows for adding logs to the log folder and setting the level of logs included in the logs. | |
| Emails | This will trigger an email notification to the configured email addresses, informing them that the Job has been delayed. | |
| Create Assignments | This will create user and group assignments regarding the delayed Job. | |
Refer to the following article to learn about Running a Flow as a Scheduled Job.
AD Sync Jobs
To learn all about the Active Directory (AD) and Active Directory (AD) sync Jobs, refer to the following Documentation:
Interval Jobs
The Add Interval Job option allows users to run a Flow, usually at specified intervals.
Difference between "Scheduled Jobs configured as Time Span" and "Interval Jobs"
The Scheduled job can also be configured as an interval job by setting it to a time-span scheduled job, but there is still a major difference in both types of jobs.
| Scheduled Jobs configured as Time Span | Interval Jobs |
|---|---|
| The next scheduled run time for a "Time Span Scheduled Job" is calculated by adding the specified time interval to the start time of the job. | In Interval Jobs, the next run date is determined by adding the configured interval to the ending time of the previous Job. |
| These jobs are suitable when you need a task to start at specific, predefined intervals. | Interval Jobs are ideal when you want the next instance to start at a fixed time after the previous Job has ended. |
| If the duration of a job Flow is greater than the configured time span, the next Job won't start until the previous one is completed. Only one Job runs at a time, ensuring sequential execution. | Multiple instances of the Job can run concurrently if configured to do so. |
| If you want a job to start every 10 minutes, a Time Span Scheduled Job is the appropriate choice. | If you want the next Job to start 10 minutes after the previous run has ended, you should use an Interval Job. |
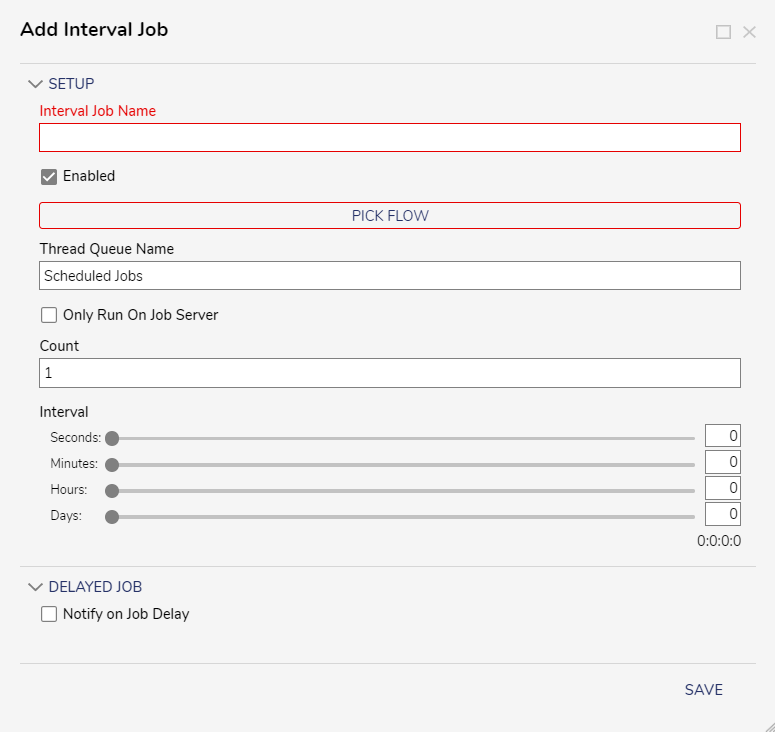
Configurations for Interval Job
| Configuration | Description |
|---|---|
| Job Name | This allows setting the Name of the Job |
| Enabled | When selected, this will ensure that the Interval Job is active and running. |
| Pick Flow | This will allow the user to pick an existing Flow |
| Only Run on Job Server | When Enabled, this will run the Job only on one server from the clustered environment. |
| Count | Number of times the Job will run at once |
| Interval | Adjust the Sliders to set the interval time |
| Notify on Job Delay | When this option is enabled, users can set up notifications for delays in their Job by configuring the relevant details. |
Delay Greater than (in seconds) | This is a buffer period before notifications are sent to users regarding the job delay. |
| Add to Logs | This feature allows for adding logs to the log folder and setting the level of logs included in the logs. |
| Emails | This will trigger an email notification to the configured email addresses, informing them that the Job has been delayed. |
| Create Assignments | This will create the assignments to the users and groups regarding the delayed Job. |
Once all the settings are configured, the Interval Job will start instantly. To learn more about Interval Jobs, refer to Interval Jobs.
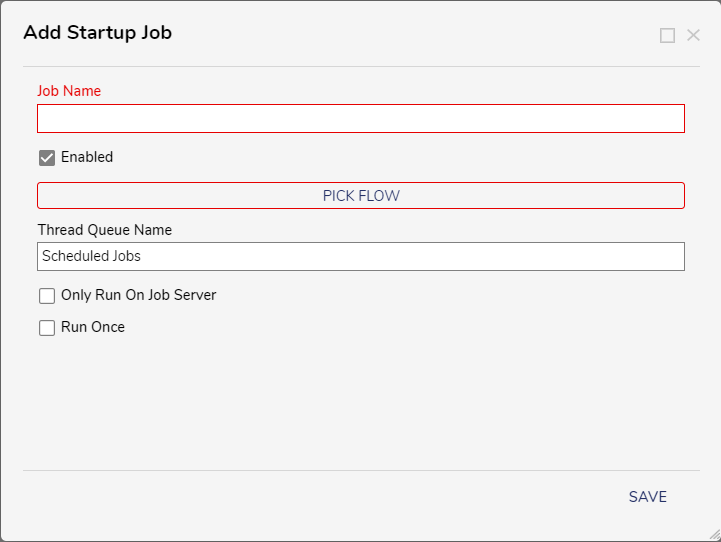
Startup Jobs
The Add Startup Job option allows users to run a Flow when the Decisions Server is restarted.
- Self-Hosted: Restarting the Decisions Server from Windows Services
- IIS Hosted: Restarting the Decisions Server by entering 'iisreset' from the Command Prompt/PowerShell
Thread Jobs
Thread Jobs shows all the Decisions' internal Job Processes.
Frequently Asked Questions
What happens to a Scheduled Job that runs up until its next scheduled run time?
In a situation where a Scheduled Job was set to run every five minutes, but an instance took 10 minutes to run, if both Jobs are on the same queue the second run will wait until the first finishes before starting.
Feature Changes
| Description | Version | Date | Developer Task |
|---|---|---|---|
| From v8.13 and above, users will not be allowed to create a Flow in this field. Users can only pick the already created Flow. | 8.13 | 08/11/2023 | [DT-038418] |
| Added a new setting on Scheduled Flows: "Run Only on Job Server". | 8.16 | 11/7/2023 | [DT-038427] |