Overview
Active Directory (AD) systems can be synchronized with this system to create local Accounts through scheduled sync jobs automatically.
This will require appropriate technical resources on the clients' side to be able to implement. It is recommended to make sure there is someone with experience available to streamline the process. The Decisions support team is available to help but may not be able to answer questions or solve problems that are unique and company-specific.
Queries
Do not attempt to sync AD by using a query.
The AD server authentication must have already been configured in the portal. See Setting up Active Directory (AD) Server Authentication.
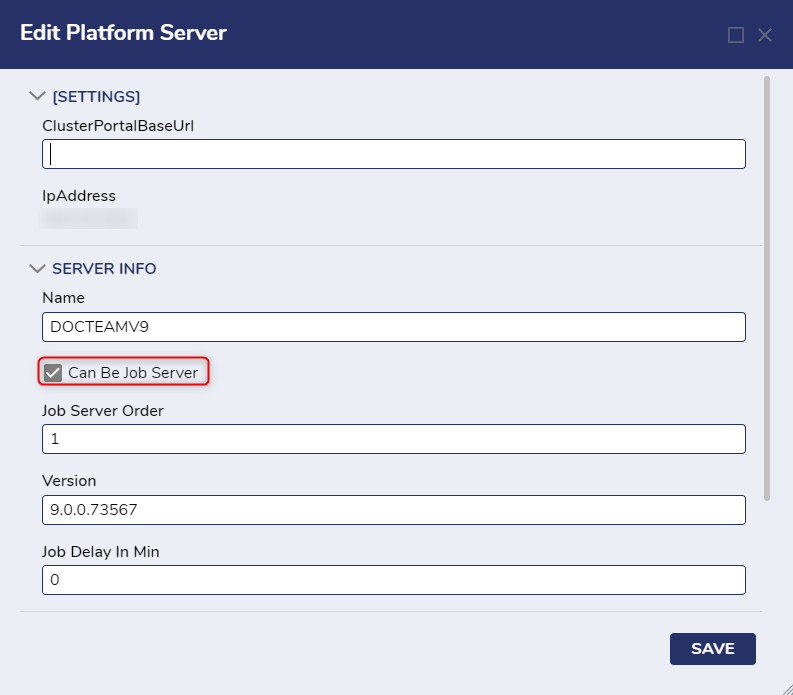
Additionally, the Server must have the Can Be Job Server System Setting enabled. To enable this, navigate to System > Administration > Servers. Right-click the desired Server and click Edit Server. Then, check Can Be Job Server and click SAVE.
For more information on enabling Job Servers, see: Enabling and Disabling Job.
Warning for SSO
Users cannot set up Active Directory Sync simultaneously with Single Sign-On (via SAML and OpenID Modules). Doing so will result in an error that requires users to reset their sign-on setup.
If an account has to be deactivated in Decisions, be sure it is also deactivated in Active Directory to avoid any potential issues when syncing.
Example
Warning on Import/Export
AD Sync Jobs should never be imported/exported to another environment. They must be created individually on each desired environment.
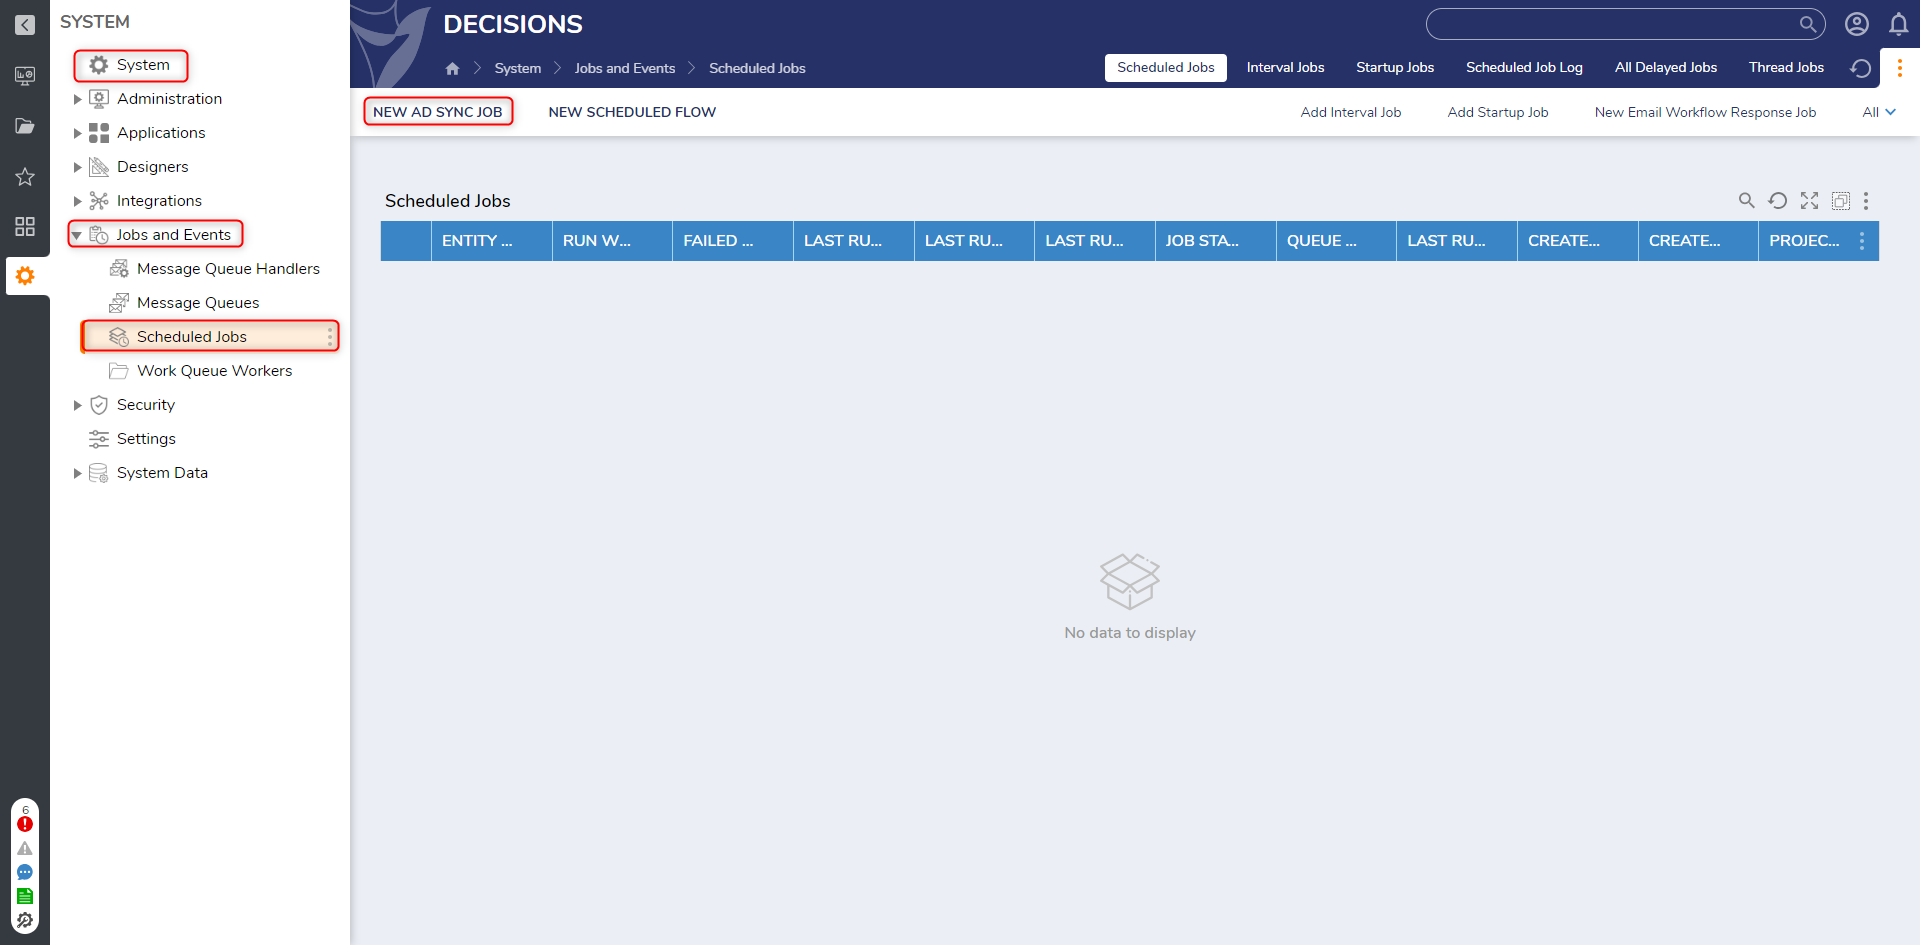
- Navigate to System > Jobs and Events > Scheduled Jobs.
- Select NEW AD SYNC JOB.
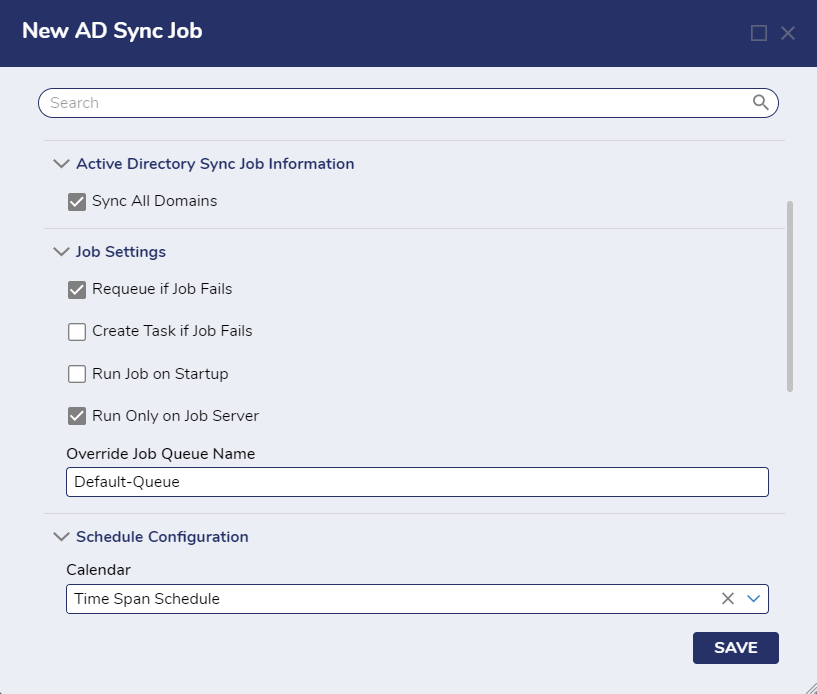
- In the New AD Sync Job dialog, select the Sync All Domains.
- Select the Requeue if Job Fails checkbox to ensure that this sync job is re-queued in the event of a failure.
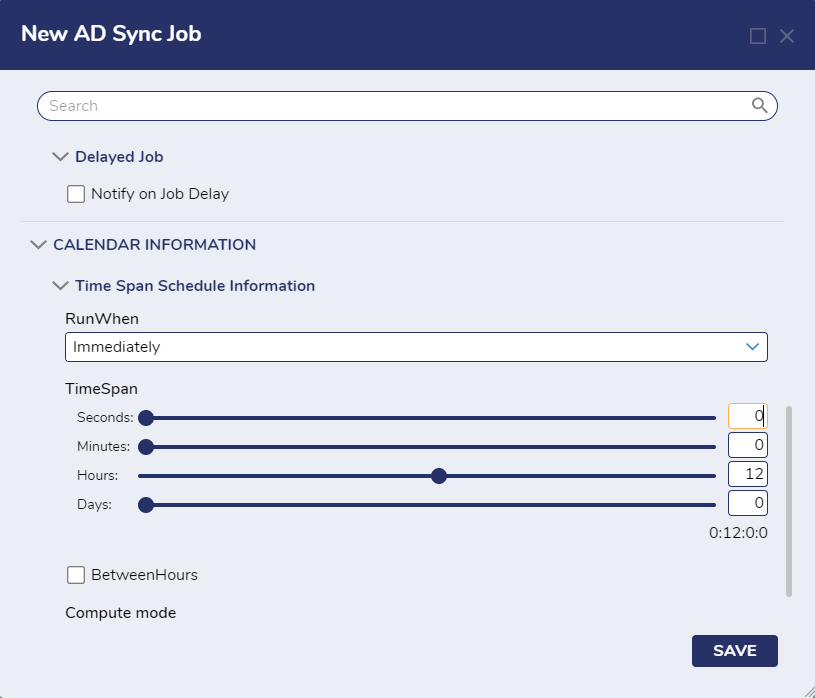
- Under Schedule Configuration, in the Calendar drop-down, select Time Span Schedule.
- Select Immediately in the RunWhen drop-down list.
- Use the TimeSpan controls to define an interval of 12 hours. This means that every 12 hours, the system will immediately try to synchronize with the AD server.
- Select SAVE.
- The new AD Sync Job will appear in the Scheduled Jobs folder, where further actions can be taken on it.
