Overview
With Cache Steps, users can store and retrieve data values in memory for a defined time. In Decisions, there is the ability to define different types of Cache. While trying to store some value in Cache, define an Instance of the cache, cache type, and a key to access the current value.
Put in Cache
To learn more about the different Cache Definitions, see Cache Definitions.
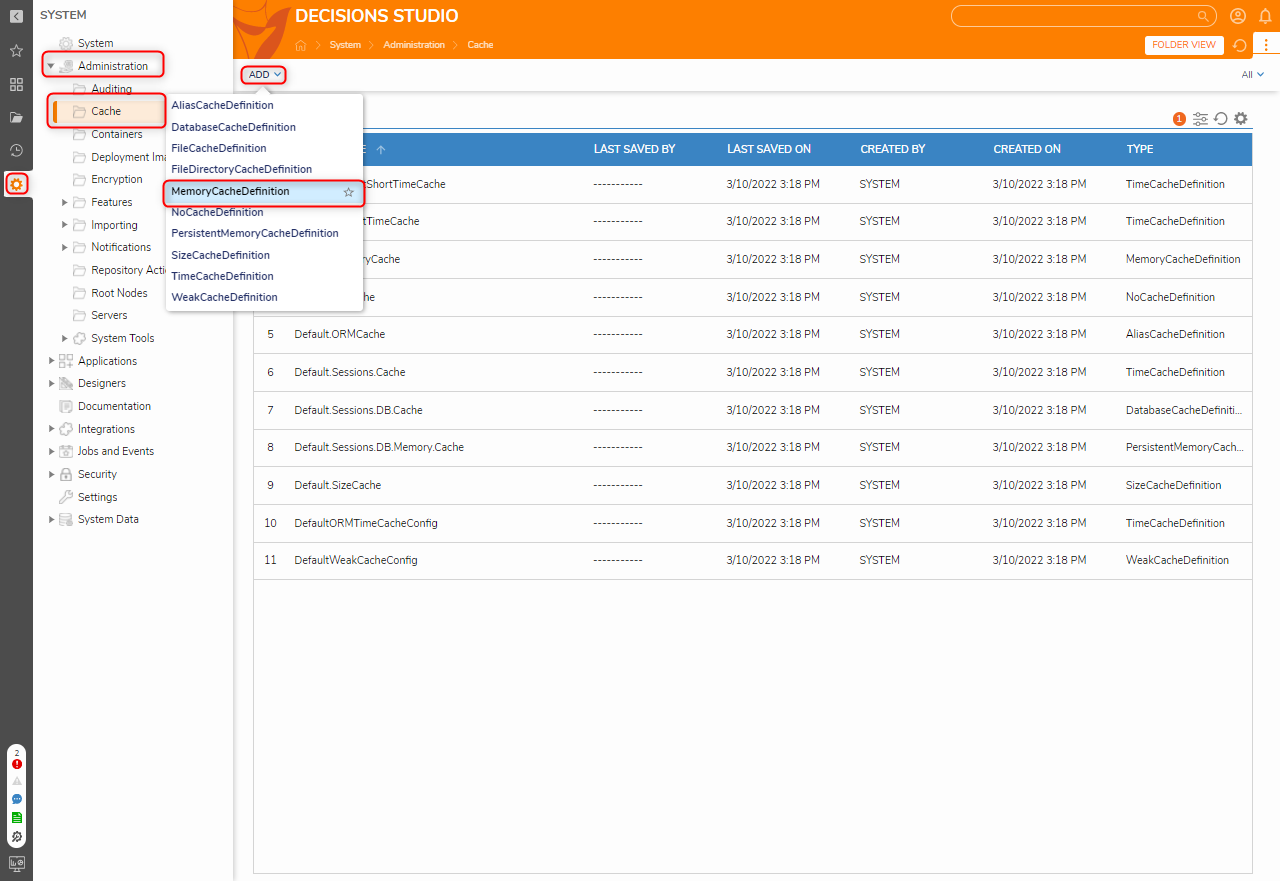
- In the Decisions Studio, navigate to System > Administration > Cache and click ADD. Select MemoryCacheDefinition.
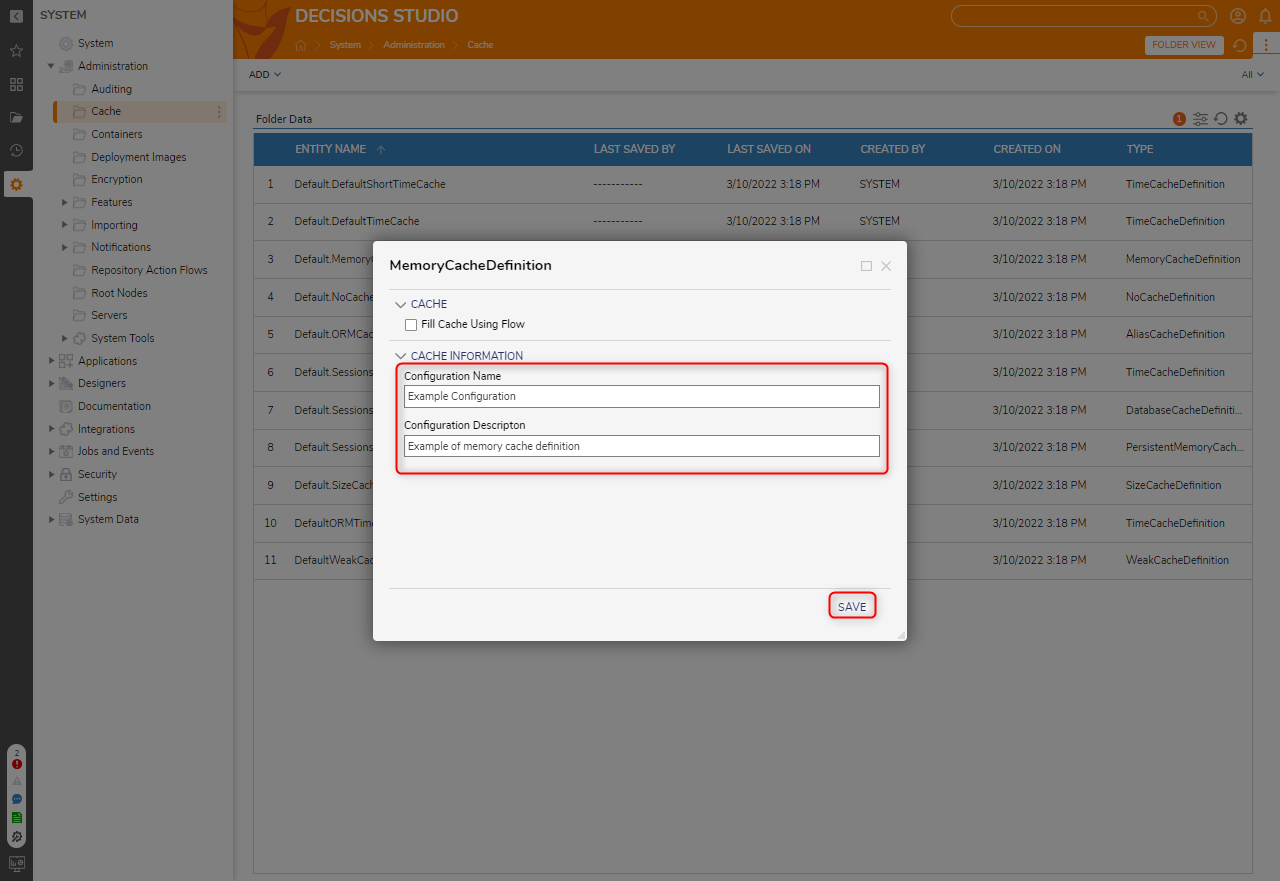
- From the MemoryCacheDefinition window, provide the desired Configuration Name and Description. Click SAVE.
- From a Designer Project, select CREATE FLOW from the Global Action Bar. Select Flow, name the Flow, and click CREATE.
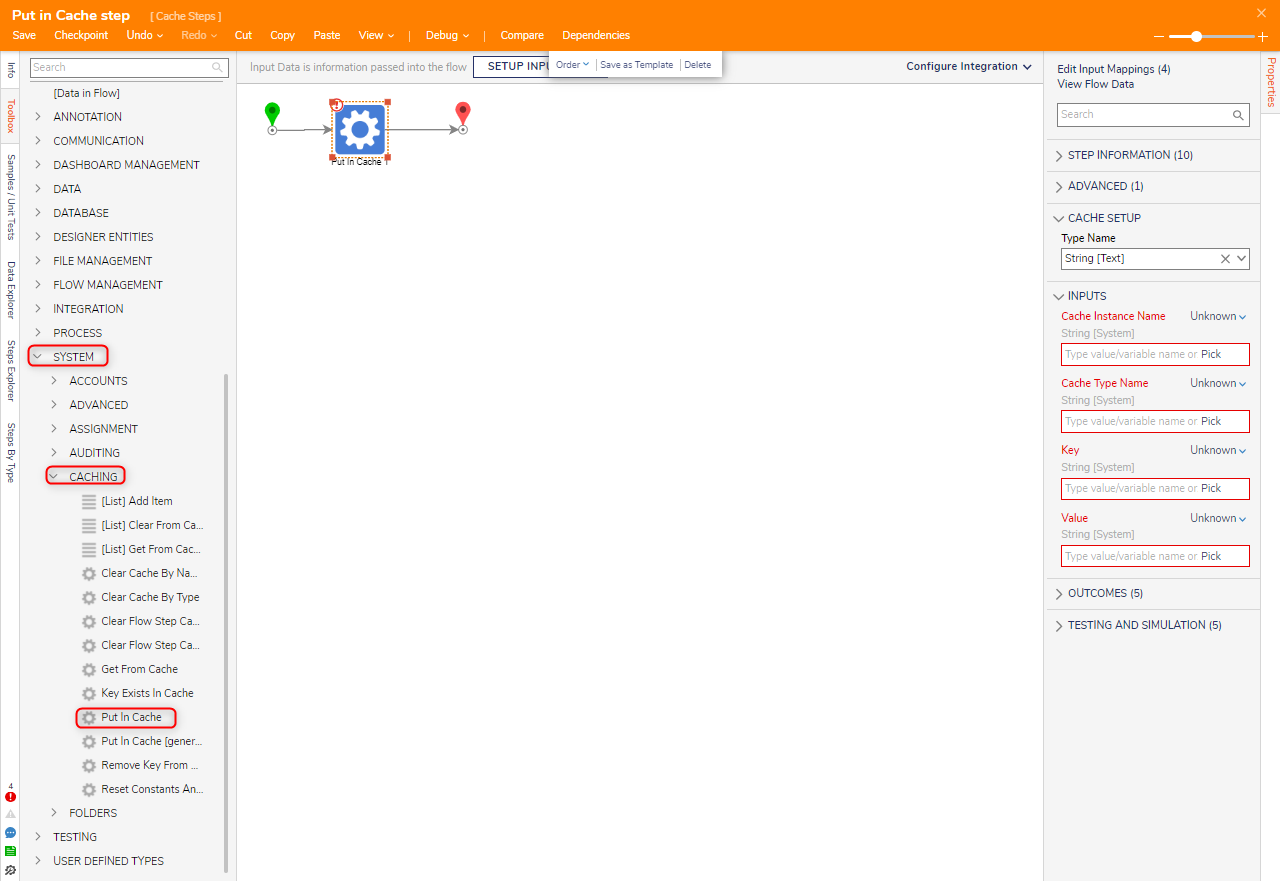
- On the Toolbox panel, navigate to SYSTEM > CACHING and attach a Put In Cache step to the Start and End steps.
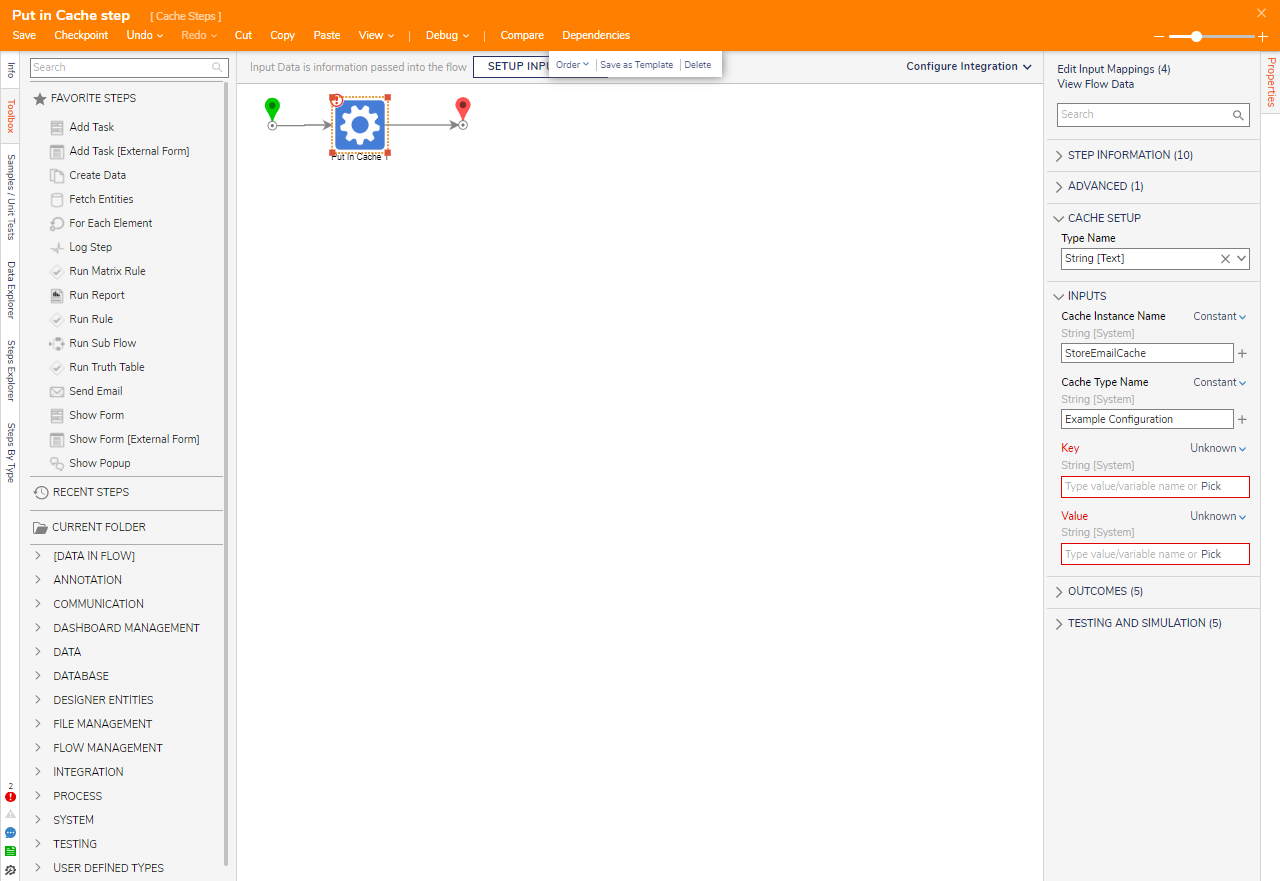
- On the Properties panel, enter "StoreEmailCache" in the Cache Instance Name field. Select the Unknown on Cache Type Name and select Constant and enter the name of the cache configuration.
- Enter "1" in the Key field and "admin@decisions" Value. Additional Info on KeyThe Key Input is used as an identifier for the Value being placed in the Cache. It is used to both organize the Value in the Cache and can be used to later locate and pull the Cache via additional steps.
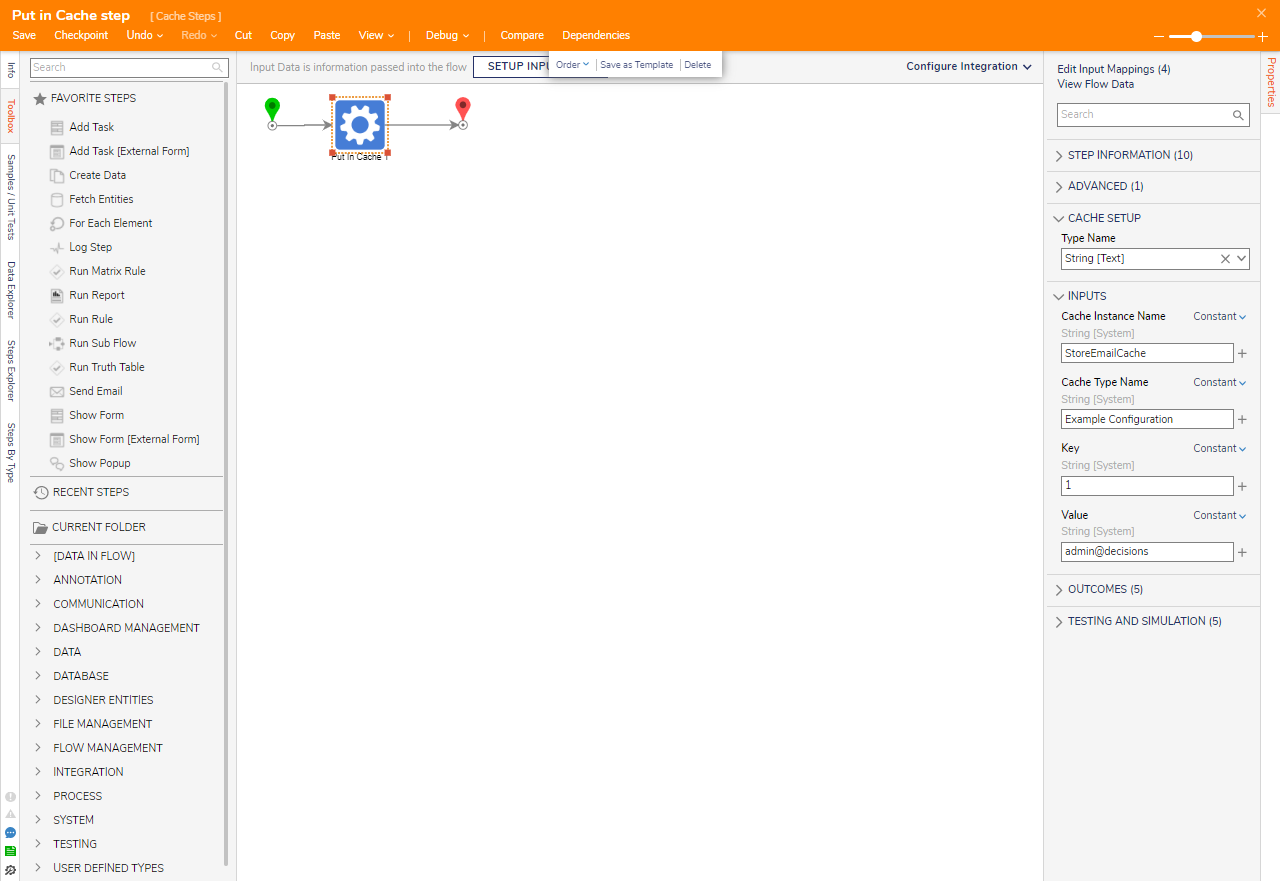
- Click Save to save changes to the Flow. Click Debug from the top action bar. Click START DEBUGGING.
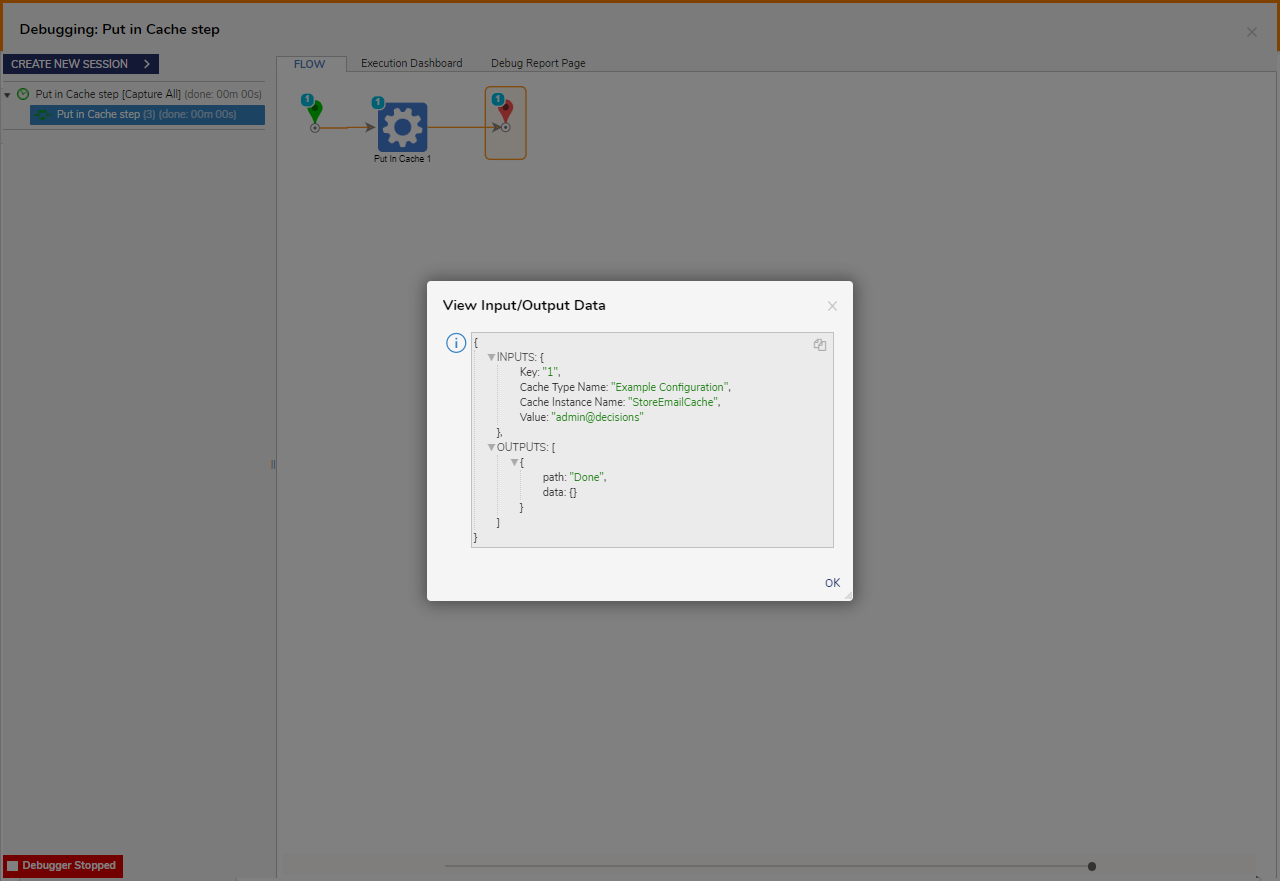
- After the Flow runs, select the Put In Cache step. Click Execution 1 and select View Input/Output Data to verify that the value was stored in the Cache.
Get From Cache
The following example demonstrates how to pull an email address from an email cache via a Flow.
- In a Designer Project, click CREATE FLOW. Select Flow, name the Flow, and click CREATE.
- In the Flow Designer, attach a Get From Cache step from the Toolbox panel under SYSTEM > CACHING to the Start and End steps.
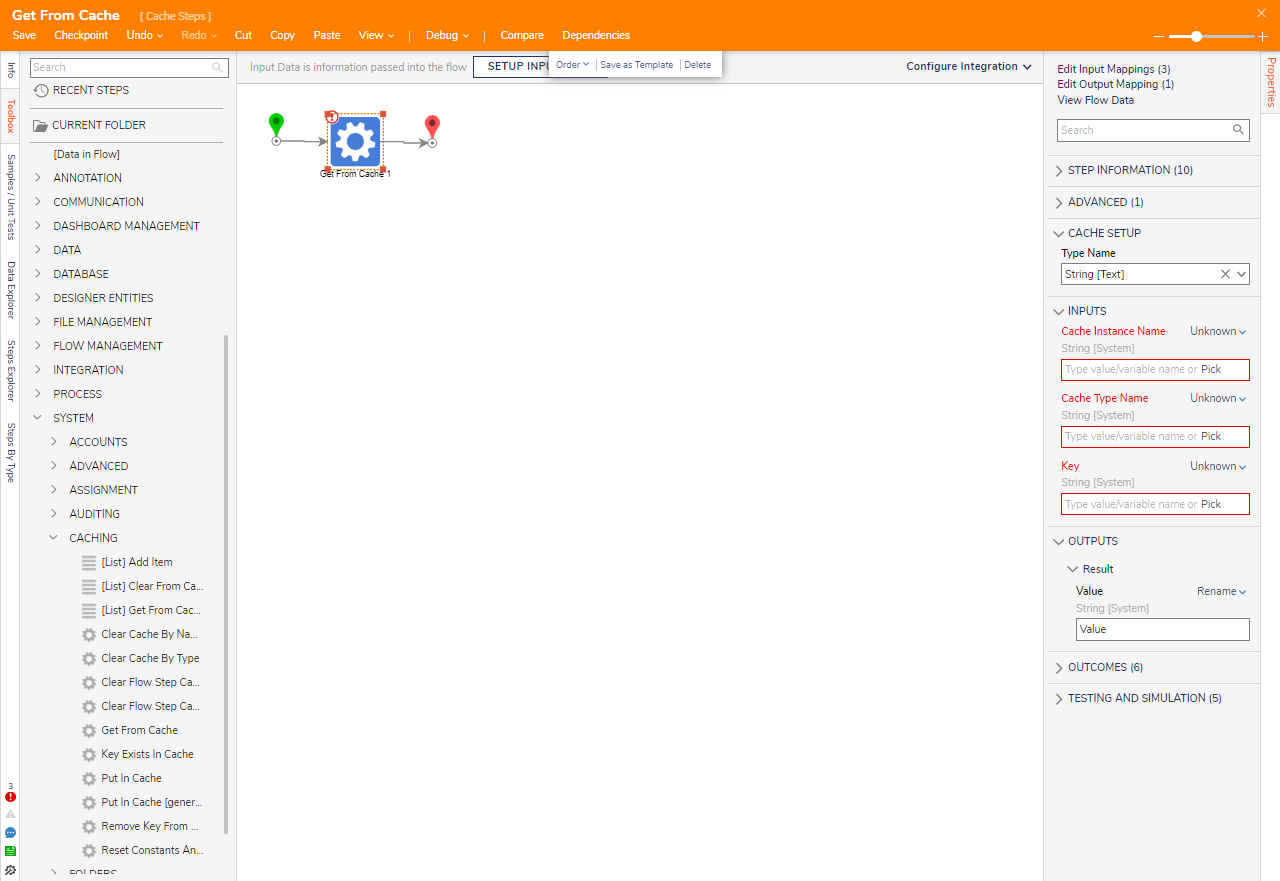
- From the Properties tab of the Get From Cache step, Constant map the corresponding Cache Instance Name, Cache Type Name, and Key that were used to place the value in the Cache.
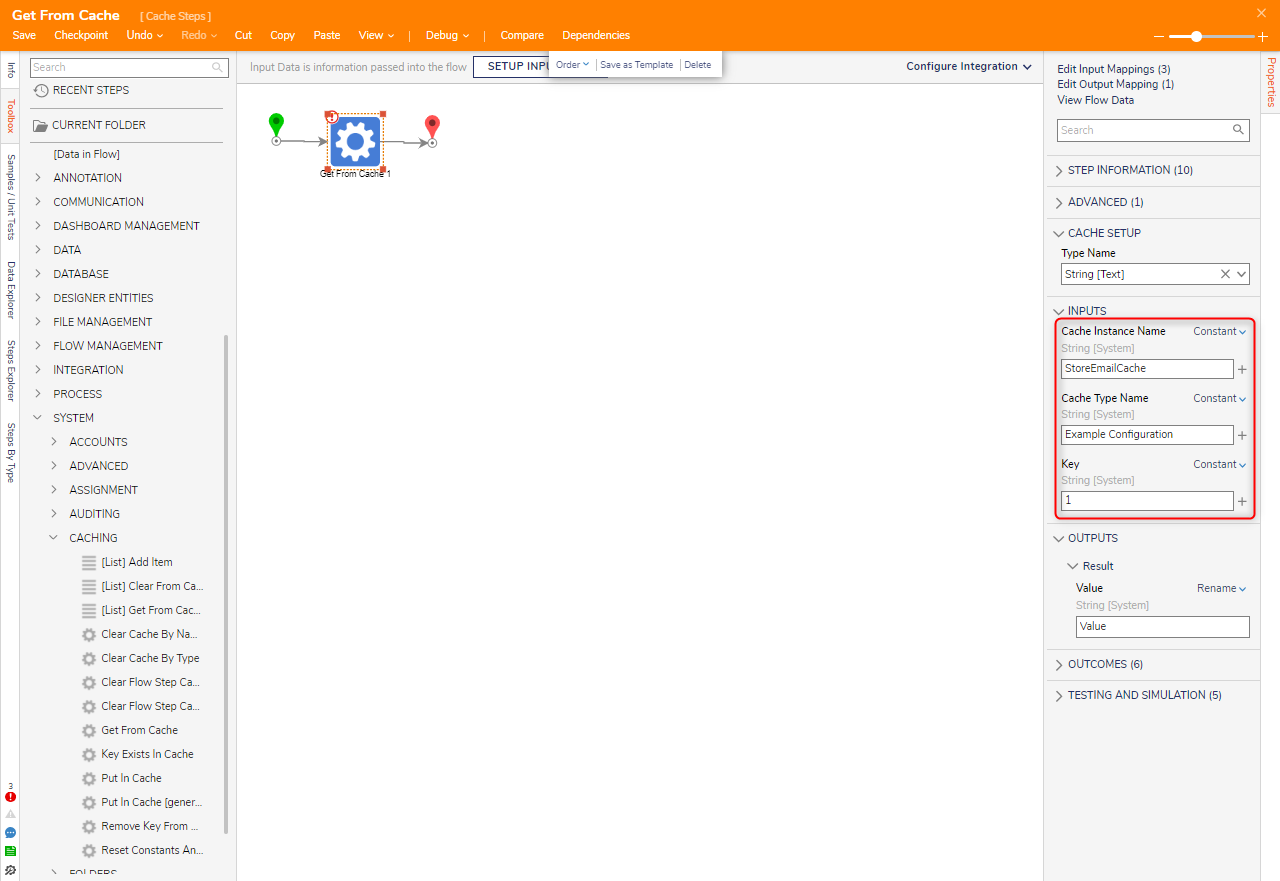
- Click Save to save changes to the Flow. Click the Debug on the top action bar, then click START DEBUGGING.
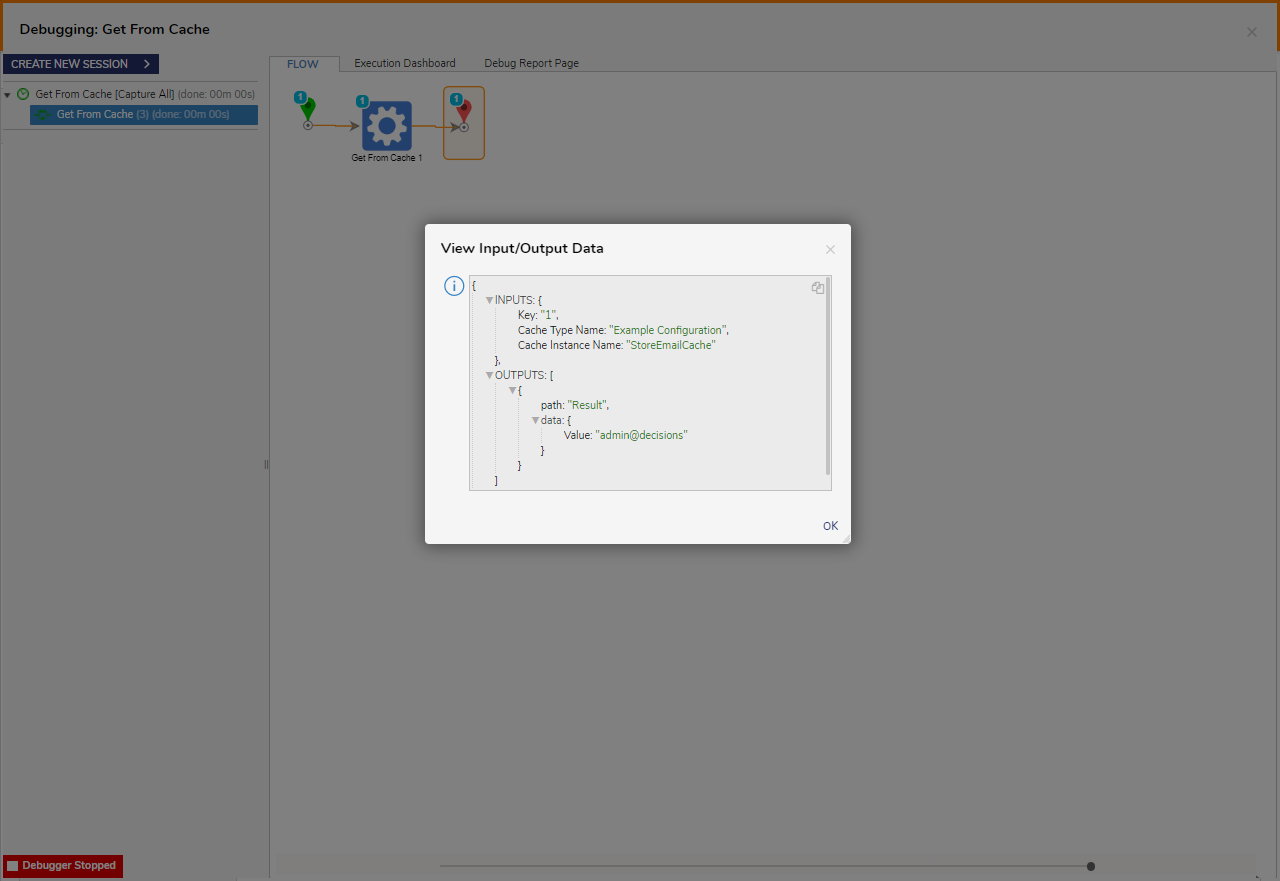
- After the Flow runs, click Get From Cache > Execution 1 > View Input/Output to verify that the retrieved email matches the one that was added previously to the Cache.
Adding Multiple Items to Cache
The following example demonstrates how to add multiple items to a Cache compiling Admin Emails, via a Flow.
- In a Designer Project, click CREATE FLOW. Select Flow, name the Flow, and click CREATE.
- From the Toolbox panel, attach a Create Data step from the FAVORITE STEPS category to the Start step.
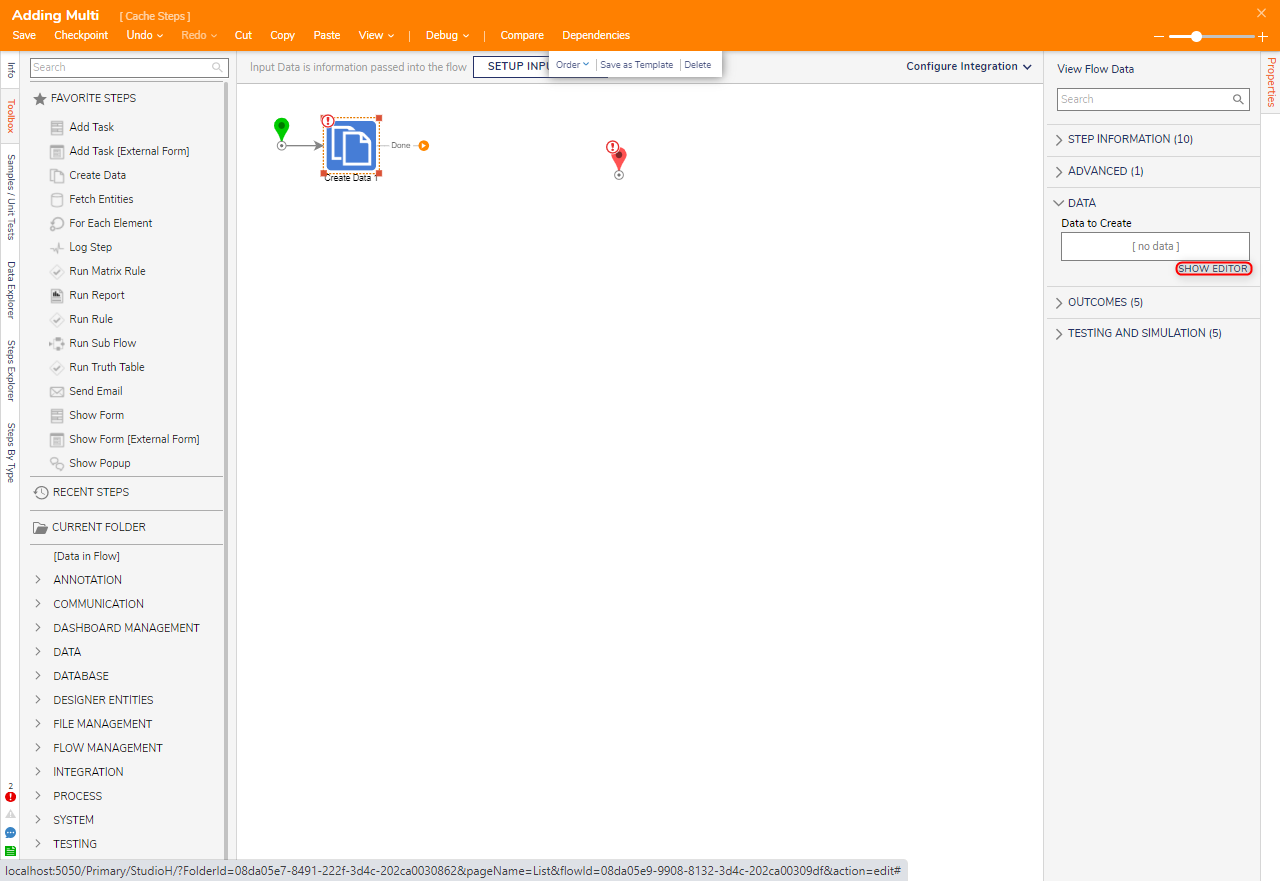
- From the Properties tab of the Create Data step select SHOW EDITOR.
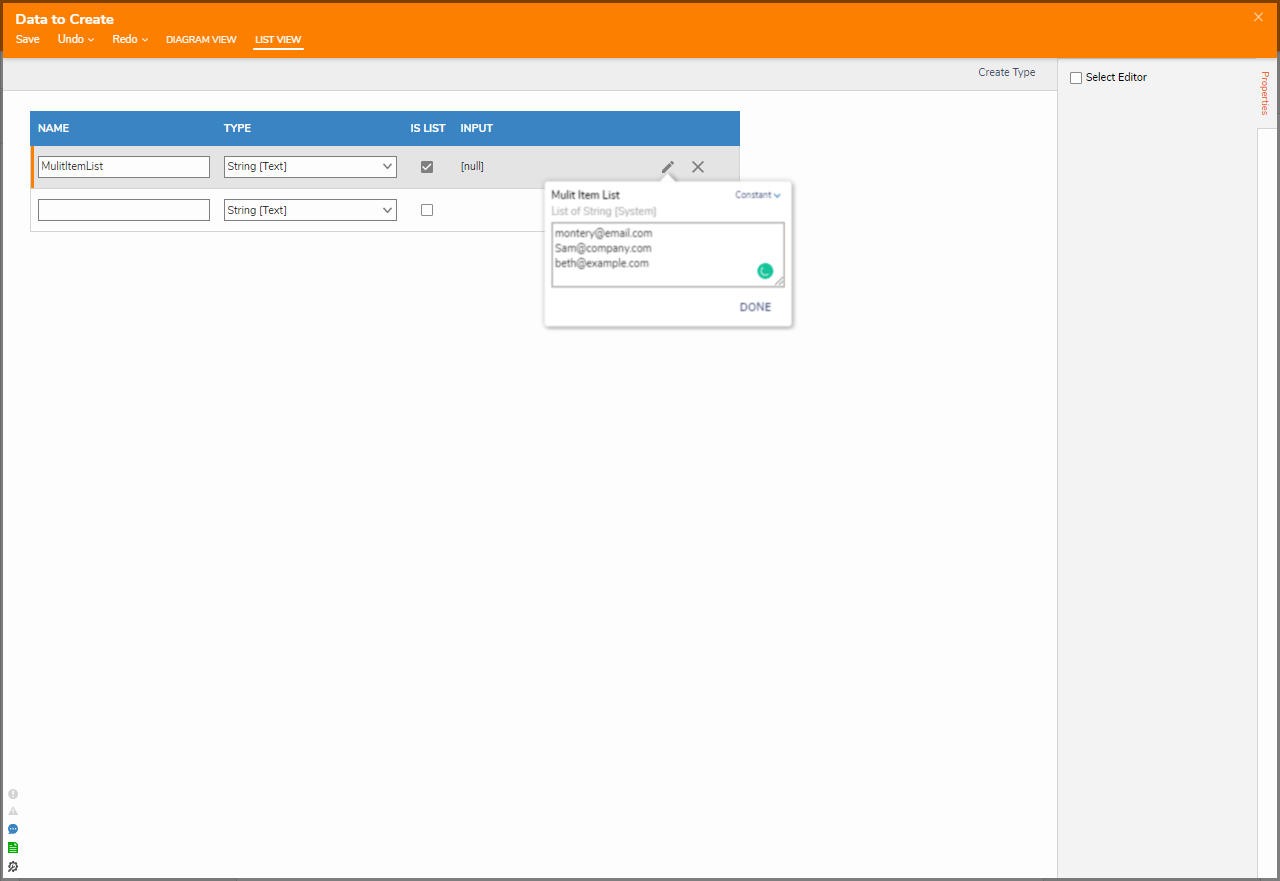
- From the Data to Create window, provide a NAME and select the String [Text] TYPE from the dropdown menu. Check the IS LIST box.
- Set INPUT to Constant, then map the desired Emails. Click DONE then Save and close the window.
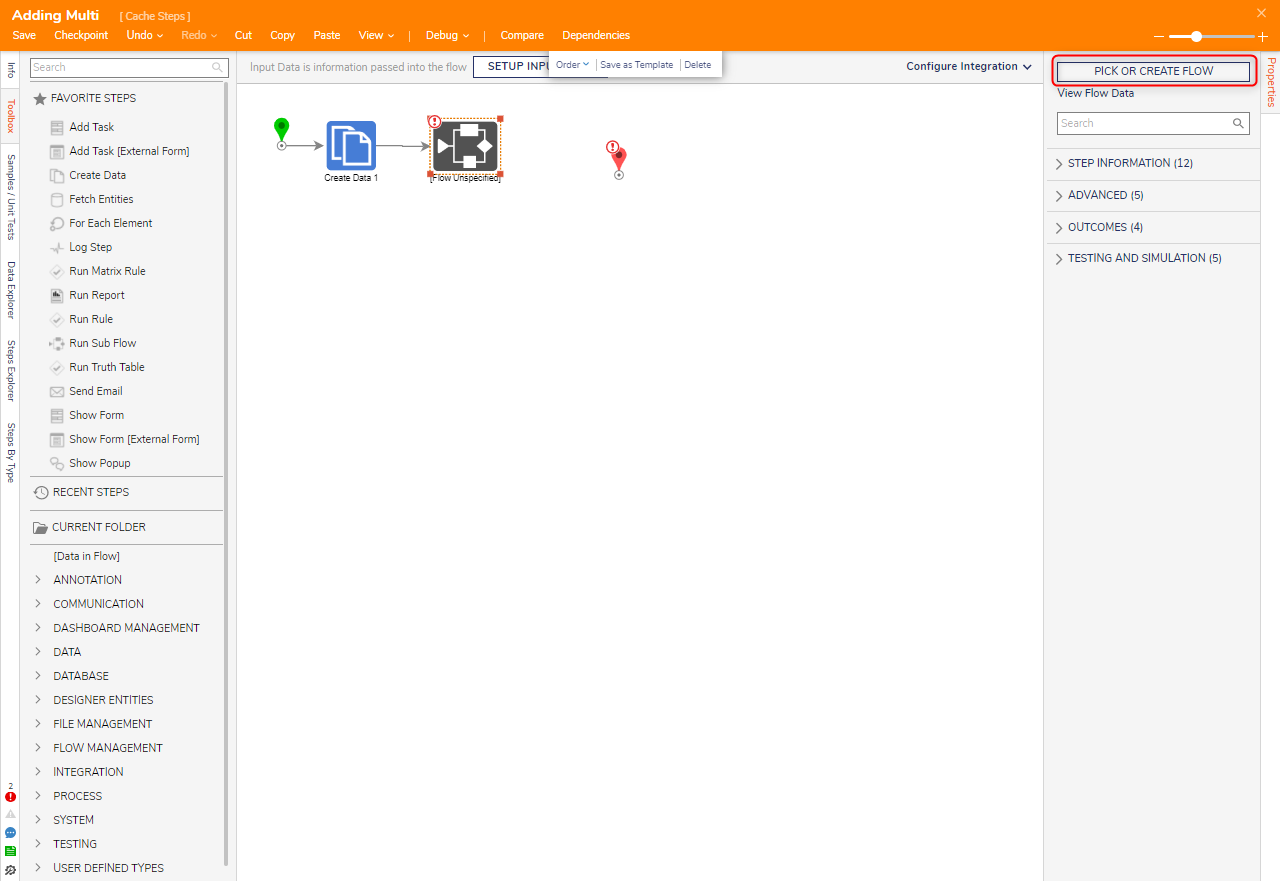
- From FAVORITE STEPS, attach a Run Sub Flow step to the Create Data step. On the Properties panel, select PICK OR CREATE FLOW and create a new Flow.
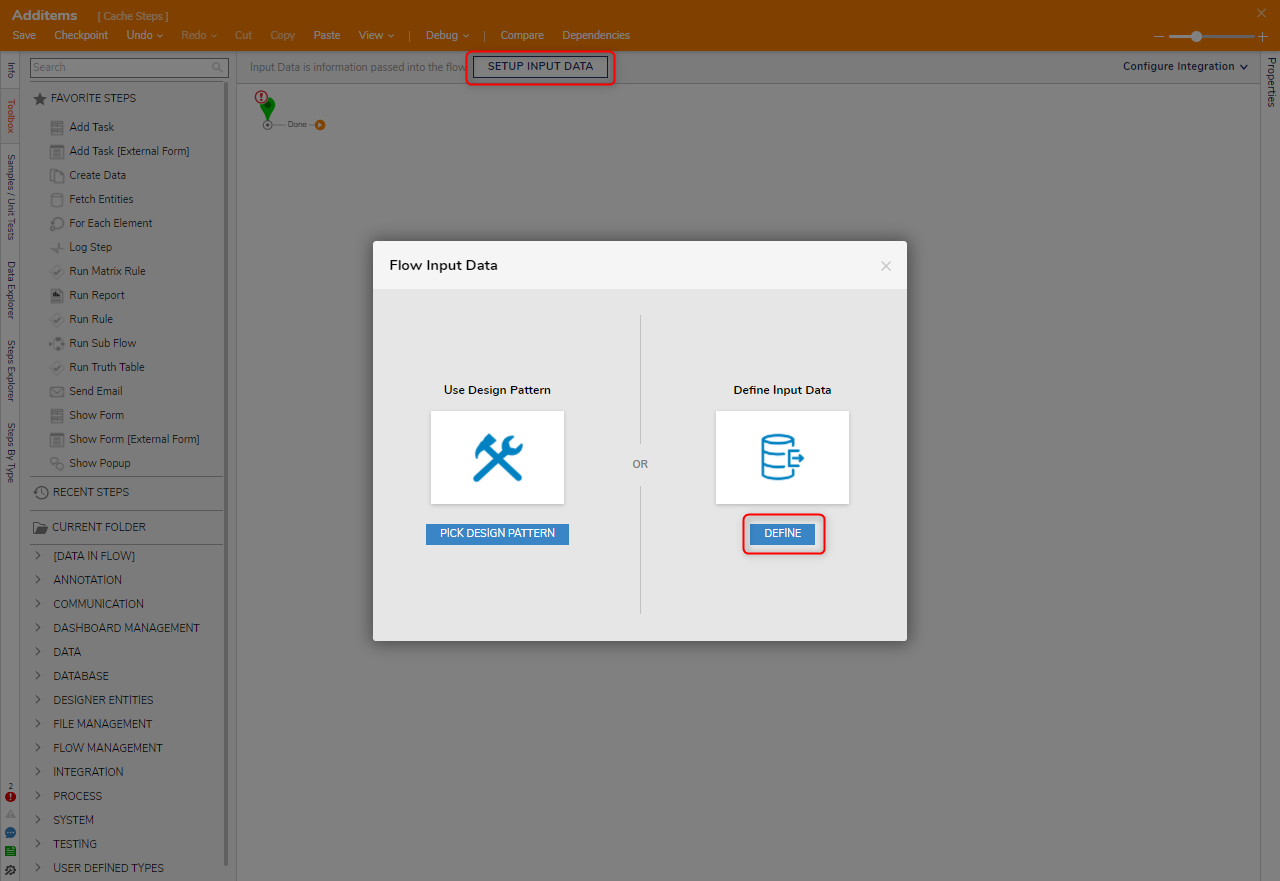
- From the Flow Designer of the new Sub Flow, select SETUP INPUT DATA and then DEFINE under Define Input Data.
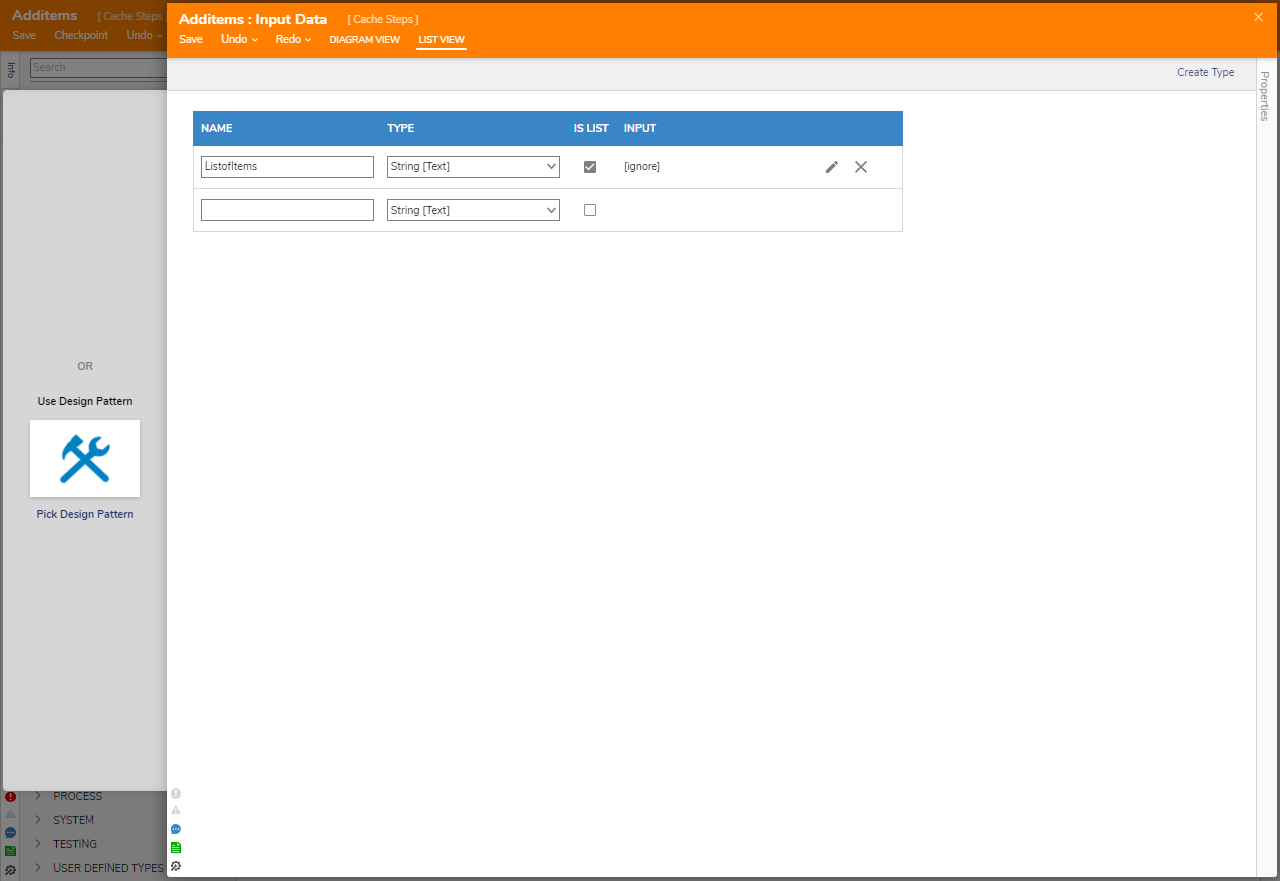
- From the Input Data window, enter "ListofItems" under NAME and select String [Text] as the TYPE. Check IS LIST, click save, and close the window.
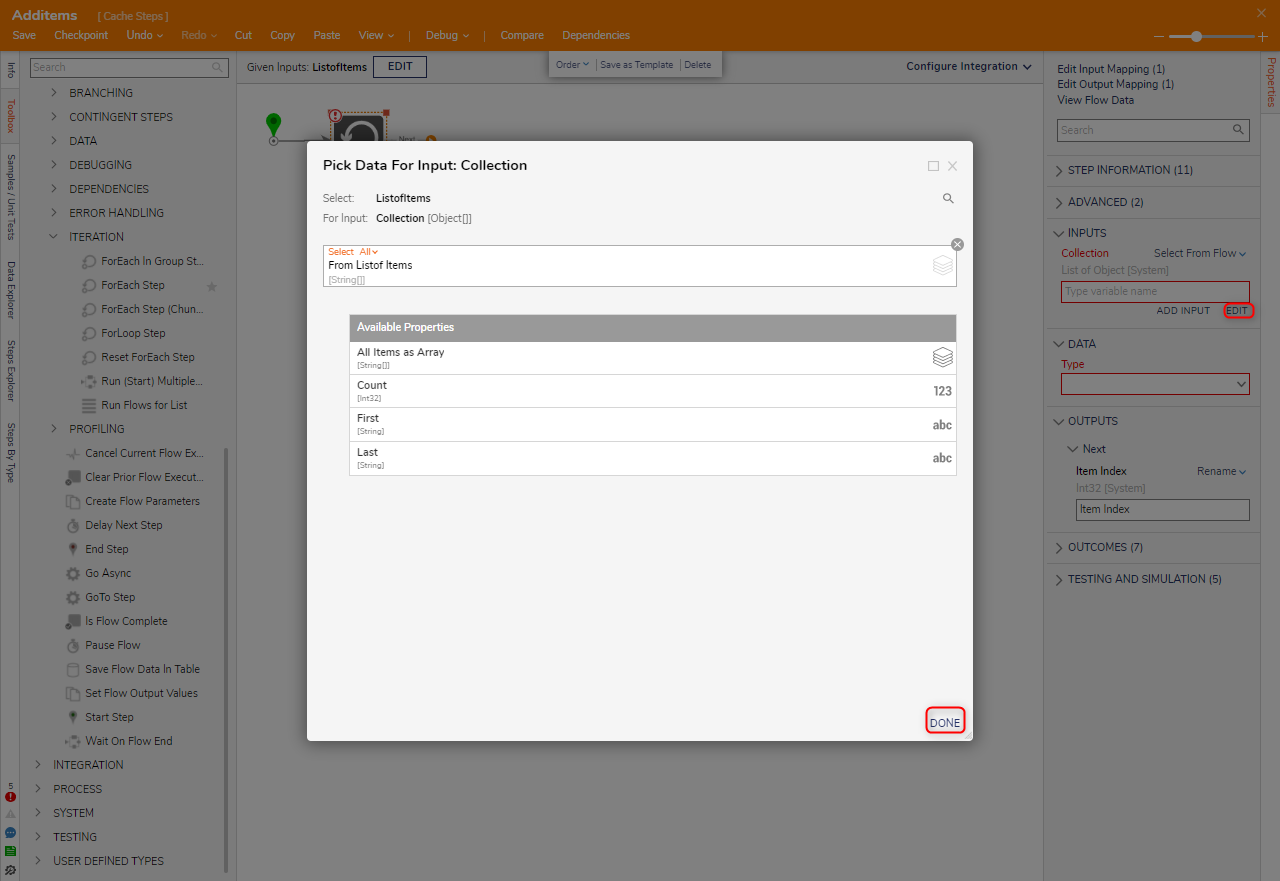
- In the Toolbox panel, navigate to FLOW MANAGEMENT > ITERATION, attach a ForEach Step step to the Done path of the Start step. On the Properties panel next to Collection field, Select From Flow and map it to ListofItems.
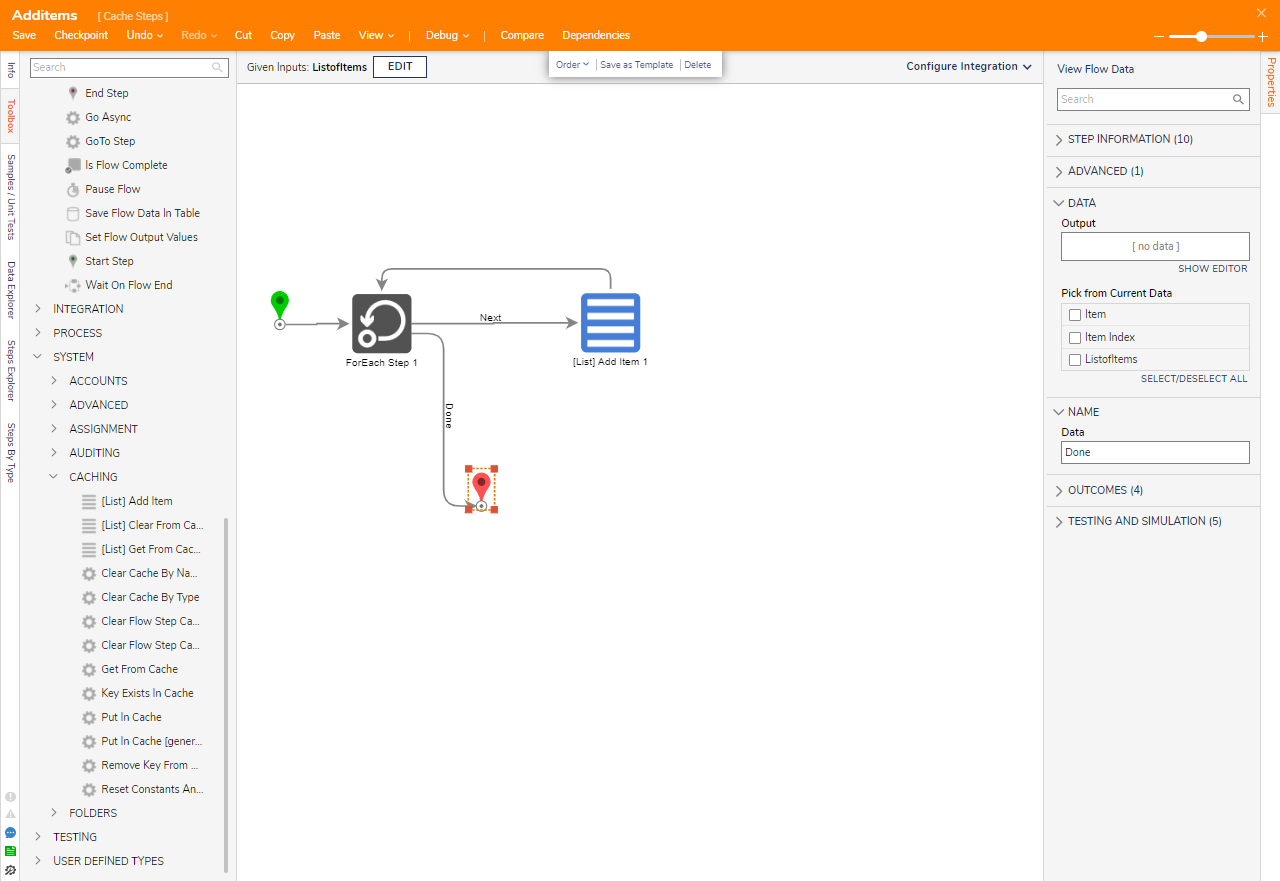
- Under the SYSTEM > CACHING category, attach a [List] Add Item step to the Next path of the ForEach Step. On the Properties panel under CACHE SETUP, provide a Cache Instance Name and select the desired Cache Type Name.
- Under INPUTS, Constant map the desired Key value. Then, Select From Flow map Item to Value. Utilizing the same Key should allow the ability to recover all the added Values at once.

- Connect the Done path of the [List] Add Item step to the ForEach Step, then connect the ForEach Step's Done path to the End step. The ForEach Step is used to split the input List of Emails into individual items, then send each item to the [List] Add Item step to be added to the Cache.
- Save the changes to the Sub Flow and close the Sub Flow.
- From the Parent Flow, select the Sub Flow step to navigate to its Properties tab and map the Output of the Create Data step, to the Email List Input of the Sub Flow.
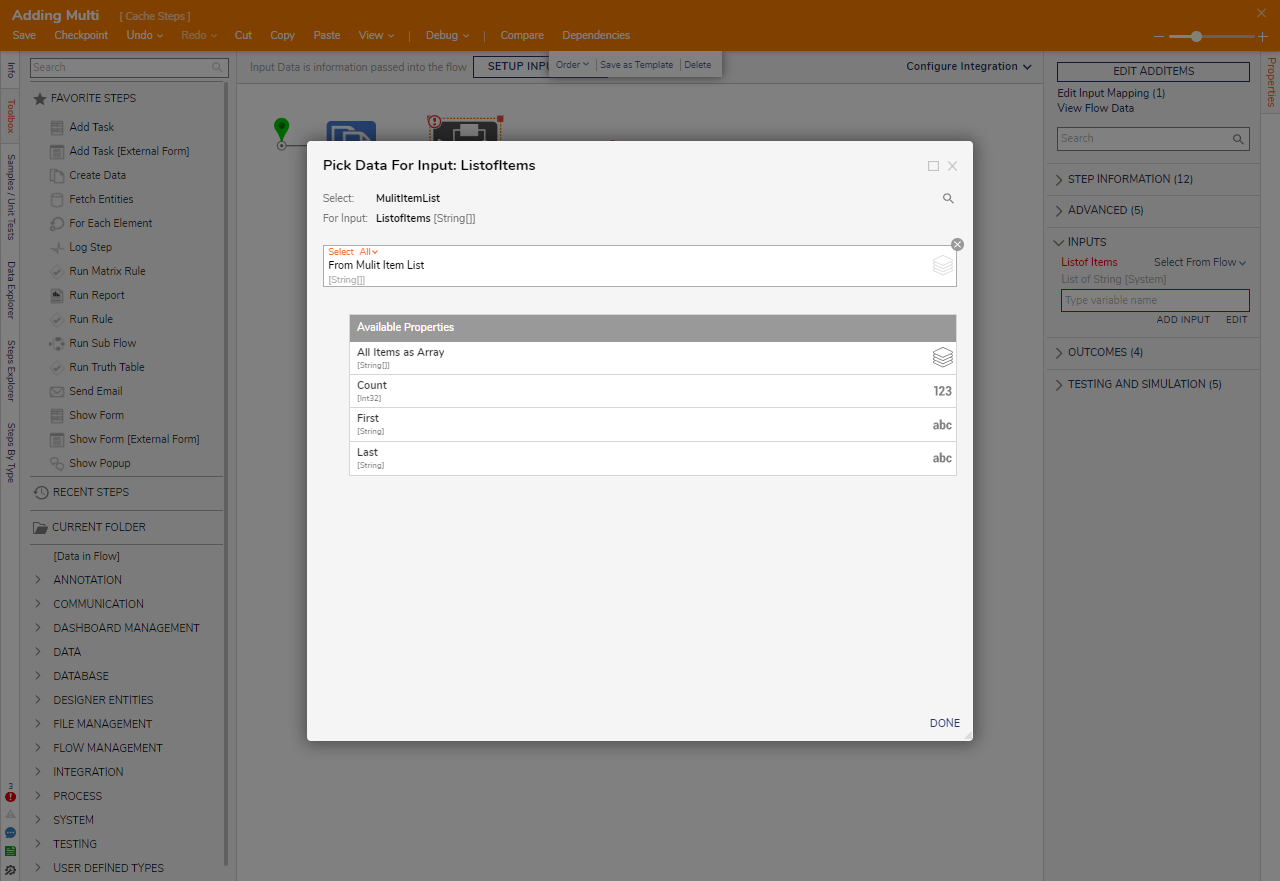
- Connect the Done path of the Sub Flow to the End step. Then, save the Flow.
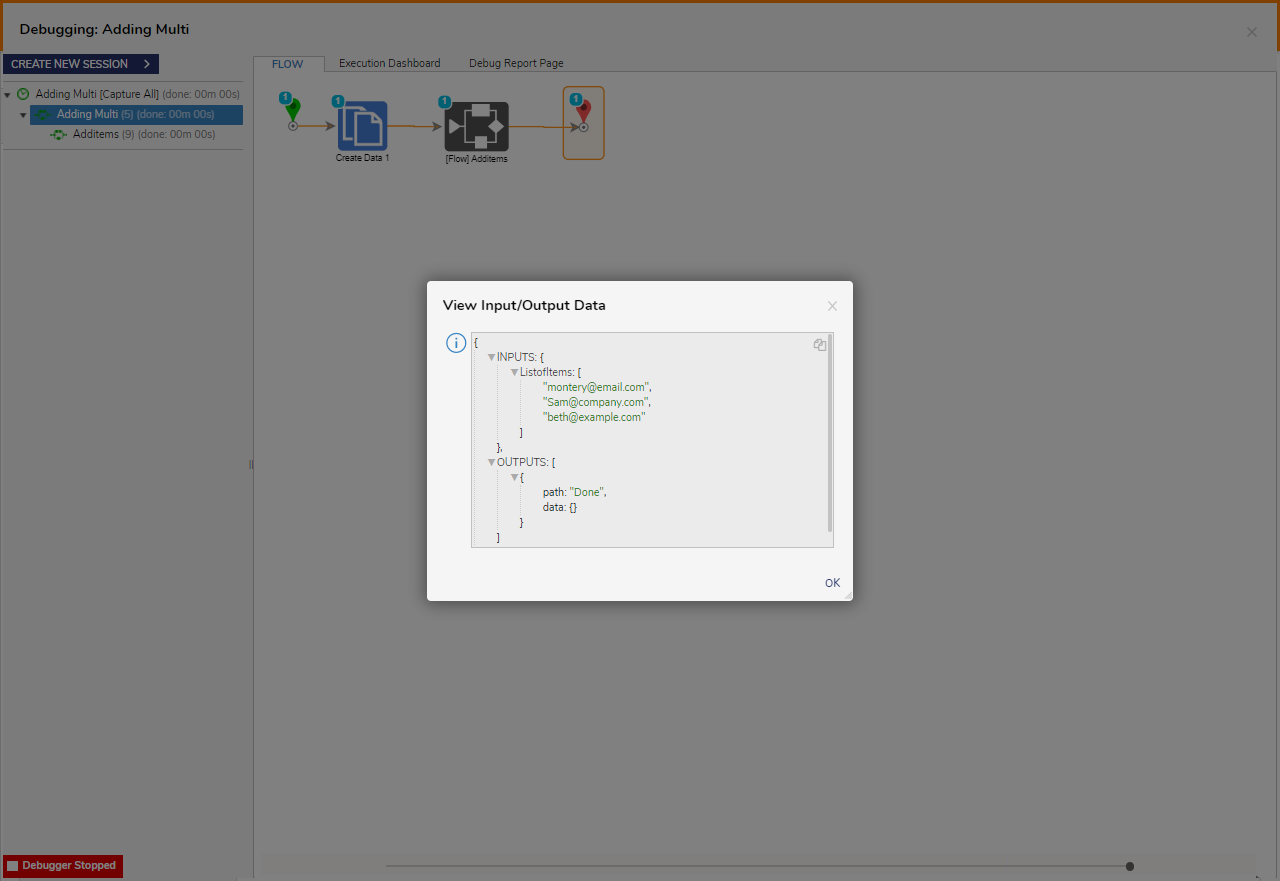
Click Debug from the top action bar. Select the Sub Flow, click Execution 1, and click View Input/Output Data.
Additional Cache Steps
| Cache Step | Description |
|---|---|
| Clear Cache | Clear desired Instance in Cache. Can be selected by Name or Type |
| Key Exists In Cache | Check if the Instance of the Cache contains the Key |
| Put In Cache [generated key] | Allows a user to put a value in the cache to generate and out a key to access the value. |
| Remove Key From Cache | Removes the key value from a cache instance |
For further information on Flows, visit the Decisions Forum.