Developing a process requires building multiple Designer Elements to achieve the process's goal. For example, a process could involve a Flow relying on data collected by a Form that a later Rule references in its logic and then ends with a Page displaying that Rule's outcome. Dependencies represent relationships between Designer Elements where one relies on another to perform correctly.
The platform automatically declares dependencies whenever creating or adding a Designer Element into a parent Designer Element. Users may also manually declare dependencies. Disconnecting a Designer Element from its dependency causes exception errors during runtime due to missing process crucial information. The following article describes how to view and manage dependencies, manually declare dependencies, and export considerations for dependencies.
Dependency Browser
The Dependency Browser hierarchically organizes relationships between the selected Designer Element as well as any present validation issues in an interactable graph.
Users may open the Dependency Browser via two methods:
- After opening a Designer Element in a Visual Designer, select Dependencies from the Top Action Bar.
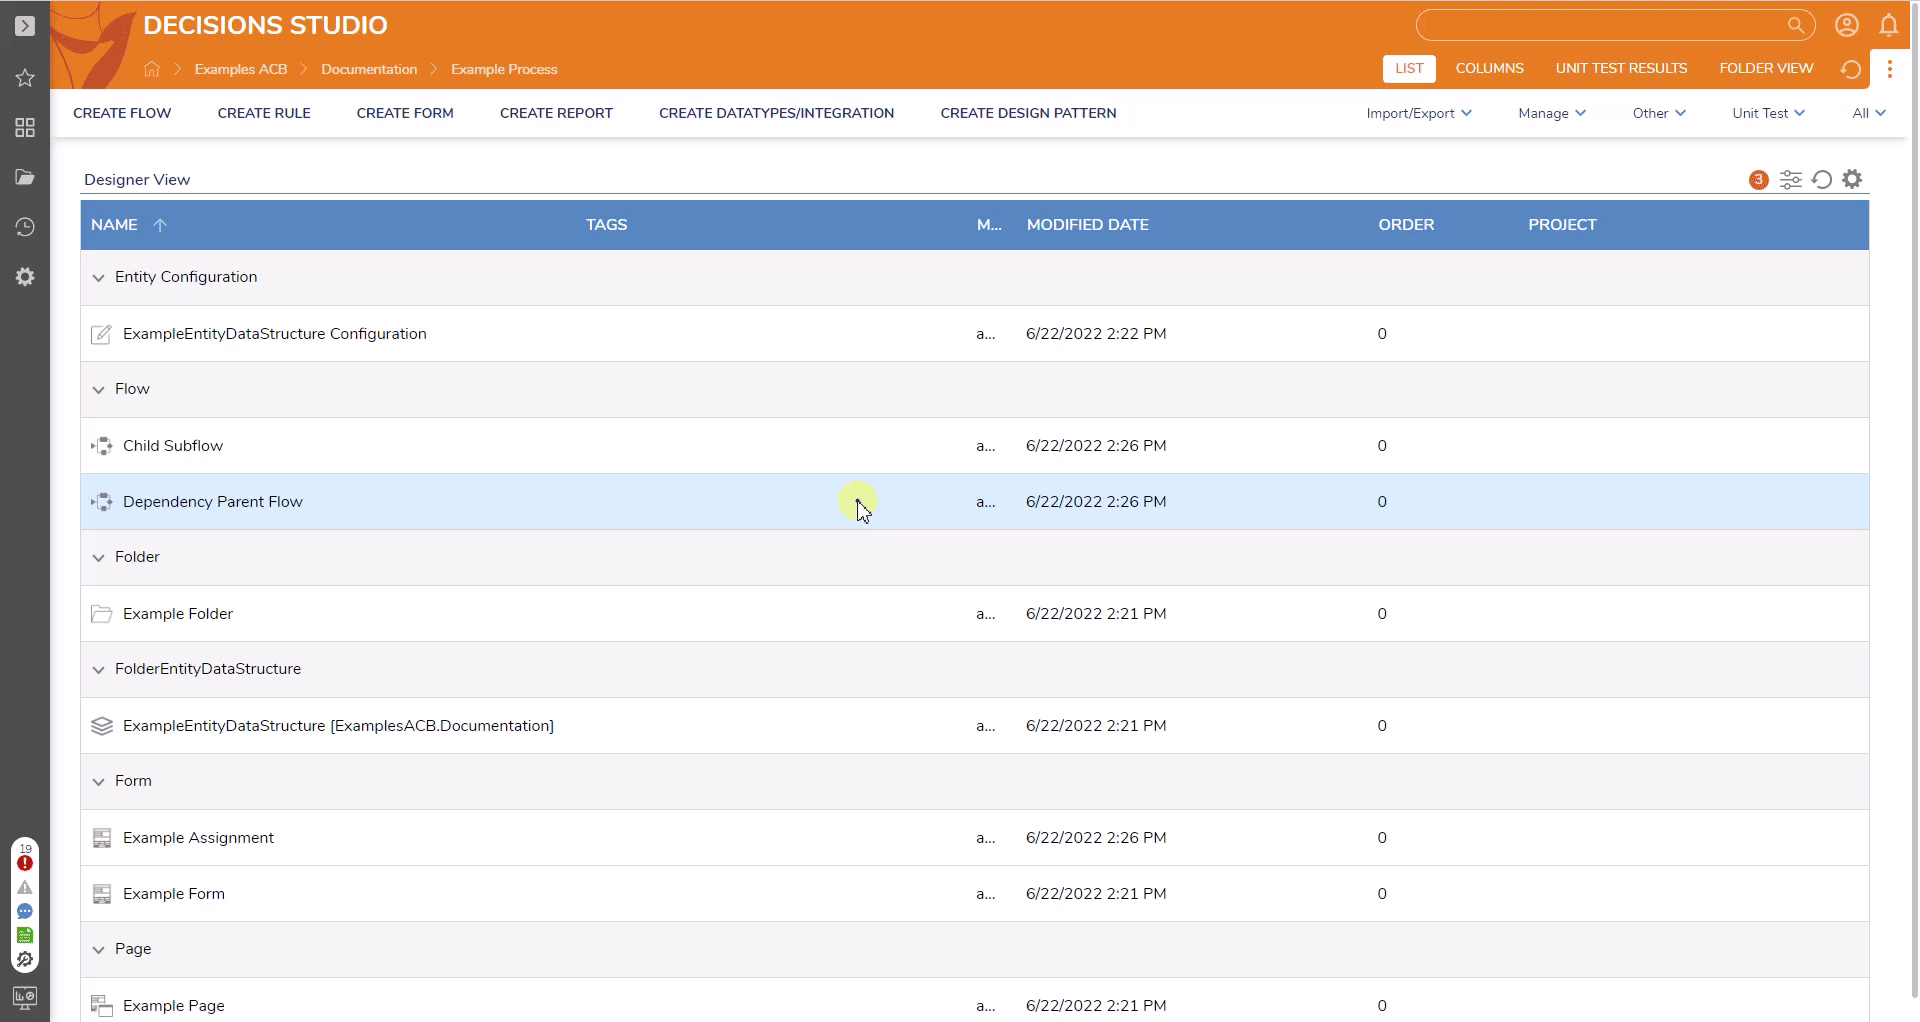
- In a Designer Project, right-click a Designer Element and select Dependencies > Browse Dependencies, as shown in the below gif.
The Dependency Browser displays information in three rows:
- The center row contains the selected Designer Element.
- The above I DEPEND ON row lists the Designer Elements it relies on to run.
- The below DEPEND ON ME row lists the Designer Elements reliant on it to run.
Right-clicking a Designer Element in the graph opens its Action menu, similar to the Designer Project.
Selecting a dependency from the I DEPEND ON or DEPEND ON ME rows refocuses the graph on the newly selected Designer Element. It then appears in the center row of the Dependency Browser, and its dependencies now occupy the top and bottom rows.
A Designer Element in the Dependency Browser consists of the following information:
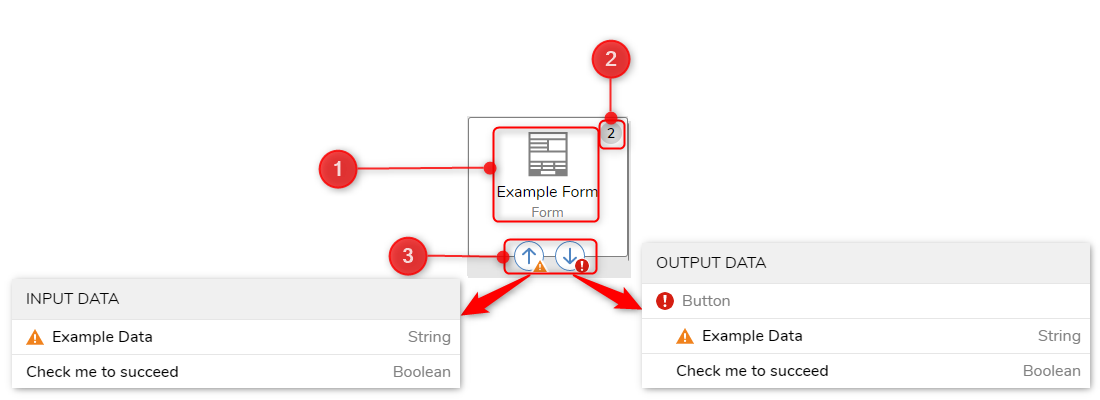
| Section Number | Section Name | Description |
|---|---|---|
| 1 | Designer Element Information | Displays the following information from top to bottom: Designer Element type's icon, its name, and the Designer Element's type. |
| 2 | Dependencies Icon | Displays a number of dependencies this Designer Element contains. If no dependencies exist, then this icon does not appear. |
| 3 | Input/Output Data | Displays an up and down arrow that opens a window listing the Designer Element's input and output data. Validation warning   icons appear next to these arrows if containing any issues. These icons then appear in the input/output data windows next to the data causing the issue. icons appear next to these arrows if containing any issues. These icons then appear in the input/output data windows next to the data causing the issue. |
Designing with Dependencies
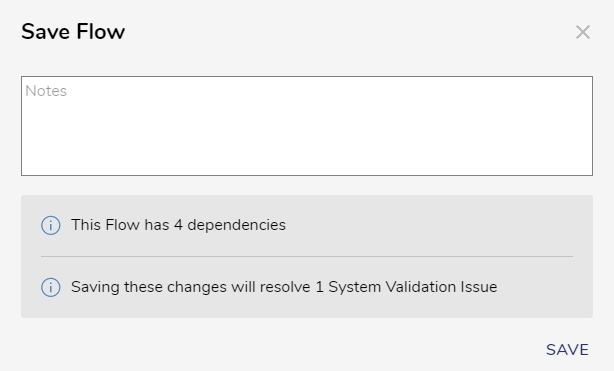
The Save window displays dependencies information upon saving a Designer Element in a Visual Designer. Keep these dependencies in mind when editing a Designer Element to prevent avoidable errors, unnecessary rework, and other functionality roadblocks.
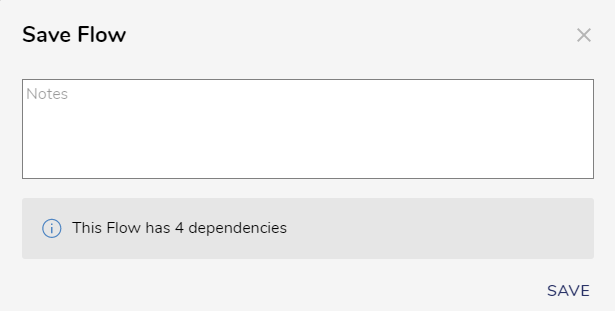
If saving after producing new validation issues since the last save, another notification states how many now exist within the Designer Element.
It is recommended to solve the issues before saving, so an issue-containing version of the Designer Element is not stored in its History Folder in case an old version of the Designer Element needs to be restored.
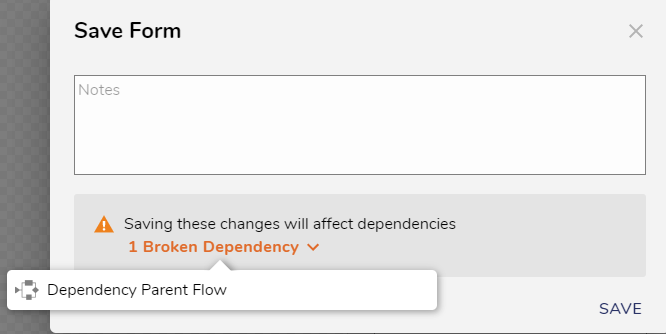
If saving after solving an existing validation issue, another notification appears stating how many issues are now solved within the Designer Element. It is a best practice to also name what errors were solved and the steps are taken to fix them in the Save window's Notes section.
Manually Declaring Dependencies
Since the platform automatically recognizes and declares dependencies, typical processes will not require manual declaration; however, the option is available via the Declare [Dependency Type] action.
An example scenario of manual declaration may involve two Flows that are a part of the same process but do not rely on each other to function correctly. Declaring these Flows as dependents include one another during import/export without requiring the Flows to exist in the same project.
- In a Designer Project, right-click on a Designer Element and navigate its Action menu to Dependencies > Declare.
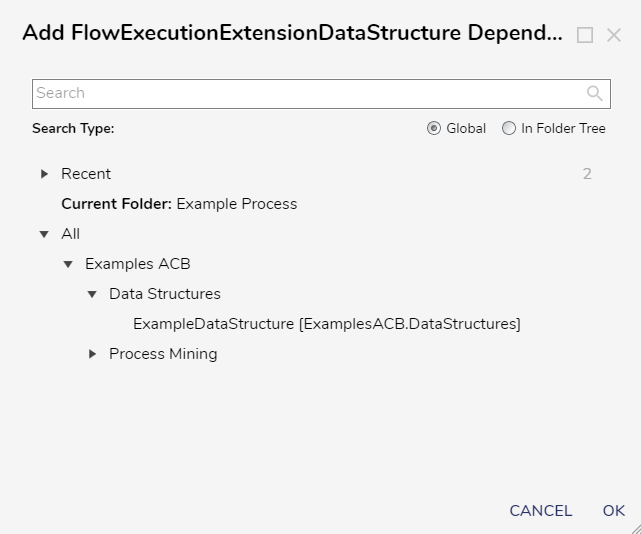
- Select the desired dependency listed in the menu. This menu populates with non-typical objects that may not be created in or referenced in the Designer Element.
This example selects AddFlowExecutionExtensionDataStructure.
- From the resulting Add Dependency window, select the desired Designer Element, then click OK to confirm the new dependency.
Managing Manual Dependencies
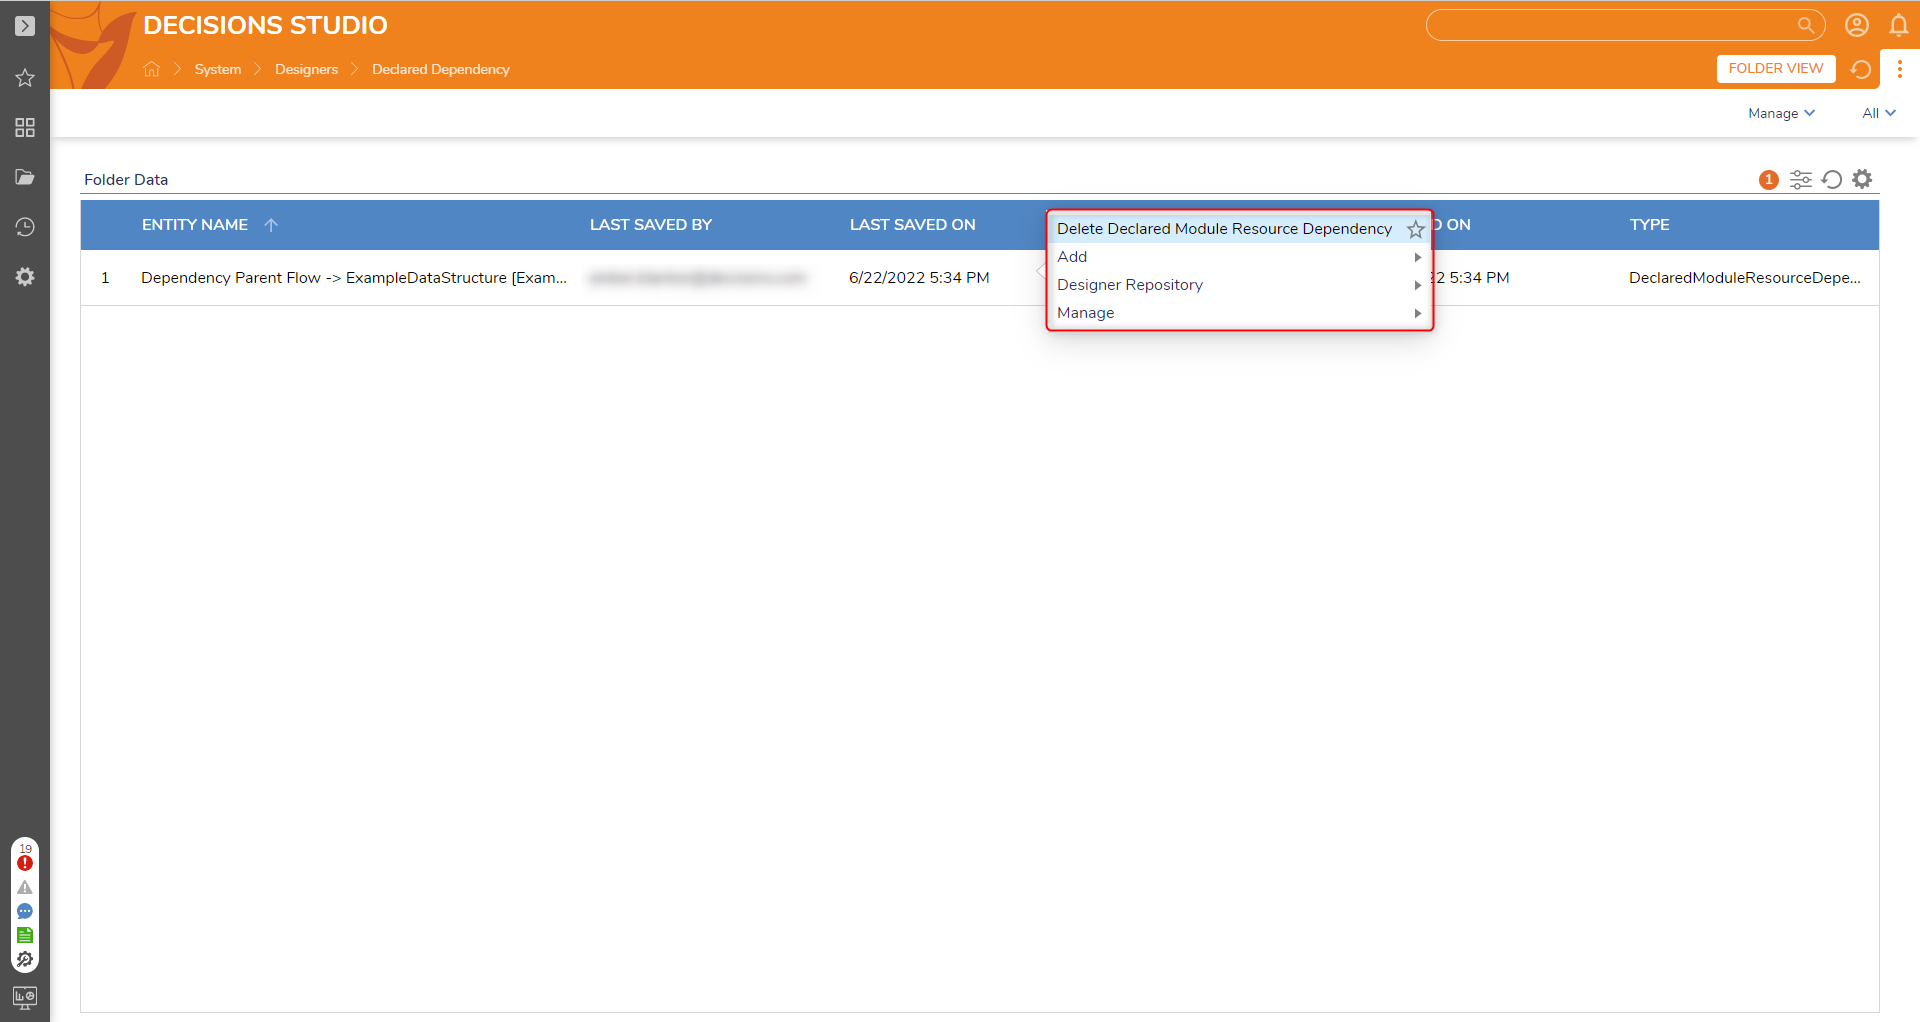
Manual dependencies are provided a unique display and actions for deletion, the Repository interactions, etc., via the Manage Declared Dependencies action that directs to the Declared Dependency Folder.
- Right-click an item in the Decisions Studio. Expand the Dependencies Action menu and select Manage Declared Dependencies.
- From the Declared Dependency Folder, right-click the desired manual dependency in the Folder. The item' Entity Name is formatted as follows: "[Reliant Designer Element Name] -> [Source Designer Element Name]" Notice the unique Delete Declared Module Resource Dependency action to delete it. The other actions are shared between other items and are defined in the Designer Project Actions Glossary.
Updating Dependencies
If troubleshooting issues with Visual Designers not recognizing all dependencies and/or missing dependencies during import/export, run the Dependencies > Update Dependencies action to refresh all dependencies immediately connected to the selected Designer Element, i.e., the Designer Elements in the I DEPEND ON and DEPEND ON ME rows in its Dependency Browser.
If experiencing these issues in multiple projects/processes, try initiating the Update Dependencies [All Objects] action refreshes dependency connections for each and every connected Designer Element connected to the selected one, its dependencies, and so on.
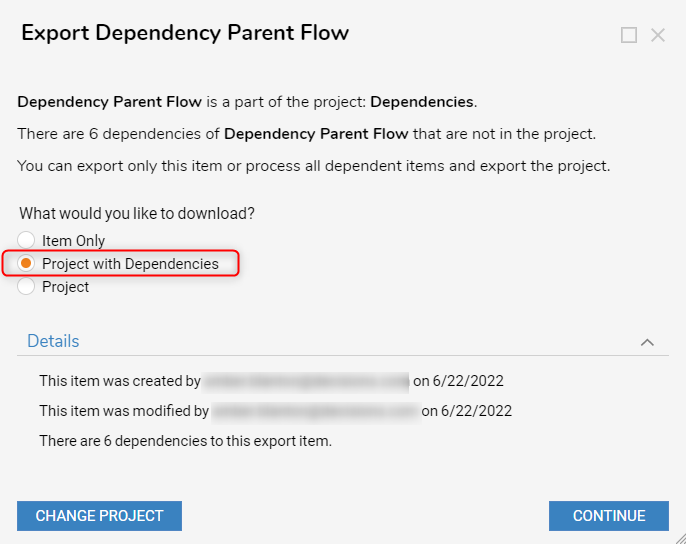
Exporting with Dependencies
Exported Designer Elements and Designer Projects prompt users to include their dependencies via downloading the Project With Dependencies option to preserve functionality across environments.
Expanding the Export window's Details sections also shows how many dependencies will be added to the export .zip file. Typical exports should include dependencies; however, they can be excluded. Remember that dependent Designer Element(s) need reconfiguration to function properly without them in the new environment. Missing dependencies in a project appear during import into another environment.