Theme Editor Overview
- 25 May 2022
- 3 Minutes to read
- Print
- DarkLight
Theme Editor Overview
- Updated on 25 May 2022
- 3 Minutes to read
- Print
- DarkLight
Article Summary
Share feedback
Thanks for sharing your feedback!
Overview
The Theme Editor edits the UI of all users within the Decisions instance.
The changes made in the Theme Editor can be applied immediately without writing or changing the code on the default LESS files for Decisions. Users can select to edit the User Portal, Designer Studio, or Mobile theme. After the theme is selected, the Theme Editor will display several different UI elements that can be changed.
Do not manually modify the .less outside of the Theme Editor to prevent errors during upgrading.
A common use case may involve changing the color scheme from the default Decisions instance to something that fits better with a company's branding. Furthermore, any navigational icons, loading icons, etc may be changed to fit this as well.
Accessing the Theme Editor
To view the Theme Editor. open the System folder from the Studio. Right-click on it to view the System's Action then select Theme Editor.
The following UI may be edited with the Theme Editor:
- User Portal
- Studio
- Mobile
The left panel displays the different UI elements within the selected UI Theme. Users may search for specific elements via the search bar. Elements can be expanded to show a wider range of parameters by clicking the expansion arrow to the left of the element name.
There are four elements types available for editing. For each type, they may be manually edited via the Edit action. Selecting the Pick Variable option instead lets this element mirror the styling of the selected elements. This may be useful in examples where wishing to preserve the same color scheme across multiple UIs.
- Image
- Font
- Size
- Color
Selecting an element populates the right panel with editing options. For each type, they may be manually edited via the Edit action. Selecting the Pick Variable option instead lets this element mirror the styling of an already existing element in the UI. This may be useful in examples where wishing to preserve the same color scheme across multiple UIs.

Applying a Change in the Theme Editor
Following alongside this and subsequent examples will change the UI of the Decisions instance.
Do not follow alongside the example unless wishing to replicate the changes.If done so accidentally, refer to the Reverting Theme Editor Changes subsection to learn how to undo. Note this method reverts all changes.
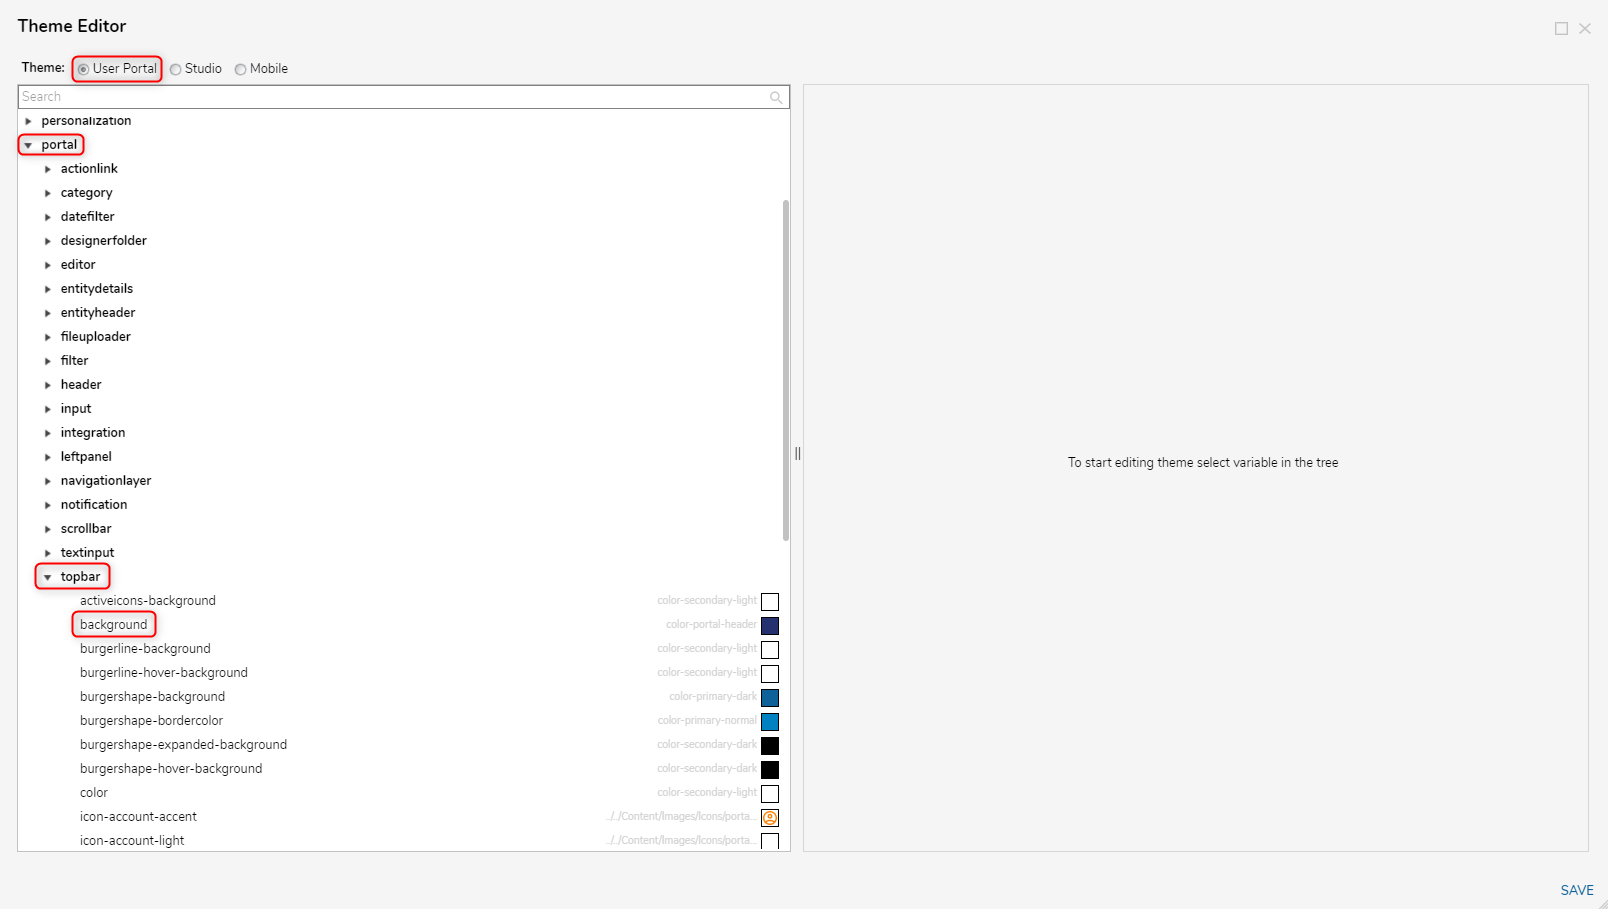
- In the Theme Editor window, select User Portal from the top radio button list. Expand portal then expand topbar. Select background.
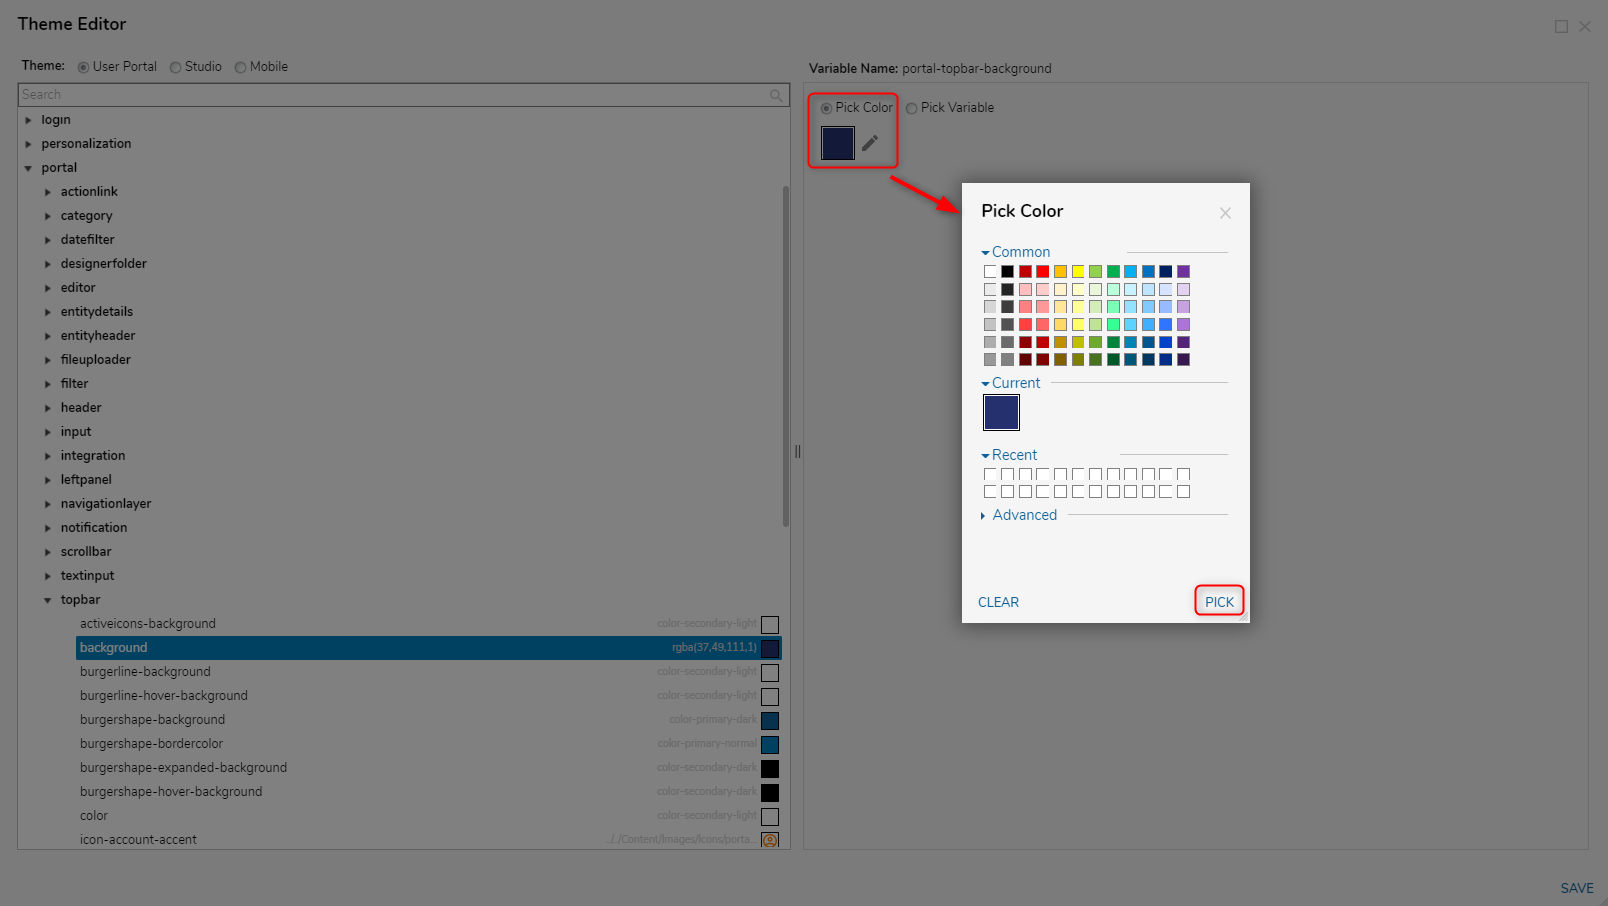
- In the right panel, select Pick Color to bring up the Pick Color window. Select a new color then confirm selection by clicking PICK.
- Select SAVE at the bottom right corner of the Theme Editor. A popup window appears confirming the theme saving though extensive edits may take a couple minutes and a Portal reload to update.
Select APPLY AND RELOAD to save the changes, reload the instance, and then view the changes.Changes not appearing after reload?Try clearing the browser's cache to update the theme.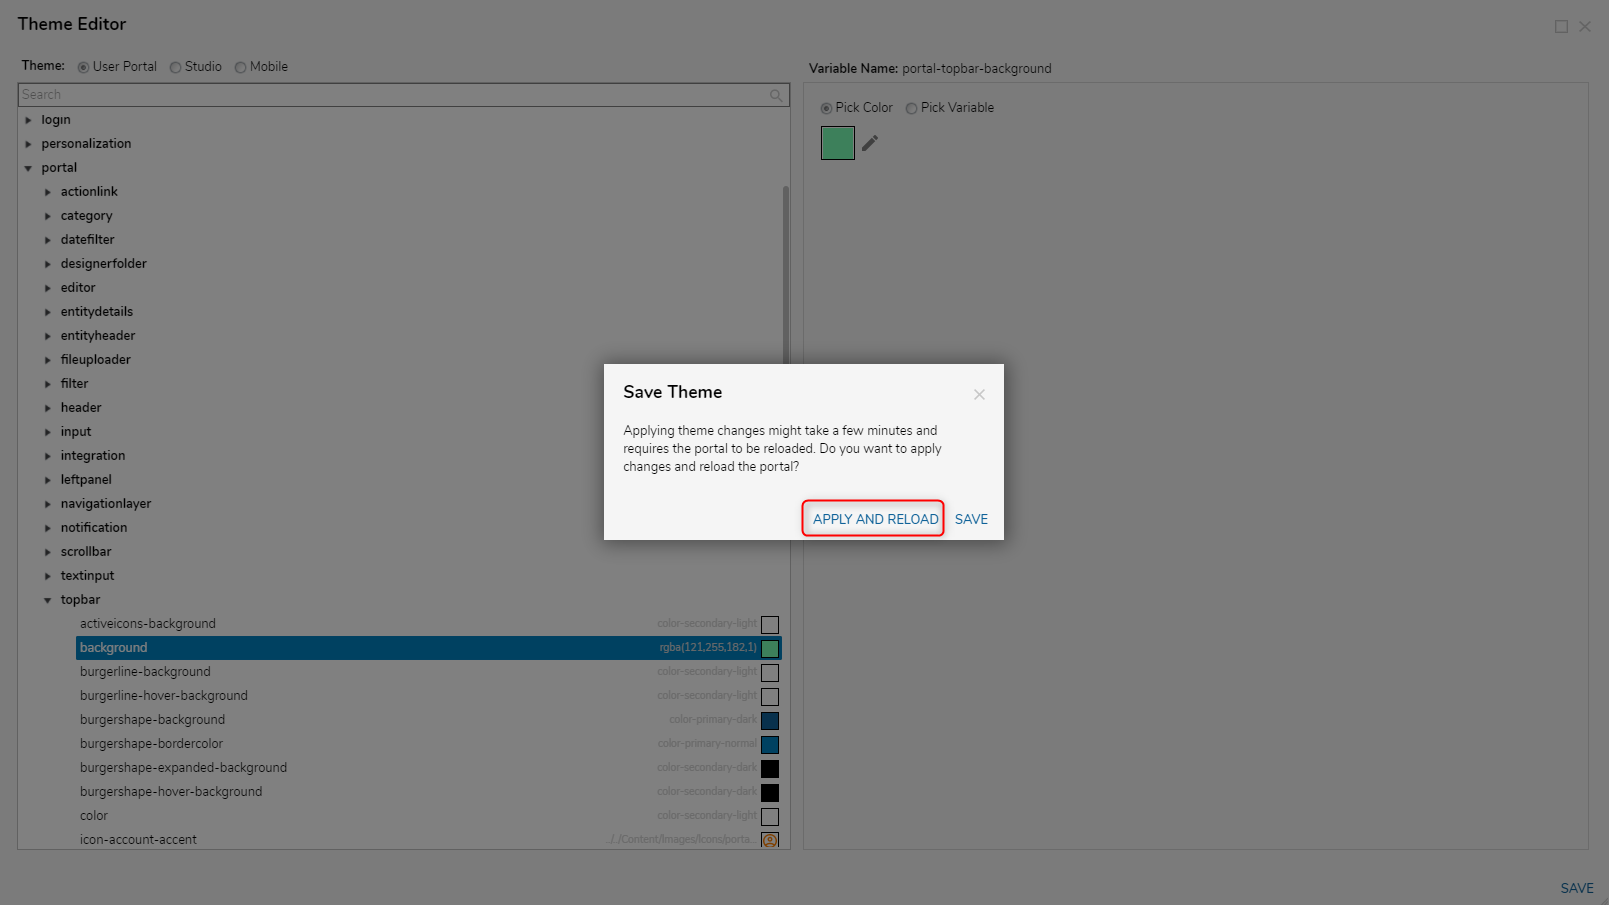


Import/Exporting Theme Editor Settings
To transfer Theme Editor Settings from one Decisions instance to another, copy the custom .less files(s) formatted as "theme.[UITheme]-custom" found under C:\Program Files\Decisions\Decisions Web Host\HUI\styles\less\themes of the originating instance and paste them into the same directory in any other instance.
These custom files generate then update automatically upon any changes made to the instance's Theme Editor. These files also stay in the file system even after upgrading.
After pasting the files into the other instances, restart the Service Host Manager of the other instances. Upon a successful restart, the instance will apply the new Theme Editor settings.

Reverting Theme Editor Settings
This method completely reverts all changes made to the Theme Editor.
Individual, specific reverts can only be conducted manually, so it is a best practice to track changes to the custom .less files.
To revert changes made, navigate to C:\Program Files\Decisions\Decisions Server\wwwroot\styles\Less\themes and delete only the "theme.[UITheme]-custom" .less file(s). After the relevant custom files are deleted from the folder, restart the application.
For further information on the Portal, visit the Decisions Forum.
Was this article helpful?