Overview
A Swim lane (or swim lane diagram) is a visual element used in process flow diagrams or flowcharts that visually distinguishes job sharing and responsibilities for sub-processes of a business process. The swim lane flowchart differs from other flowcharts in that processes and decisions are grouped visually by placing them in lanes. Parallel lines divide the chart into lanes, with one lane for each person, group, or subprocess. Lanes are labeled to show how the chart is organized. This tutorial demonstrates how to use the Swimlane component in the Flow Designer.
Example
In this example, create a simple Approval process workflow. This Approval process has 3 participants: a Sales Representative who submits a customer's sale they made, the member of a Legal Team who needs to approve or cancel the order, and a shipment Fulfillment procedure. Swim Lane components are useful in this workflow to separate visually the steps for each participant.
Begin in the Designer Folder by clicking Create Flow on the bottom left of the Folder Actions Panel. Then, Name the Flow and click Create to proceed to the Flow Designer.
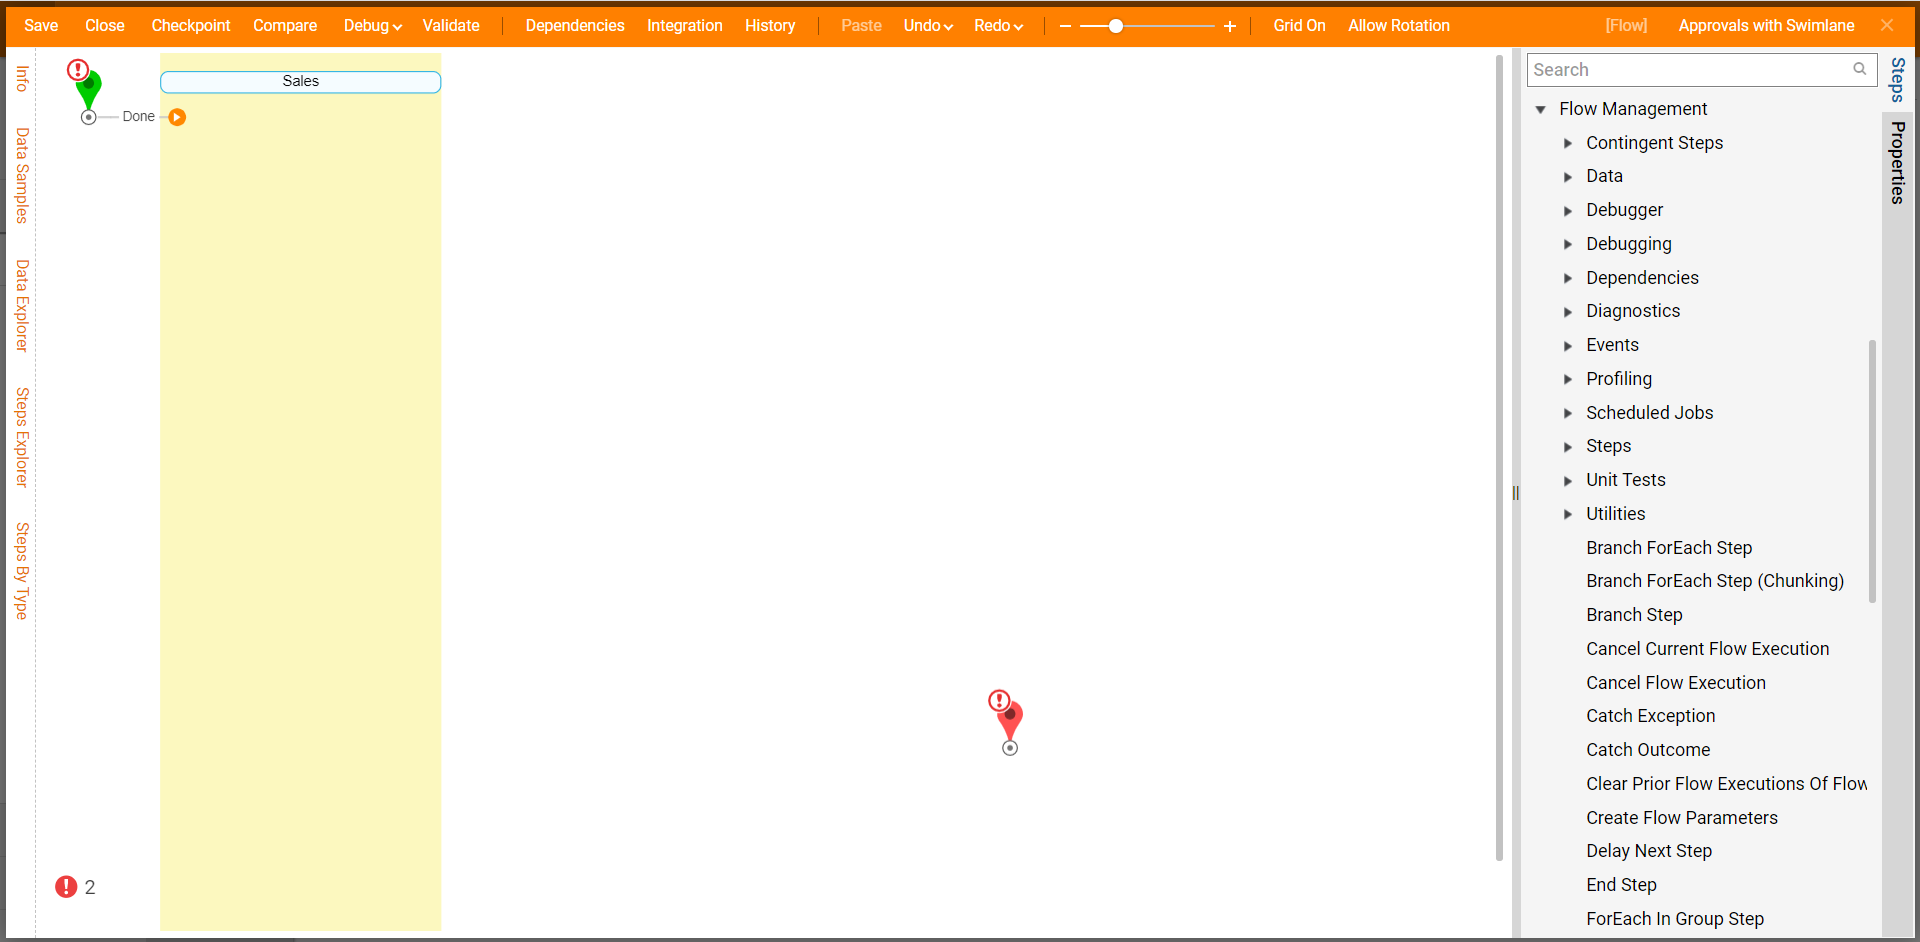
In the Flow Designer, begin by adding and defining Swim Lane components. First, locate the Swim Lane component in the Flow Management category in the ToolBox and drag it to the workspace. With the Swim Lane component selected, Rename it so it indicates the first process participant's Name (Sales).
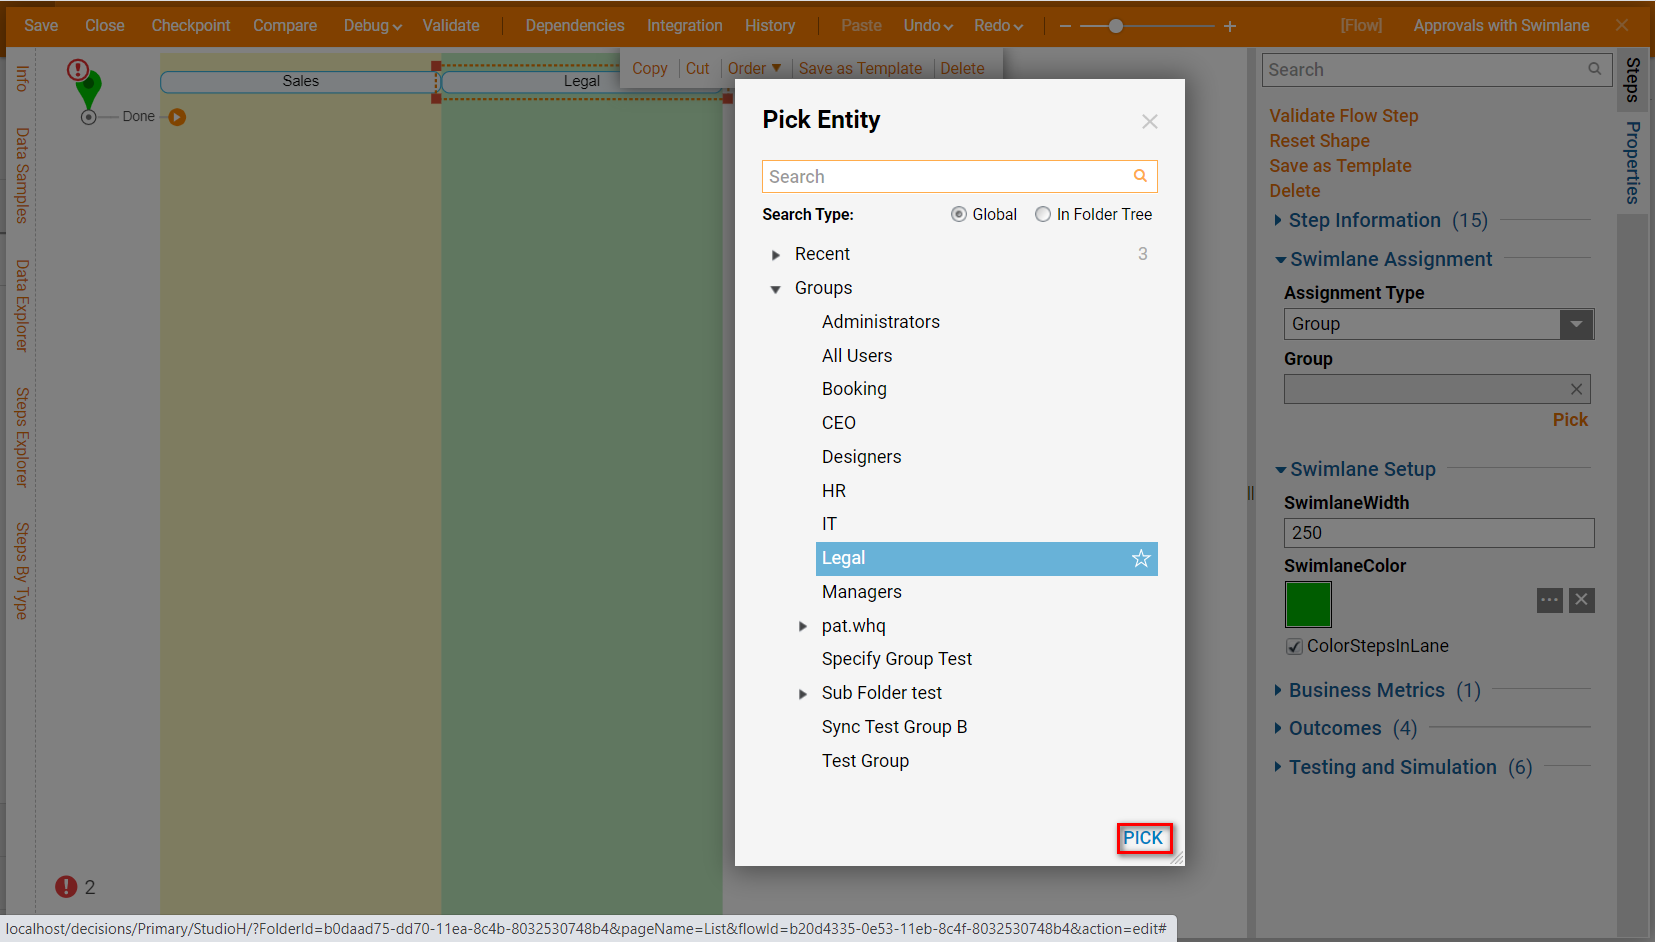
Then, add another Swim Lane component to the workspace. The second participant of this approval process is the Legal team. This participant will probably have some Forms that will be Assigned to their corresponding Group or Users.
Locate the Swimlane Assignment section and change Assignment Type to Group. Next, with the Group picker, select the Legal group.
Then, in a similar manner, add the Fulfillment Swim Lane and Assign it to the Fulfillment Group.
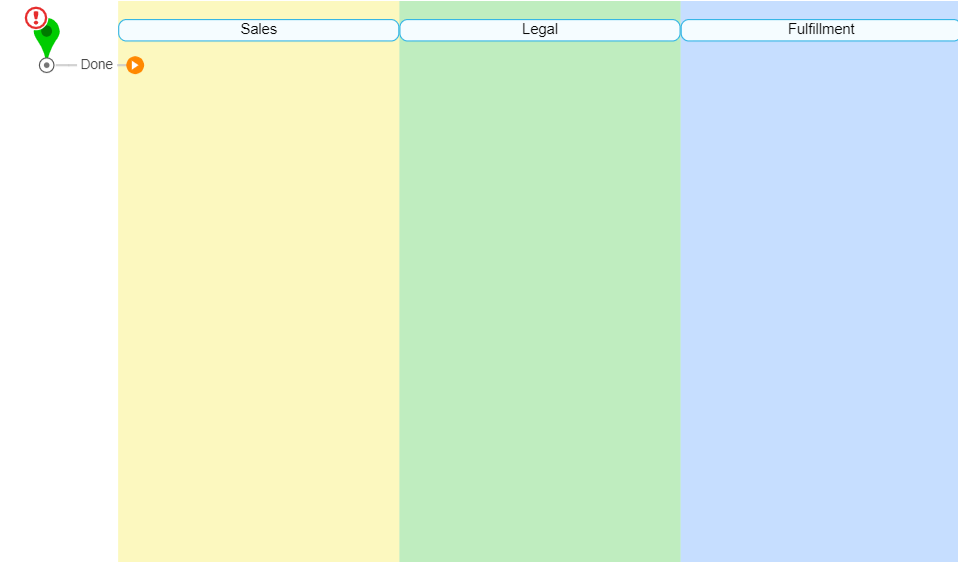
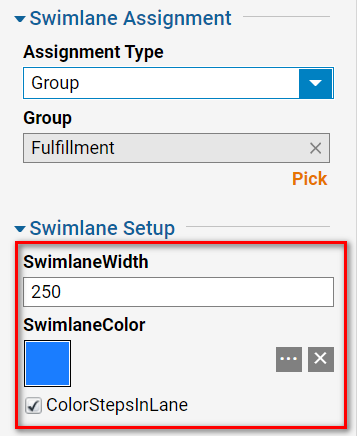
After the Swim Lanes have been defined, build the approval process.
First, add a Show Form step from the Favorite Steps category; position this step under the Sales Swim Lane (this is going to be a Form where a Salesperson submits an order). After adding the step, select it and navigate to the Pick or Create Form link in the Properties tab; Name the Form, and then click CREATE.
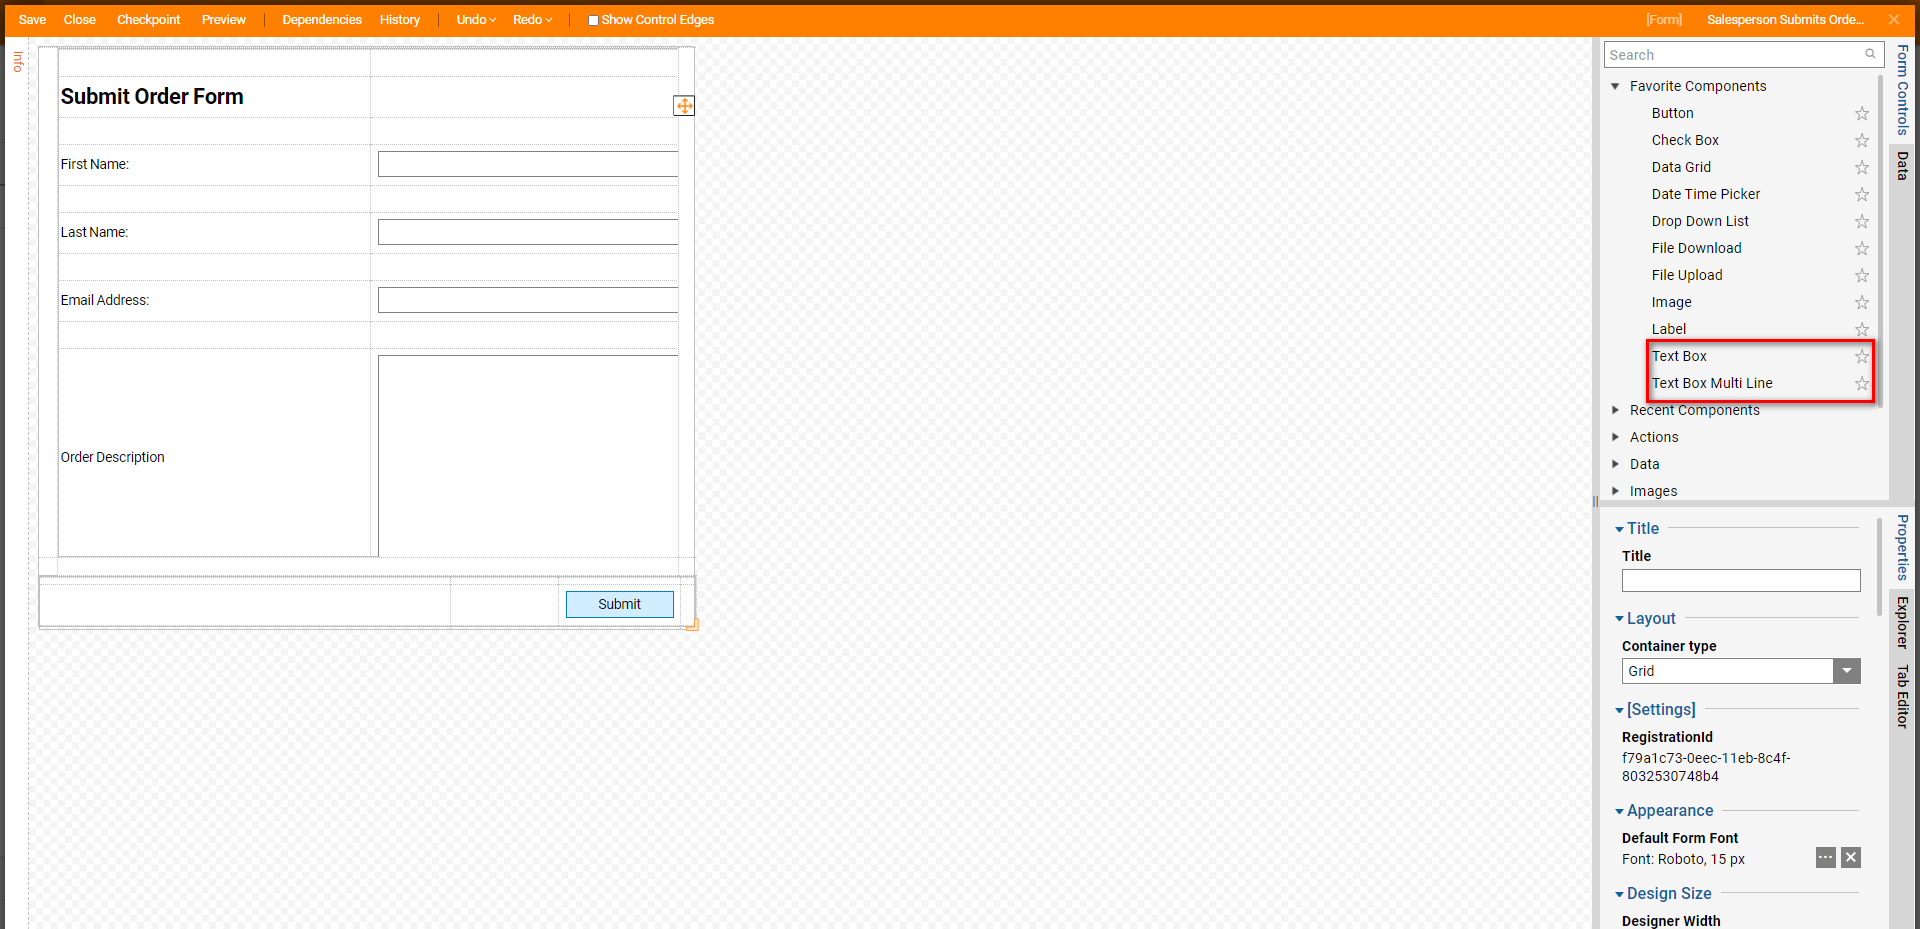
Design the Form as follows: Utilize three Text Box components pertaining to the First Name, Last Name, and Email Address for the customer's order.
Then add a Text Box Multi Line component that allows the salesperson to input an Order Description. Finally, add a Button component and label it Submit
When finished, Save and Close the Form Designer.
Next, navigate to the Show Form step's Properties tab and change the Input Mappings for the Form to Ignore; this will allow the user to input their own data upon running the Flow.
Next, attach another Show Form step to the first Form's Submit path. Position this step under Legal Swim Lane.
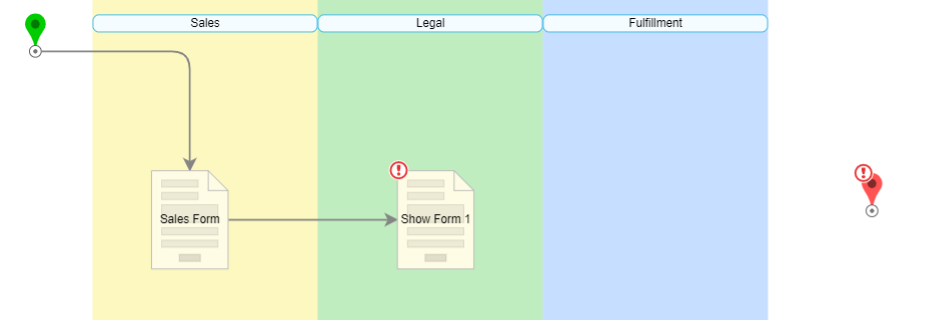
Then, from the Properties tab for the newly added Form, select Pick or Create Form, Name the Form and select CREATE.
Begin configuring the Form by navigating to the Data tab; drag in the Data for each element from the first Form (First Name, Last Name, Email Address, Order Description) making sure to select Label of Data Value.
Then, add a Text Box Multi Line component to allow the Legal Team to make any comments should they Reject the order.
Add two Button components to create two separate paths: Approval and Rejection.
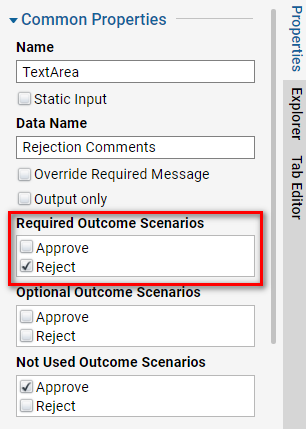
After adding these components, select the Text Box Multi Line. Then, from the Properties tab on the right under Required Outcome Scenarios, uncheck Approve, and toggle Reject; this will enable the ability to use the Rejection comments should the user trigger a Rejection Outcome.
Save and Close the Form.
.png)
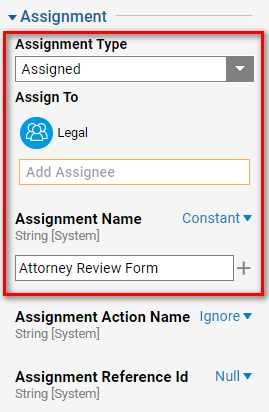
Back in the Flow, select the Legal team Form to navigate to the Properties tab; change the Assignment Type for the Legal Rep Form that was just created from InSession to Assigned, under Assign to and choose Legal. Then, set the Input for Rejection Comments to Ignore.
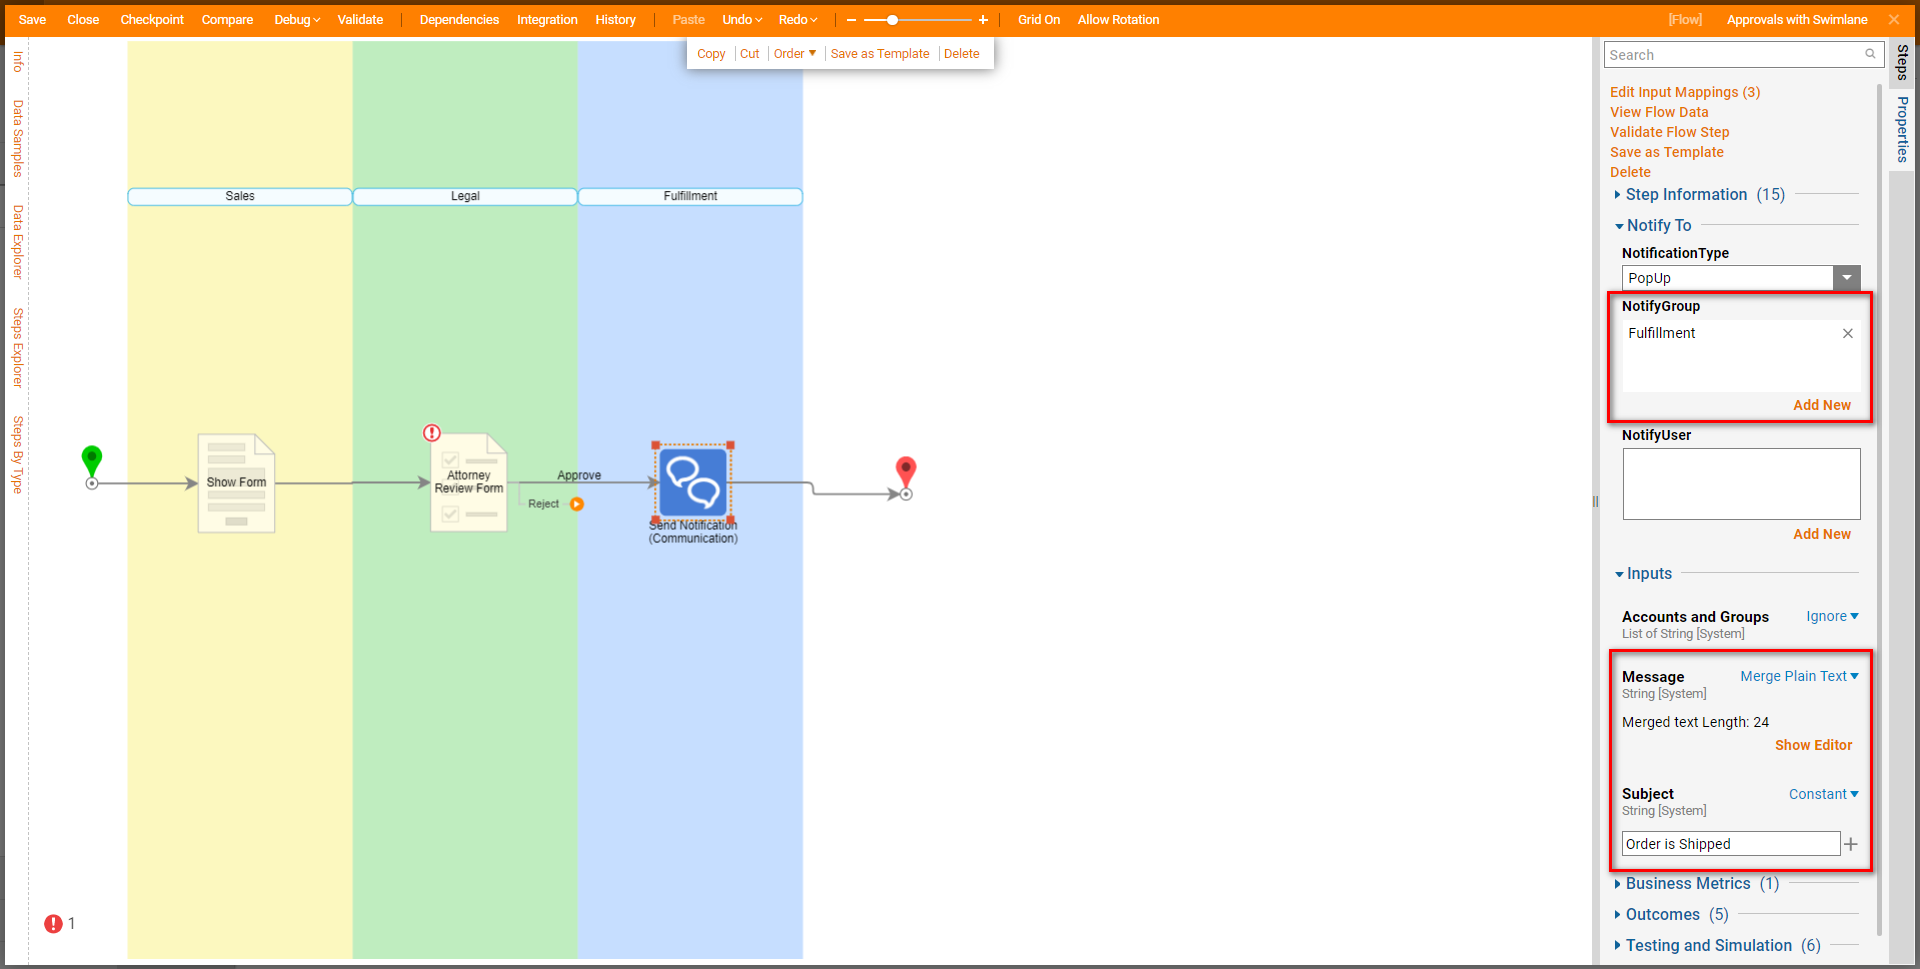
 Next, connect a Send Notification step to the Approve path of the Attorney Review Form. Then, drag this step out to the Fulfillment Swim Lane.
Select the Notification step to access the Properties panel and configure the step as follows: Set Constant for Subject as 'Order is Shipped', select the Text Merge.Plain then utilize the Show Editor button to edit the text for the Message.
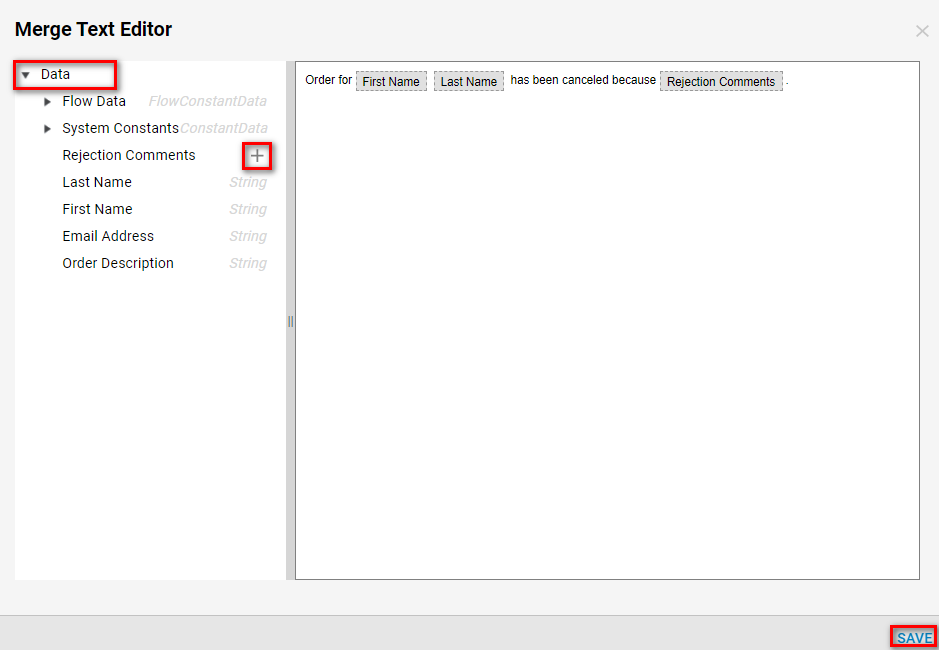
Using the pieces of Data on the left side of the Merge Text Editor in combination with text input, configured the Message as "Order for First Name Last Name has shipped". When done, click SAVE to save the Message configuration.

Back in the Flow Designer, from the Send Notification Properties tab, under NotifyGroup, Add New the Fulfillment Group. Connect the Done path of the step to the End step when complete.
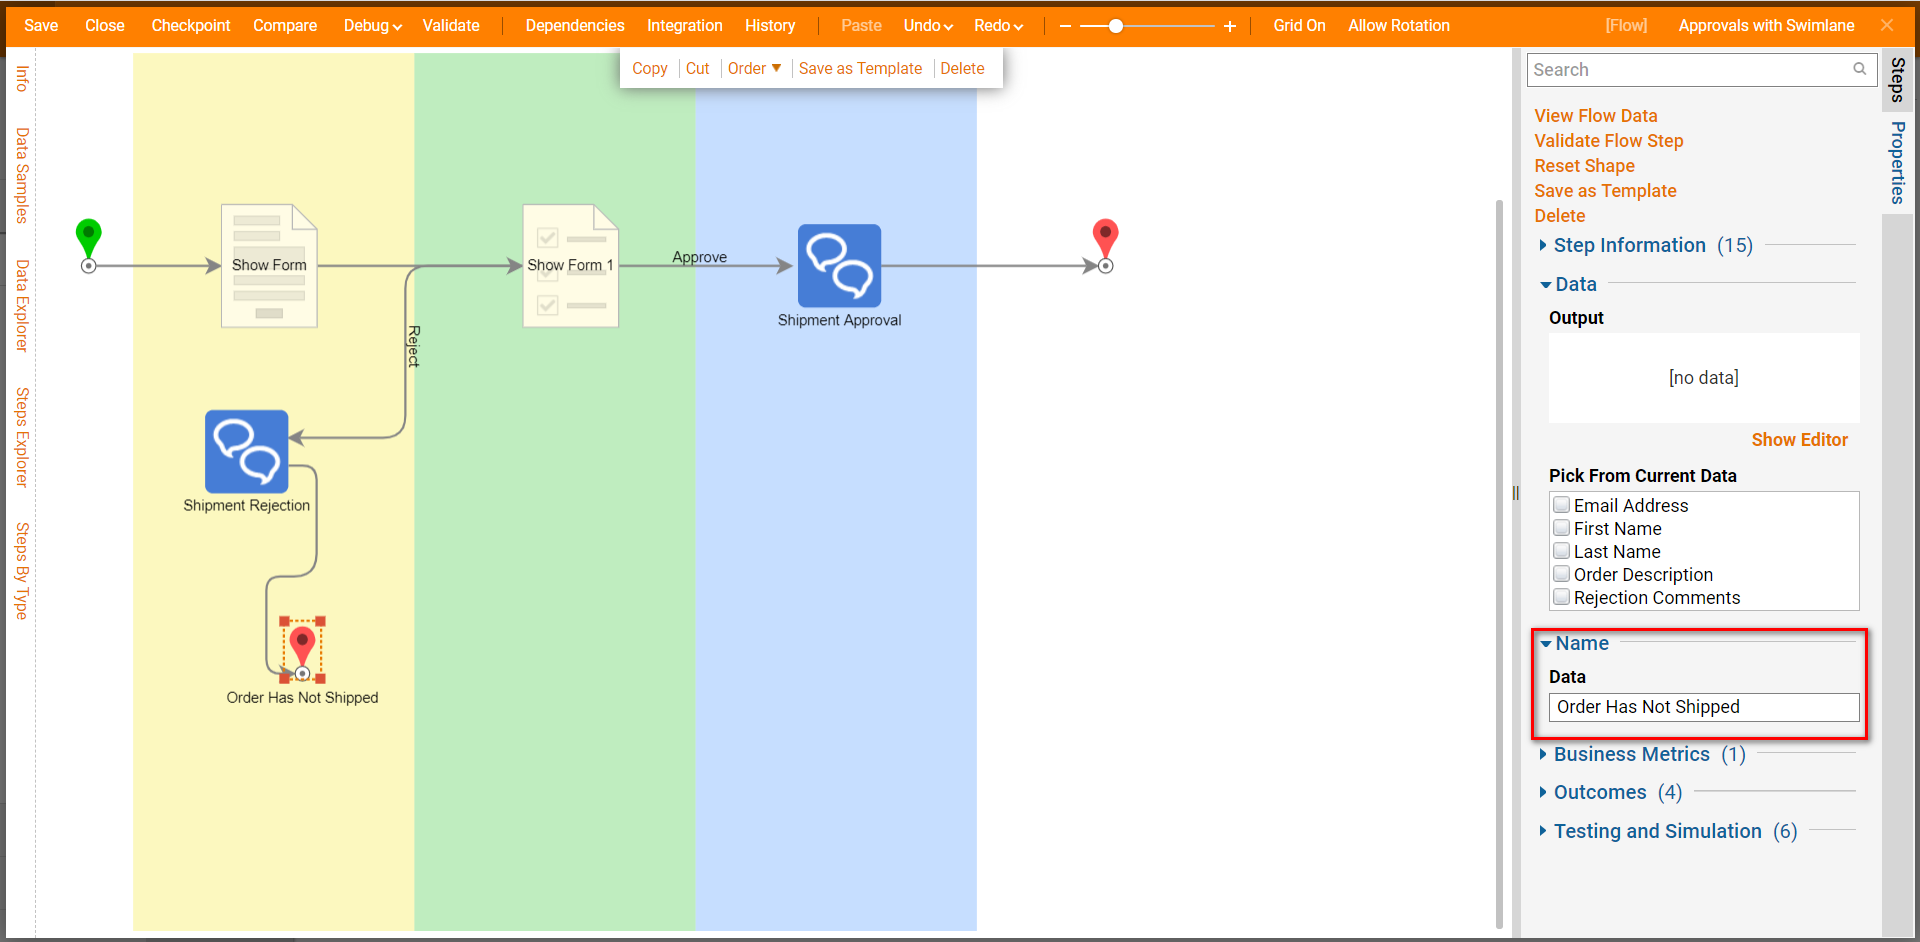
Next, drag out the Reject path from the Attorney Review Form, out to the Sales Swim Lane, and attach a Send Notification step. Add the User or Group associated with the Sales team to either the NotifyGroup or NotifyUser Input, via the Add New button. Constant map the Subject as 'Order is Rejected' and Merge Plain Text map the Message Input as 'Order for First Name Last Name has been canceled because Rejection Comments." After defining the Merge Text, click SAVE to save changes and return to the Designer.
Finally, utilize the Steps tab to search for an End step; attach this step to the Done path for the Rejection Notification. In the step's Properties tab, under Data, give the step a Name that indicates that the "Order Has Not Shipped." Save and Close to complete the Flow.
Debug
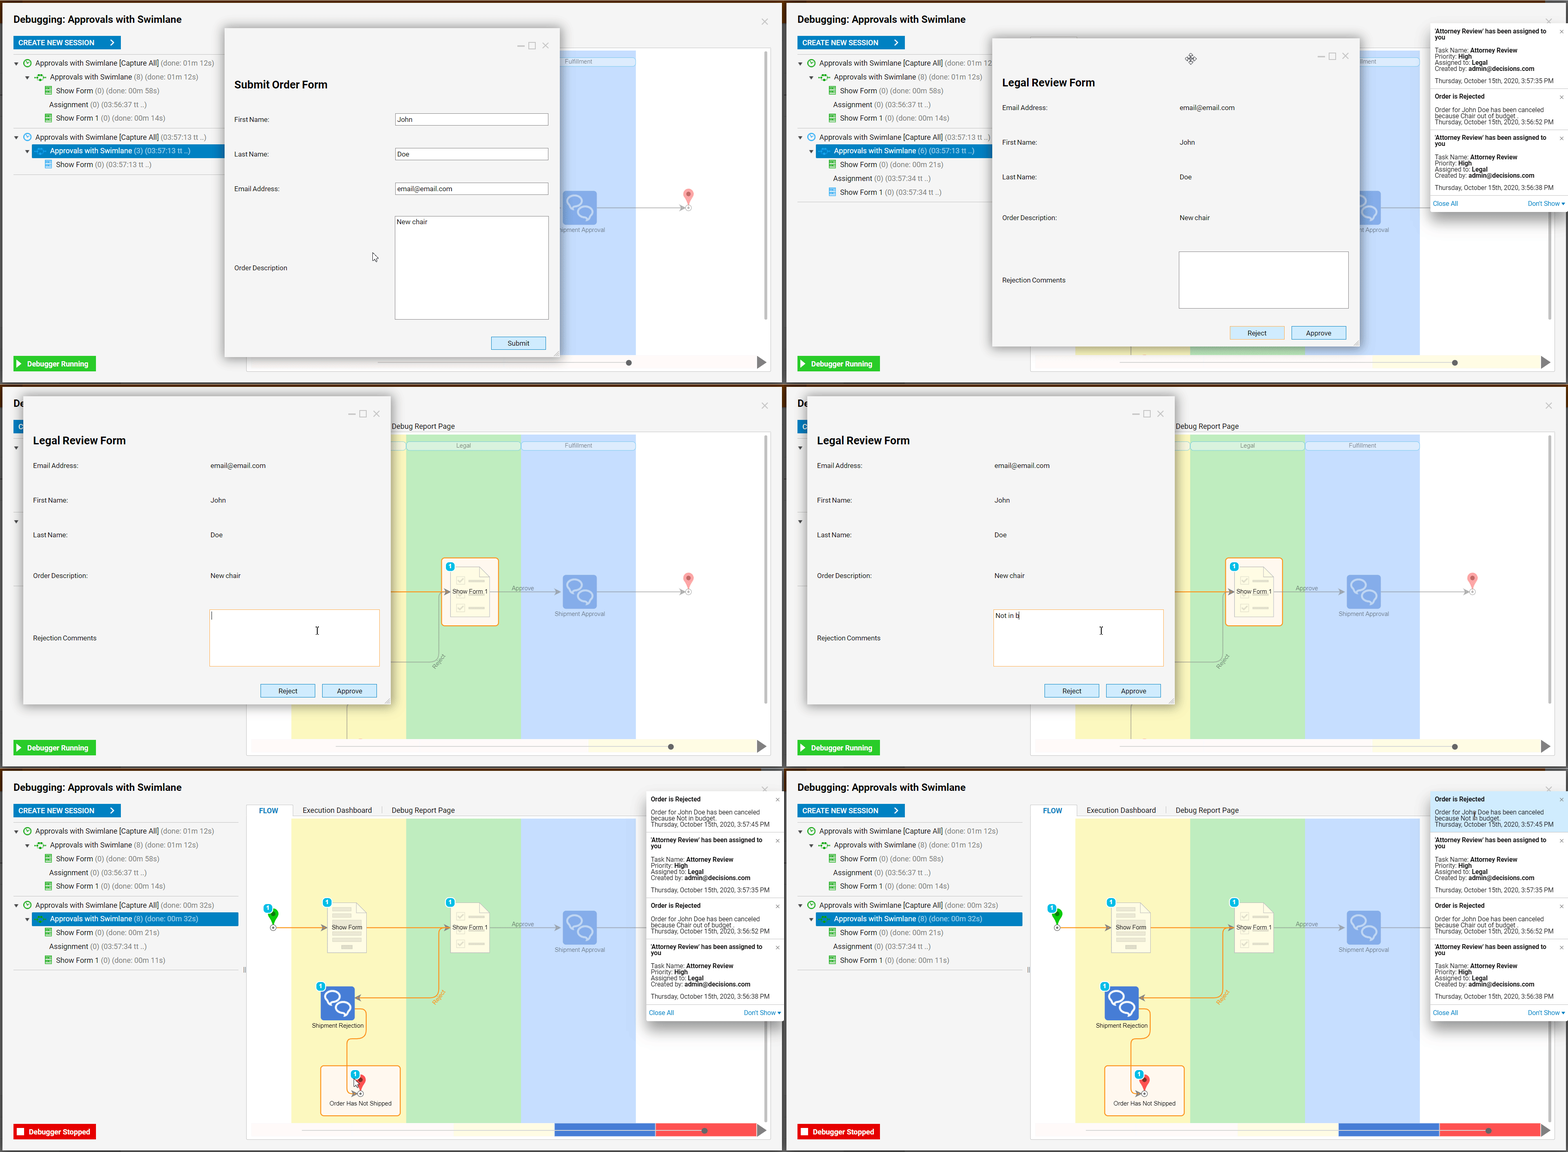
To test the Flow, select Debug on the top panel of the Flow Designer.
Fill out the Sales Form and click Submit to send it through the Flow. Note the progression of the Flow and how it passes through each Swim Lane.
Repeat the Process twice to ensure that the Flow properly progresses through each Lane and to represent an Approval and a Rejection Outcome. An Approval Outcome will simply follow the entire Flow, starting from the Sales Lane and running all the way to the Fulfillment Lane.
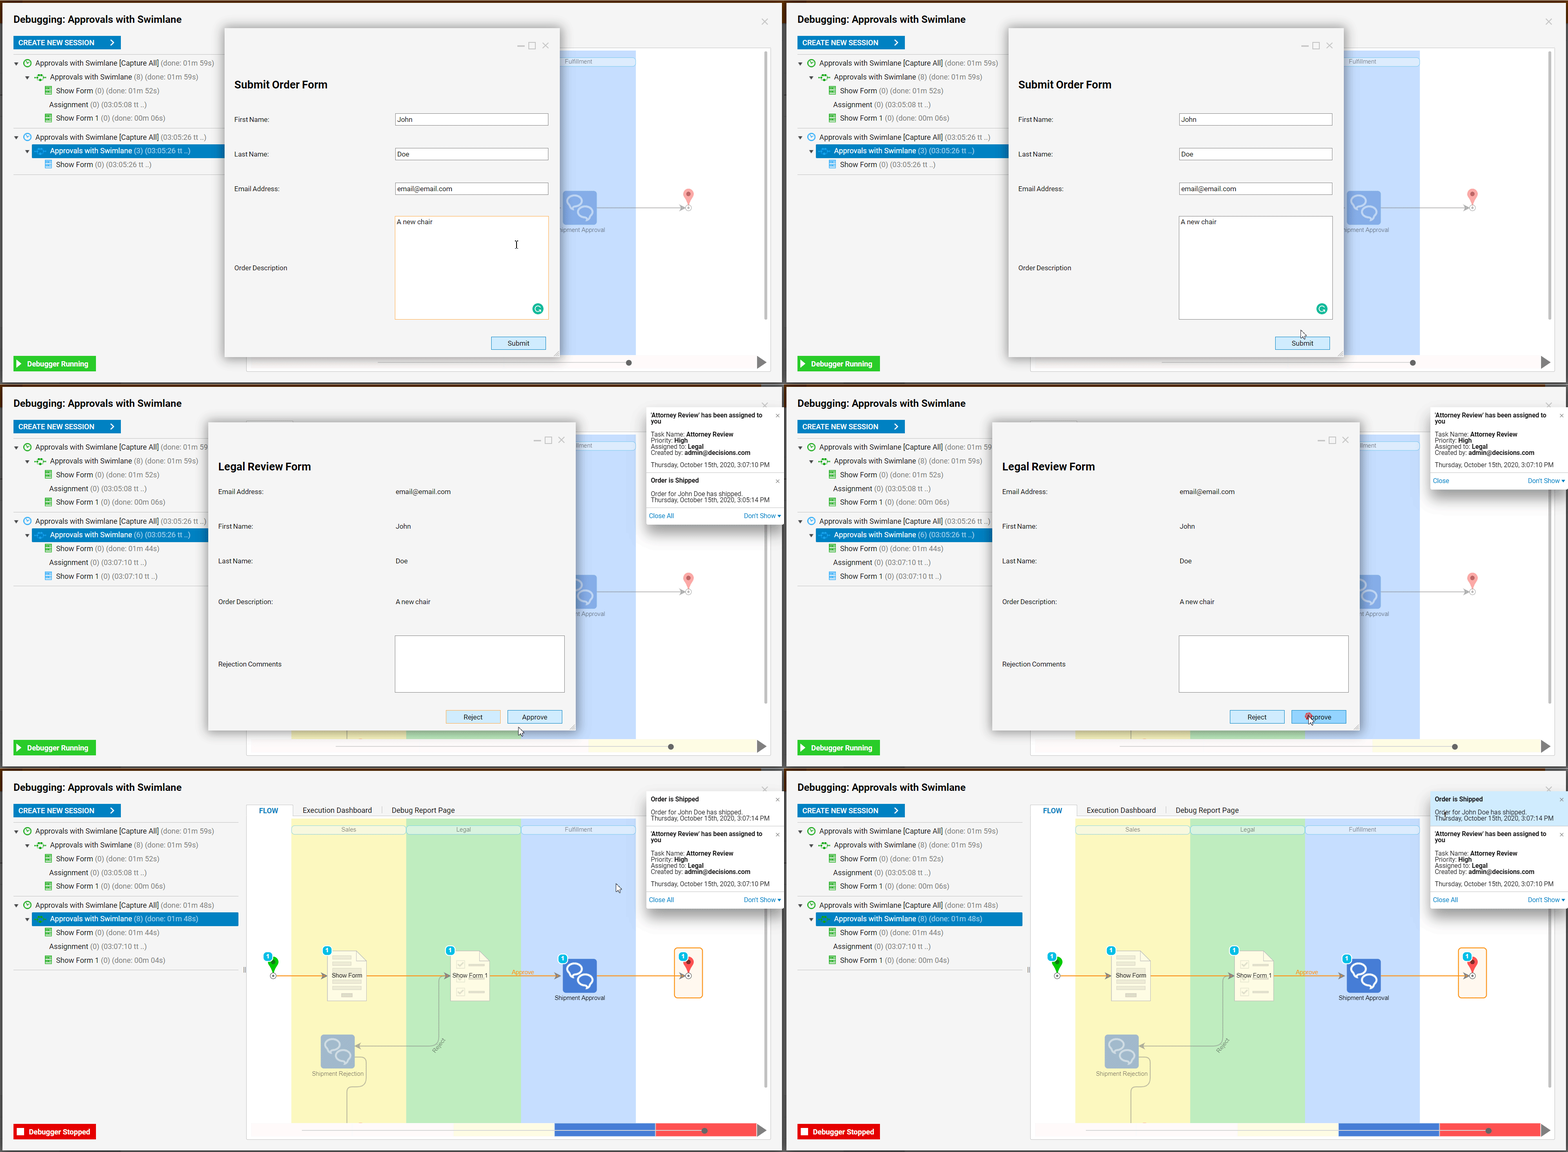
On a Rejection Outcome, the path will follow through the first two Swim Lanes and then back to the Sales Lane.
