Overview
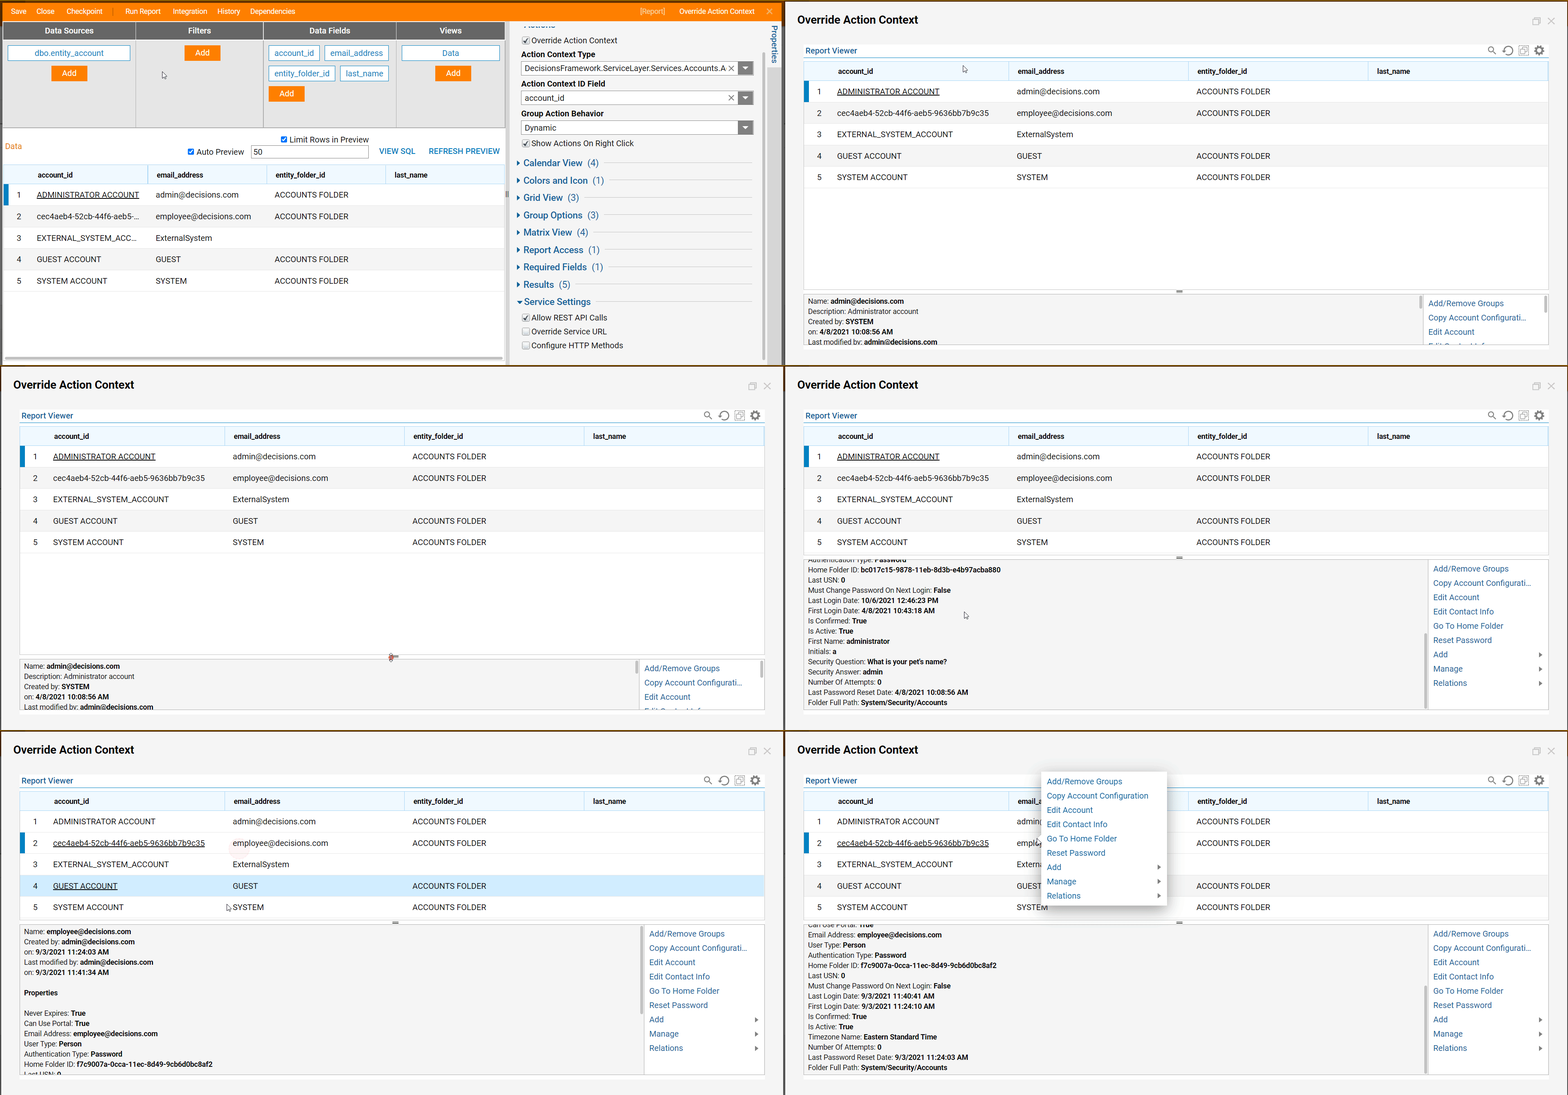
Reports offer the ability to collect, view, filter and organize data, and often times when data is collected, it may be helpful to edit the collected data. By default, users do not have the ability to use data-specific Actions on the collected data in a Report. However, by utilizing the Override Action Context Property, users can configure which sorted data element they wish to gain Actions for. Once configured these Actions can be used by right-clicking a piece of data that represents the user-defined Entity type on a Report. The following article discusses how to enable Override Action Context on an Integrated Table in a Report.
Example
In this example, integrate with a Database Table in Decisions. This table contains ID, First Name, Last Name, and Email Address fields. Begin by creating a Report on the External Table, allowing the ability to pull Account Information and Actions by selecting Report Data.
Setup
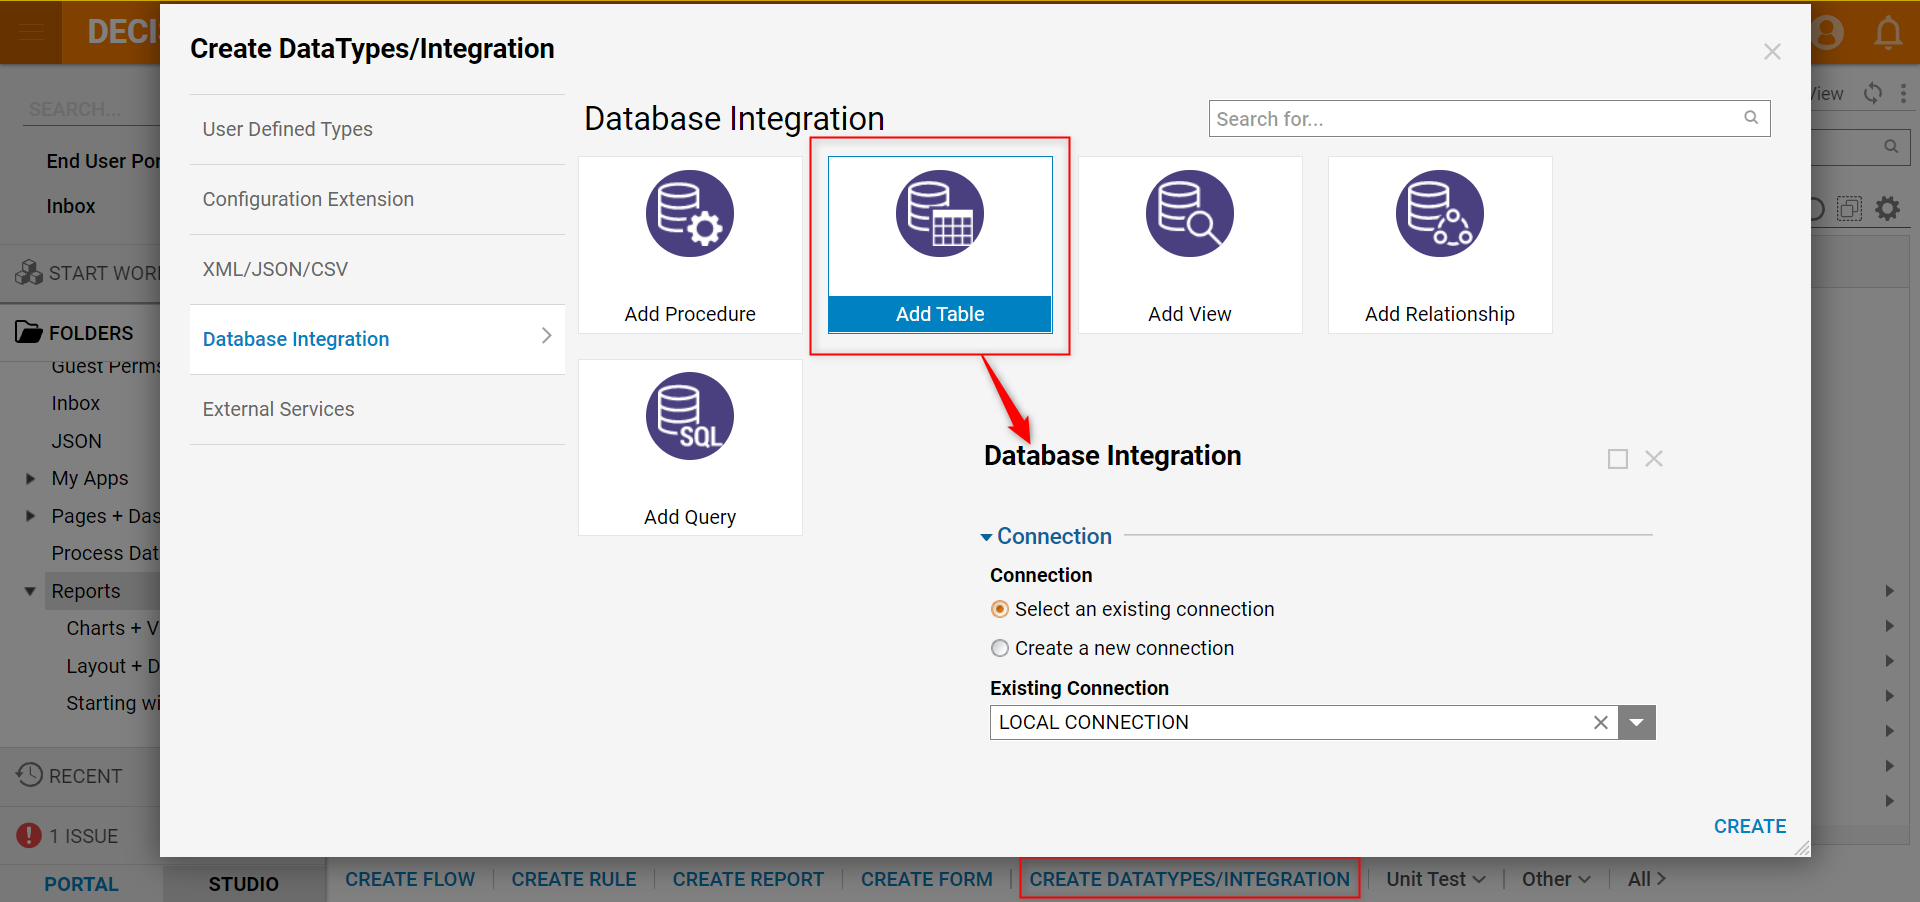
- Start with Adding a Database Table; in the Studio, navigate to a Designer Folder and click CREATE DATATYPES/INTEGRATION.
- Then, choose Add Table from the Datatypes/Integration > Database Integration, and then CREATE.
- Choose an existing local connection or create a new Database Integration. For this example, LOCAL CONNECTION is selected. Then, click NEXT.
- In the resulting window, select an Internal Database to Integrate with; choose dbo.entity.account for this example, then select NEXT.
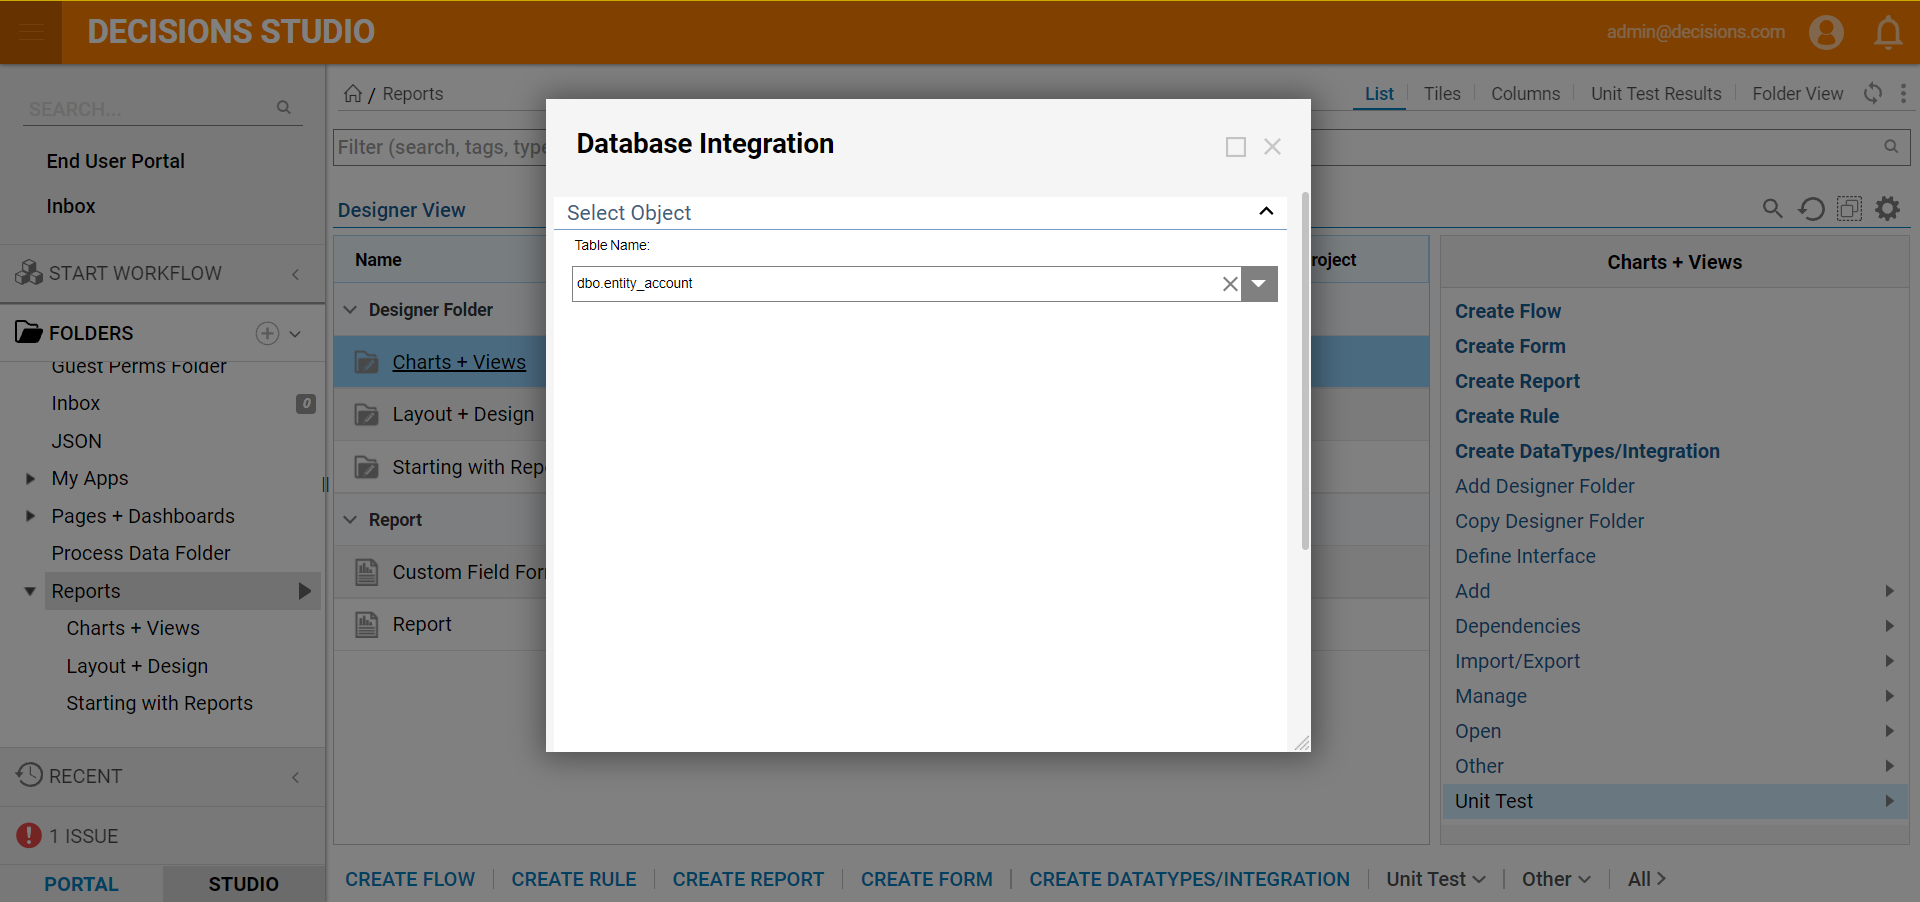
- Select a Table from the Table Name drop-down list.
- Then, choose from the Fields available. The Fields that are selected will generate for this Table integration.
- Select a Table Key choose NEXT and then SAVE to save the table integration.
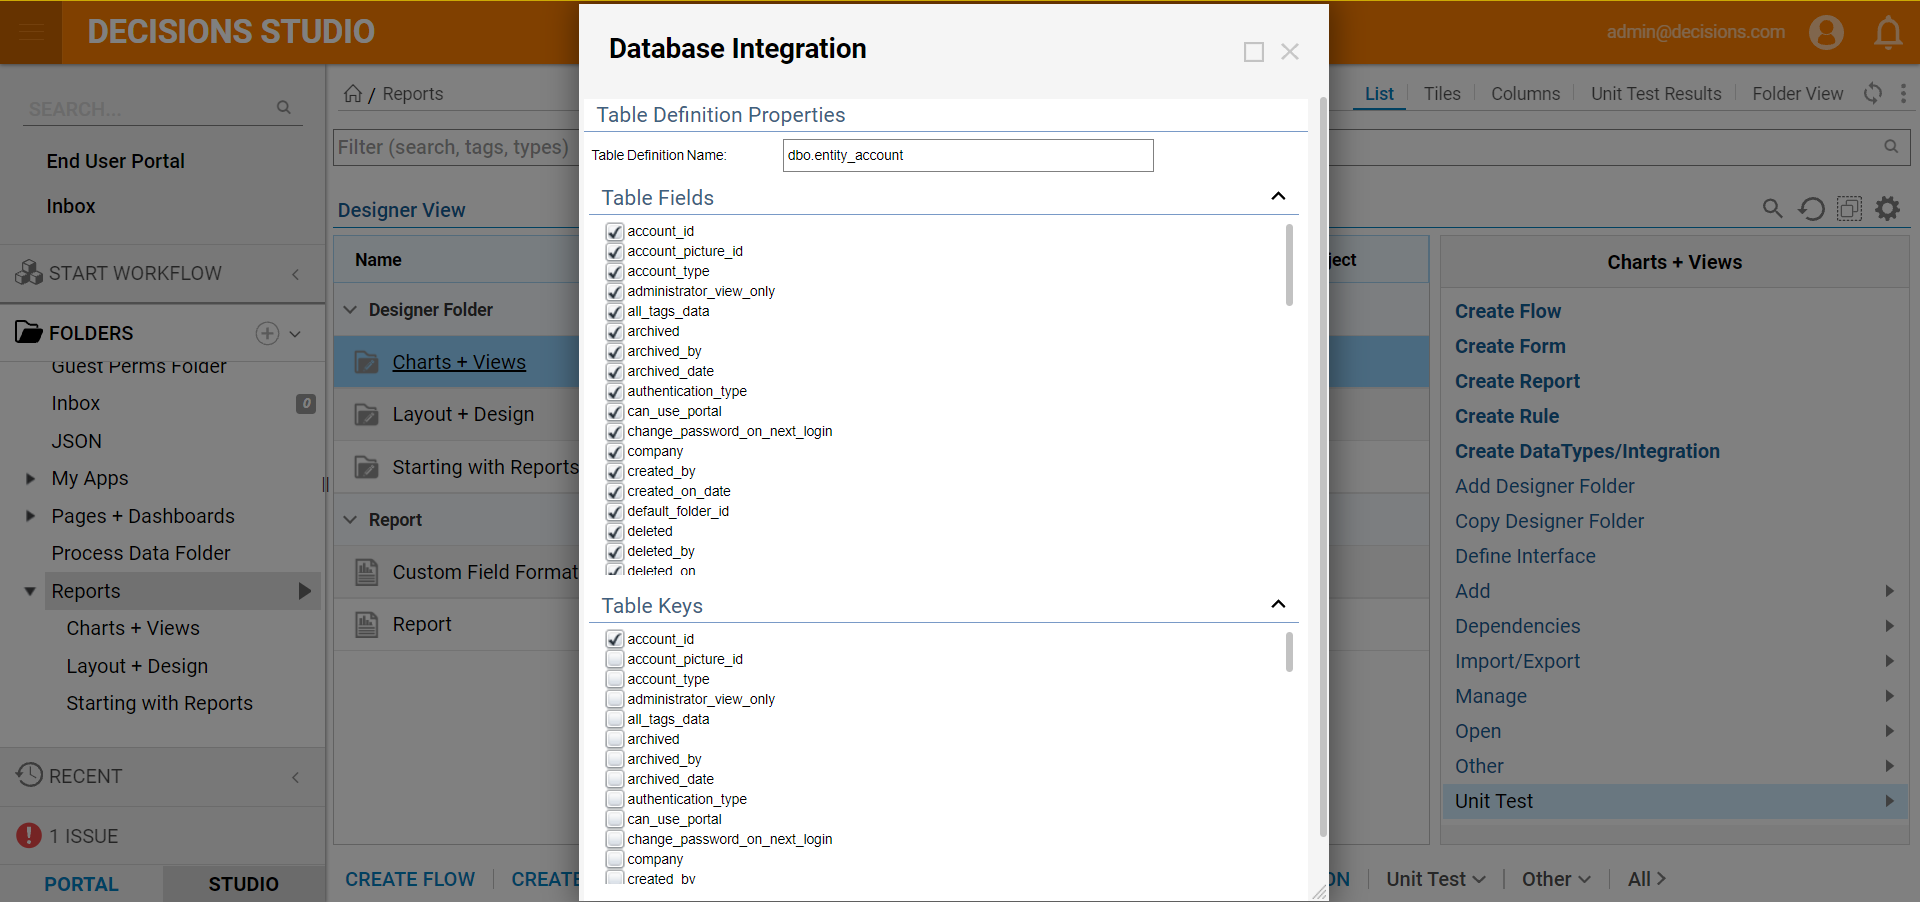
- SAVE the Database Integration Steps.
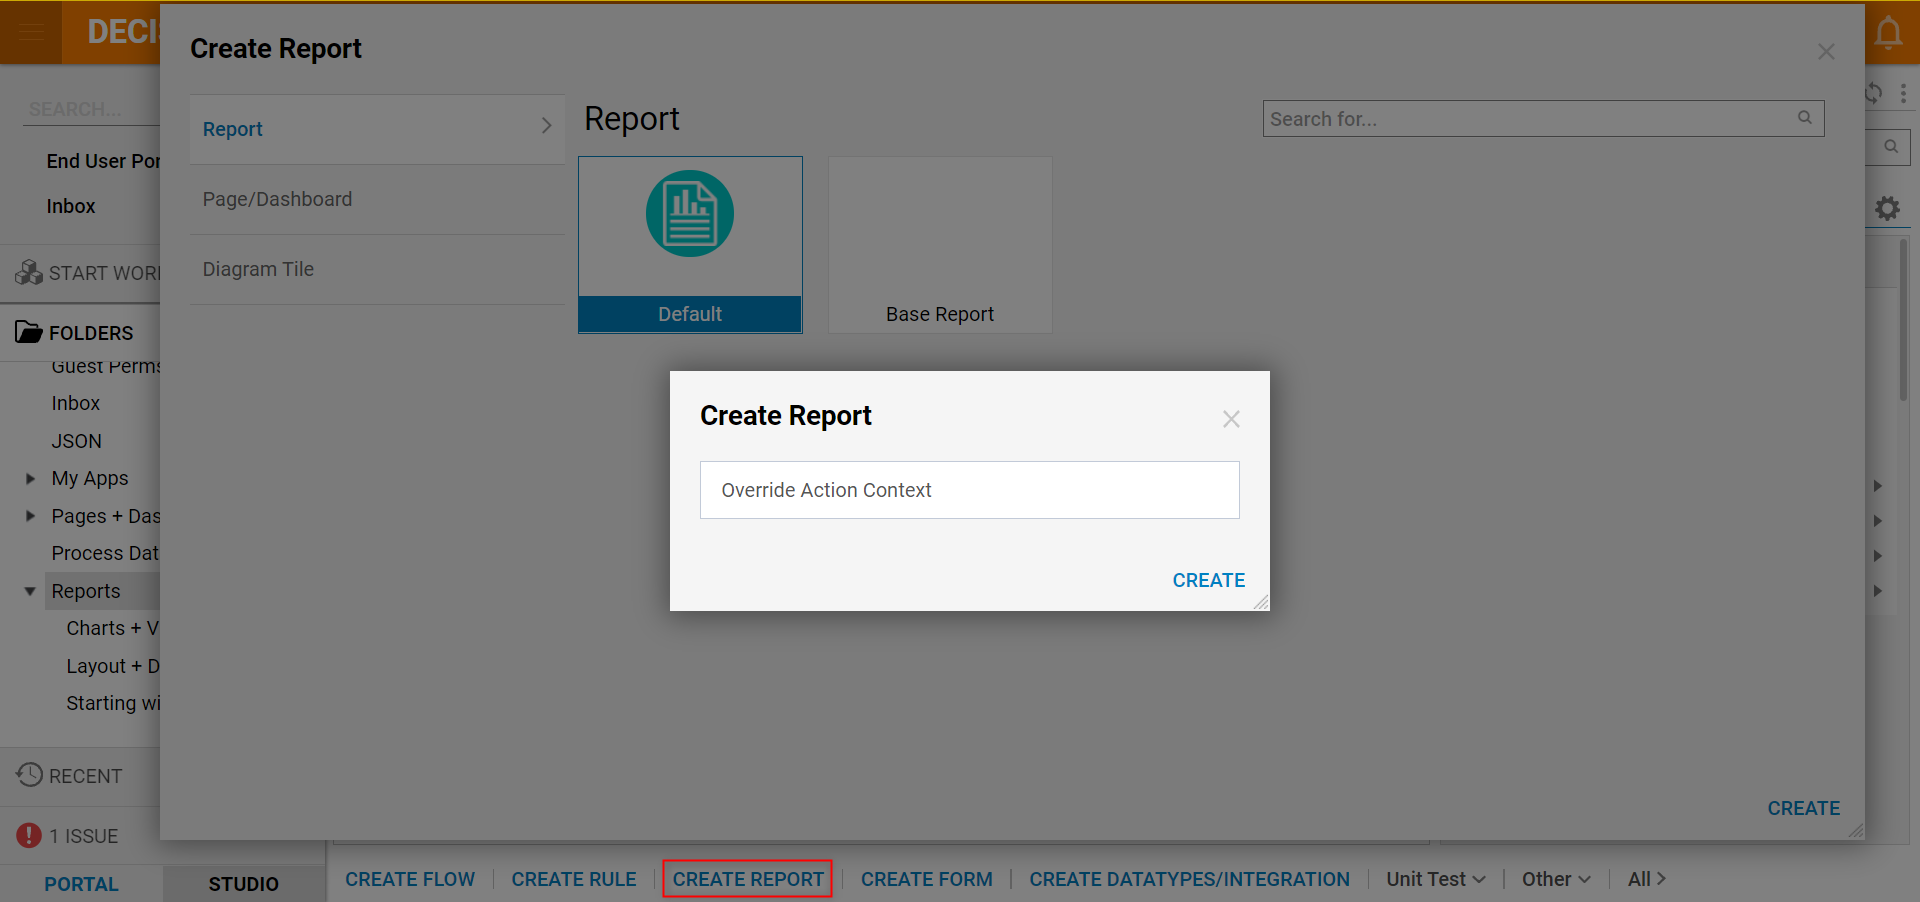
- Back in the Designer Folder click CREATE REPORT from the bottom toolbar.
- Next, select the Default Report type, click CREATE, then Name the Report (in this example, "Override Action Context").
- Afterward, select CREATE once more to proceed to the Report Designer.
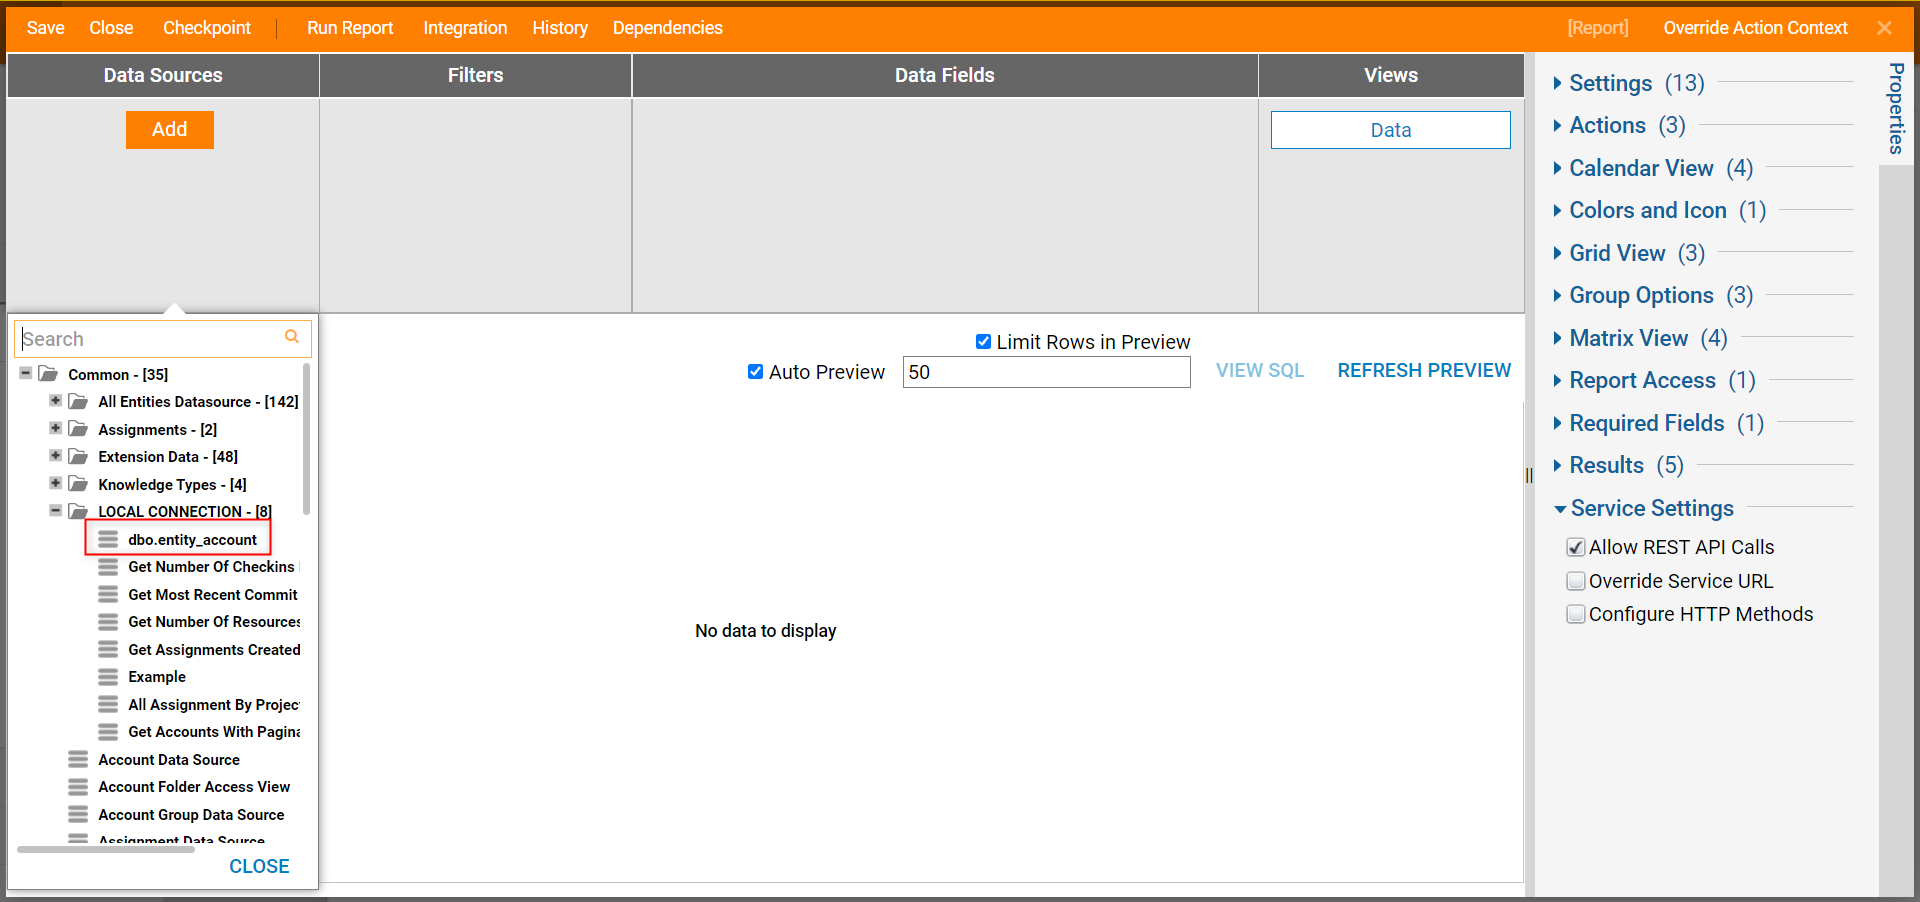
- In the Report Designer add the Integrated Table as Data Source for the Report; expand Data Sources > Common > LOCAL CONNECTION and add the dbo.entity_account table as the Data Source.
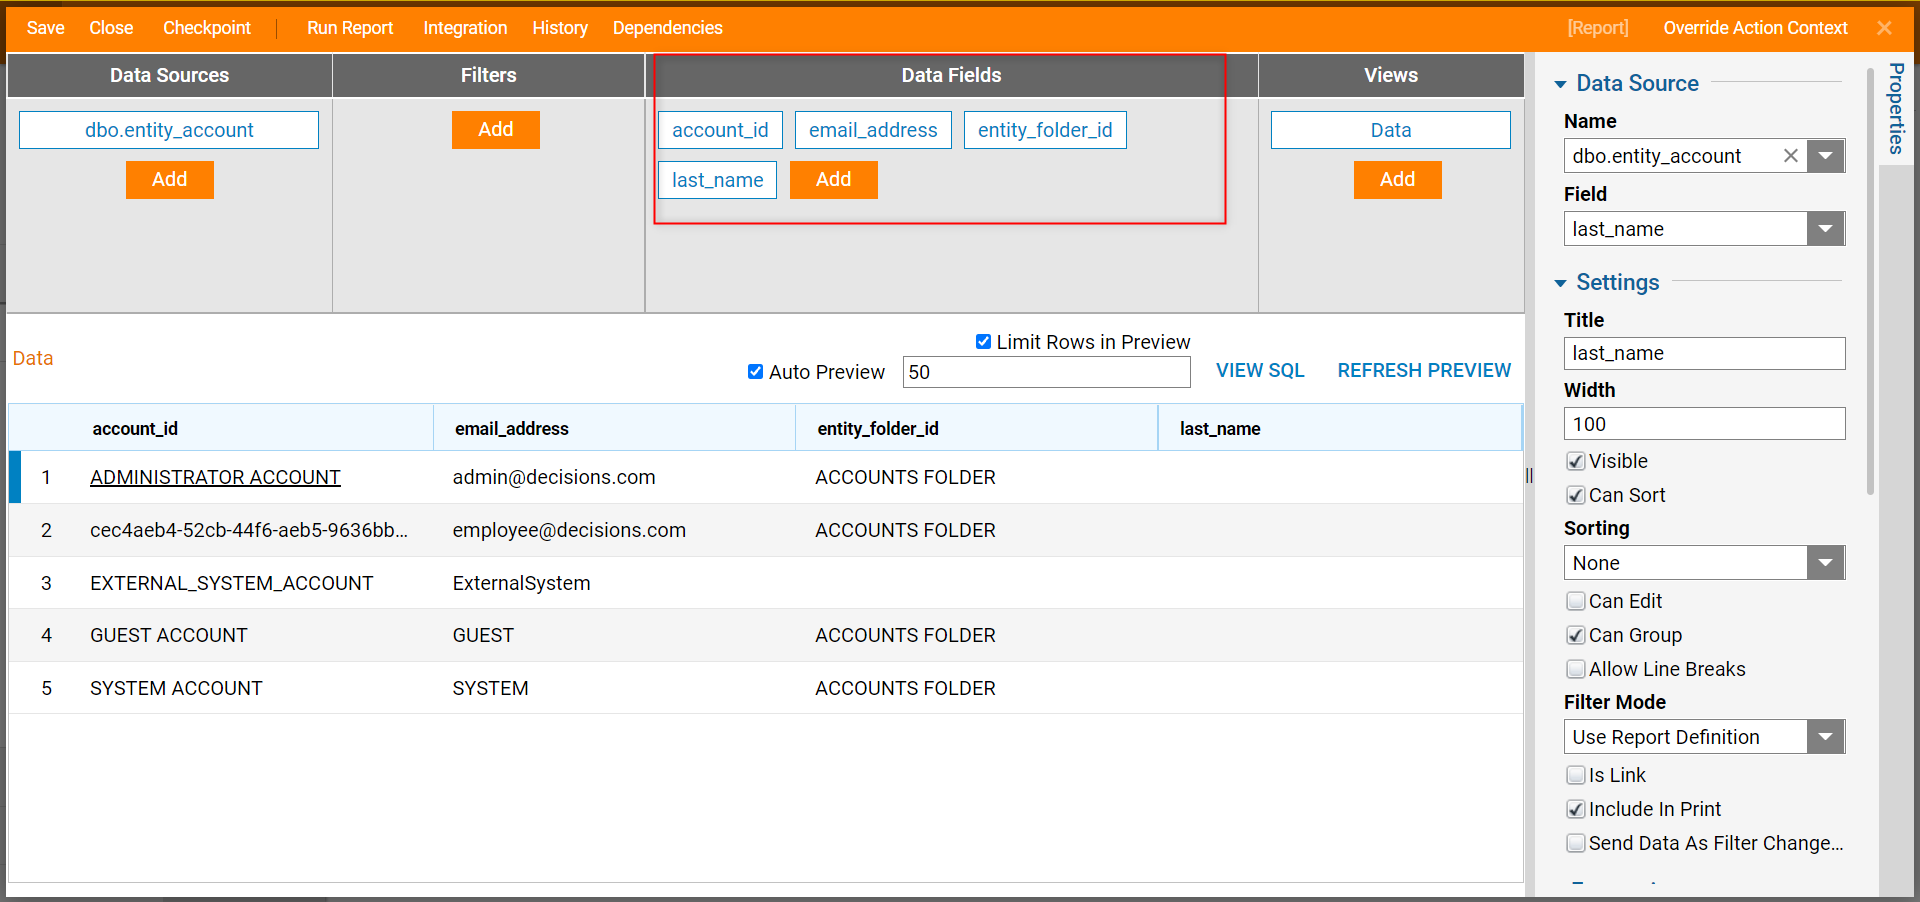
- Next, add desirable columns from the Data Source to populate Report with Data. In this example, those fields are "account_id", "email_address", "entity_folder_id", and "last_name".
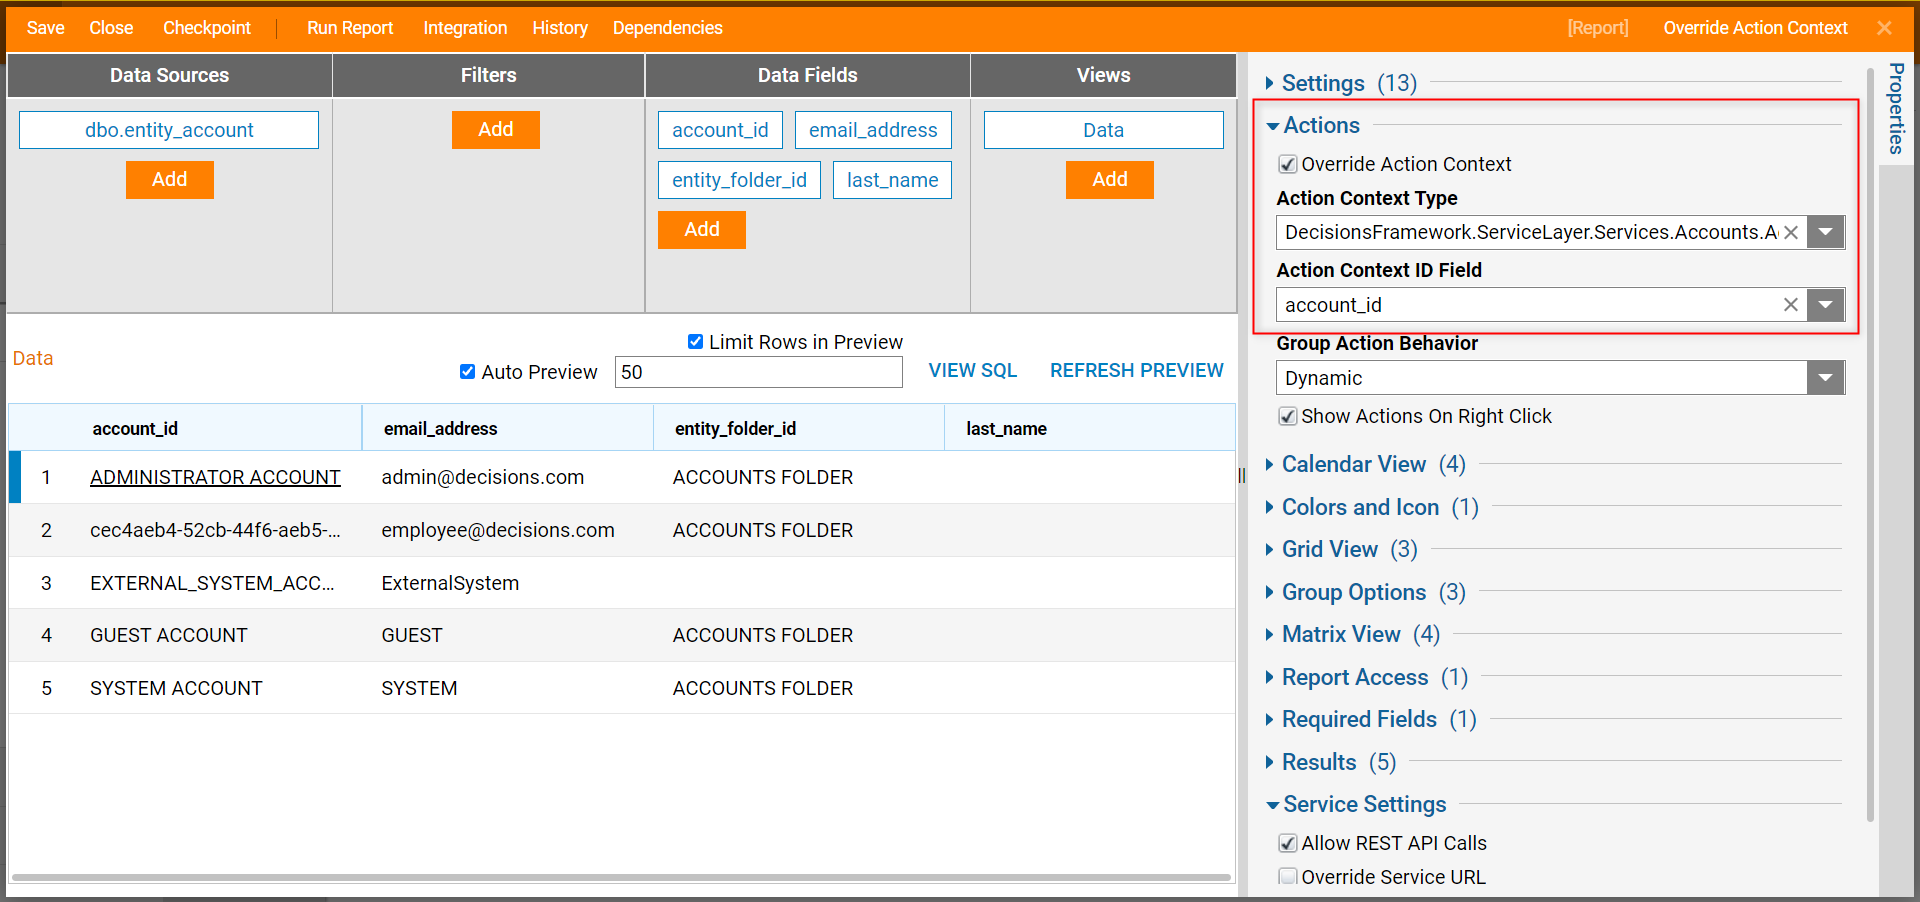
- Next, locate the Properties panel > Actions > Override Action Context boolean and enable it.
- Then, in Action Context Type search for ‘account’ and pick DecisionsFramework.ServiceLayer.Services.Accounts.Account type.
- Next, from the Actions Context ID Field drop-down, pick the account_id column.
Application
- In the Report Designer, click Run Report from the top bar; a window opens with a Report Viewer of a running Report.
- Select any Row Data on the Report. This will display information about the Account with the same ID that can be viewed at the bottom of the page.
- Right-click any Row Data on the Report to view the available Account Actions.
