Overview
When a Scheduled Job is added to Decisions, it has options to enable it or disable it manually. The Job Schedule settings will remain, but they are ineffective once the job is disabled. Enable the job to continue its use and adhere to the Job Schedule settings. These functions are only available when at least one Scheduled Job is added.

Example
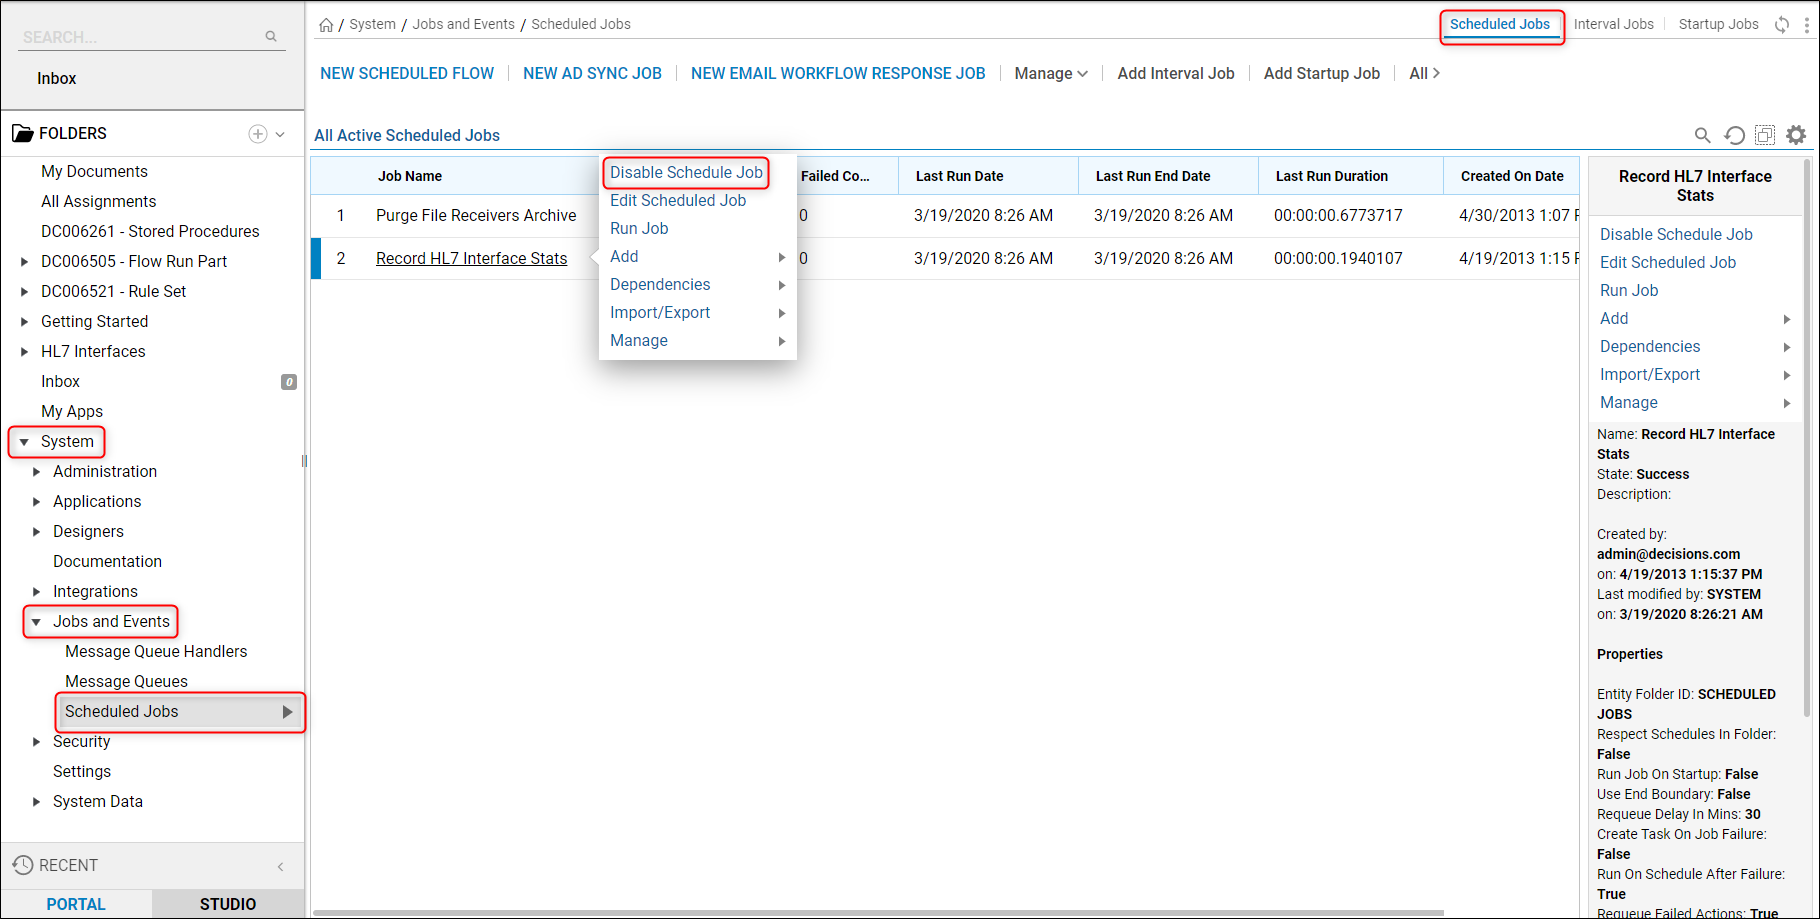
To enable or disable a job, navigate to System > Jobs And Events > Scheduled Jobs. Right-click the name of the Scheduled Job that is going to be disabled, then select the Disable Schedule Job option from the Action Menu. When the Disable Schedule Job window appears, confirm the action with Yes.

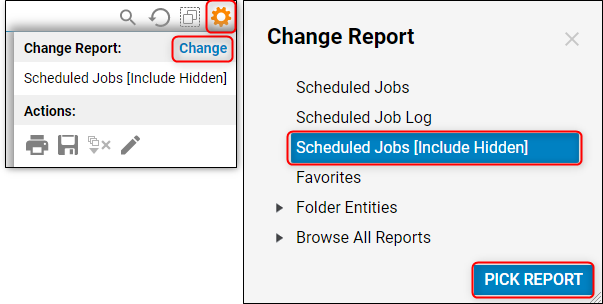
Notice that the Scheduled Job has been removed from the Scheduled Jobs folder view. To see the Scheduled Job so that it can be enabled again, click the gear icon in the top right corner of the Folder view, then select Change next to Change Report. Select Scheduled Jobs [Include Hidden] from the Menu and click Pick Report.

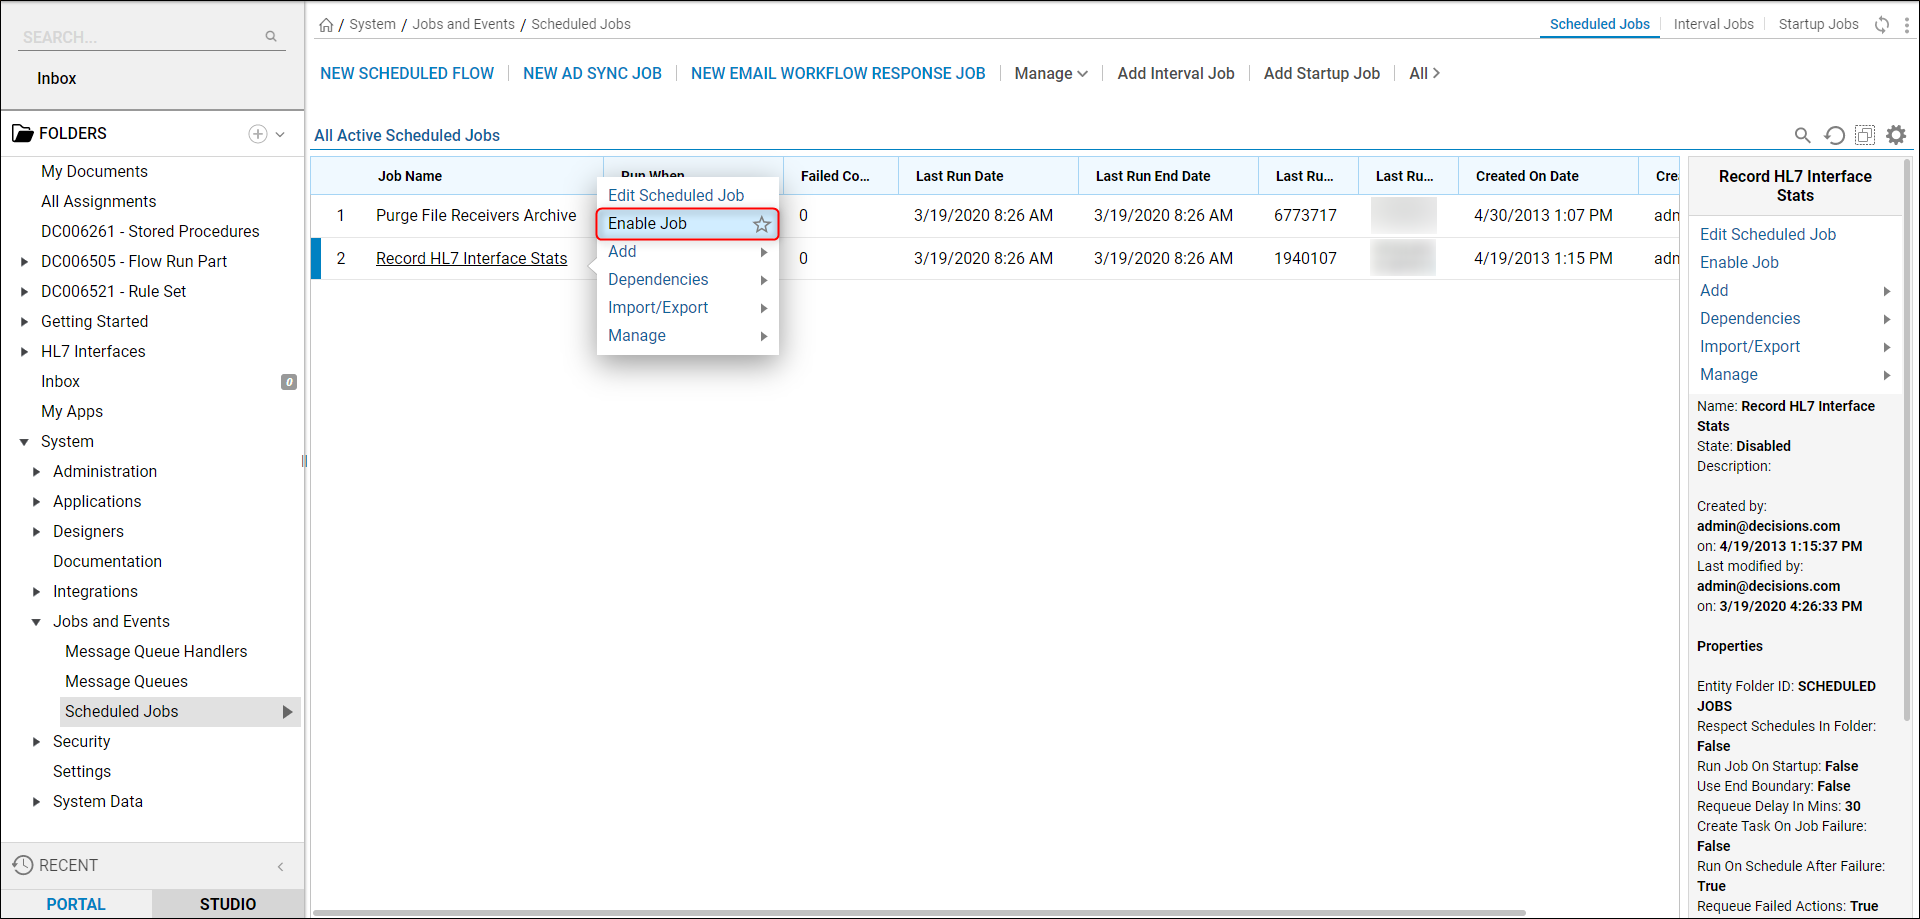
Now that the Report has been updated to include the hidden and disabled Scheduled Job, it can be enabled again. Right-click the name of the Scheduled Job that was disabled and select Enable Job from the Action Menu to resume it.
