Overview
Assignments allow Designers to give users or Groups specific Tasks in the form of configurable actions and options via the use of a Flow and an Assigned Form. Assignments allow Administrative users the ability to delegate Tasks automatically without having to send out each Task one by one. These processes can entail:
- Creating Notifications (ex: Portal alerts or an email) to inform Assignees (via the Assignment Properties panel) about their pending Task(s).
- Assigning a travel Form to a manager for approval.
- Setting a time frame for a certain Task to be completed.
- Requiring that a particular Form is approved by multiple people before being accepted.
The following document discusses how to Create a basic Assignment used for data collection, which may be used to update a database of employee information.
Example
In this example, users will:
- Create a Flow that uses an Add Task component.
- Configure the Assignment.
- Run the Flow and see the newly created task in the My Home Folder.
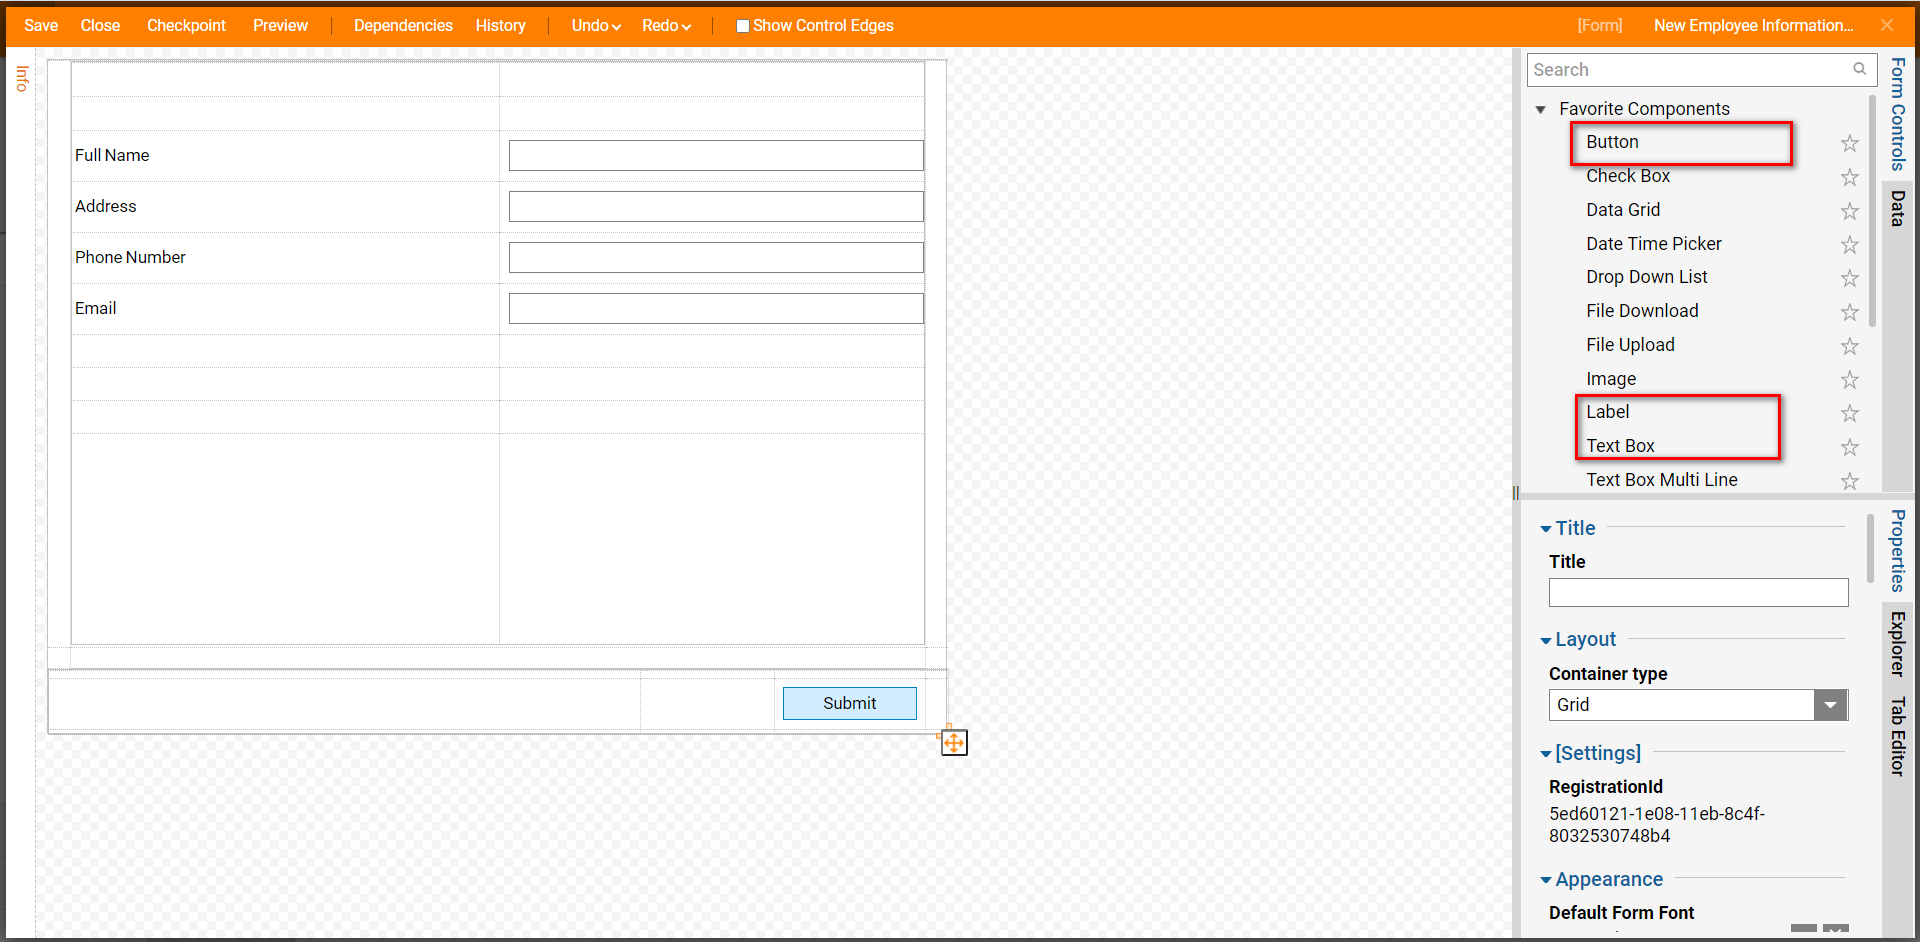
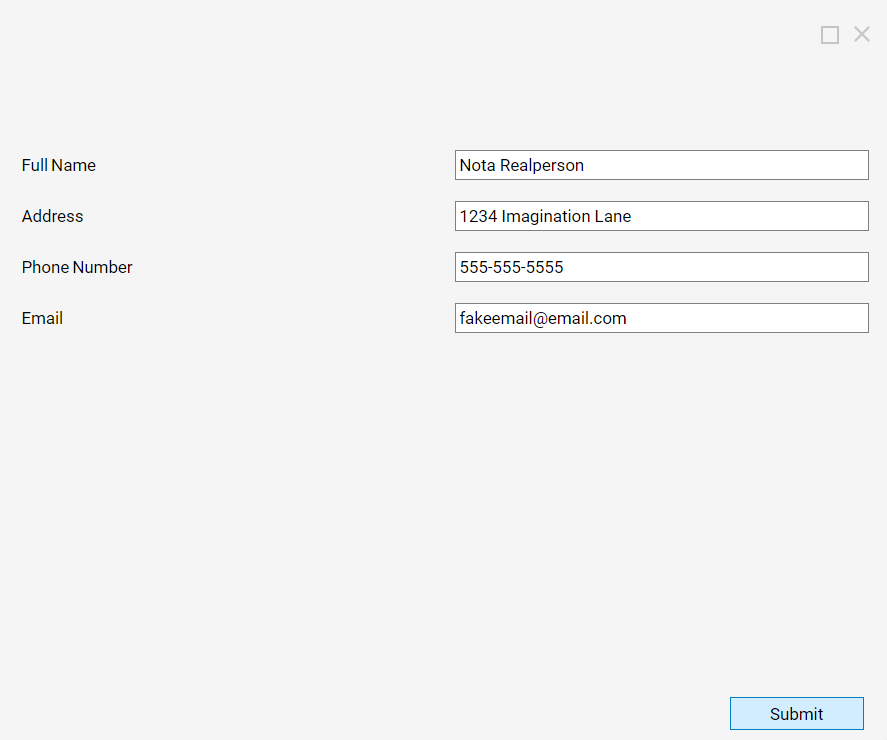
This example assumes that the Form, New Employee Information Entry, has already been created. See the screenshot below for reference.
To create a Task from a Flow:
- Select a Designer Folder and click the CREATE FLOW button from the bottom toolbar.
- Name the Flow and click CREATE.
- From the Steps tab on the right, add an Add Task step to the workspace.
- Connect the Done path from the Start step to the Add Task step.
- Click the Add Task step.
- Select the Pick or Create Form link and choose the New Employee Information Entry Form.
- Select PICK.
- Connect the component to the End step.
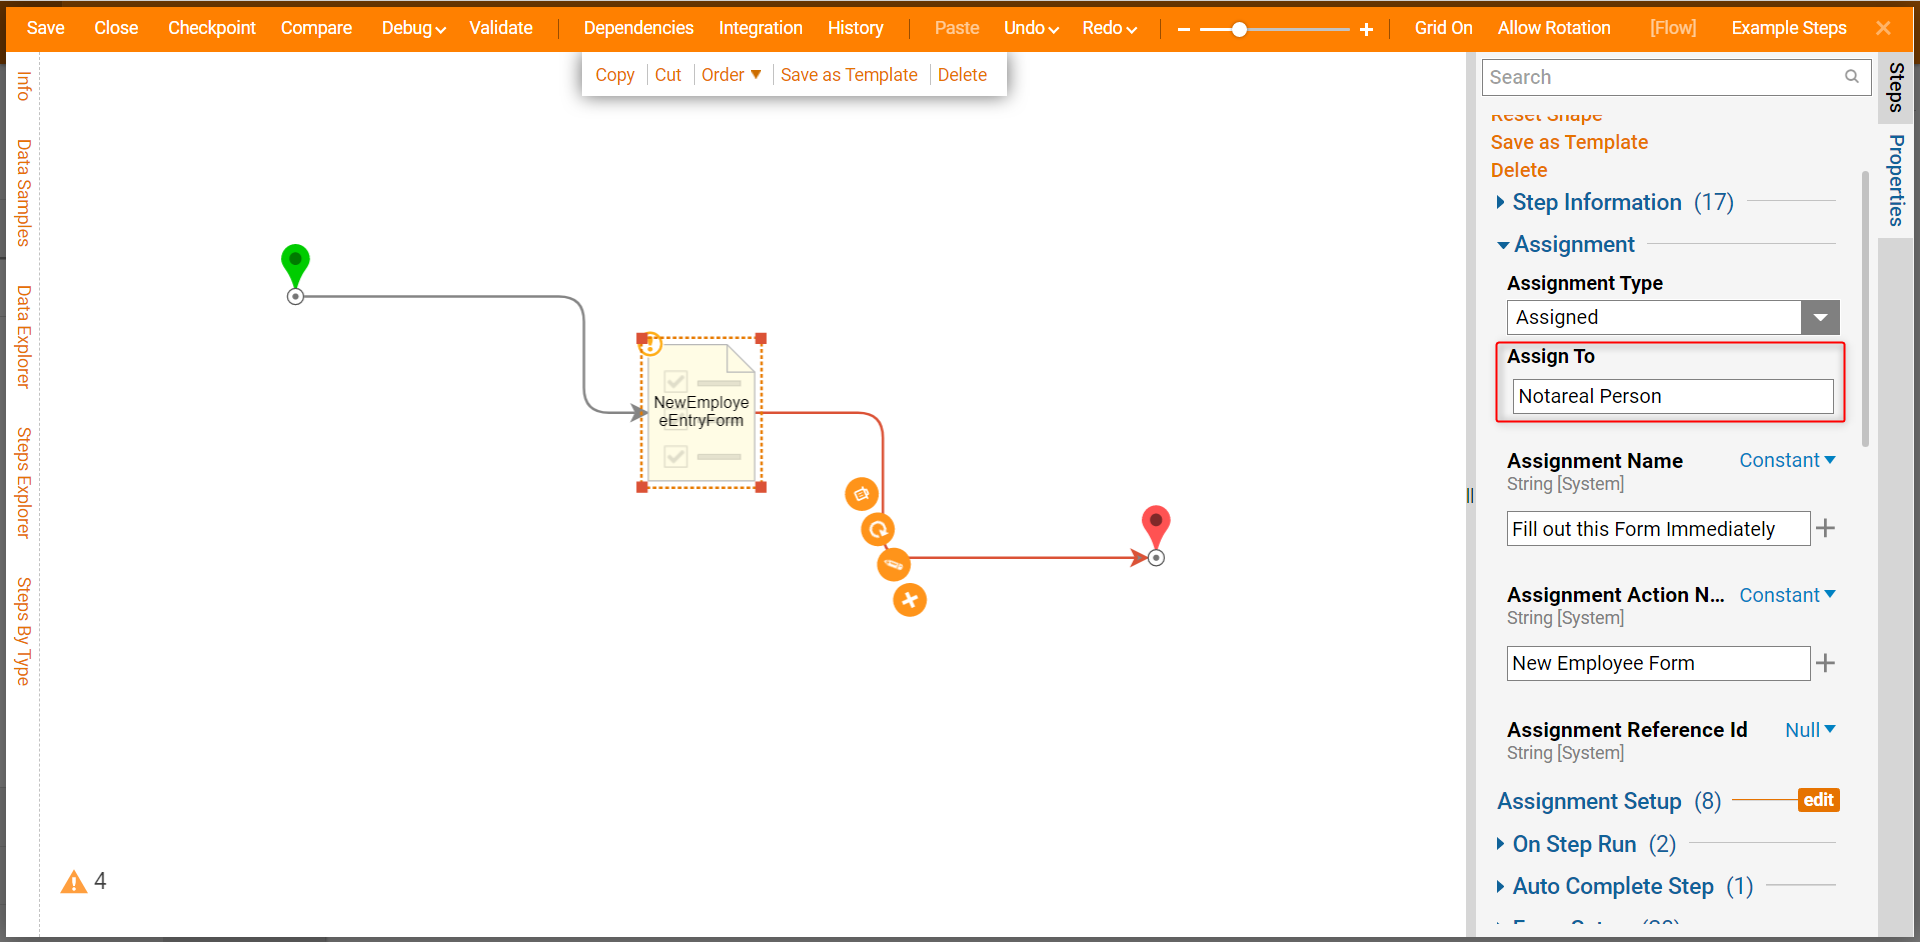
- Select the Form. The Add Task component behaves similarly to how a Show Form step would but by default chooses Assigned as the Assignment Type Property of the Form.

- From the Properties tab of the Form step, designate an Account, Group, or Role in the Assign To Input.
- Give the Assignment a Name and provide an Input for the Assignment Action Name.
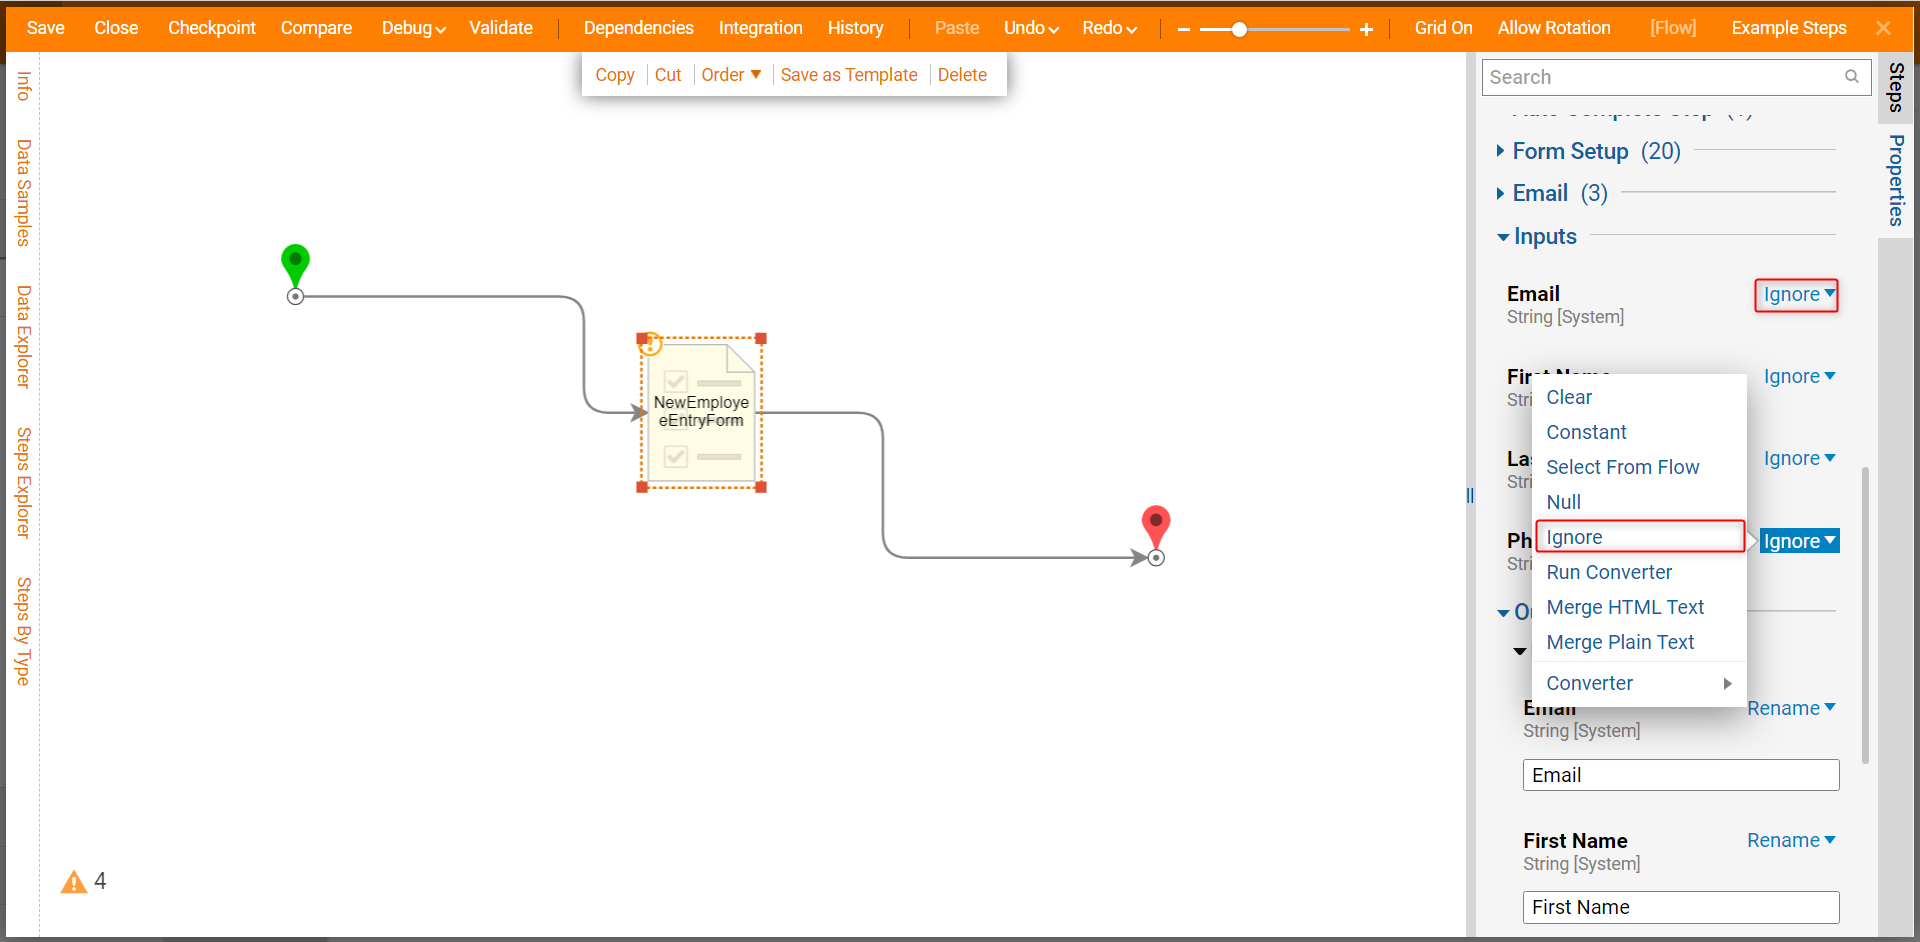
- Scroll down to the Inputs panel and give each one an Input Mapping of Ignore. This will allow the Assignee to fill out the Form with their own data.
- Save and Close the Flow.
Debug
To ensure that the Task is working properly, Debug it.
- From the Flow Designer, select the Debug link from the top toolbar. Be sure to Debug the Flow in full.
- Running the Flow will trigger it to send the Assigned Task to the User, Group, or Role that was assigned in the Assign To Property of the Flow.
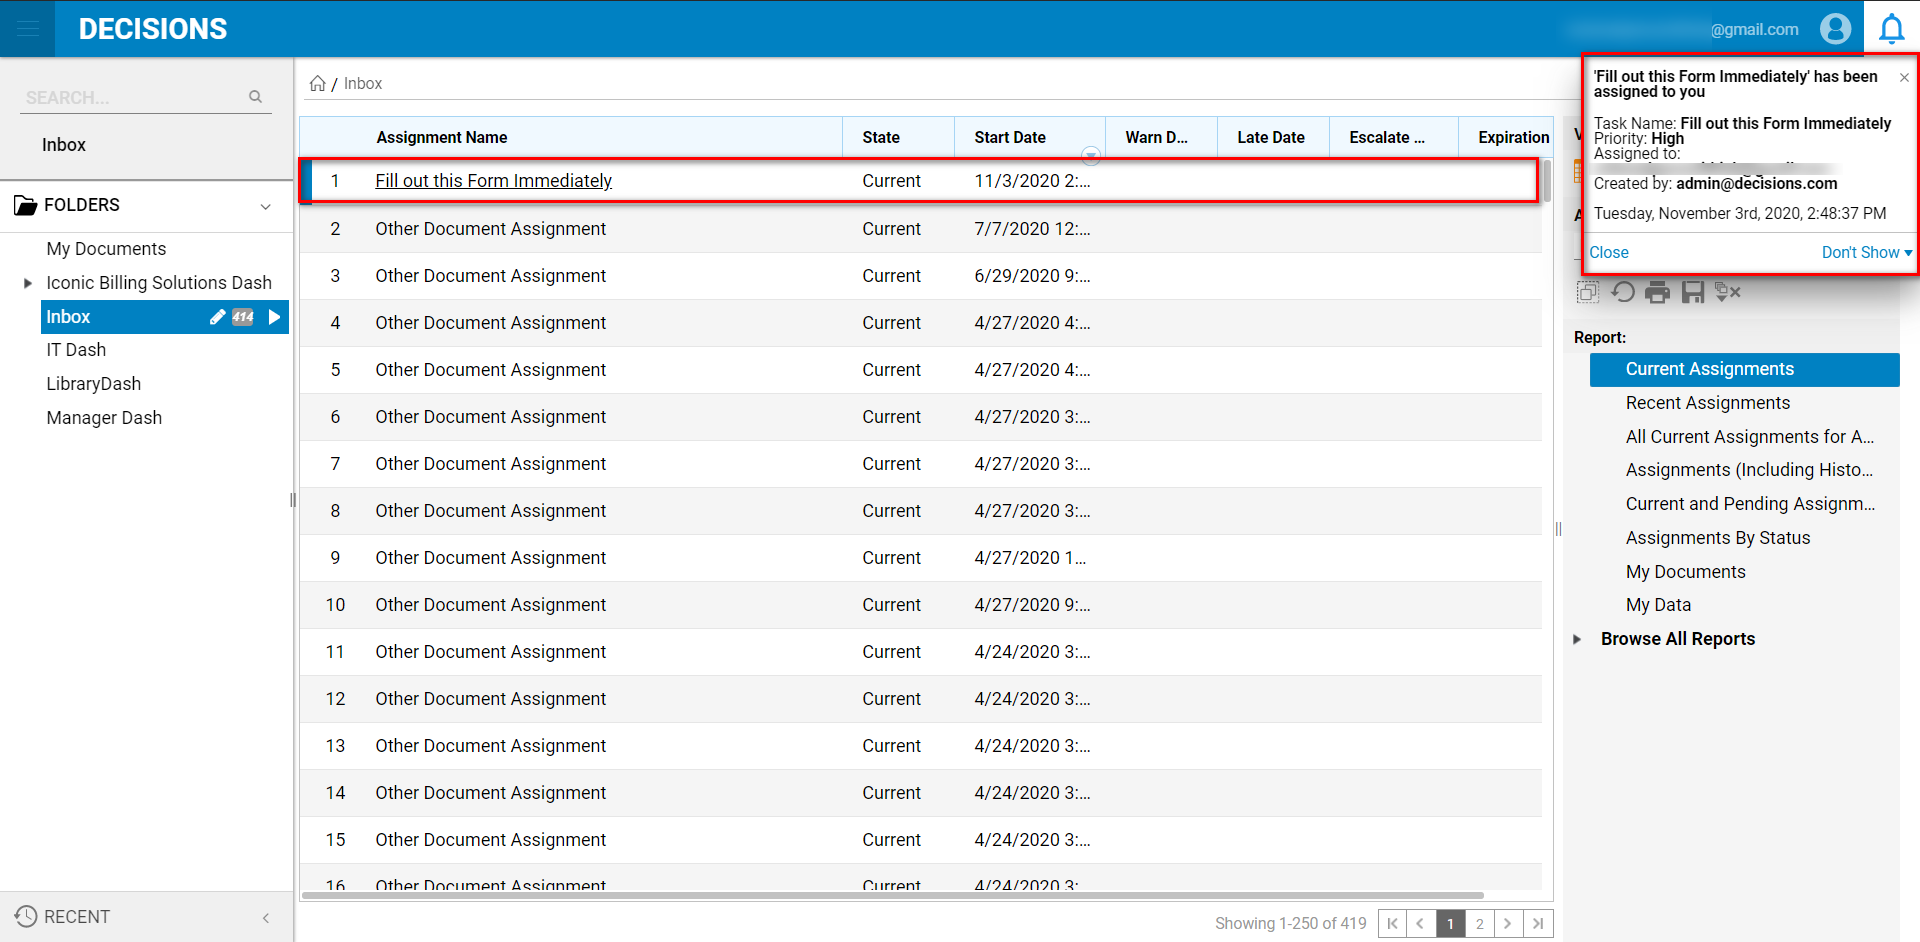
- The Task will appear both as a Pop-up in the top right corner of the screen and as an item in the user's Inbox.
- Complete the Assignment.
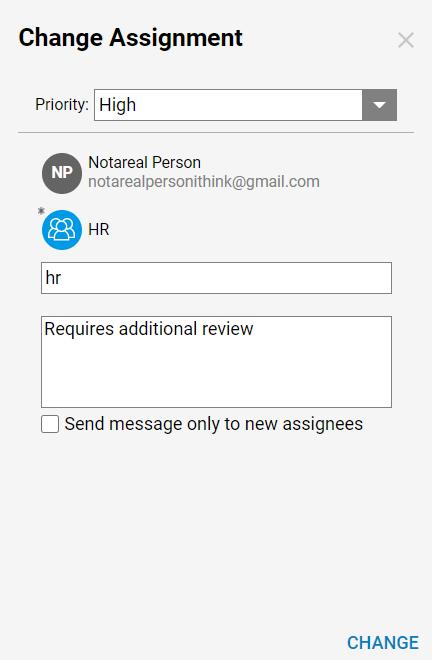
- The Assignee may also use the Change Assignment option to redirect the Assignment to a new recipient. This can be useful in instances where an Assignment was misdirected or requires additional attention from other users.
- From the Change Assignment screen, choose a Priority for the Assignment to alert the next recipient of the urgency of the task's completion.
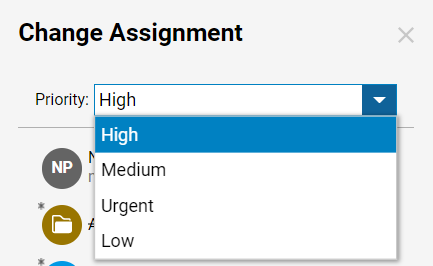
- Under the Priority drop down, the Assignee can designate who will receive the assignment via the Add Assignee box.
- Underneath the Add Assignee box, users can input an Optional Message; this may be used to provide extra insight into why the Assignment is being redirected.
- A user may also toggle the Send message only to new assignees checkbox to restrict the recipient of the message to just the new Assignee.
