Overview
To further the integration abilities with External Databases, Decisions provides the ability to connect to ODBC Databases. ODBC's (Open Database Connectivity) are APIs that allow an application to utilize information from different Database Management Systems.
Designers integrate with any Database supporting ODBC not already built into Decisions through the use of the ODBC Metadata Flow. Designers may specify the unique characteristics of the Database's type to connect and collect the Database's Metadata for creating Tables, Reports, etc. within Decisions. Once successfully connected, the new Database automatically appears as an option in future Decisions Integration wizards on the device.
Once a Database is introduced, components to Query, Insert, or Update data to or from the Database within the Flow Designer can then be used similar to other methods of integration.
The following document details how to establish a connection with an ODBC via Decisions integration.
Example
The following example demonstrates how to Integrate with a Sybase ODBC Database. To do so:
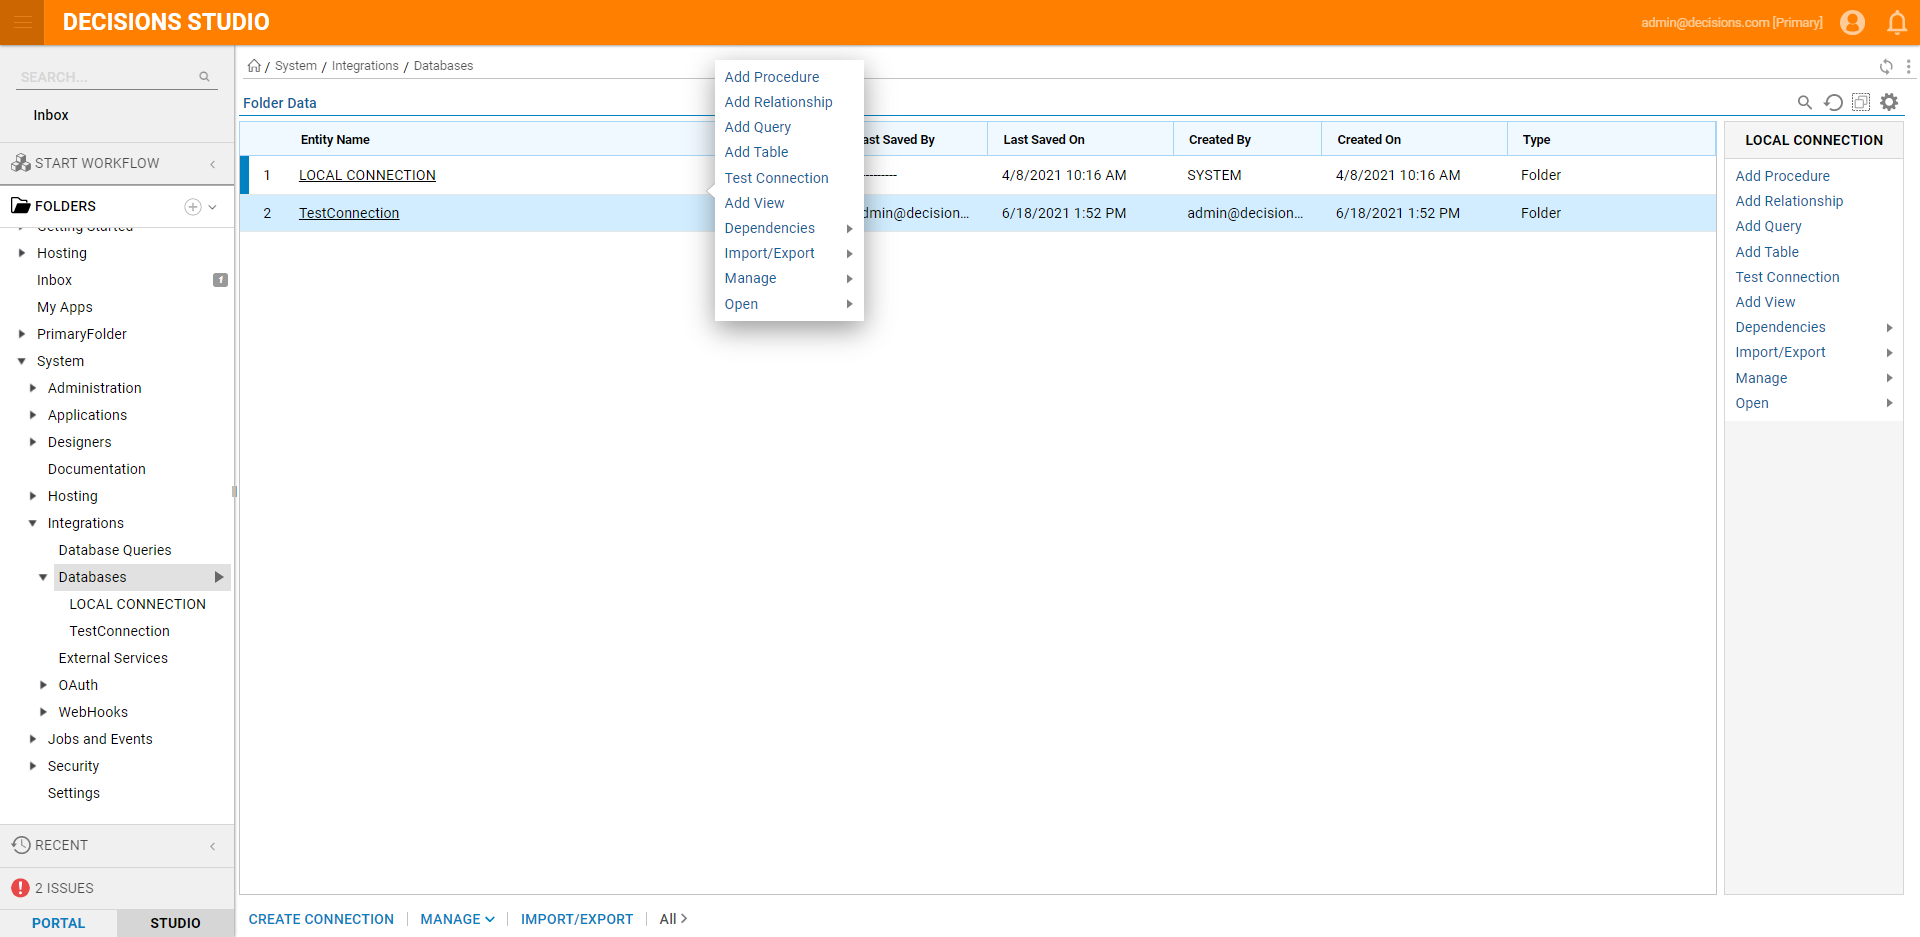
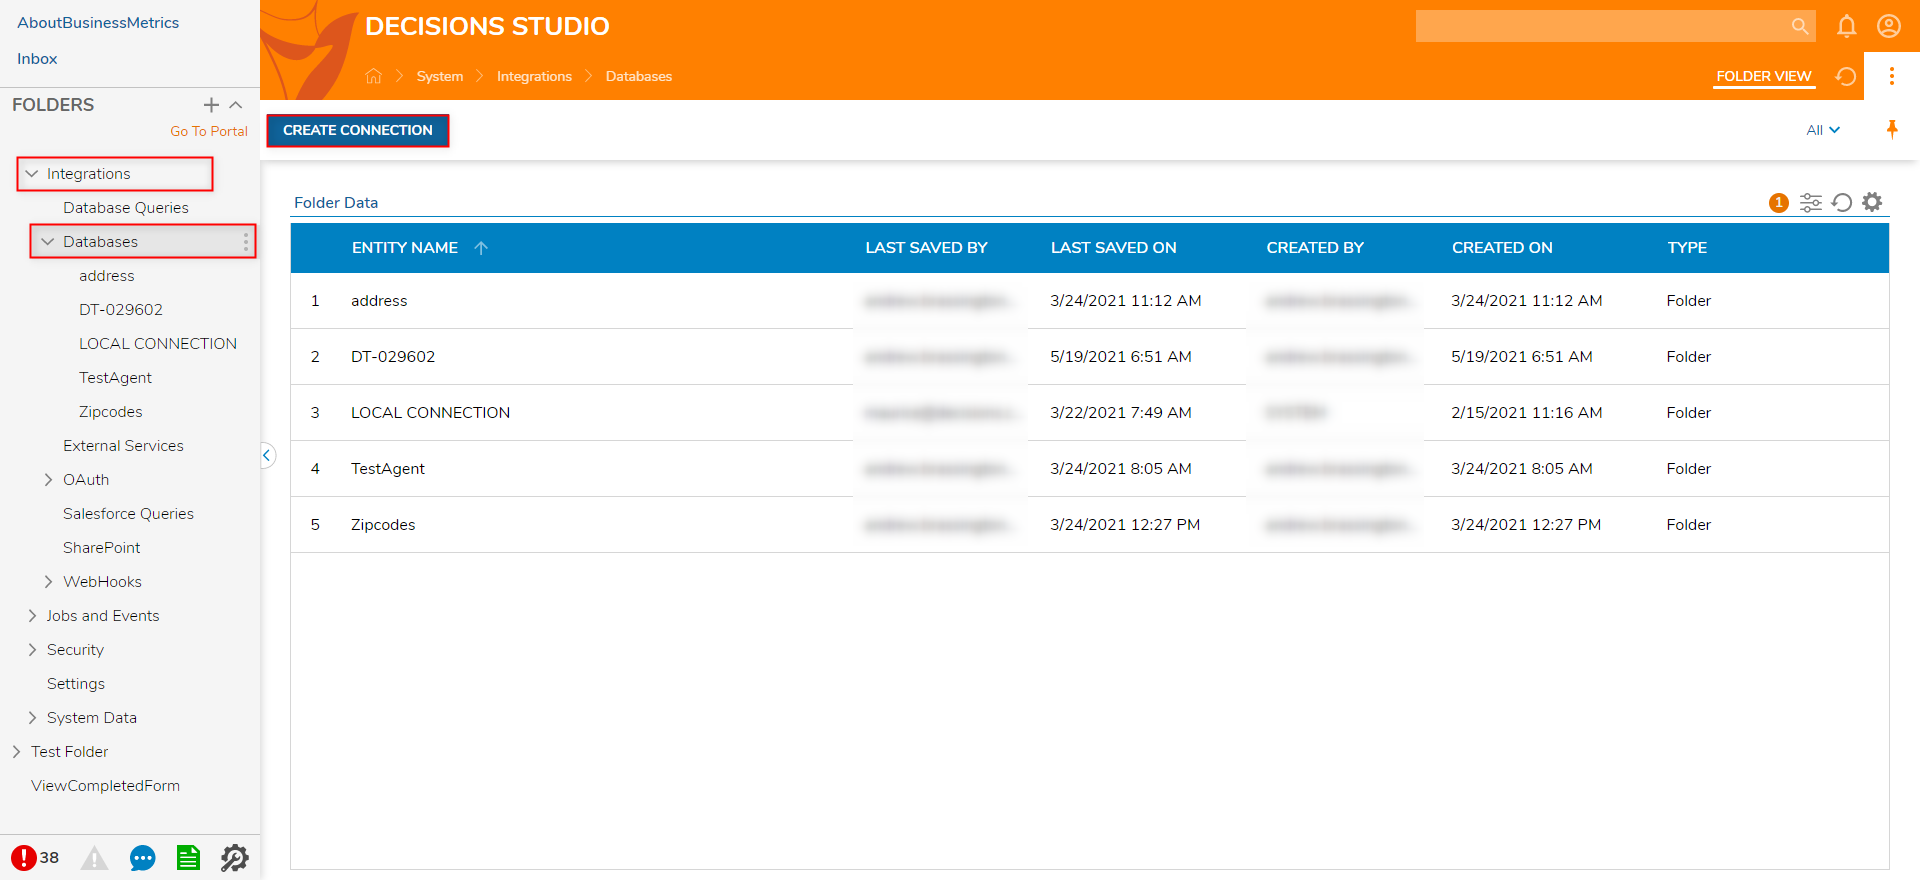
- From the Decisions Studio, navigate to System > Integrations > Database.
- From the Global Action Bar, click the CREATE CONNECTION button.
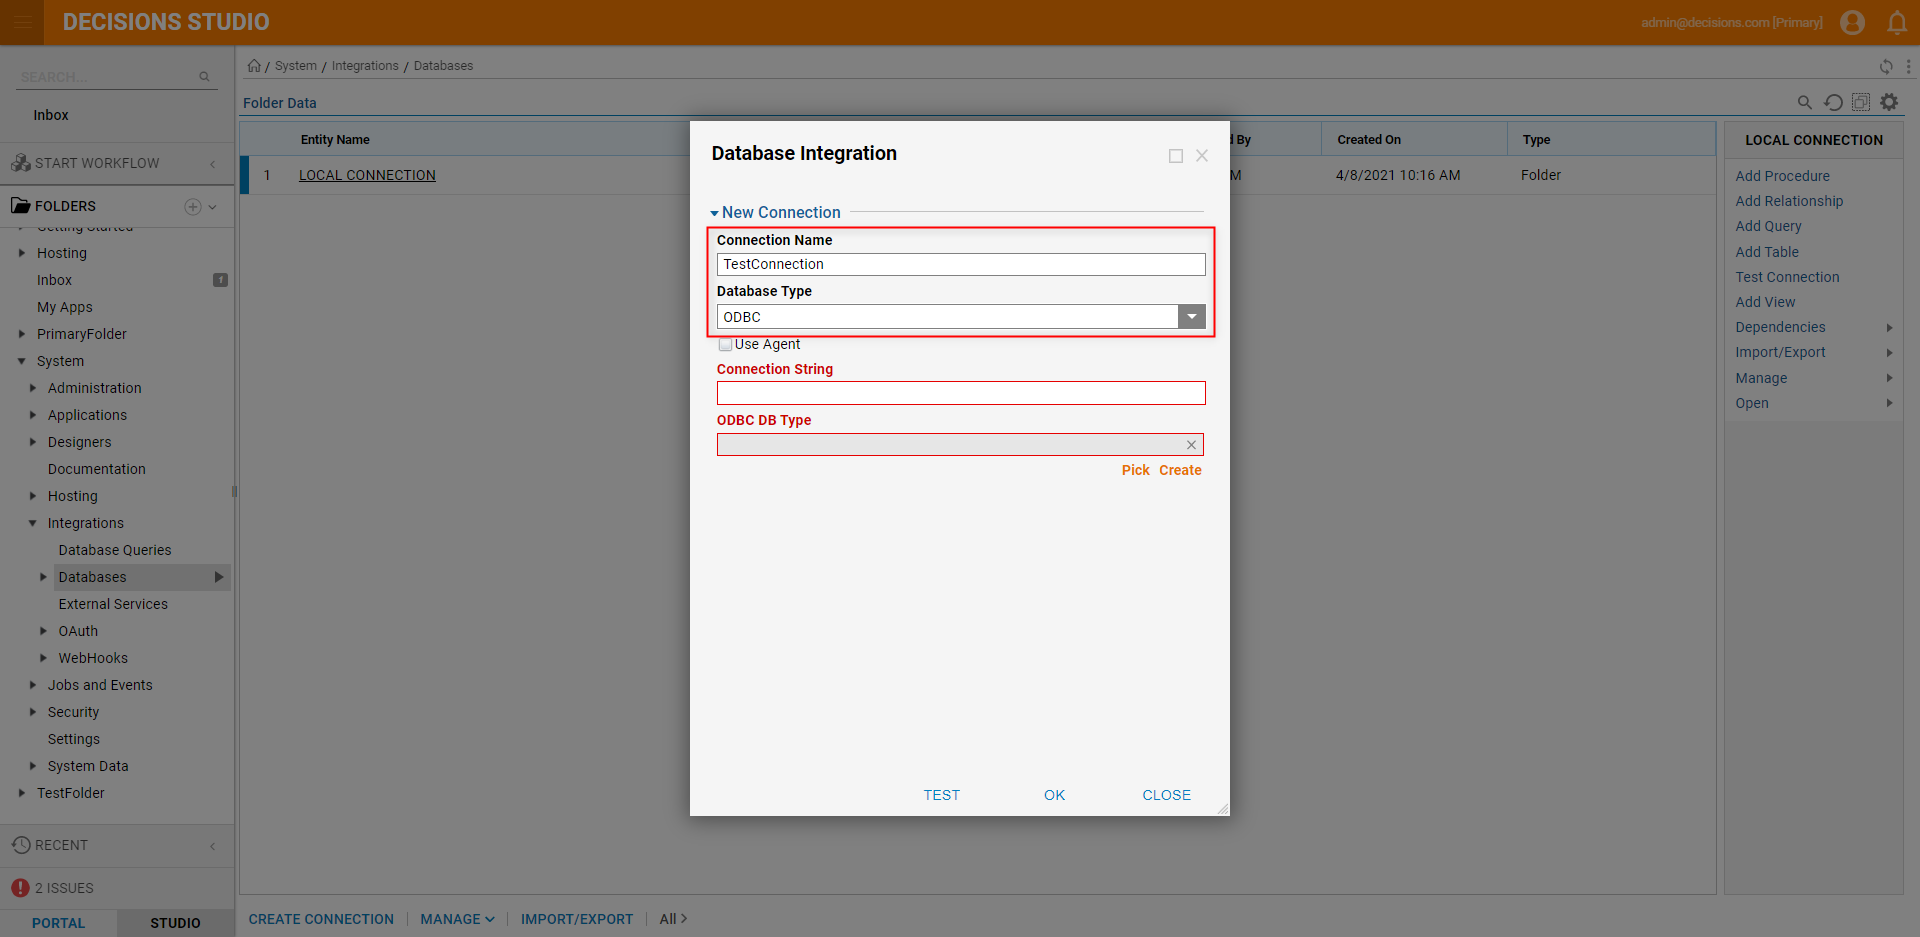
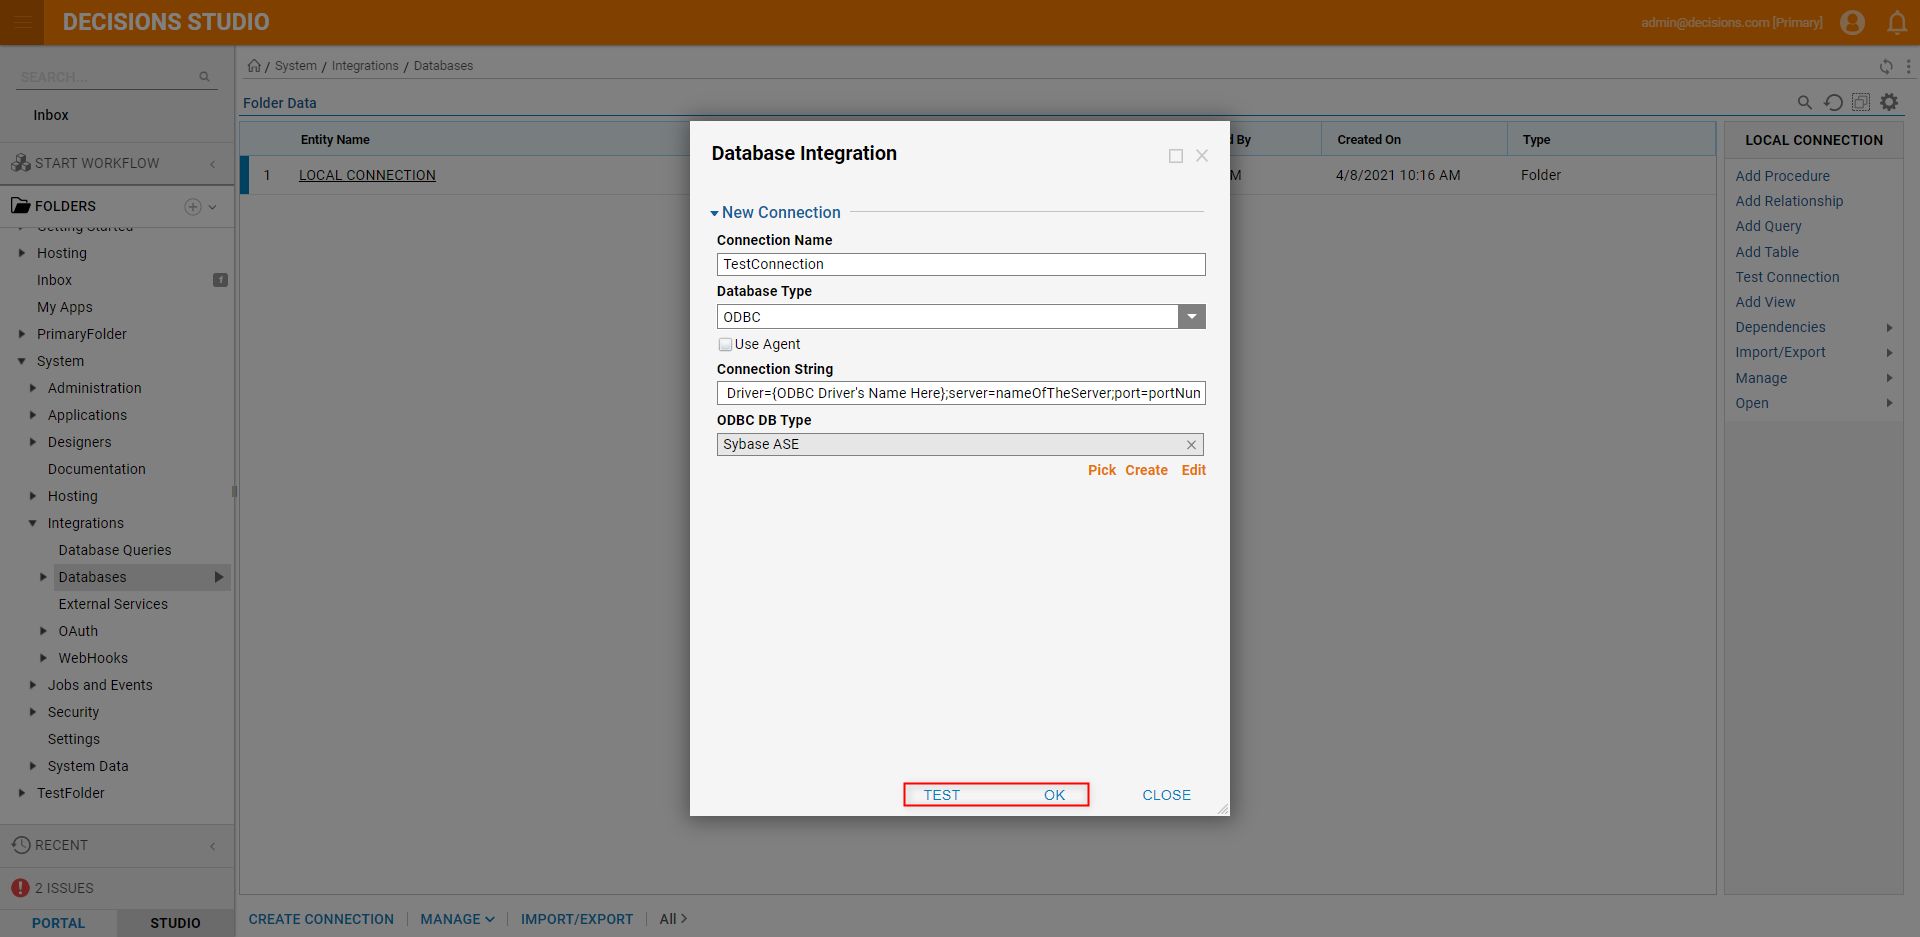
- From the Database Integration window, provide a Connection Name. Then, select ODBC from the Database Type dropdown. Additional Information on Connection NameNote that that the Connection Name cannot contain any spaces.
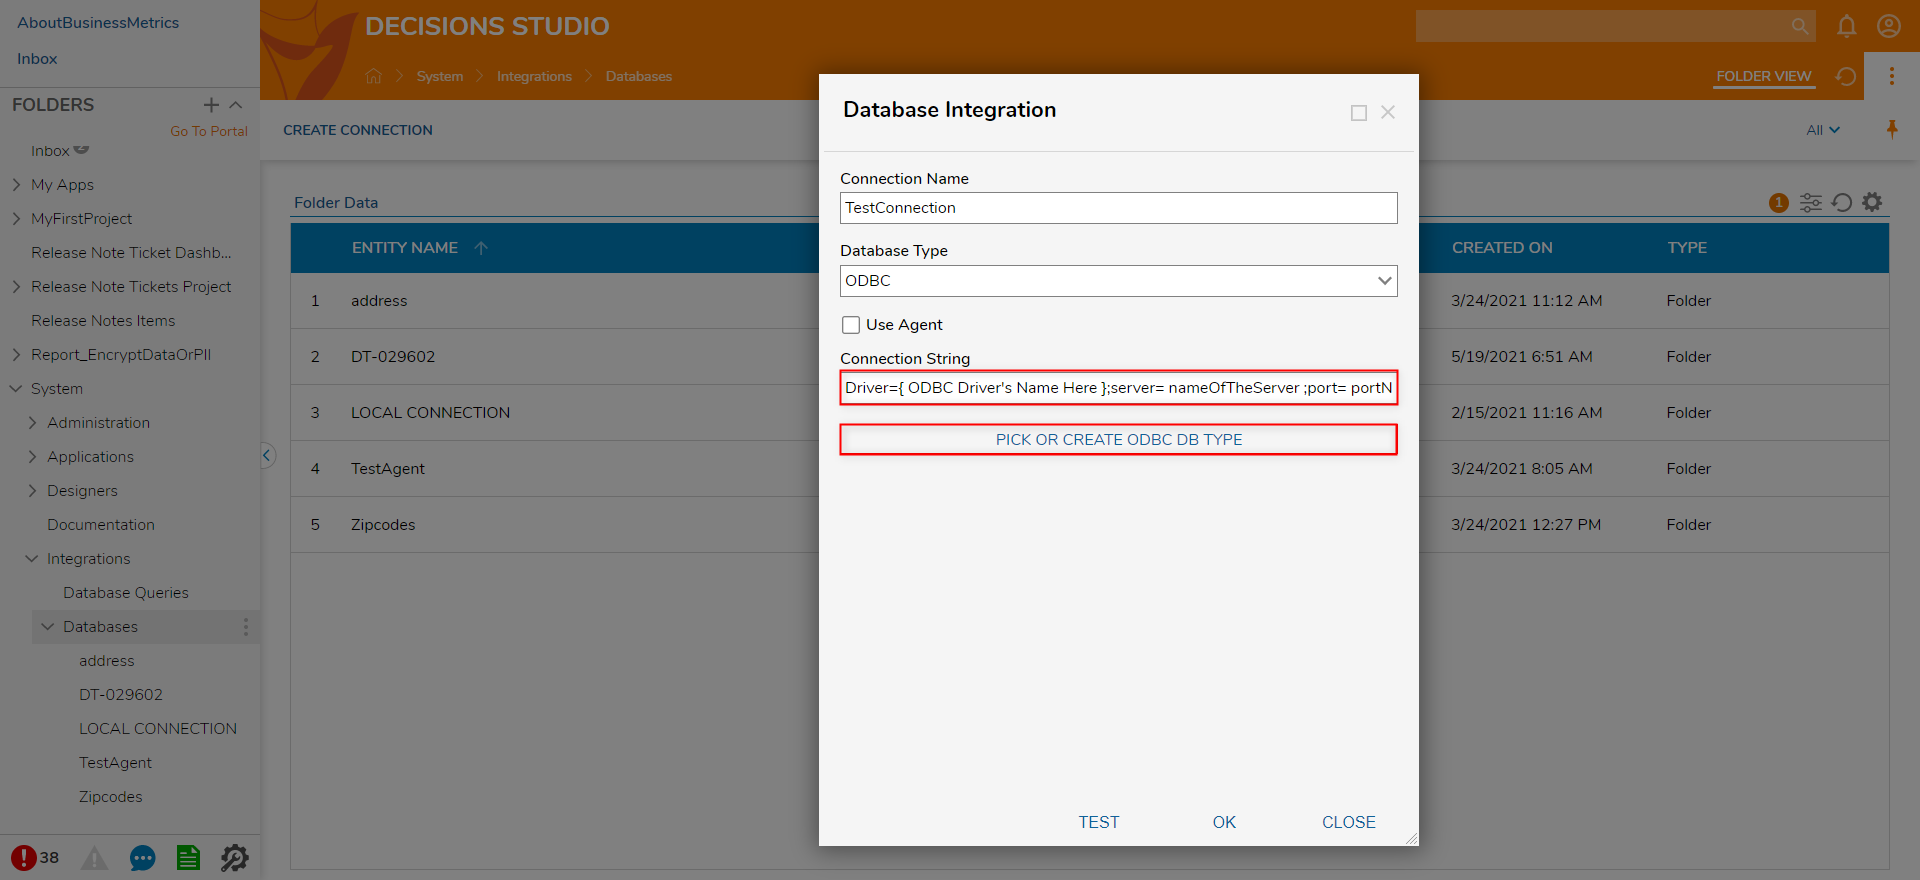
Provide a valid connection string following the: Driver={ODBC Driver's Name Here};server=nameOfTheServer;port=portNumber;db=databaseName;uid=login;pwd=password; format. Then click PICK OR CREATE ODBC DB TYPE.
Pick the Flow that corresponds with the Database (in this case Sybase ASE), and click TEST to test the connection. Then, click OK to save the Integration and exit.
After Connection
Once integration with an ODBC has been properly established, users may then Integrate with its respective Database Tables or utilize its respective Flow steps in the Flow Designer by navigating to Steps > Integration > [NameOfIntegration] > [Table].
