Overview
The platform supports SSL encryption for secure transactions over HTTPS. To enable SSL in the Installer, click the Edit Settings button. In the Settings pop-up, navigate to the EndPointDefinition Collection Editor to ensure that the Ports are set to 80 (HTTP) and 443 (HTTPS). These values are set by default by the installer.
Example
This example assumes that the platform has already been successfully installed. View the Installation Requirements article for assistance on installing the platform.
This example also assumes there is an SSL certificate installed in IIS. Decisions can use either a signed certificate or a Self Signed Certificate generated on the server.
- Signed Certificate: After installing the SSL certificate, ensure that the
LocallyAddressableIISWebsiteIP OrDNSName in the settings.xml file points to the URL that the certificate is issued for. This can also be done via the Edit Settings button. - Self Signed Certificate: Install Self Signed Certificate in Trusted Root CA (please visit Microsoft.com ) to ensure Local Computer valid communication.
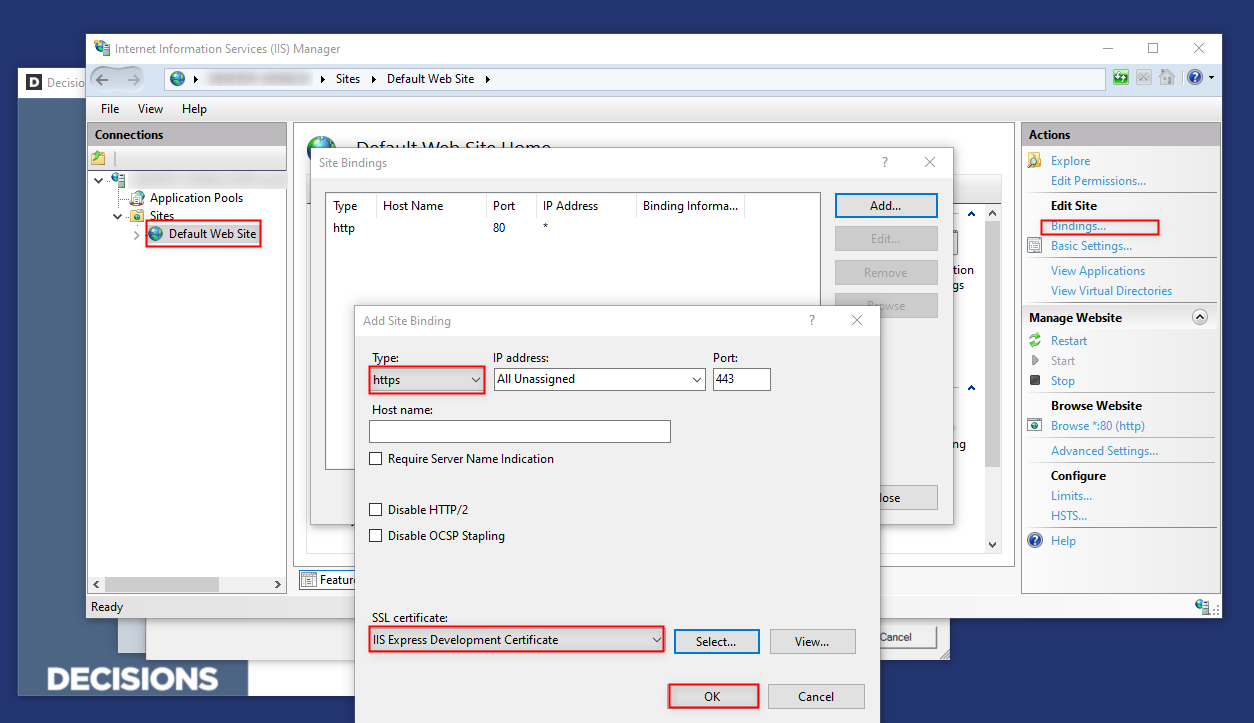
From the Site Bindings window, click Add. From the Add Site Binding window, select https from the Type dropdown. Then, select the applicable SSL certificate, and click OK. Then Close out of the window and IIS.
Make note of the Port number.
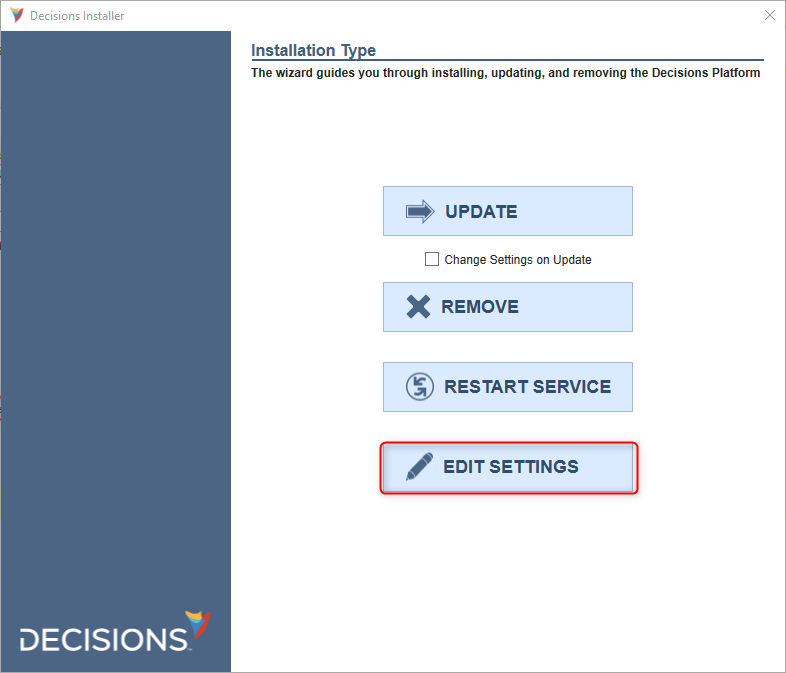
- Open the installer executable 'DecisionsInstaller.exe'. In the Installation Type dialog, select the Edit Settings button.
 If Port 443, the ControlInstanceEndpoints settings will not need to be changed. Please only change if using an alternate port.
 - Locate ControlInstanceEndpoints , and click the (Collection) selector to open the EndPointDefinition Collection Editor dialog.
- Select the second member, number 1, and confirm that the Port property matches the value used for the HttpsEndpointPort (typically port 443).
- Click OK to close the dialog.
- Additionally, if a signed certificate is being used modify LocallyAddressableIISWebsiteIPOrDNSName to be the same name that is on the certificate.
- Locate the LoginPageAllowedIPs tag and add in the machines' IPv6Address or IPv4Address in this field. If this tag is not in this file, it will need to be added in.The computer will also have to be able to resolve to that DNS or IP, which may require modification of the networks DNS settings, or the server's hosts file. If help is needed please contact support.
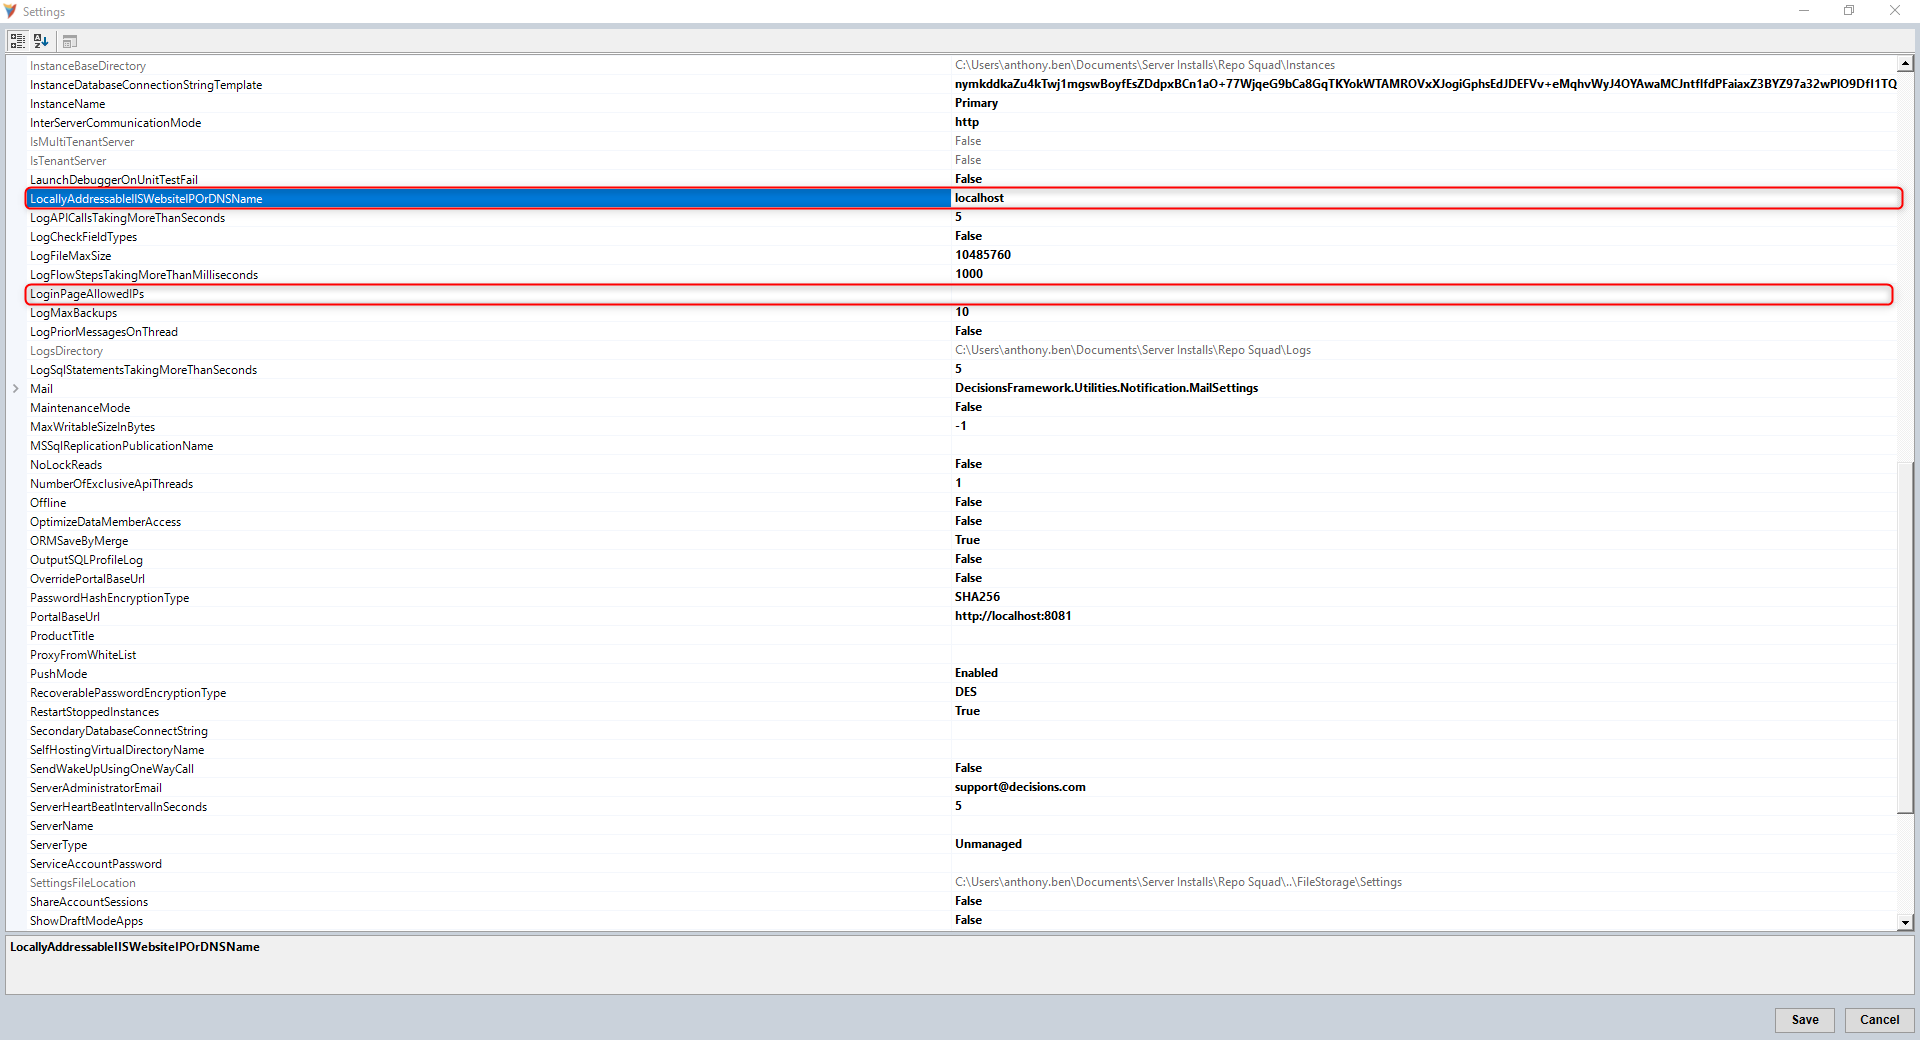
- Click Save to save these settings and close the Settings pop-up.
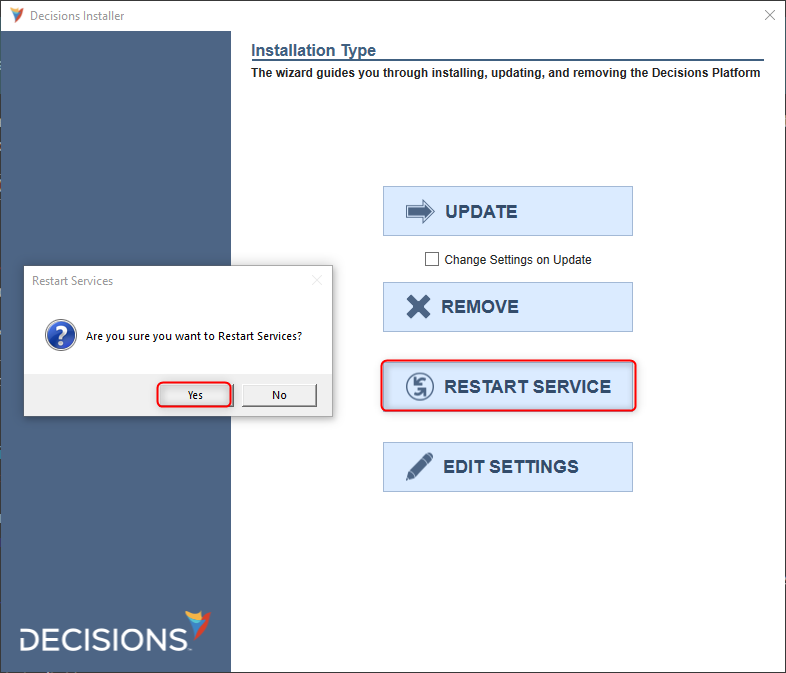
- Click the Restart Service button to restart the platform with the new settings.
- Click Yes in the Restart Services dialog to confirm the restart. When the platform restarts, SSL encryption will be enabled over the HTTPS port.
LocallyAddressableIISWebsiteIPOrDNSName matches the URL in the certificate
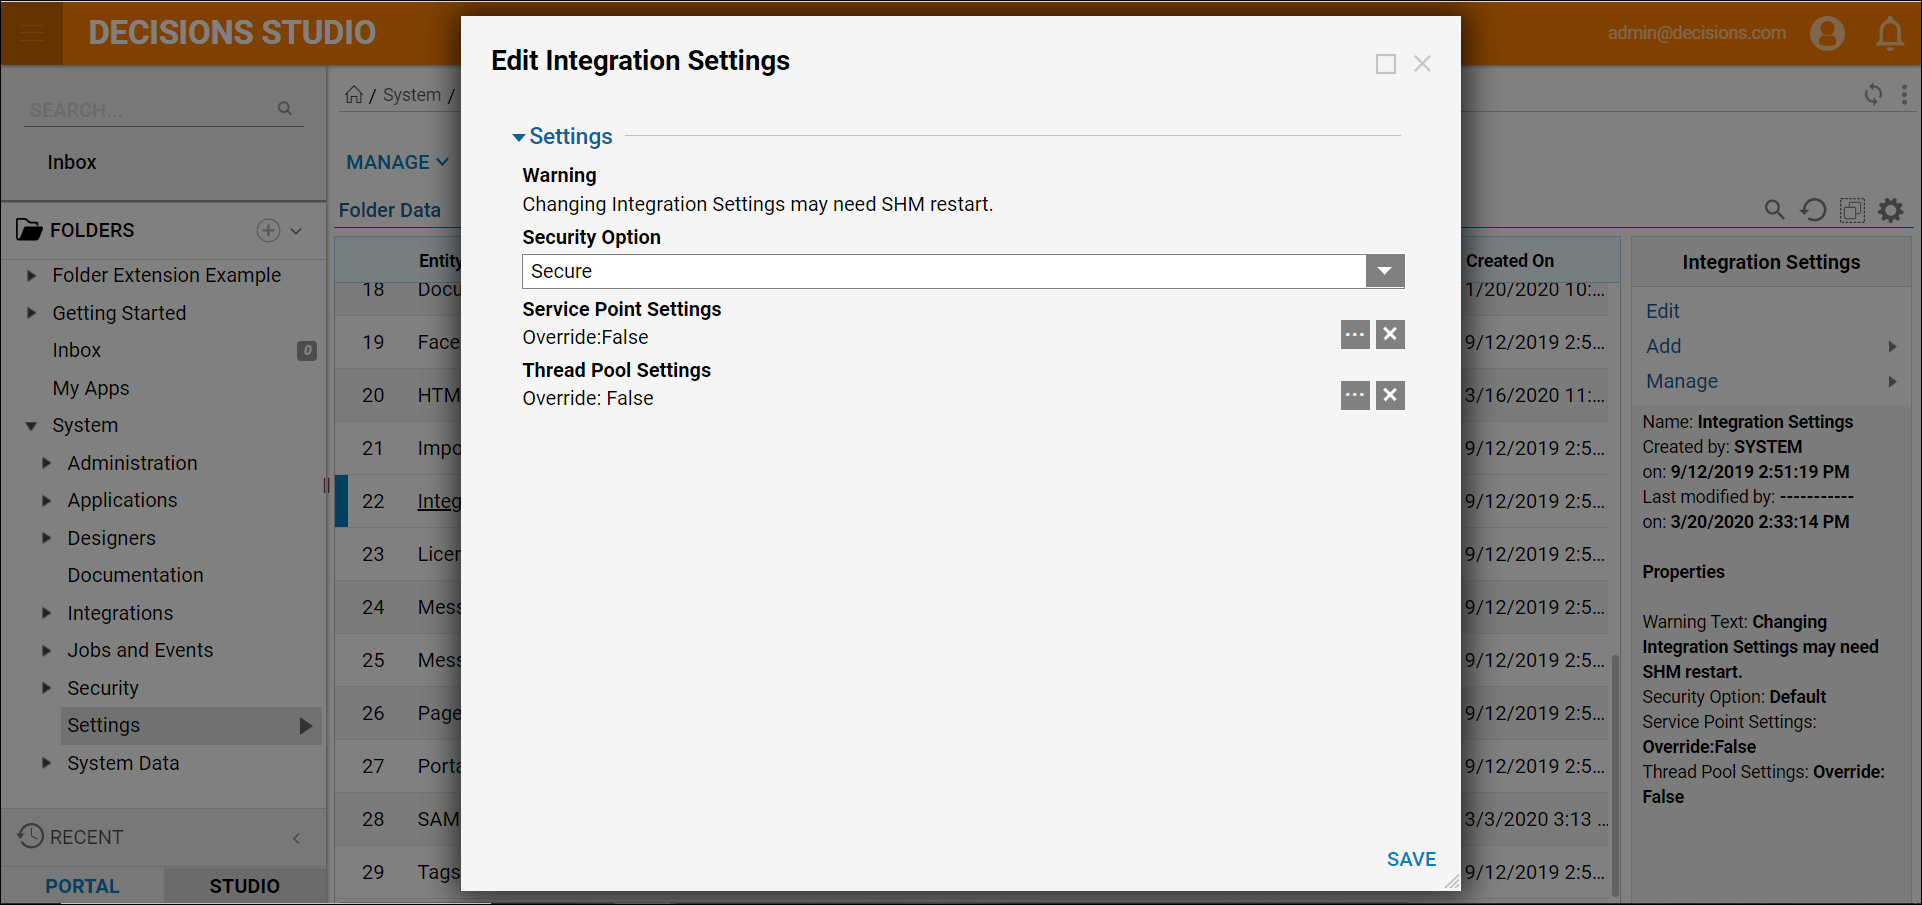
If the application server has less secure protocols like SSL 1.1 disabled, the portal will not be accessible through HTTPS. Navigate to System > Settings > Integration Settings. In the Security Options drop-down choose Secure to allow this.
STARTTLS Configuration
STARTTLS is an email protocol command that uses SSL/TSL as a means of converting an Email Client's connection from insecure, into a secure one.
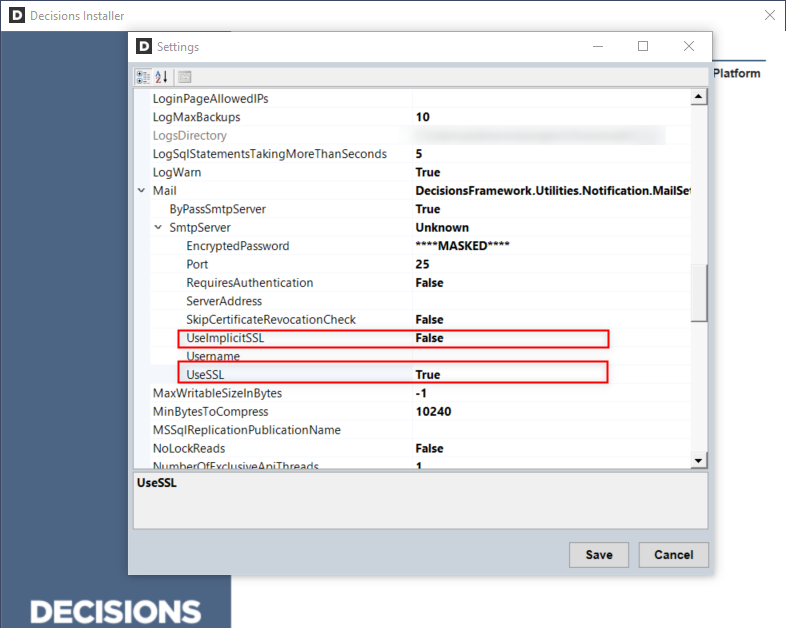
When using STARTTLS with Decisions, users should configure their SMTP Settings as they typically would.
Note that Implicit SSL is for SMTP Servers that cannot handle Explicit SSL (such as Microsoft Exchange Web Services).
