Overview
This document provides step-by-step instructions for installing and configuring the Deployment Server MVP Beta, including the Development Server and the Deployment Server components. This guide is intended for early users of the MVP Beta build. The instructions include links, installation steps, and configuration for connecting development environments to the deployment infrastructure.
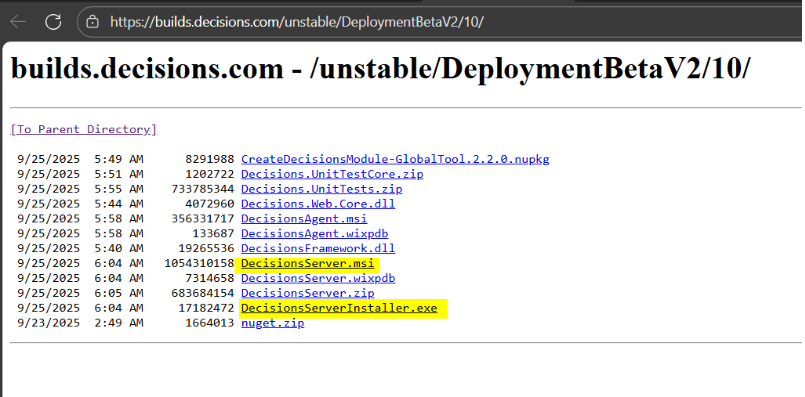
Getting the Build
The build can be downloaded from the following unstable build link:
https://builds.decisions.com/unstable/DeploymentBetaV2/10/
Installing the Development Server
- Download both the MSI and EXE files from the provided build link.
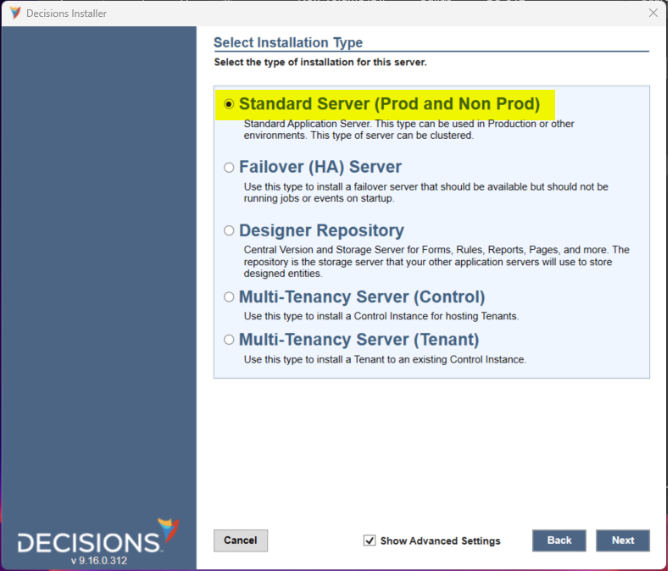
- Run the EXE installer.
- Proceed with the installation using the default option: Standard Server.
- After installation, navigate to System > Administration > Features and install the Deployment Client module.
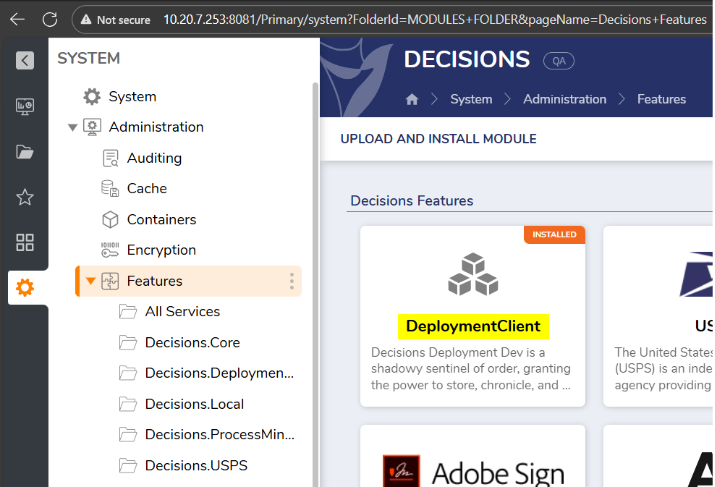
- Restart the Decisions service.
The Development Server is now ready for use.
Installing the Deployment Server
- Download both the MSI and EXE files from the provided build link.
- Run the EXE installer.
- Proceed with the installation using the default option: Standard Server.
- After installation, navigate to System > Administration > Features and install the Deployment Server module.
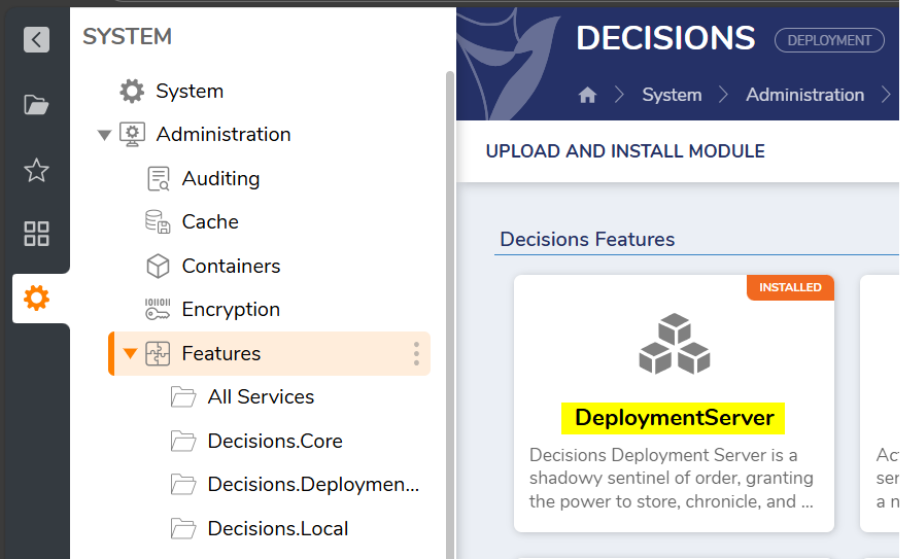
- Restart the Decisions service.
The Deployment Server is now ready for use.
Connecting the Development Server to the Deployment Server
- Log in to the Deployment Server.
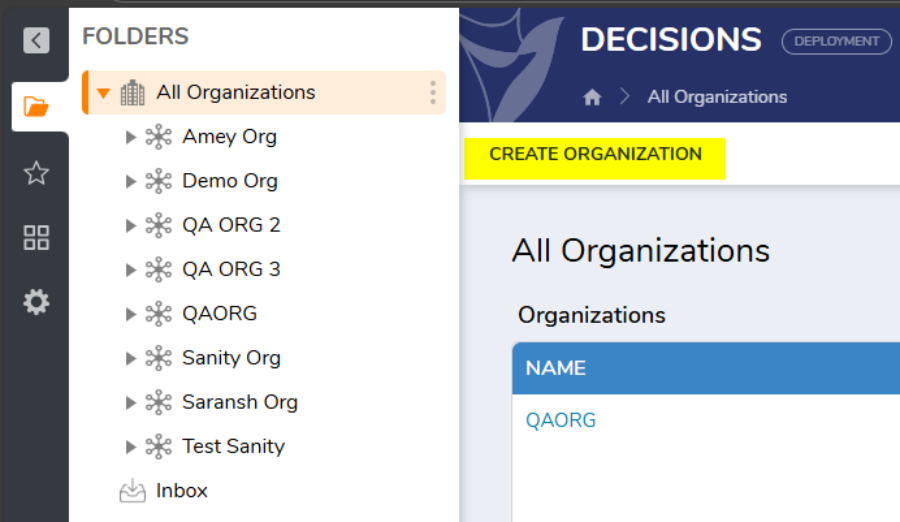
- Navigate to All Organizations and create a new organization.
- Log in to the Development Server.
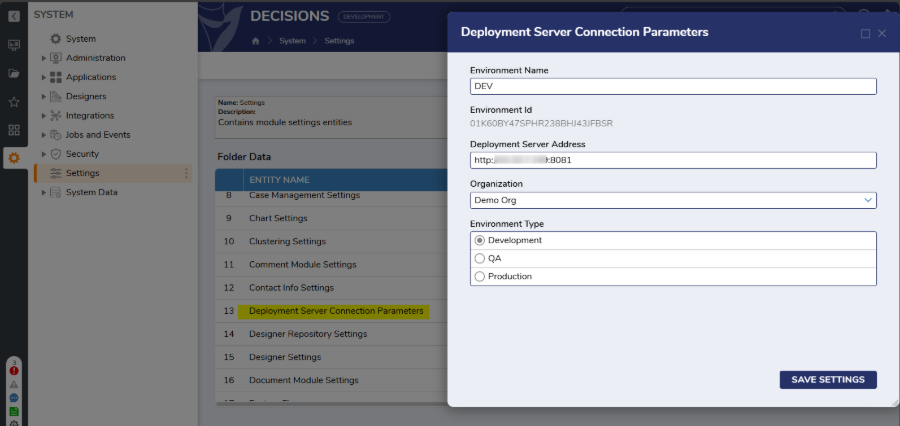
- Navigate to Settings > Deployment Server Connection Parameters.
- Enter the desired Environment Name.
- Provide the URL of the Deployment Server.
- Select the Organization from the dropdown menu.
- Choose the appropriate Environment Type (Dev, QA, or Prod).
- Save the settings.
Once configured, the system is ready for checking in and checking out projects between the Development Server and the Deployment Server.