The Ticketing System Accelerator includes a fully designed interface with Dashboards and Workflows that assist in organizing help desk ticket requests, maximizing efficiency when resolving issues.
This Accelerator includes pre-built features that allow Users to manage ticket requests. The Requester Group Dashboard includes User actions to add, remove, and edit Group information and assign Accounts to Groups. After creating a Requester Account, Users can submit a ticket directly from the Tickets Dashboard.
The Assignee Time Off Dashboard organizes assignees who request Time Off, and the Tickets Dashboard stores all existing tickets and displays information about the Requester, associated notes, and the Creation Date.
The Ticketing System Accelerator oversees ticket requests on a dynamic, user-friendly interface and is ideal for Administrators looking to maximize efficiency in the workplace.
Key Features
- Requester Groups and Account Information Dashboard
- Requester Portal Dashboard
- Ticket Dashboard
Considerations
- Users should have the Error Handling Accelerator installed before utilizing this Accelerator.
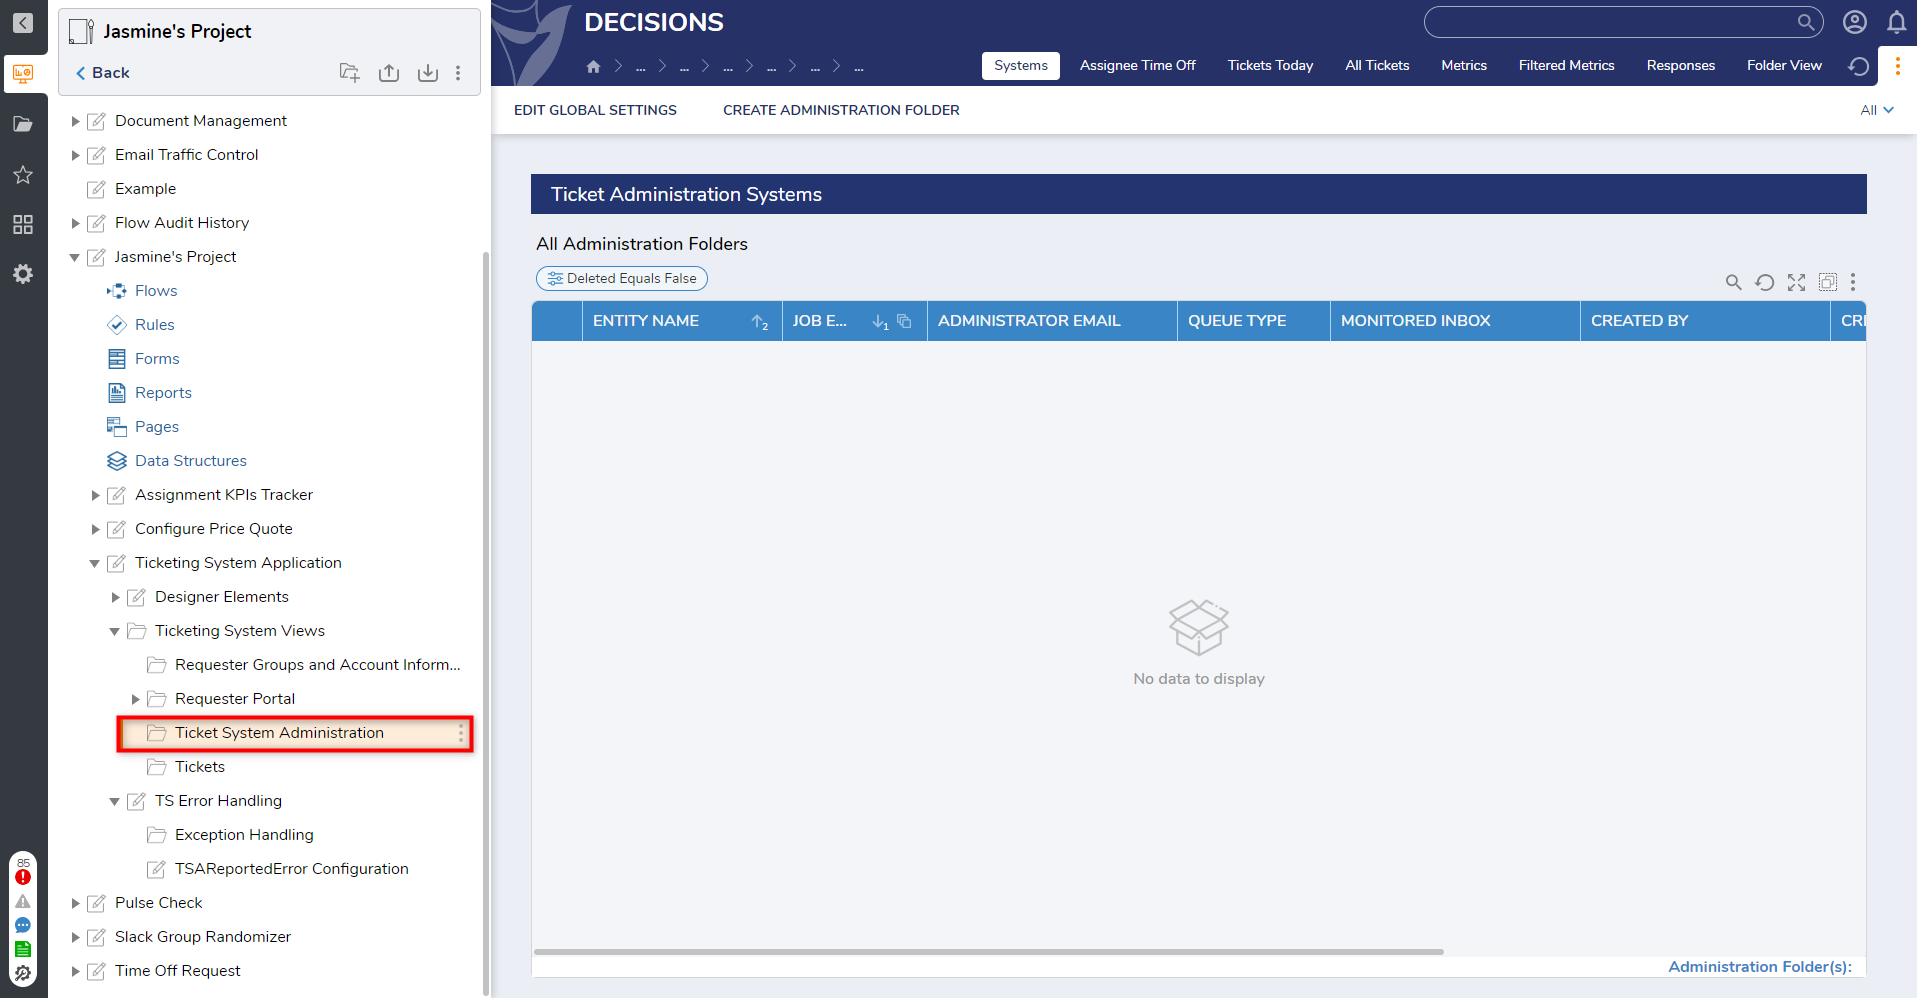
Users must create an Administration Folder for the Ticketing System after importing the Project. This can be enabled by navigating to Ticketing System > Ticketing System Views > Ticket System Administration.
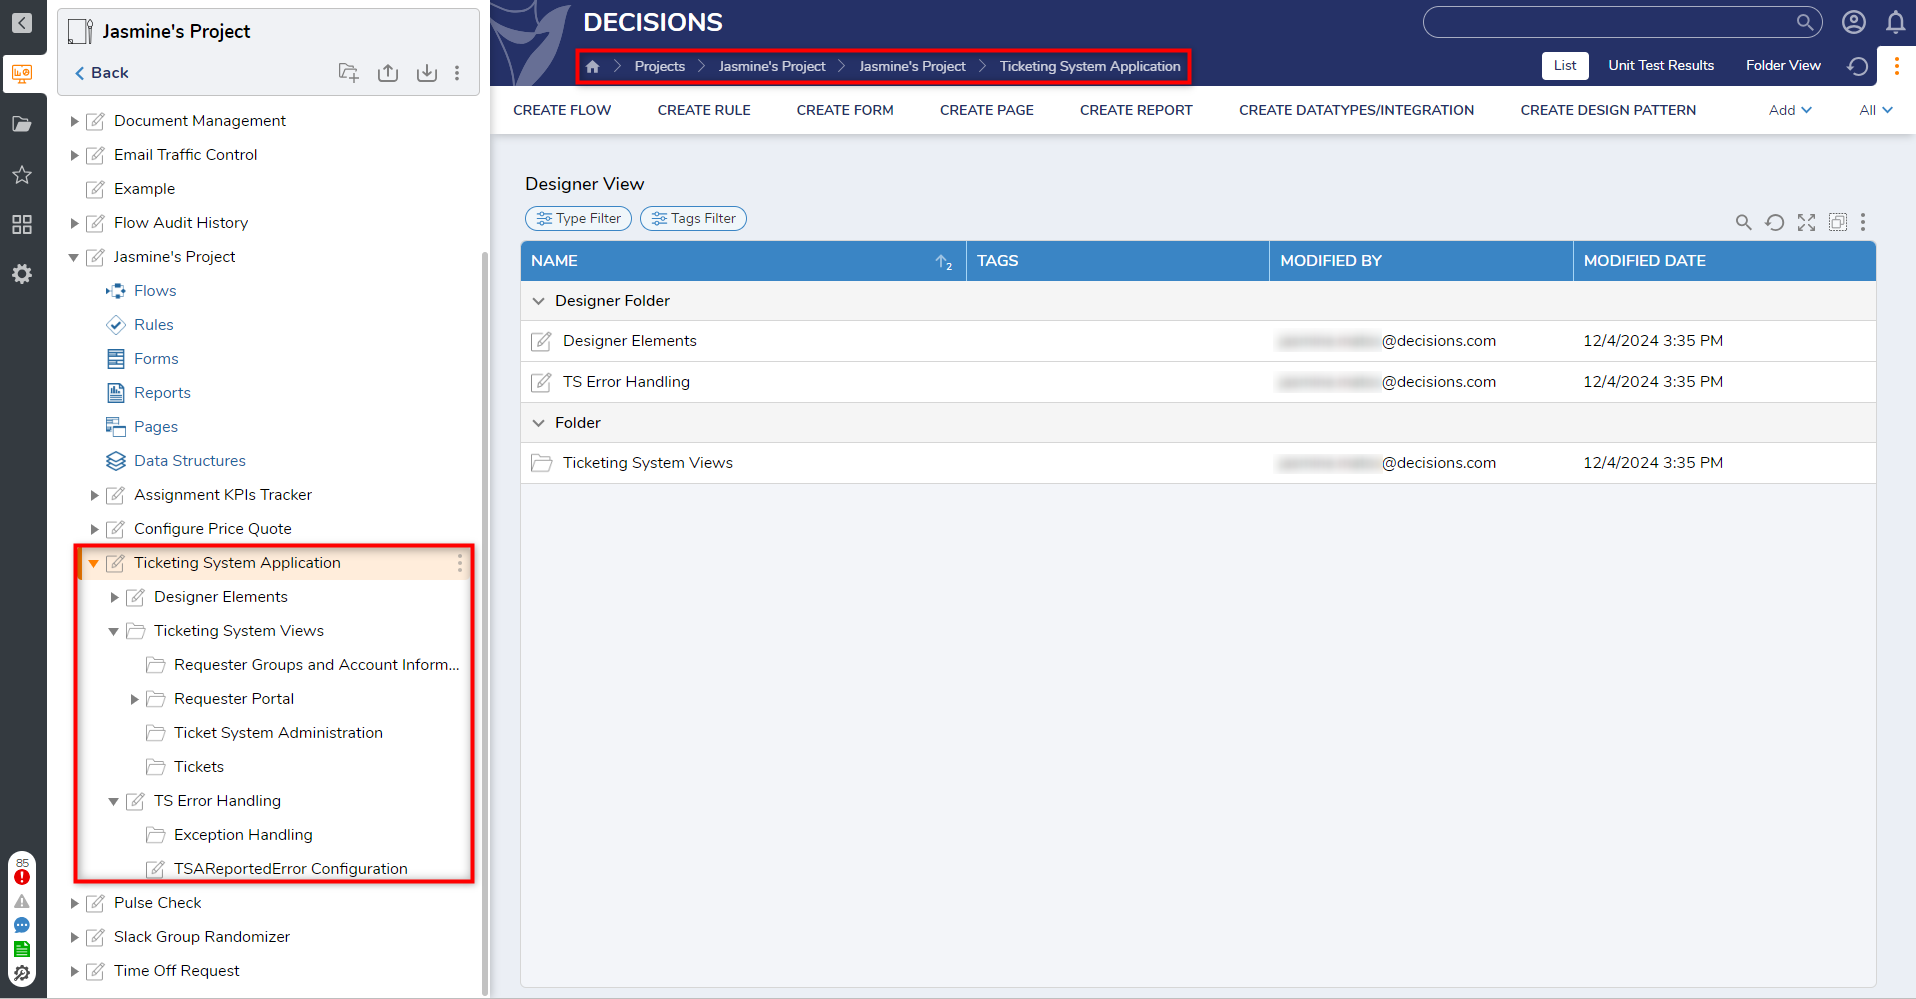
Application Organization
The Ticket System Application Folder is divided up into three subfolders: Designer Elements, Ticketing System Views, and TS Error Handling. Administrators will mainly use the Ticketing System Views Subfolder to manage the Ticketing System.
Ticketing System Views
This Folder contains all the Dashboards for this application. This is where all the user actions will take place. Below is a list of Subfolders stored in this Folder.
| Folder Name | Description |
| Requester Groups and Account Information | This Dashboard shows all existing Requesters, Requester Groups, and any additional contacts. |
| Requester Portal | This Folder houses two Dashboards: All Tickets and My Tickets. All Tickets shows all existing tickets while My Tickets shows all tickets submitted by the current user. Both Dashboards have the option to submit a ticket. |
| Ticket System Administration | This Dashboard houses all existing Administration Folders. |
| Tickets | This Dashboard houses all existing tickets as well as information like the requester, notes, creation date, etc. |
Designer Elements
This Folder contains Subfolders that are divided based on a specific component of this Application design. These are all the design elements that are used for this Application. Below are the nested Subfolders.
| Folder Name | Description |
| Assignee and Administration Management | This Folder contains all the designer components for the Ticket System Administration Dashboard. |
| Email Monitoring | This Folder contains all the components for the Email Monitoring process. |
| Requester Management | This Folder contains designer elements that make up the Requester Dashboard components. |
| Ticket System KPIs | This Folder contains all the KPIs used in this Application. |
| Configurable Designer Objects | This Folder contains the components to configure the Scheduled Job Flow. |
| Data Types | This Folder contains all the Data Structures used in this Application. |
| Requestor Actions | This Folder contains all User Actions available to Requestors. |
Configuration
Administration Folder Configuration
- An Administration Folder needs to be created for the Ticketing System. This can be found under Ticketing System Application > Ticketing System Views > Ticket System Administration.
- Administration Folders are used to manage the Ticketing System. Click the Create Administration Folder button. This will open a Ticketing System Administration Folder window.

- Here you will need to fill in the fields to set up the Folder. The table below provides details for each field. Once the configuration is complete, click SUBMIT. The Folder will then be added to the All Administration Folder Report.
Field Name Description Folder Name This name will help identify the system it is for. Description This field holds a brief description of the Administration Folder. Administrator's Email Address They will get notified of all the action. If a ticket cannot get assigned to an assignee, it will notify the admin of the ticket.
Business Location The location in which the business is operating from.
Queueing Type The user will have the option to set this field as either Round Robin or Manual Queue. Bounding Characters This is used to bind a Process Folder Id to a ticket. When there is an email corresponding to a ticket, there is an invisible text in the HTML that has the Process Folder Id which is used to bind to the ticket in the Application. The bounding characters are used to fetch the Id. It is best practice to use a special character, as full words run the risk of being displayed on the email. Broadcast Emails This is used to determine who the tickets are sent to via email. These could be individual emails or a list of emails. IMAP Server Information Monitoring Email Username This the username for the mailbox the emails will be pulled from. Monitoring Email Password This the password for the mailbox the emails will be pulled from. Users will need to locate the App Password for the Mailing Application they are using. This is especially required if there is two-factor verification on that account. IMAP Folder Name This is the specific label or folder from the email account (i.e. the Inbox). Server Address The server address of the system you are using for the email. Server Port This is the server port for the system you are using for the email. Is Secure Connection? This is used to determine if that server is secure. Use OAuth? This is used to determine if any OAuth are to be used.
Ruleset Configuration
The Ruleset determines how to filter the emails from the inbox for tickets. Users will configure settings to filter out announcements and spam emails by navigating to Ticketing System Application > Designer Elements > Configurable Designer Objects > Ticket System Router. Note: if there are no Rulesets configured, then there will be no filter on the emails that will be pulled for tickets.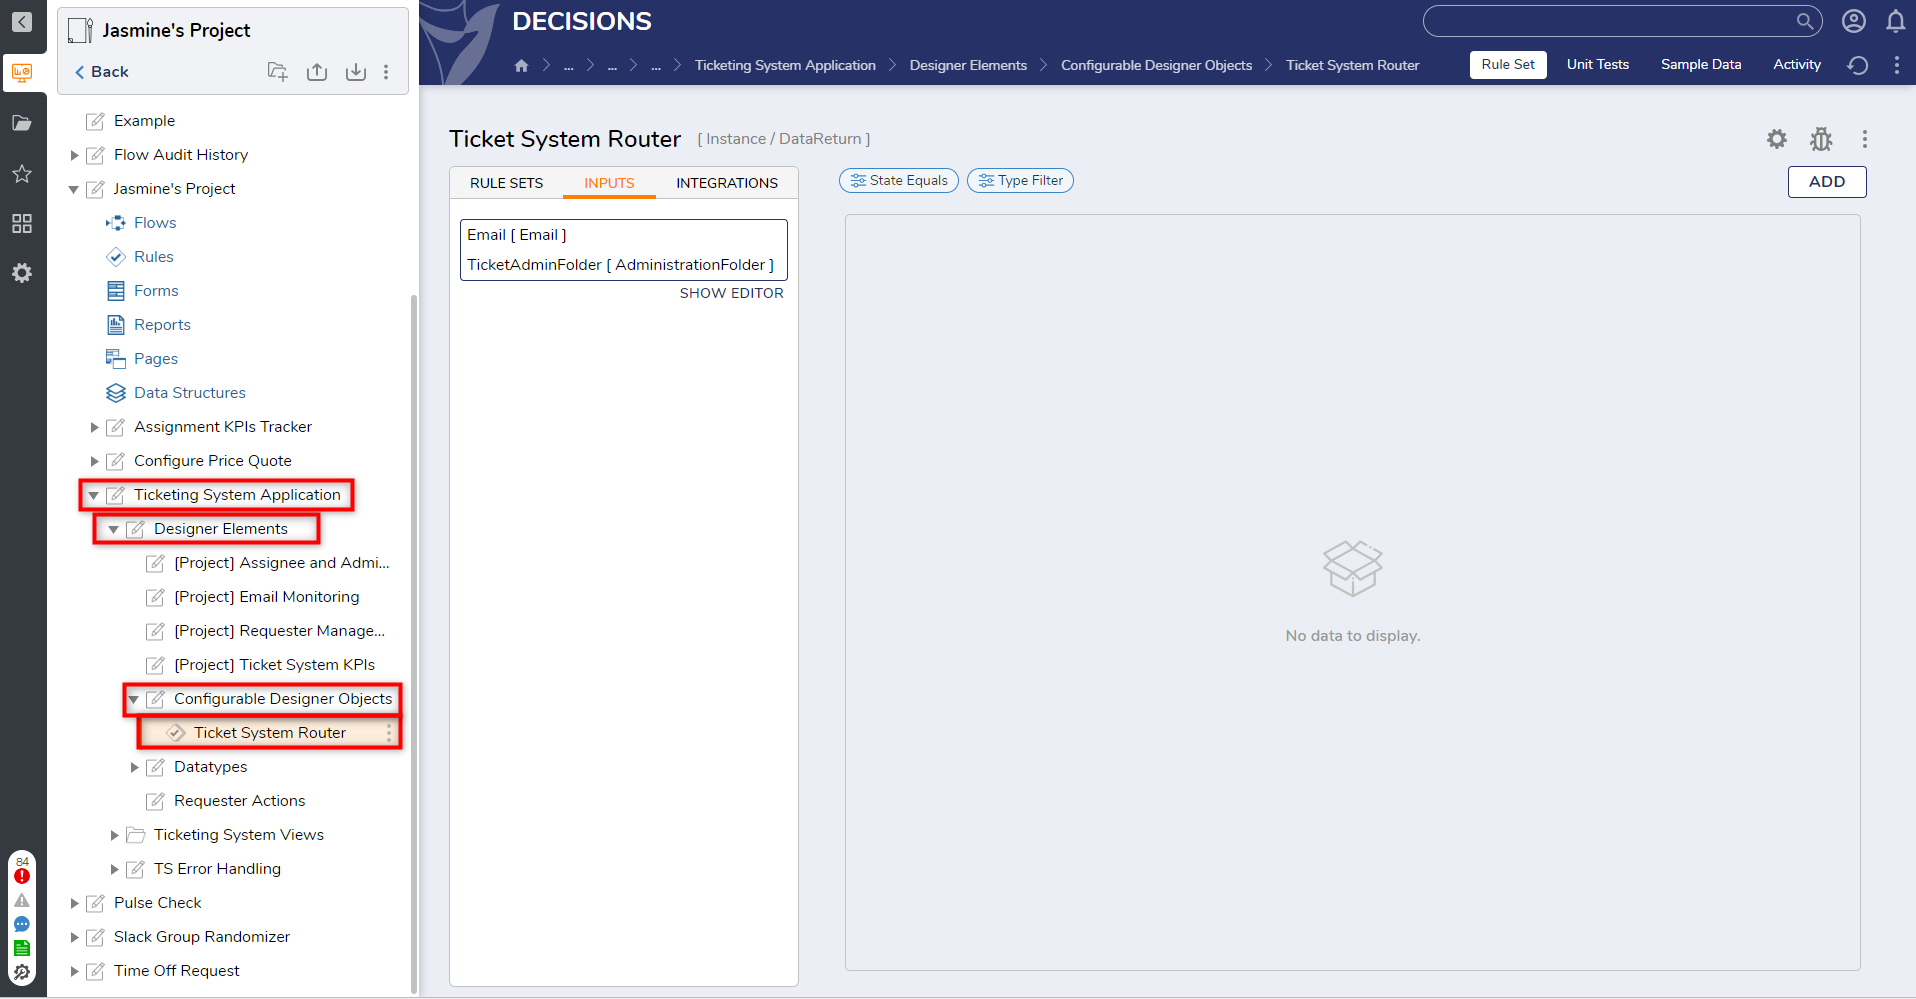
- Flow/Ruleset Visualization Page: The default Inputs are Email and TicketAdminFolder (AdministrationFolder type).
- Rule/Flow Set View page: On this page, Designers can configure the rule. Click Add Evaluation Rule from the Action Bar at the top of the page. A Rule Designer will open. Notice that the input that was set up earlier is available to be used here.
- Outcome Path Configuration: Select the gear icon on the right side of the Dashboard and navigate to the Advanced Section of Setup Rule Set. From here, Designers can configure Rule Outcomes for True or Falseevaluations.
- Please make sure to configure "Done" for Outcome Path On False and "Skip" for Outcome Path On True.
Management Tools
The information below discusses the various tools an Administrator can use in order to manage the Ticketing System.
Ticket System Administration
This Folder holds the Administration Folders. Below is information on the Pages and User Actions available in an individual Administration Folder. The Ticket System Administration Folder can be found by navigating to Ticketing System Application > Ticketing System Views > Ticket System Administration.
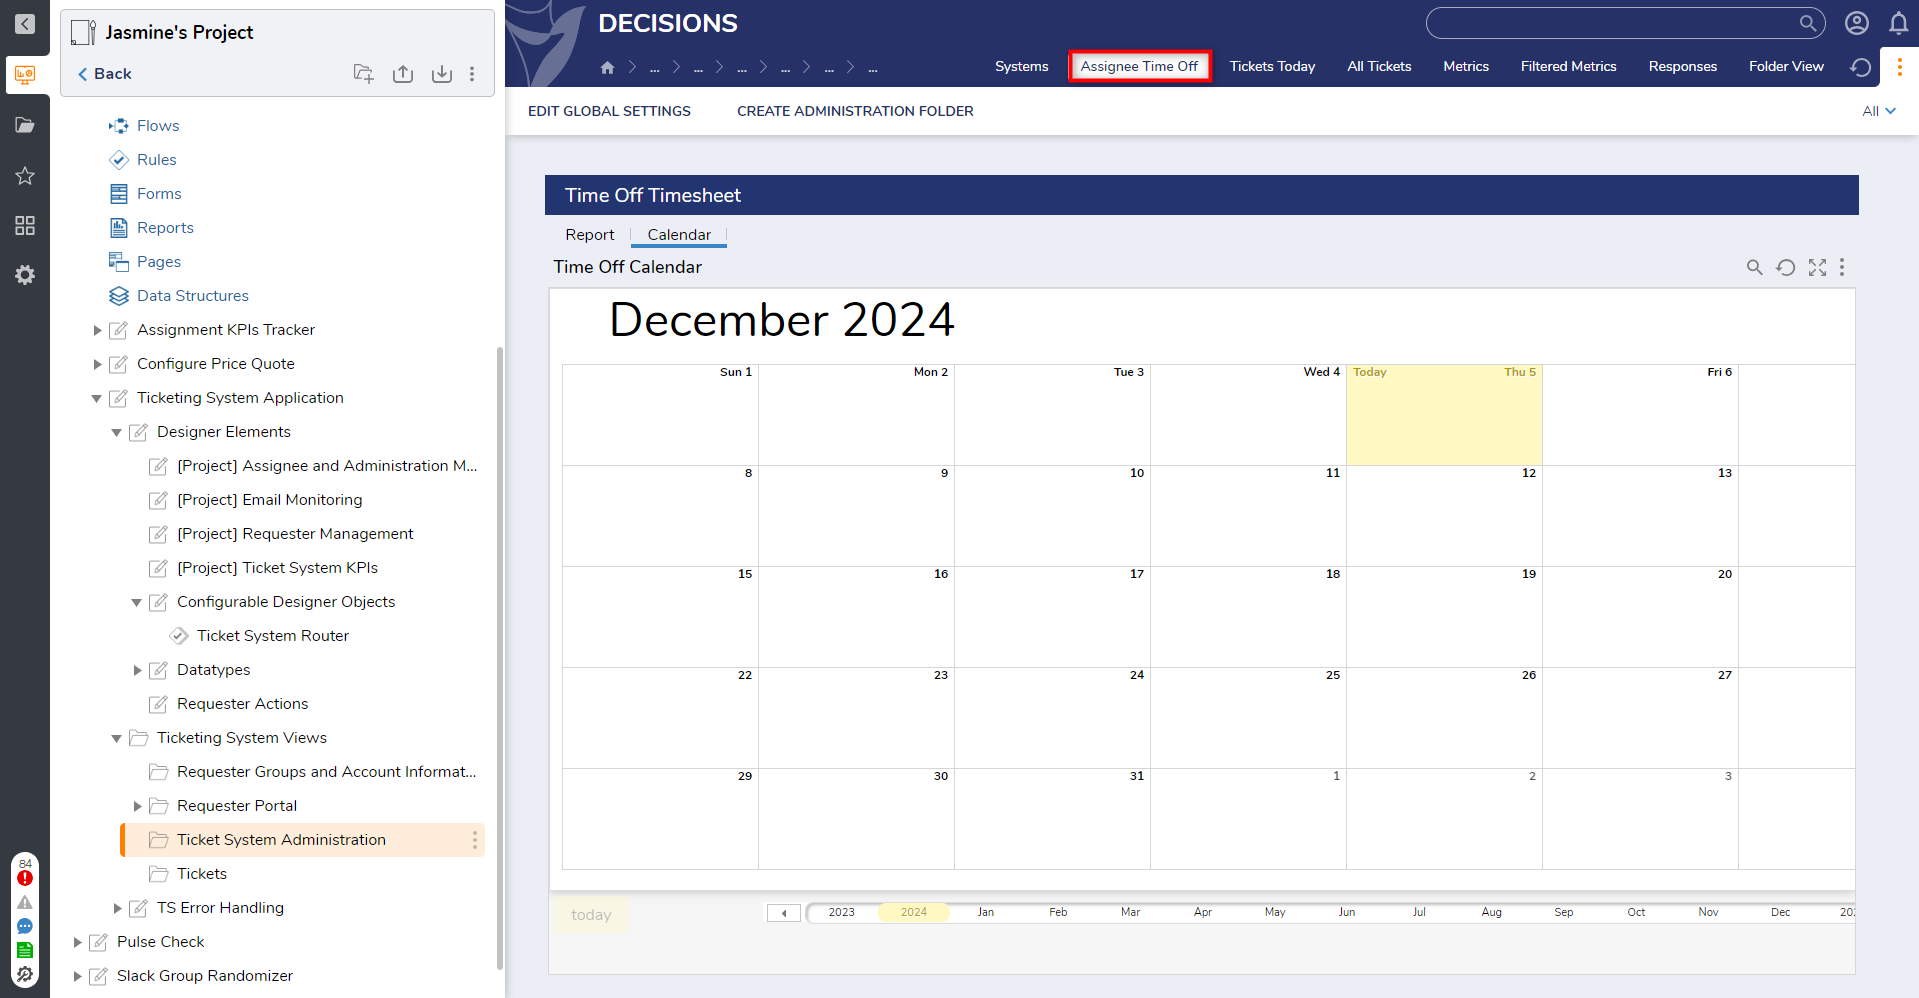
- Assignee Time Off Page: This Page has a Report with the list of all assignees and their configuration information. Assignee configuration is set up using the user's actions available once the Administration Folder is created. This Page has two Report views. One report view is a list view of all assignees and their time off. There is also a calendar view which will display the information on the appropriate date.
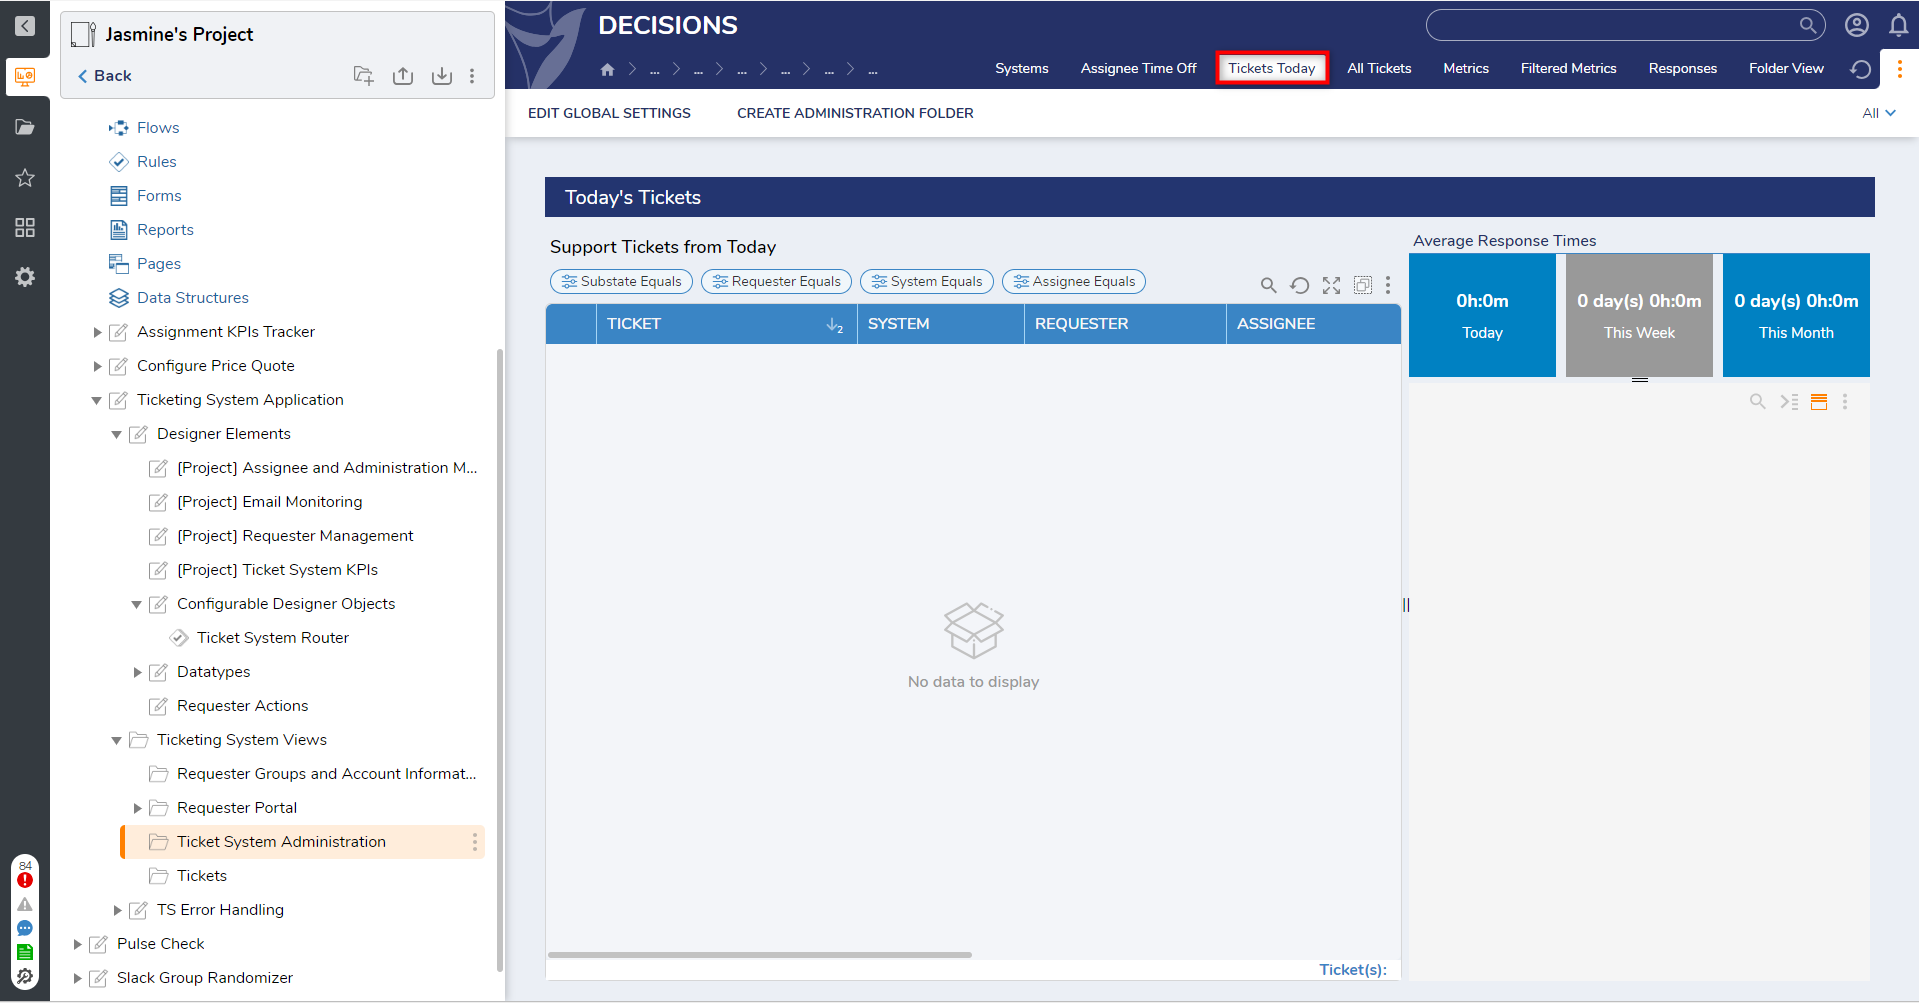
- Tickets Today Page: This Report will display all the tickets that came in on the current day. This Report will display the following information: Ticket Name, Requester, Assignee, Created On Date, Substate, Duration, Needs Attention, and State. This Report is filtered by tickets not resolved and the current date. Also, the activity panel will display information on the selected ticket.
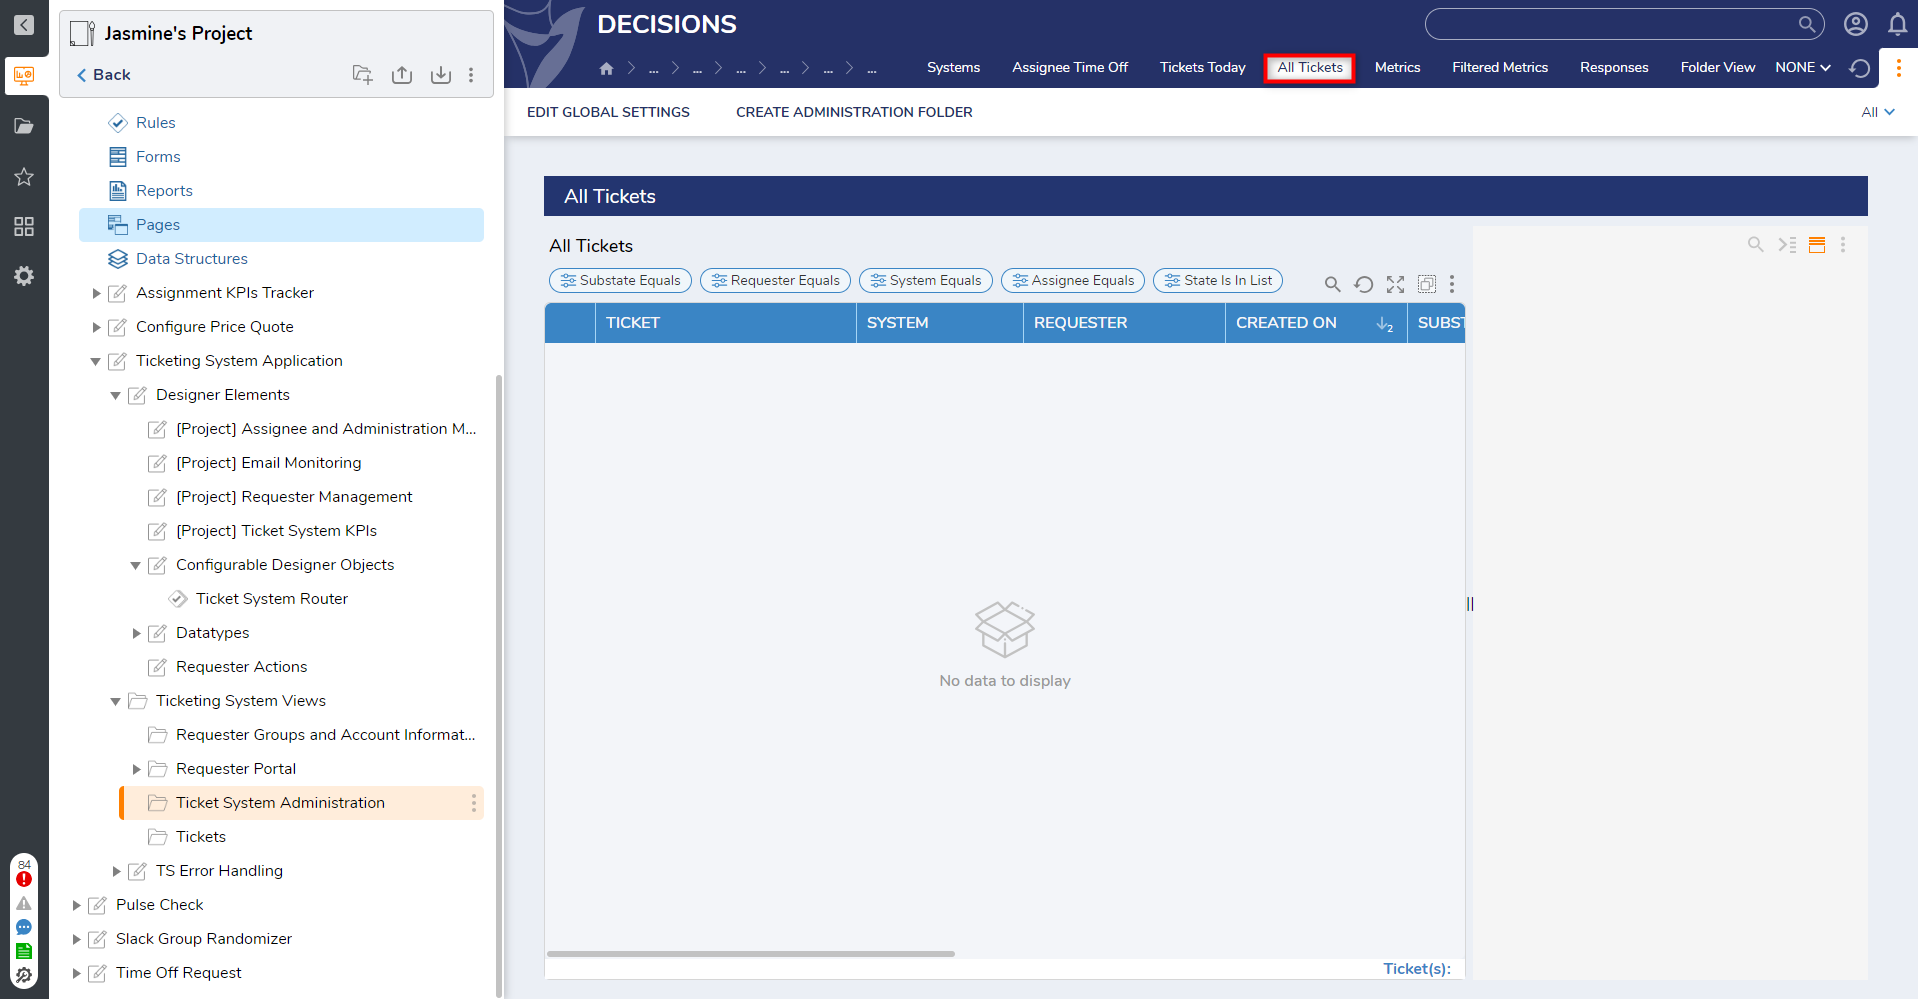
- All Tickets Page: This Page provides information on all tickets. It also has an activity panel that will provide the information on tickets once they are worked on. It contains the following information: Ticket Number, Requester, Created On Date, Substate, Assignee, Watchers, Duration, Needs Attention, Priority, and State.
- Requester Groups: This Page provides information on the Groups and Assignees. There are multiple Reports present on this page, explained in the table below.
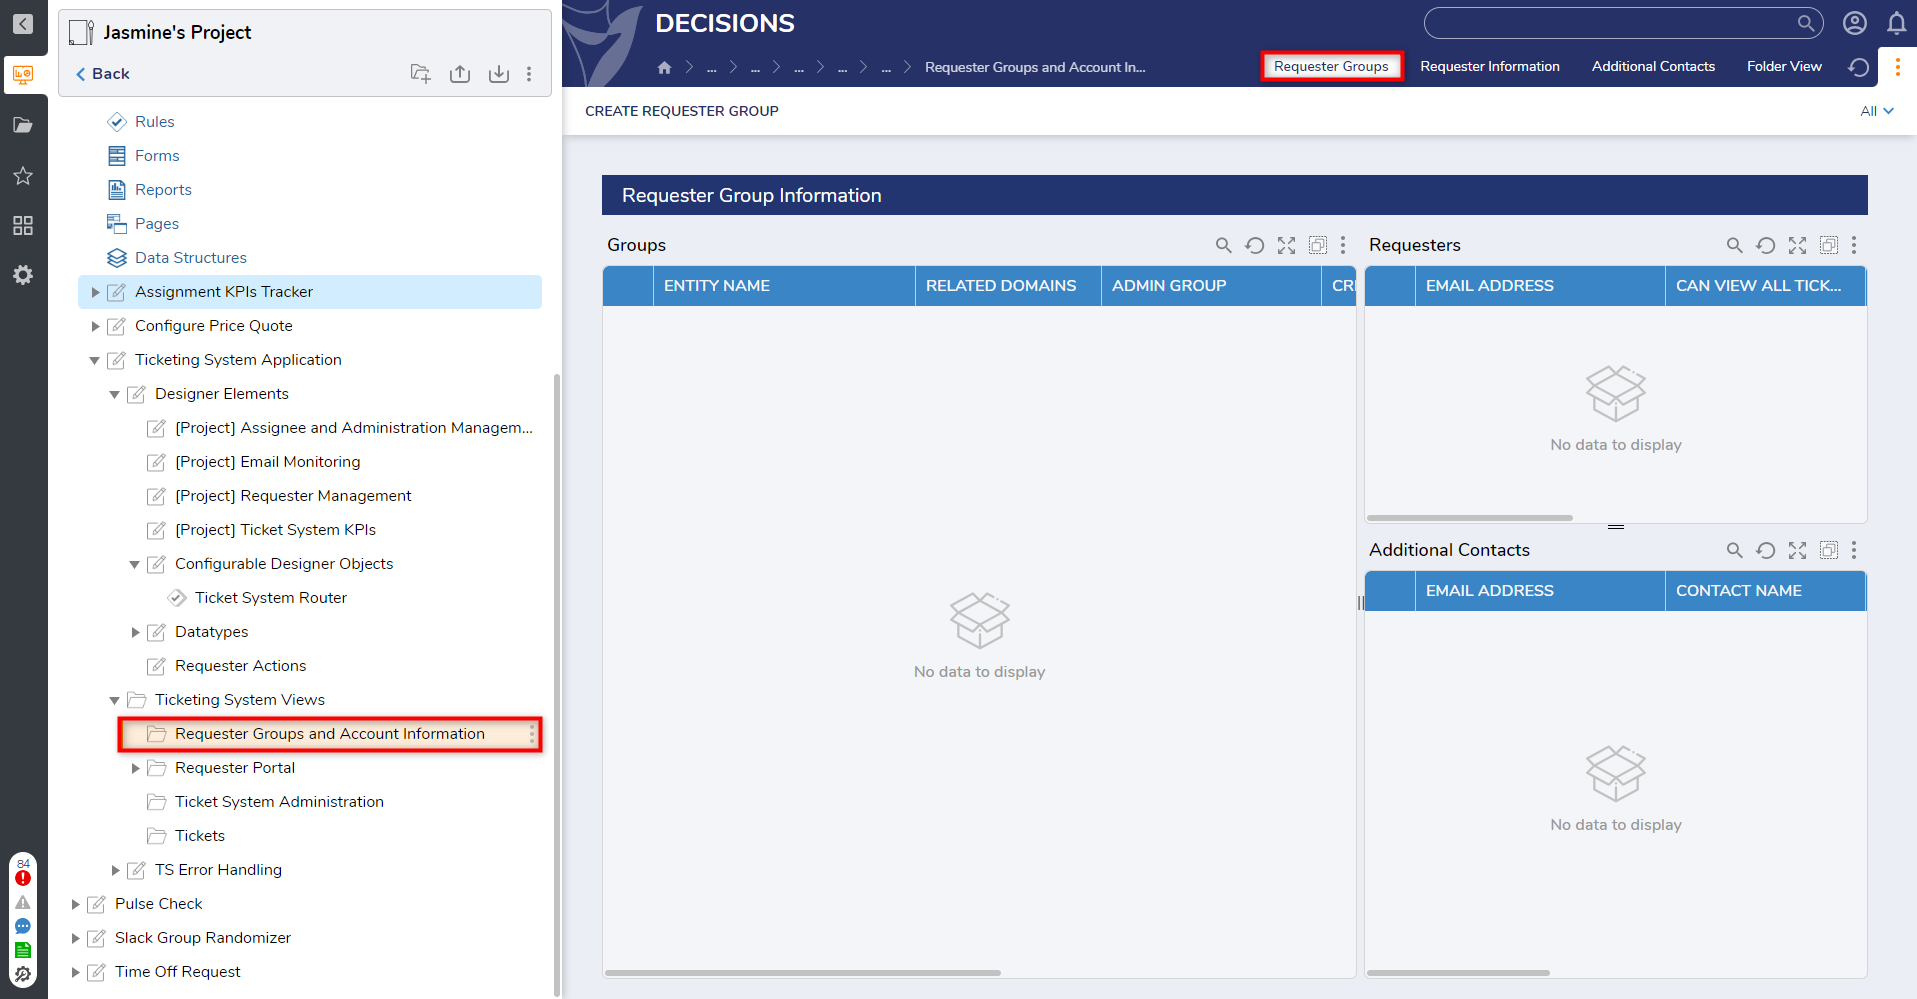
Report Name Description Groups The Groups Report includes the following information: Name of Group, Priority, Time of Operation. These Groups are pertaining to different teams such as international teams and local teams that can be assigned tasks. You can right-click and edit the team information from the Report.
Preferred Assignees The Preferred Assignee Report will have the following information: Domain, Assignee, Assigned Over Daily Limit, Assignee is Disabled. You can right-click and edit preferred Assignee information. This is used to assign tickets coming in from specific email domains to specific Assignees.
Members The Members Report has the following information: Email, Ticket Limit, Last Assigned date, Time Off, Group, Time Zone, Modified By, Modified Date, Status. You can right-click on the Members report and edit the Assignee information and can also modify the last assigned date by using the Modify Last Assigned Date User Action.
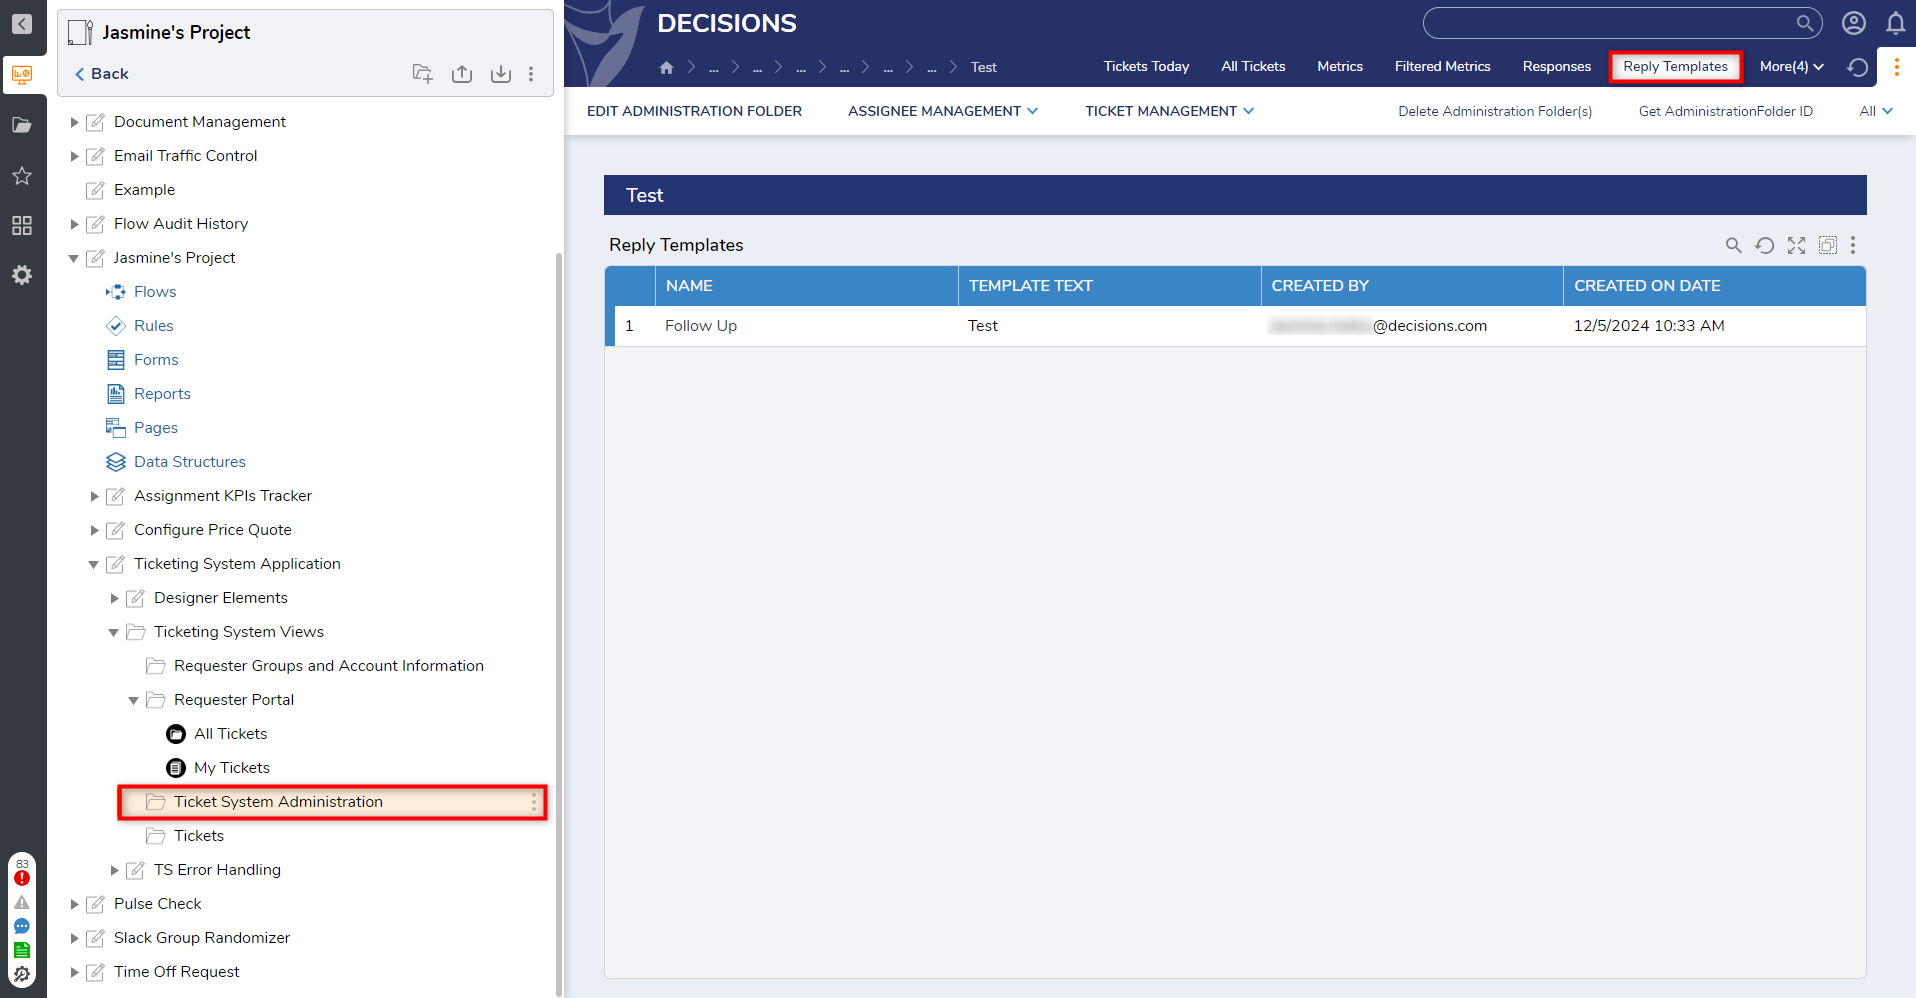
- Reply Templates Page: This Page will have all the Reply Templates that have been created. Reply Templates are created using the Add Reply Template User Action in the Ticket Management drop-down in the action bar (more information is provided below).
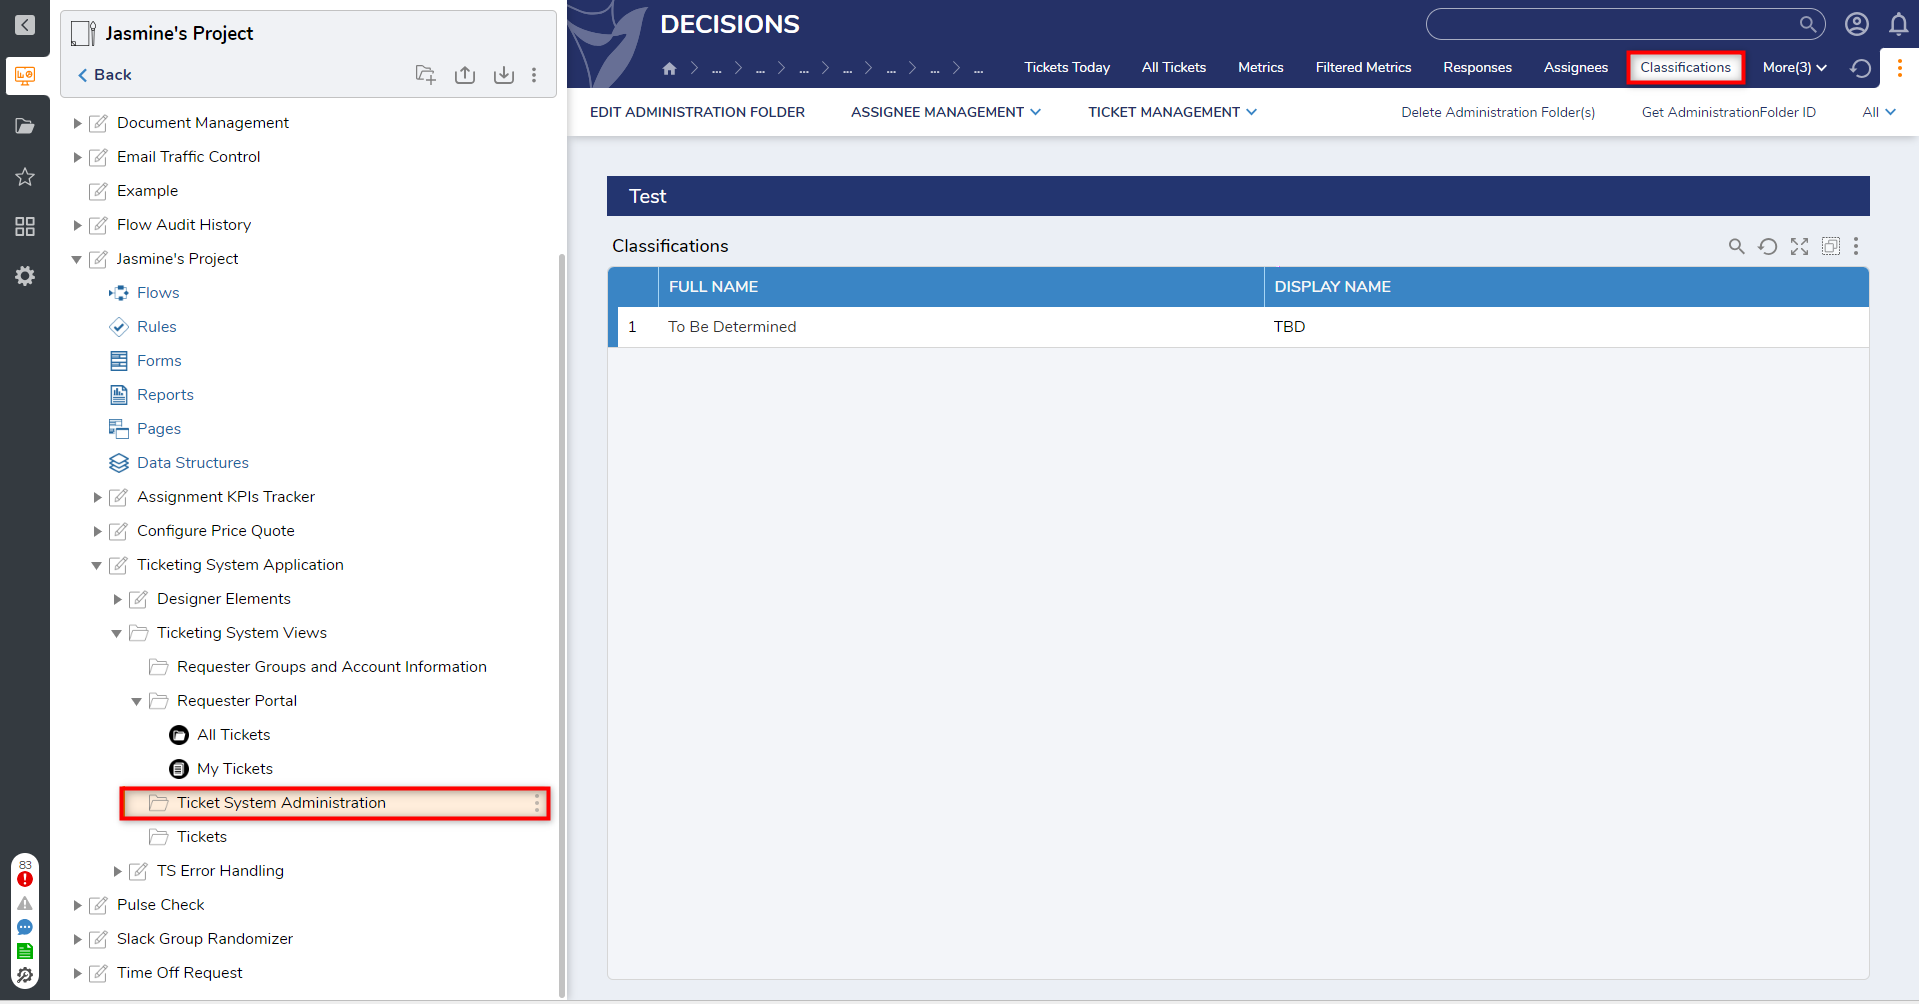
- Classifications Page: This Page holds the tags that can be added to the tickets. Classification Options are created using the Add Classification Option User Action in the Ticket Management drop-down in the action bar (more information is provided below).
- Assignee Management: These are the User Actions available in regards to Groups and Assignees. The table below explains the purpose of each User Action.
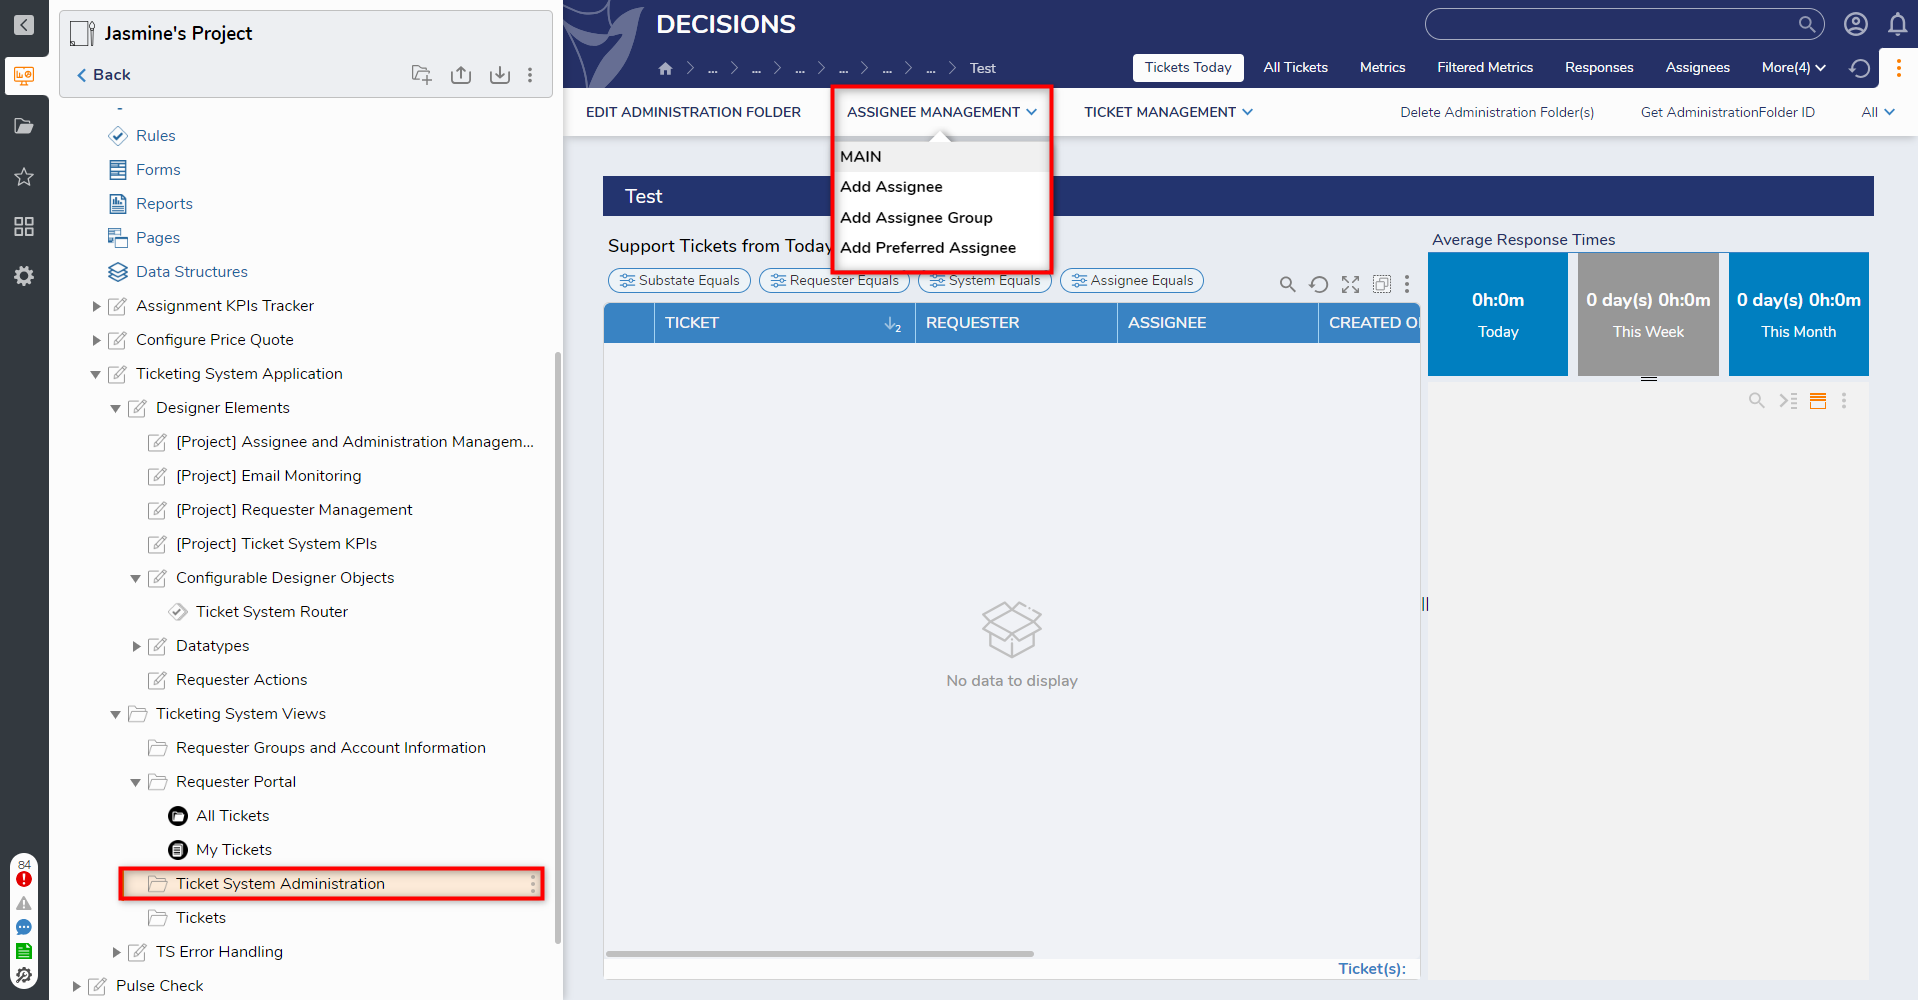
Action Name Description Add Assignee This allows users to add an Assignee. This Assignee information will be generated in the Members Report. Add Assignee Group This allows users to add a Group. This group information will be generated in the Group Report. Add Preferred Assignee This allows users to set a specific member to get specific tickets from the specified domain. - Ticket Management: These are the User Actions available in regards to Ticket Management. The table below explains the purpose of each User Action.
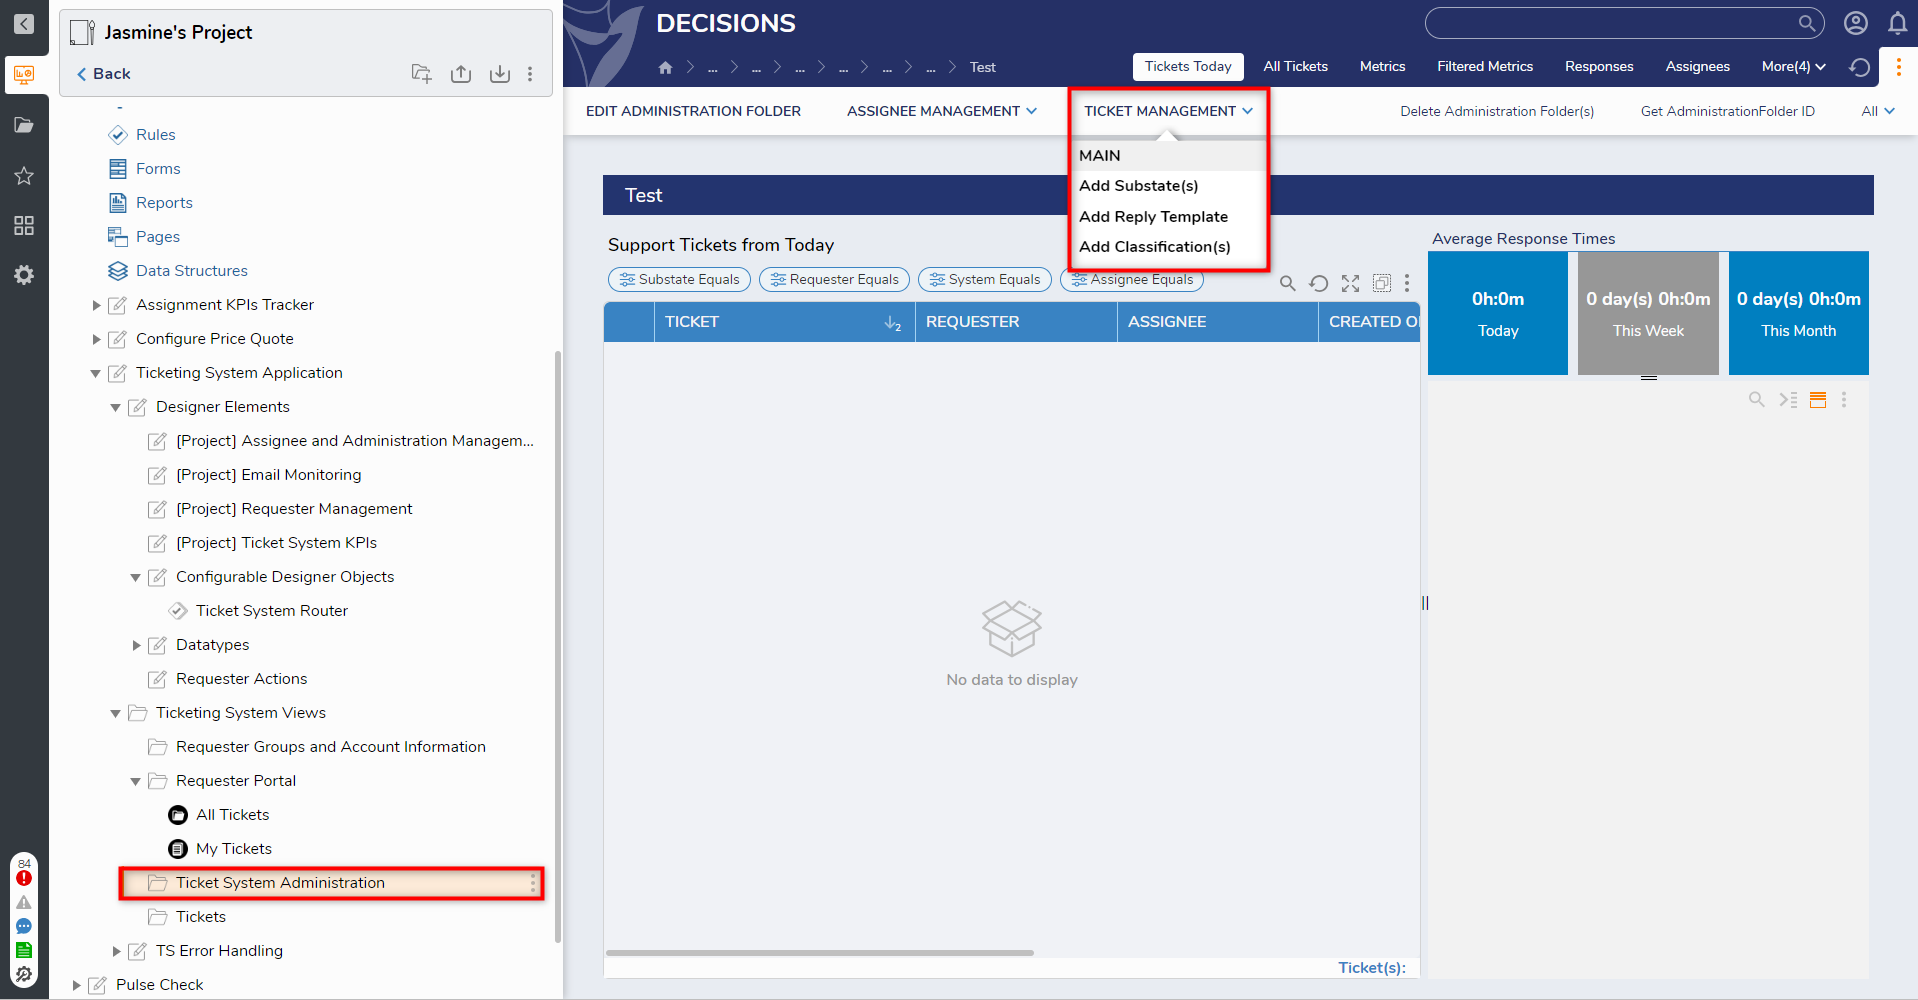
Action Name Description Add Status(es) This User Action allows users to add a Status option for the tickets. Users will need to provide an internal and external status. This will be added to the Status Option Report of the Ticket System Administration Dashboard. Add Reply Template This User Action allows users to add a Reply Template for users to use when they send out replies. Users will need to provide a Name for the template and add the template in the text area. This will be added to the Reply Template Report of the Ticket System Administration Dashboard. Add Classification(s) This User Action allows users to add Classification information for Tickets. Users will need to provide a Display Name and a Full Name. This will be added to the Classification Options Report of the Ticket System Administration Dashboard.
Ticket Dashboard
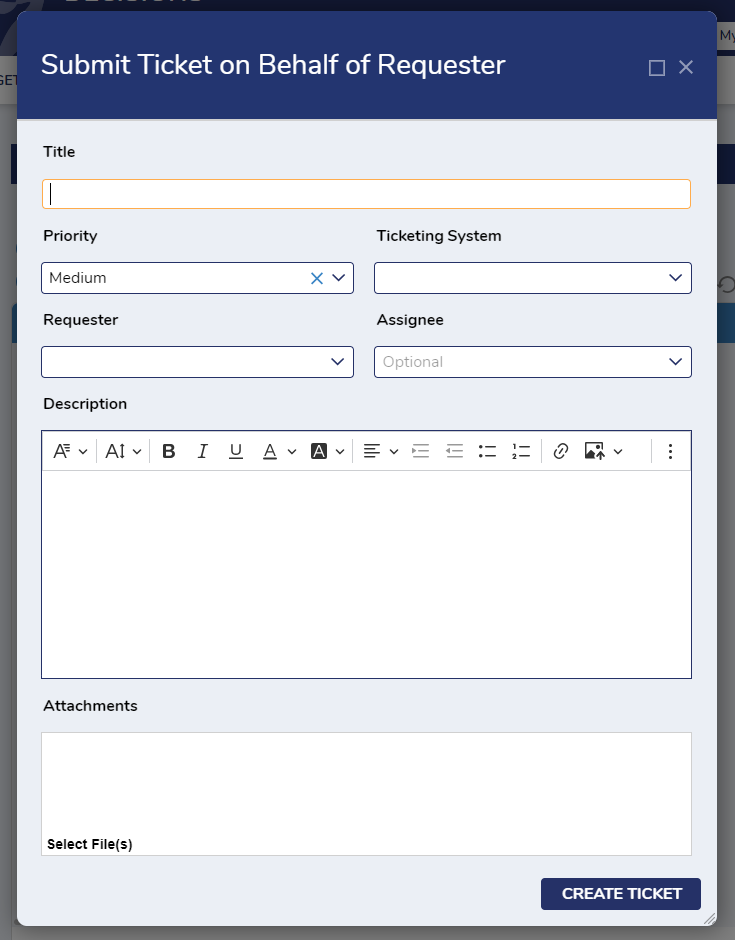
- The Ticket Dashboard can be found by navigating to Ticketing System Application > Ticketing System Views > Tickets. The main User Action for this Dashboard is “Submit Ticket," which can be found in the Action Bar located at the top of the page. Selecting this allows users to create a ticket on behalf of another person.
- A Submit Ticket on behalf of Requester Form will appear for a user to complete. Once the required fields are filled out, select CreateTicket to complete the process.
Requester Portal
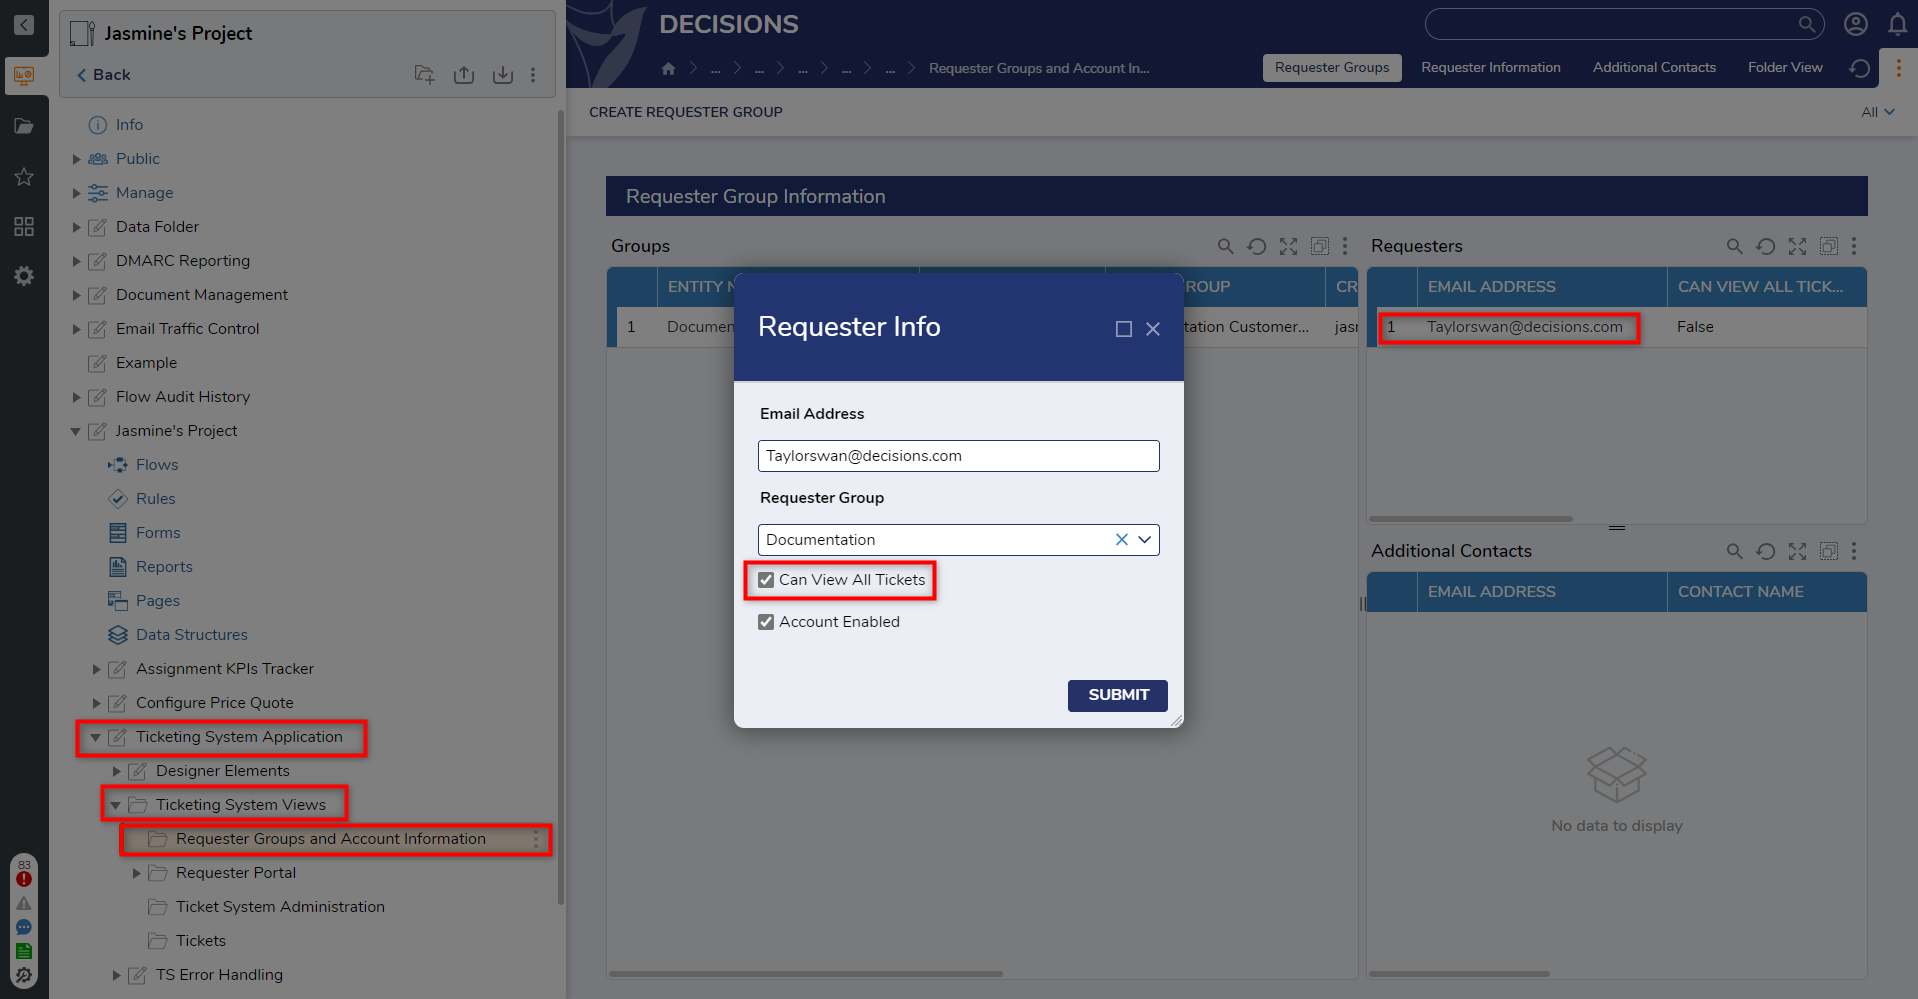
- For users to have access to the Requester Portal, they will need to be granted permission. Admins have access to the Requester Groups and Account Information Dashboard, which can be found by navigating to Ticketing System Application > Ticketing System Views > Requester Groups and Account Information. We can click on the groups to view the accounts associated with them. When we click on an account we can edit and enable the “Can View All ticket” feature. This will make the “All tickets” page visible for that user in the portal. They will be able to view all submitted tickets by their company.
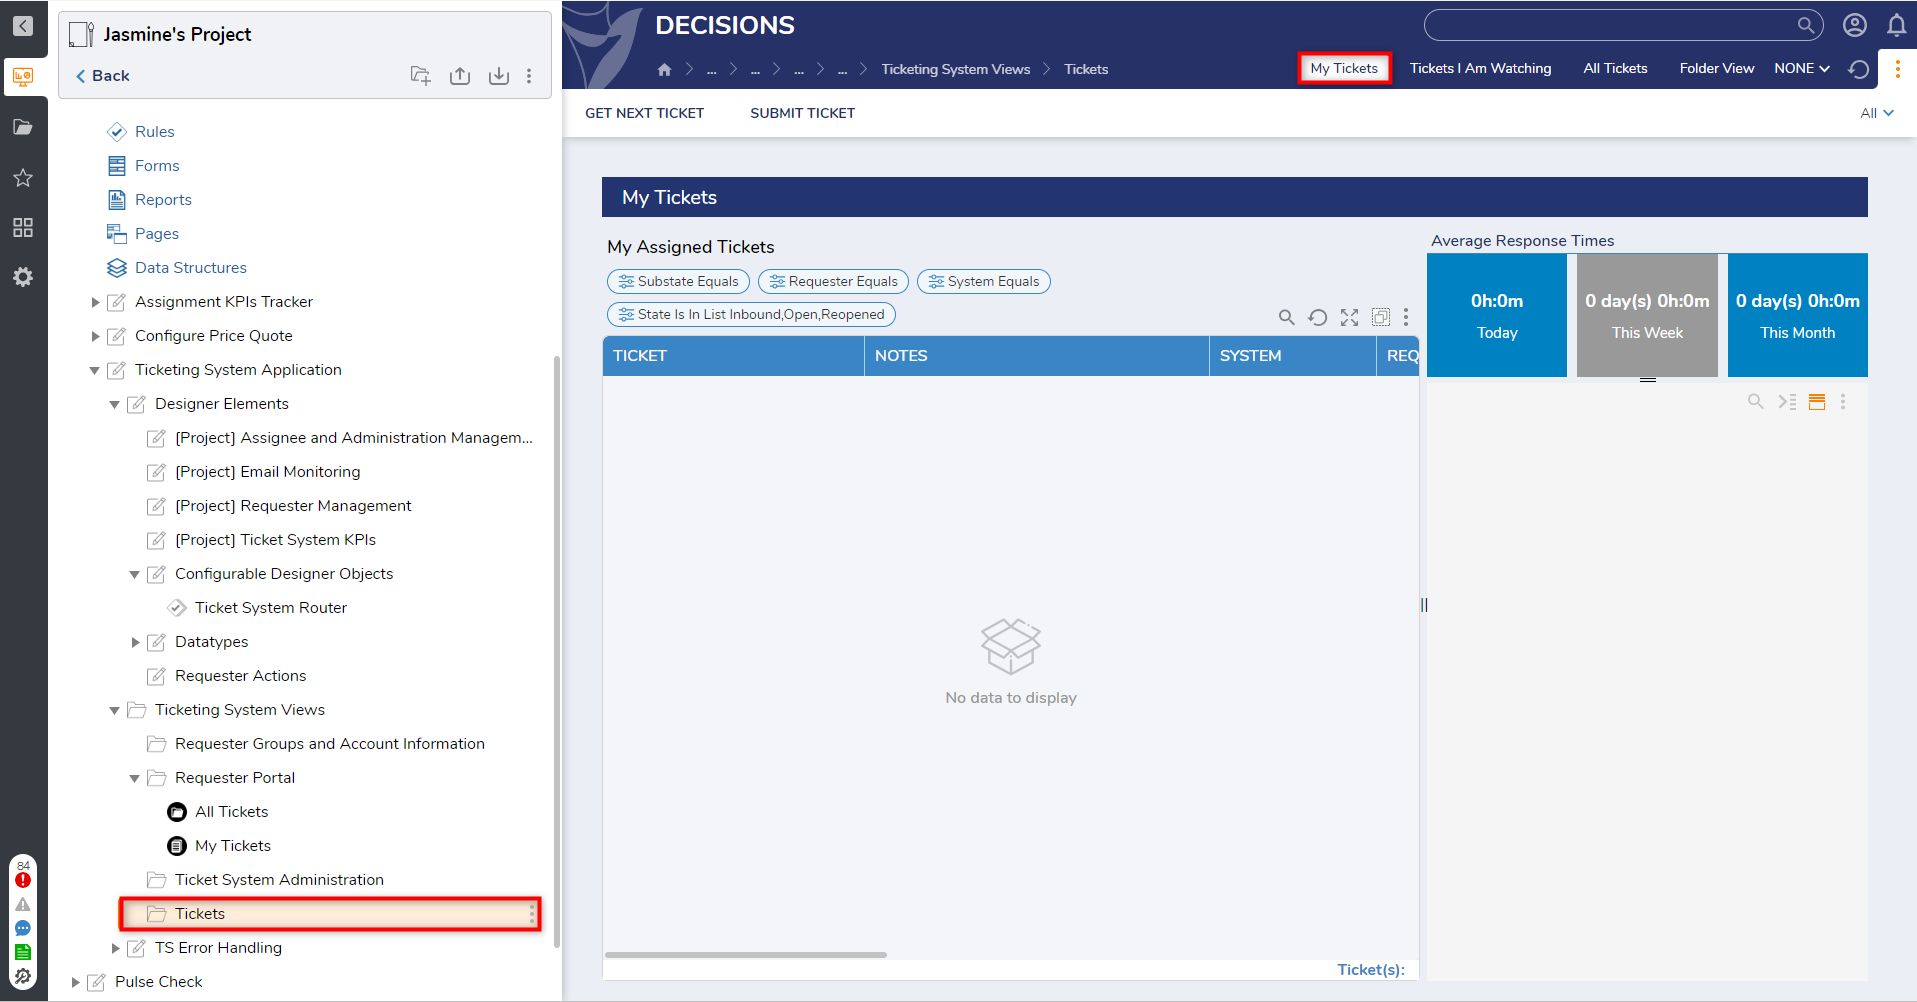
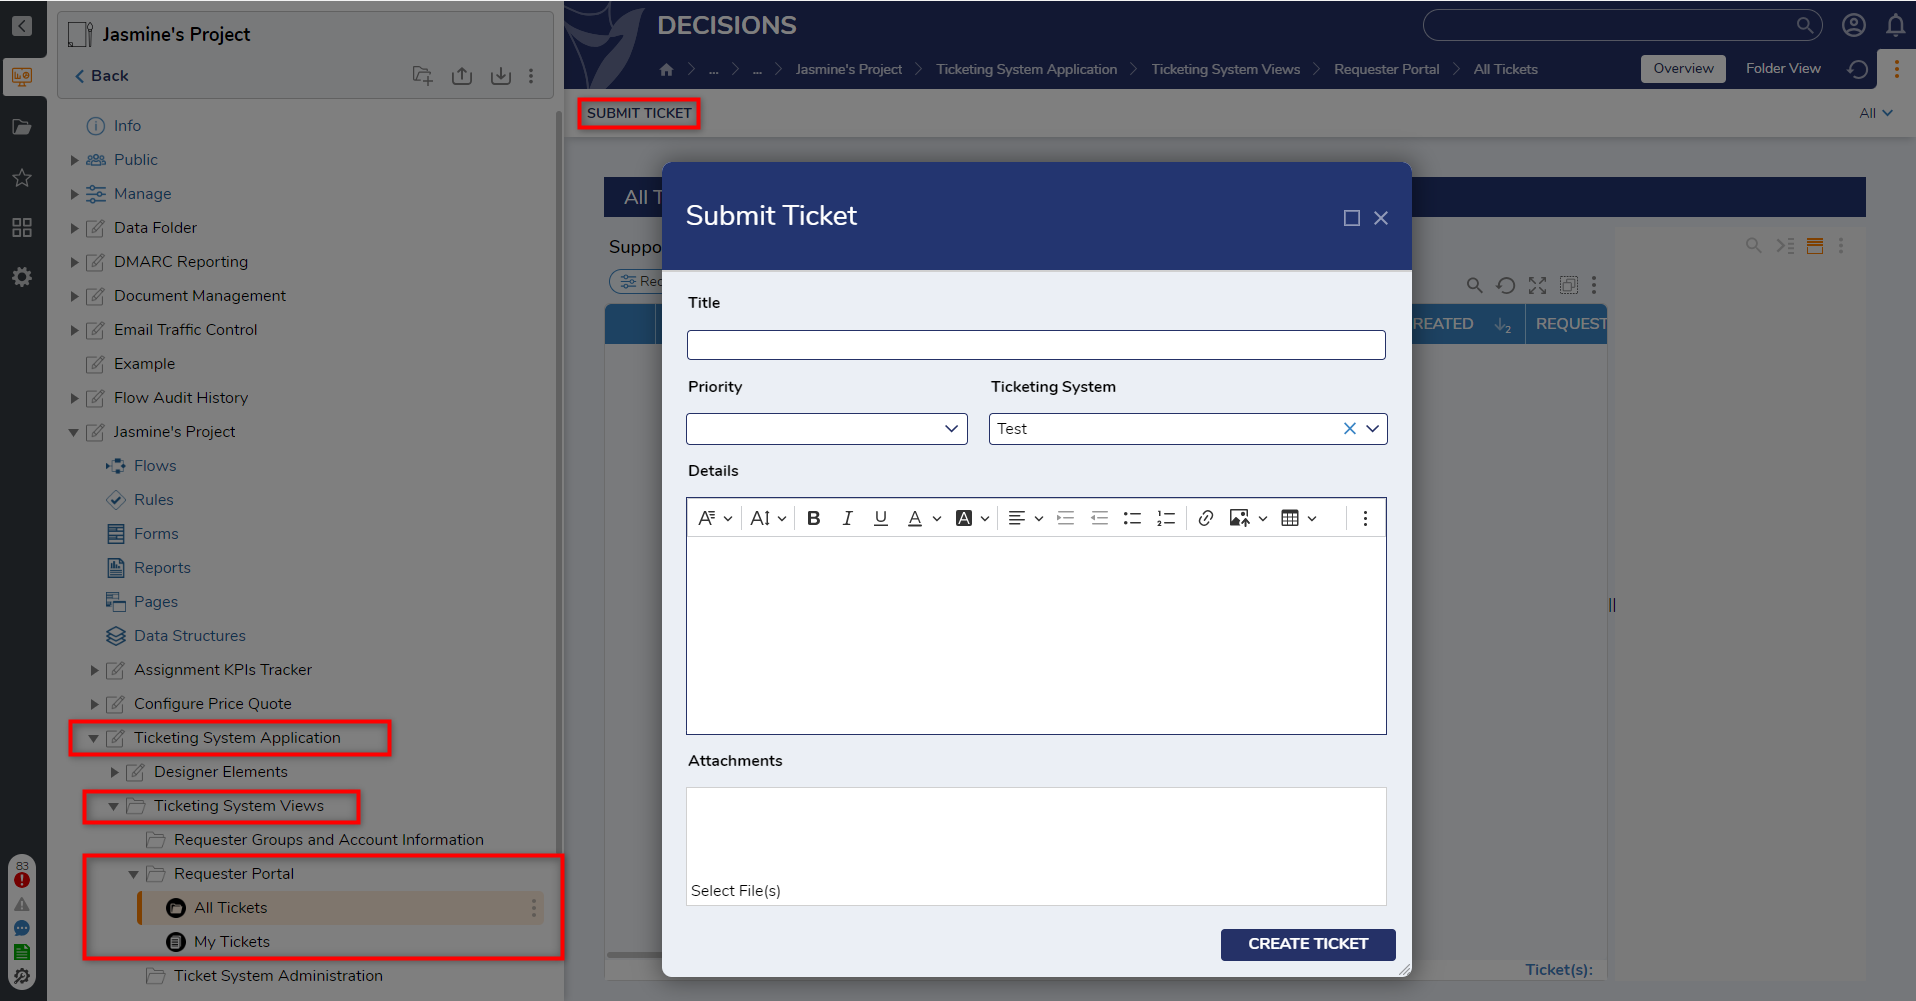
- The Requester Portal can be found by navigating to Ticketing System Application > Ticketing System Views > Requester Portal. The requester will have the following two Dashboard views available to view their submitted tickets and get information on them: All Tickets and My Tickets. Users can use the Submit Ticket button in the Action Bar at the top of the page to submit a ticket.
- End users can perform User Actions on the tickets they have submitted through the Requester Portal. These User Actions can be accessed by right clicking the desired ticket. Details about these User Actions are listed in the table below.
Action Name Description Close Ticket Allows the End User to close out their ticket. They will be prompted to provide closing comments. Send Message Allows the End User to send a message to the assignee of the ticket. Update My Notes Allows End Users to add notes to their ticket. Manage Ticket Actions Change Grouping Allows the End User to update the Group Name. Change Priority Allows the End User to set the Ticket Priority on their ticket. Change Ticket Name Allows the End User to update the Ticket Name. Request Update Allows the End User to ask for an update on the ticket. Upload Attachments Allows the End User to attach files to their ticket.