Overview
The Simple Query Builder simplifies the process of creating SQL queries with an intuitive interface, allowing Users with basic SQL knowledge have the ability to build complex queries more efficiently. Once Users input query details, a corresponding SQL query is generated.
Users can schedule individual queries or combine multiple queries into a single query set to run at specific times, enhancing automation and efficiency. Administrators are provided with the ability to create and manage query groups, as well as grant specific access to database tables. This process ensures controlled access and data security within the system while empowering Users to perform data operations with ease.
Key Features
- Simple Query Builder Admins can create and manage Query Groups.
- Admins can create new Query Schedules and generate text files from queries.
- Simple Query Builder Users can only perform actions in the Query Groups assigned to them.
Considerations
- Users must install Error Handling before installing this Project.
- After installing the Project, Users must create or add existing accounts to the Simple Query Builder Admins Group and Simple Query Builder Users Group. Users that are apart of either of these groups will have access to the appropriate actions. To make an account:
- Navigate to System > Security > Accounts.
- Select Account on the top action bar.
- Enter an Email Address and Password for the new account and scroll down to the Select Group section.
- Click Add New and select Simple Query Builder Admins or Simple Query Builder Users Group (depending on intended permissions for the User) and click Pick.
- Select Create Account. The account will be created in Decisions and added into the Simple Query Builder Admins Group or Simple Query Builder Users Group.
- Users who need to create queries on a connection other than Local Connection must have the connection created within this Project. To create a connection:
- Navigate to Manage > Integrations > Databases within the Project.
- Click Create Connection on the top action bar.
- Once details for the connection have been added, click Ok to establish the connection.
- For more information on creating connections in Decision please refer to External Database Integration.
Main Flows
| Flow Name | Description | Image |
|---|---|---|
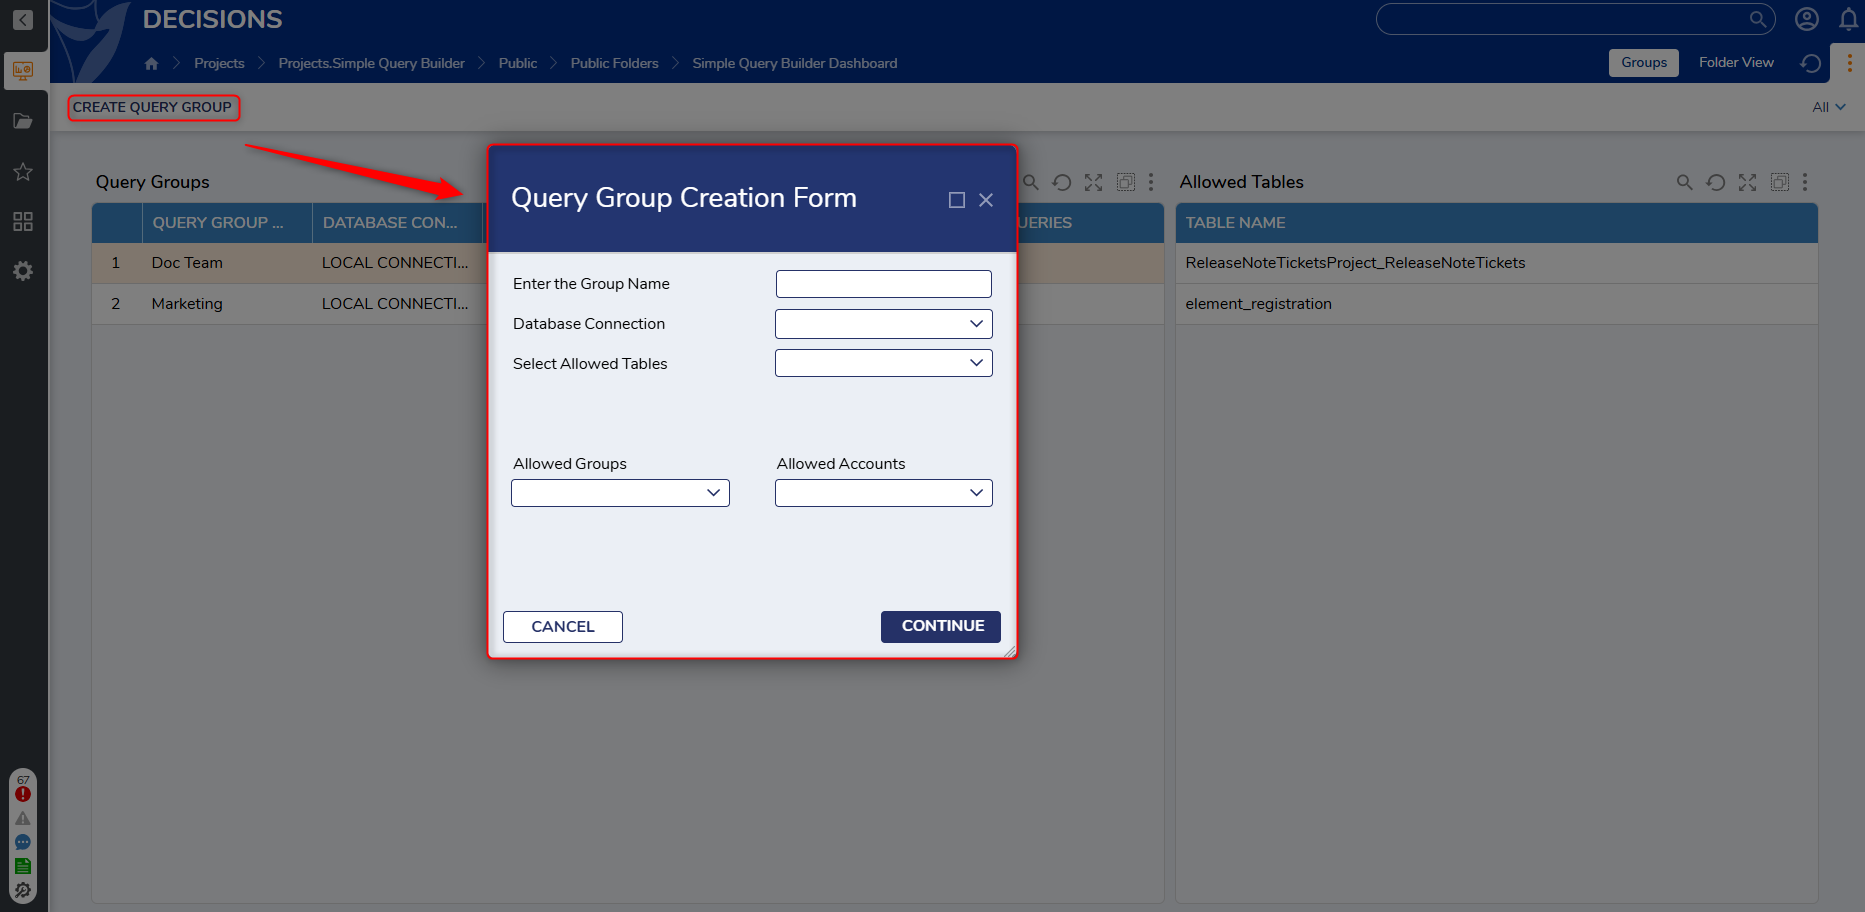
| Create Query Group | This Flow is used as a Folder action on the Simple Query Management Dashboard. When the Flow is triggered, a Form is presented to the User prompting for the following details to be added: Group Name, Allowed Tables, and Allowed Groups. Once required information is added the Flow will generate a new Query Group. |  |
| Create Query Flow | This Flow runs as a User Action on a Query Group. This Action presents a Form to a User, allowing them to add information to the provided inputs. Once Users have completed filling out the input information, clicking the Preview Query button will display results. Users can save the query from here. | 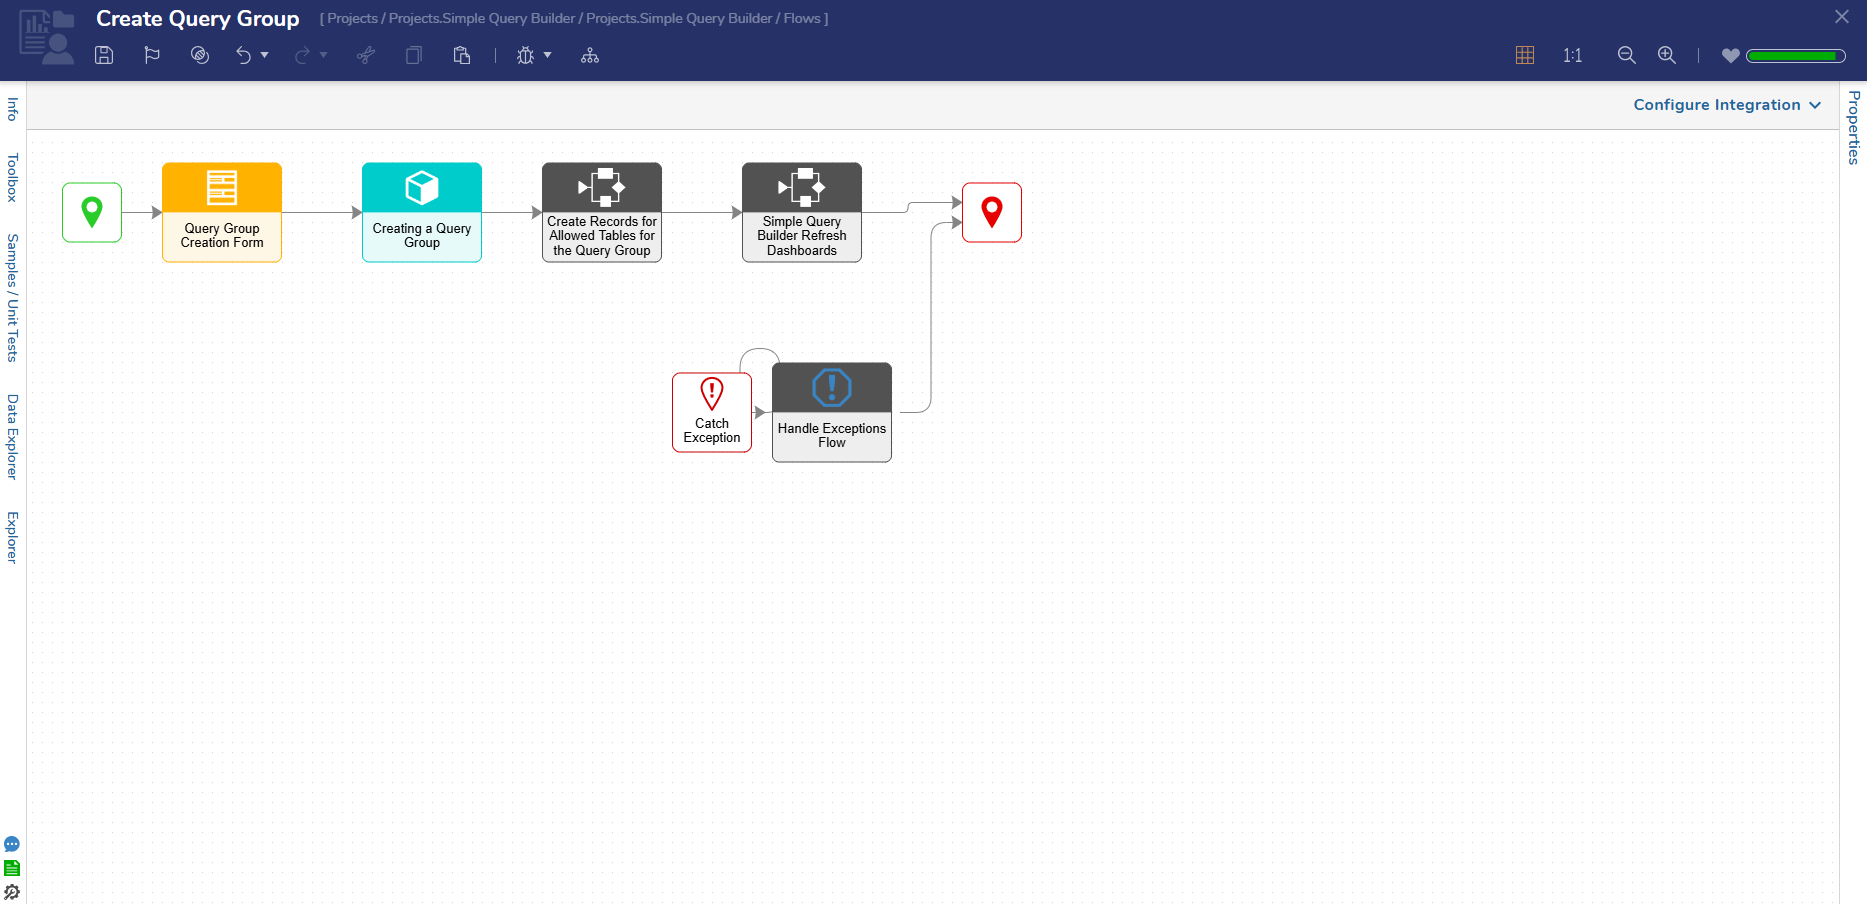 |
| Create Scheduled Query Flow | This Flow runs as a User Action on a Query Group. This action will present a Form to a User, allowing them to select a query to be scheduled. If the scheduled query has where clauses, Users can make changes to the values if needed. Once the information is edited as desired, a query Schedule will be created, and a confirmation message is displayed. | 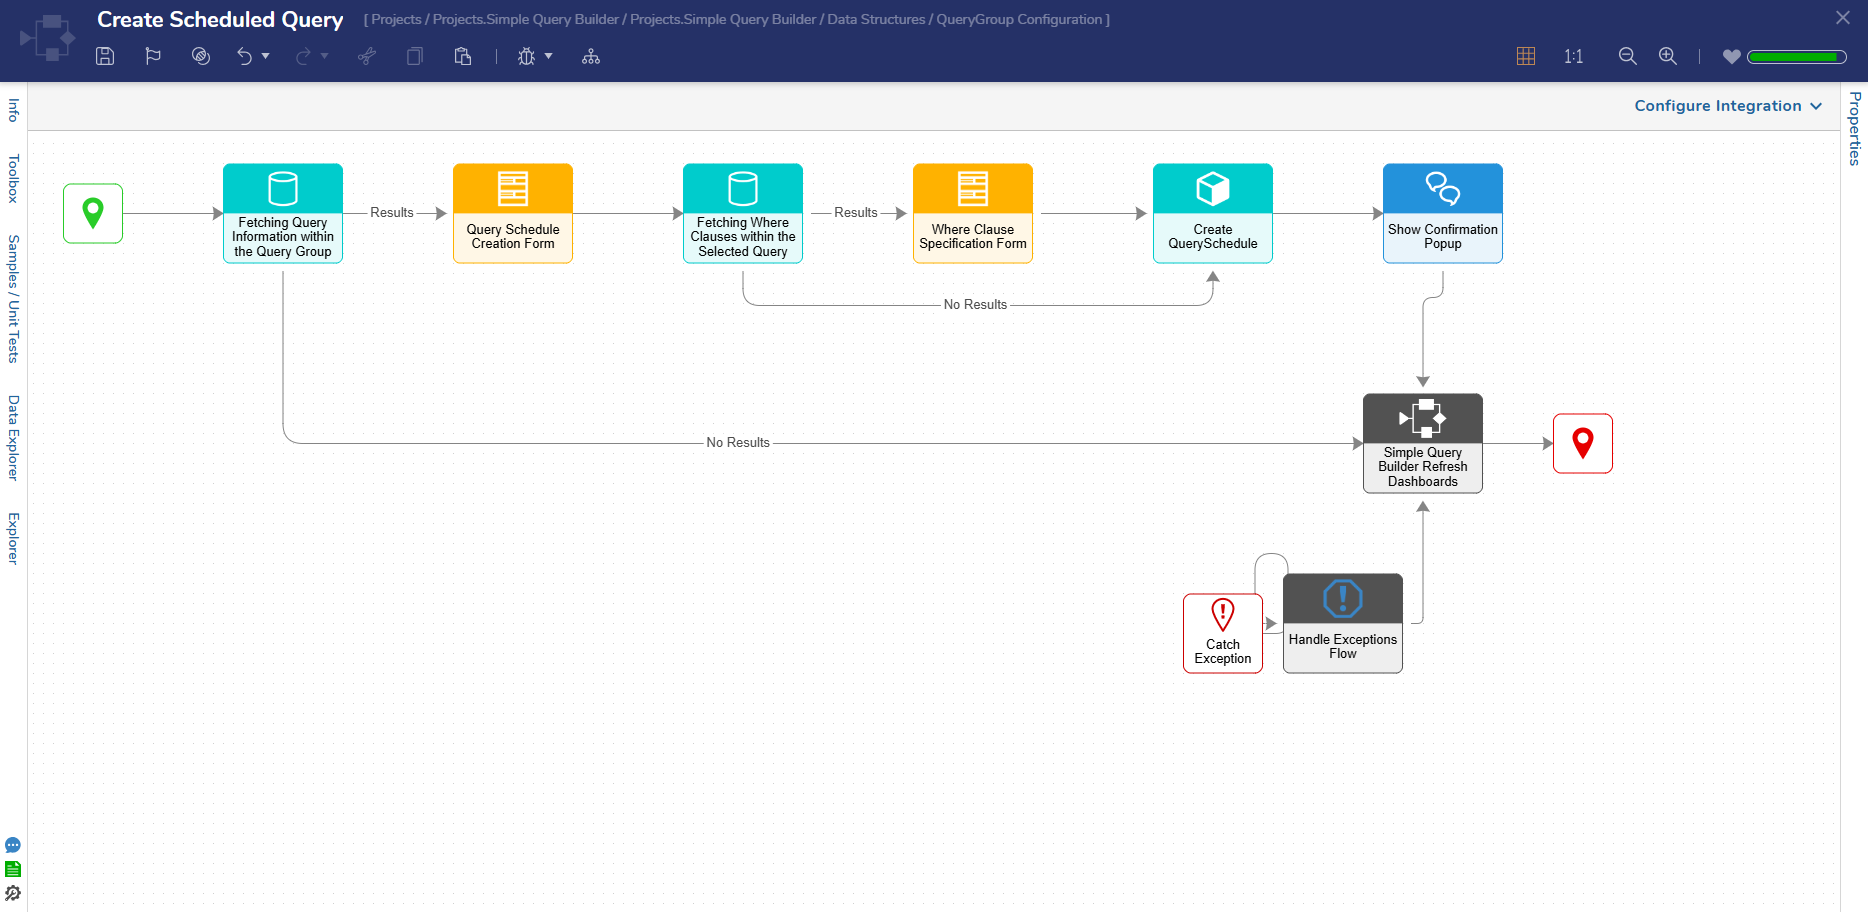 |
| Run Scheduled Query Scheduled Job Flow | This Flow runs daily as a Scheduled Job that fetches all scheduled queries, iterates through the list, and checks whether the query needs to be executed. If needed, the query will be executed and send results to the appropriate recipient or else will check for the next scheduled query. | 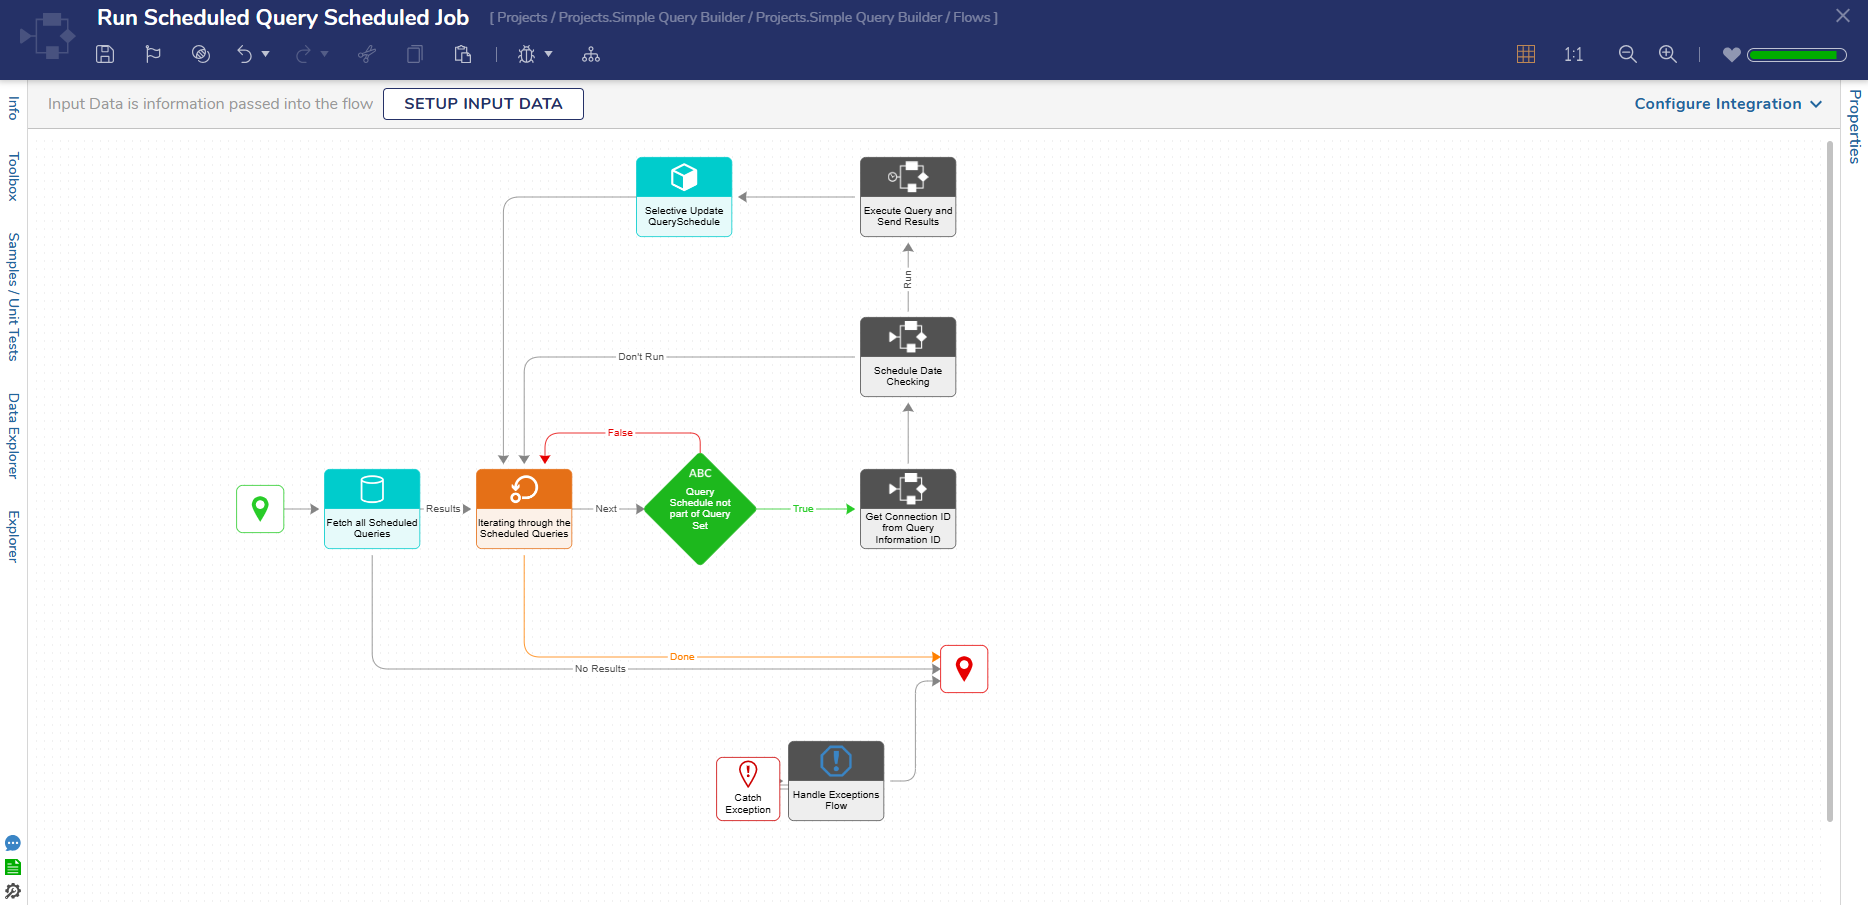 |
| Generate Query File Flow | This Flow runs as a User Action on a Query Group. This action enables Users to generate a text file of a query and download it. A Form will populate with all queries from the Query Group and Users can select a query from the list. If the selected query has where clauses within it, another Form will populate, allowing Users to change values in the where clauses as needed. After changes are completed, Users can download the query as a text file. | 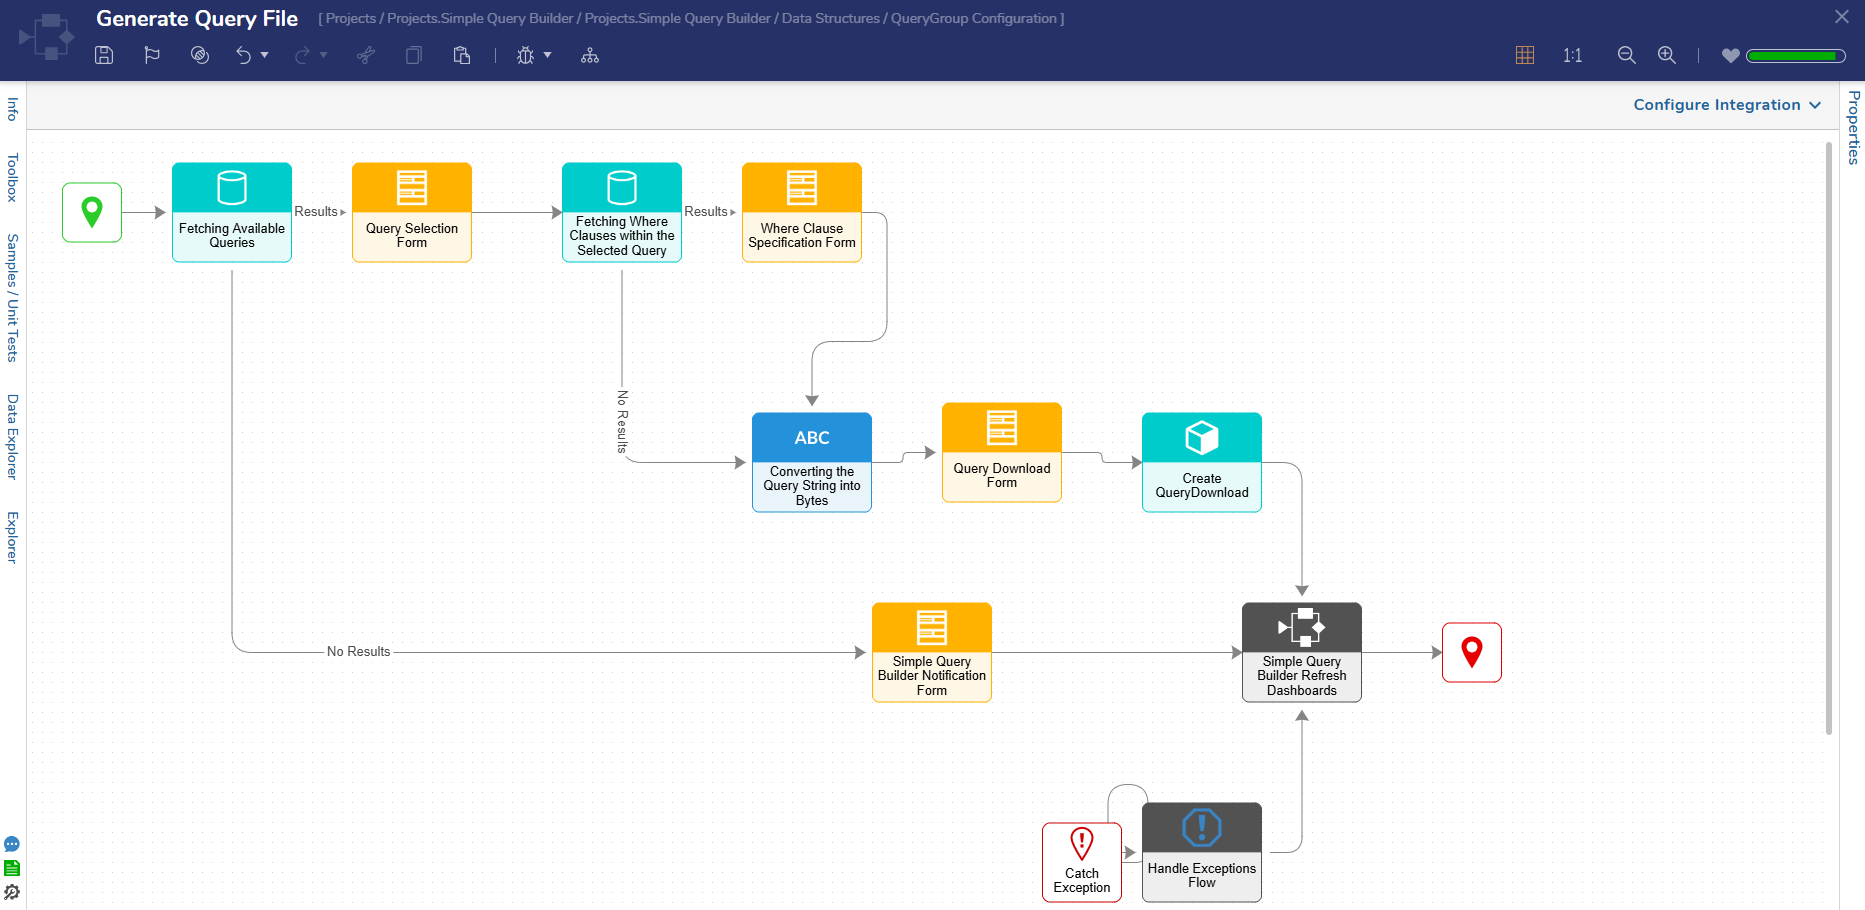 |
| Create Query Set Flow | This Flow runs as a User Action on a Query Group. This action presents a Form to Users, allowing them to specify the Query Set and Table Names. Users can then add Queries and specify whether the default or query specific where clauses need to be used. Once the queries are added the Query Set will be created. | 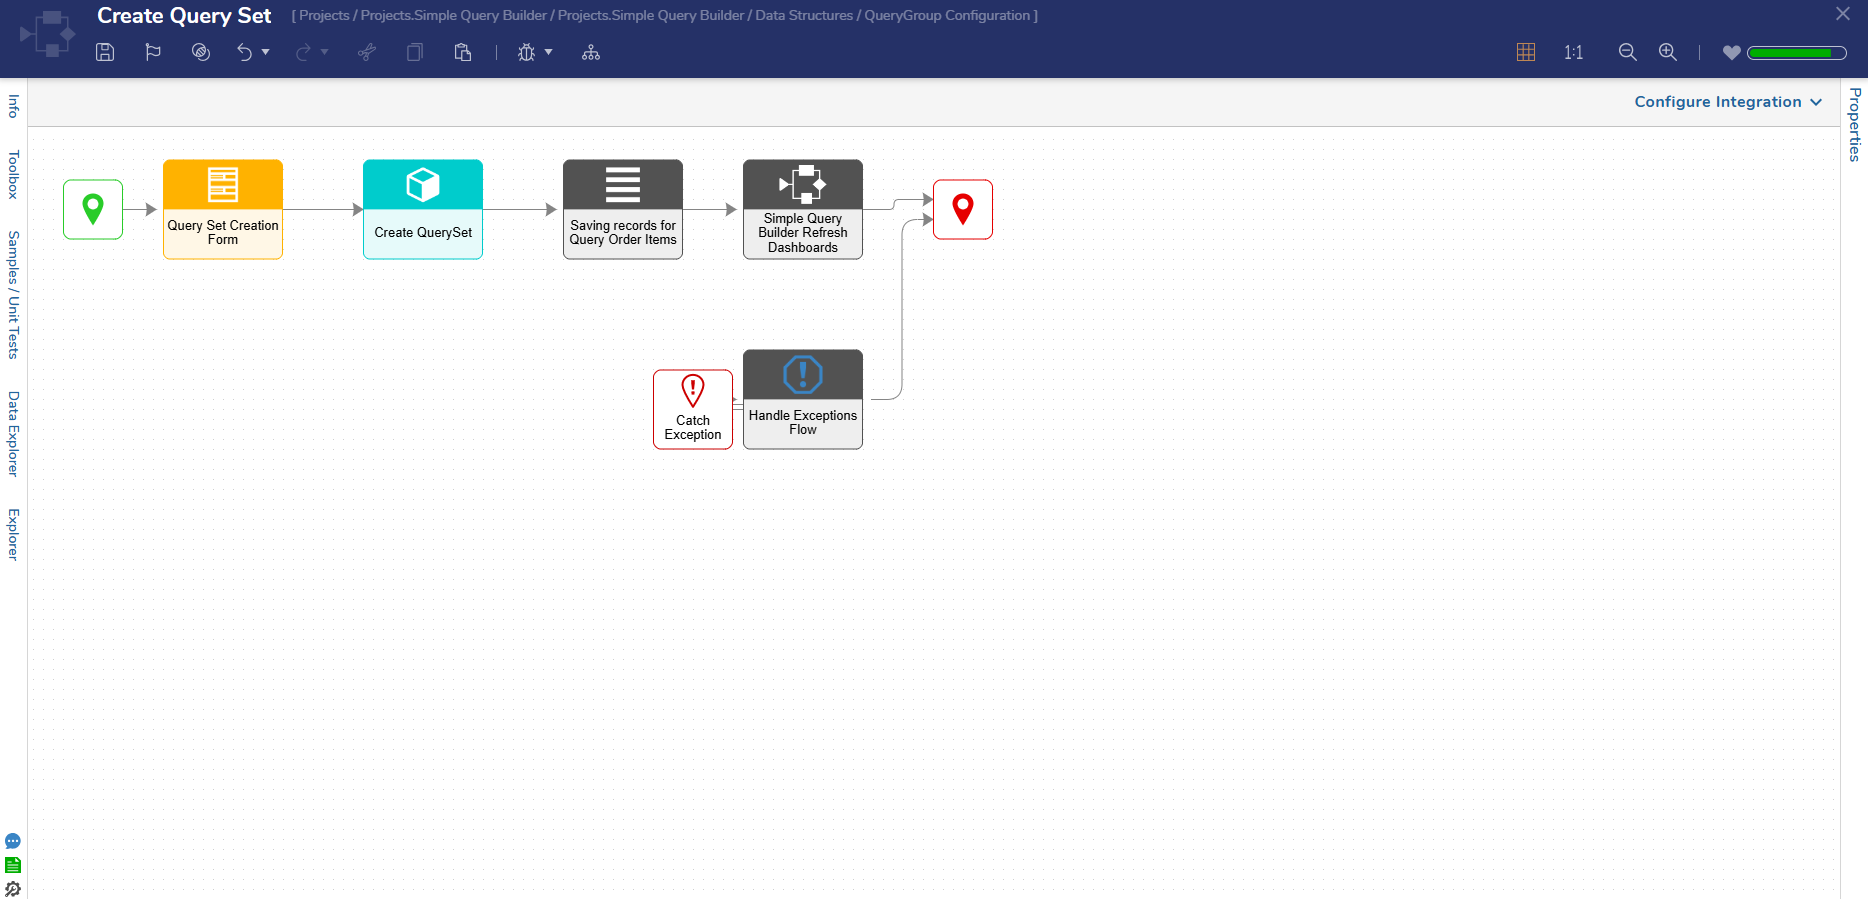 |
| Create Query Set Schedule Flow | This Flow runs as a User Action on the Query Group. Using this action will present a Form to Users, allowing them to select a Query Set, input schedule details, and provide the recipient's email address. After this information is added and the Create button is clicked, if queries added to the Query Set at the time of creation have where clauses and Users have asked for these values to be specified, the Where Clause Specification Form will be displayed. | 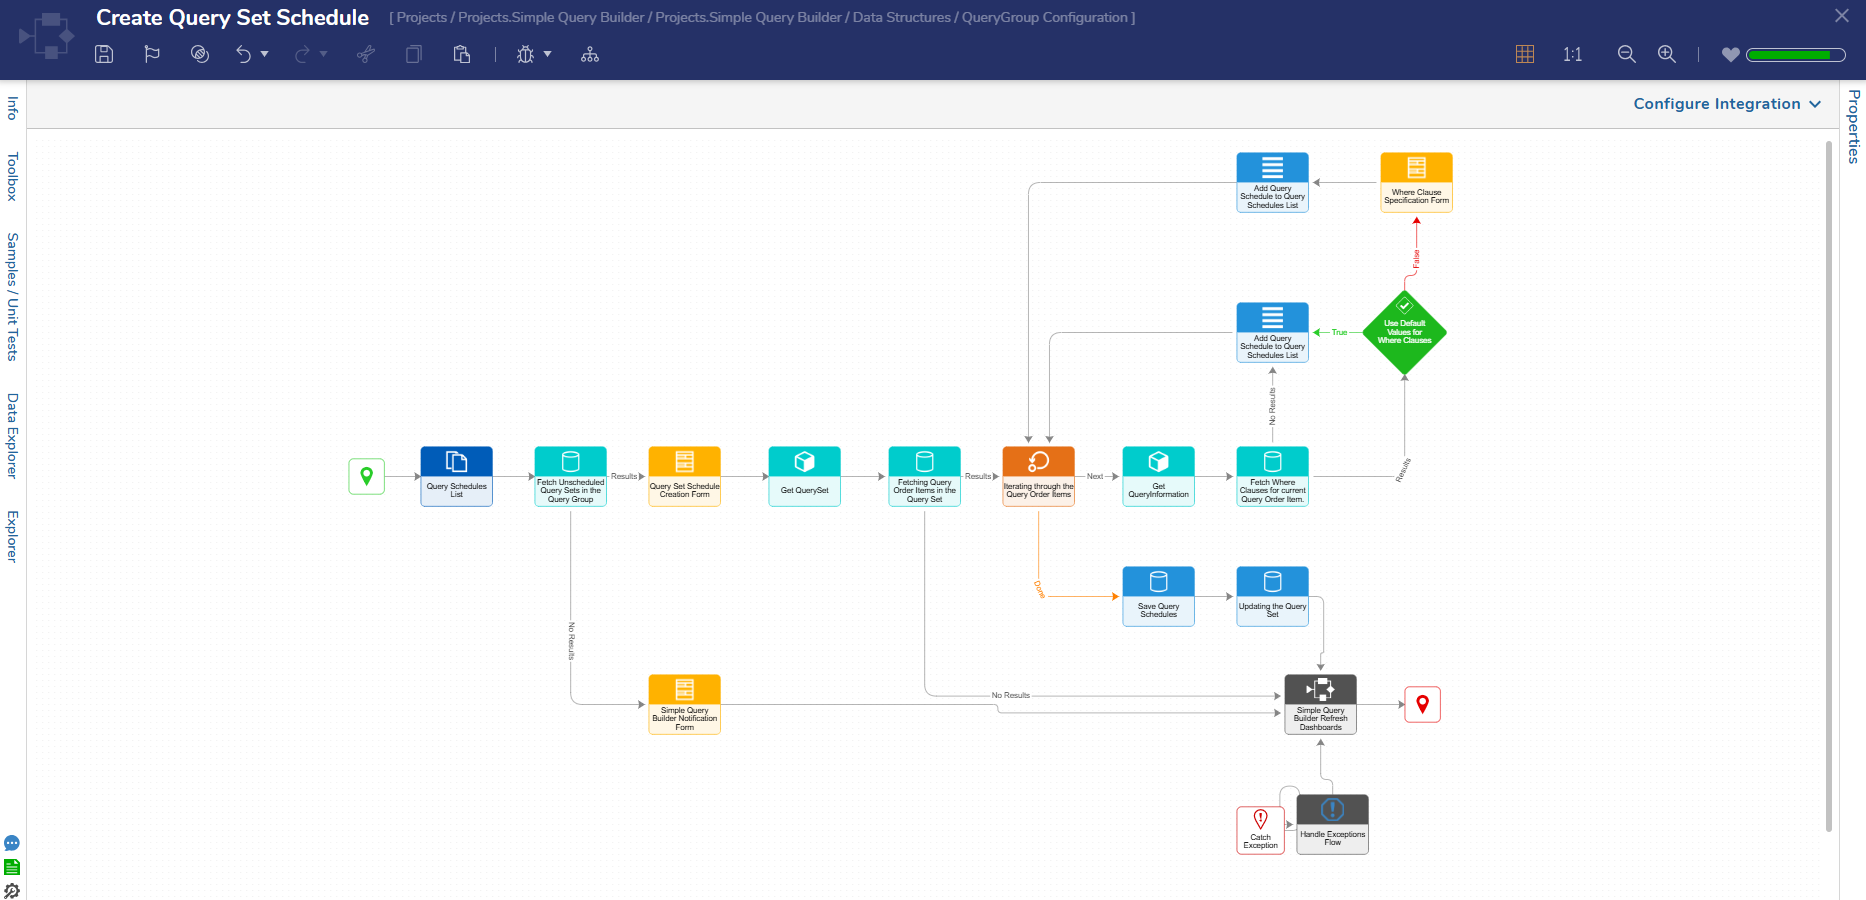 |
| Run Scheduled Query Set Scheduled Job Flow | This Flow runs as a Scheduled Job and is executed on a daily basis. It fetches all scheduled Query Sets, iterates through each one, and then checks whether the Query Set needs to be executed. If needed, the Query Set will be executed,, and results will be delivered to the specified recipients. | 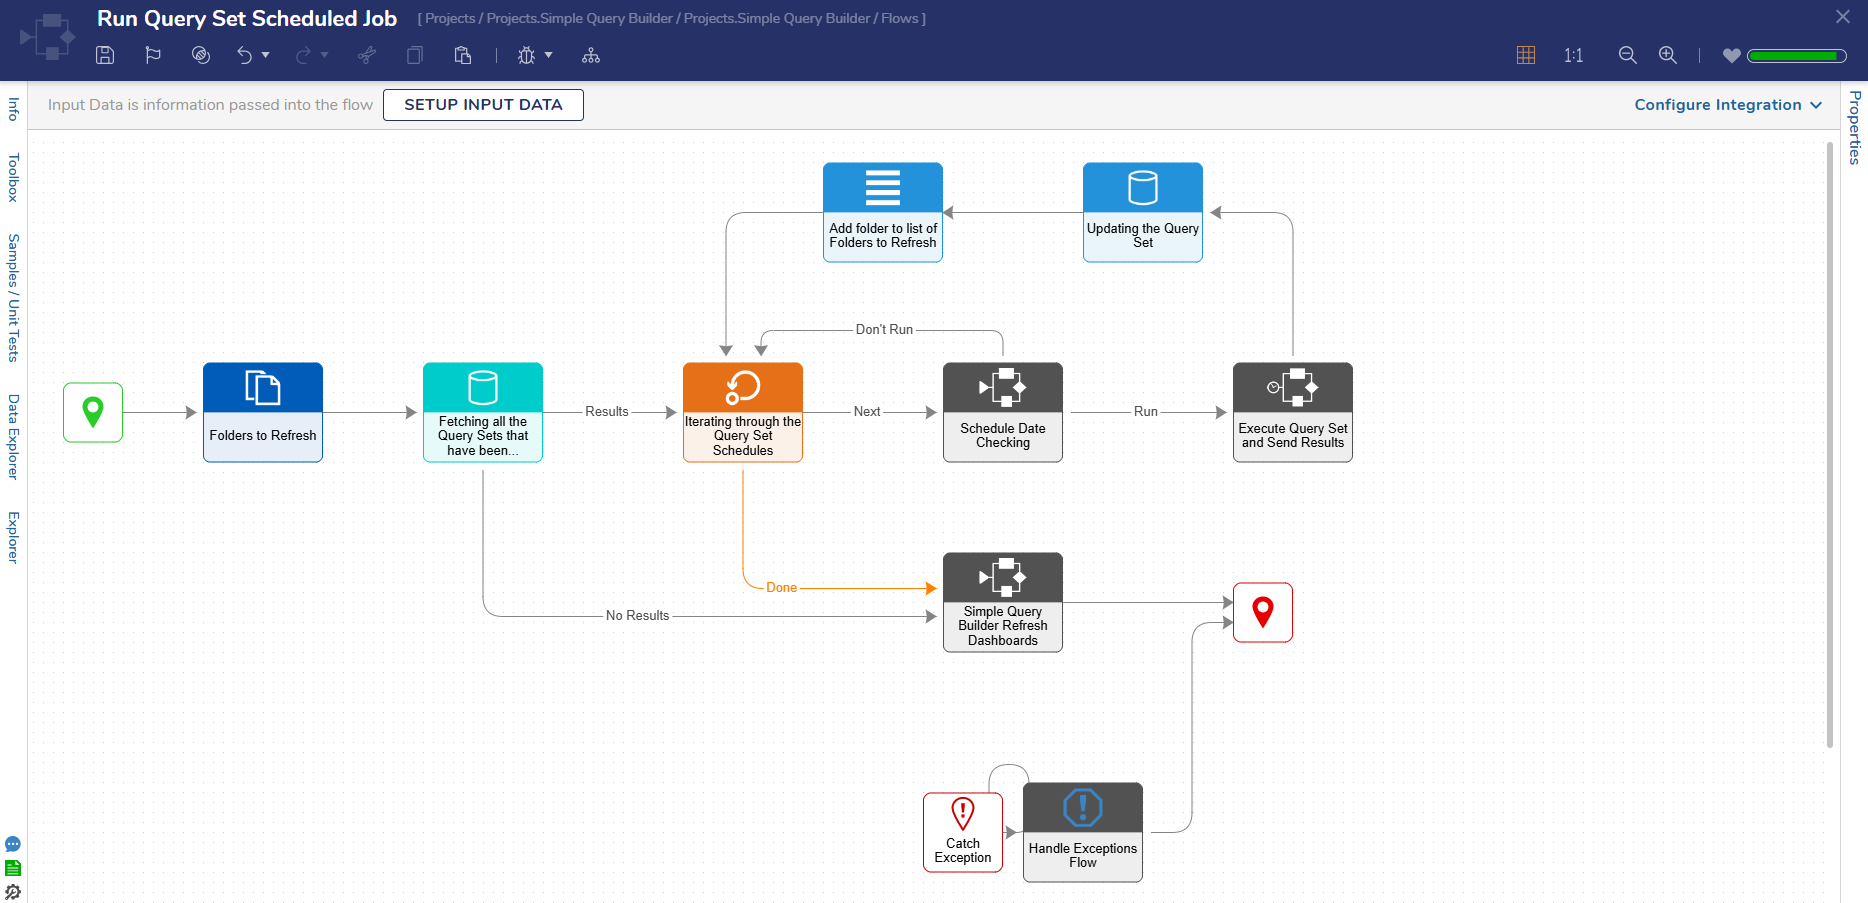 |
| Execute Query Set and Send Results Flow | This Flow runs as a Subflow in the Run Scheduled Query Set Scheduled Job Flow. It takes in the Query Set ID and Query Set Name as Inputs and fetches the Query Schedules associated to the Query Set, iterates through the list, and then executes these queries, adding the results of each query into the Query Results Excel file. If an error occurs while running the query, an error message will be added to the Excel sheet as well. | 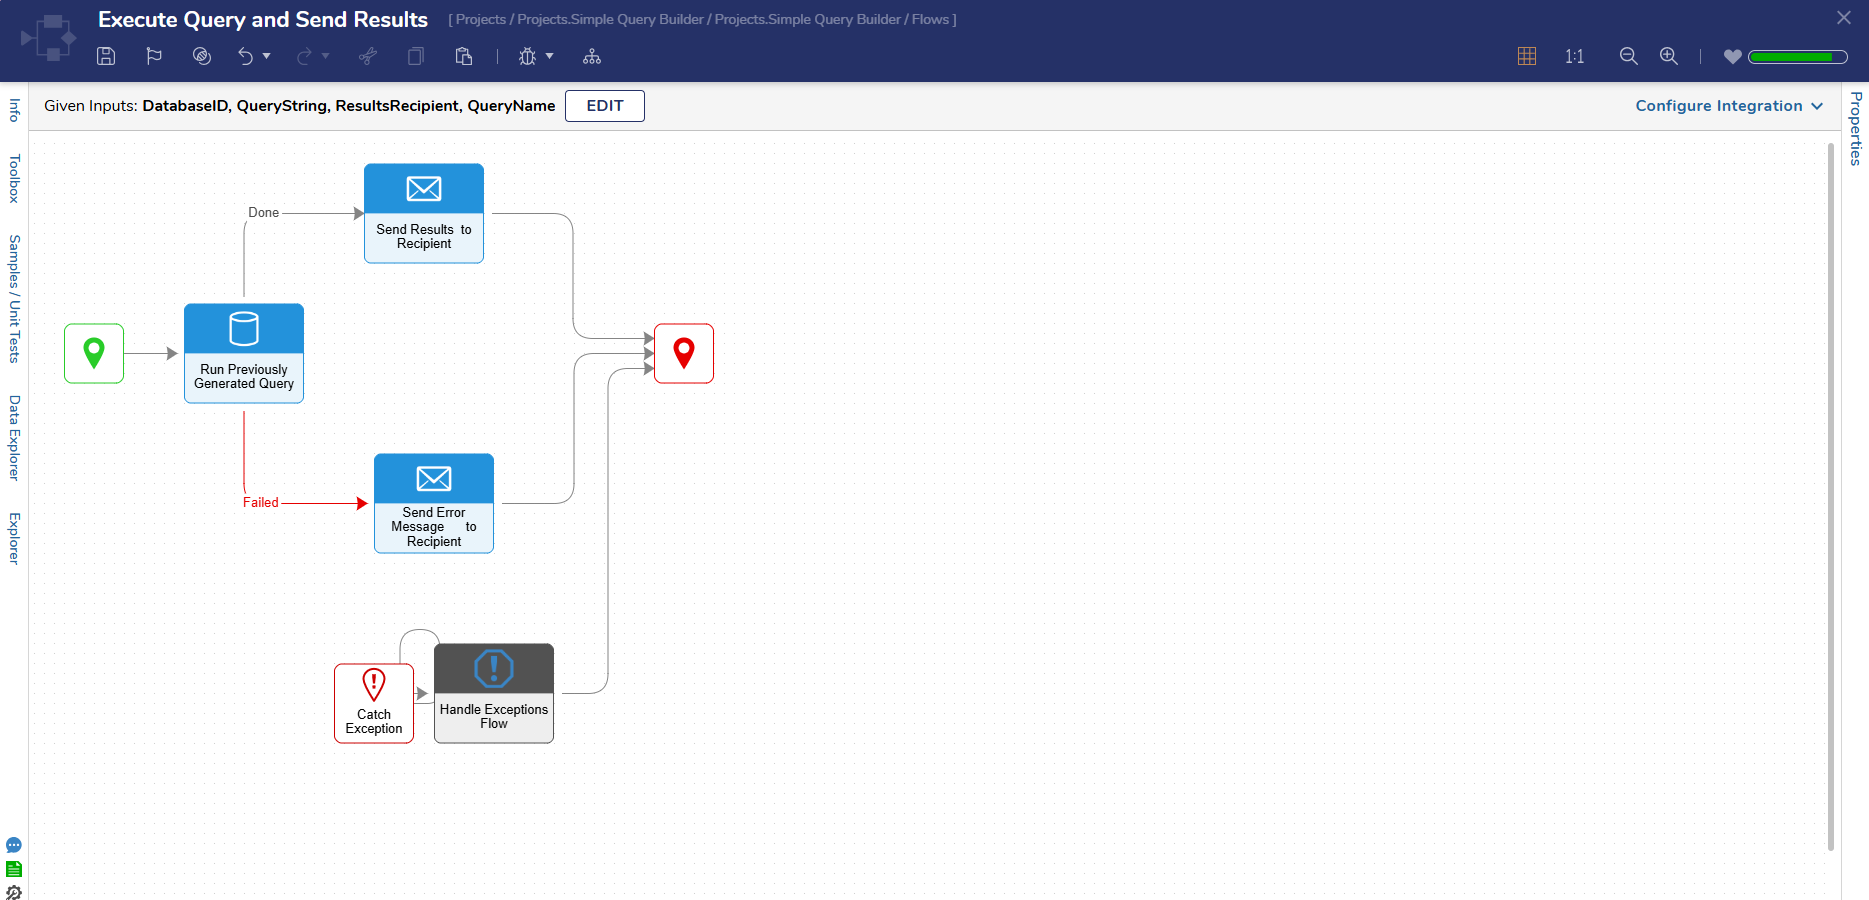 |
Dashboards & Pages
This Project contains two Dashboards:
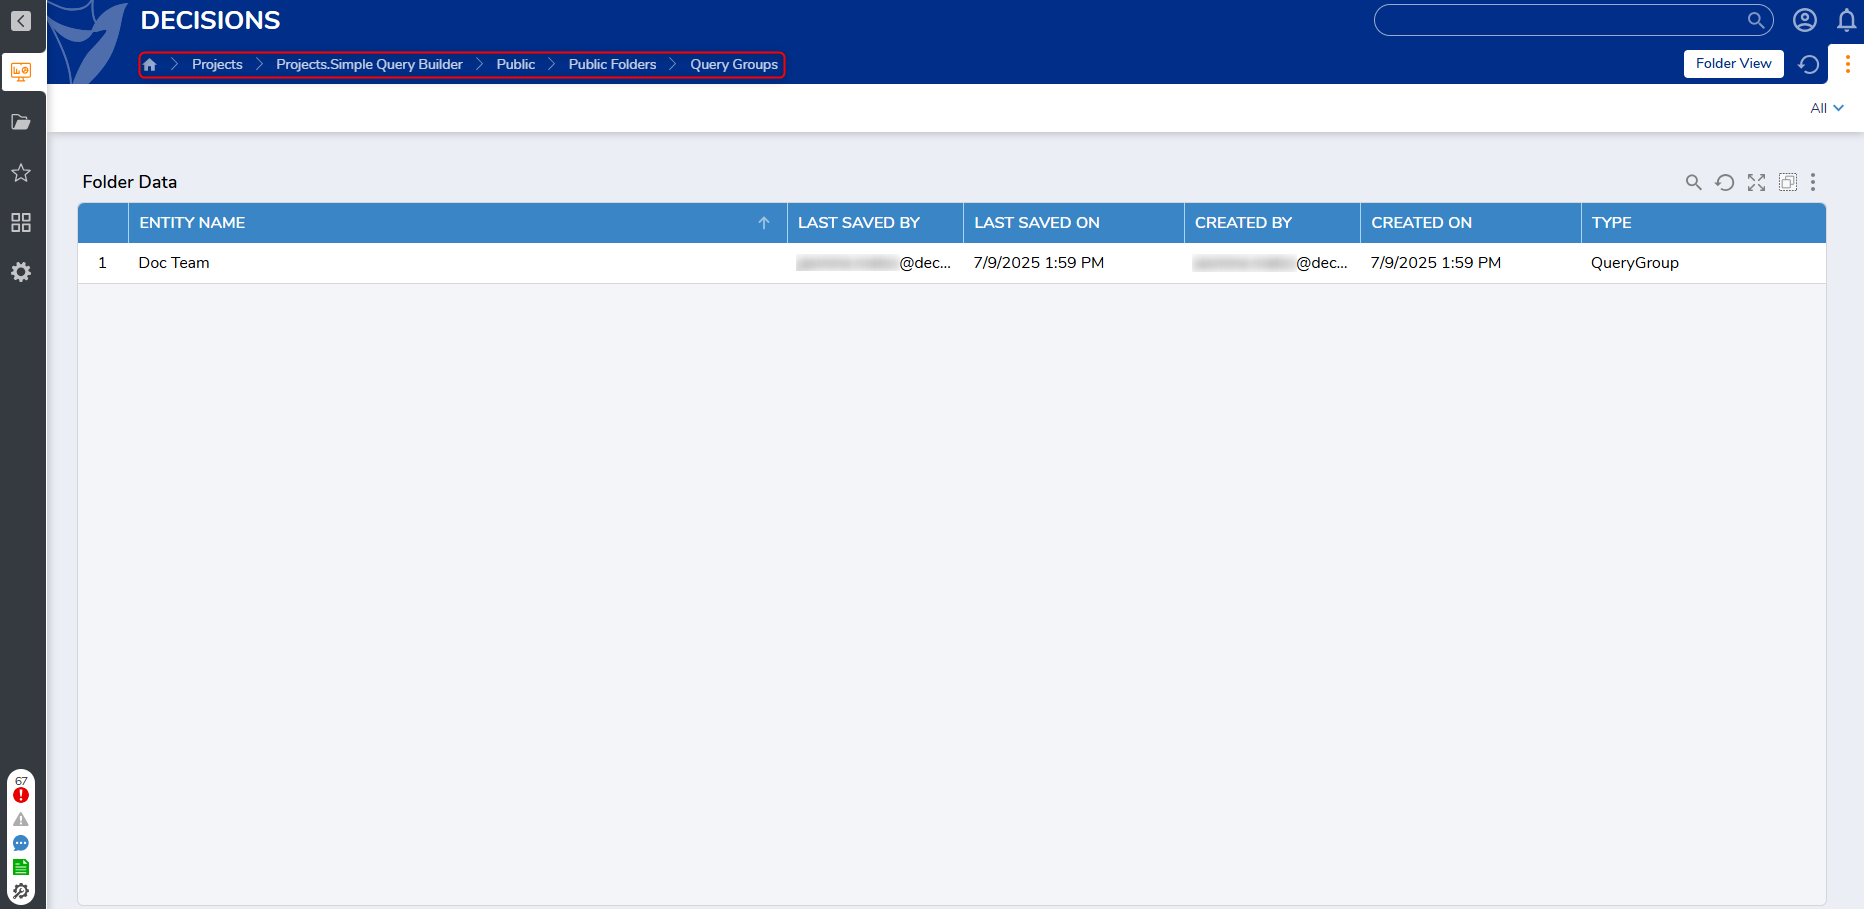
Query Groups
This Dashboard displays a single page of Folder data for all created Query Groups, organized by:
- Entity Name
- Last Saved By
- Last Saved On
- Created By
- Created On
- Type
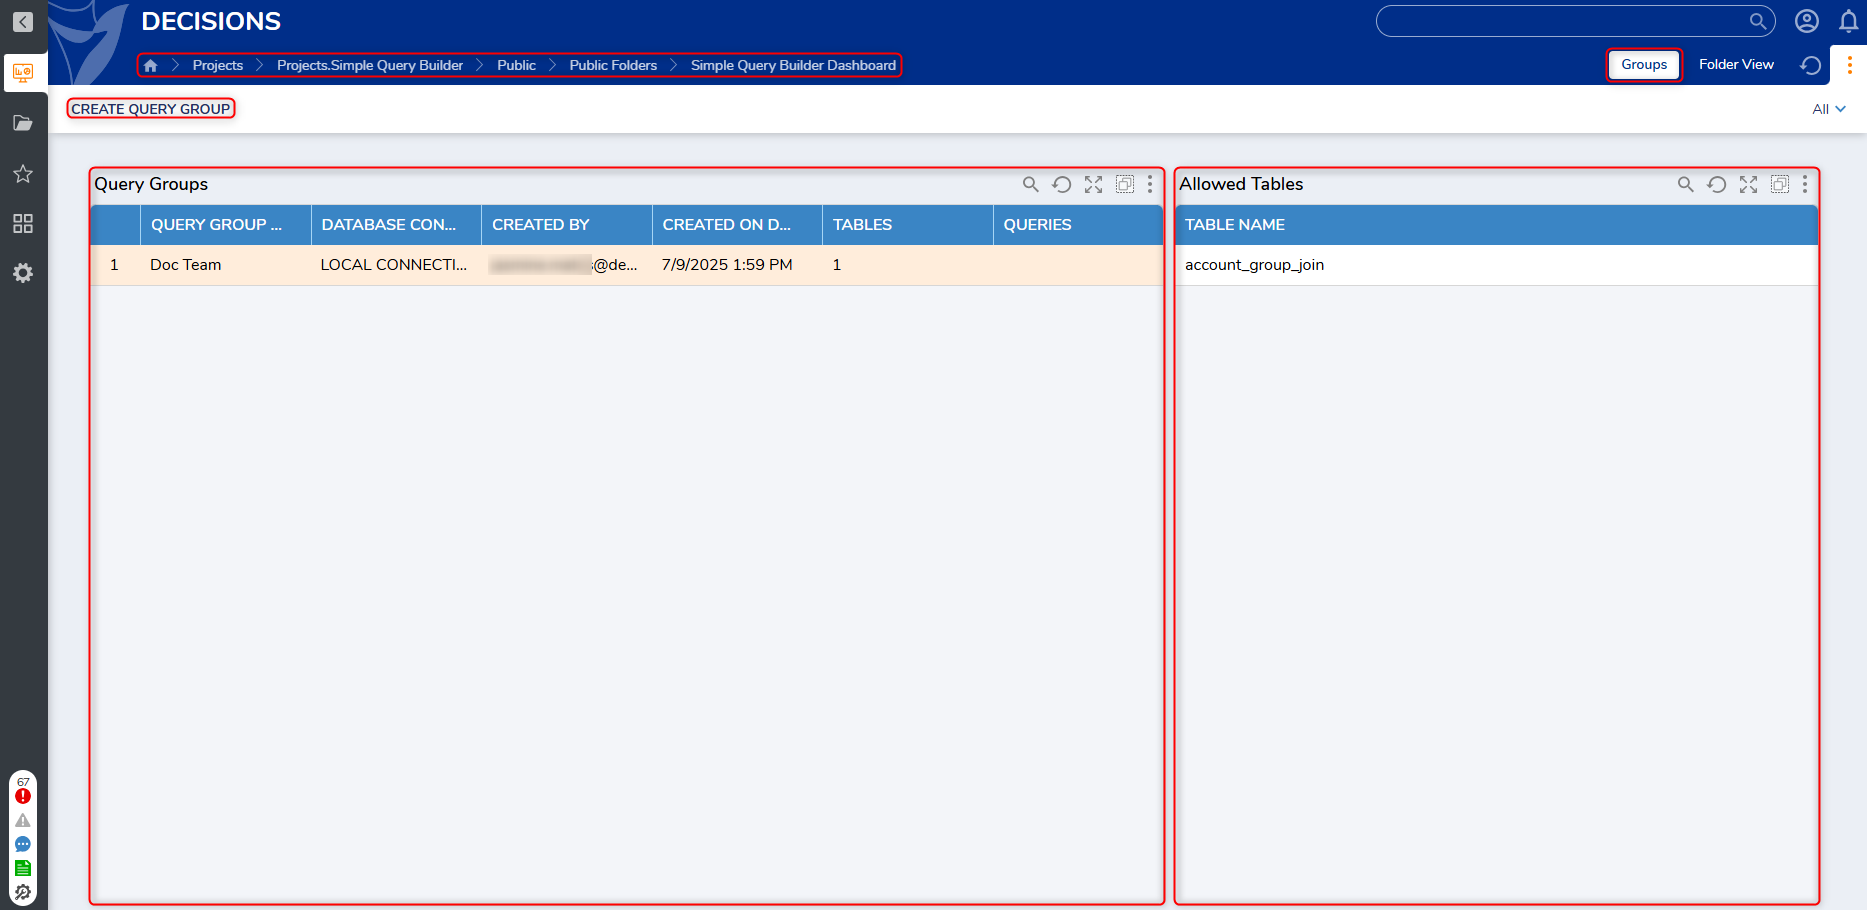
Simple Query Builder
This Dashboard displayed two Reports: Query Groups and Allowed Tables. Query Groups displays all created Query Groups, and Allowed Tables displays all associated Tables. Users can also create a new Query Group by selecting the Create Query Group button.
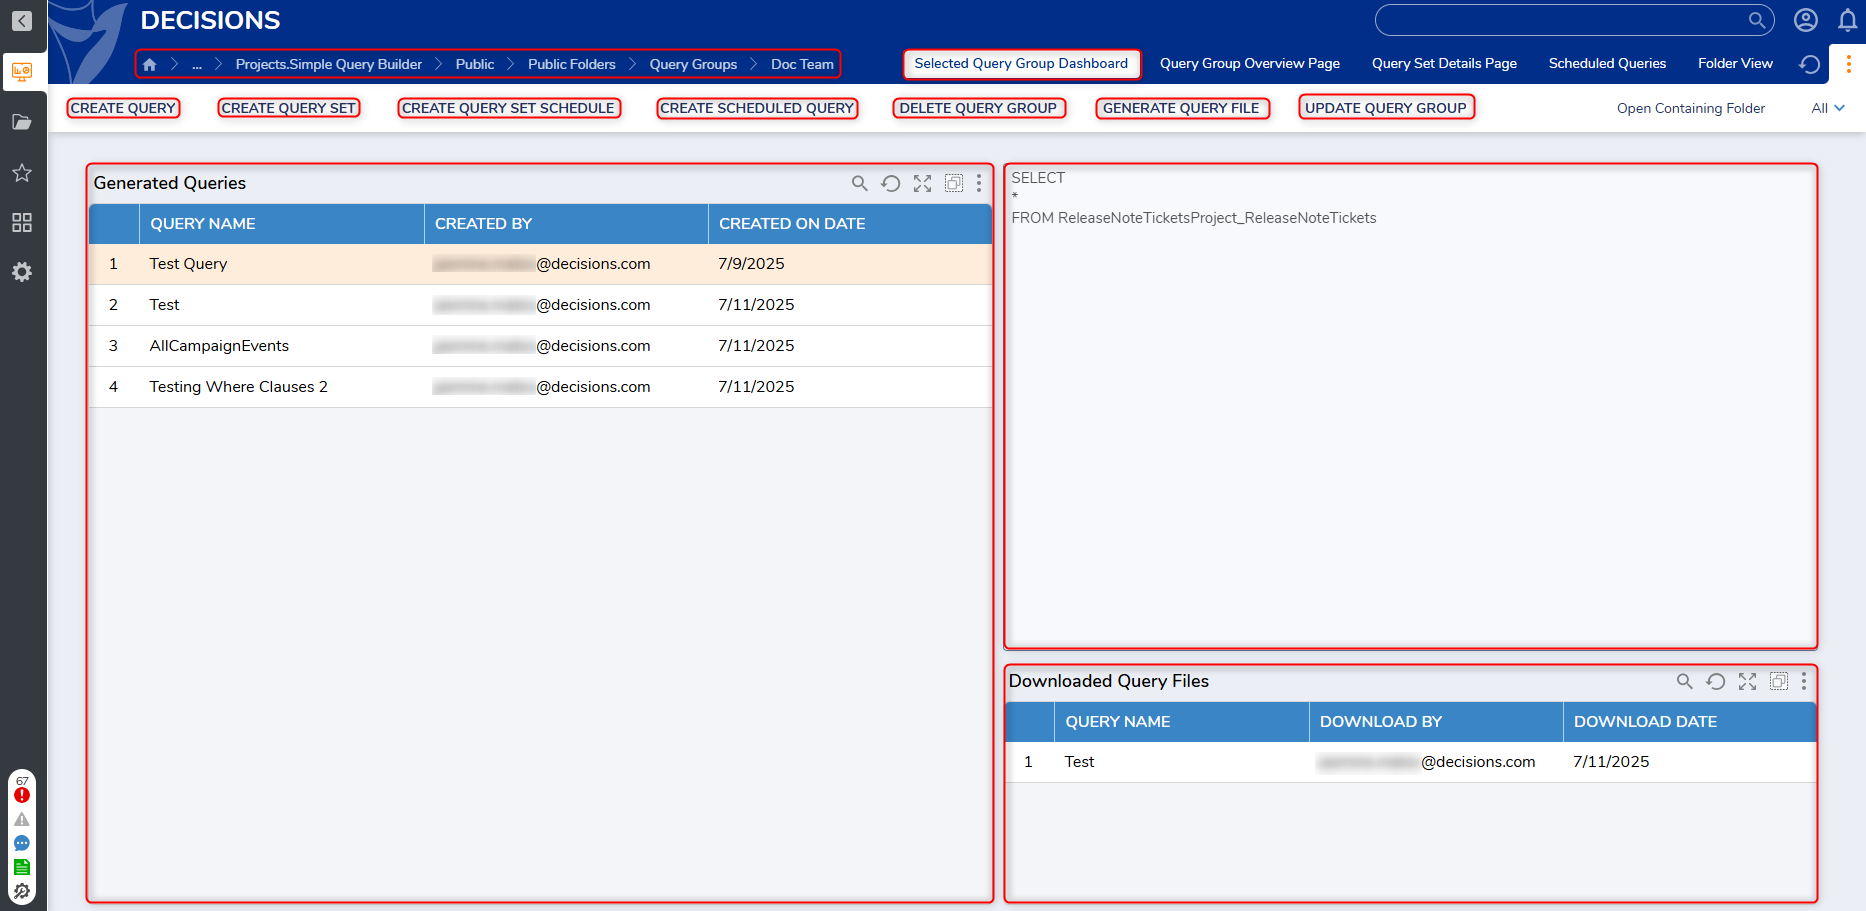
Selected Query Group Dashboard
Clicking on a Query Group navigates Users to the Selected Query Group Dashboard.
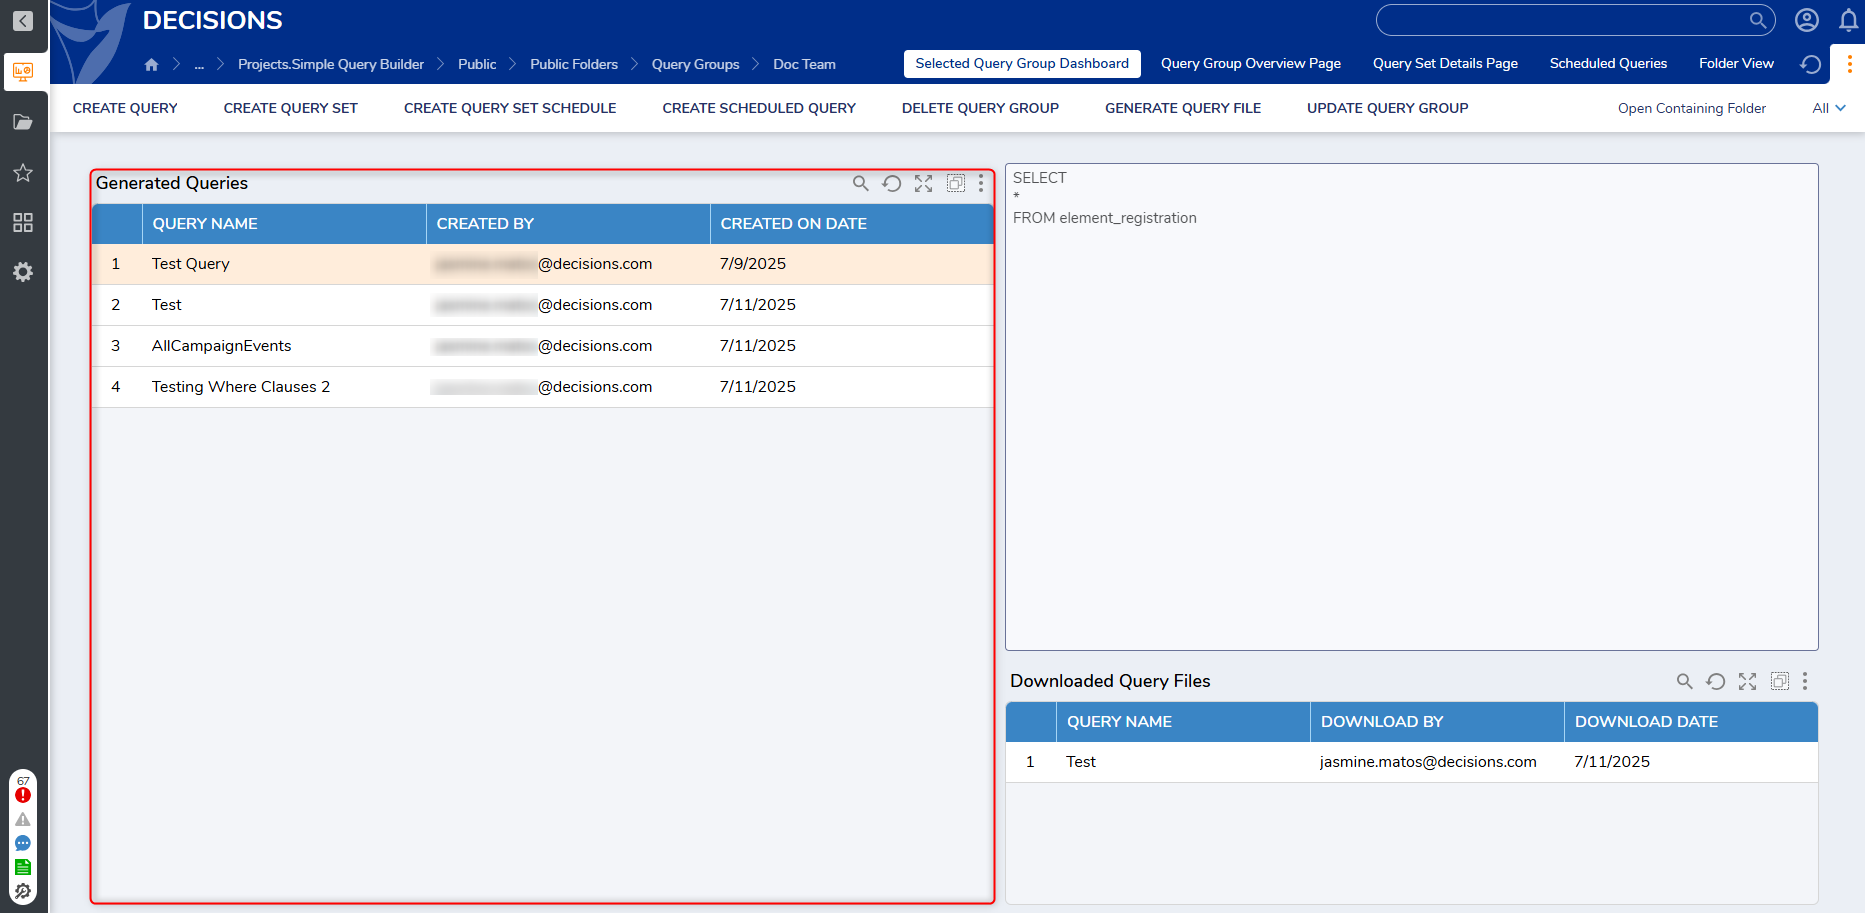
- The Selected Query Group Dashboard Page displays a Generated Queries Report, organized by:
- Query Name
- Created By
- Created on Date
- Selecting an individual query will display the query on the right-hand side of the Dashboard.
- The Dashboard will also display a list of downloaded query files, and enables Users to perform the following actions:
- Create Query
- Create Query Set
- Create Query Set Schedule
- Delete Query Group
- Generate Query File
- Update Query Group
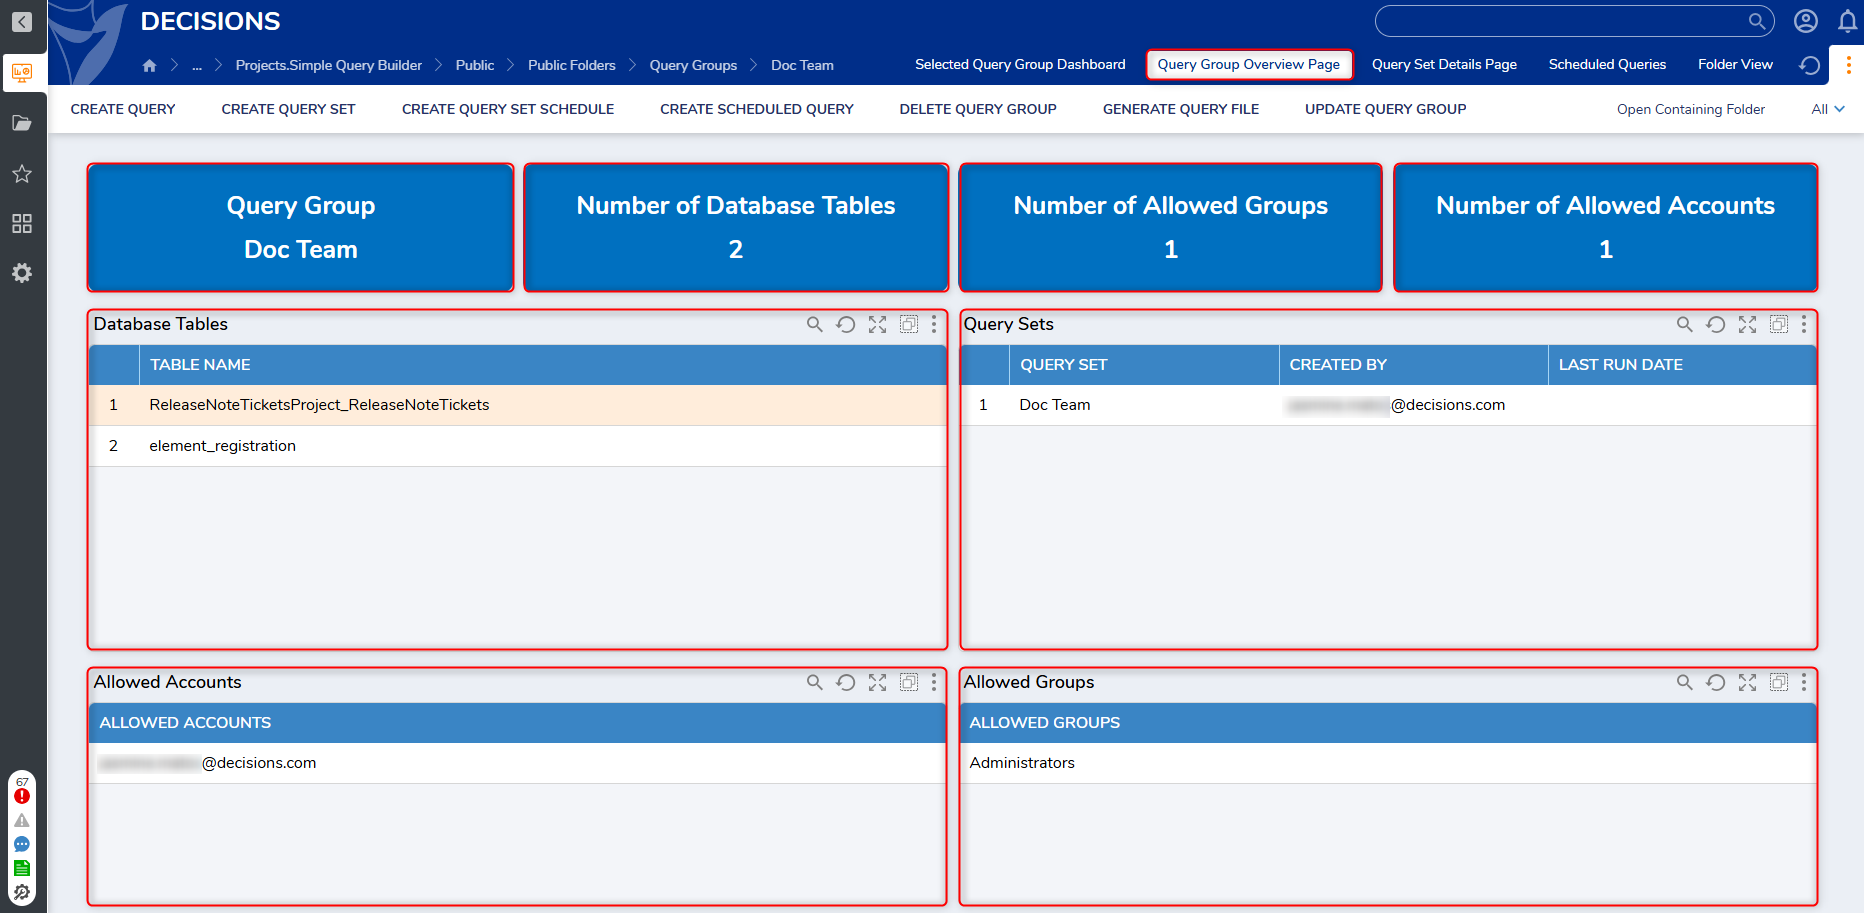
Query Group Overview Page
This Page displays an Overview of the selected Query Group. There are four tiles at the top of the Page that display the following details:
- Query Group Name
- Number of Database Tables
- Number of Allowed Groups
- Number of Allowed Accounts
This page contains the same actions available on the previous Page.
Query Set Details Page
This Page lists of Query Sets created within a Query Group. Five tiles at the top of the Page display a count for the following categories:
- Query Group Name
- Number of Queries
- Number of Query Sets
- Last Query Set Ran
- Last Run Date
This Page contains the same actions available on the previous Page.
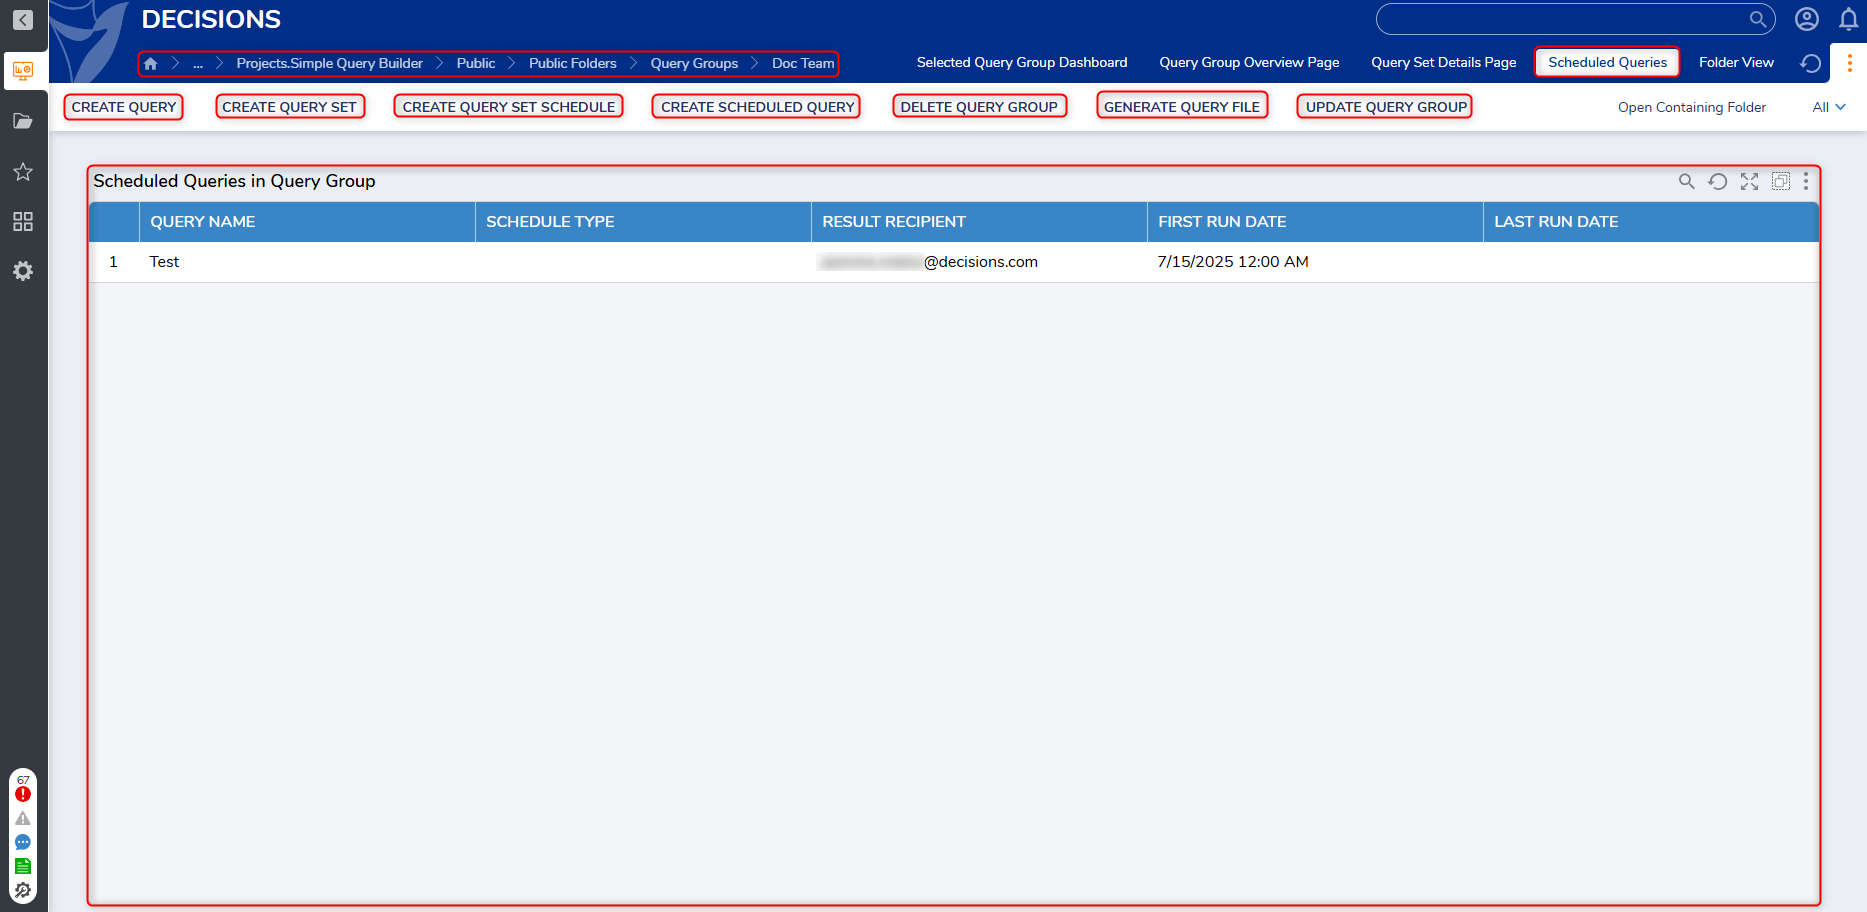
Scheduled Queries
This Page displays all created Scheduled Queries in the selected Query Group, organized by:
- Query Name
- Schedule Type (if applicable)
- Result Recipient
- First Run Date
- Last Run Date
This Page also contains the same actions available on the previous Page.
Utilizing the Simple Query Builder
Creating a Query Group
- To create a Query Group, navigate to the Simple Query Builder Dashboard and select the Create Query Group action on the left-hand side of the Dashboard.
- This action is only available to Users in the Simple Query Builder Admins Group.
- This action is only available to Users in the Simple Query Builder Admins Group.
- This action will display the Query Group Creation Form. Users can fill out the field to provide a Group Name, Database Connection, select Allowed Tables, select Allowed Groups, and select Allowed Accounts.
Once all the fields have been completed, click Continue to save the changes and create the new Query group.
Updating a Query Group
- To update a Query Group, right-click on a desired Query Group and select Update Query Group.
- The Update Query Group action is only visible to Users in the Simple Query Builder Admins Group.
- This action will display the Update Query Group Form. This Form will display all previously entered details for the selected Query Group, excluding the Database Connection.
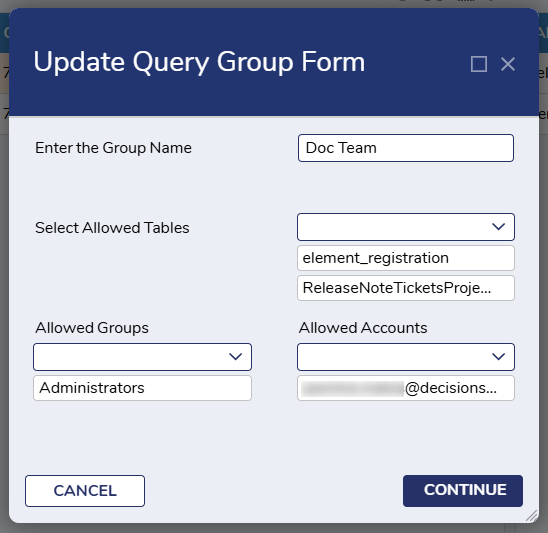
- After making any necessary changes, click Continue to update the Query Group.
Deleting a Query Group
- To delete a Query Group, right-click on the selected query and select Delete Query.
- This action will only be available to the creator of the query.
- This action will display the Query Group Deletion Form that will confirm the Group's deletion.
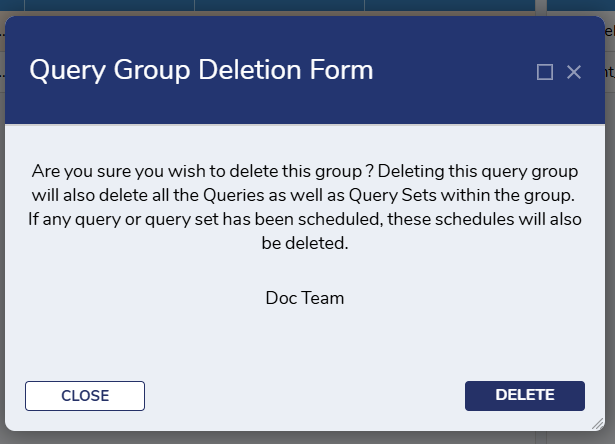
- After confirming the Query Group should be deleted, click Delete to remove the Query Group.
View Query Results
- To view the results of a Query, click on the desired Query Group the Query resides. This will navigate Users to a Report of all created queries in the selected Query Group.
- From here, right-click on the desired query and click View Query Results.
- This action will present Users with the Query Results Form.
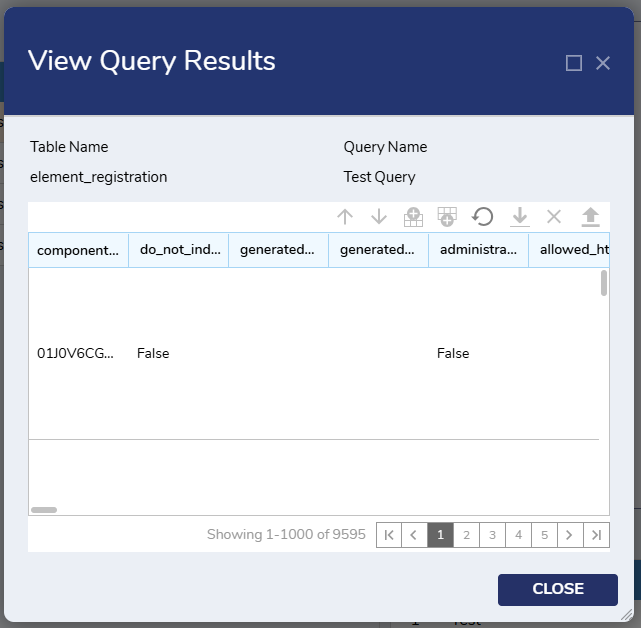
- This action will present Users with the Query Results Form.
Create Scheduled Query
- To create a Scheduled Query, click the desired Query Group and select the Create Scheduled Query action at the top of the Page.
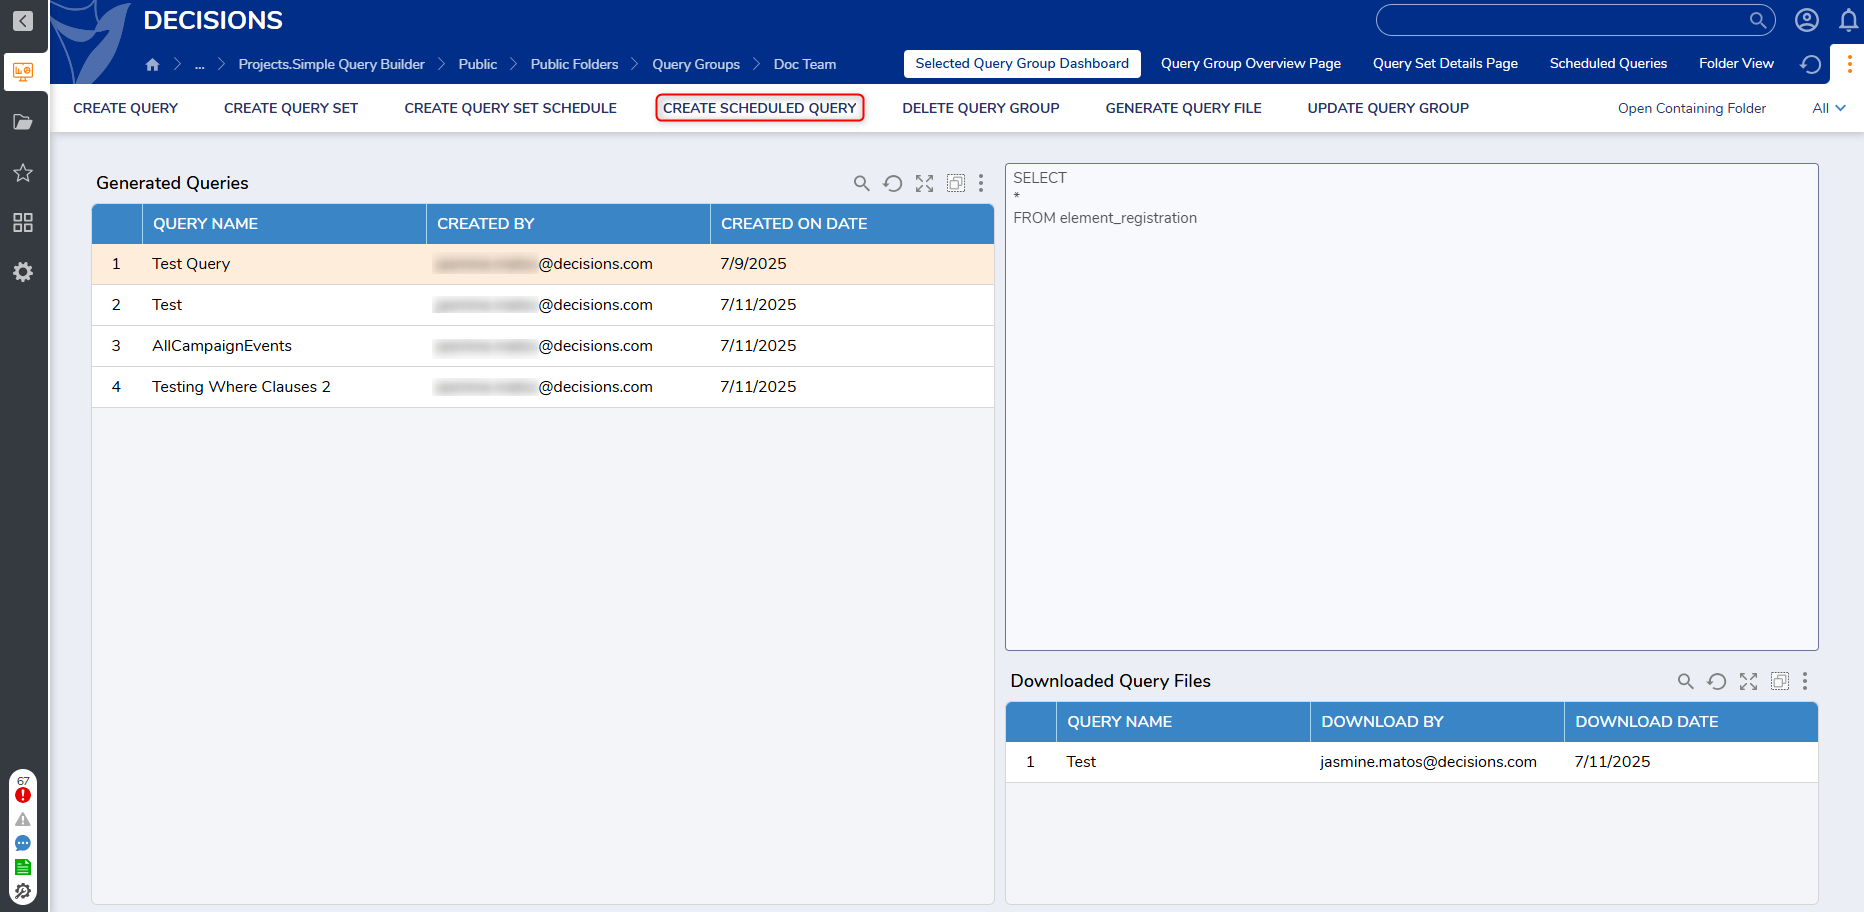
- Users can also right-click on the Query Group to access the same action.
- This action will populate the Query Schedule Creation Form.
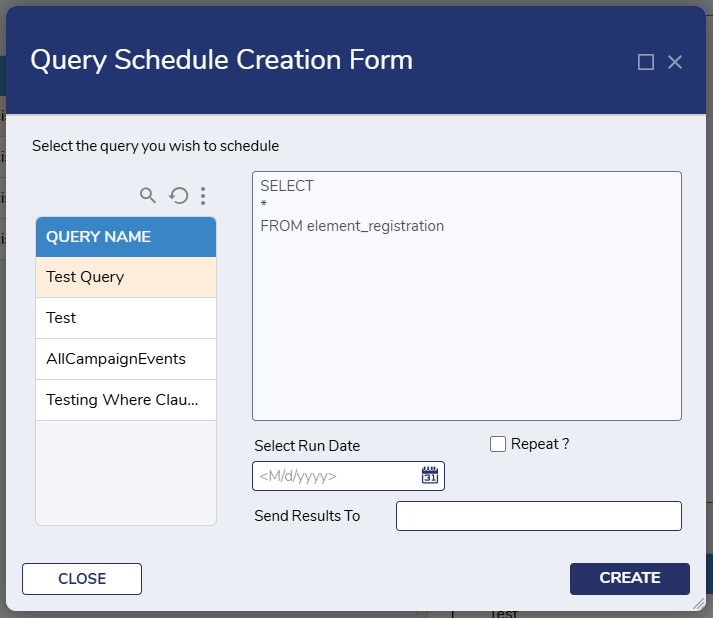
- The left-hand side of the Form will display all queries available in the selected Query Group. Select a query from the list that will run on schedule and input the following details:
- Select Run Date
- Repeat? (True or False)
- Send Results To
- After all the Data has been inputted, select Create. If the selected query has where clauses within it, the Where Clause Specification Form would be displayed. Users can change the provided values here if necessary.
- The left-hand side of the Form will display all queries available in the selected Query Group. Select a query from the list that will run on schedule and input the following details:
- Once where clauses are specified, click Continue to create the Scheduled Query.
Edit Scheduled Query
- To update a Scheduled Query, select the desired Query Group in which the Scheduled Query has been created in and navigate to the Scheduled Queries Page.
- This Page will display all Scheduled Queriesthat have been created in the Query Group.
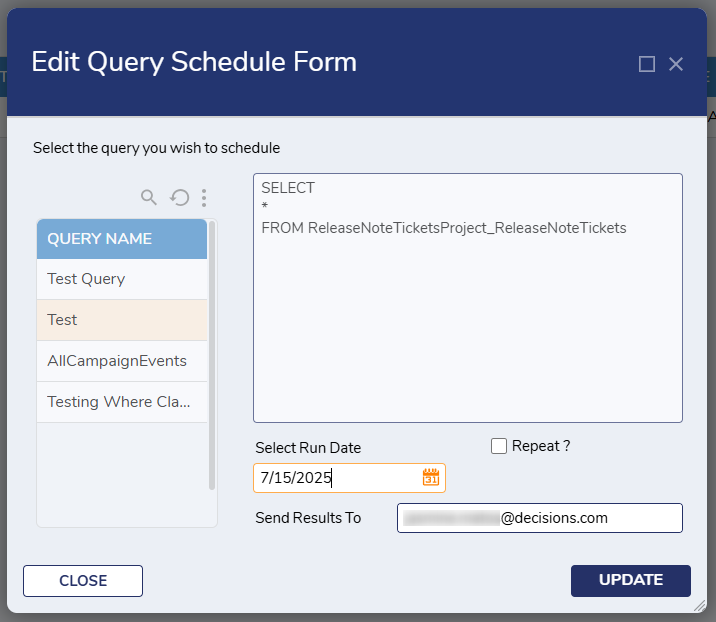
- Right-click on the desired Scheduled Query and select Edit Scheduled Query.
- This action will display the Edit Query Schedule Form.
Delete Scheduled Query
- To delete a Scheduled Query, click on the desired Query Group and navigate to the Scheduled Queries Page.
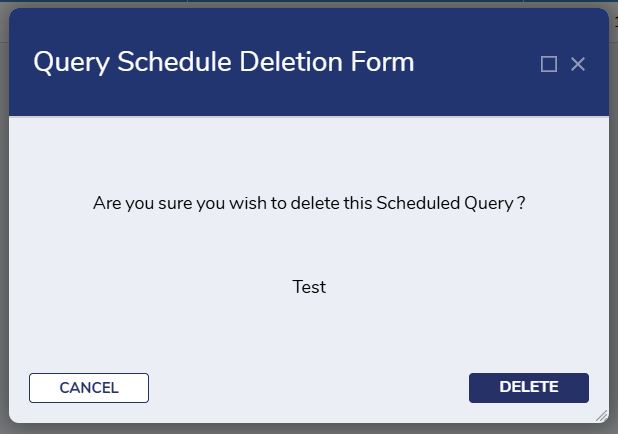
- From here, right-click on the desired Scheduled Query and select Delete Scheduled Query.
- This action will display the Delete Scheduled Query Form to confirm deletion. Select Delete to remove the Scheduled Query.
Create Query Set
- To create a Query Set, right-click on the desired Query Group and select Create Query Set.
- This action will display the Create Query Set Form. Users can input details for the Query Set Name and select a Database Table from the Drop-down menu.
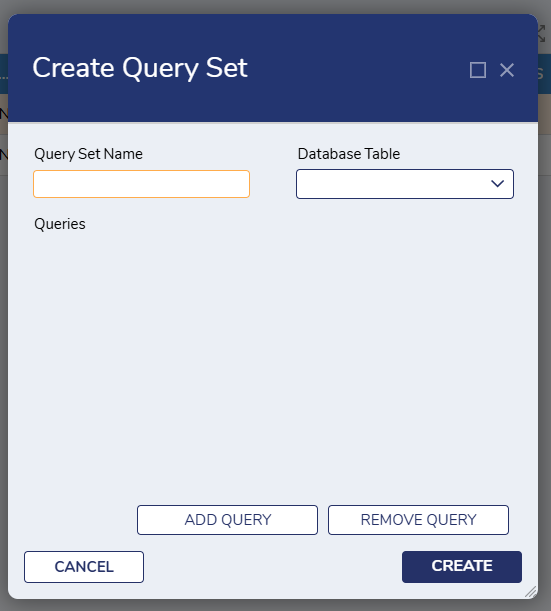
- Database Tables are added when a New Query Group is created, and new database tables can be added when updating a Query.
- Click the Add Query button. This action will display two fields:
- Order: Adding a number to this box will determine the order of the selected Query.
- Query: Users can select any of the Queries created within the associated Query Group from this Dropdown.

- If the selected query has where clauses within it, the check box Use Default Values for All Where Clauses will be displayed.
Check this box if the default values must be used, or else keep it unchecked. Values can be specified the values when the Query Set is scheduled.
This process should be provided for every additional query that is needed. Query Orders will be automatically adjusted.
Once the necessary queries have been added, select Create. The new Query Set will be created.
Editing a Query Set
- To update a Query Set, select the desired Query Set and navigate to the Query Set Details Page.
- From here, right-click on the desired Query Set from the Query Set Report and select Edit Query Set.
- This action will display the Edit Query Set Form with previously entered inputs. All details can be updated except for the Query Set Name.
- After making the necessary changes, select Update to update the Query Set.

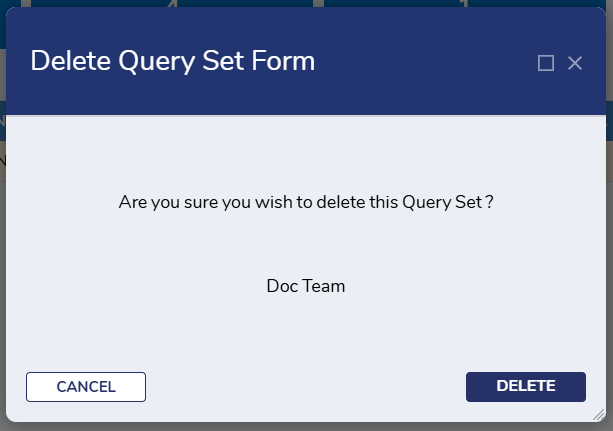
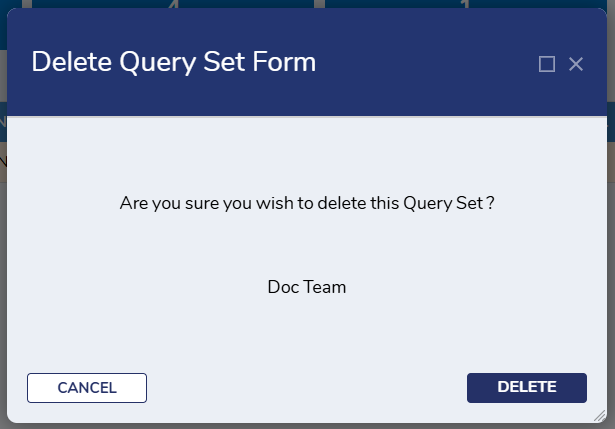
Deleting a Query Set
- To delete a Query Set. Right-click on the desired Query Set and select Delete Query Set.
- This action will display the Delete Query Set Form. Users can confirm deletion before selecting Delete to remove the Query Set.
- This action will display the Delete Query Set Form. Users can confirm deletion before selecting Delete to remove the Query Set.
Create Query Set Schedule
- To create a Query Set Schedule, right-click on the Query Group and select Create Query Set Schedule.
- This action will display the Create Query Set Schedule Form. From here, select the Query Set that will be scheduled and fill in the input fields.
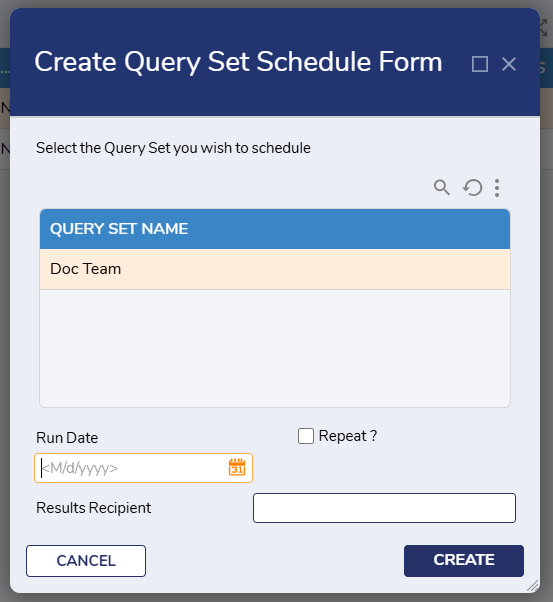
- This action will display the Create Query Set Schedule Form. From here, select the Query Set that will be scheduled and fill in the input fields.
- Once all details have been inputted, select Create to create the new Query Set Schedule.
Editing a Query Set Schedule
- To update a Query Set Schedule, select the Query Group where the desired Query Set Schedule is located. From here, navigate to the Query Set Details Page.
- Navigate to the Query Sets Report, right-click on the desired Query Set, and select Edit Query Set Schedule.
- This action will only display for Query Sets that have already been scheduled.
- This action will display the Edit Query Set Form, with previously inputted details. All fields can be updated except the selected Query Set.

- Once all changes have been made, click Update to update the Query Set Schedule.
Delete Query Set Schedule
- To delete a Query Set Schedule, right-click on the desired Query Set Schedule and select Delete Query Set Schedule.
- This action will only display for Query Sets that have already been scheduled.
- Once the action is clicked, the Delete Query Set Schedule Form will be presented to confirm deletion.
- Once action is confirmed, the Query Set Schedule will be deleted.
Generate Query File
To generate a Query as a text file, right-click on the desired Query Group and select Generate Query File.
- This action will prompt the Query Selection Form to display. The left-hand side of this Form will display all Queries available in the selected Query Group.
- Select the query that will be generated into a text file. Clicking on a query will display a preview of the selected query on the right-hand side of the Form.
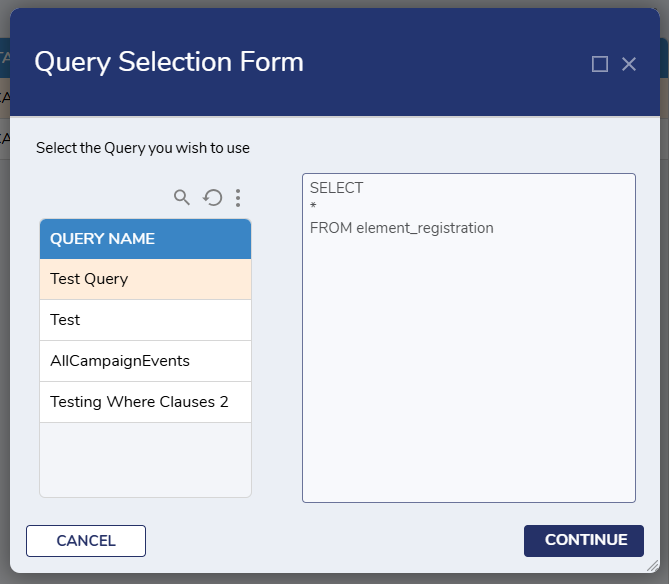
- Select the query that will be generated into a text file. Clicking on a query will display a preview of the selected query on the right-hand side of the Form.
- Once the query has been selected, click Continue to proceed.
- If the selected query has a where clause, the Where Clause Specification Form will be displayed. This enables Users to change values for the where clauses as needed.
- Once all values have been specified, Users can click Download File to download the selected query as a text file.