The Sighting Tracker is a tool to allow users to record sightings of whatever they want and upload pictures and a paired description/comment. Our internal use case is Customer Sightings, seeing a Decisions customer logo outside of work.
Prerequisites
- Users should have the Error Handling Accelerator installed before utilizing this Accelerator.
Configuration
Permissions
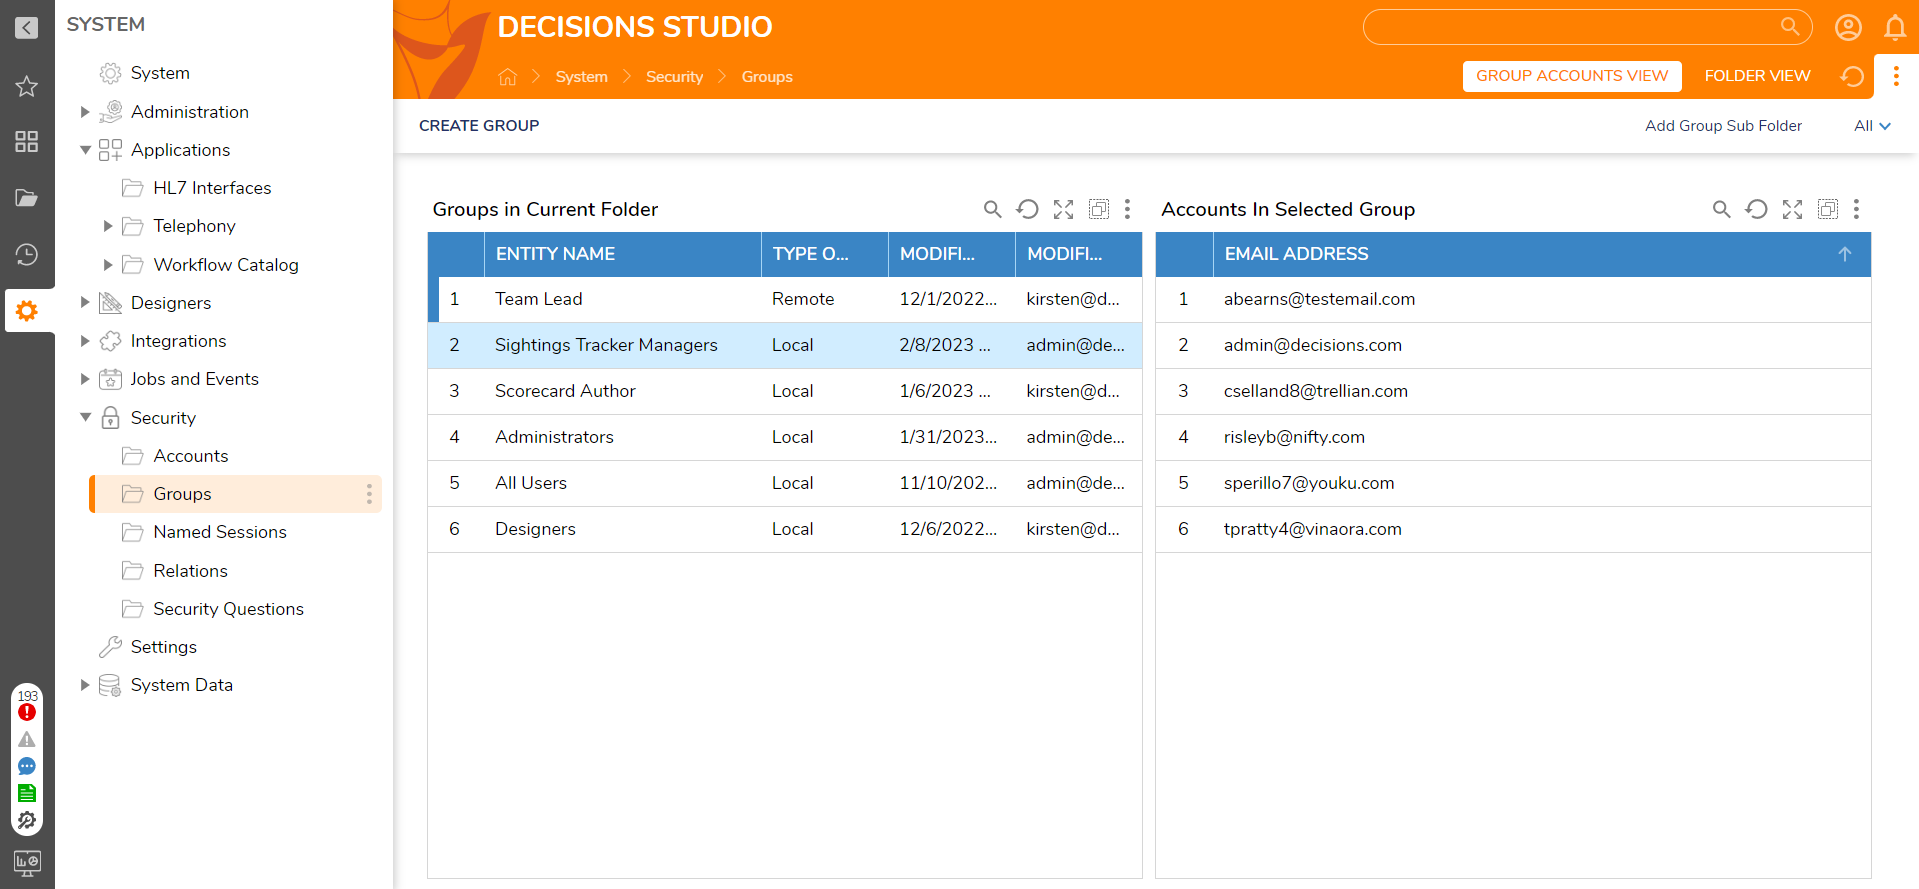
Sightings Tracker Managers
Any user or group that needs to maintain the available trackers and view their respective statistics needs to be added to this group. To set this up, the following steps need to be executed:
- Navigate to System> Security > Groups in the designer studio and locate Sightings Tracker Managers.
- Right-click on this group to show available actions:
- To add individual accounts to the group, right-click on Sightings Tracker Managers and select Add/Remove Accounts.
- To associate with another group, right-click on Sightings Tracker Managers and select Edit Group. Next, enable the Specify Linked Groups setting and add the desired groups with the Add button under the Linked Groups header.
Embedding the Form
This allows the Form to be used on an external Page. Follow the full article on Embedding Forms to achieve this on the primary Flow: Report New Sighting API Flow.
Run the Flow from a URL
Flows can be run using a URL. This can be accomplished on the Primary Flow, Report New Sighting API Flow. Follow the Running a Flow from a URL article to achieve this.
Sightings Tracker Overview Dashboard
This dashboard allows Sightings Tracker Managers to create and maintain sightings trackers available to their users.
The Sightings Trackers Overview can be located at any of the following locations:
- Open the Workflow Catalog and navigate to Sightings Tracker > Sightings Trackers in the User Portal
- Navigate to Sightings Tracker > Sightings Views > Sightings Trackers Overview in the Designer Studio.
Create Sightings Tracker
- Navigate to the Sightings Trackers Overview dashboard.
- Select the Creating a Sightings Tracker.
- Fill out the Form provided. Announce Sightings Flow and Sighting SubTypes need additional configuration.
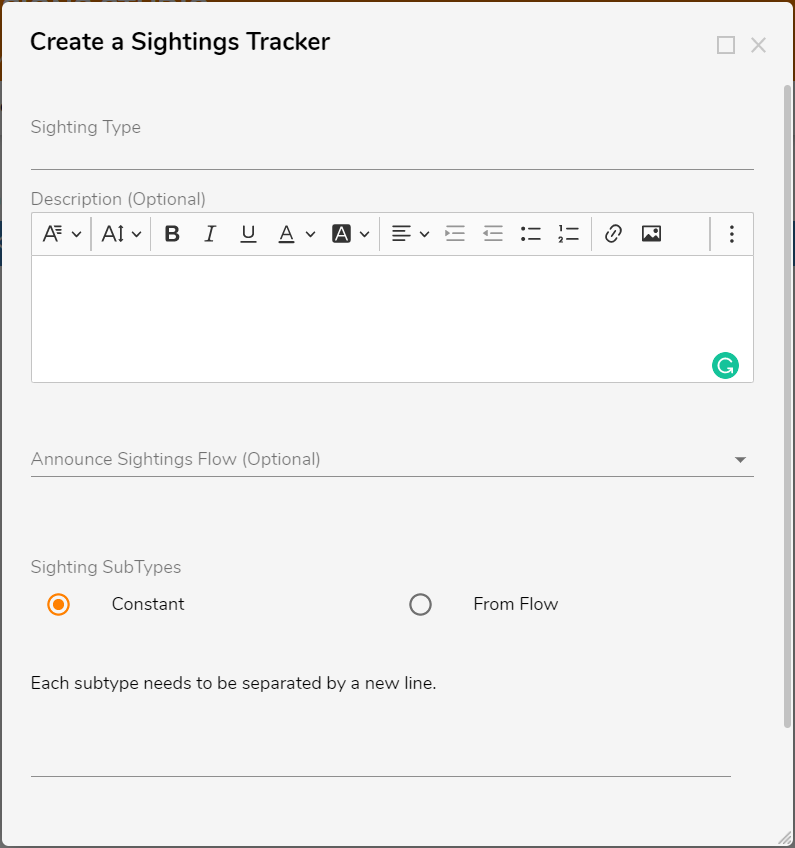
Announce Sightings Flow Options
This drop-down is controlled by a user-created list of Flows located in the following Folder in the Designer Studio: Sightings Tracker Announce Sightings Flows. Designers can copy the example Flow ([Example] Sightings Tracker Announcement Sample Flow) and update the logic inside of it to send custom-configured announcements. When creating a new Announce Sightings Flow, Designers must ensure that the Flow inputs and outputs are not modified (this applies to both the name and the type). Values can be mapped to these existing inputs/outputs as needed.
The allowed inputs to this type of Flow is/are:
- Sighting (SightingsTracker.Sighting)
There are no permitted outputs to this Flow.
Sightings SubTypes From Flow Options
This drop-down is controlled by a user-created list of Flows located in the following Folder in the Designer Studio: Sightings Tracker Sub Type Flows. Designers can copy the example Flow ([Example] Sightings Tracker SubType Sample Flow) and update the logic inside of it to send custom-configured announcements. When creating a new Sightings SubTypes Flow, Designers must ensure that the Flow inputs and outputs are not modified (this applies to both the name and the type). Values can be mapped to these existing inputs/outputs as needed.
There are no allowed inputs to this Flow.
The allowed outputs to this type of Flow is/are:
- SubTypesList (String [List])
Edit or Delete Sightings Tracker
To edit an existing Sightings Tracker, Sightings Tracker Managers:
- Right-click on the desired Sightings Tracker.
- Select Edit Sightings Tracker.
To delete an existing Sightings Tracker, Sightings Tracker Managers:
- Right-click on the desired Sightings Tracker.
- Navigate to and select Manager Actions > Delete Sightings Tracker.
Specified Sightings Tracker Dashboard
This custom dashboard is generated and maintained by Sightings Tracker Managers and is located in Sightings Trackers Overview. These dashboards will allow Sightings Tracker Managers to monitor and maintain statistics related to the custom-made Sightings Tracker. Each tracker shows the following information:
- Total count of sightings
- Top submitter with their count of sightings
- Sightings reported over time
- Sightings by subtype
- A Report of all sightings
All this information is filtered using the Date Range Filter located on the top right corner of the Page.
.png)
Delete Sighting
A Sightings Tracker Manager can delete any sightings if needed. This ensures that all sightings submitted are relevant to the Sightings Tracker.
- Right-click on the desired Sighting.
- Navigate to and select Manager Actions > Delete Sighting(s).
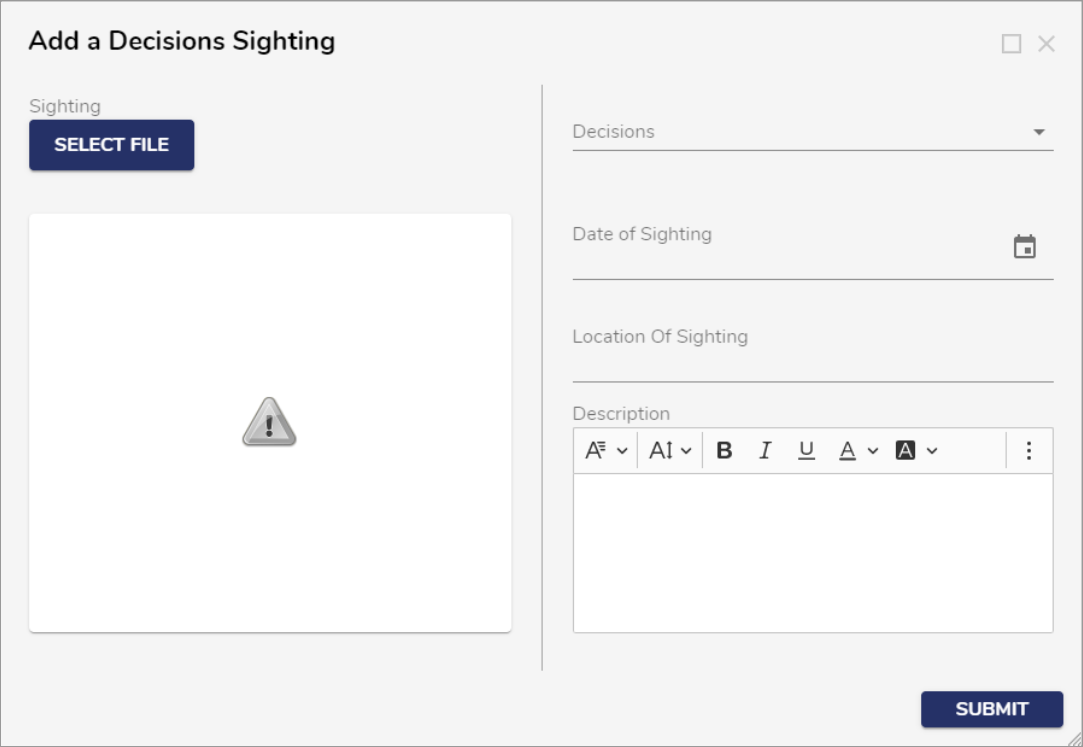
Report New Sighting
This action can be located in the workflow catalog (also known as Start Workflow) and navigate to Sightings Tracker > Report New Sighting.
This action allows users to select a Sightings Tracker and Report a new sighting into the System. Users will need to provide the following:
- The desired Sightings Tracker (only applicable if more than one tracker exists in the System)
- An image file of the sighting
- The type of sighting
- Date of sighting
- Location of Sighting
- A brief description explaining what they found.
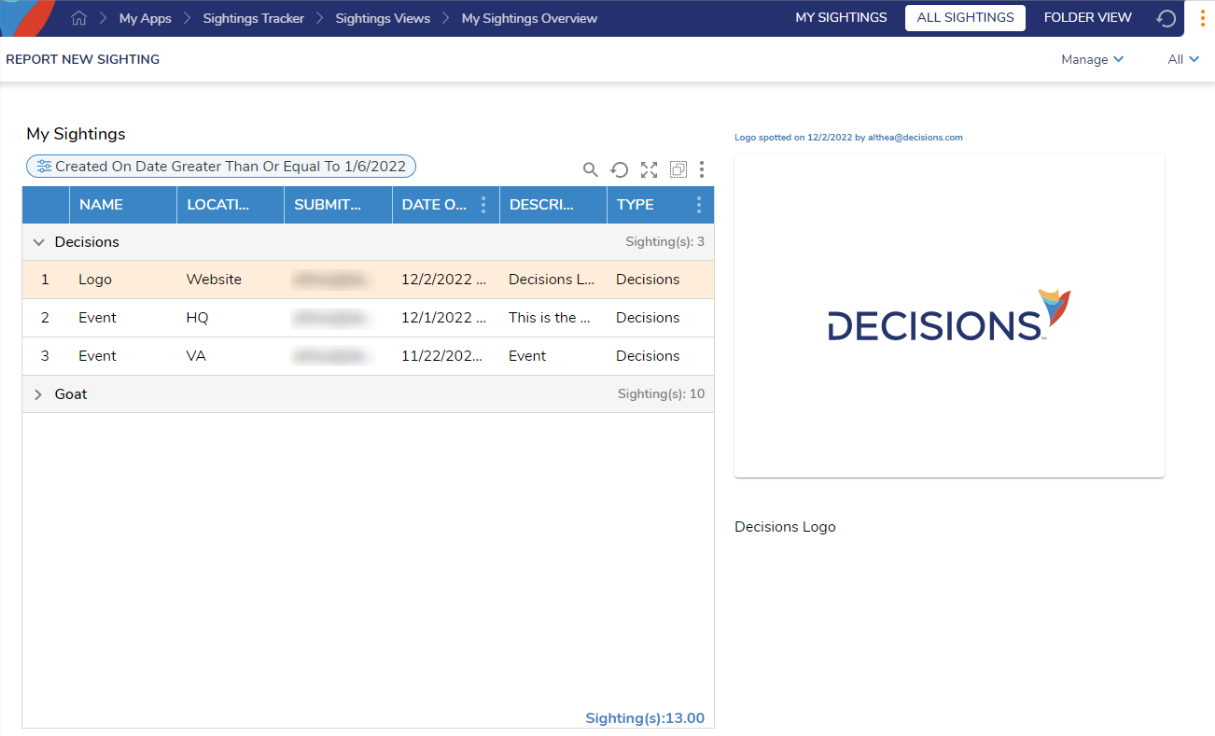
My Sightings Overview Dashboard
This dashboard is available to all users with access to the server and allows them to track, Report, and review all their sightings. Additionally, users can check all sightings submitted by other users with limited access.
The Sightings Trackers Overview can be located at any of the following locations:
- Open the workflow catalog (also known as Start Workflow) and navigate to Sightings Tracker > My Sightings in the User Portal, or
- Navigate to Sightings Tracker > Sightings Views > My Sightings Overview in the Designer Studio.
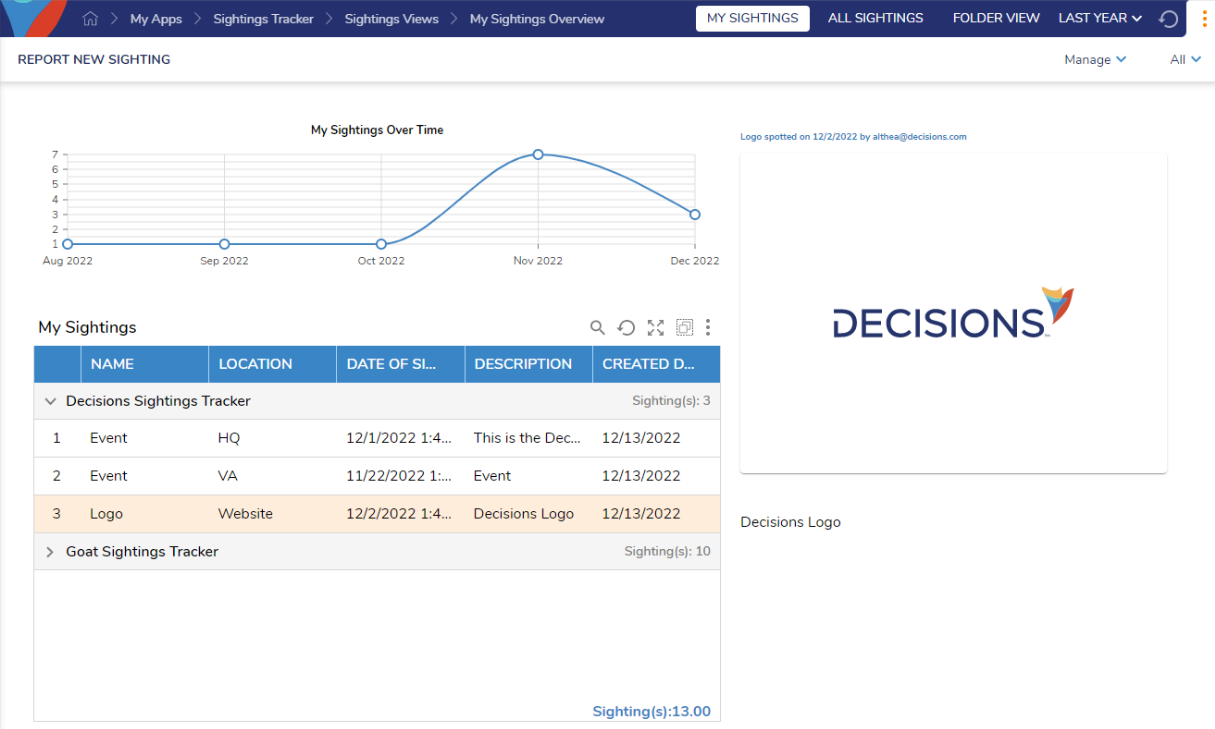
This Page allows users to track all the sightings they've reported. It shows information such as:
Their sightings (grouped by tracker)
- A preview of the selected sighting
- An action to report a new sighting
- Ability to view and download the sighting
- A graph of their sightings over time
- This graph is filtered using the Date Range Filter located on the top right corner of the Page.
View Sightings
A user can view additional information on the sightings:
- Right-click on the desired sighting.
- Select the View Sighting action.
This action shows the following information:
- A downloadable image
- Subtype
- Submitter
- Date of Sighting
- Location of Sighting
- A formatted Description