The Inventory Management Accelerator assists IT administrators in efficiently tracking and managing various IT assets, accessories, consumables, and office equipment across multiple office locations.
This Project contains pre-built Dashboards and Flows that assist Users in organizing an inventory by department and allow streamlined tracking of asset allocation, availability, and condition.
The Inventory Management Accelerator has a user-friendly interface that simplifies asset management processes and improves visibility into inventory usage, assists in optimizing resource allocation, and serves as an essential tool for IT departments looking to maintain accurate records of their equipment and resources.
Prerequisites
- Users must install Error Handling before using this Project.
- Users must add the appropriate Inventory Management Administrator Group accounts to access the Inventory Management and Inventory Tasks Dashboards.
Features
- Users in the IT Admin Group can create Users, Departments, Locations, and statuses within a space.
- Notifications will be sent to Users in the IT Admin Group to update the check-in date if a check-in is due.
- Users in the IT Admin Group can create inventories of different types, such as Asset and Accessory.
Main Flows
| Flow Name | Description | Image |
|---|---|---|
| Create Space | This Flow triggers a Form that Users will fill out to create a space. | 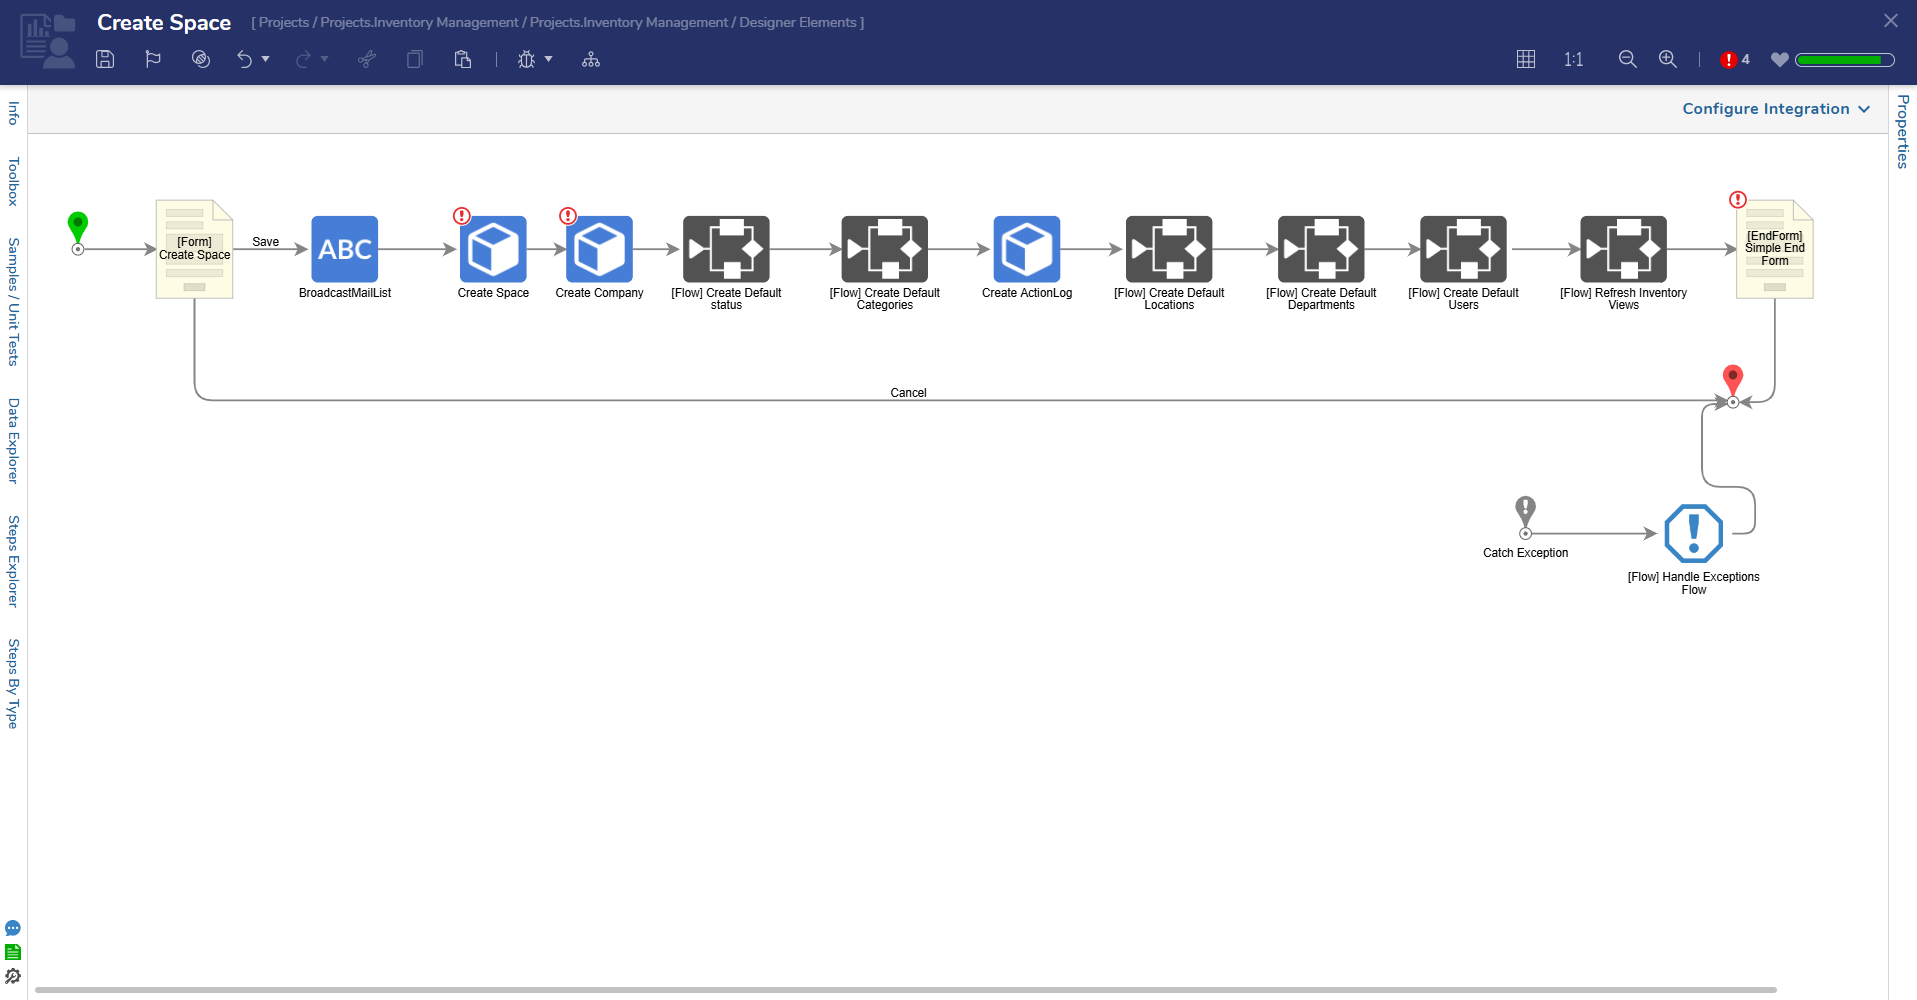 |
| Check-in Logic Flow | This Flow triggers a Form that enables Users to update the status (statuses should not be set to deployed to prevent throwing errors). The Flow will then check the provided action name to determine the correct path, update the item and inventory with the updated status, and deliver a notification that the status is pending. | 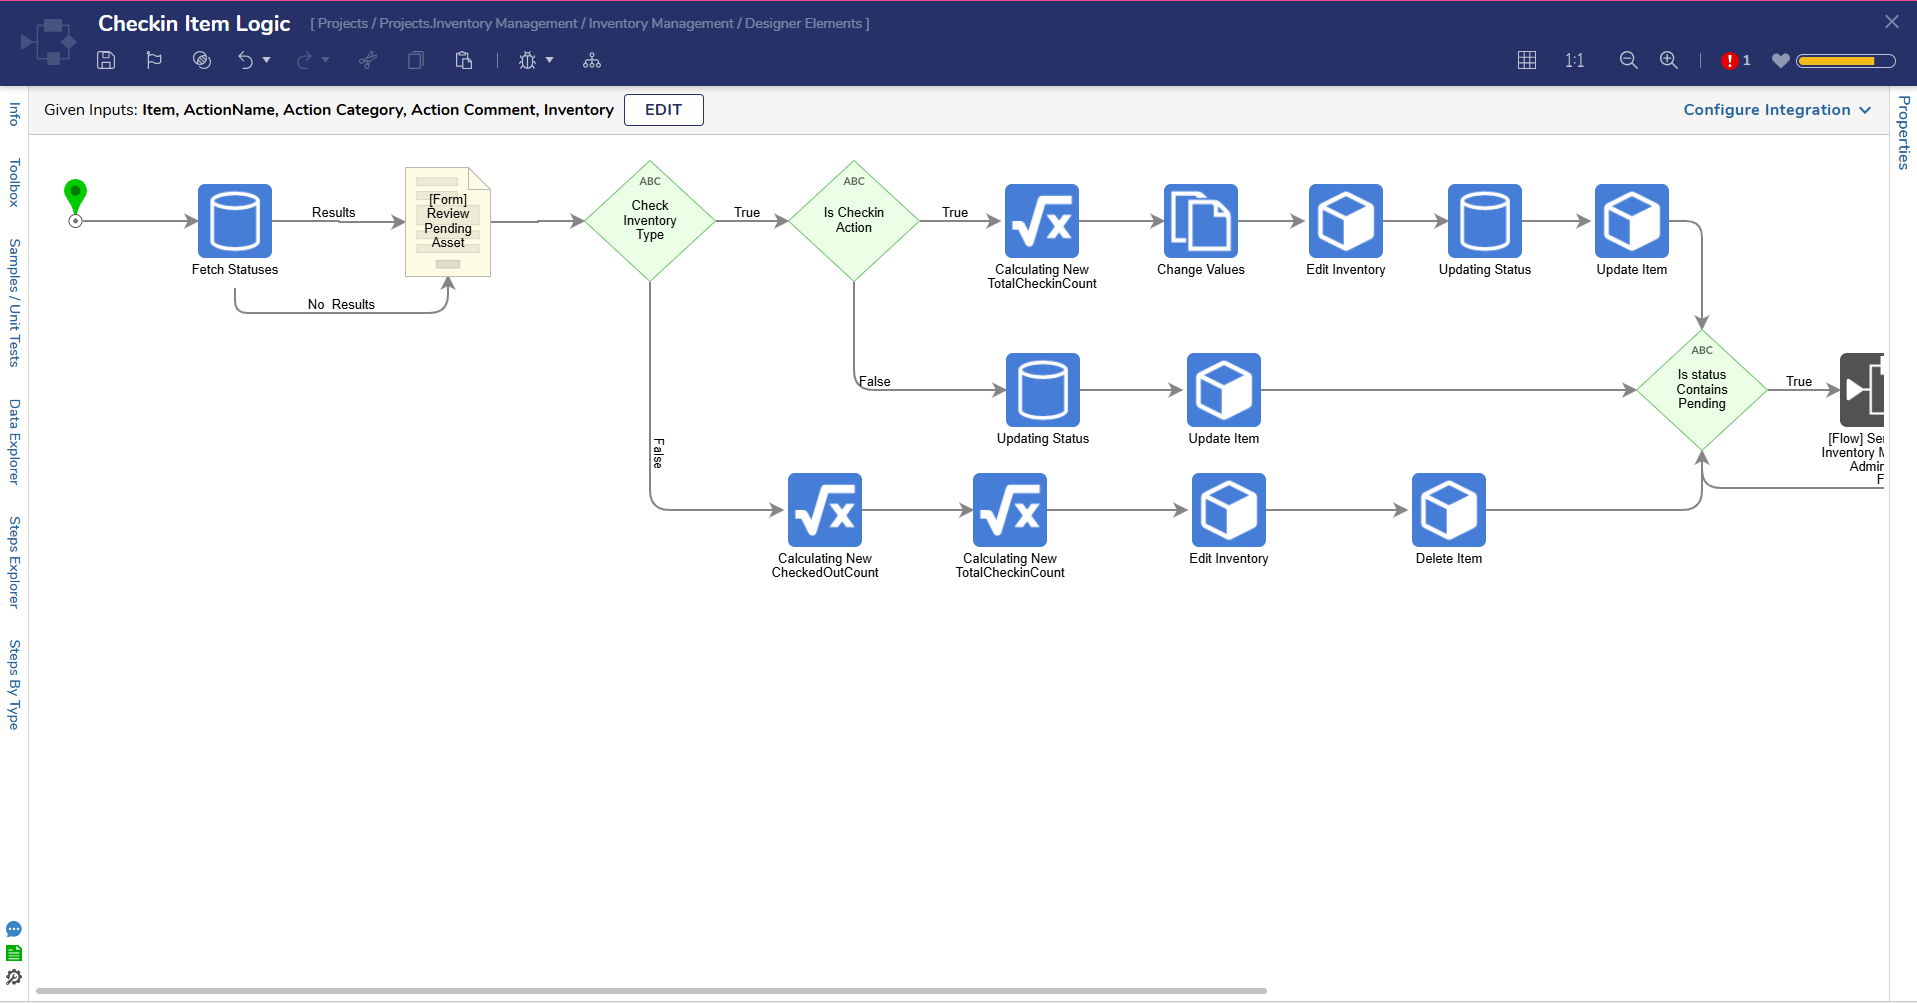 |
| Create/Edit Asset Inventory | This Flow creates an Asset Inventory, which will fetch the Department, Company, Status, Locations, and Model associated with a selected space. The Flow will then trigger a Flow to enable Users in the Admin group to create an asset. Once all the details are filled, an asset tag will be generated, and an Asset Inventory will be created with an Action Log. | 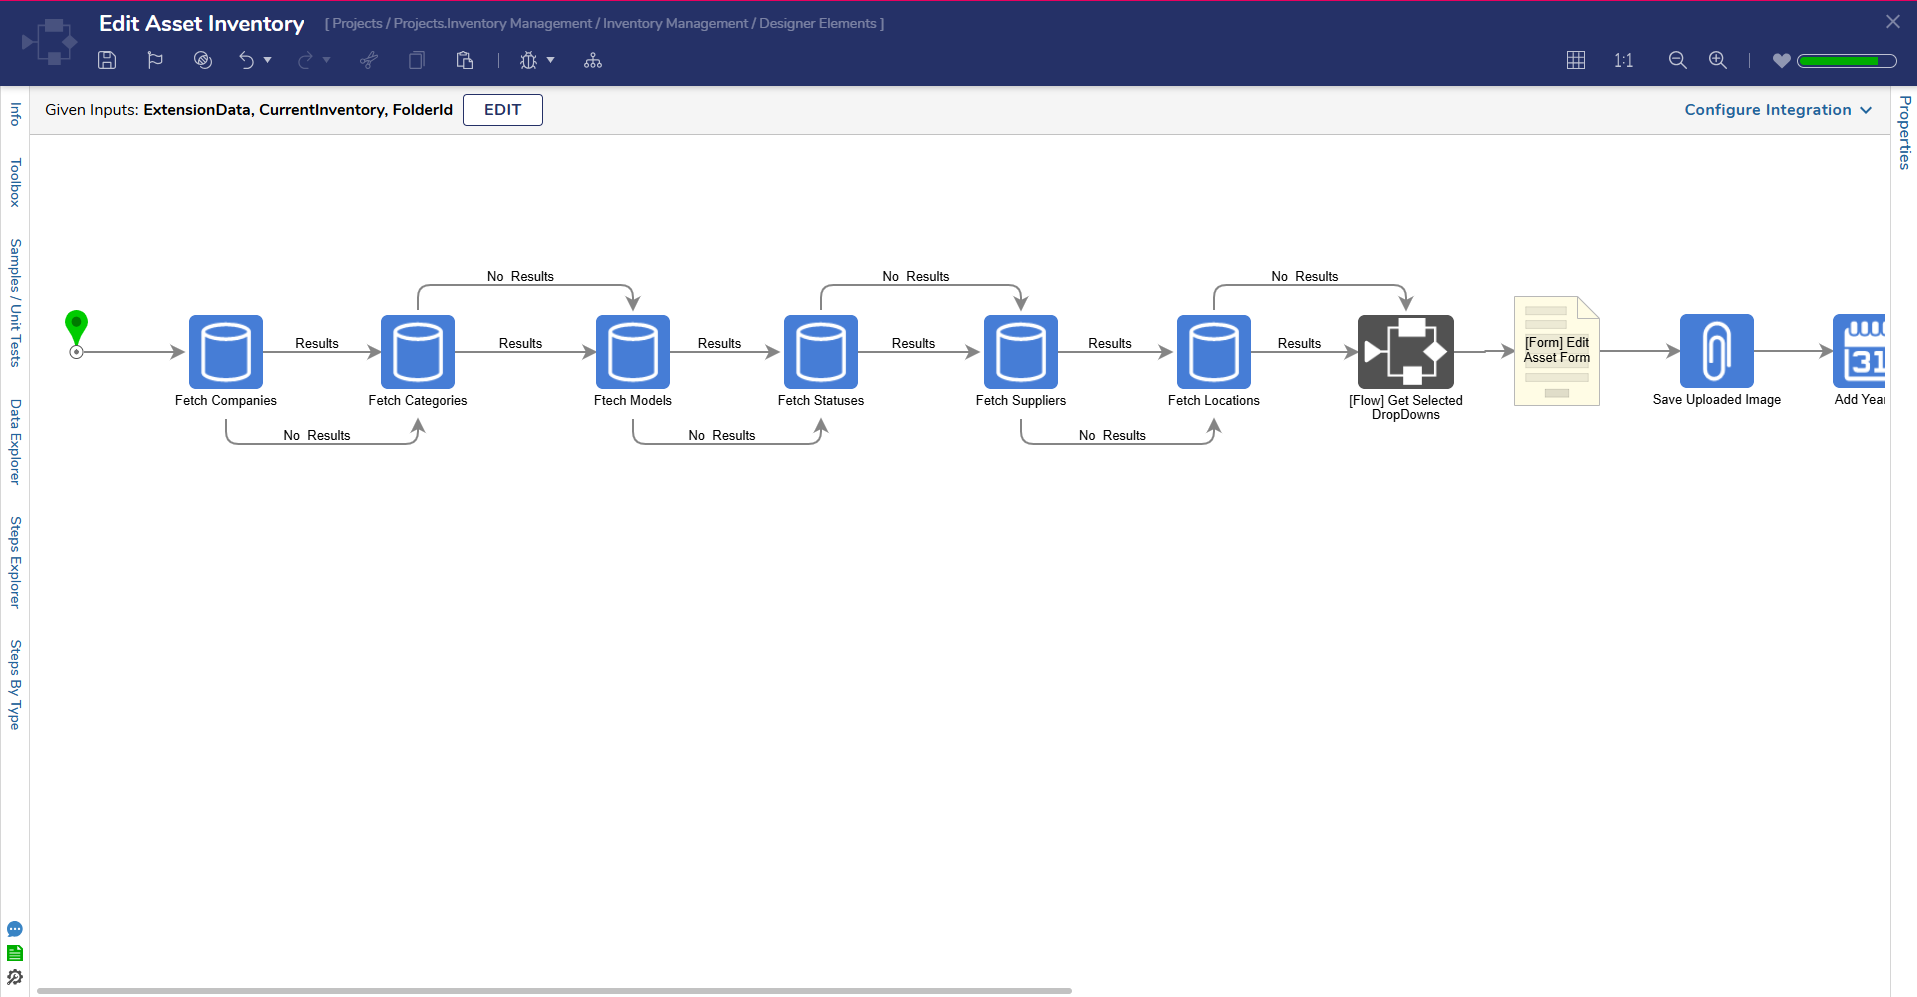 |
| Create Pending Item Nagger | This Flow will deliver a notification to all Users of the IT Administrators Group for pending inventories. | 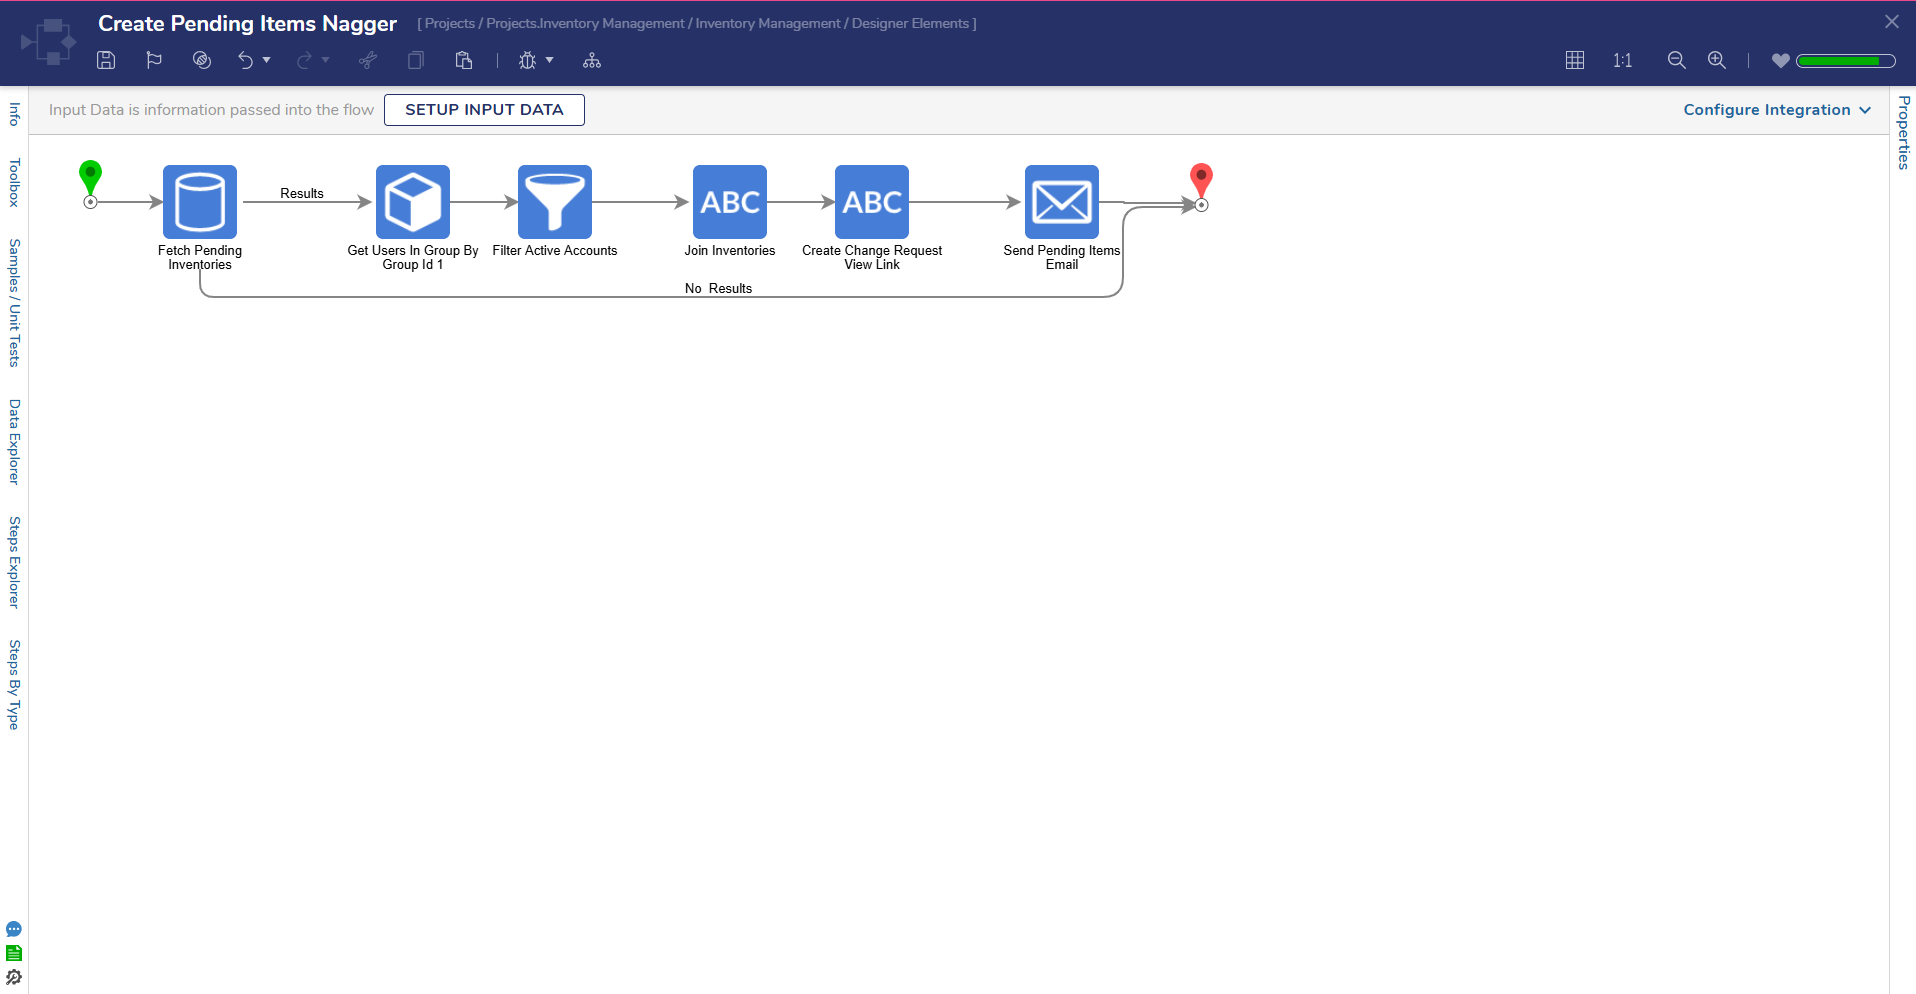 |
Key Flows
| Flow Name | Description | Image |
|---|---|---|
| Weekly Time Off Request Nagger | This Flow is a Scheduled Job that fetches all pending time off requests and delivers a reminder email to all Managers. |  |
| License Expiration and Termination Scheduled Job | This Flow is a Scheduled Job that fetches all licenses that will expire and be terminated in 30 days. The Flow then sends an email to the associated Space manager. | 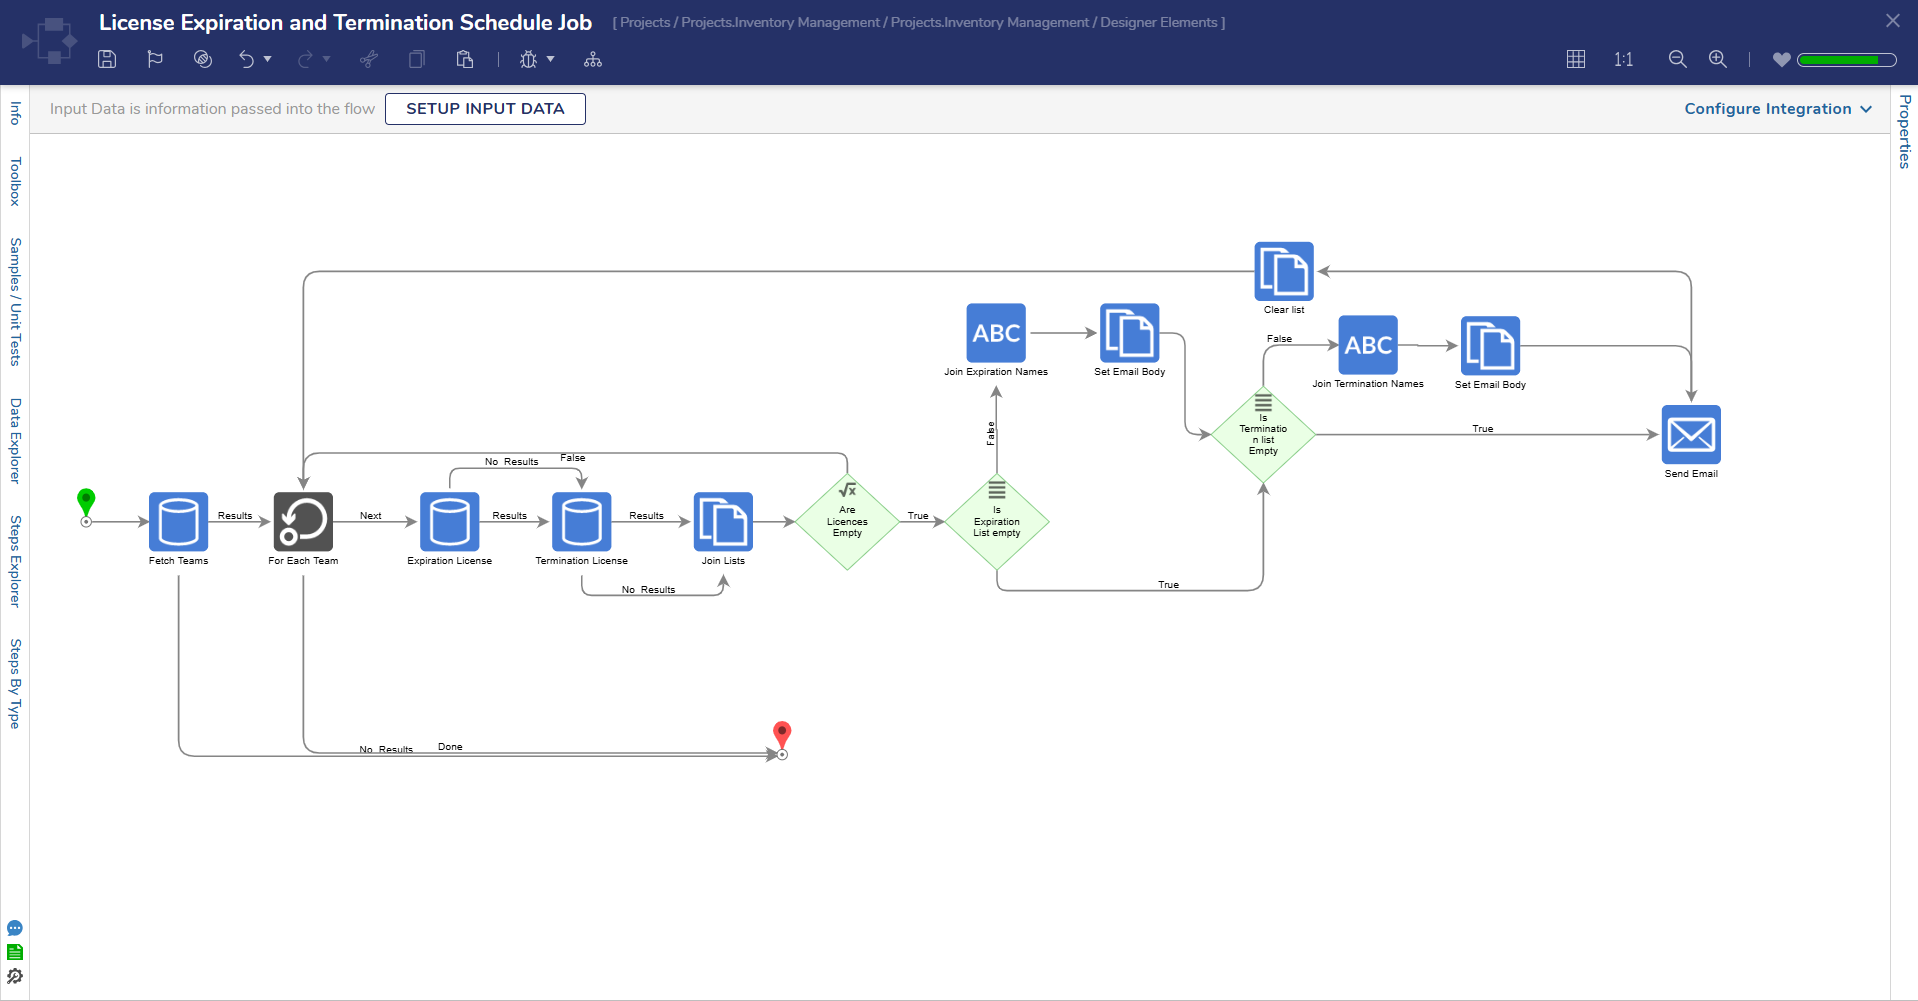 |
- If the expiring license list or termination date is empty, it should not be included in the email.
- At least one of these lists needs to be present in the email
- If neither list is filled in, the email should not be sent.
Dashboards and Pages
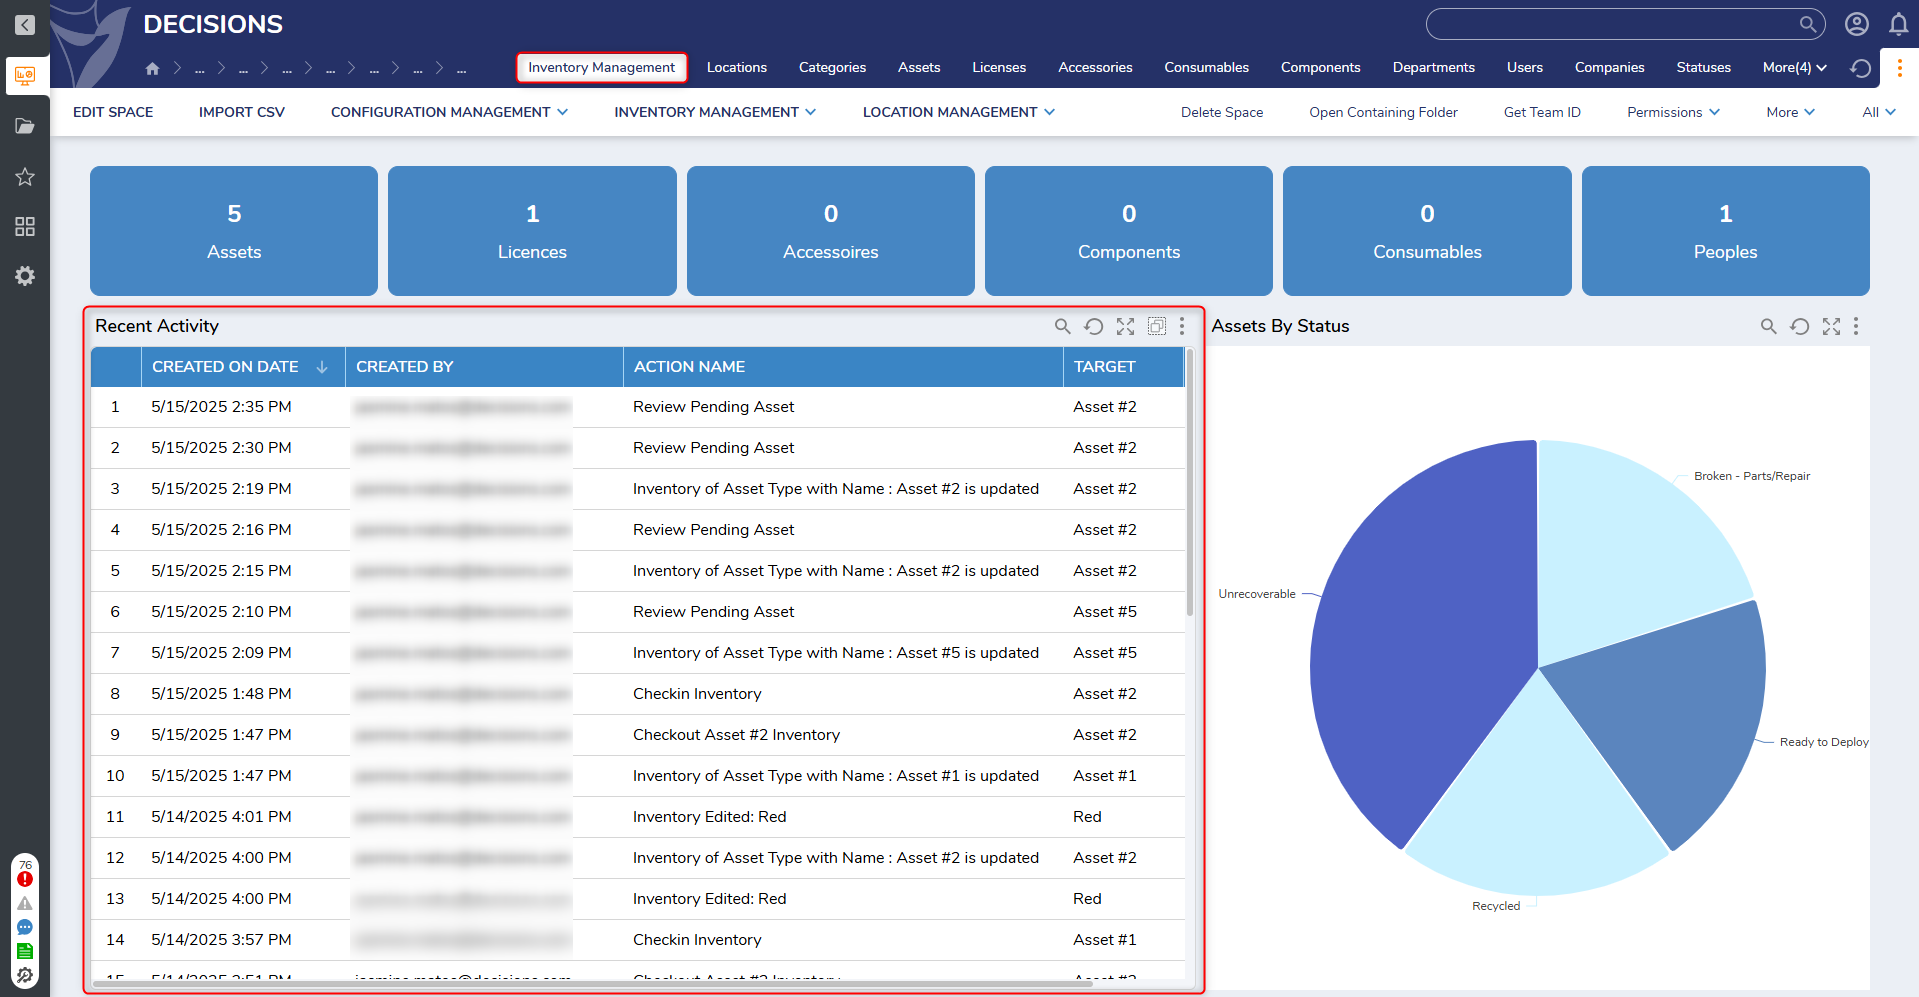
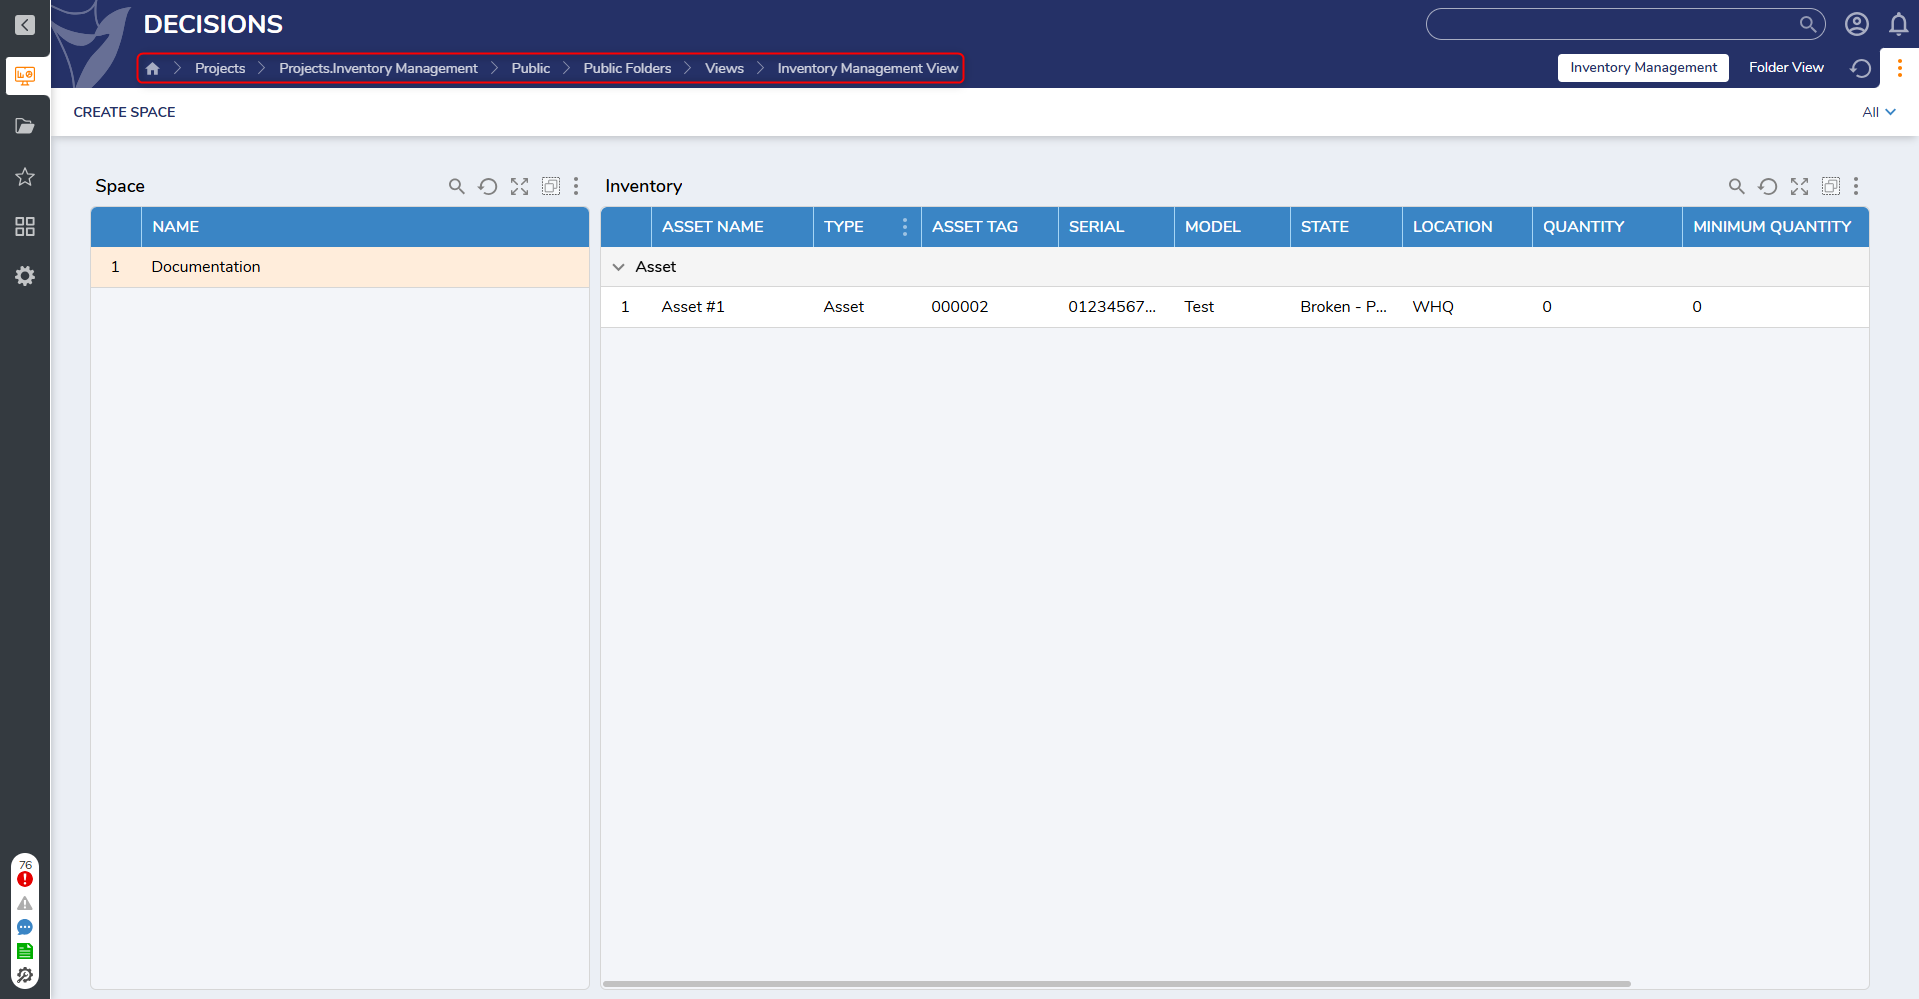
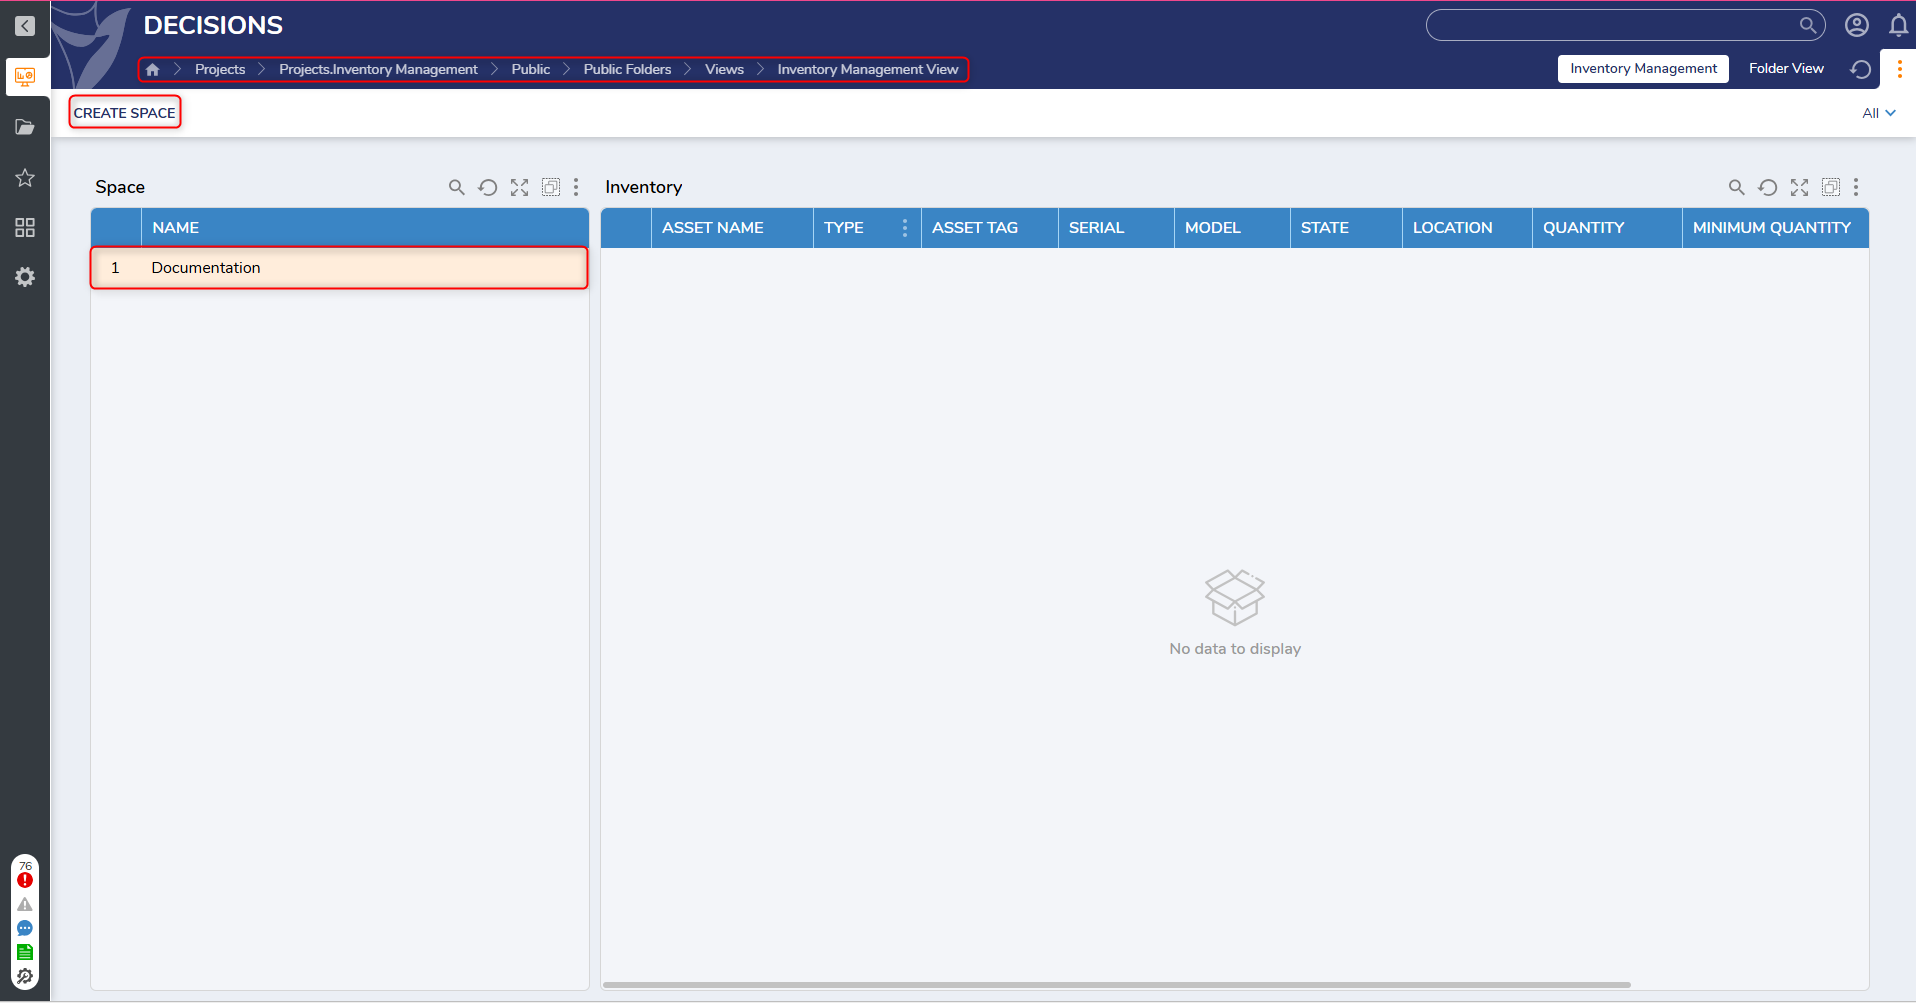
Inventory Management View Dashboard
The Inventory Management Dashboard displays created spaces on the left-hand side of the page, and items within the Inventory organized by category on the right-hand side.
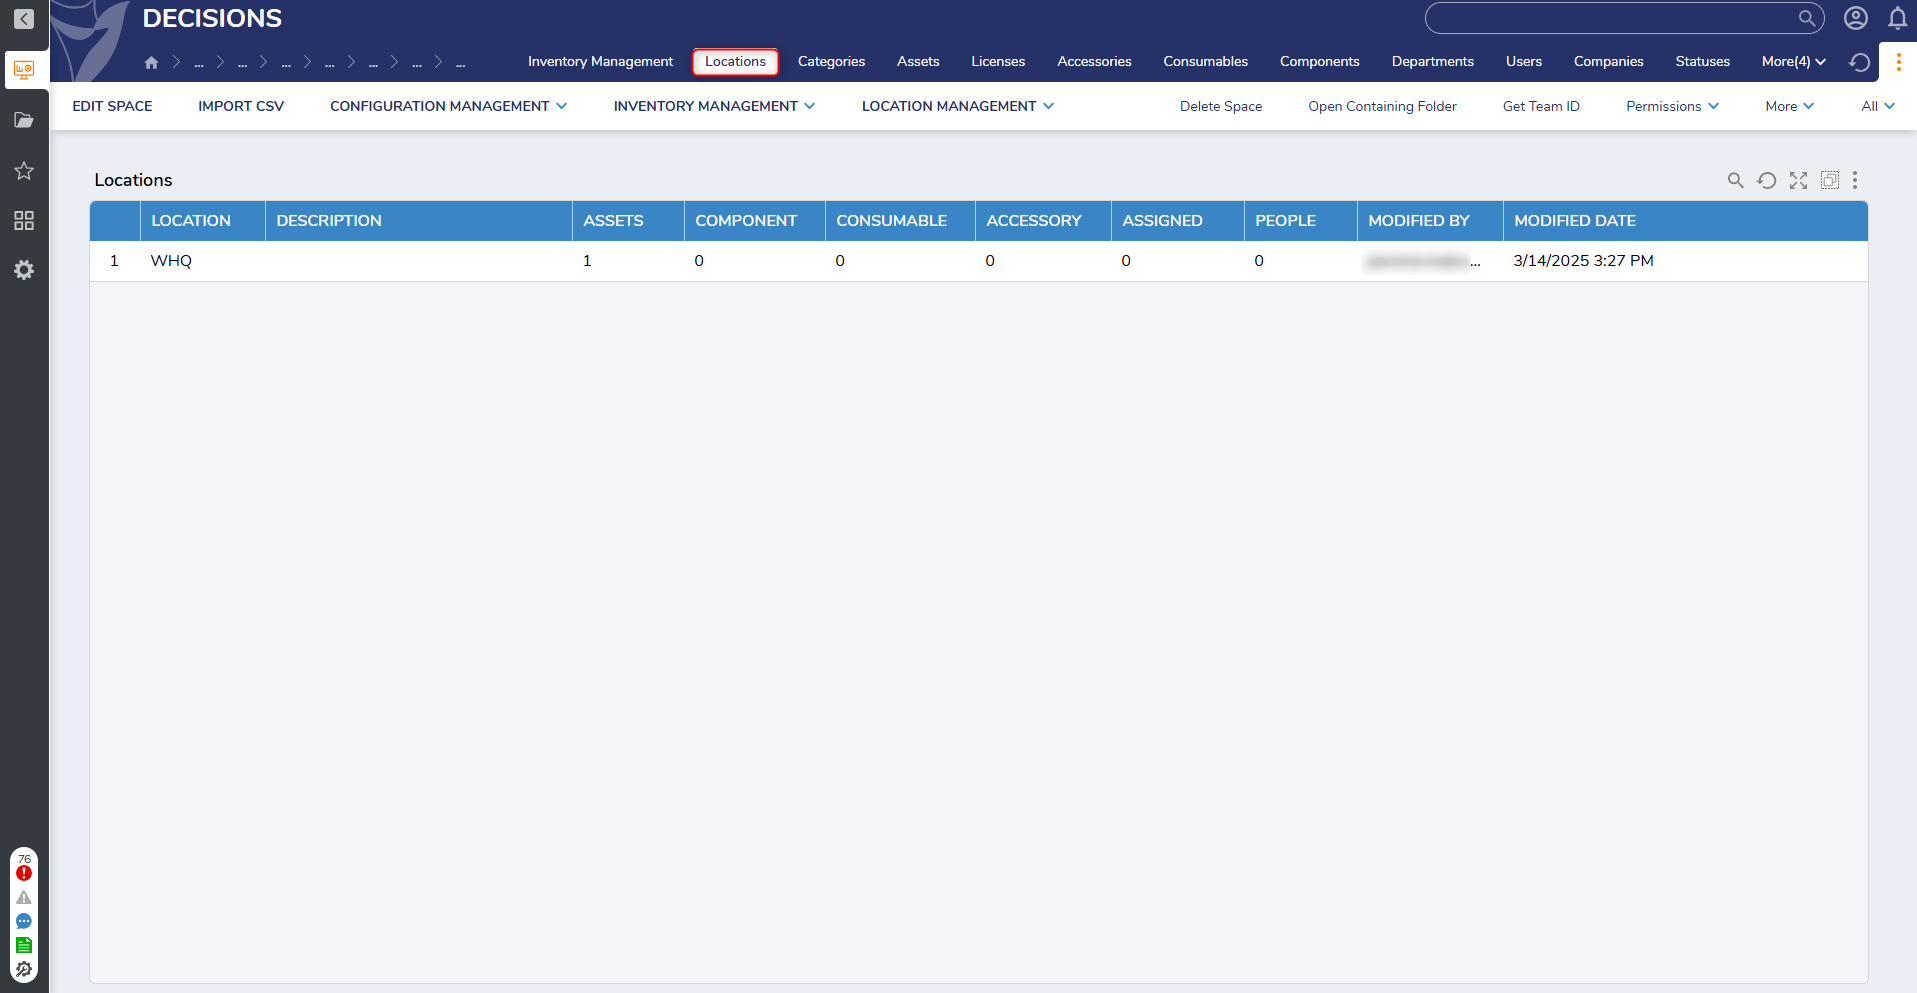
Location Overview Page
This Page displays location information, associated Users, and Inventory counts.
Assets Page
This Page displays a list of Assets for the associated Space. 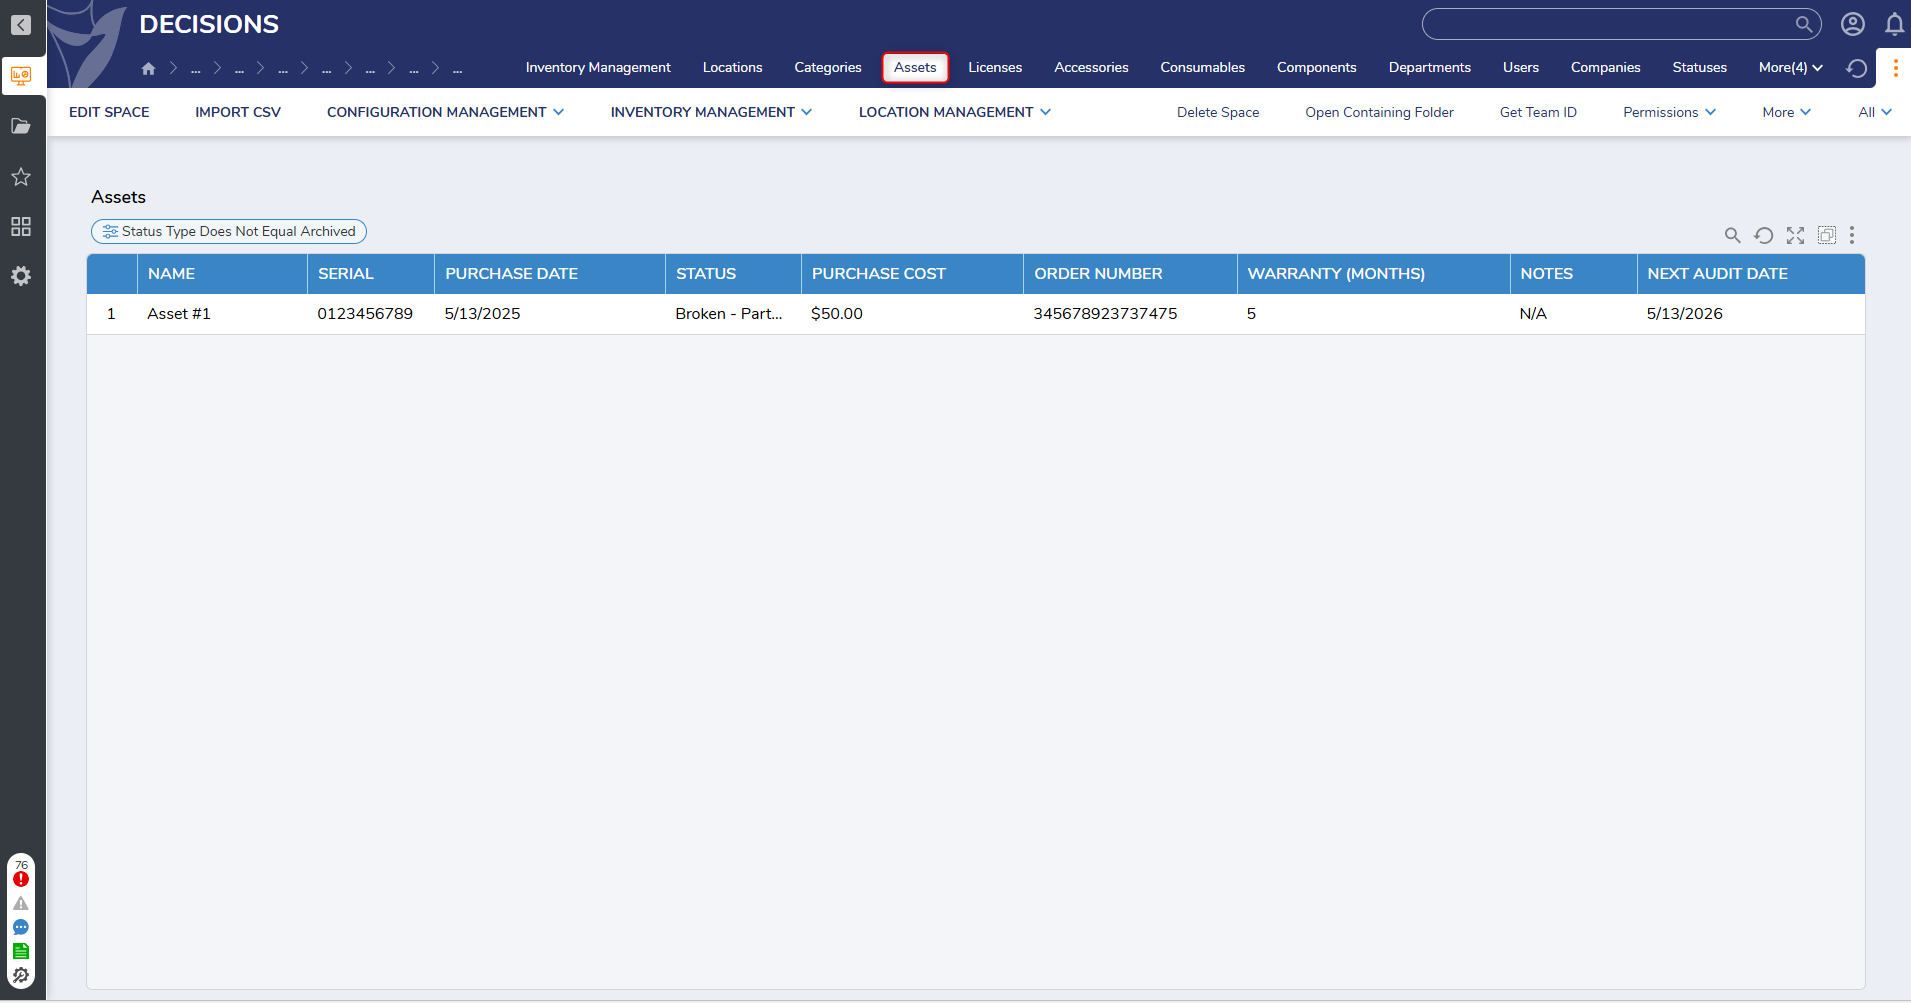
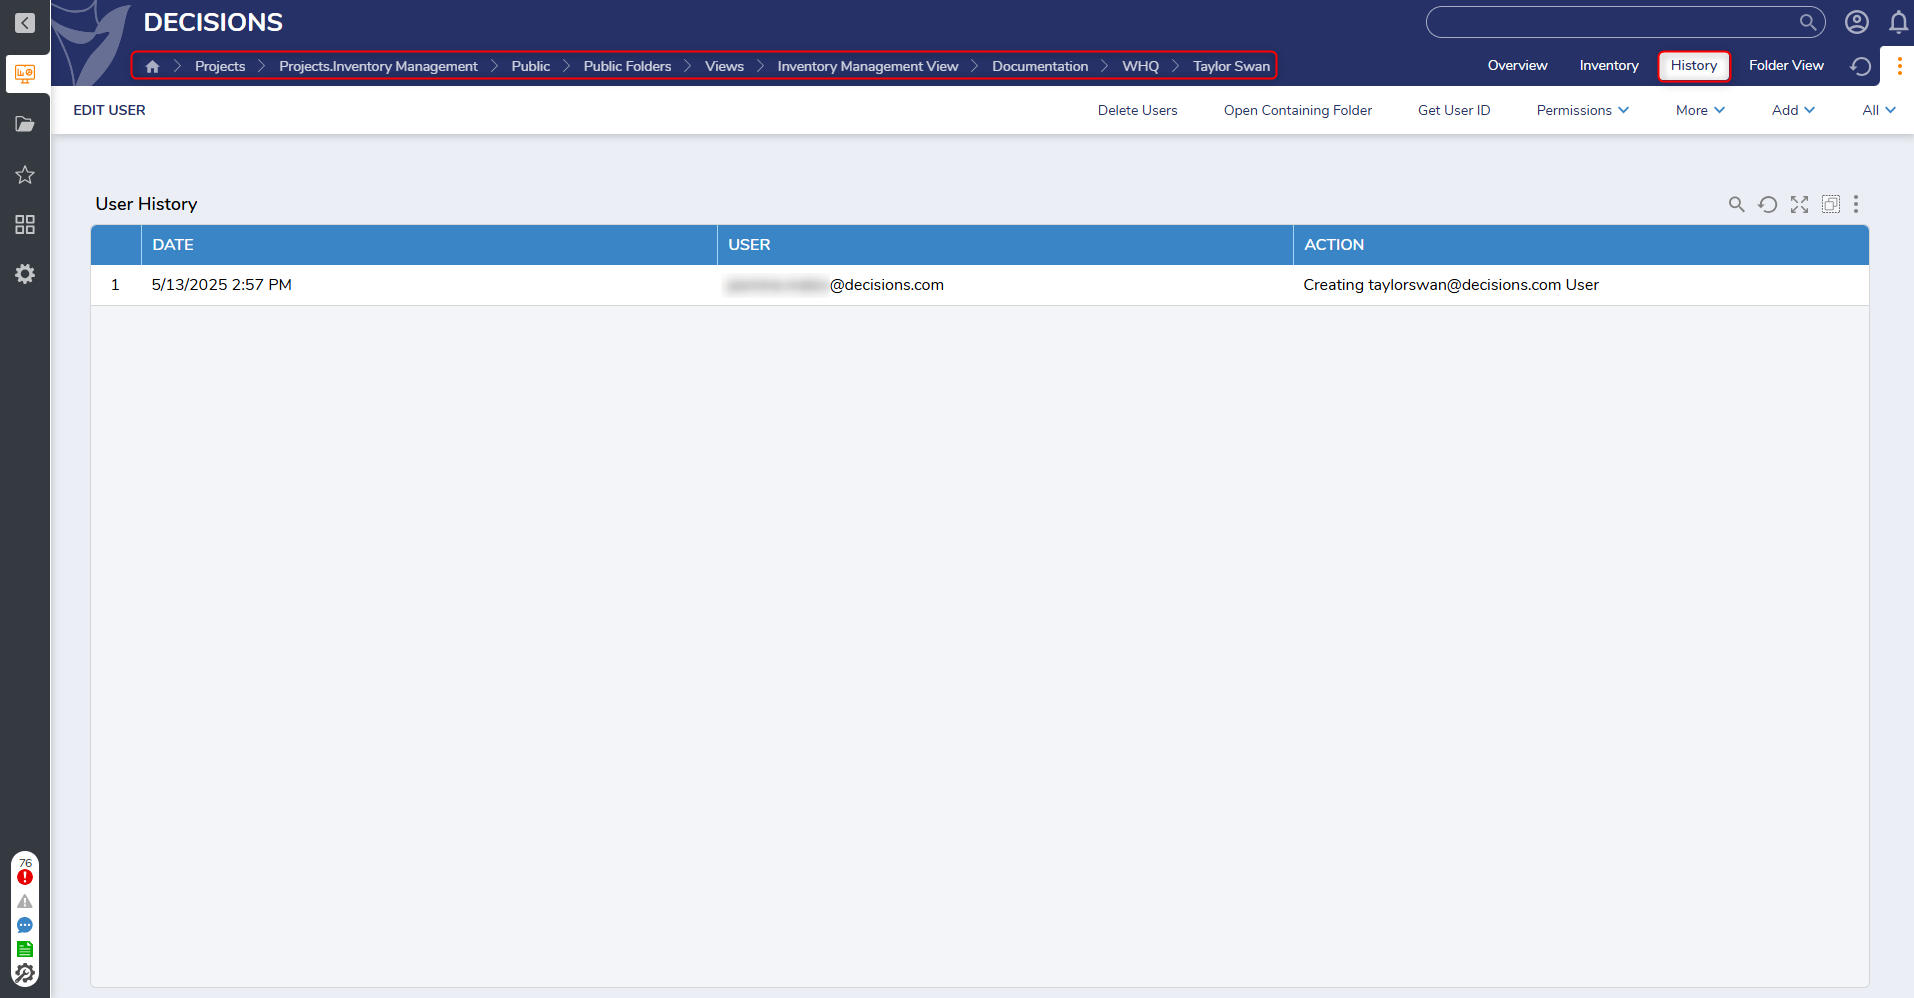
User History
This Page displays a User's history with the associated date and name of the action.
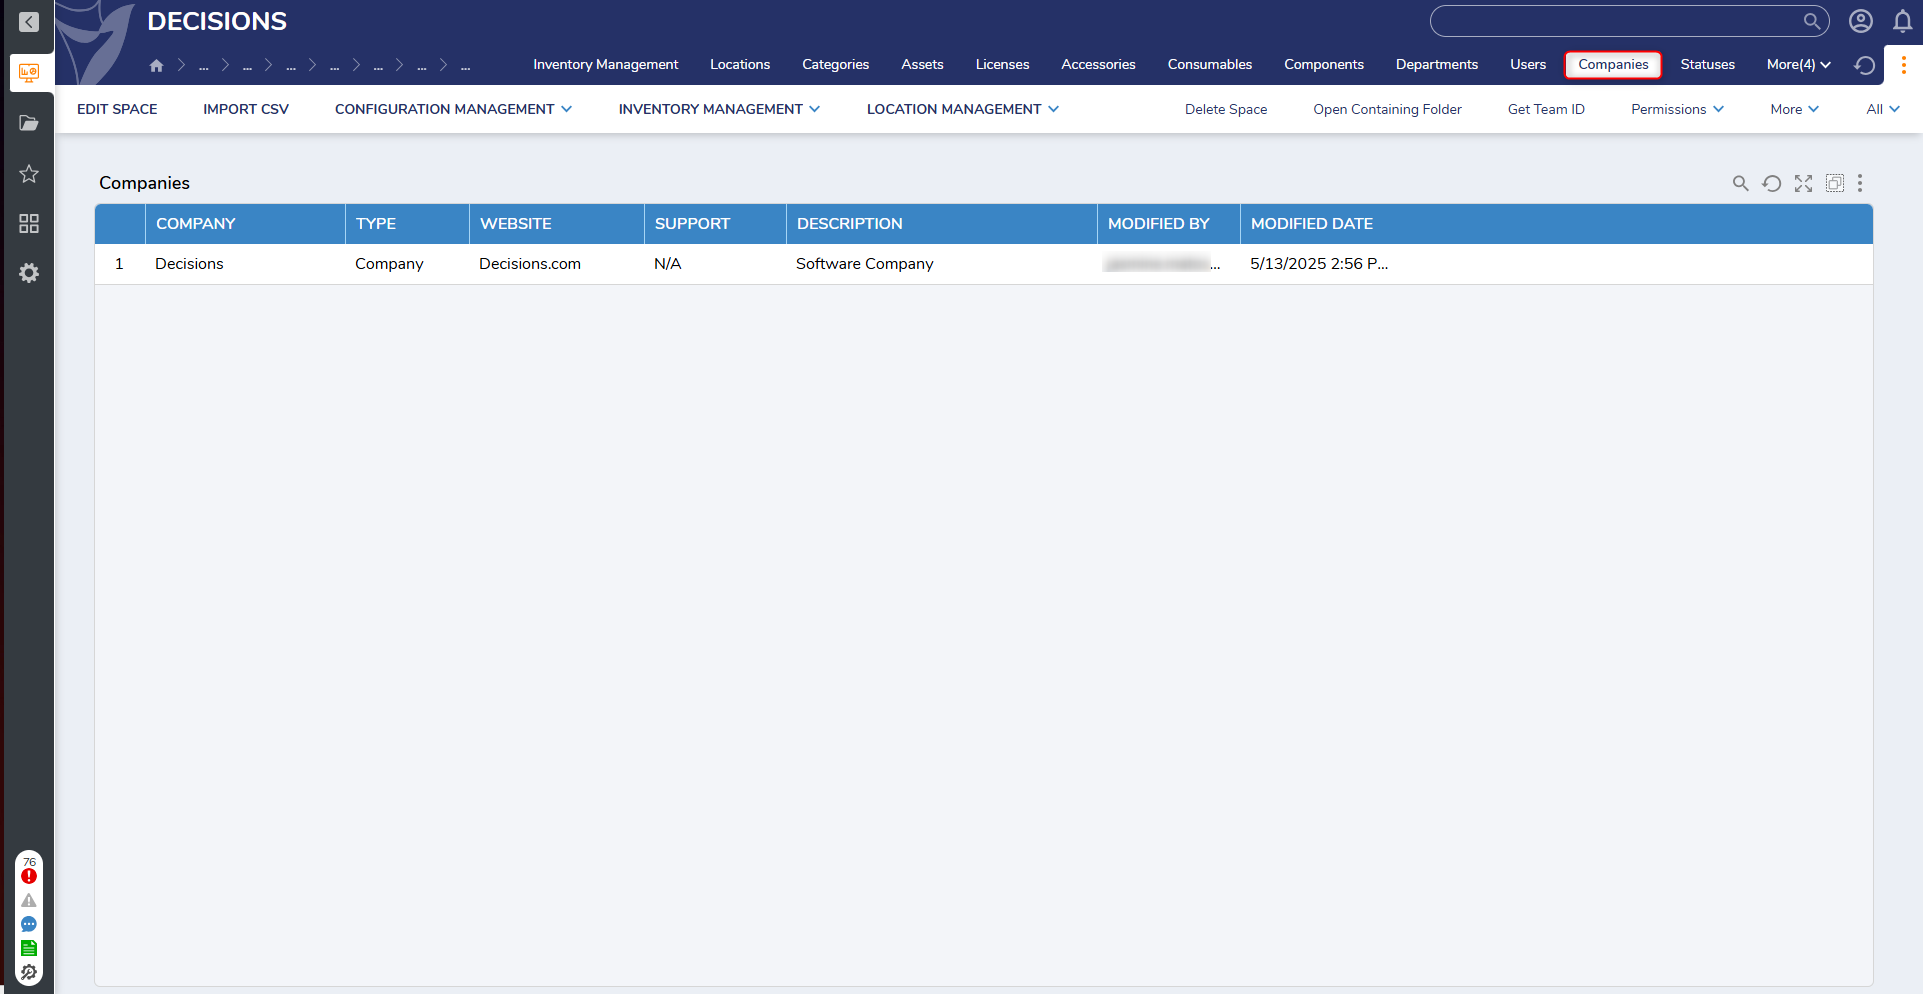
Companies Page
This Page displays a list of manufacturers, suppliers, and companies. Users have the opportunity to create a company and choose between all three types.
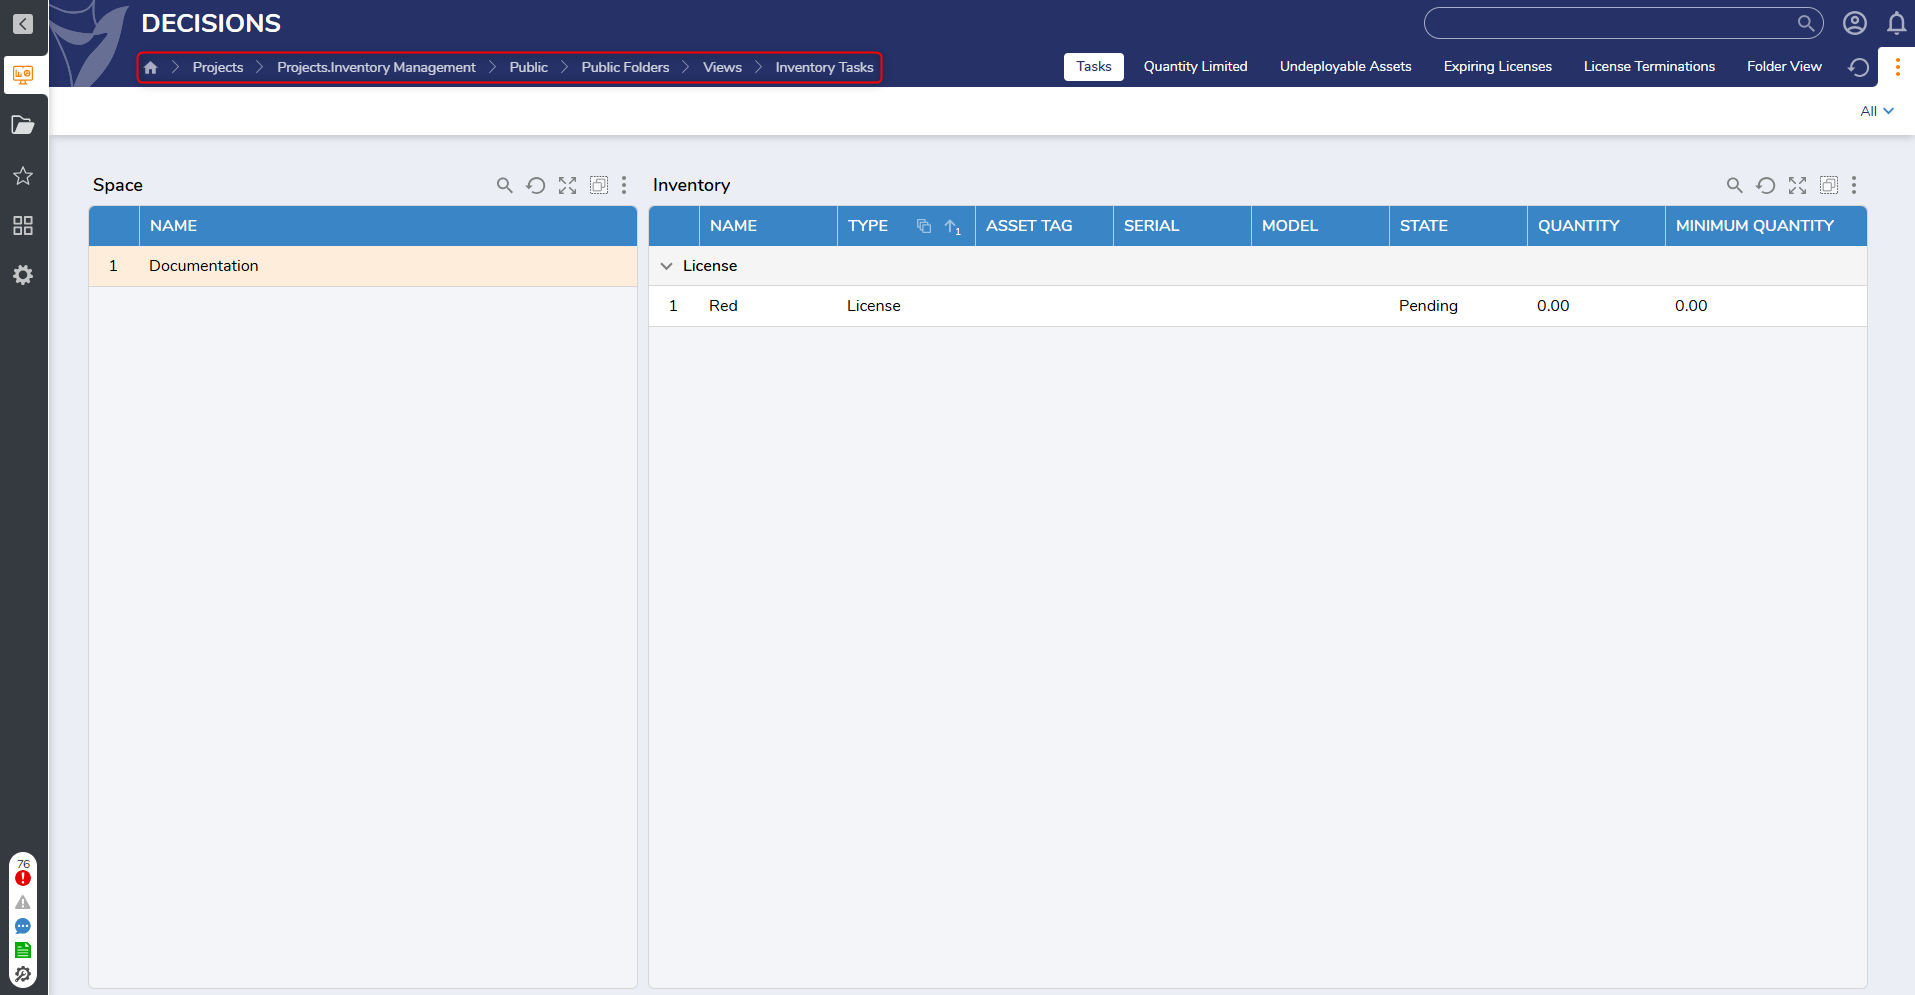
Inventory Tasks Dashboard
This Dashboard contains Pages that display:
- Inventory items with open tasks.
- Inventory items will not display associated Users and will only display a status of Pending or Recycling.
- Inventory items that have a quantity below 1.
- Assets that have been marked as Undeployable.
- Licenses that are approaching expiration.
- Licenses that have been terminated.
Forms
| Form Name | Description | Image |
|---|---|---|
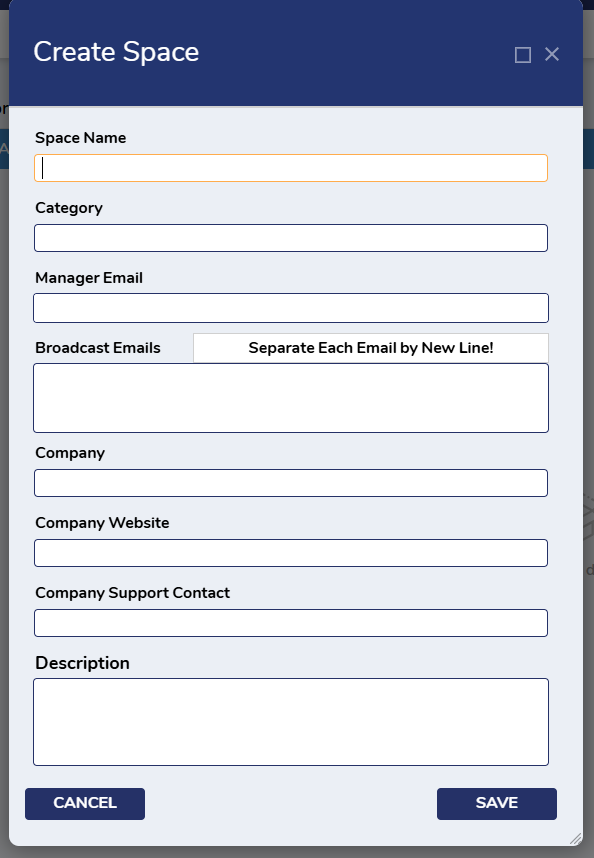
| Create Space | This Form enables Users to create a space. Creating a space is the first step before Users can add locations, departments, and Users. | .png) |
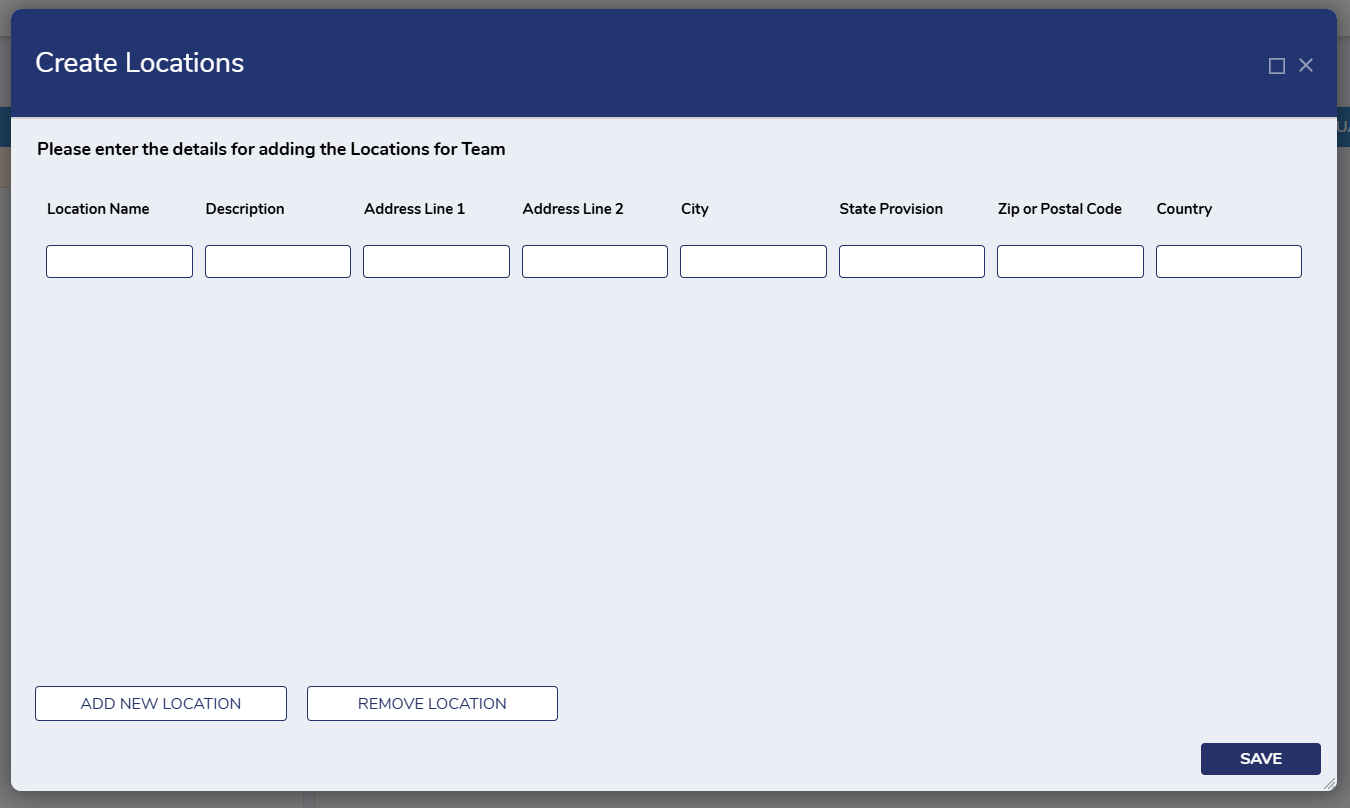
| Create Locations | This Form enables Users to create a location. | 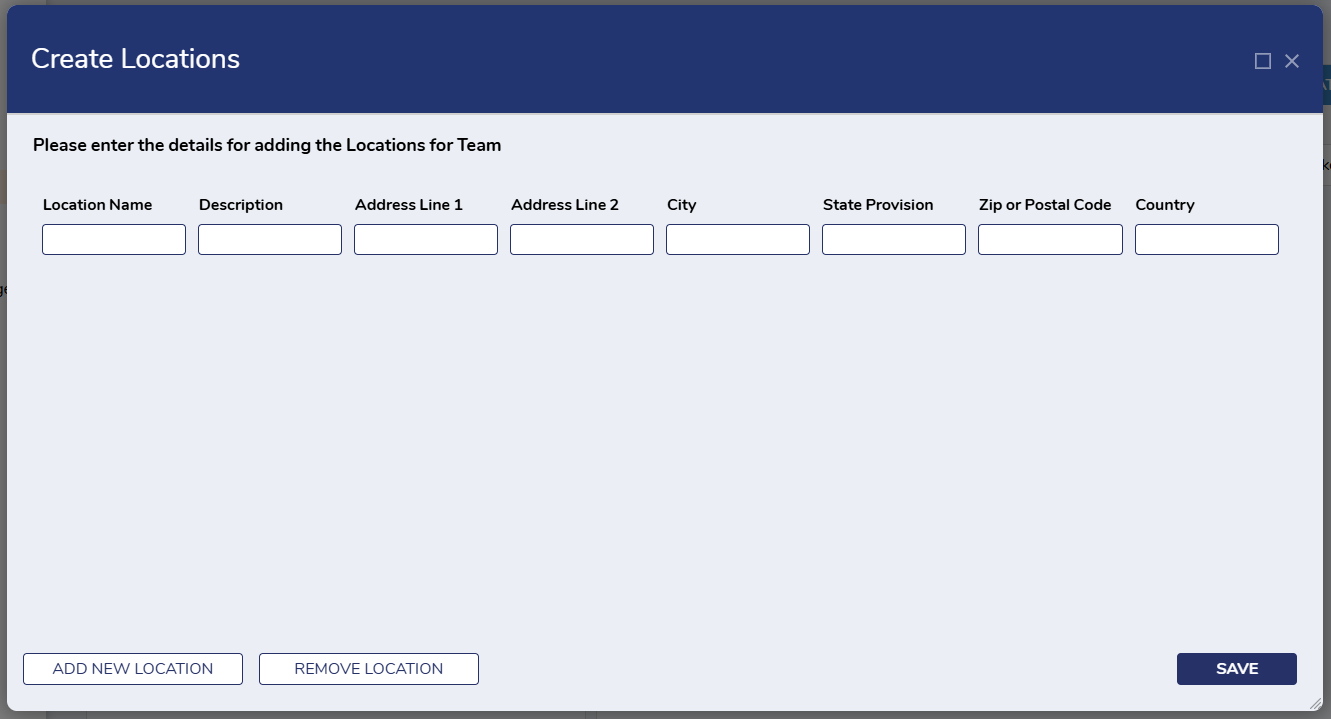 |
| Create Departments | This Form enables Users to create a department. | 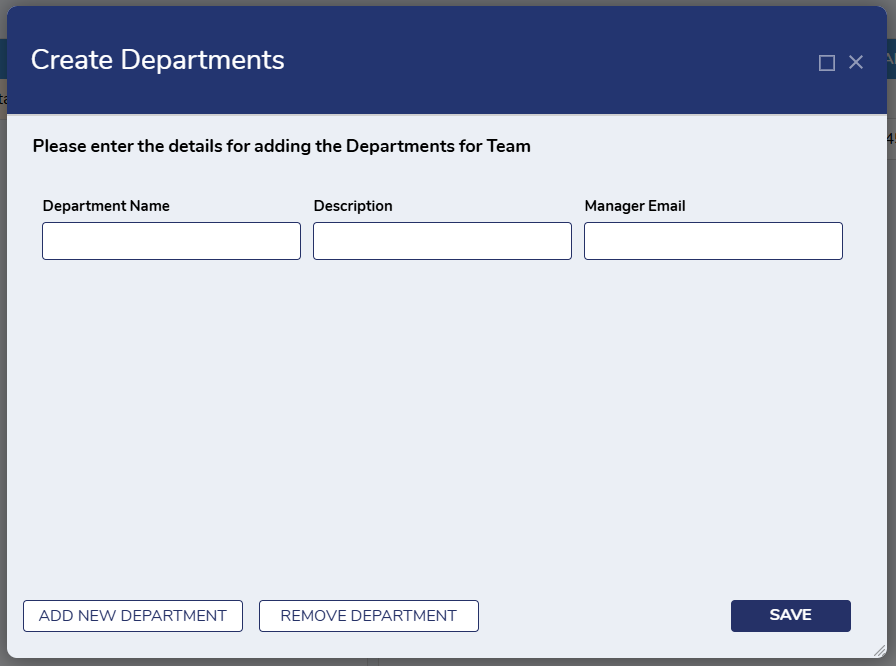 |
| Create Users | This Form enables Users to create Users within a location. | 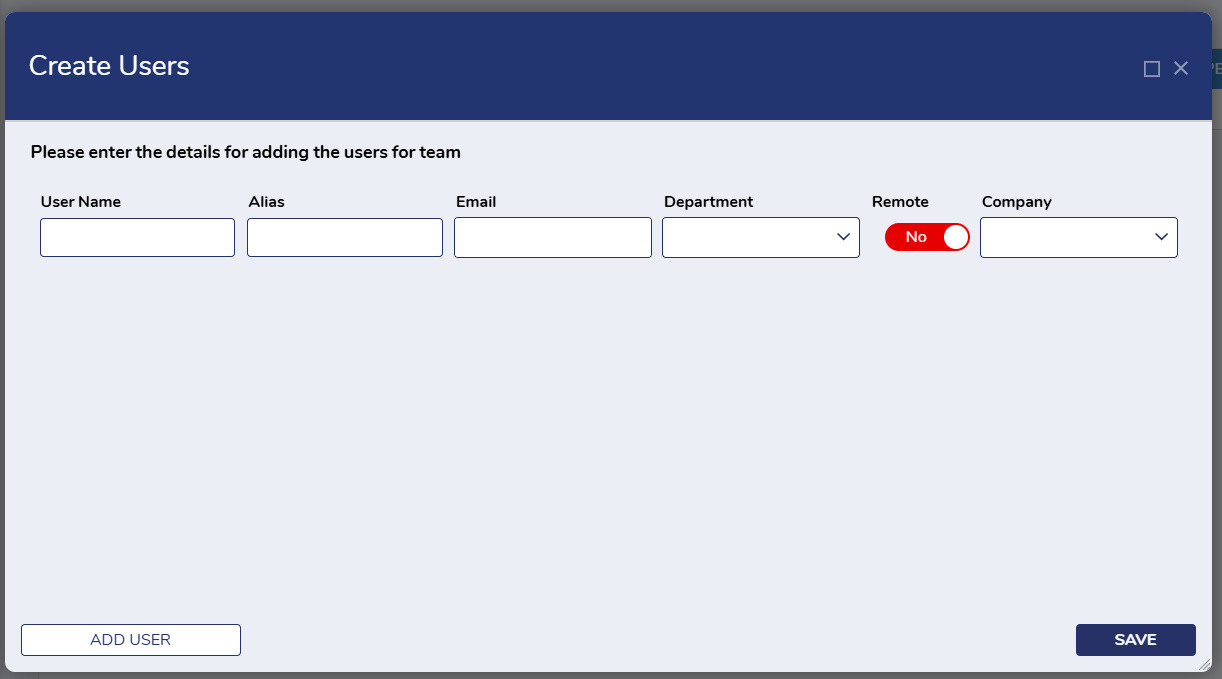 |
| Create Categories | This Form enables Users to create categories within a space. | 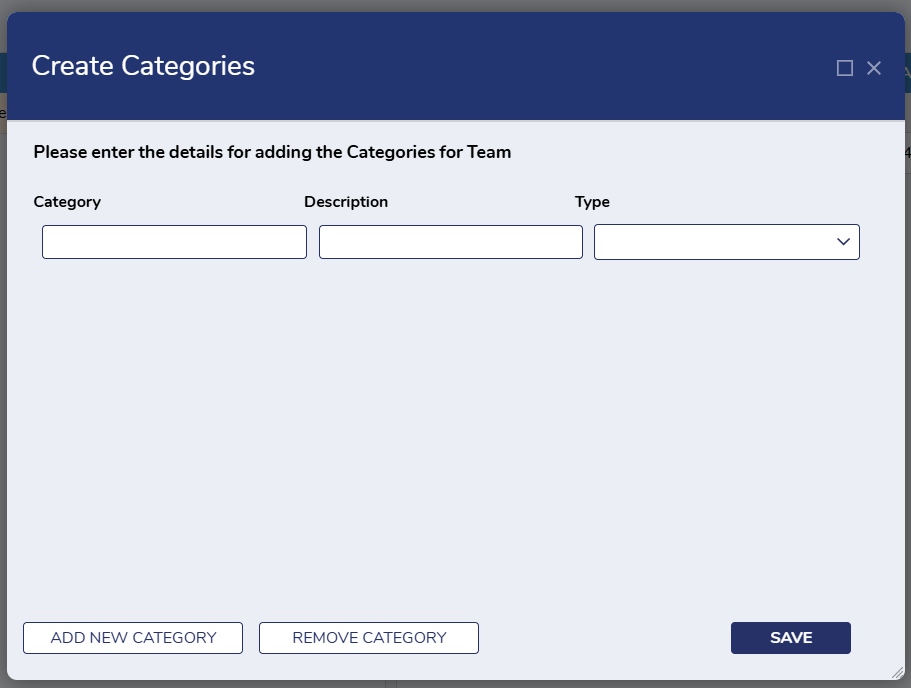 |
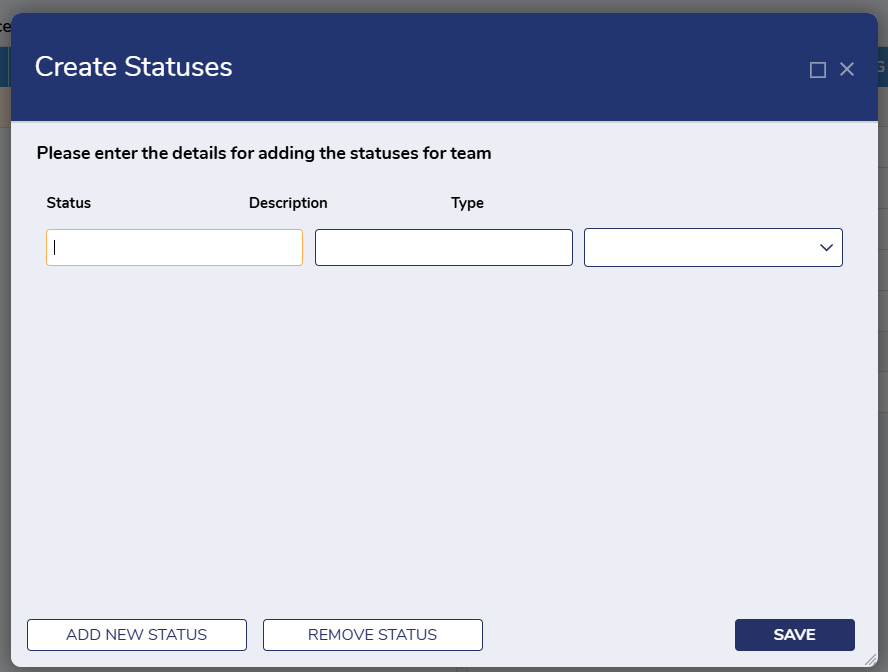
| Create Statuses | This Form enables Users to create statuses for a selected space. | 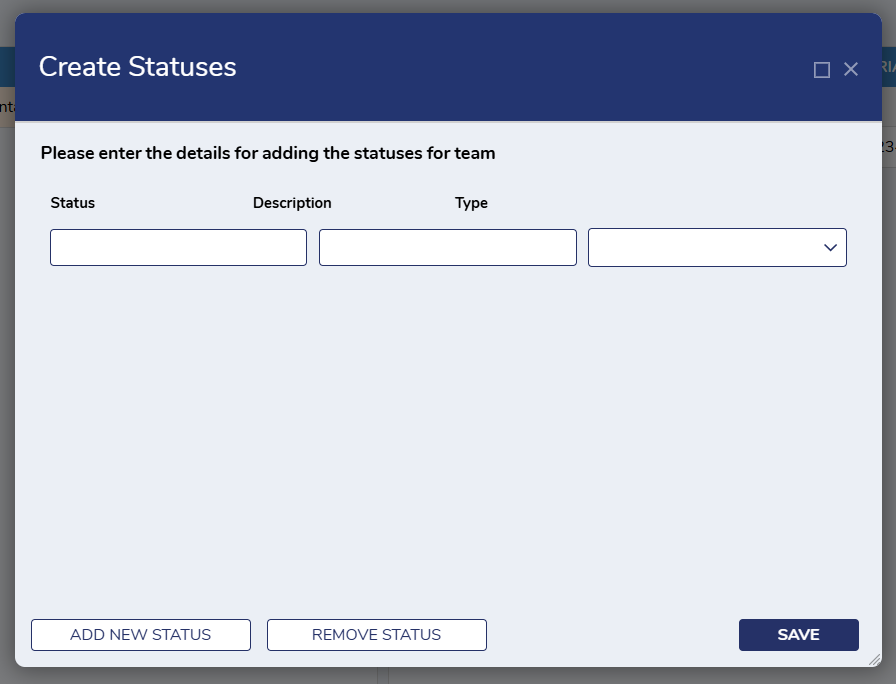 |
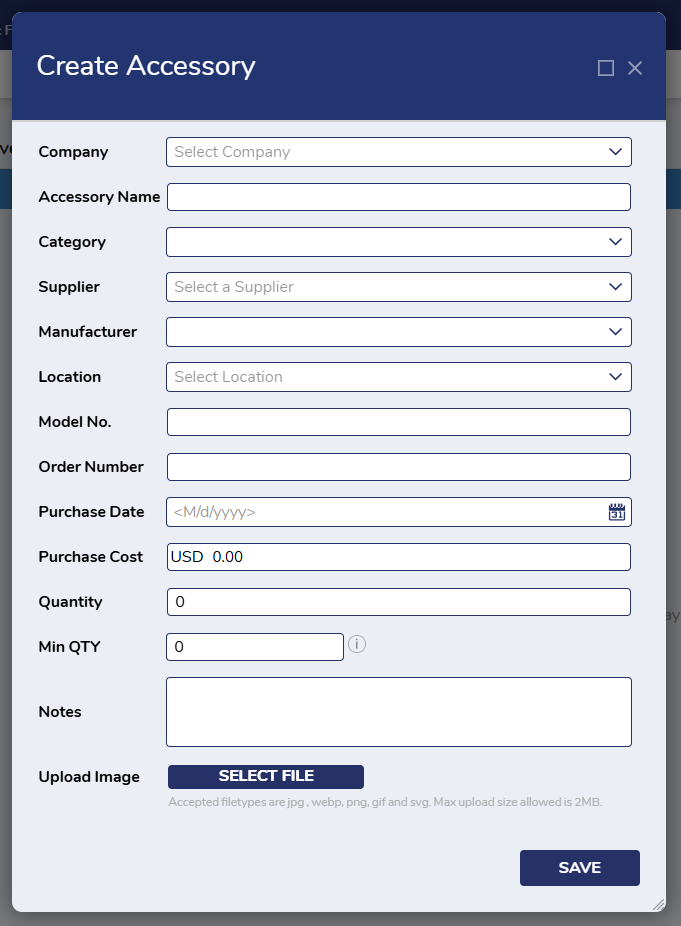
| Create Accessory | This Form enables Users to create an accessory for a selected space. The Category Dropdown menu will only display categories created solely for an Accessory. | 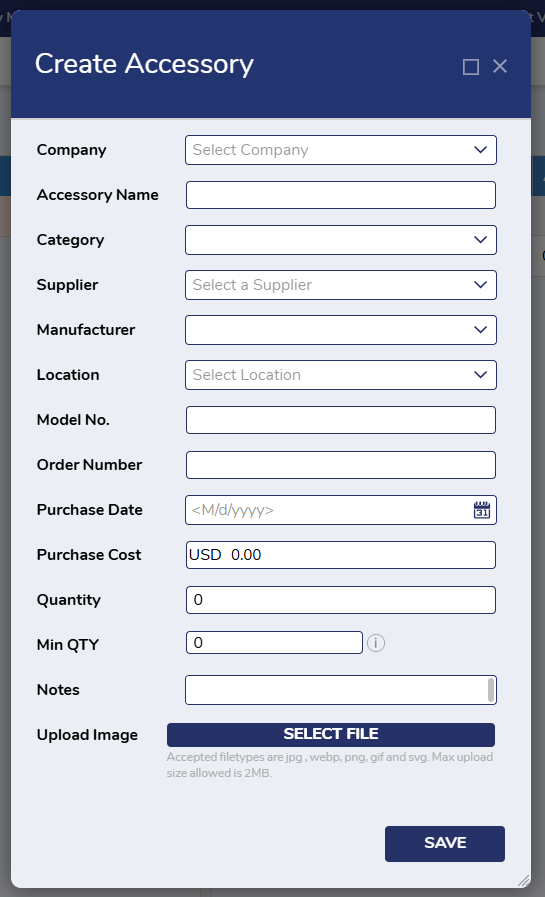 |
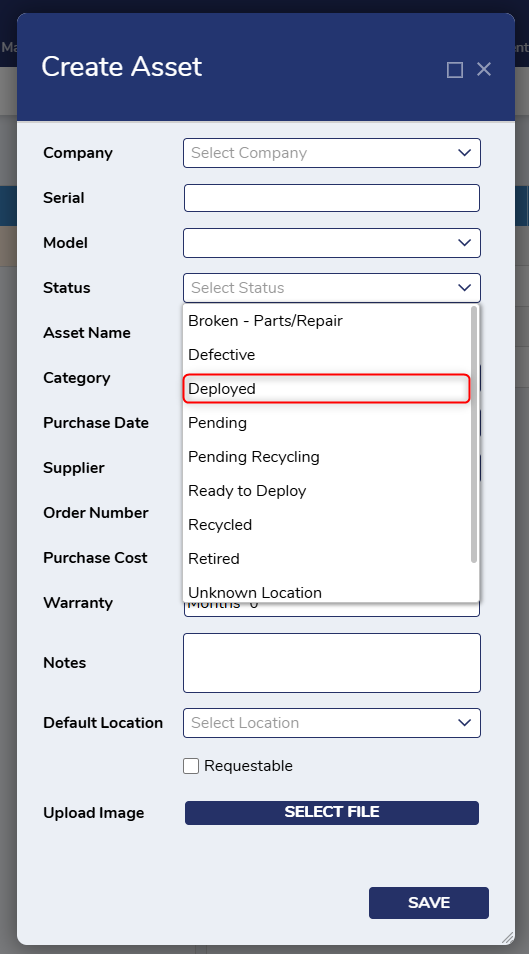
| Create Asset | This Form enables Users to create an asset for the selected space. The Category Dropdown menu will only display a list of categories created solely for an Asset. | 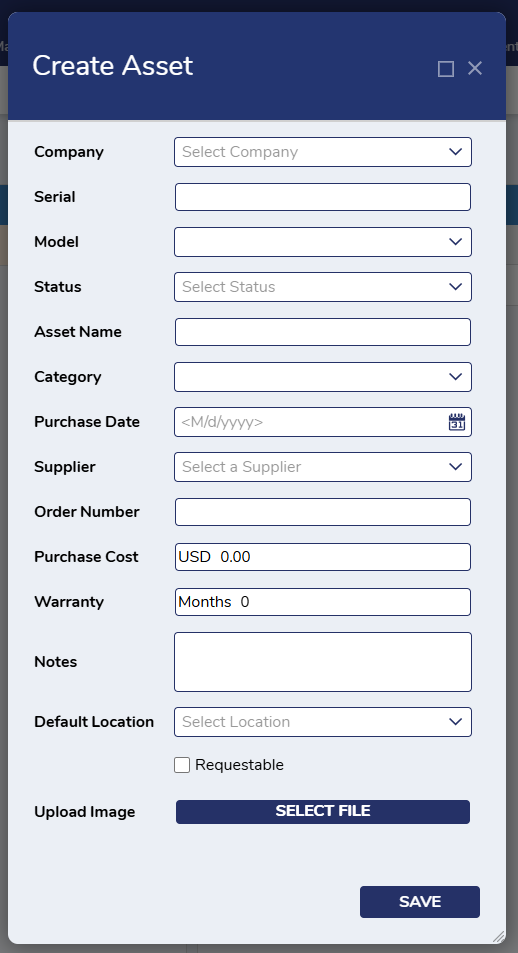 |
| Create Component | This Form enables Users to create a component for the selected space. The Category Dropdown menu will only display a list of categories created solely for a Component. | 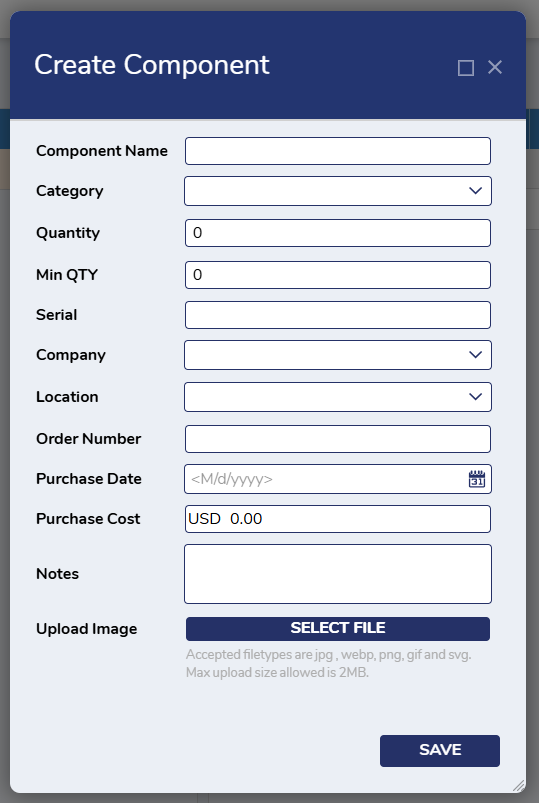 |
| Create Consumable | This Form enables Users to create a Consumable. The Category Dropdown menu will only display a list of categories created solely for a Consumable. | 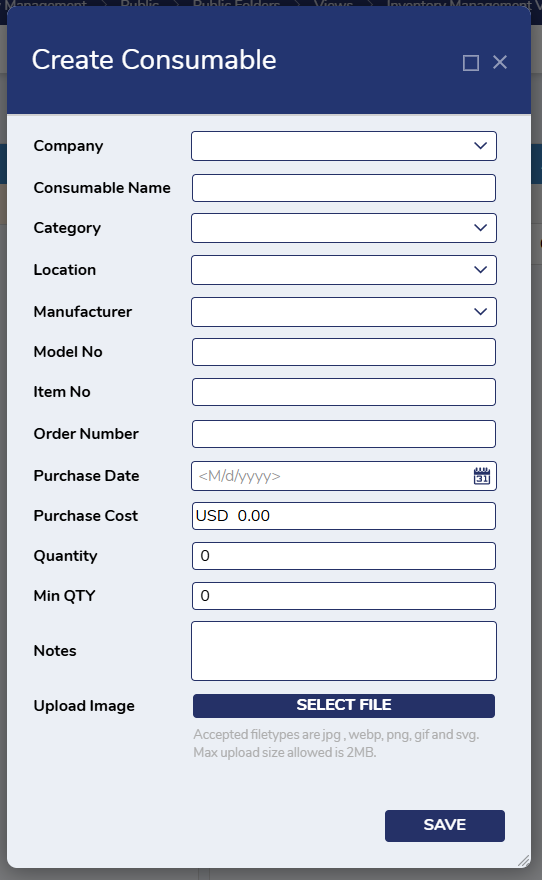 |
| Create License | This Form enables Users to create a License. The Category Dropdown menu will only display a list of categories created solely for a License. | 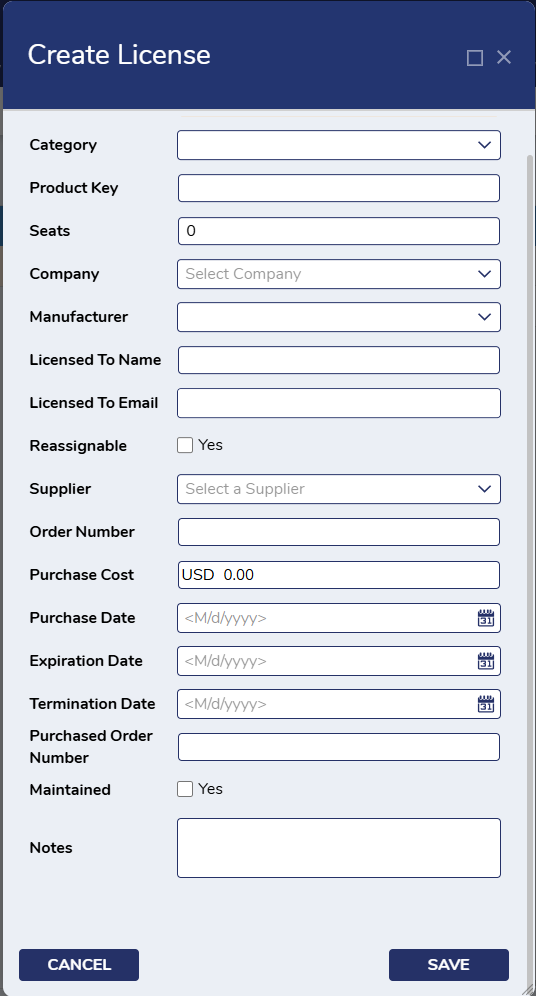 |
Admin Actions
Once an Admin User creates a space, it will display the following categories of User Actions:
- Configuration Management Actions
- Inventory Management Actions
- Location Management Actions
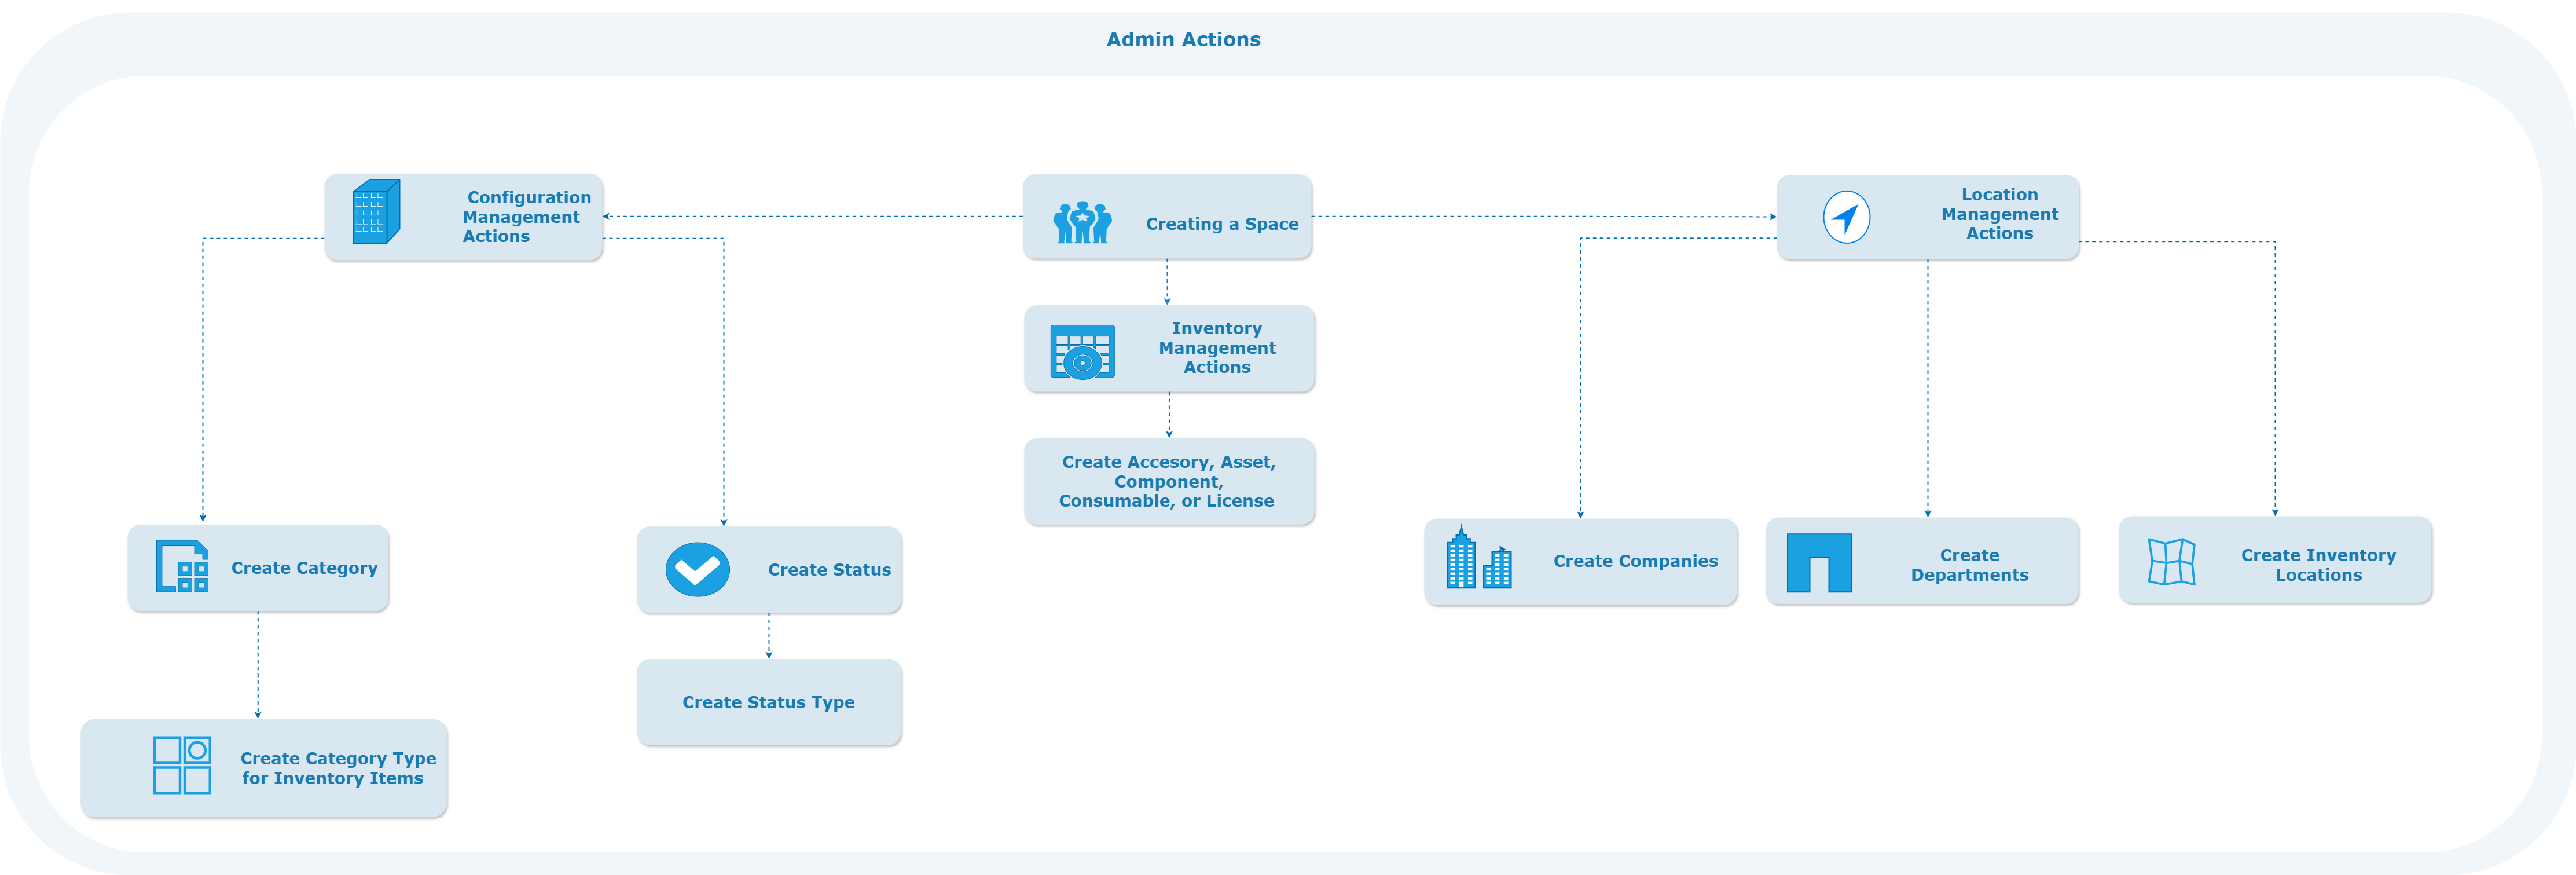
These actions can be found by right-clicking on a created space on the Inventory Management View Dashboard.
How to Use Inventory Management
Creating a Space
- To create a space, navigate to the Inventory Management View Dashboard and select Create Space.
- This action will trigger a Form that Admin Users can specify the Space Name, select a Category, etc.
- The Broadcast Emails field enables Users to send notifications to additional emails.
- After the required fields are completed, click Save to submit the Form.
- A new space will be created, with ten new default statuses.
- Admin Users can customize these statuses by navigating to the Inventory Management View Dashboard, right-clicking on Configuration Management, and selecting Create Statuses.
- Admin Users can customize these statuses by navigating to the Inventory Management View Dashboard, right-clicking on Configuration Management, and selecting Create Statuses.
- A new space will be created, with ten new default statuses.
- Action logs will also be created for the action performed, along with associated comments.
Creating a Company
- To create a company, right click on the desired space, and select Location Management > Create Companies.
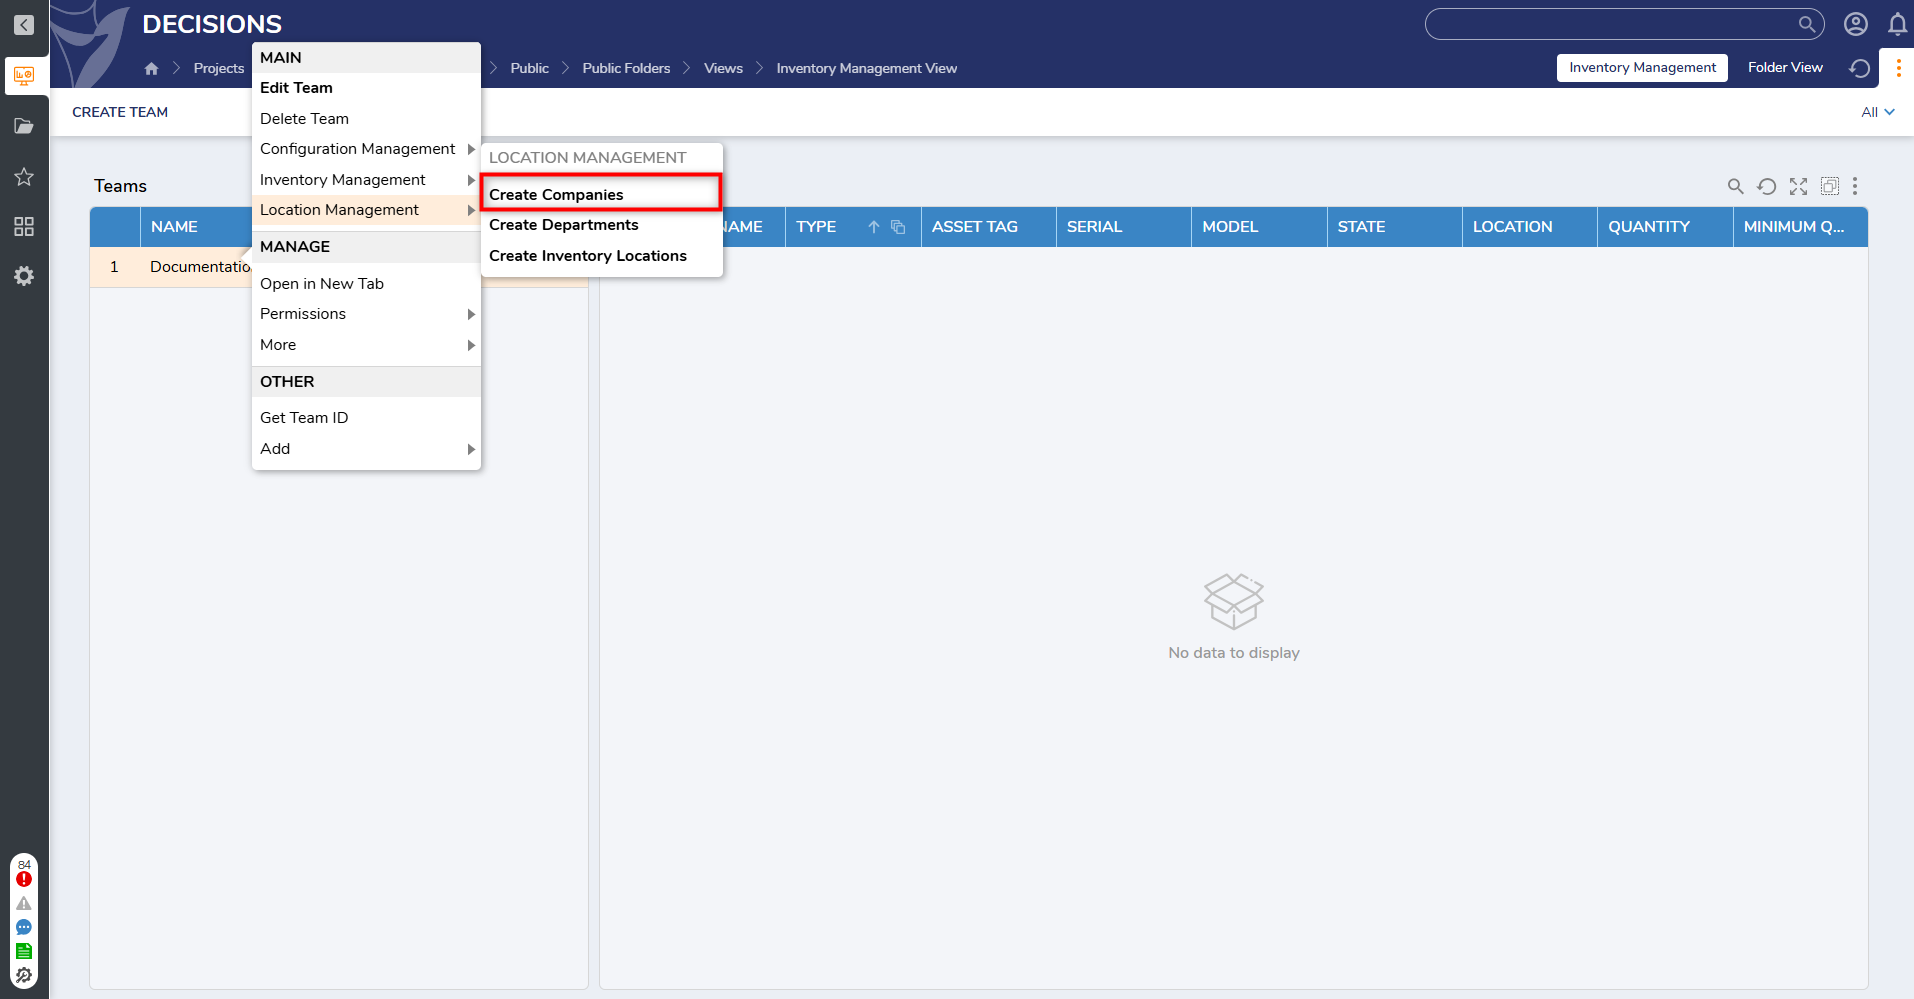
- This action will trigger a Form that enables Users to enter all the necessary details (Company, Name, and Type).
- Users can add multiple companies by clicking Add New Company. Once all the required fields have been entered, select Save to create the desired companies.
- Action Logs will be created for performed actions and associated comments will be added.

Create Location
- To create a location, right-click on a desired space and select Location Management > Create Inventory Locations.
- This action will populate a Form allowing Users to enter all necessary details (Address, City, State, etc.)
- Users can add multiple locations by selecting Add New Location. Once all the required fields have been completed, click Save to save the new location.
- Action Logs will be created for performed actions and associated comments will be added.
Create User
- To create a new User, select the desired space and navigate to the Locations Page. From here, right-click on the desired location and select Create Users.
.png)
- This action will trigger a Form that allows Admin to add details for the User (Name, Email, Alias, etc.)
- Admin Users can also select the desired Department and Company using the Dropdown menu.
- After the desired fields have been created, click Save to create the new User.
- Action Logs will be created for performed actions and associated comments will be added.
.png)
Create Inventory Item
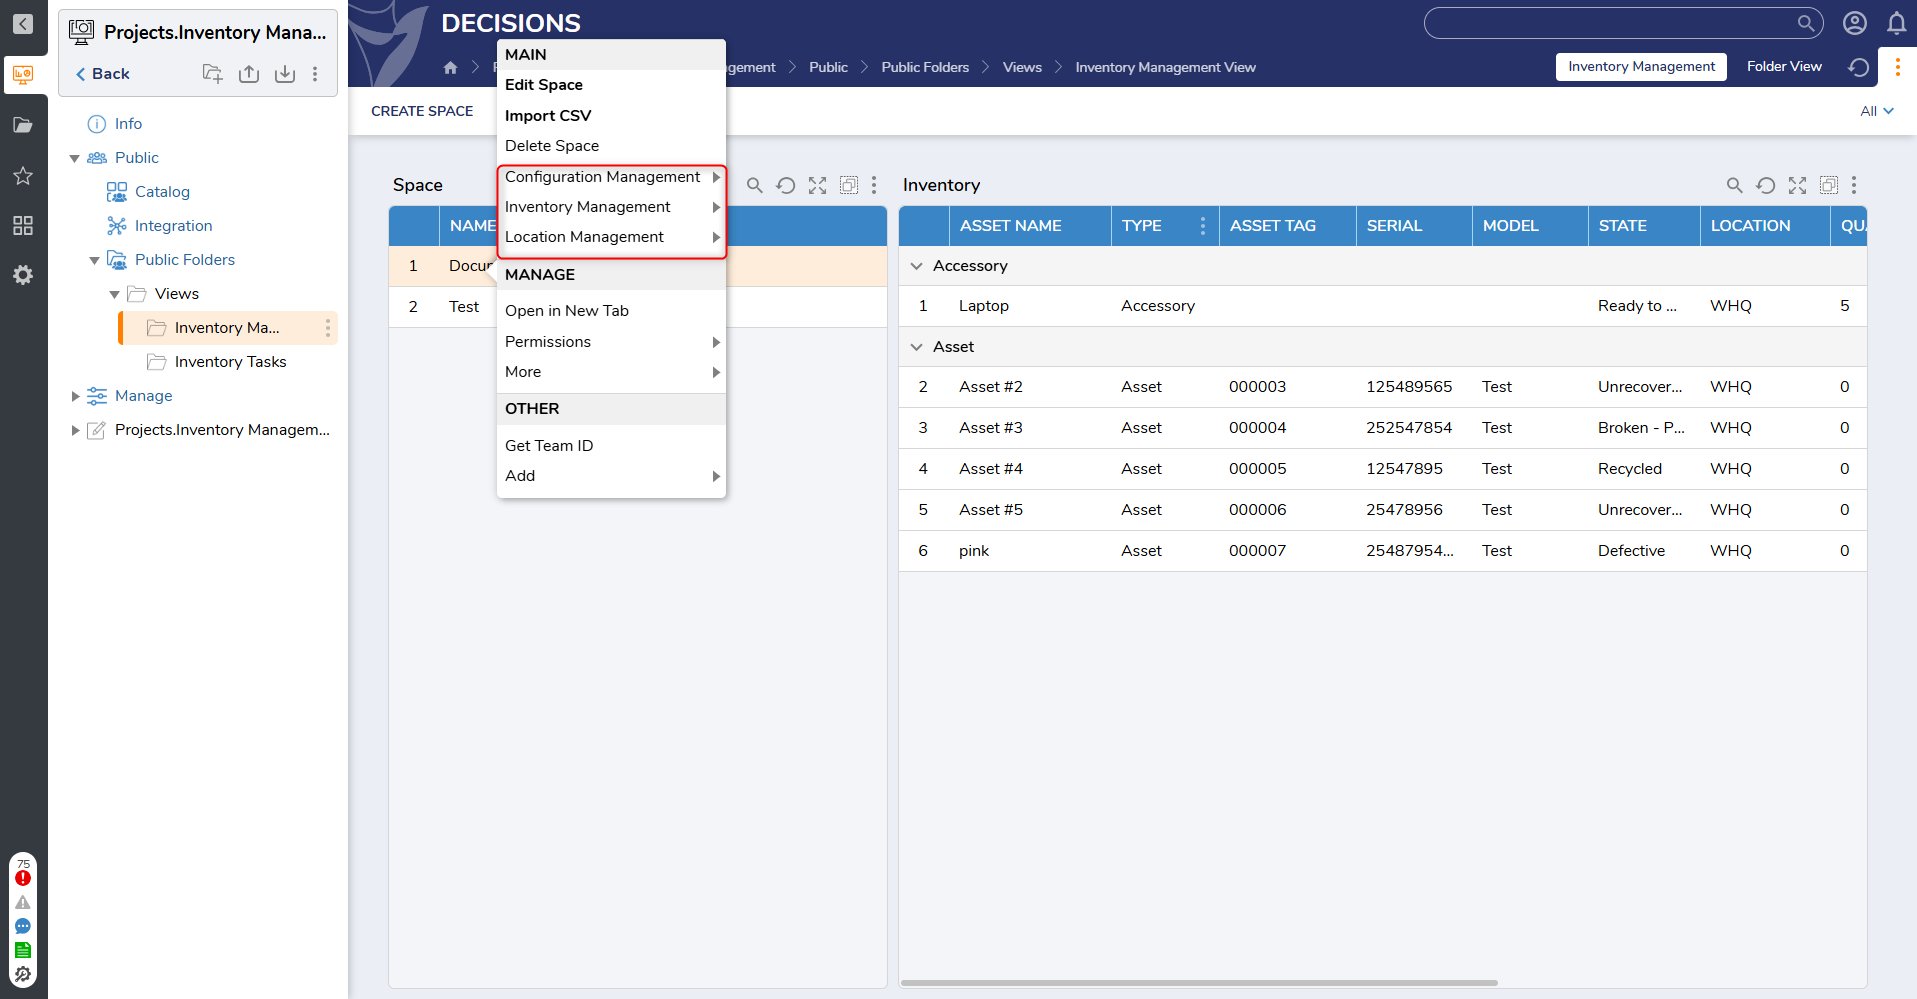
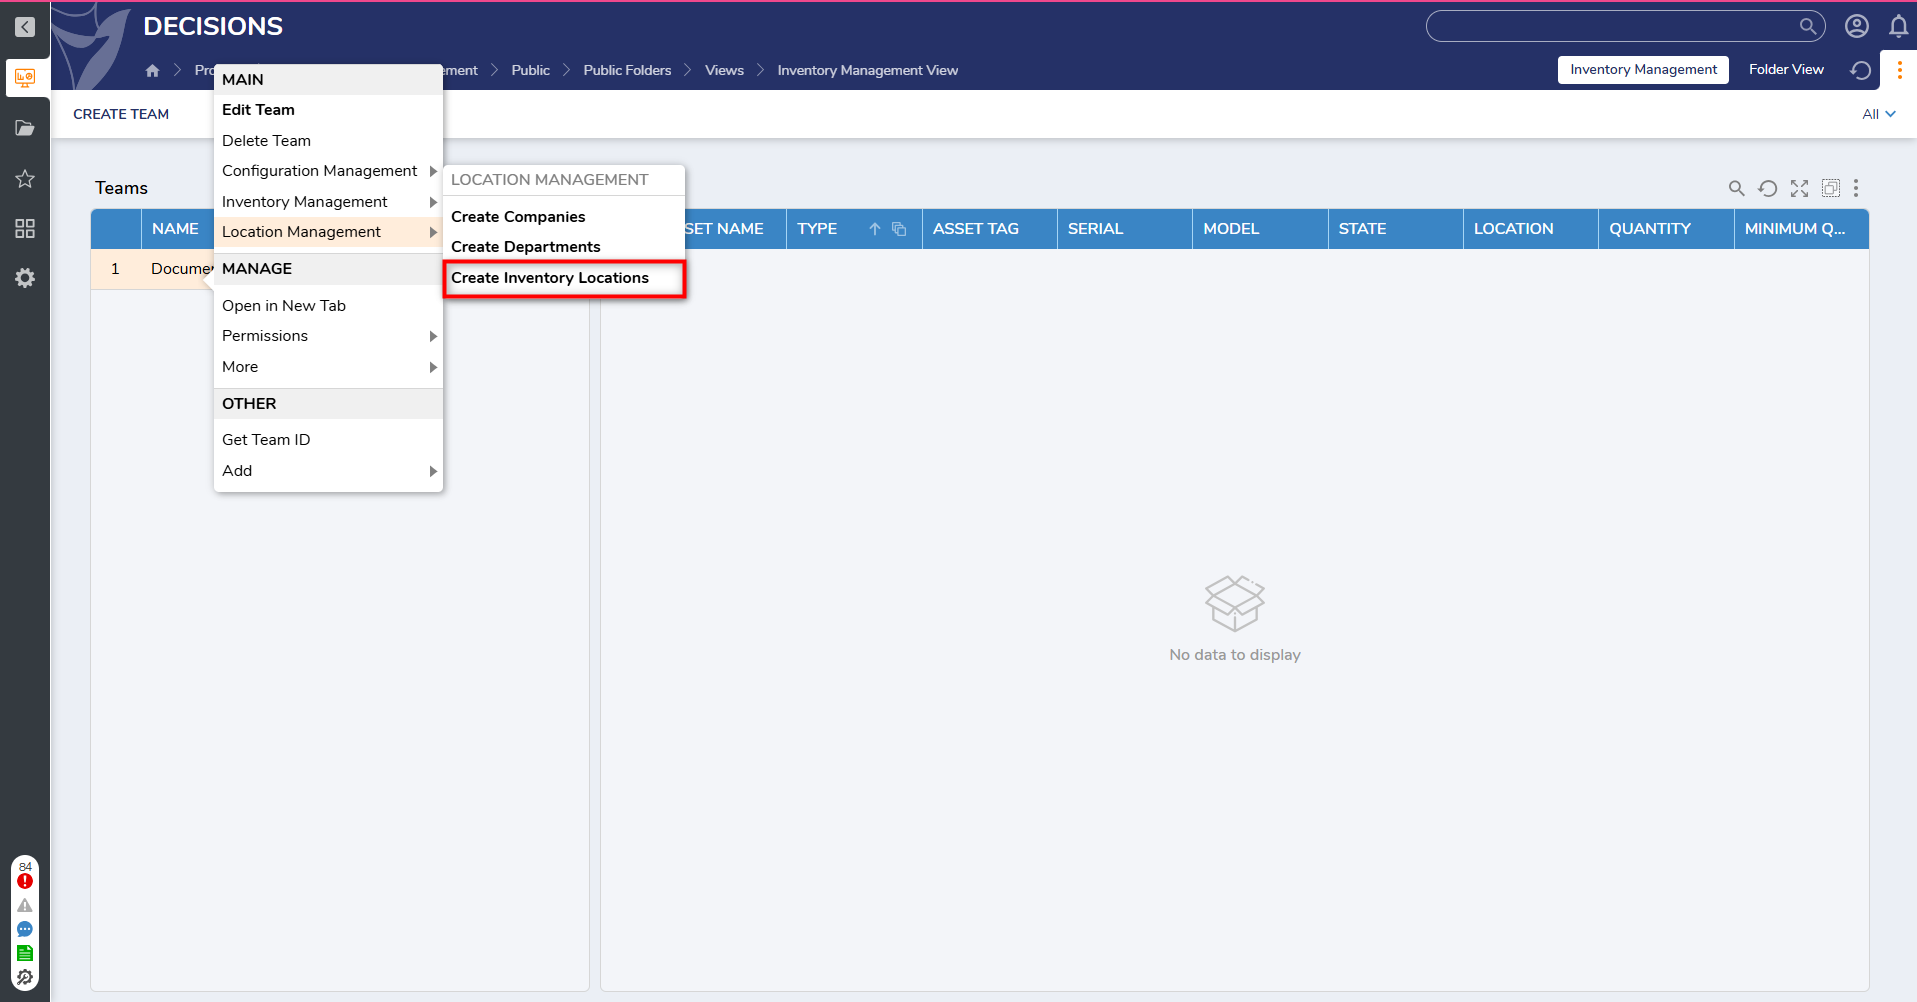
- To create an Inventory item, right-click on the desired space and hover over Inventory Management.
- Users can choose between five Inventory types (Create Accessory, Create Asset, Create Component, Create Consumable, and Create License).
.png)
- After selecting the desired type, a Form will populate allowing Users to enter all the necessary information. Once all the required details have been completed, click Submit to create and save the new Inventory.
- Action Logs will be created for performed actions and associated comments will be added.
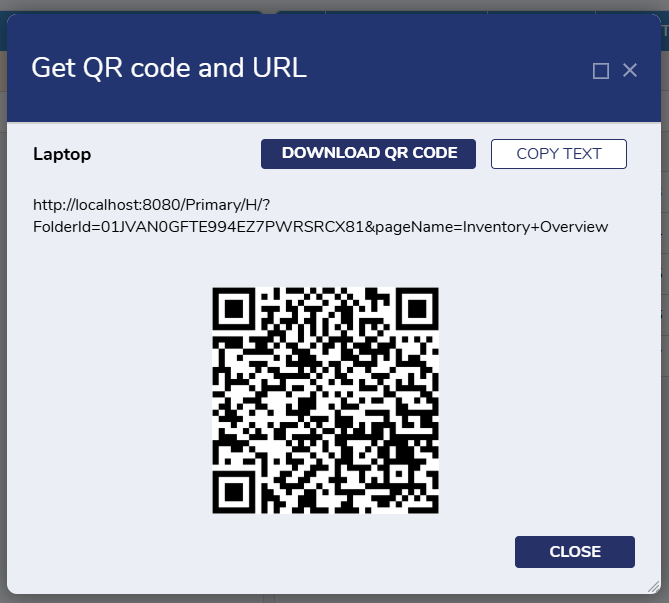
- Once the Inventory item has been created, Users can access a QR code and direct URL by right-clicking on the item and clicking Get QR code and URL.
Check-in Inventory
Admin Users are only able to check-in Inventory items marked as Assets. All other Inventory Items can only be checked-out.
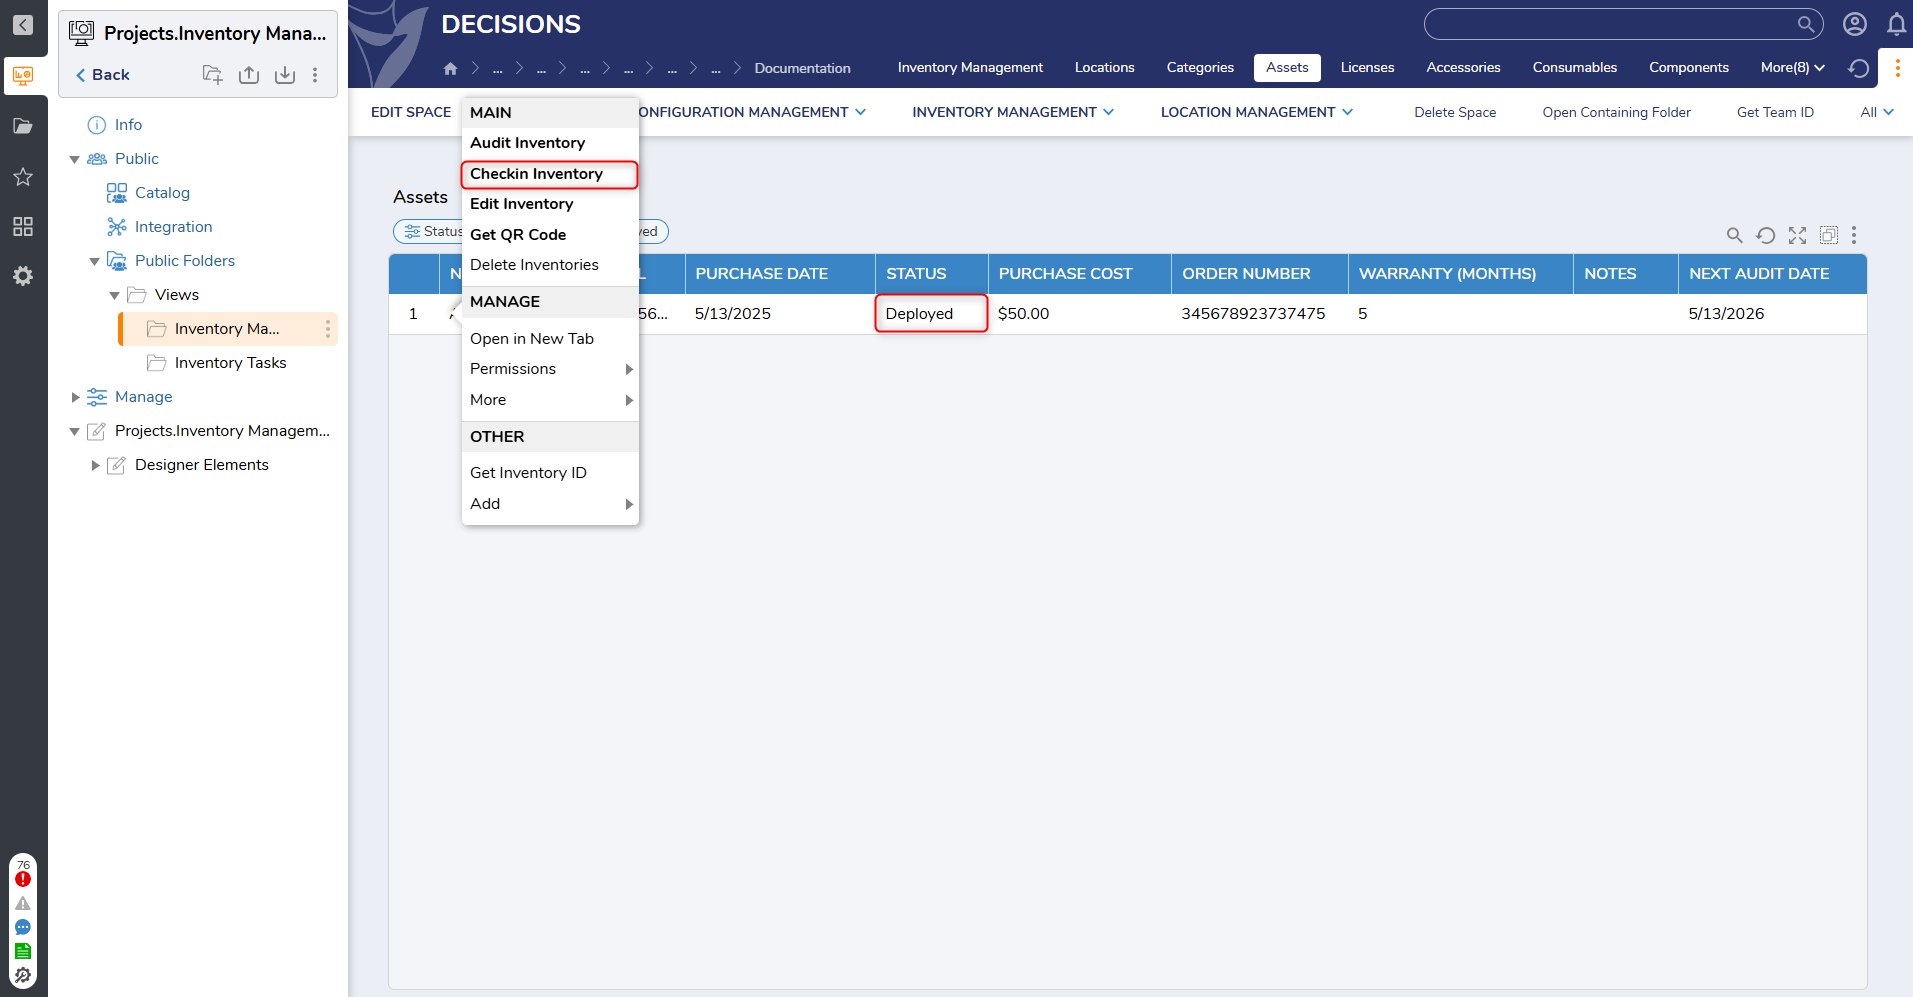
Admin Users can check-in Assets through the Inventory Management View Dashboard.
When checking in Assets, the Check-in Inventory action will only be visible on Assets in the Deployed state.
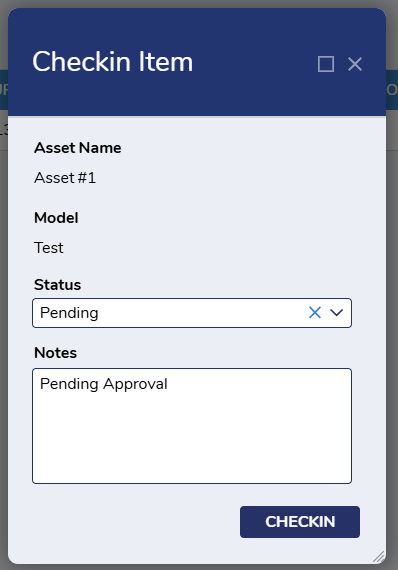
- To complete a check-in, right-click on the Inventory, once it's in the Deployed State. This action will populate the Check-in Form.
- Users can review the information displayed and update the status.
- The status should not equal Deployed, or else it will throw an error.
- Users can review the information displayed and update the status.
- Once the required details have been completed, Users will be able to successfully check-in.
- Action Logs will be created for performed actions, and associated comments will be added.
Check Out Inventory
IT Admin can check-out any of the Inventory items (Accessory, Asset, Component, Consumable, and License) by navigating to the Inventory Management View Dashboard:
- From here, right-click on the Inventory item and select Check-out Item.
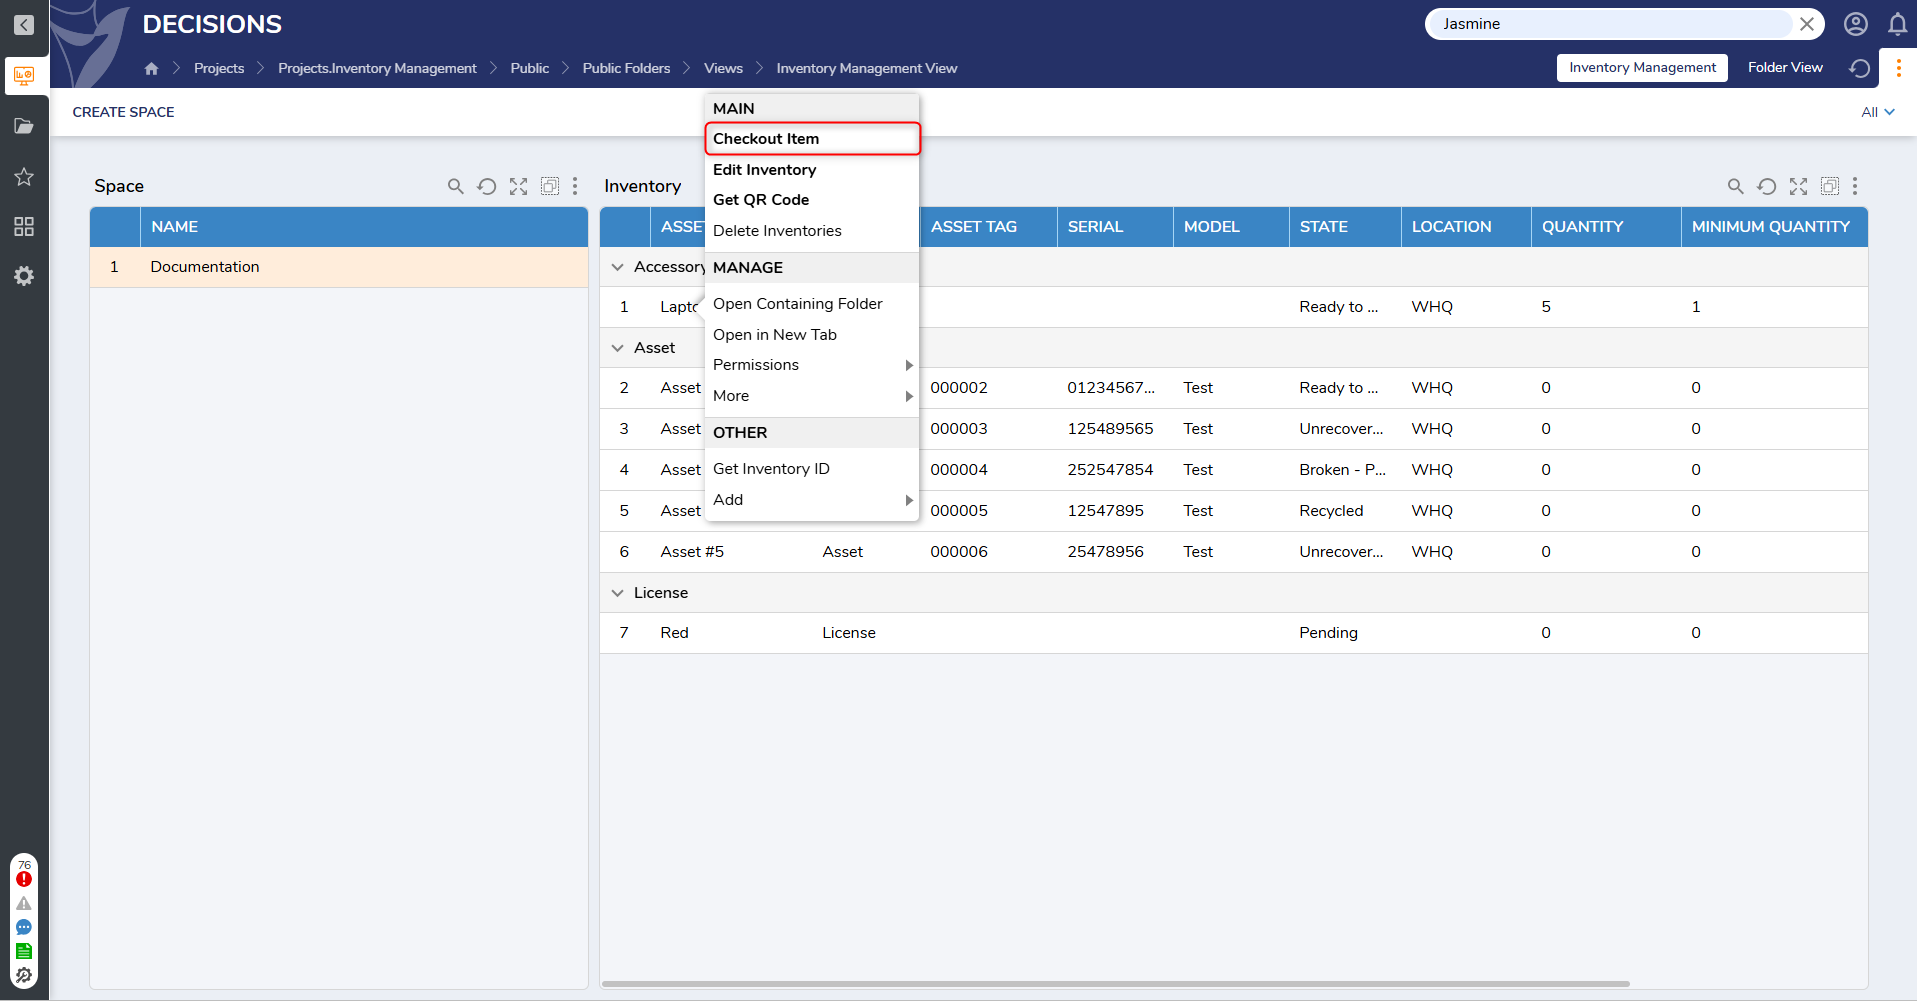
- This action will populate the Checkout Item Form.
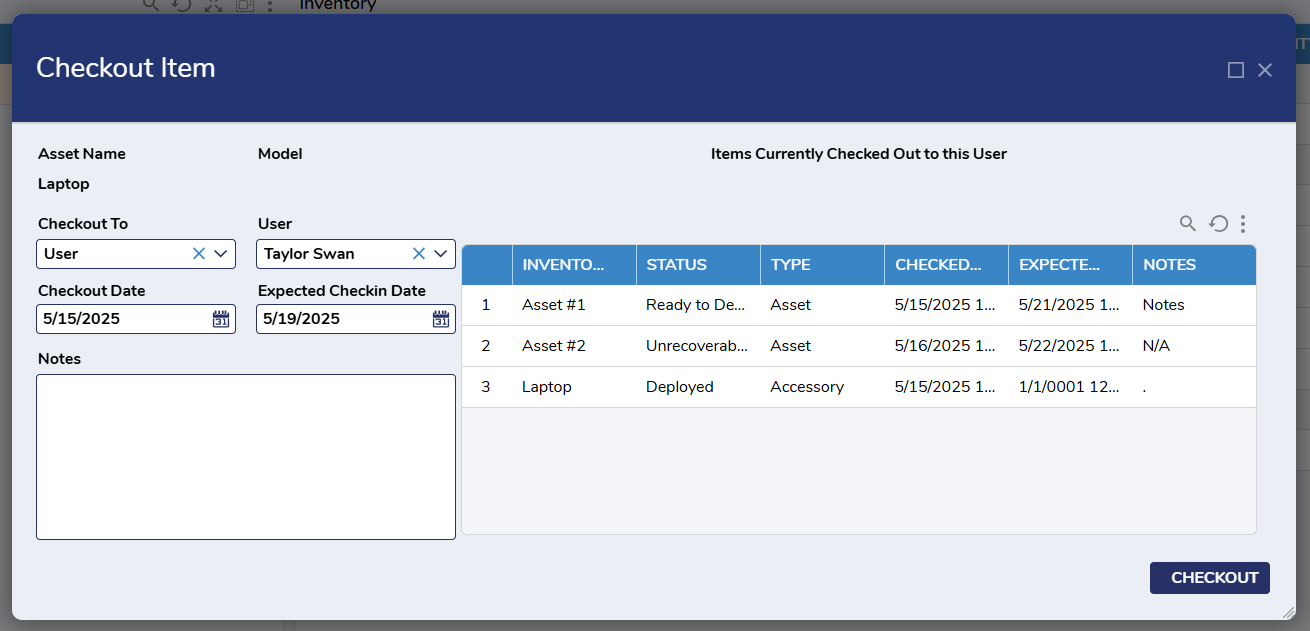
- Admin Users can choose to check-out the item to a User, Asset, or Location, and select the associated Asset, User, or Location in the next Dropdown menu.
- Select a date for the Check-out Date and Expected Check-in Date, and any desired Notes.
- After the required information has been completed, select Checkout to save the changes.
Tracking Activity
Admin Users can track all activity, including the status of inventory items, by navigating to the Recent Activity Report on the Inventory Management Dashboard. The Dashboard always displays a tile with a current count of Inventory items that have been created and Users.