The Logs Overview page enables Users to view all logs available in the Process Mining Platform in a tabular format. Users can sort logs based on desired criteria and easily identify logs that require reorganization.
Navigating to the Logs Overview Page
- To view the Logs Overview Page, navigate to the homepage and select Global View in the upper right-hand corner.
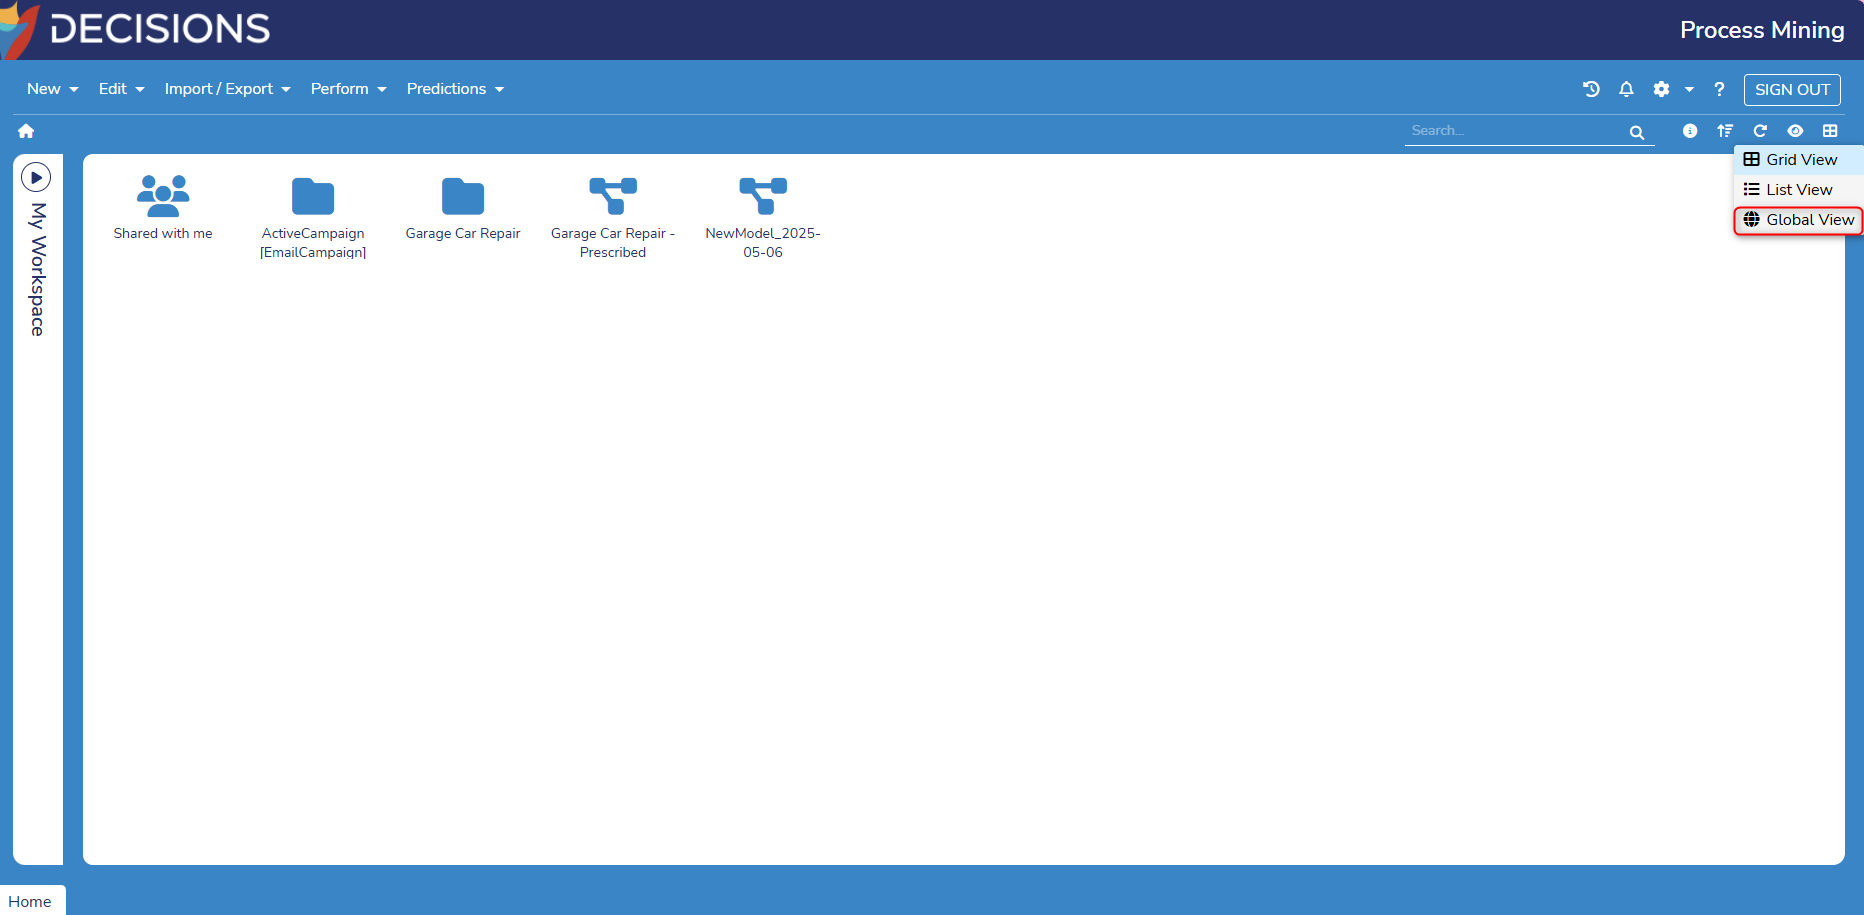
This action will populate all logs available in the Process Mining Platform.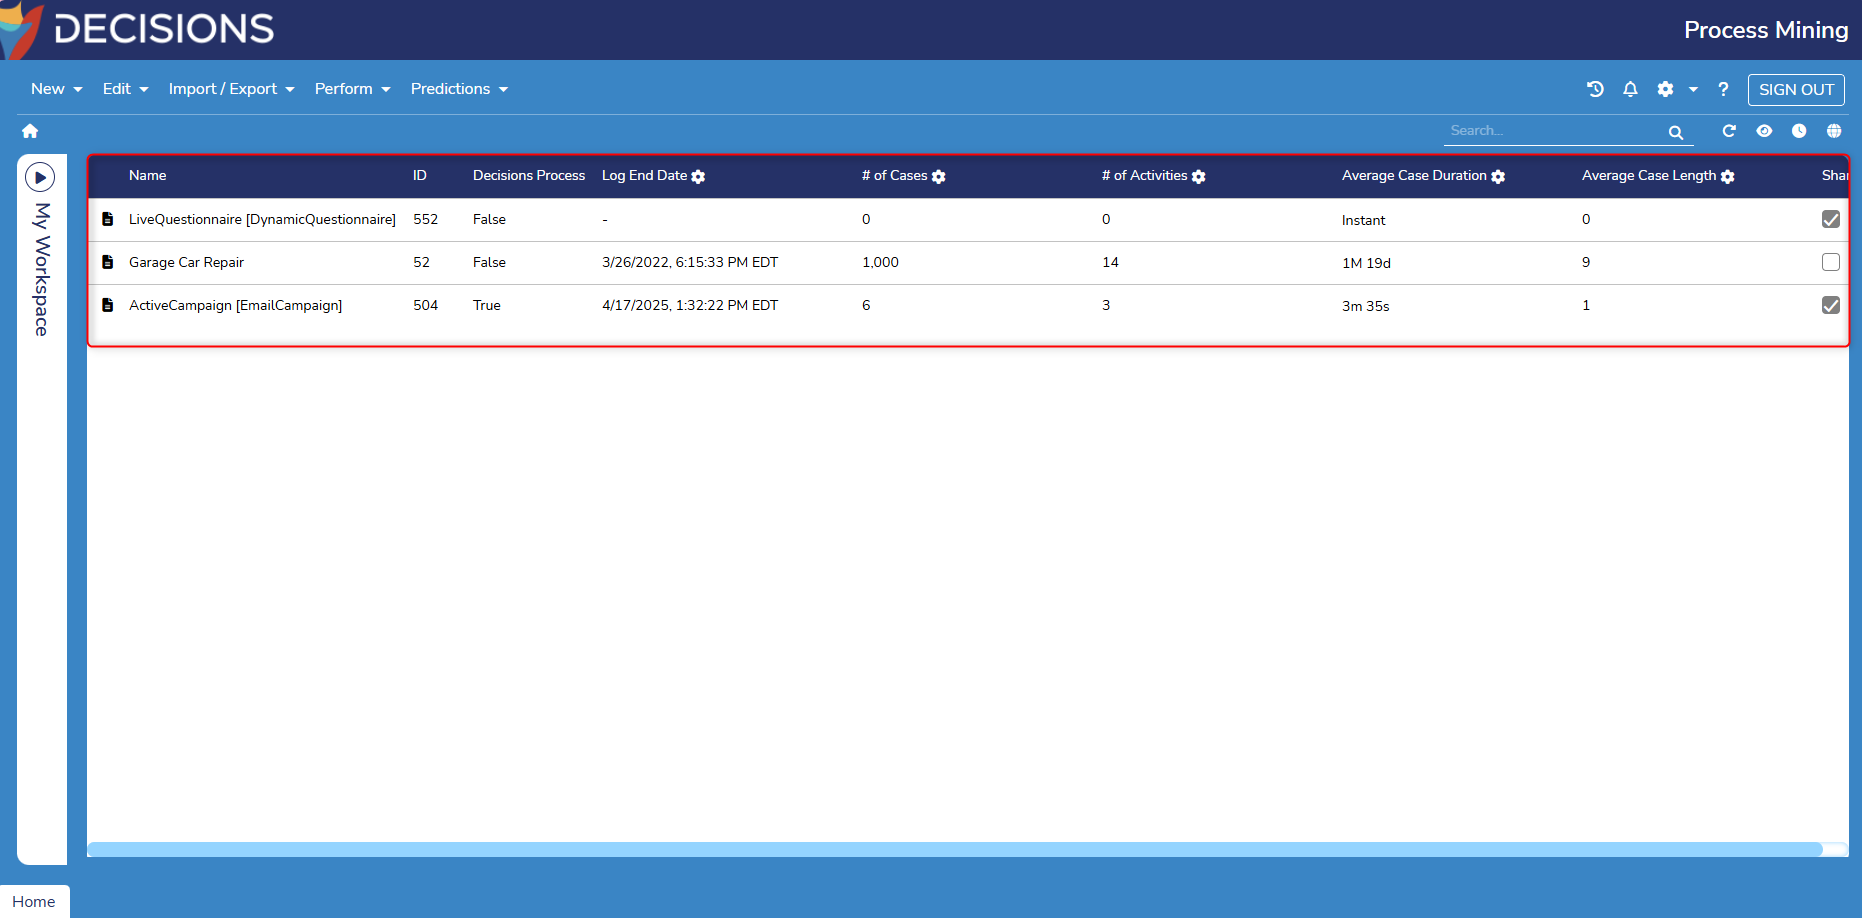
In v3.8, the Global View has been optimized to only display essential details across all event logs, which has improved performance.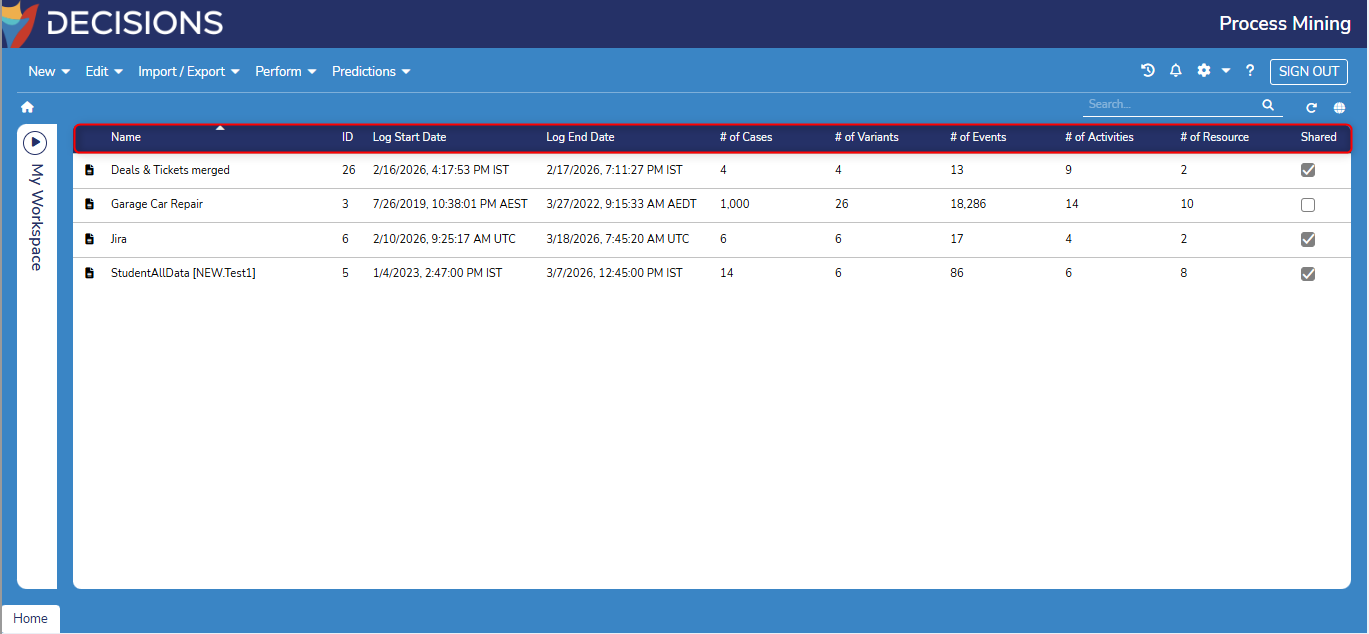
- To view only Decisions Logs, click the Eye button and ensure Decisions Logs is checked.
- This action will remove any logs where the Decisions Process is False.
.png)
- This action will remove any logs where the Decisions Process is False.
User Actions
- Users can perform multiple actions when utilizing the Logs Overview Page, using the toolbar, and by directly interacting with the log.
- The following actions are available in the Toolbar:
- Search: Users can search for specific values within a log.
- Refresh: Users can refresh the homepage and undo any changes made.
- Visibility: Users can remove logs not associated with Decisions from the view.
- Data Timeframe: Users can customize the A/B Testing Comparison settings.
- Global View: Users can change the current view to a Grid View or List View, or back to a Global View.
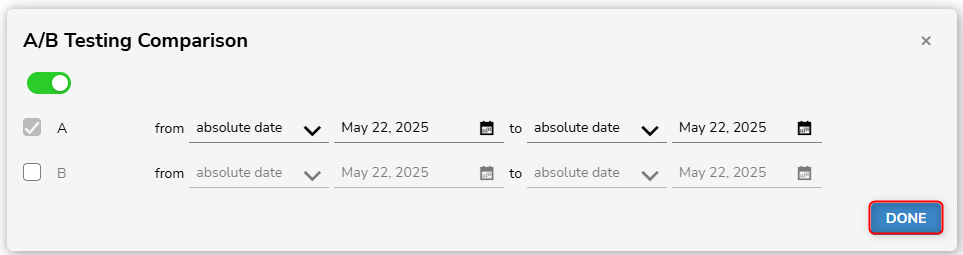
Editing the Data Timeframe
- To edit the Data Timeframe, select the timer icon.
- This action will populate a window that enables Users to modify the A/B Testing Comparison.
- To edit the window, toggle the slider button to on and enter the desired values.
- Once the values have been entered, click Done to exit the window and save any changes.
- This action will populate a window that enables Users to modify the A/B Testing Comparison.
Sorting Logs
Users can sort logs based on desired criteria in the column values, such as for the average duration or number of variants.
To sort logs:
- From the Logs Overview Page, click on any of the column values.
- All columns, aside from Shared, can be sorted from descending to ascending and vice versa.
.gif)
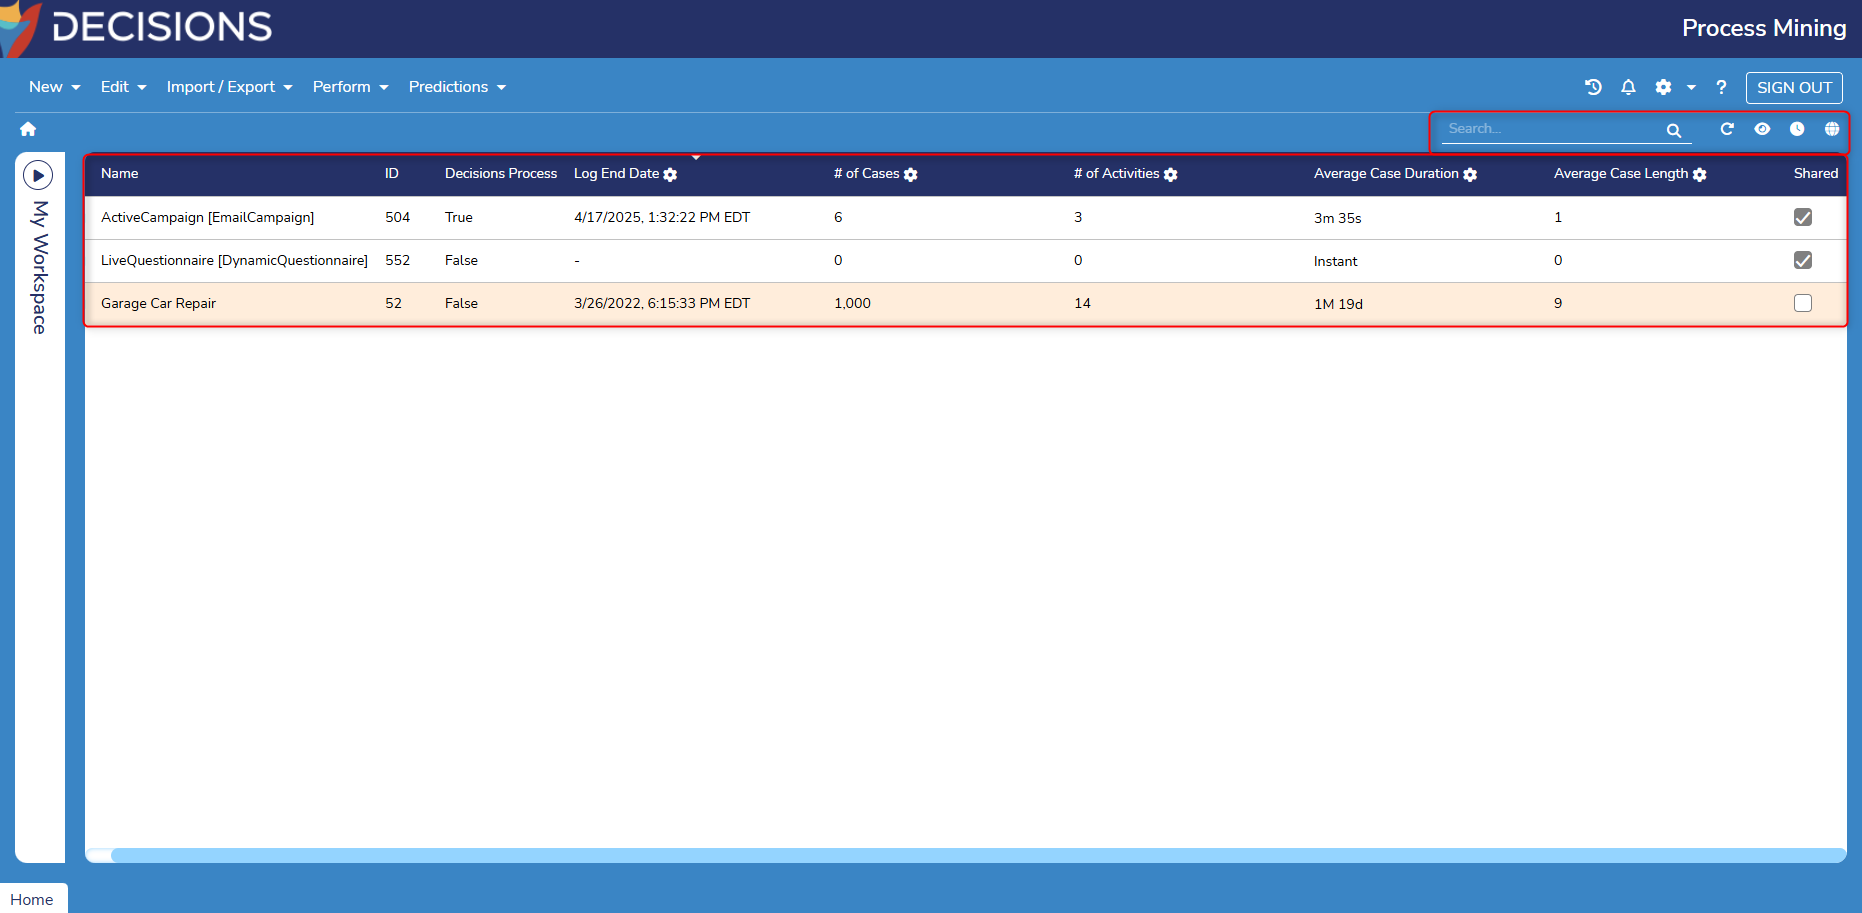
- The Shared column displays a filled-in check box if the log is shared with another User.
- Users can check an unfilled box if they wish to share the log with another User.
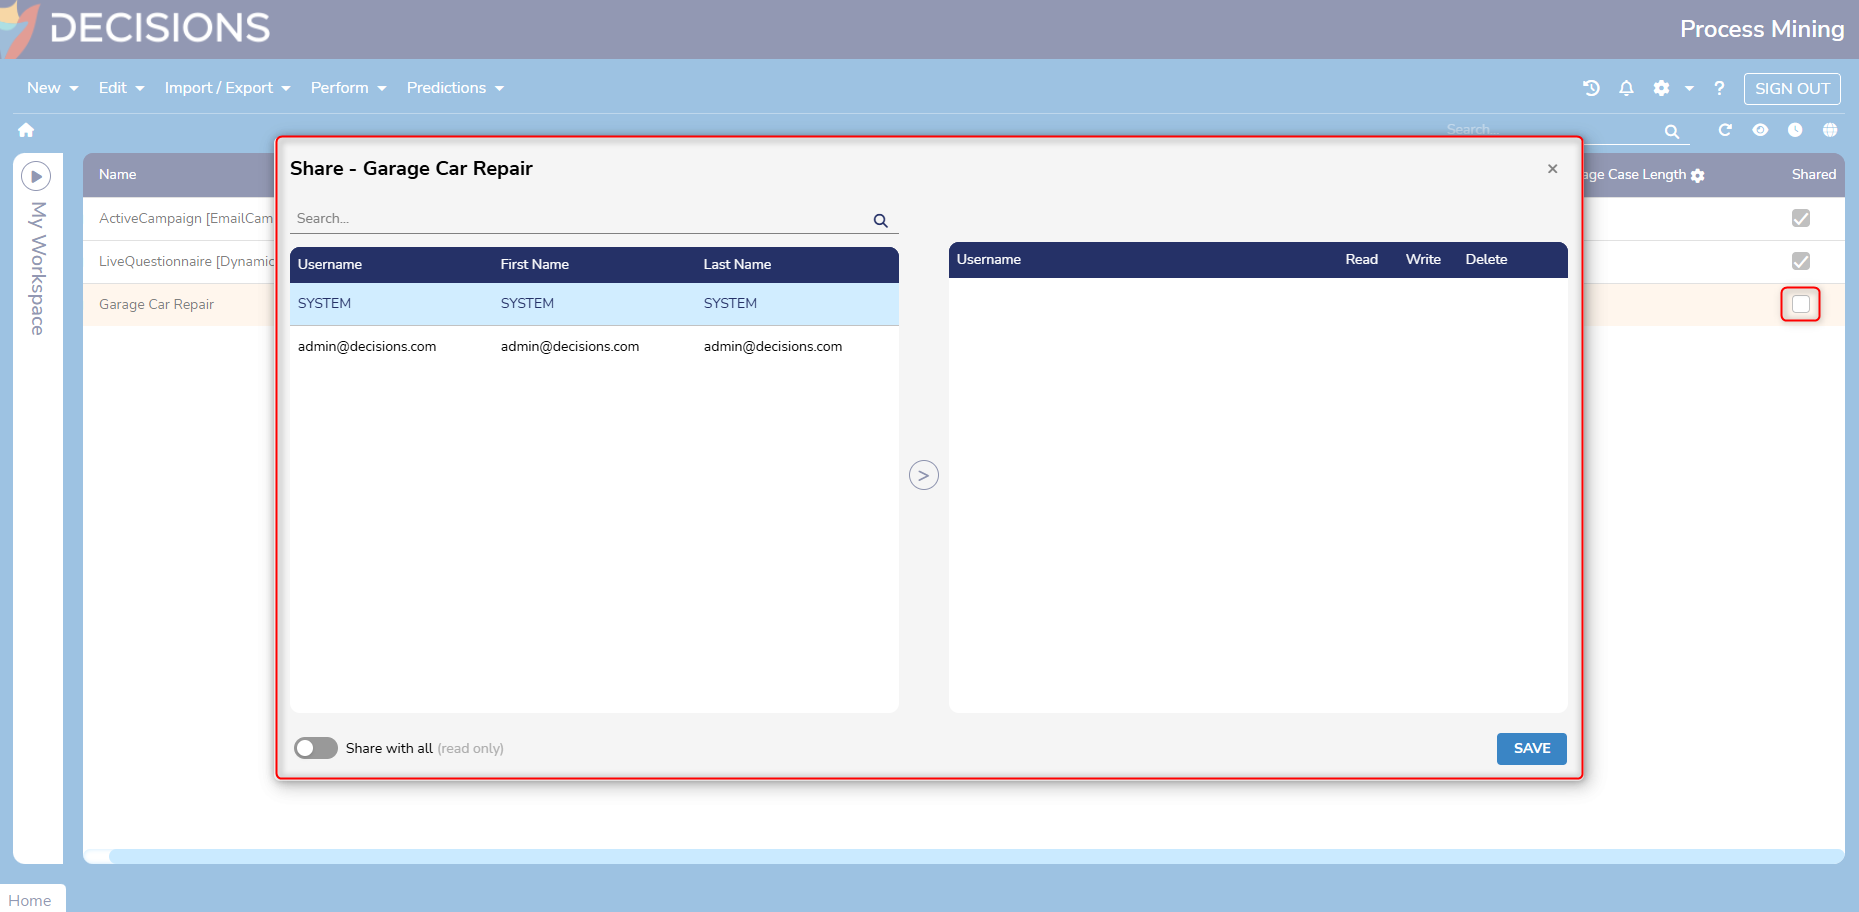
- Toggling on Share with all automatically shares the selected log with all Users displayed in this list. Click Save to exit this window and save any changes.
- Users can check an unfilled box if they wish to share the log with another User.
- The Shared column displays a filled-in check box if the log is shared with another User.
- Columns with a Settings icon have additional sorting options.
- Log End Date can be changed to Log Start Date.
- Number of Cases can be changed to Number of Case Variants.
- Number of Activities can be changed to Number of Activity Executions.
- Average Case Duration can be changed to Maximum Case Duration, and Minimum Case Duration.
- Average Case Length can be changed to Maximum Case Length and Minimum Case Length.
- All columns, aside from Shared, can be sorted from descending to ascending and vice versa.
Identifying Logs for Reorganization
- Users can double-click directly on a log to view it. From here, Users can determine if it should be reorganized.
.gif)
Log Settings
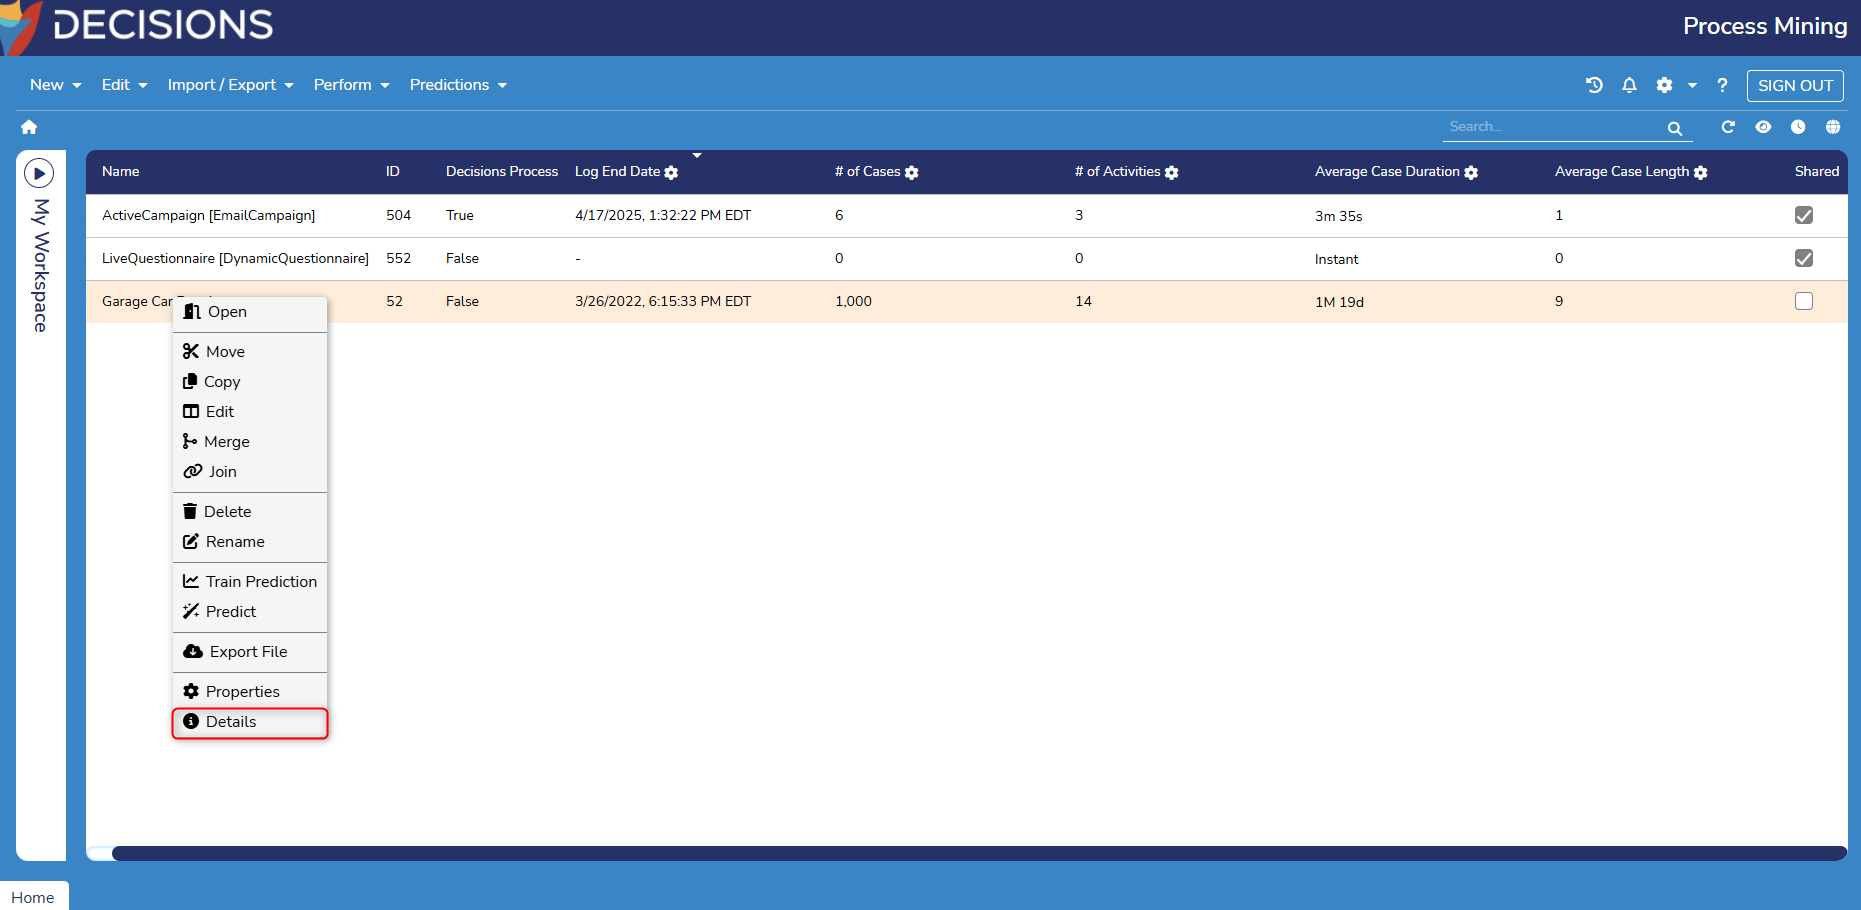
- The following settings can be accessed by right-clicking on any log.
.png)
| Setting Name | Function |
|---|---|
| Open | Opens the selected log. |
| Move | Moves the selected log to a desired Folder. |
| Edit | Allows Users to reorganize the selected log. A new log is created that reflects any changes made. |
| Merge | Allows Users to merge multiple logs with desired attributes. |
| Join | Allows logs to have additional attributes through JOIN queries. |
| Delete | Deletes the selected log. |
| Rename | Allows Users to rename the selected log. |
| Train Prediction | Retrieves available data and creates a model from it. |
| Predict | Allows Users to apply a prediction model against an imported log or CSV file. |
| Export File | Allows Users to export the selected log for a specified Data Timeframe as an XES or CSV file. |
| Properties | Displays property information for the selected log. |
| Details | Displays a window with information about the selected log. |
Setting the Hot Data Window Size
- To set the Hot Data Window Size, Users can right-click on any log and select Details.
- From here, a window will populate with the following information:
- Name
- ID
- Type
- Log Owner
- Permissions
- Last Modified
- Shared
- Hot Data Window Size
- The Hot Data Window Size will display the current memory usage.
- Users can enter the desired window size in the number box and choose between months and years with the Dropdown menu.
- There is also an option to enable unlimited memory usage.
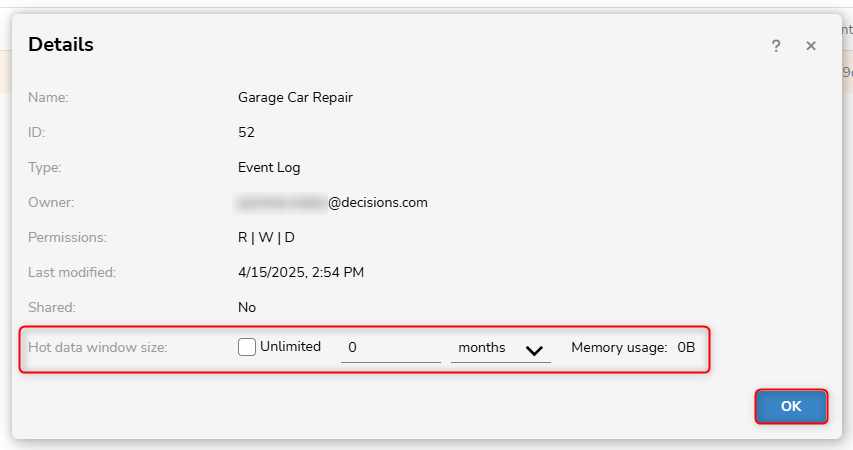
- Click Save to close the window and save any changes.
- There is also an option to enable unlimited memory usage.
- Users can enter the desired window size in the number box and choose between months and years with the Dropdown menu.
Feature Changes
| Description | Version | Release Date | Developer Tag |
|---|---|---|---|
| Added a new overview page where Users can see all Logs available in the platform. | 3.1 | July 2024 | [DT-040121] |
| The Global View in Process Mining has been optimized to display only essential details across all event logs, significantly improving performance. | 3.8 | March 2026 | [DT-045771] |