Overview
The following article serves as a walkthrough for installing and troubleshooting Decisions Process Mining.
In v8.19 and higher, the module does not need to be installed manually.
Prerequistes
Users must confirm that all Process Mining Requirements are met before attempting installation:
- Process Mining is only compatible with Decisions v8.5 or higher and requires a Windows or Linux machine or server.
- It is recommended that both Process Mining and Decisions are operating on the latest version for optimal compatibility.
Process Mining via Local Installation
- Run the Process Mining Installer as an Administrator. Running as a non-administrator prevents creating Process Mining files in the Program Files folder. Select Next to begin.
- Select I accept the terms of the license agreement, then select Next to proceed.
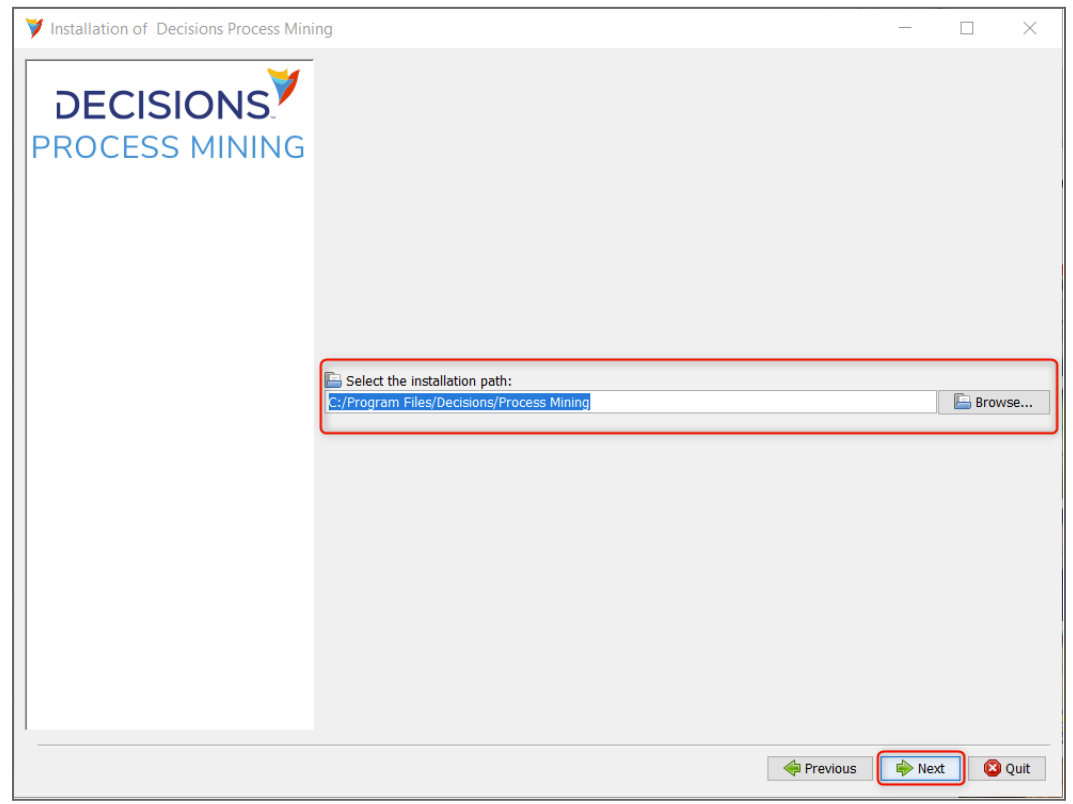
- Select the Installation Path for Process Mining by typing into the field provided or selecting Browse and navigating to the desired folder. The default file install path created is: C:/Program Files/Decisions/Process Mining. Confirm the directory location and select Next. If selecting a pre-existing installation path, a validation window appears to confirm the possibility of overwriting the old files. Select Yes to confirm this location.
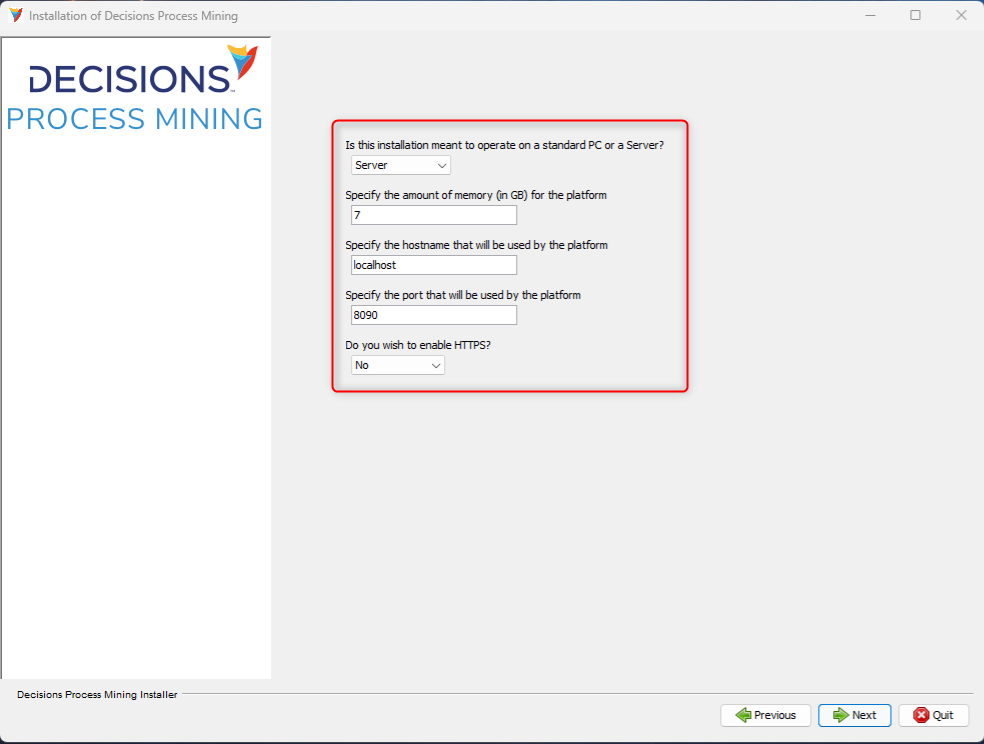
- Configure the following Process Mining application settings:
The combination of Hostname and Port Number comprise the Process Mining URL. Based on this example, the URL would be http://localhost:8090. Select Next to proceed. Users may receive a Java popup, simply select "Allow" to proceed.Setting Name Example Selection Function PC or Server Installation Type Server Server allows more RAM consumption due to multiple users accessing the Process Mining instance. It is recommended to configure Process Mining as a service to reduce downtime.
PC limits RAM consumption, thus is best selected for local environments (single user access).Amount of Platform Memory (GB) 7 Prompts for amount of RAM (GB) to allocate to the platform. Server type installations are more demanding than PC.
By default, this option populates with half of the available RAM (GB) on the machine or all of the RAM minus 1GB if the machine contains equal to or less than 8GB of total RAM. This may be changed after installation to remove any unforeseen lag.
Not giving Process Mining enough RAM may cause imports to fail.
Platform Hostname Localhost (default) Prompts for the Hostname for Process Mining.
The Hostname between Process Mining and a Decisions Server do not need to match to operate together.
Platform Port 8090 (default) Prompts for the Port that Process Mining will use.
Ensure this Port is not occupied by other services by executing netstat -ano in a command prompt window.
Enable a Security Certificate (HTTPS) No (default) The Installer has been updated to allow HTTPS during installation for advanced Users. We recommend installing on an open HTTP port during the first setup and then setting up HTTPS after licensing is completed. If this is your first time installing Process Mining, it is not recommended to add a certificate at this point.
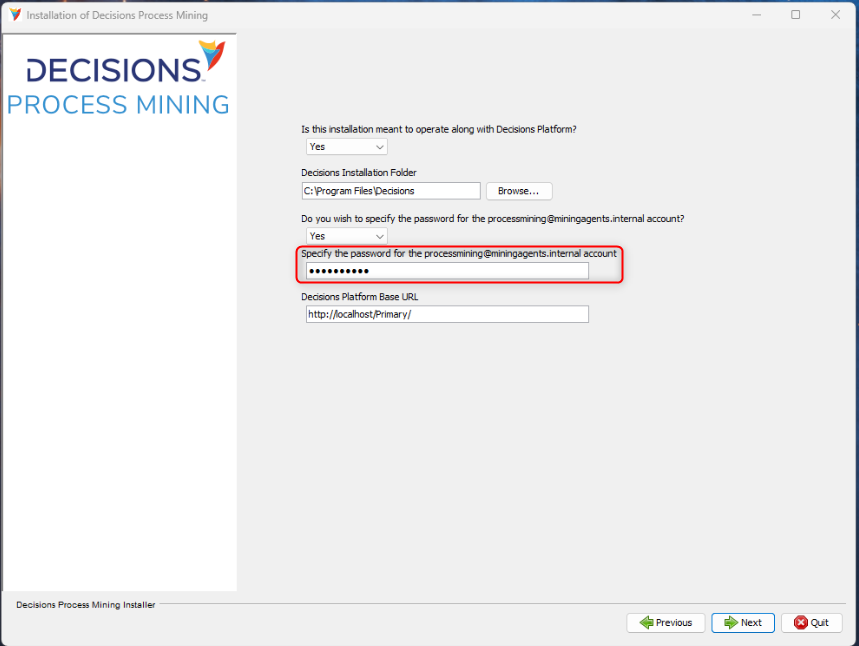
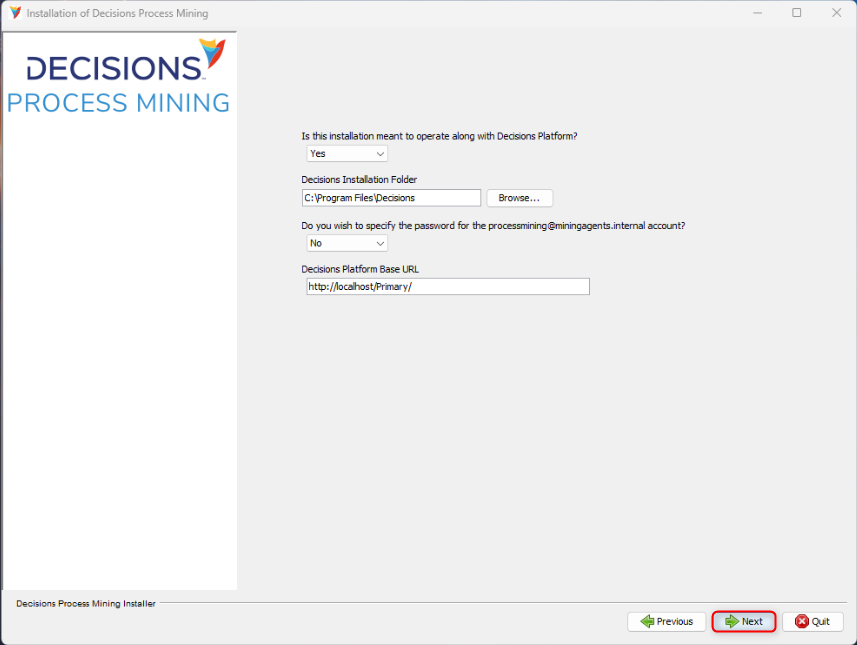
- Configure Process Mining to operate along with the main Decisions platform:
- Set the Dropdown to Yes.
- Set the Decisions Installation Folder by typing into the field provided or selecting Browse to navigate to the desired folder. Decisions default install directory is C:\Program Files\Decisions\
- Users have the option to specify the latest password for the Mining Agent by selecting Yes in the Dropdown. If the Mining Agent's password has not changed, the default password here should work; However, if Process Mining is being installed on a Decisions Production instance, Users are strongly recommended to change this Password before turning on Process Mining.
- For more information on changing the password for the Mining Agent, please visit Process Mining Settings.
- Specify the Decisions Platform Base URL found in the Settings.xml file or the System Information dialog (ex: http://localhost:8080)
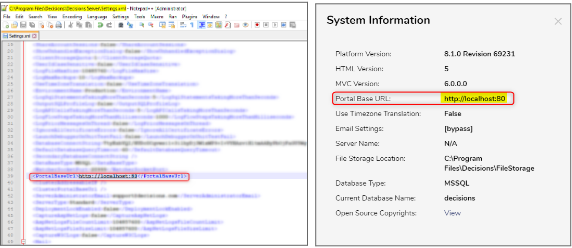
- The Decisions Platform Base URL needs to include the instance name. Sample URL: http://localhost:8080/Primary
- Select Next to proceed.
- Toggle whether the Process Mining.bat file will automatically run at startup. If checked, the Process Mining task will be installed in the Windows Task Scheduler, which will run the Process Mining task that starts the service at Startup. Enabling this removes the need to start Process Mining as a service. Select Next to proceed.
.png)
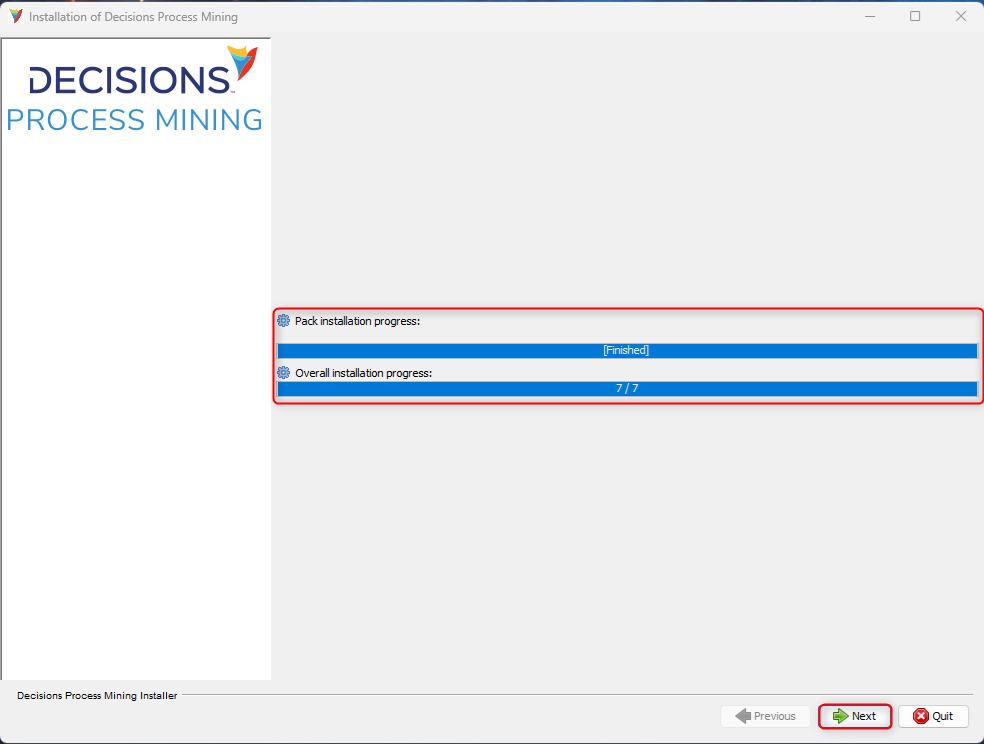
- Installation of Process Mining is underway with the specified configurations. Once complete, the download bars display [Finished]. Select Next to proceed.
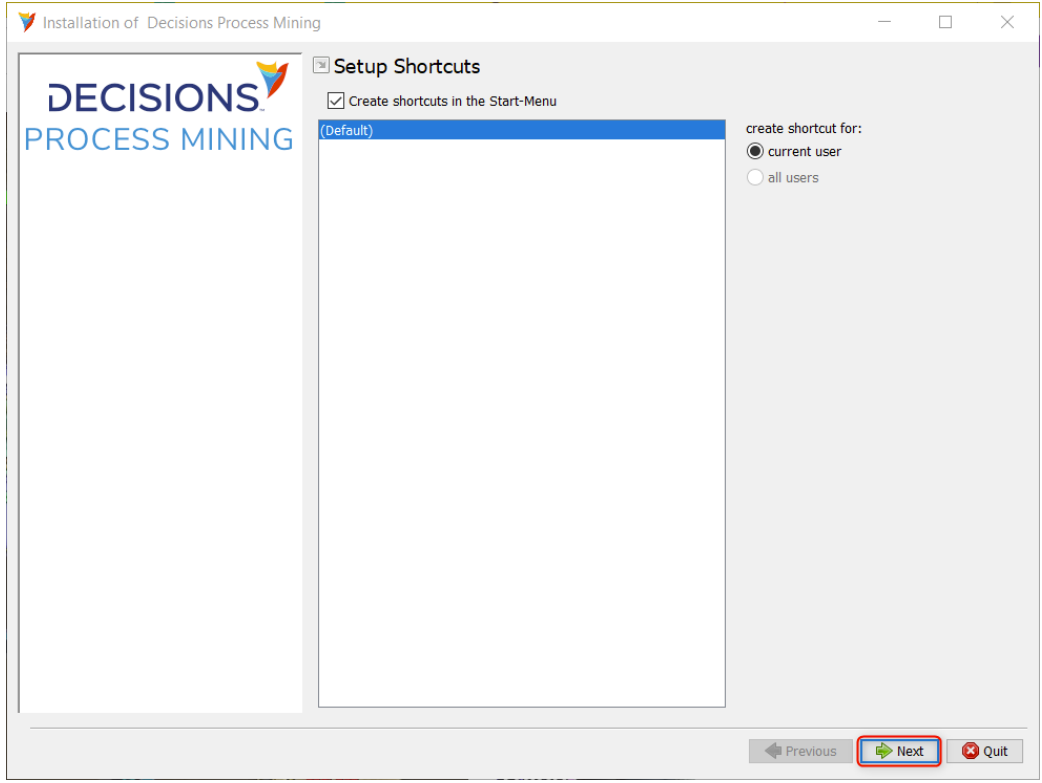
- The Installer presents the option to create a Windows Start-Menu shortcut. Make the desired selection and click Next to proceed.
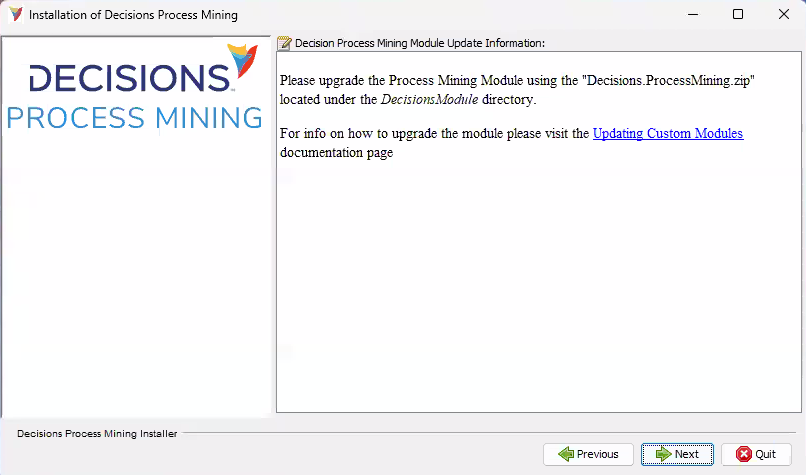
- Users will need to upgrade the Process Mining Module using the "Decisions.ProcessMining.zip" located under the DecisionsModule directory. For info on how to upgrade the Module please visit our documentation on Updating Custom Modules. Please note that this will not work for Decisions v8.14 or earlier. Select Next to continue.
.png) The Installer will confirm the successful installation of Process Mining. Click Doneto exit the Installer. Note before Starting Process MiningBefore running Process Mining, the Decisions Server must be properly configured for Process Mining (see Decisions Server Configuration).
The Installer will confirm the successful installation of Process Mining. Click Doneto exit the Installer. Note before Starting Process MiningBefore running Process Mining, the Decisions Server must be properly configured for Process Mining (see Decisions Server Configuration). - Start Process Mining and Activate Licensing:
For first-time installs, it is recommended to run the Process Mining.bat file at the default location: C:\Program Files\Decisions\Process Mining\DecisionsProcessMining.bat as an Admin. This action will populate a window, alerting you that the file is running. If Run at Startup is set to False, start the DecisionsProcessMining.bat found in the Process Mining Folder before opening the Process Mining URL.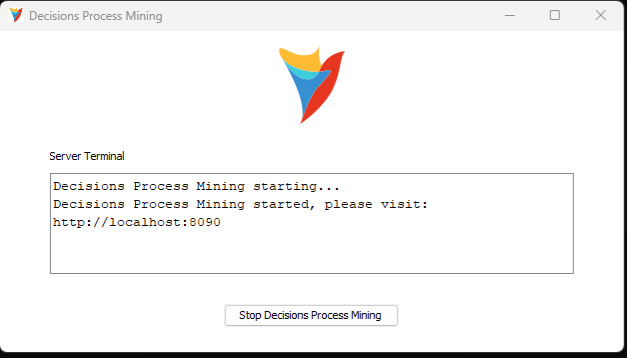 From here, navigate to the website mentioned and fill in the correct licensing information. After a license has been obtained, Process Mining should restart automatically and be accessible within the browser. Users should use an Admin account from Decisions to log in.
 - Configure Process Mining Settings.
- Delete the executable downloaded, then delete it from the Recycle Bin.
Staring Process Mining Manually
- Go to the folder where Process Mining was installed. By default, this is C:\Program Files\Decisions\Process Mining.
- Run DecisionsProcessMining.bat as an administrator. Wait for the pop-up and message telling you to go to the correct address.
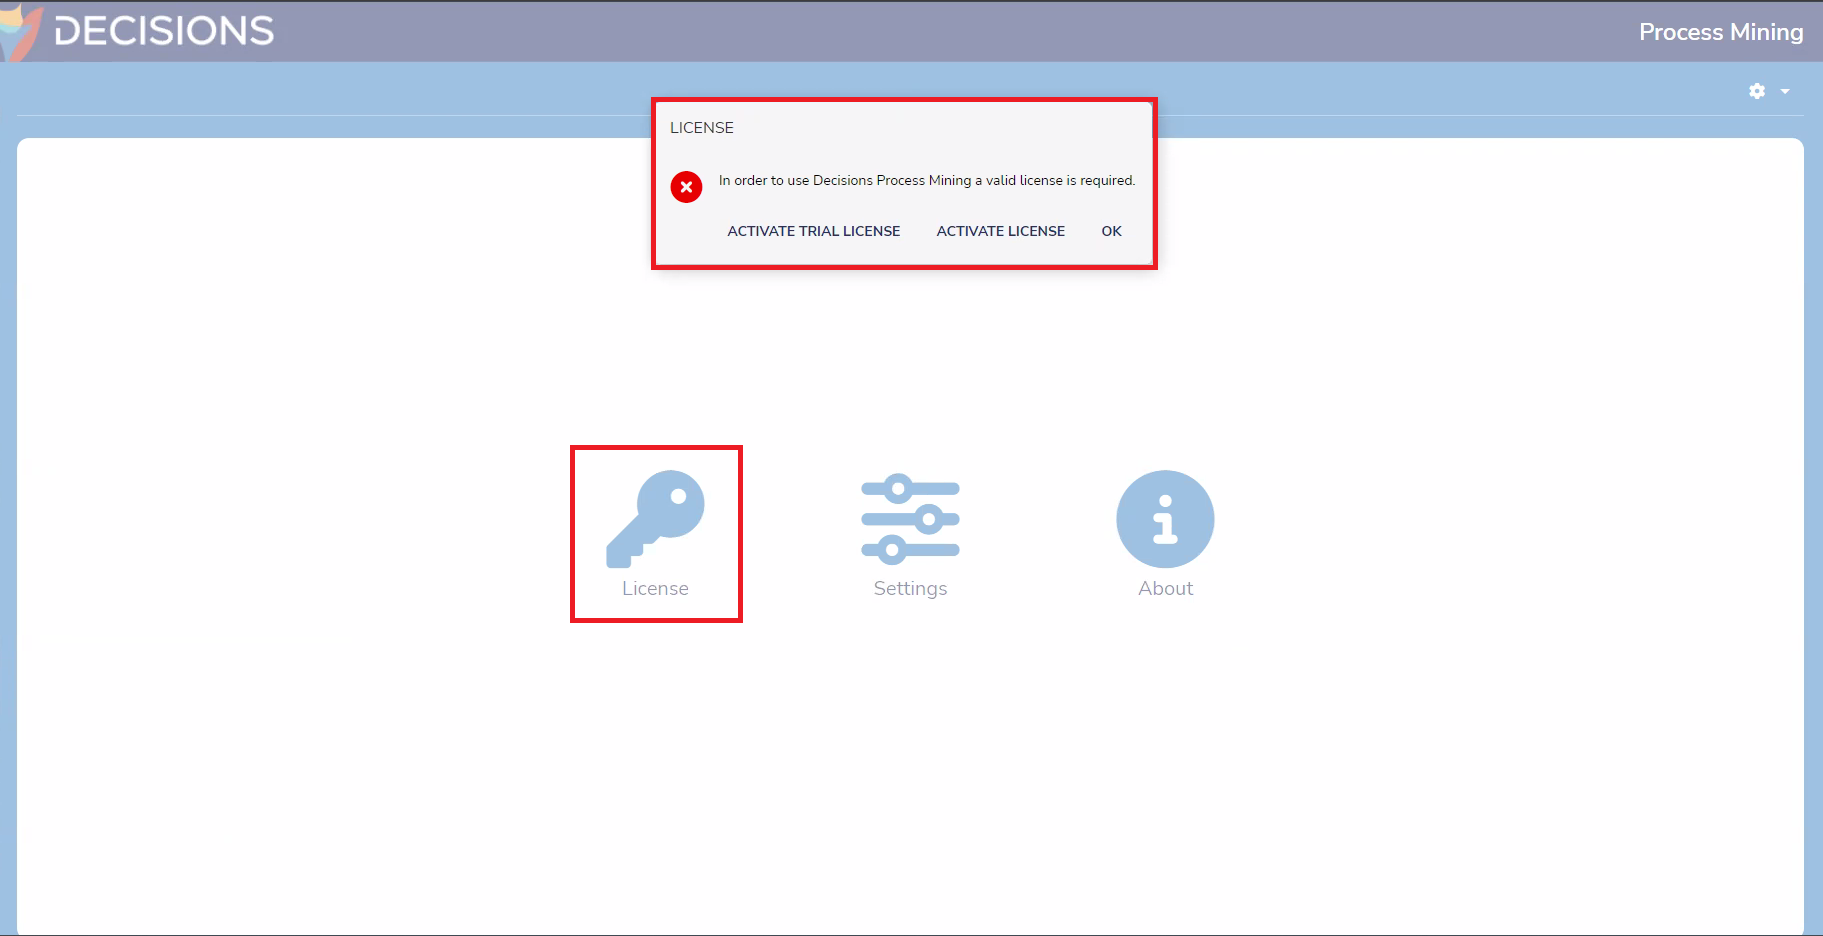
- The licensing window will appear.
Stopping Process Mining
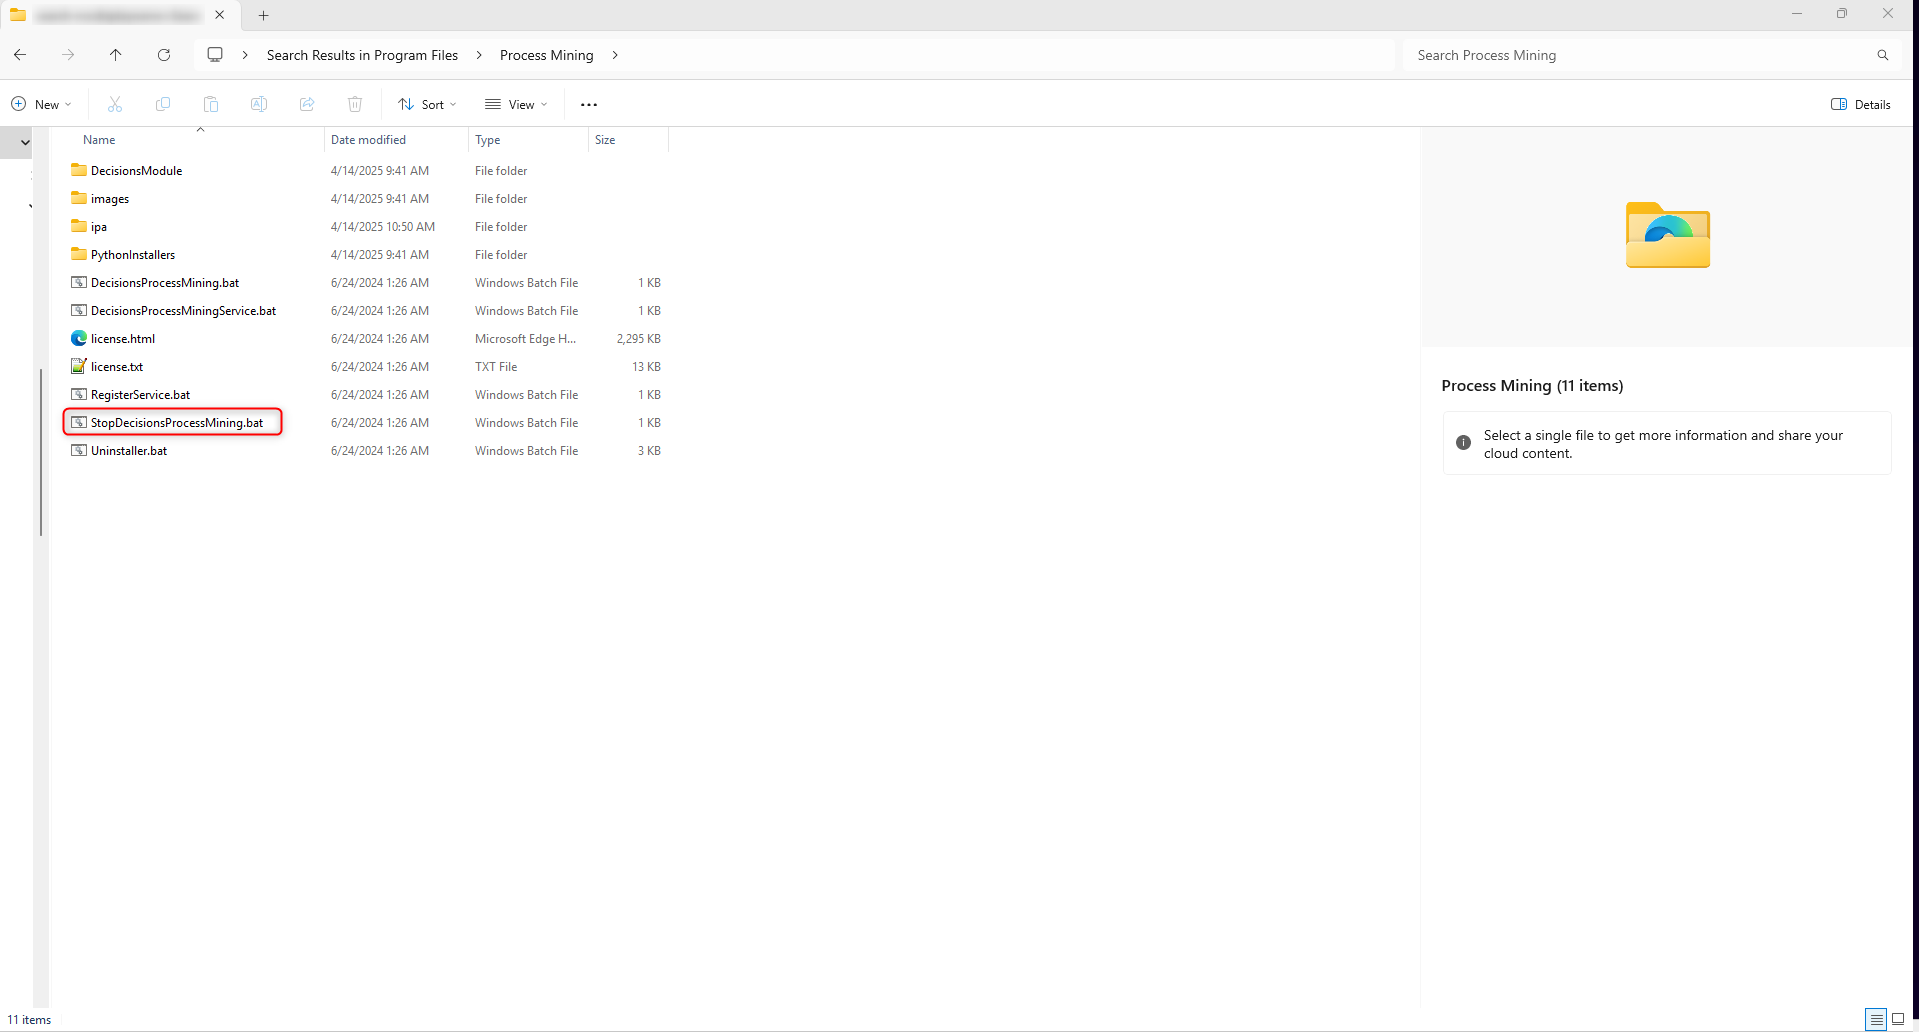
Users should follow these steps to properly stop Process Mining depending on how it was run.
1. If DecisionsProcessMining.bat was run, click Stop Decisions Process Mining and wait for it to stop running.
.png)
2. If Process Mining is running as a service, run StopDecisionsProcessMining.bat as an Admin from the Process Mining Folder and wait for it to stop running.
3. Navigate to the Task Manager and stop all instances of java.exe.
Local Installation of SSL Certificate
- Place the certificate inside the folder “$DecisionsProcessMiningFolder$/ipa”. Open the “application.properties” file and edit the following properties (when using an SSL certificate the only allowed ports are 443 or 8443):
- server.port=8443
- server.ssl.enabled=true
- server.ssl.key-alias={keystore_alias}
- server.ssl.key-store=data/{keystore_name}
- server.ssl.key-store-password={keystore_password}
- After applying the changes, restart the Process Mining platform.
Decisions Server Configuration
<LoginPageAllowedIPs>[IP Address of Process Mining Machine]</LoginPageAllowedIPs>
If the IP Address changes, update it here then restart the Decisions Server.
- For installations operating alongside a Decisions instance, login to the Decisions Studio and configure the platform to access Process Mining via System > Settings > Process Mining Settings.
- Selecting the Enable Process Mining checkbox will set it to True, the Process Mining URL is configured in step four, and the Groups Allowed to Access Process Mining will be set to Administrators by default. Once the selections are configured, click SAVE.
- Launch Process Mining via WorkFlow Catalog link, then login with a local account within the group set above. Note: SSO accounts are currently not supported.
- For standalone installations, open Process Mining by navigating directly to the Process Mining URL.
Running Process Mining as A Background Service
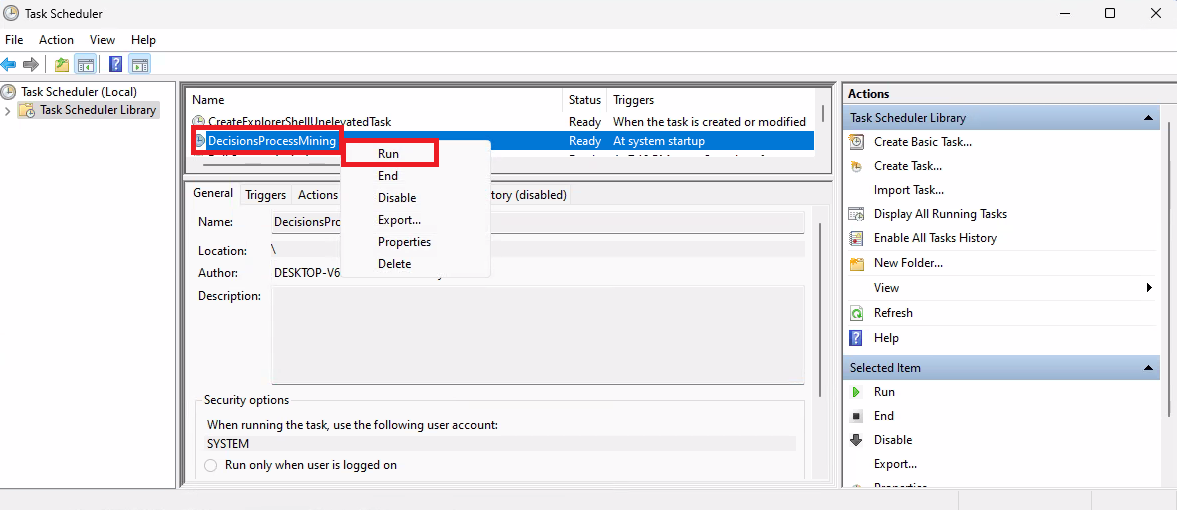
- Once the Licensing is complete, navigate to the Task Scheduler application. Select the DecisionsProcessMining option and configure the settings.
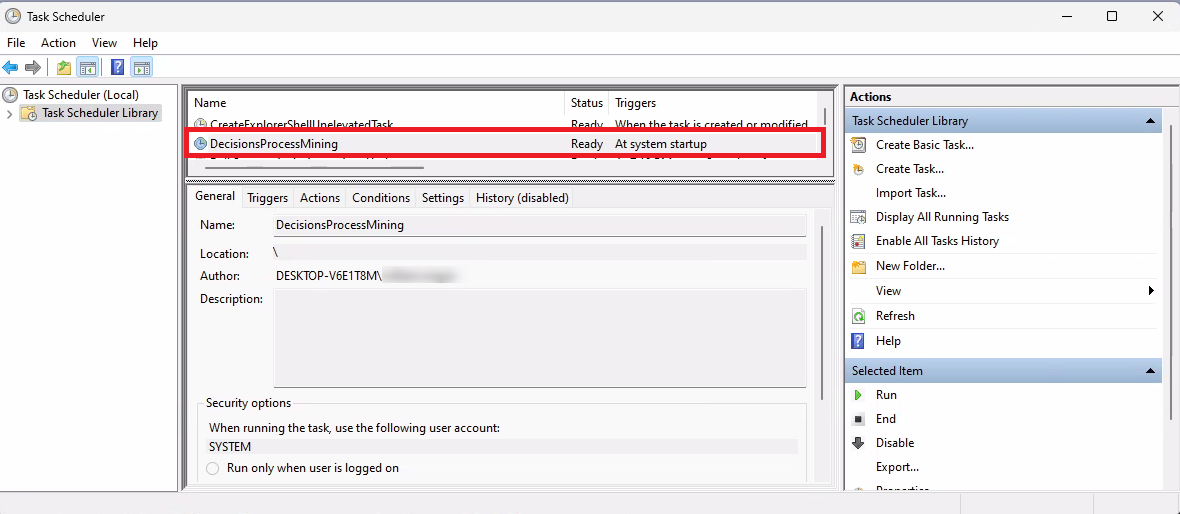
- In the Triggers section, select Edit to edit the Trigger. Make sure it is set to At Startup. Once this is configured, select OK to continue.
(1).png)
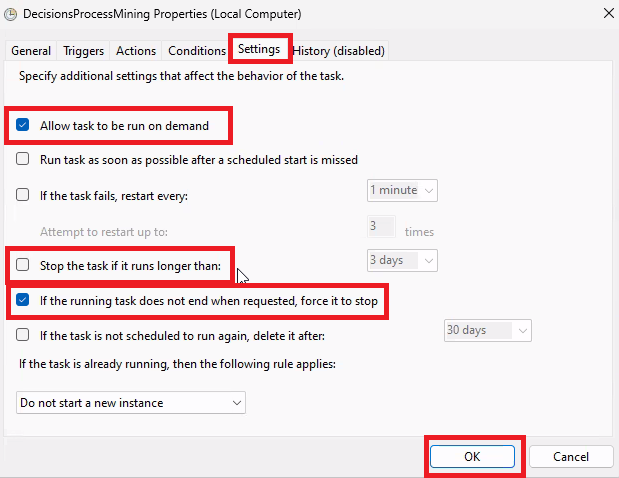
- In the Settings section, make sure the "Allow task to be run on demand" and "If the running task does not end when requested, force it to stop" options are checked and "Stop the task if it runs longer than" option is left unchecked (if this option is checked, Process Mining will stop after three days). Then click OK.
- In the Triggers section, select Edit to edit the Trigger. Make sure it is set to At Startup. Once this is configured, select OK to continue.
- Once the settings have been configured, right-click on DecisionsProcessMining and click Run.
To stop the service from starting on system start go to the installation folder for Process Mining (by default this is C:\Program Files\Decisions\Process Mining) and run StopDecisionsProcessMining.bat as an administrator. Please note that despite its name, the StopDecisionsProcessMining.bat file does not stop an actively running instance of Process Mining.
Licensing
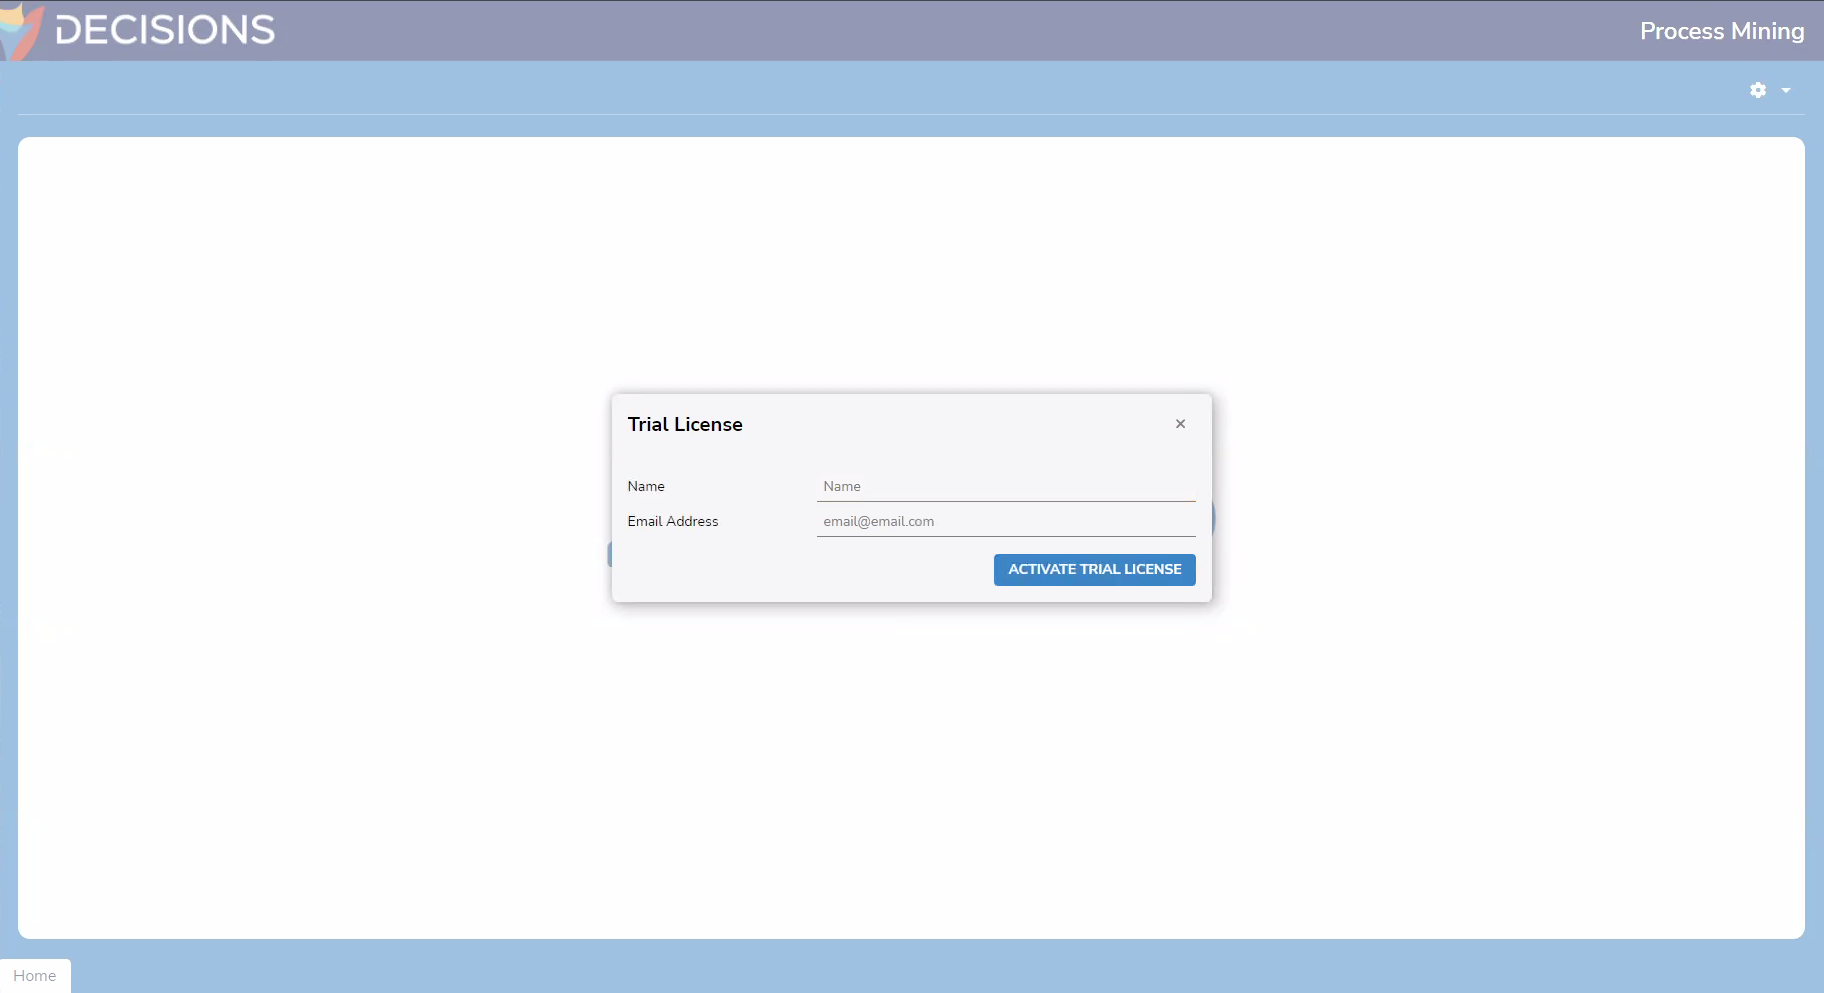
In order to activate a valid license for Decisions Process Mining, first navigate to the Process Mining URL. Select the License button and the select either Activate Trial License or Activate License from the popup.
For a Trial License, the user will simply fill out the Name and Email Address fields and then click ACTIVATE TRIAL LICENSE. The Name should be the company name, and email is the user's business email address. Once this is complete, the user will then have a Trial License for Decisions that will last for 14 days. After the 14 days ends a new license will need to be used to reactivate Process Mining. If Process Mining is no longer desired, it can be uninstalled at this point without impact on the Decisions platform.
To obtain a regular Decisions License, the user will fill out the Name, Email Address, and Phone Number fields. The user can reach out to support@decisions.com to obtain their Customer Id. Once the fields are complete, click ACTIVATE. 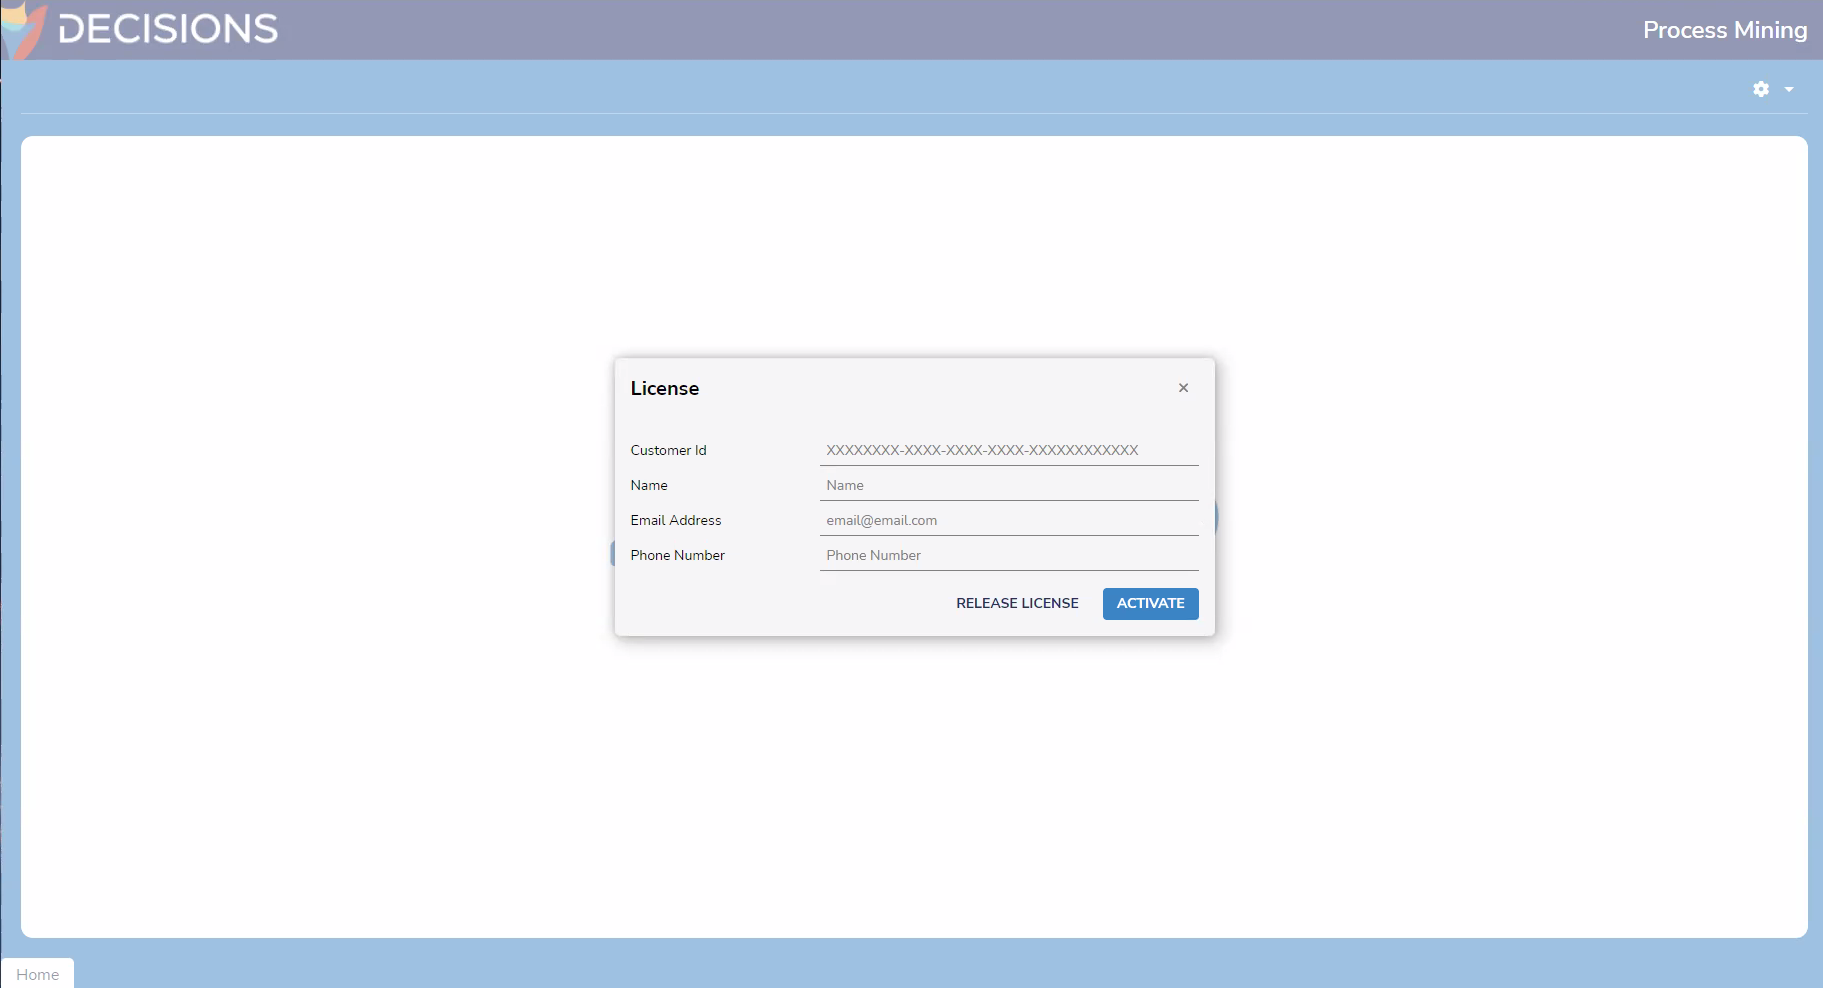
Configure SSL (HTTPS)
Prerequisites
- Create a PKCS12 certificate using OpenSSL.
- Example: sudo openssl pkcs12 -export -in fullchain.pem -inkey privkey.pem -out keystore.p12 -name CertName -CAfile chain.pem -caname root -password pass:CertPassword
| Field | Description |
| privkey.pem | The private key for your certificate. |
| fullchain.pem | The certificate file used in most server software. |
| chain.pem | Used for OCSP stapling in Nginx >=1.3.7. |
| keystore.p12 | The keystore in PKCS12 format containing the certificate. |
| CertName | The alias of the keystore. |
| CertPassword | The password of the keystore. |
Troubleshooting
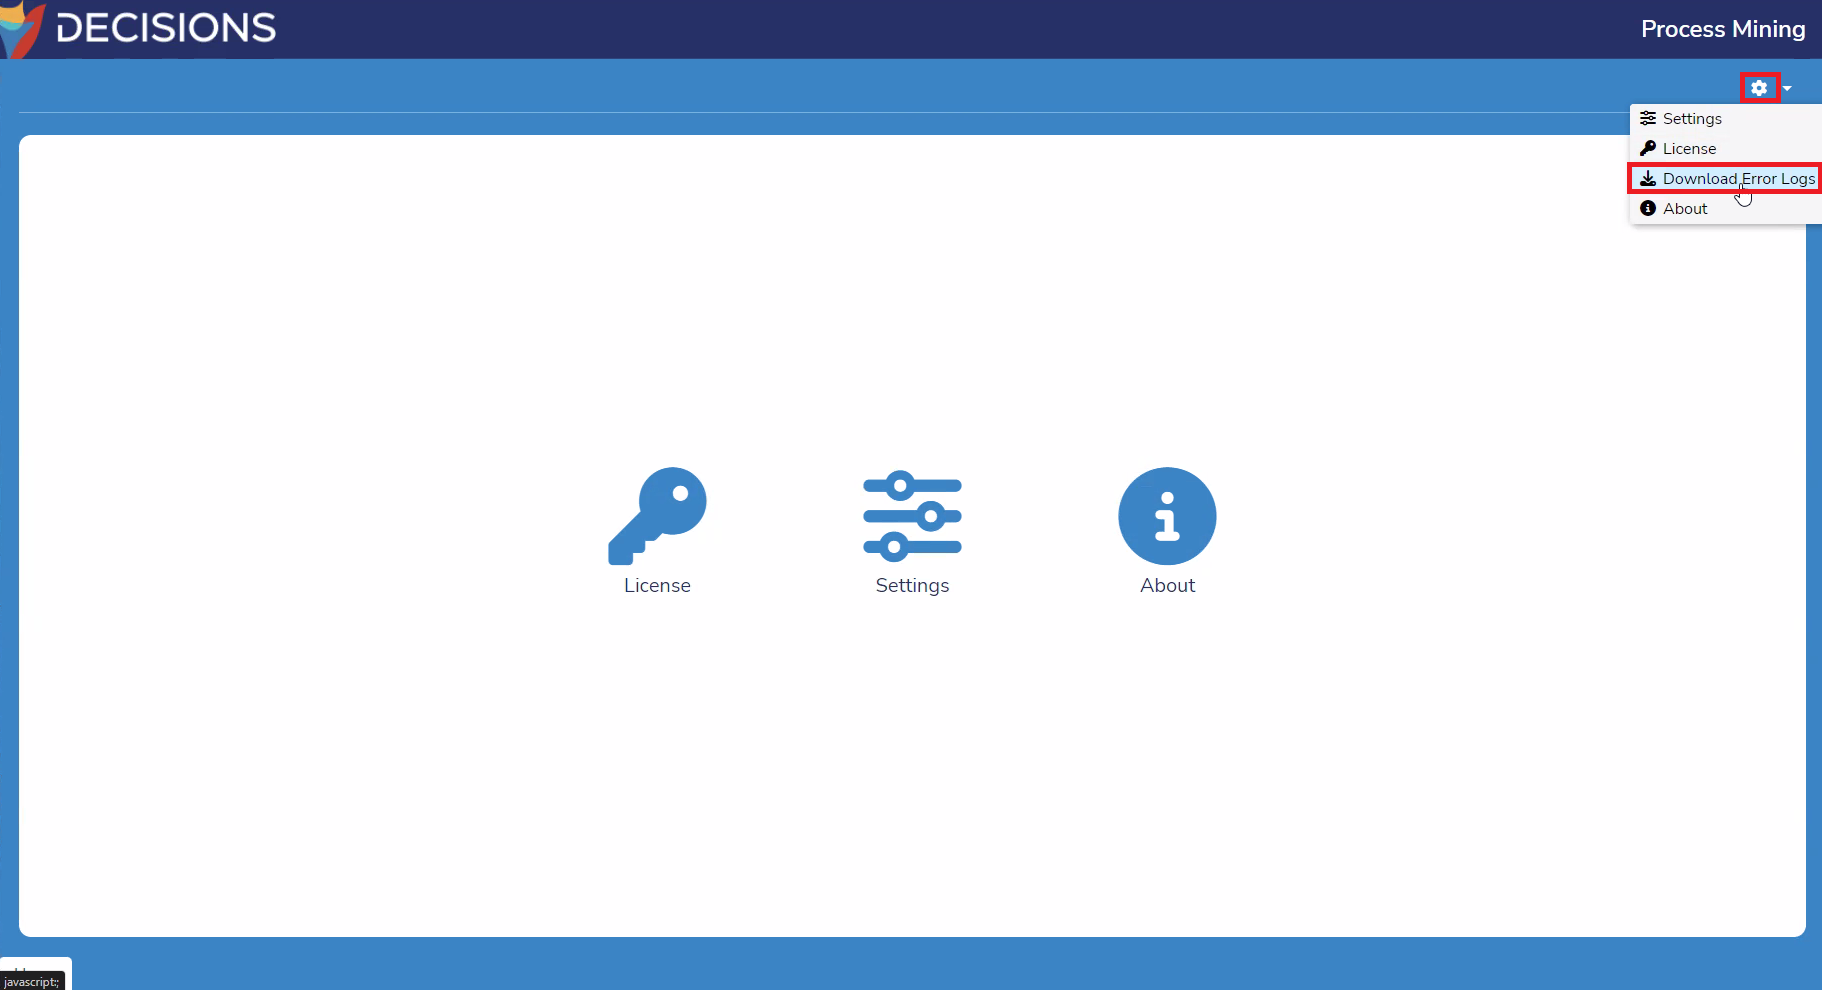
If any problems occur, users can download Error Logs from two different locations. The two locations are the default location C:\Program Files\Decisions\ipa\data\logs and from the Process Mining URL by clicking the gear icon on the top right of the page and selecting Download Error Logs. The user can then send those Error Logs to support@decisions.com for assistance.
For more troubleshooting techniques see Troubleshooting Process Mining.
Feature Changes
| Description | Version | Release Date | Developer Task |
|---|---|---|---|
| HTTPS can now be enabled during the installation process. | 3.1 | July 2024 | [DT-040674] |
| Users can now set up their password during the installation process. | 3.1 | July 2024 | [DT-040815] |
| Users can now run Process Mining on Linux and Windows. | 3.7 | September 2025 | [DT-045057] |