Overview
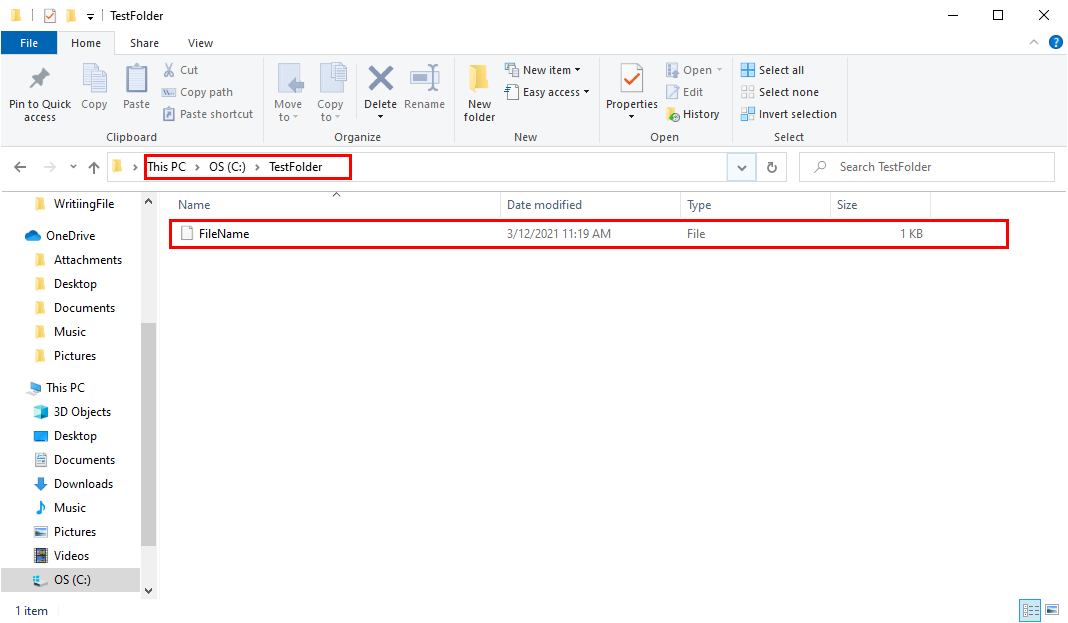
Files can be written from Decisions directly to the local File System using Flow steps. The Create Text File step saves a plain text file to the local system. The Create Data step can also be used to save complex file data to the local file system; more information on the Create Data step can be found with the Create Data Step Library article.
Example
The following example demonstrates how to use a Flow containing a Form with two input fields in conjunction with a Create Text File step to write a file to the local File System.
- From a Designer Project, select CREATE FLOW from the Global Action Bar; then, choose Flow, provide a Name, then click CREATE.
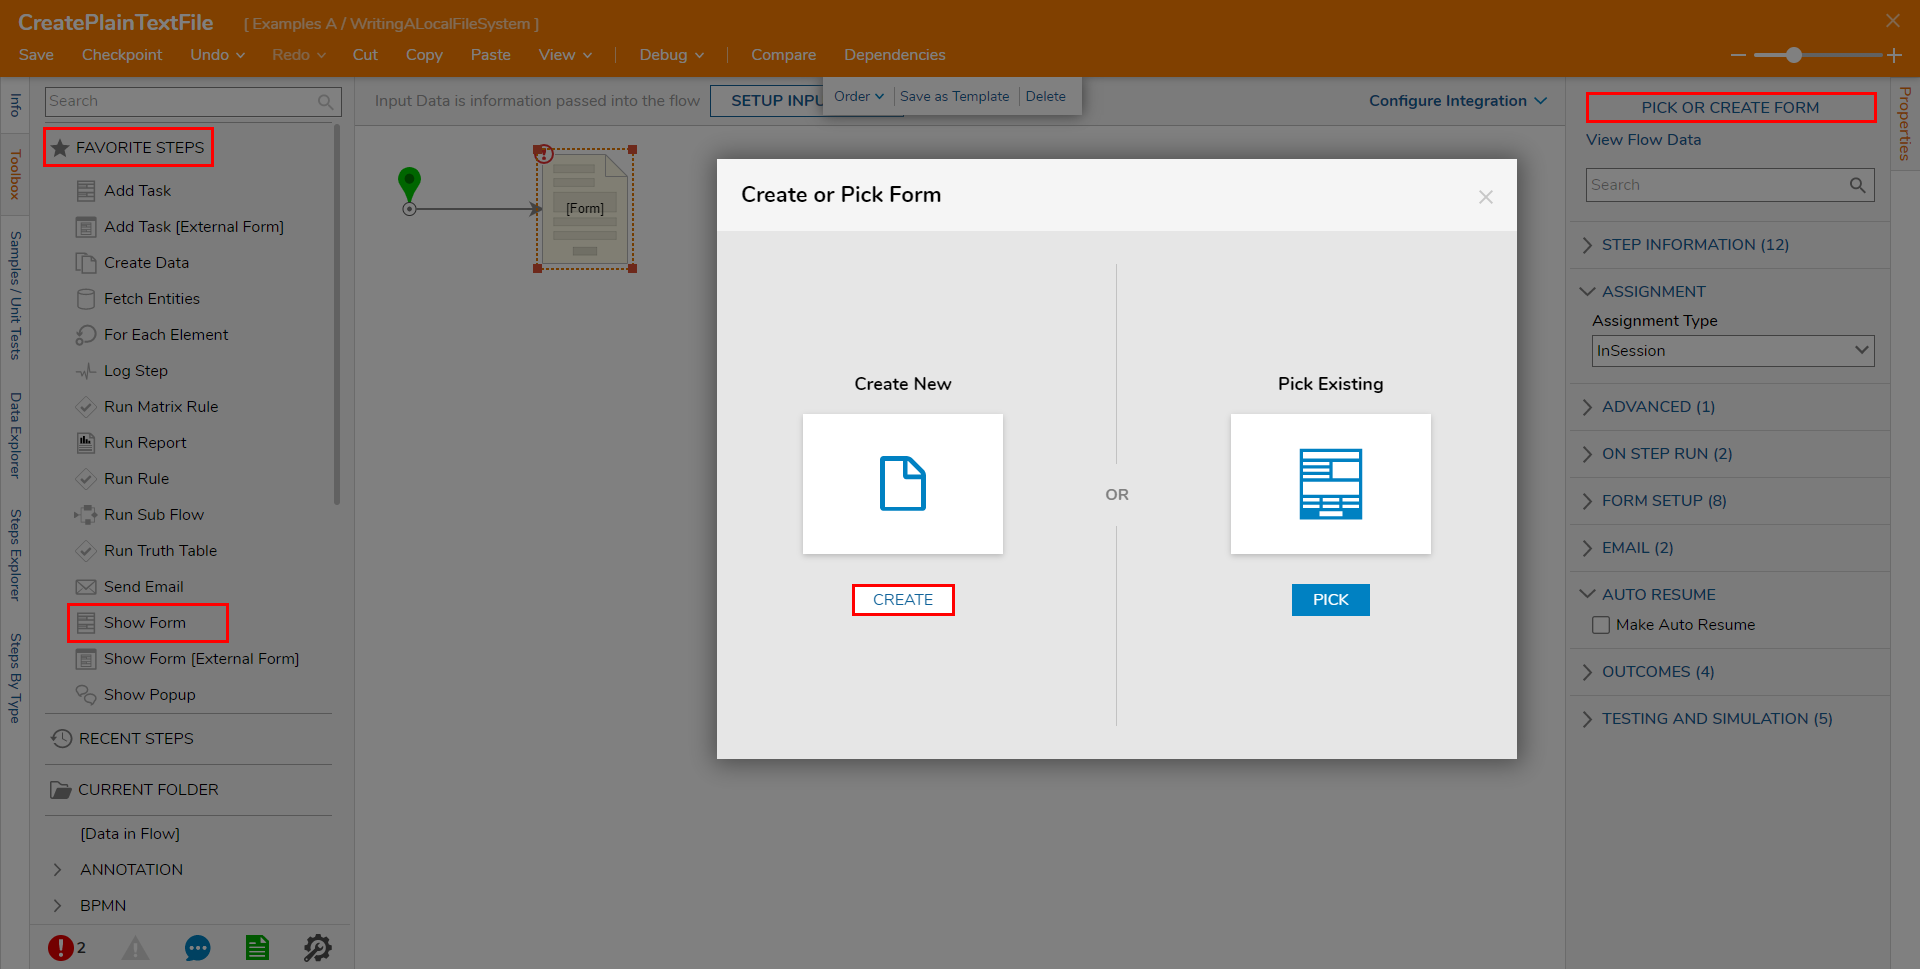
- From the Toolbox tab in the Flow Designer, attach a Show Form step to the Start step from the FAVORITE STEPS section.
- Select the Form step, navigate to its Properties tab, then click PICK OR CREATE FORM.
- Click PICK OR CREATE FORM, choose CREATE, then Form, Name it, then click CREATE.
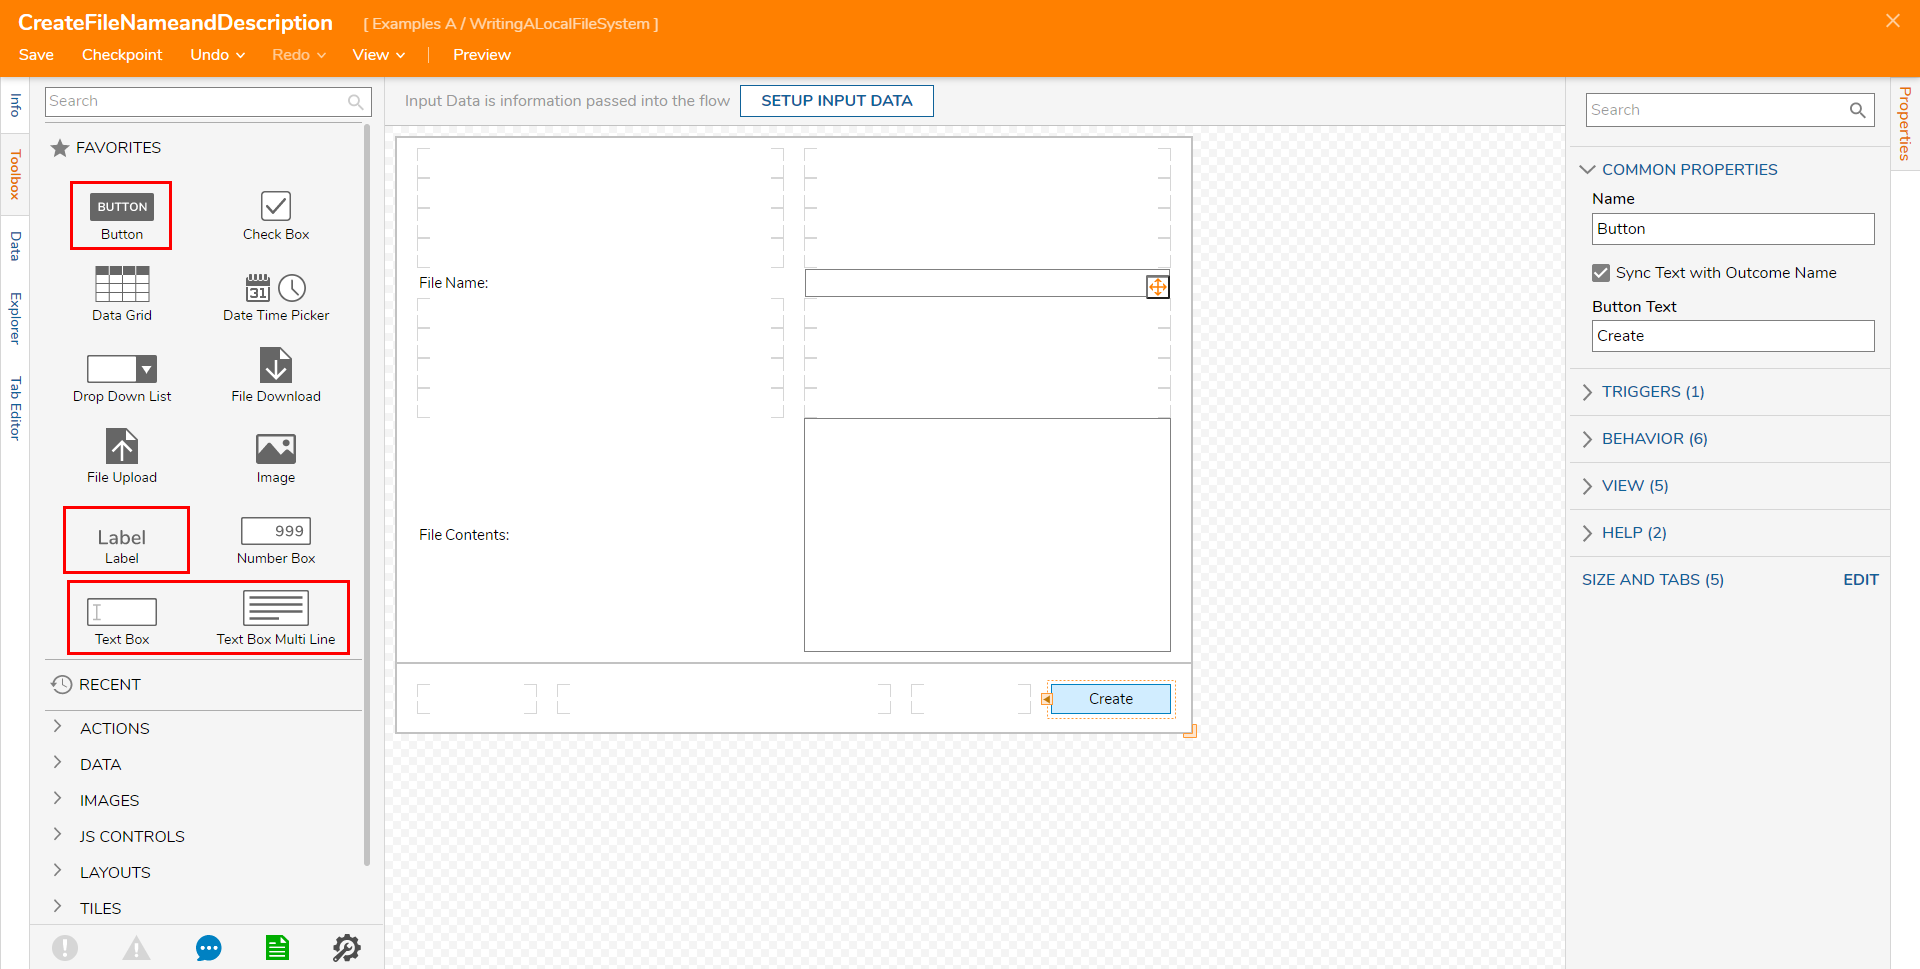
- From the Form Designer, add a Text Box, Text Box Multi Line, Button, and two Label components to design the Form. Then, Save the Form, and close via X. This Form will serve as the input source for the File Name and File Contents data.
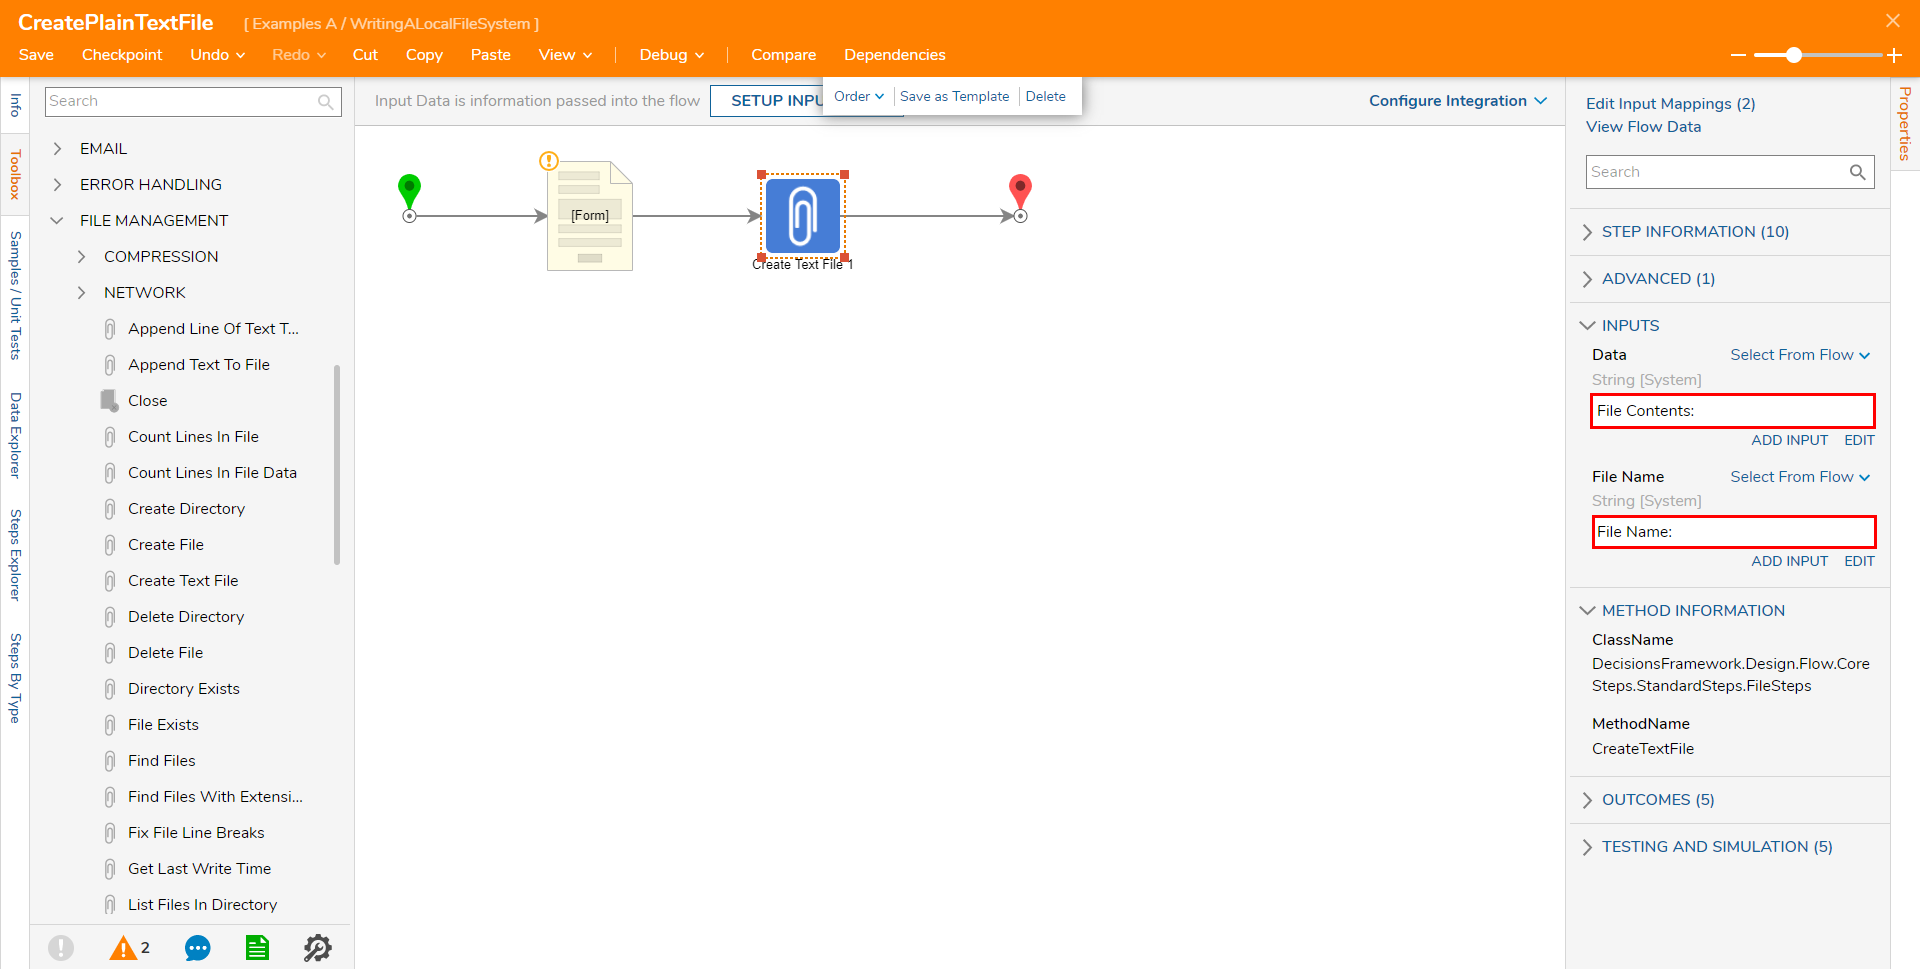
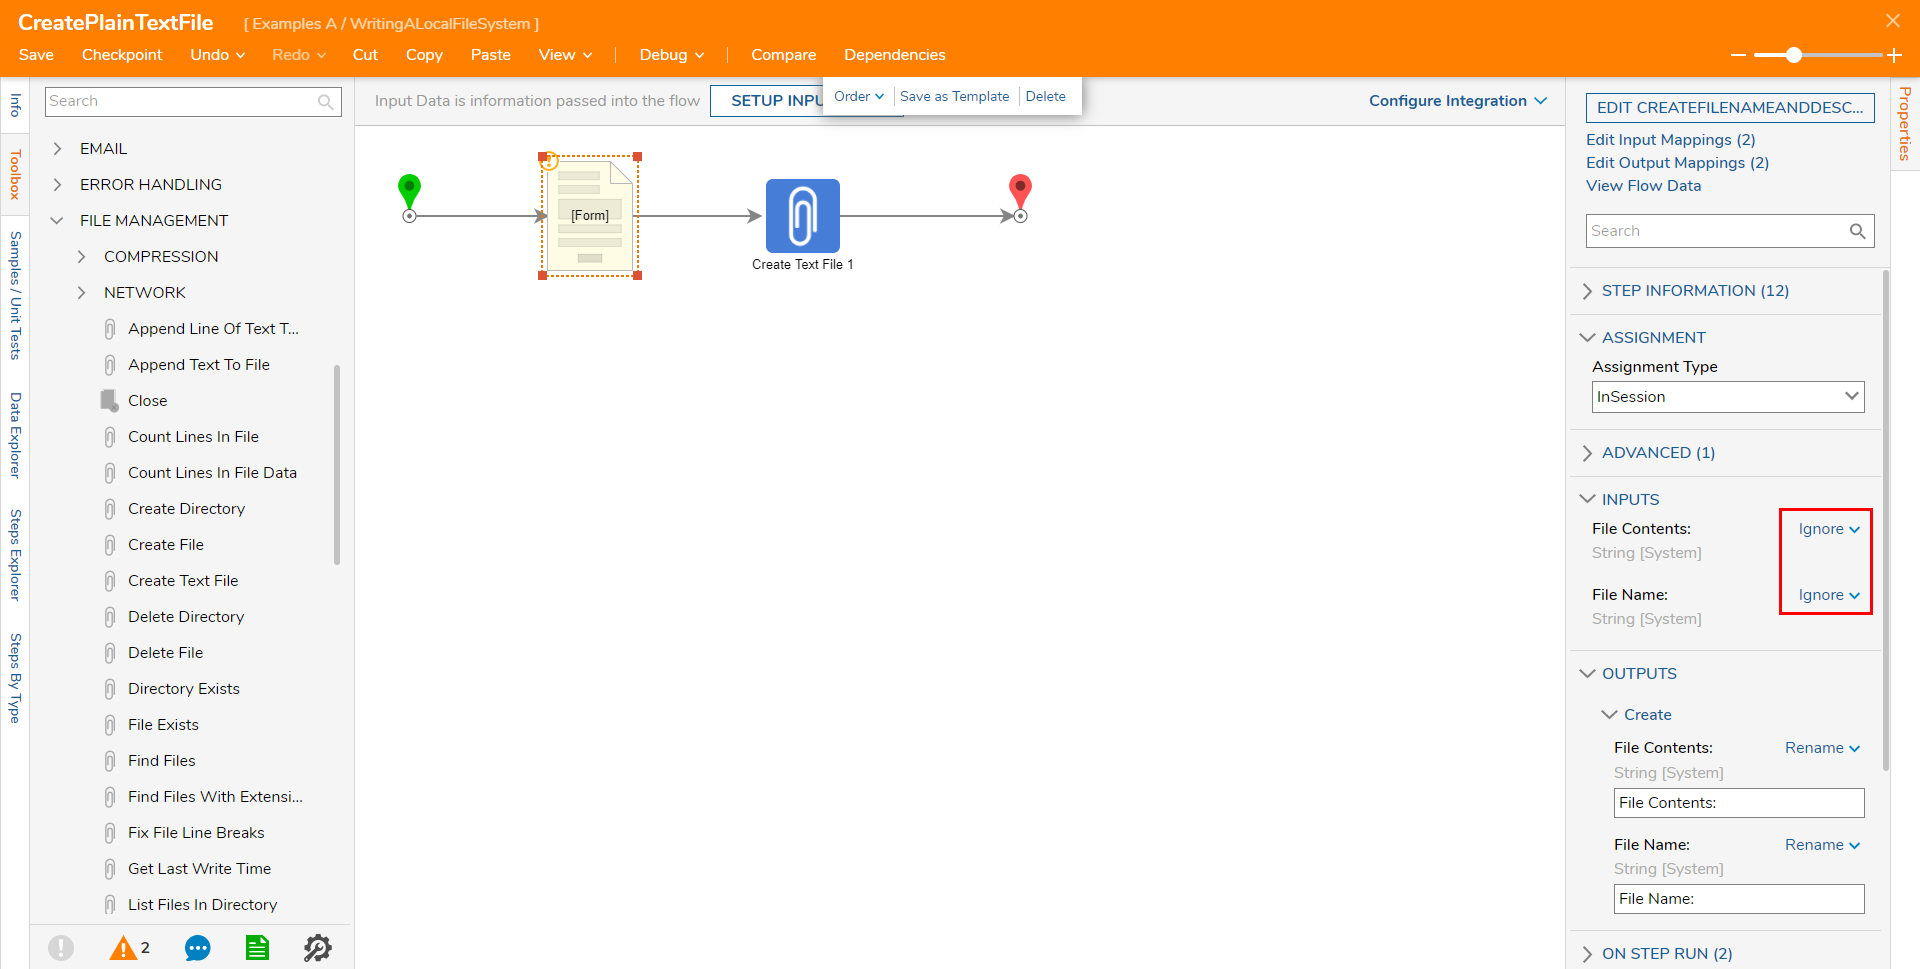
- Back in the Flow Designer, from the FILE MANAGEMENT category in the Toolbox tab, attach a Create Text File step to the Create path of the Form step; attach the Done path to the End step.
- From the Properties tab of the Create Text File step, map File Contents: to Data and File Name: to its respective Input.FileName to Specific LocationA direct file path can be used for the file Name input, which will save the file directly to the named file path. This would prevent the file from needing to be moved after it is created but can limit the naming convention from Decisions to the File System.
- Navigate back to the Properties for the Form step and set both INPUTS to ignore. Setting the INPUTS to Ignore allows users to define their own Form input on run.
- Save the Form, then, if desired, close out the Flow Designer.
Debug
- From the Flow Designer, select the Debug link from the top action bar.
- Click START DEBUGGING.
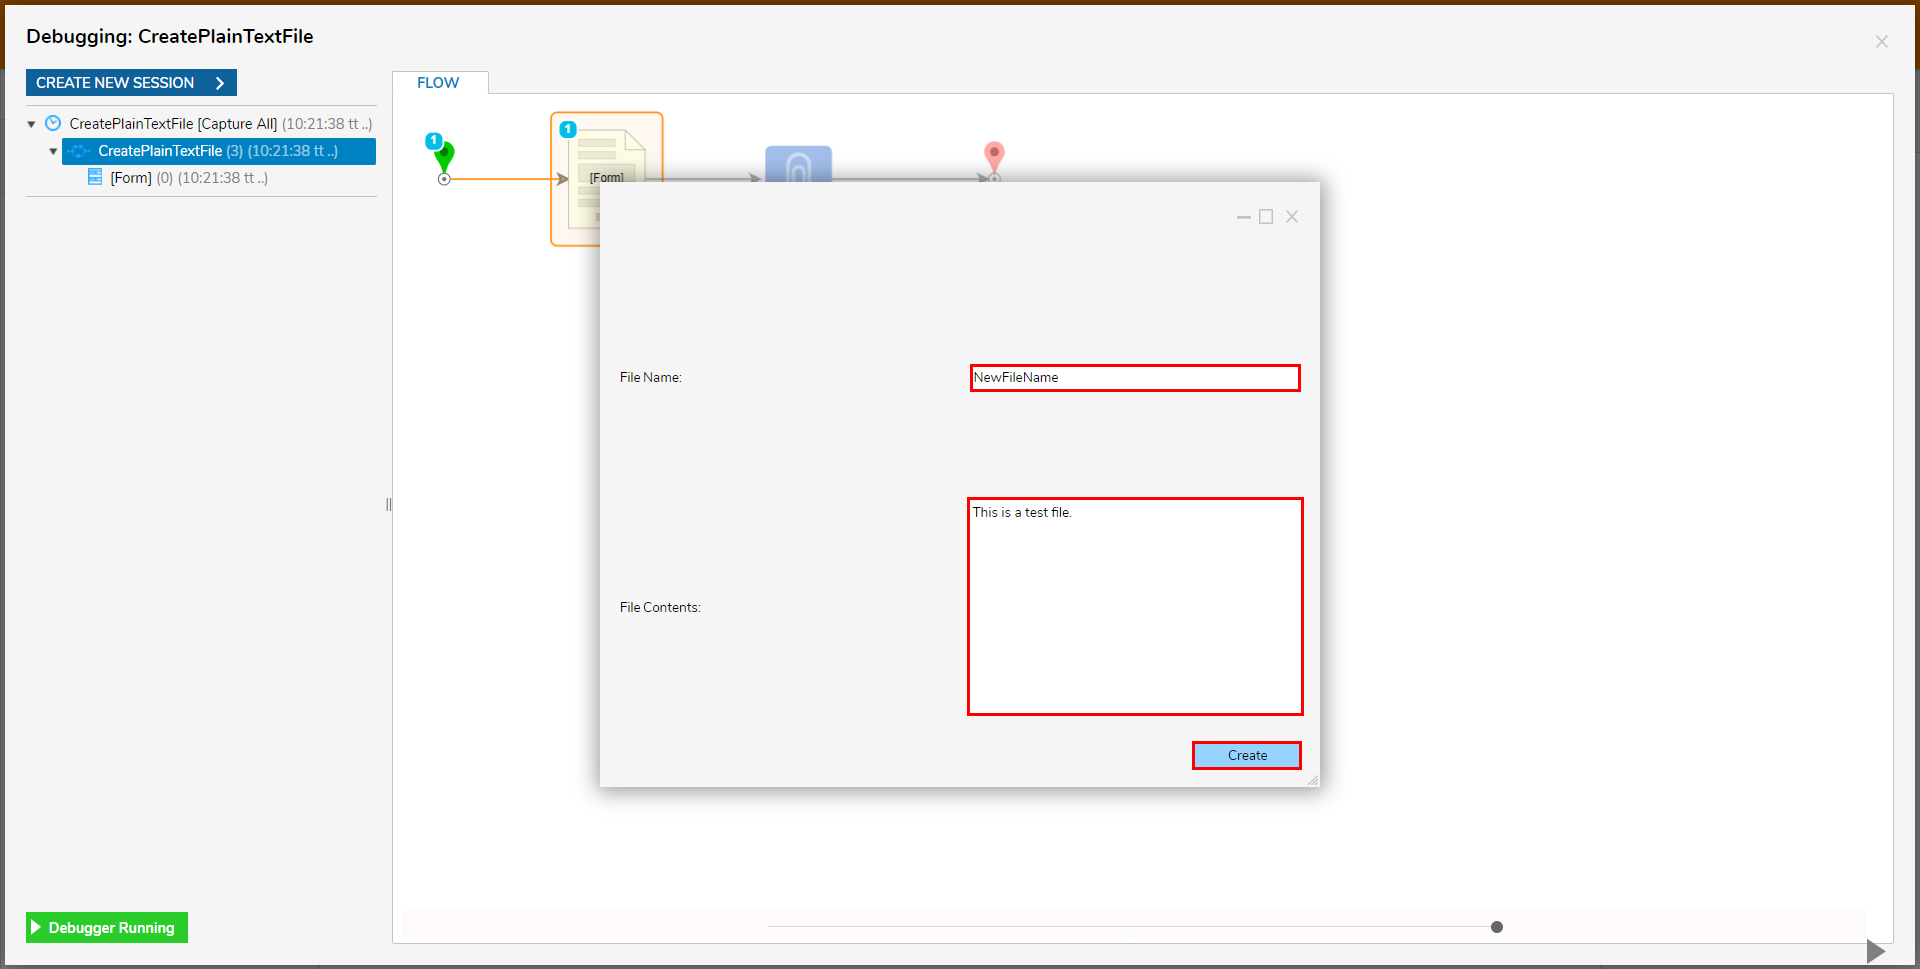
- When the Flow runs, fill out the Form with the desired File Name and File Contents, then click Create.
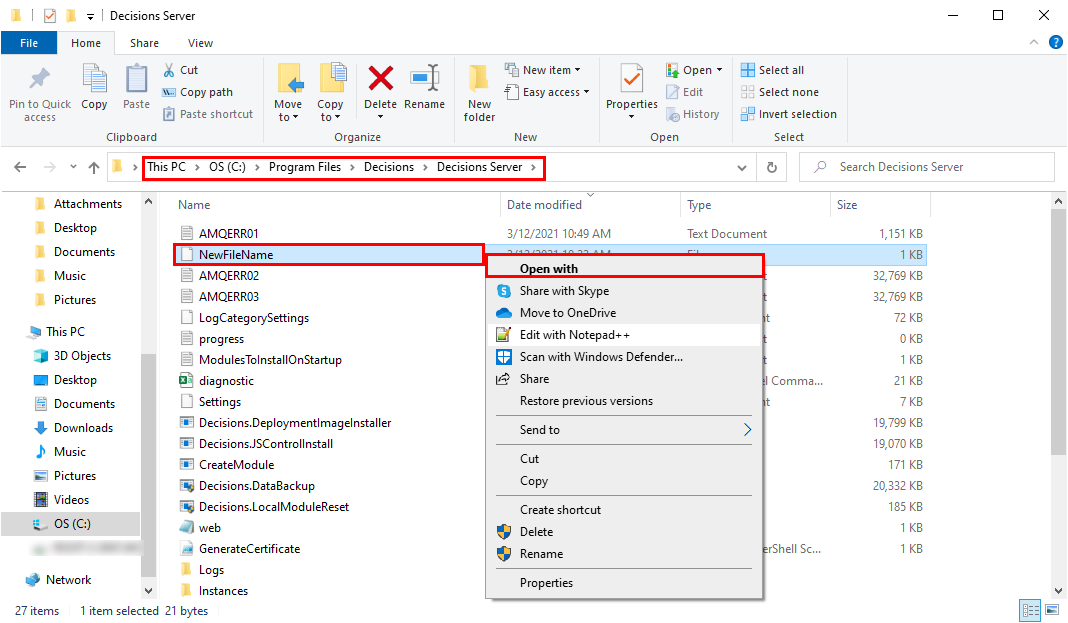
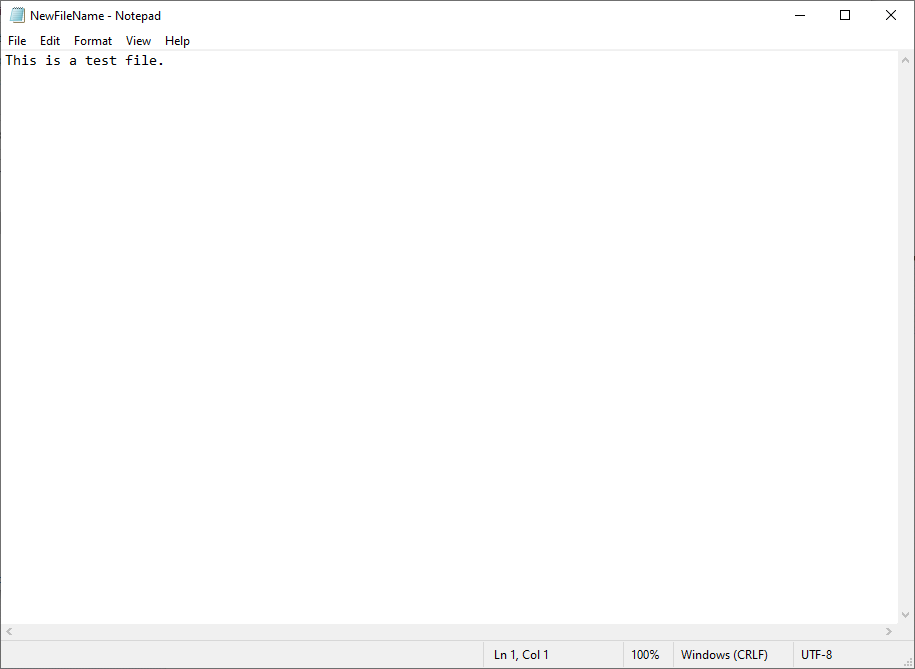
- After the Flow completes, navigate to the default Local file directory in the File System, and Open the newly saved file in a text editor to verify its contents.By default, the local file directory is set to C:\\Program Files\Decisions\Decisions Server.
Move File
Using the Move File step between the Create Text File step and the End step allows the ability to move the file to a different location after it has been created. The Move File step can be found in the Flow Designer under Toolbox > FILE MANAGEMENT.
By navigating to the step's Properties tab, users may direct the step by providing input for the File Name; this can be populated by sourcing the INPUTS for the Create Text File step. Then, the user may Constant map a Move To destination to determine where the file will be sent. This location may reflect the location of a Folder that differs from the default Directory in the Local File System.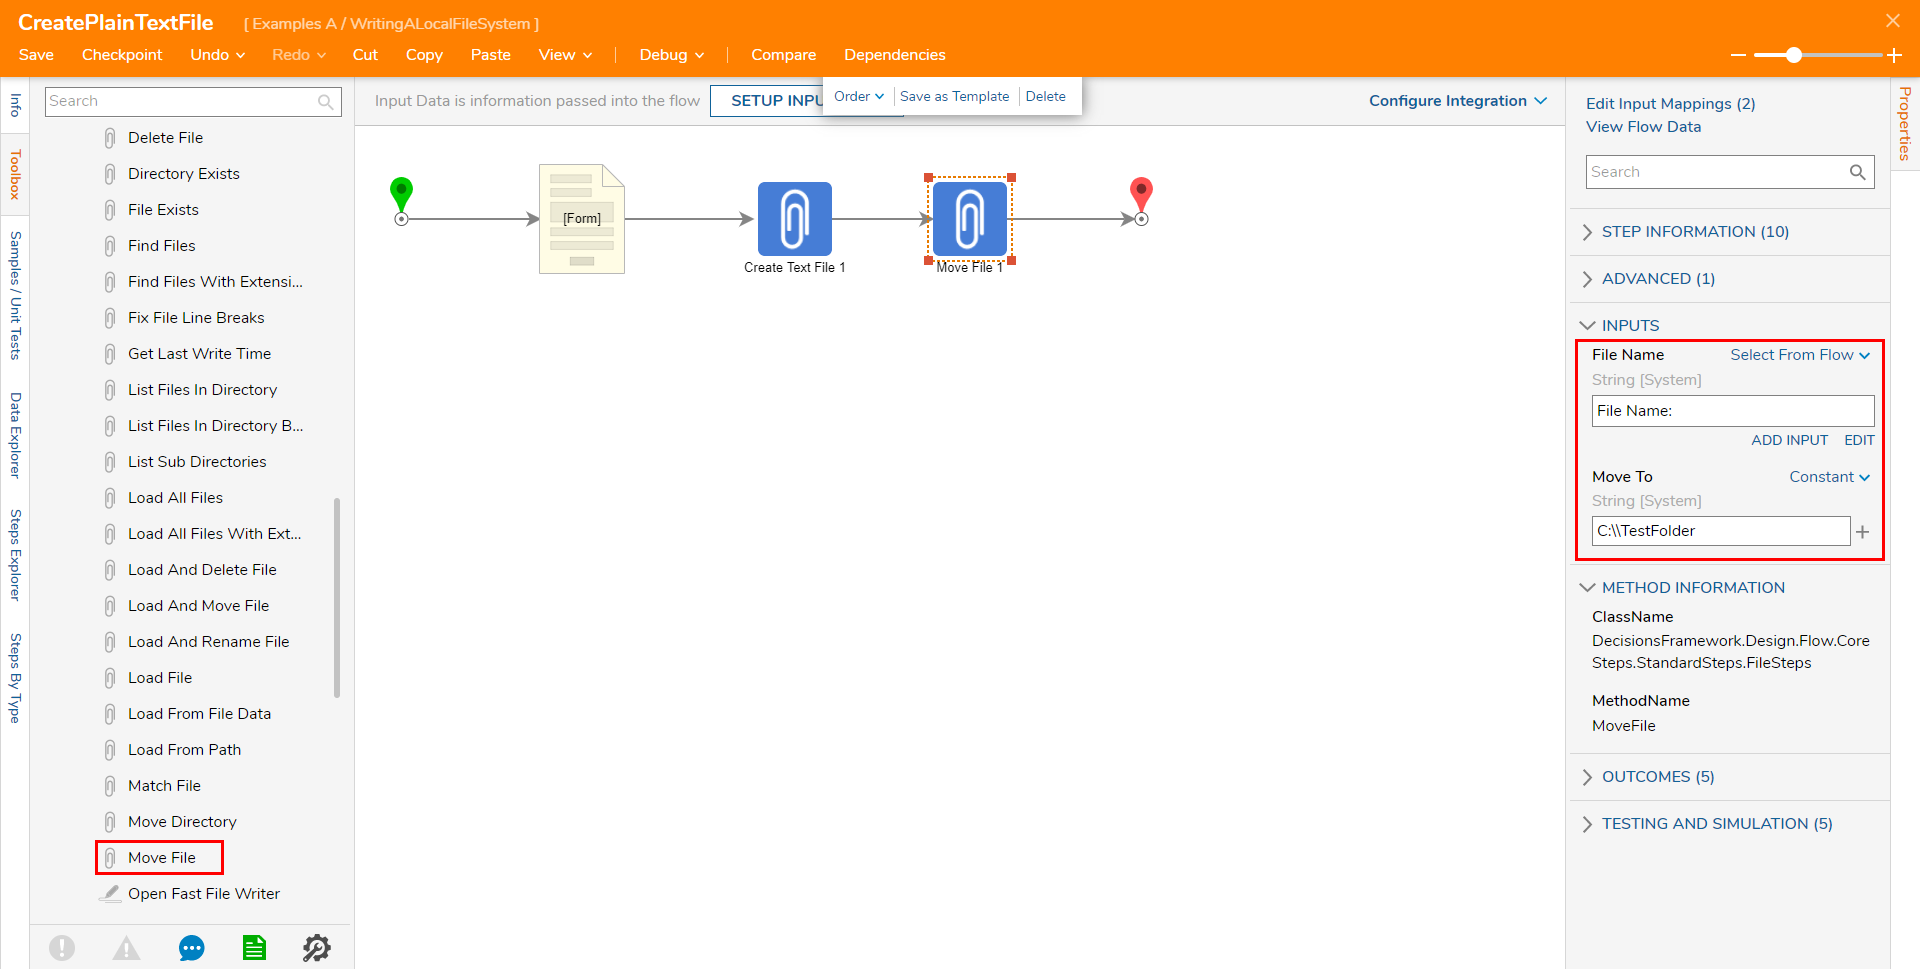
Running the Flow or Debugging will provide the desired resulting move.