Overview
This tutorial shows how to use Comparison Utility in Decisions Comparison Utility was implemented for Administrative purposes. It can be used to compare Flows and Rules. There are two options in this Utility: Compare to History or Compare to Flow/Rule. The results that are produced with this Utility should be analyzed in order to check what is the difference between two Flows/Rules or what changes have been done to the Flow/Rule.
Example A: Flows
Compare to History
- Create a Flow in a Designer Folder by clicking CREATE FLOW button from Global Action Bar.
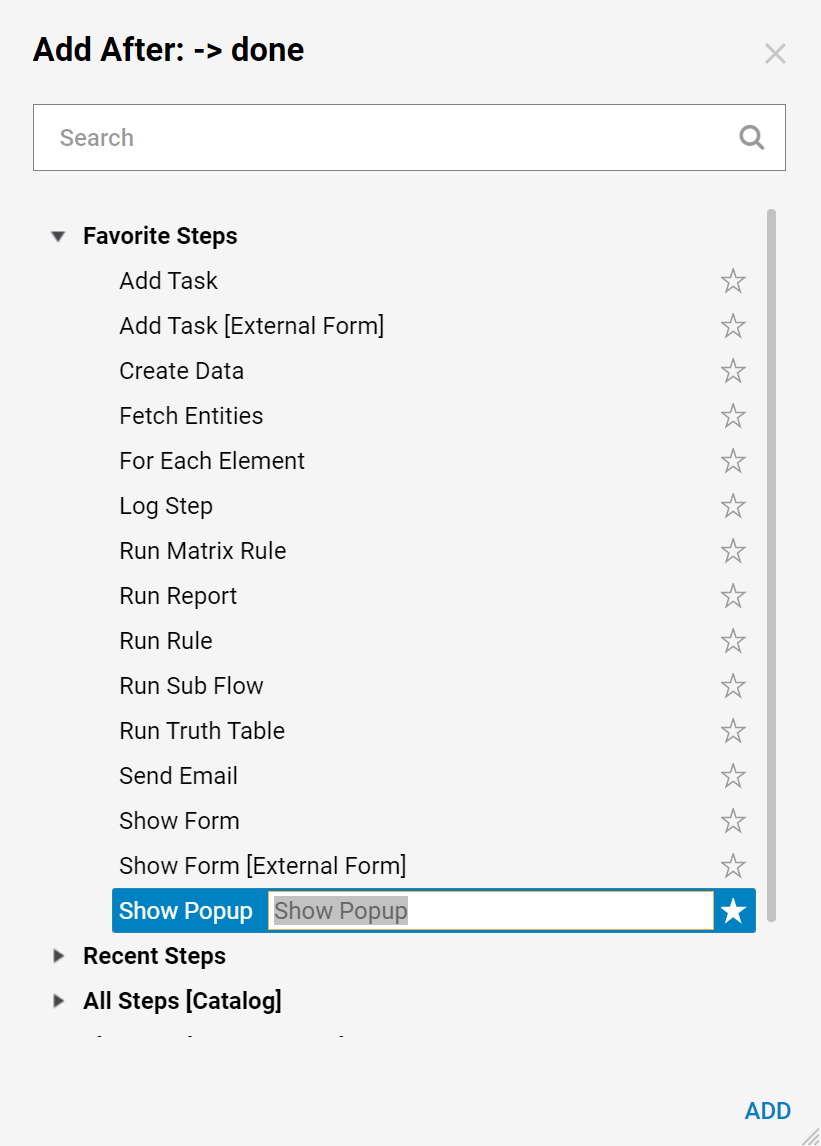
- In the Flow Designer, add Show Popup step from Favorite Steps category in the Quick Add Step dialog.
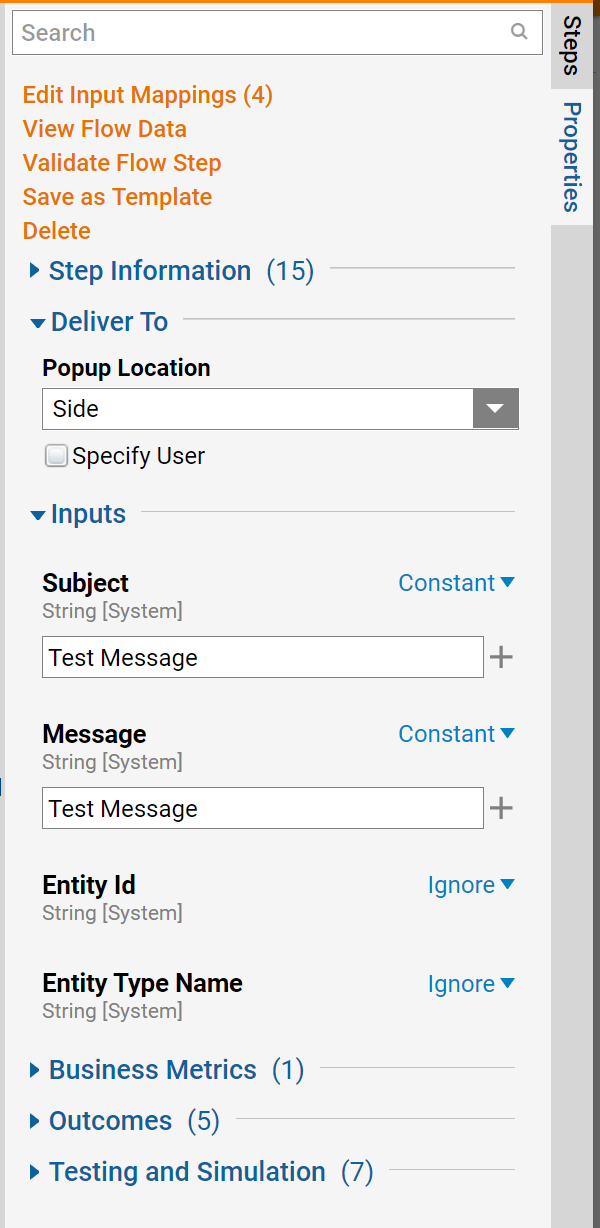
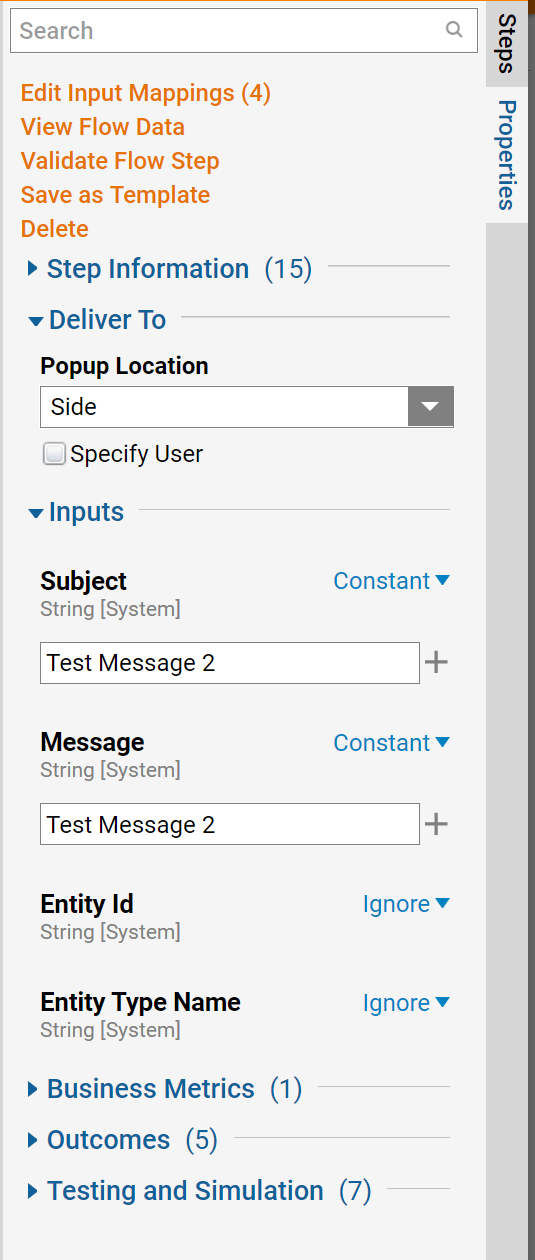
- Once added, from the Properties tab configure the Subject and MessageInputs.
- Connect the Show Popup step to the [End Step].

- Save the Flow and Close the Flow Designer.
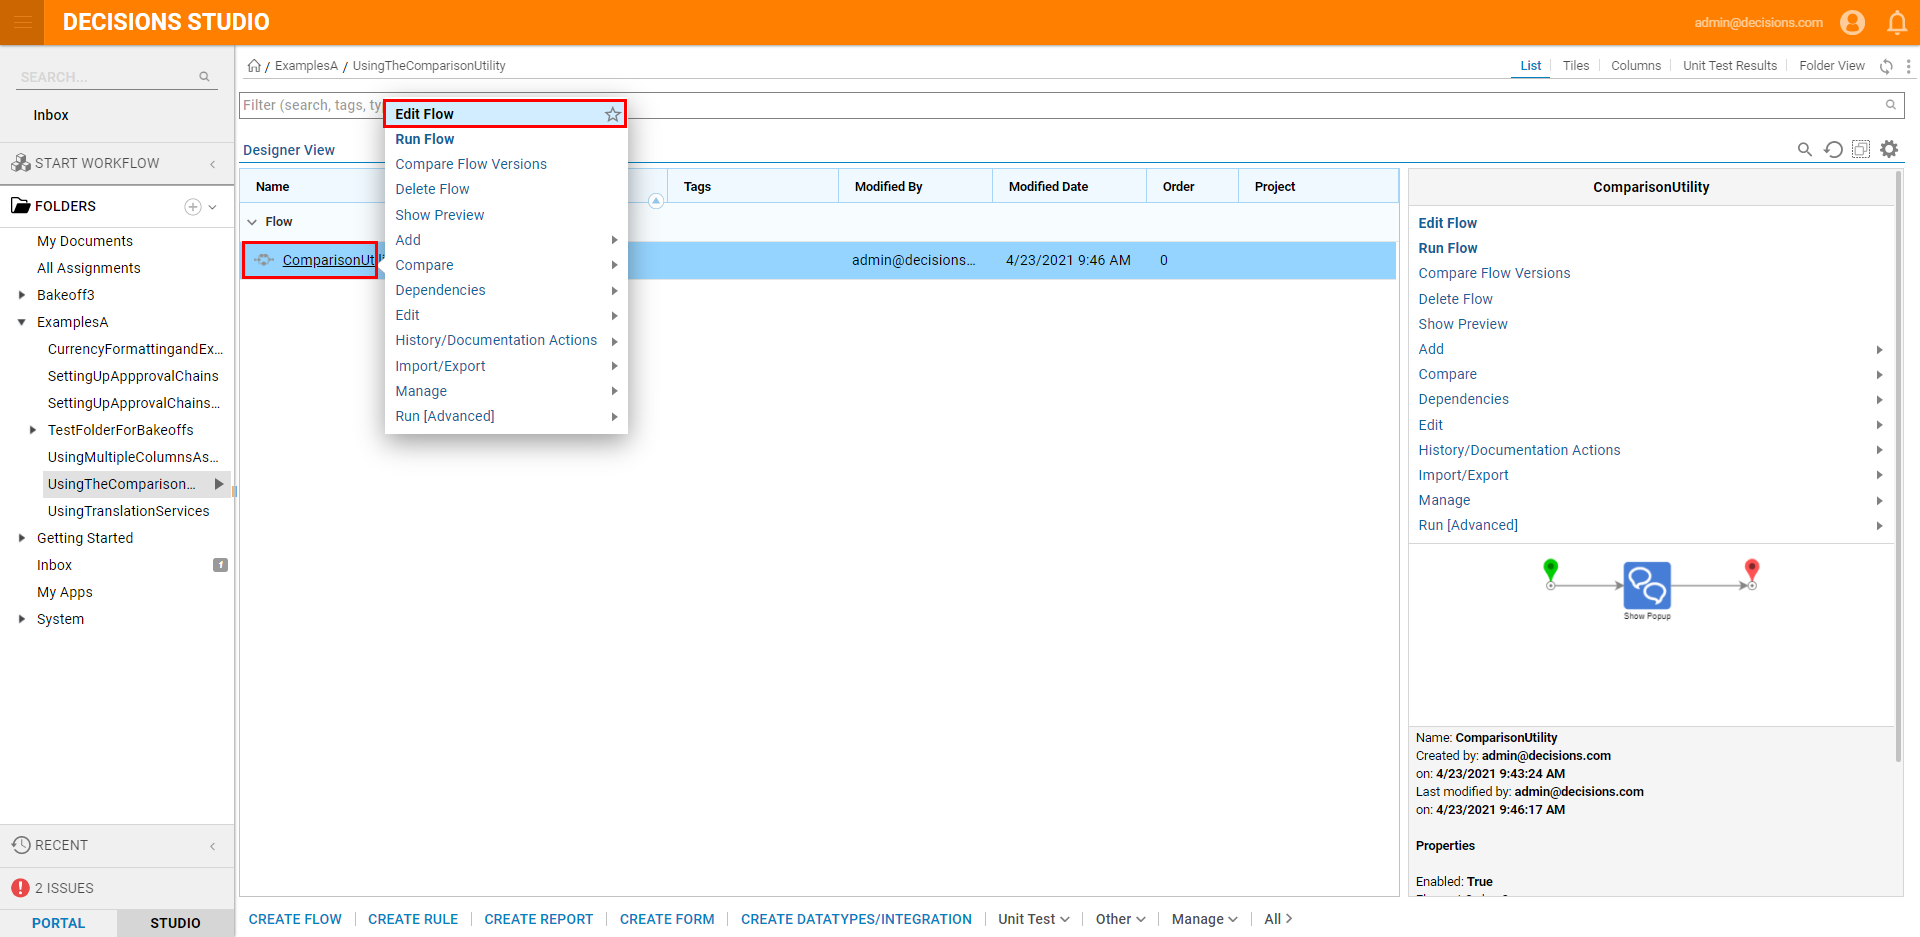
- Back in the Designer Folder, right-click the Flow and select Edit Flow.
- Add another Show Popup step beside the first one, by dragging one from the Favorite Steps category.
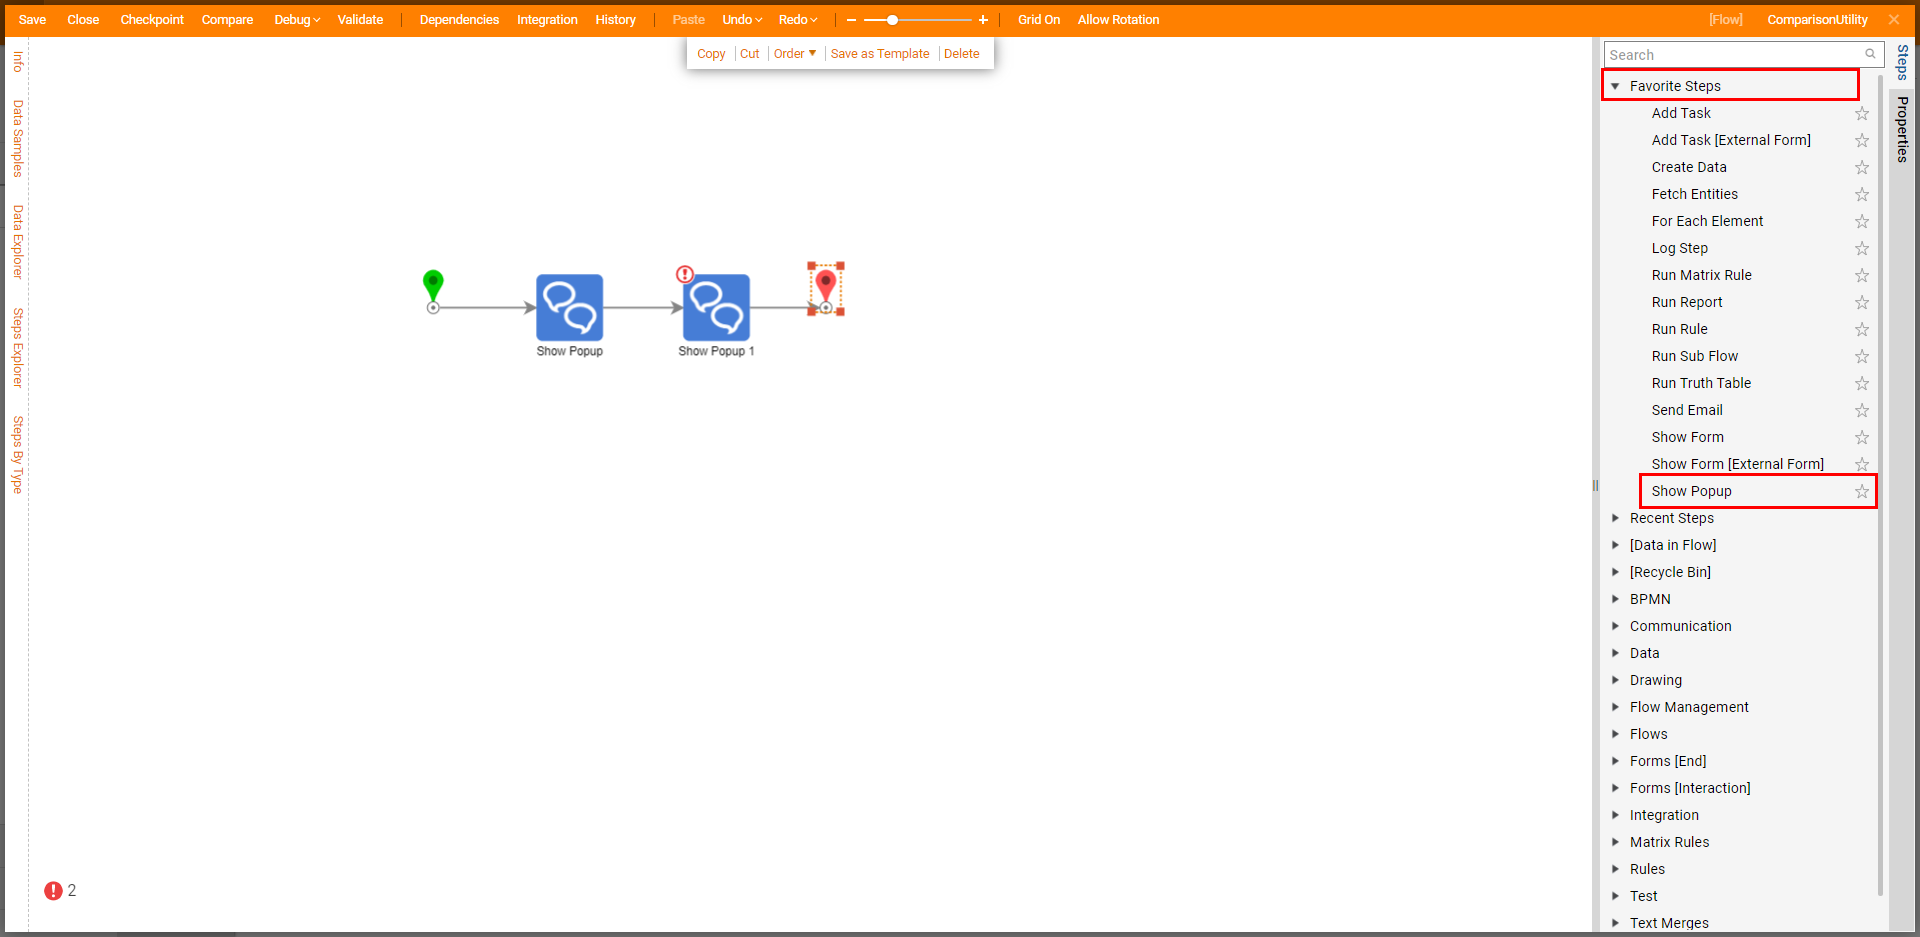
- Configure the newly added step's Inputs similar to the first one.
- When finished, save the changes to the Flow and Close the Flow Designer. Back in the Designer Folder, right-click the Flow and select Compare > Compare To History.
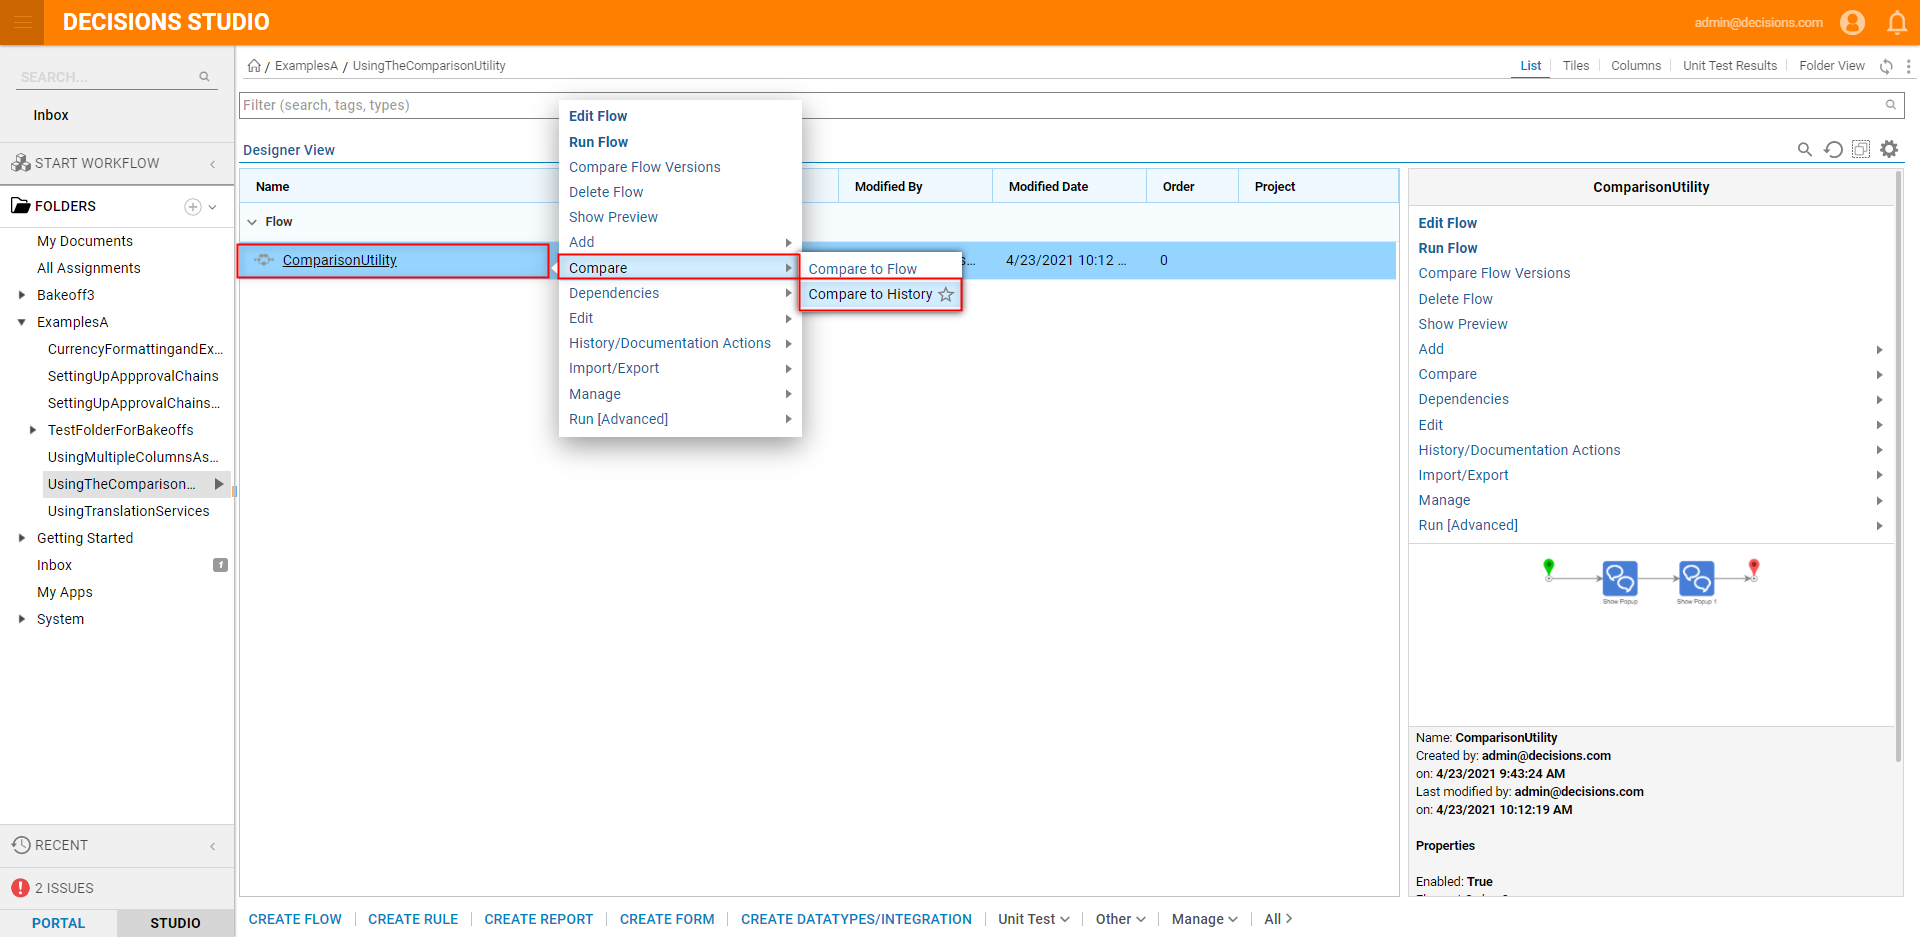
- From the Comparison window, under Compare Setup > Pick Flow, select Original Version - [FLOWNAME]from the dropdown. After observing the Comparison, exit the window. How to read the Results panel
To read the Results panel:
Note both the source and target Flows; these represent the select Flows that are being compared. Then observe each row. Each row that starts with [----diff----] indicate differences between each Flow or version of the Flow.
The [--------------] StepConnections section shows changes in connections between steps within both versions of the Flow (Note that new Connections were established in the target Flow).
In the [--------------] Steps section, note that a new Show Popup step was added. This section indicates which Steps were added to the Flow.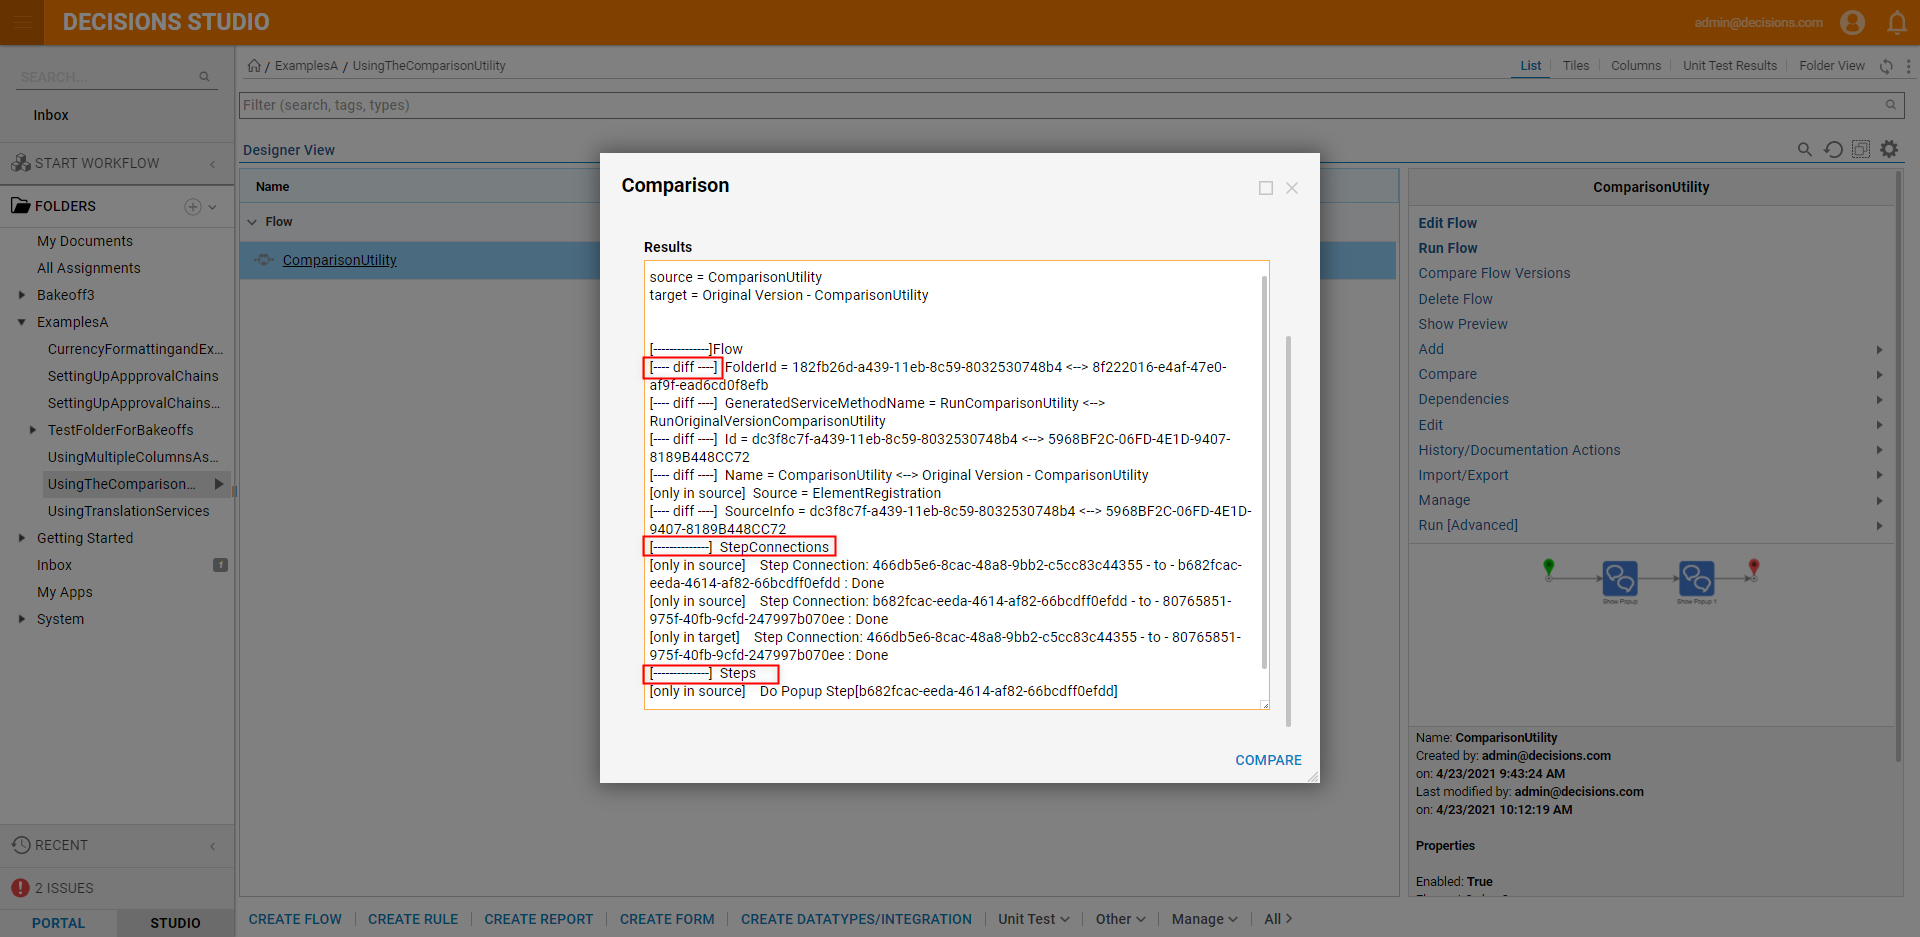
Flow Designer Method
As a visual application of Flow comparison, the Flow Compare utility may be accessed from the Flow Designer via the Compare link on the top Action bar. 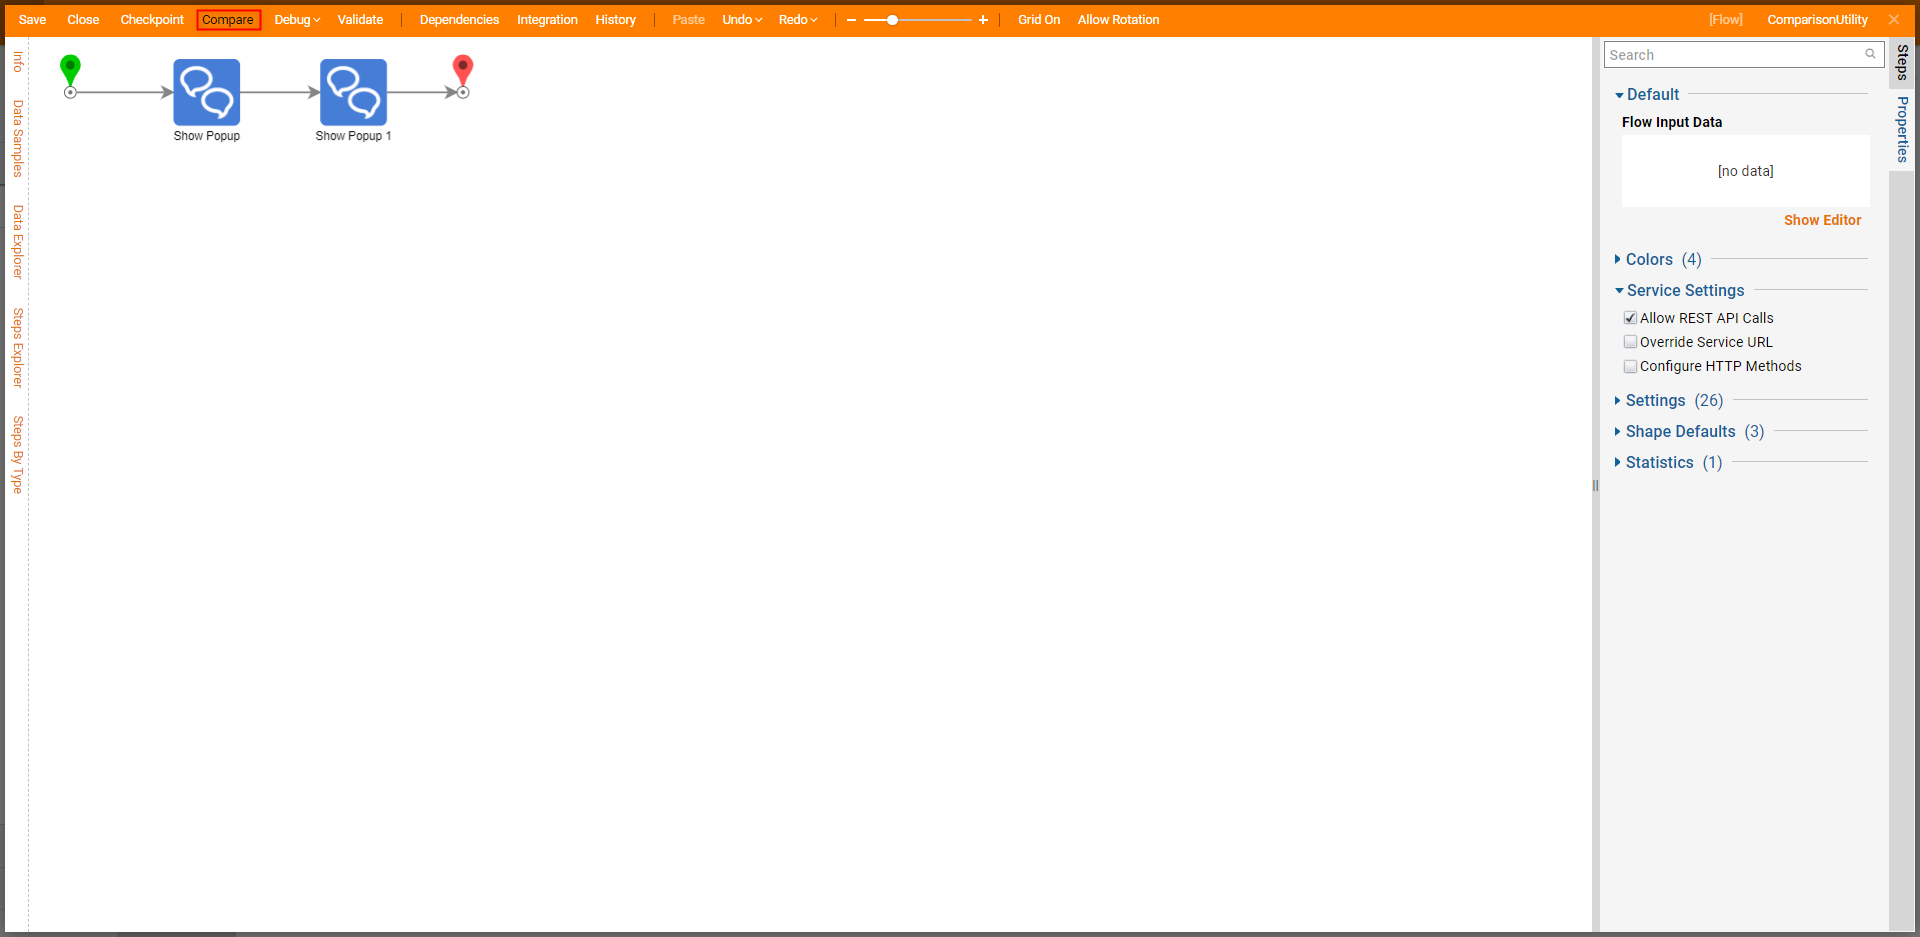
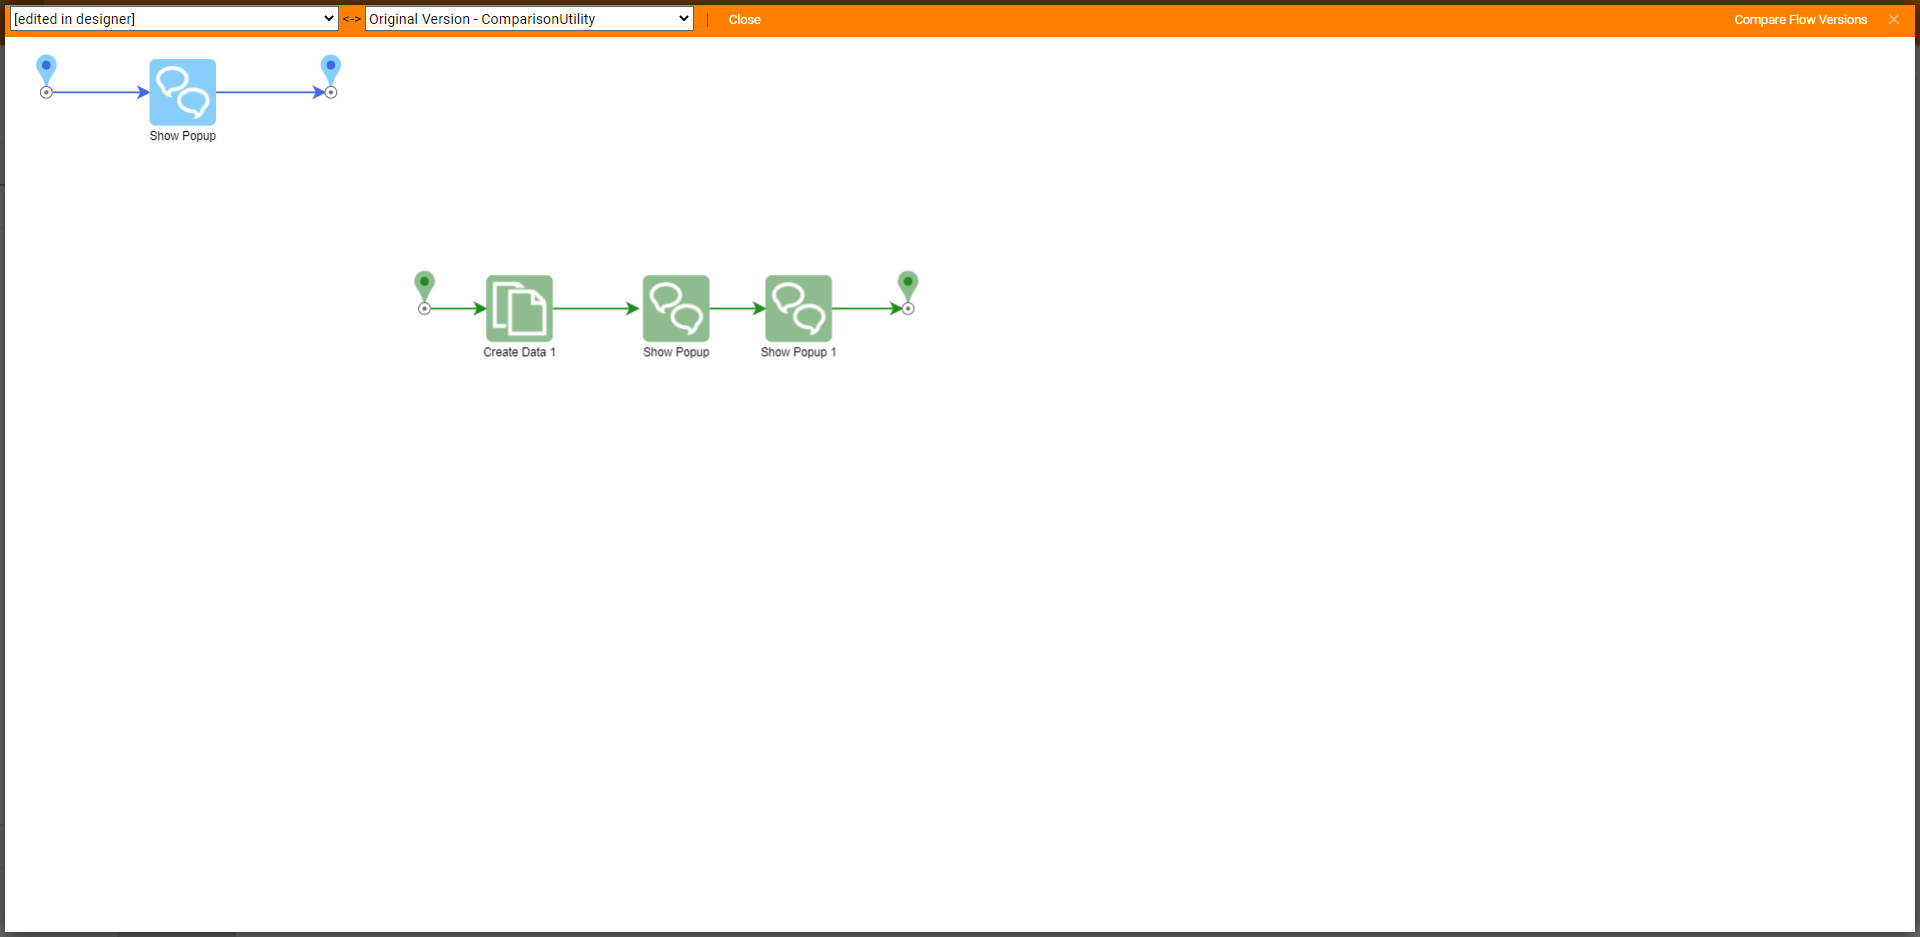
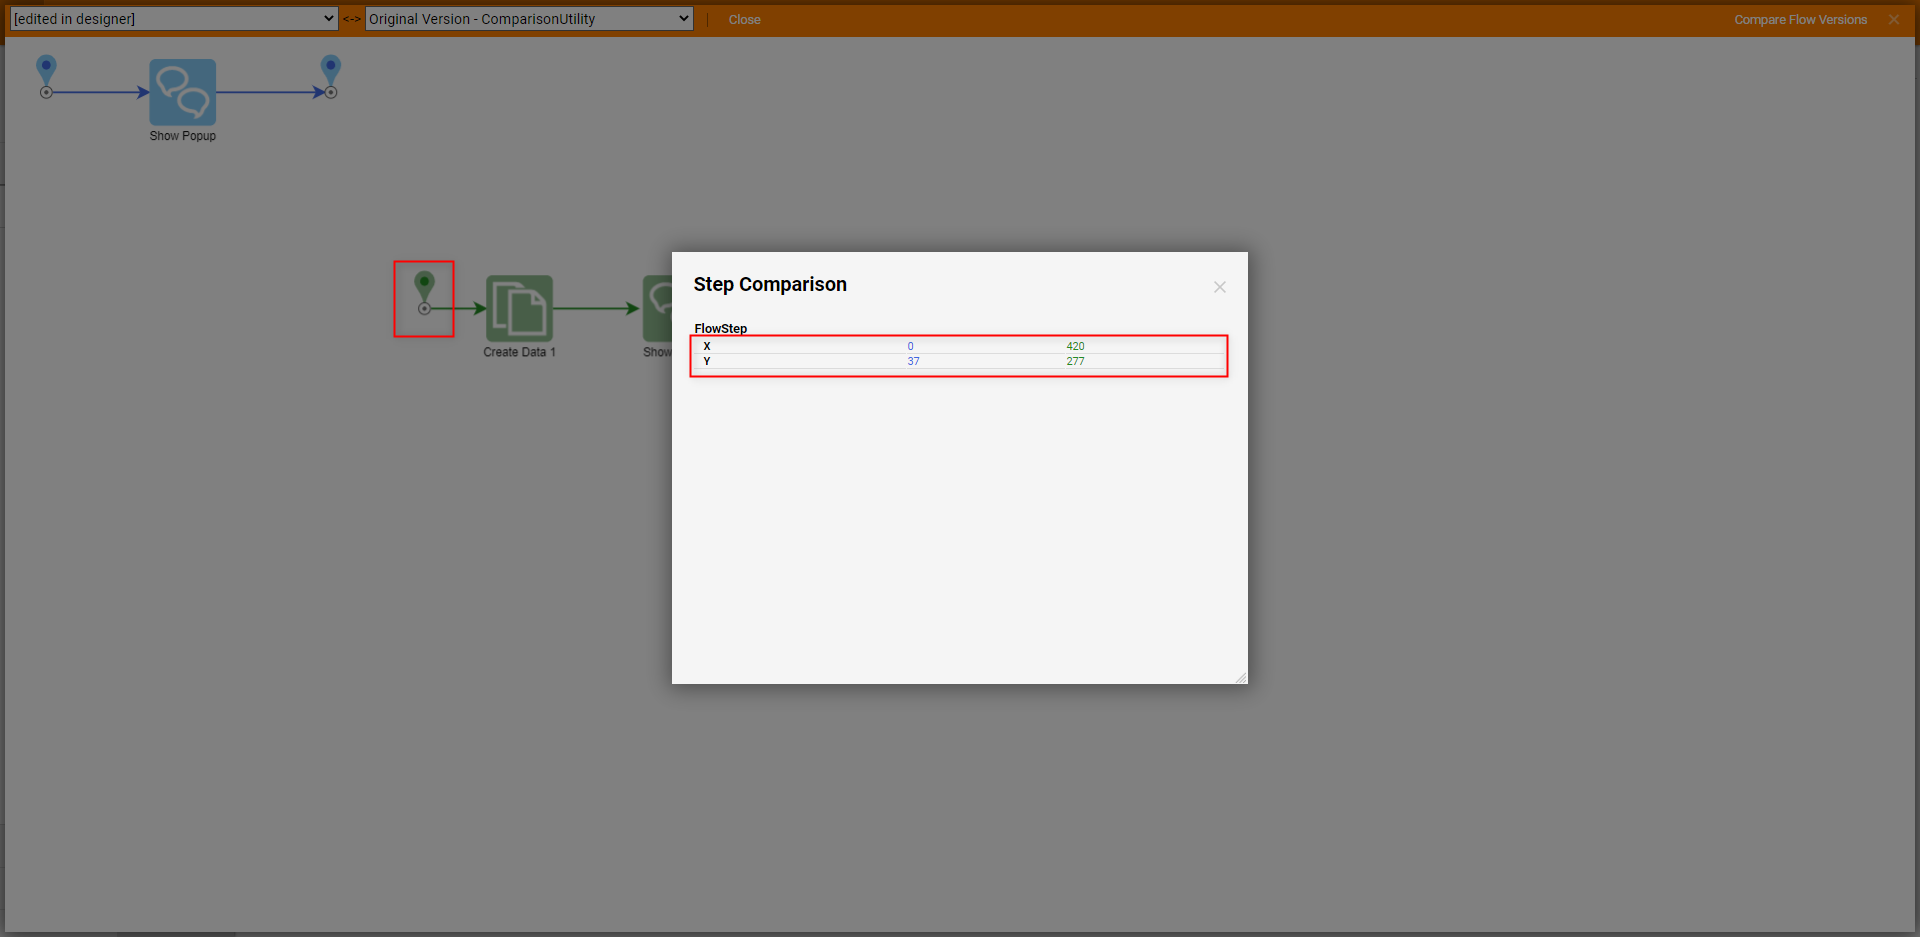
From this screen users are provided the option to select each of two desired versions for comparison via the two dropdown menus on the top Action bar. Selecting two different versions provides visual representation of the differences and similarities between each Flow's steps and their respective connections.
These steps and paths are color-coded as follows:
| Blue | Represents the original steps and paths. |
| Green | Represents added/altered steps and paths. |
| Orange | Represents removed and deleted steps/paths. |
Compare to Flow
- From the same Designer Folder, CREATE an additional Flow for comparison consisting of a single Show Popup step connected to both the Start and End steps. Save and Close the Flow when done.

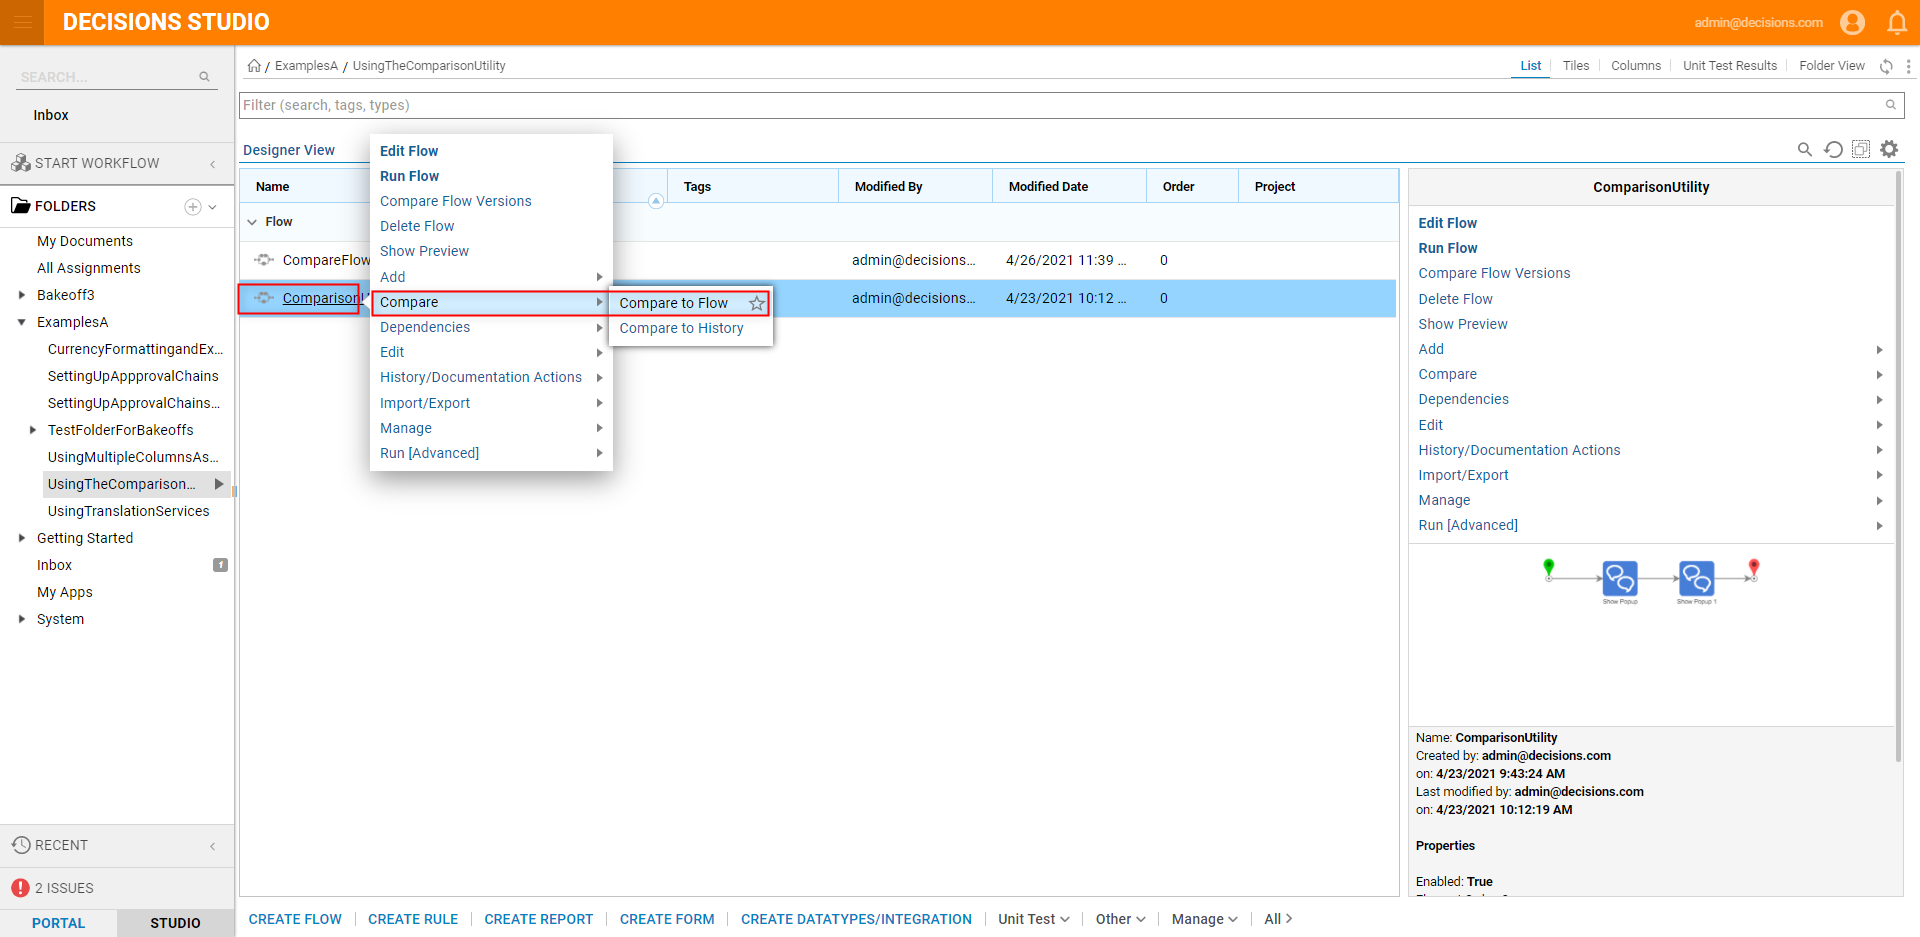
- From the Designer Folder, right-click the first Flow and select Compare > Compare to Flow.
- From the Comparison window under Compare Setup > Pick Flow, and Pick the second Flow.
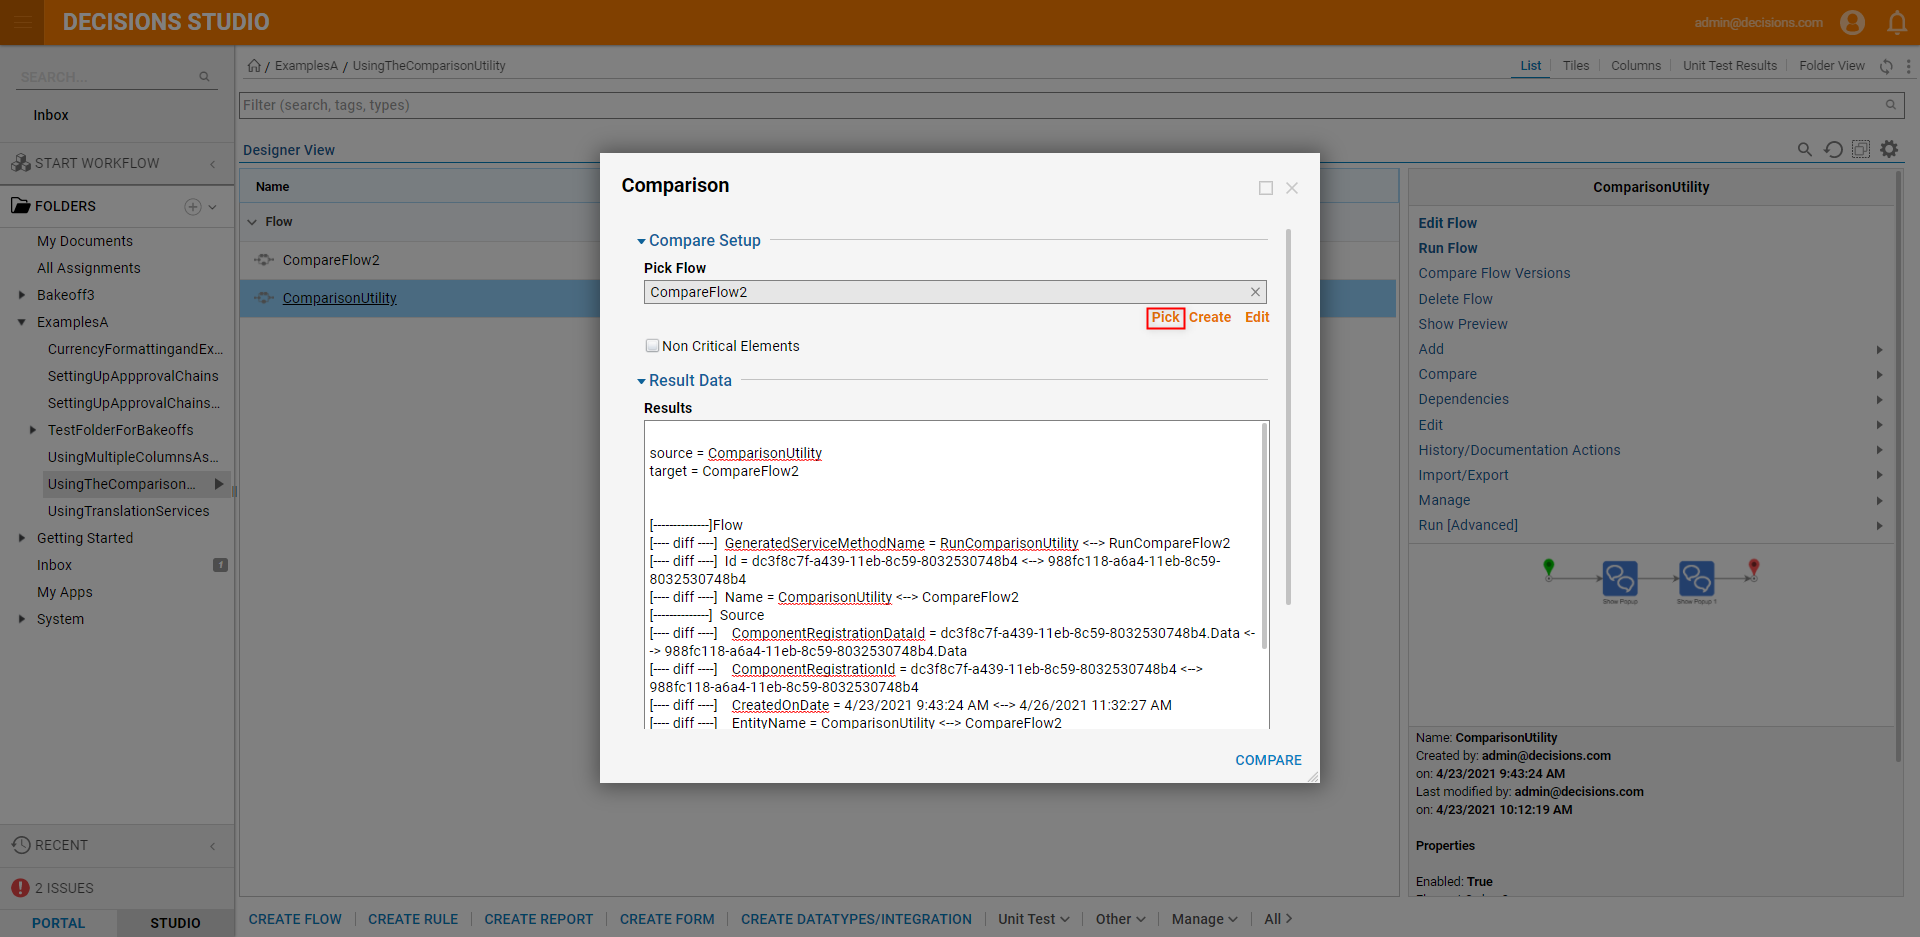
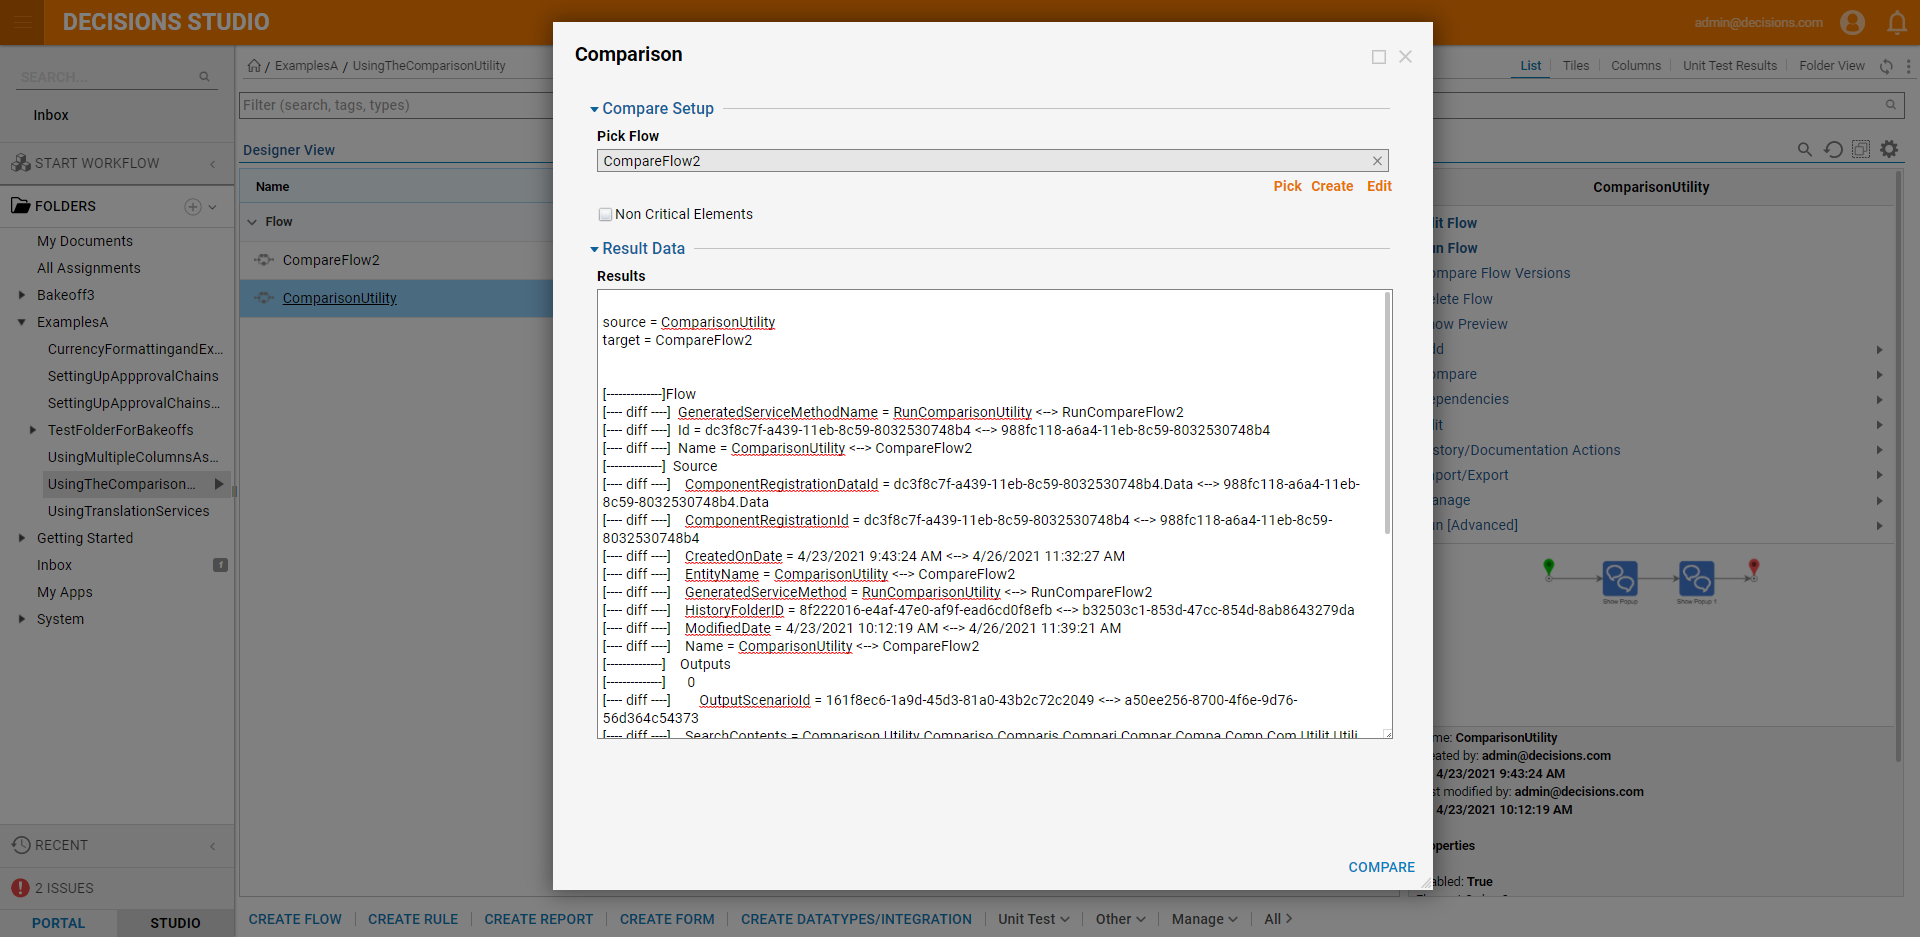
- Analyze the differences between the two Flows. Note the different GeneratedServiceMethodNames, Ids, Names, CreatedOnDates, etc.
Example B: Rules
Similarly, this utility may be used to compare a Rule with a different version of itself, or with a different Rule entirely.
To do so:
- CREATE and design a Rule.
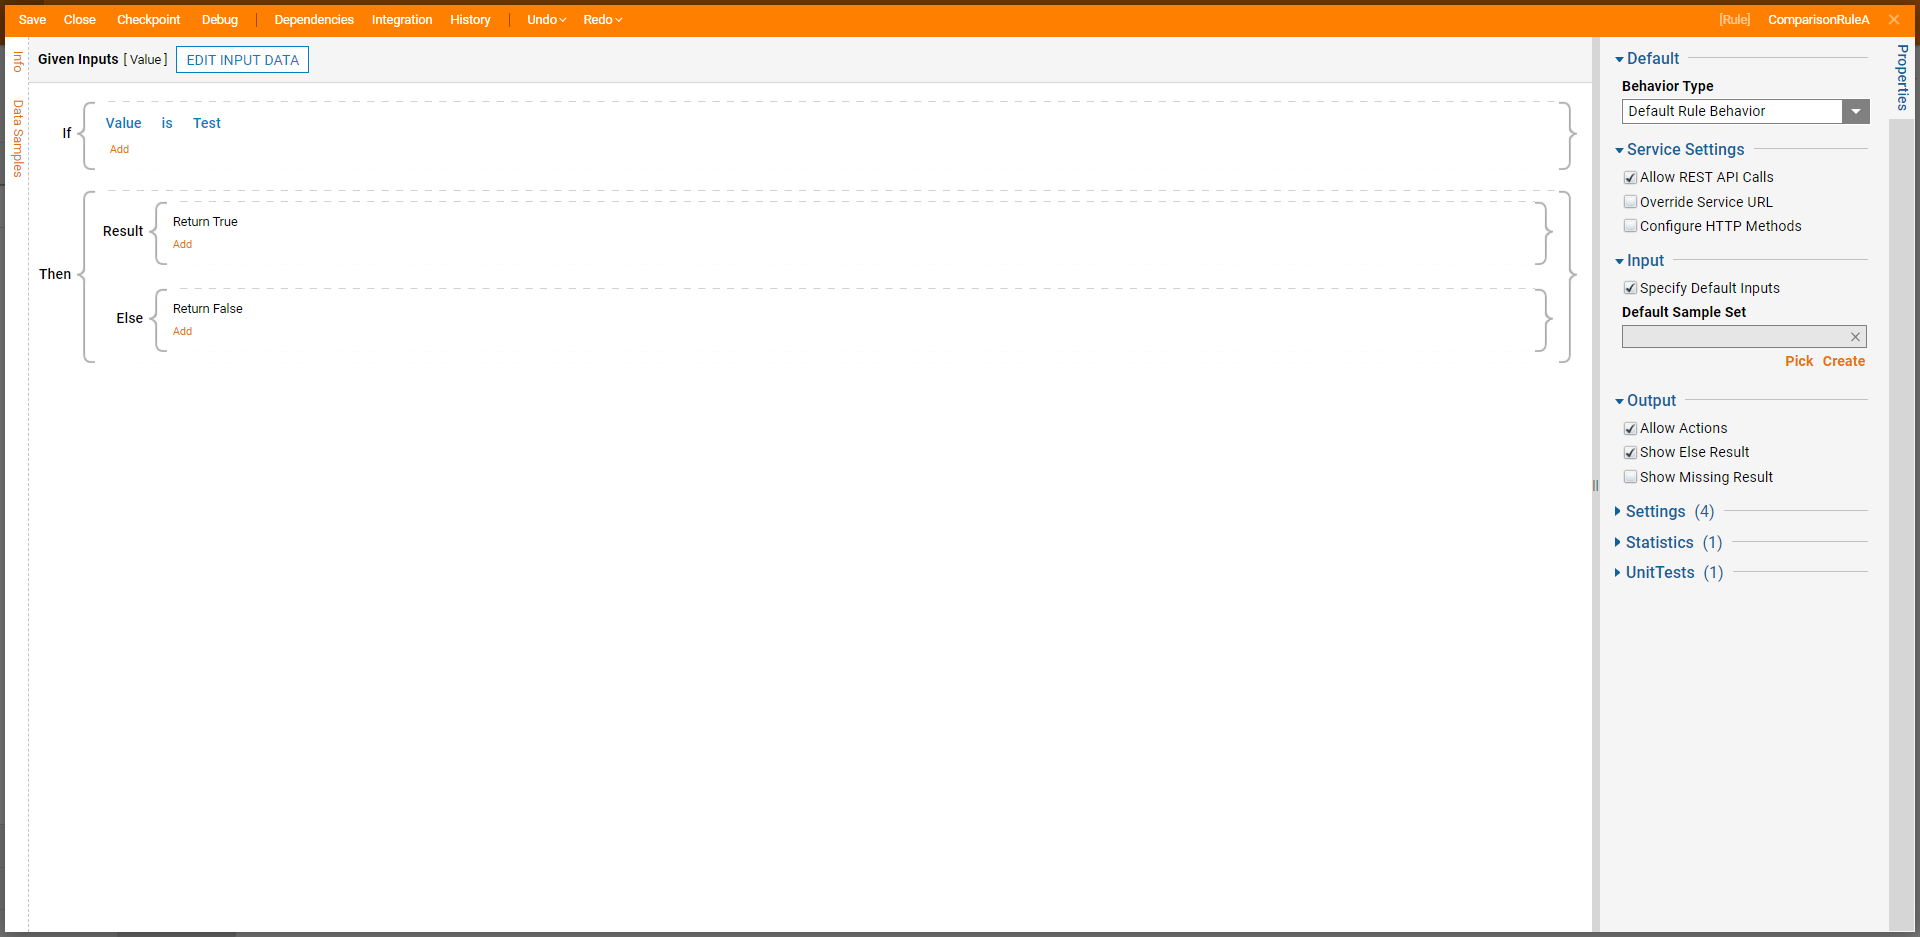
- Save the Rule, then Close the Rule Designer.
- Open the Rule and make any desired adjustments; Save and Close once more.

- In the Designer Folder right-click the Rule then select Compare > Compare to History.
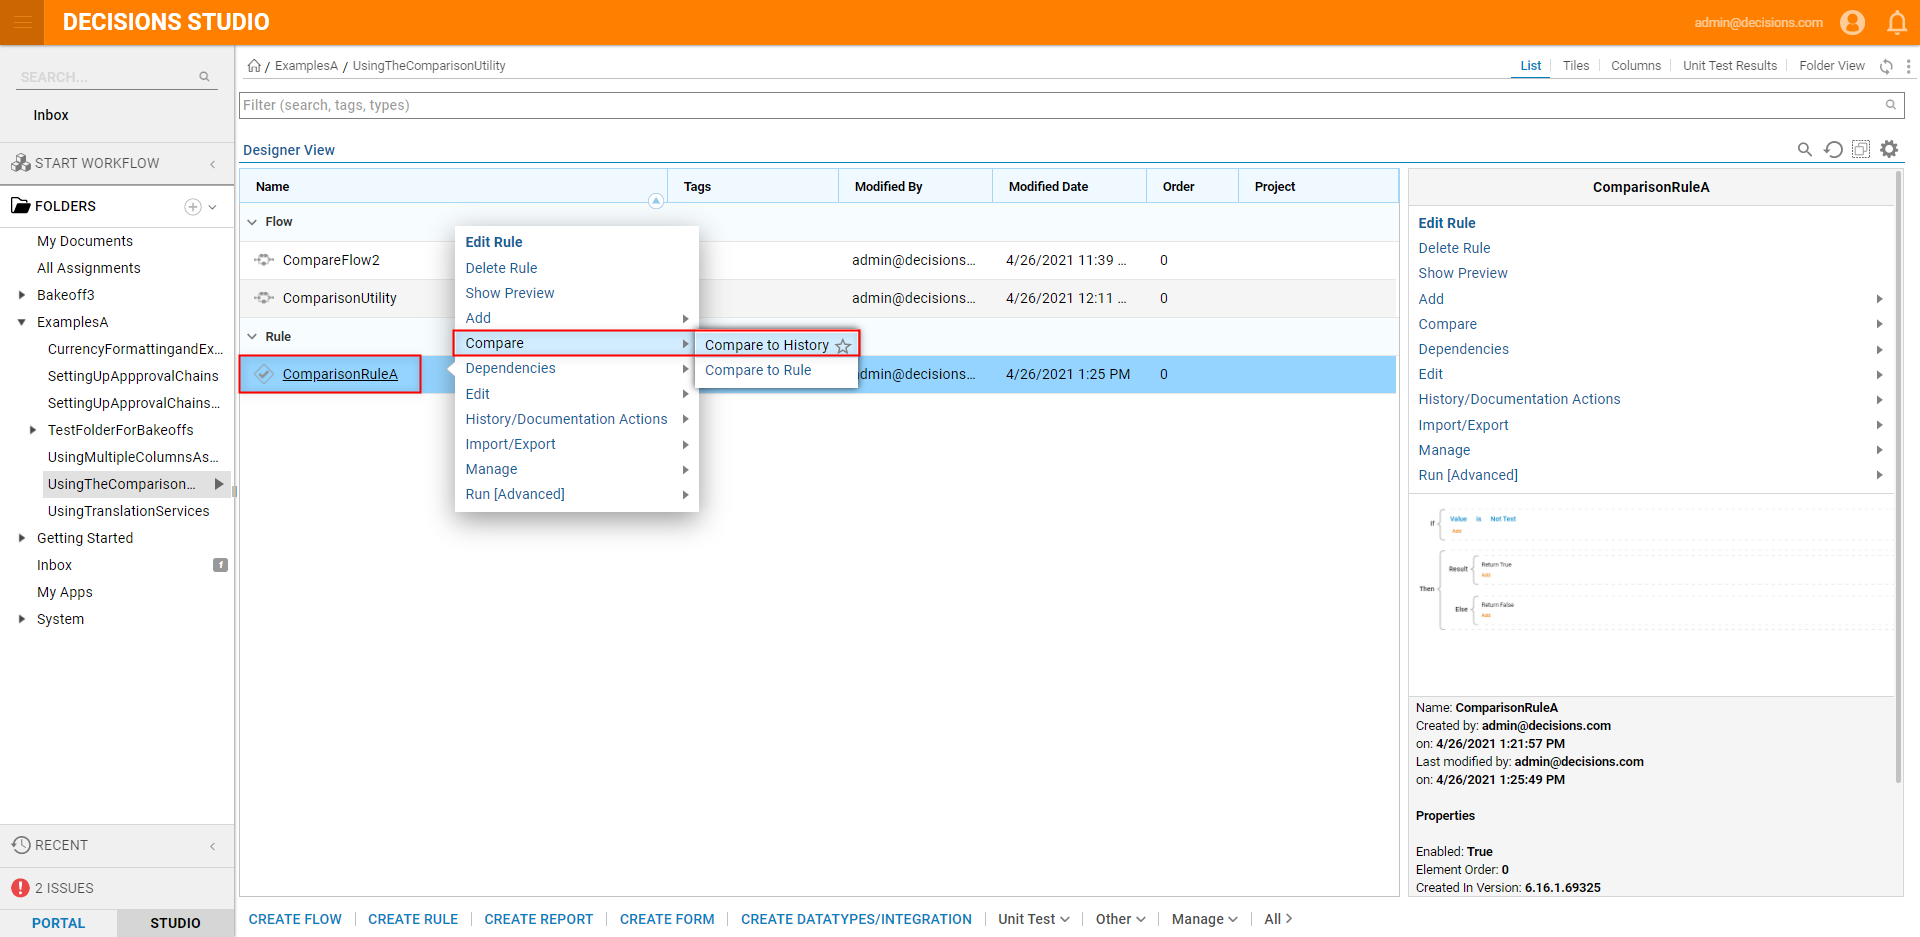
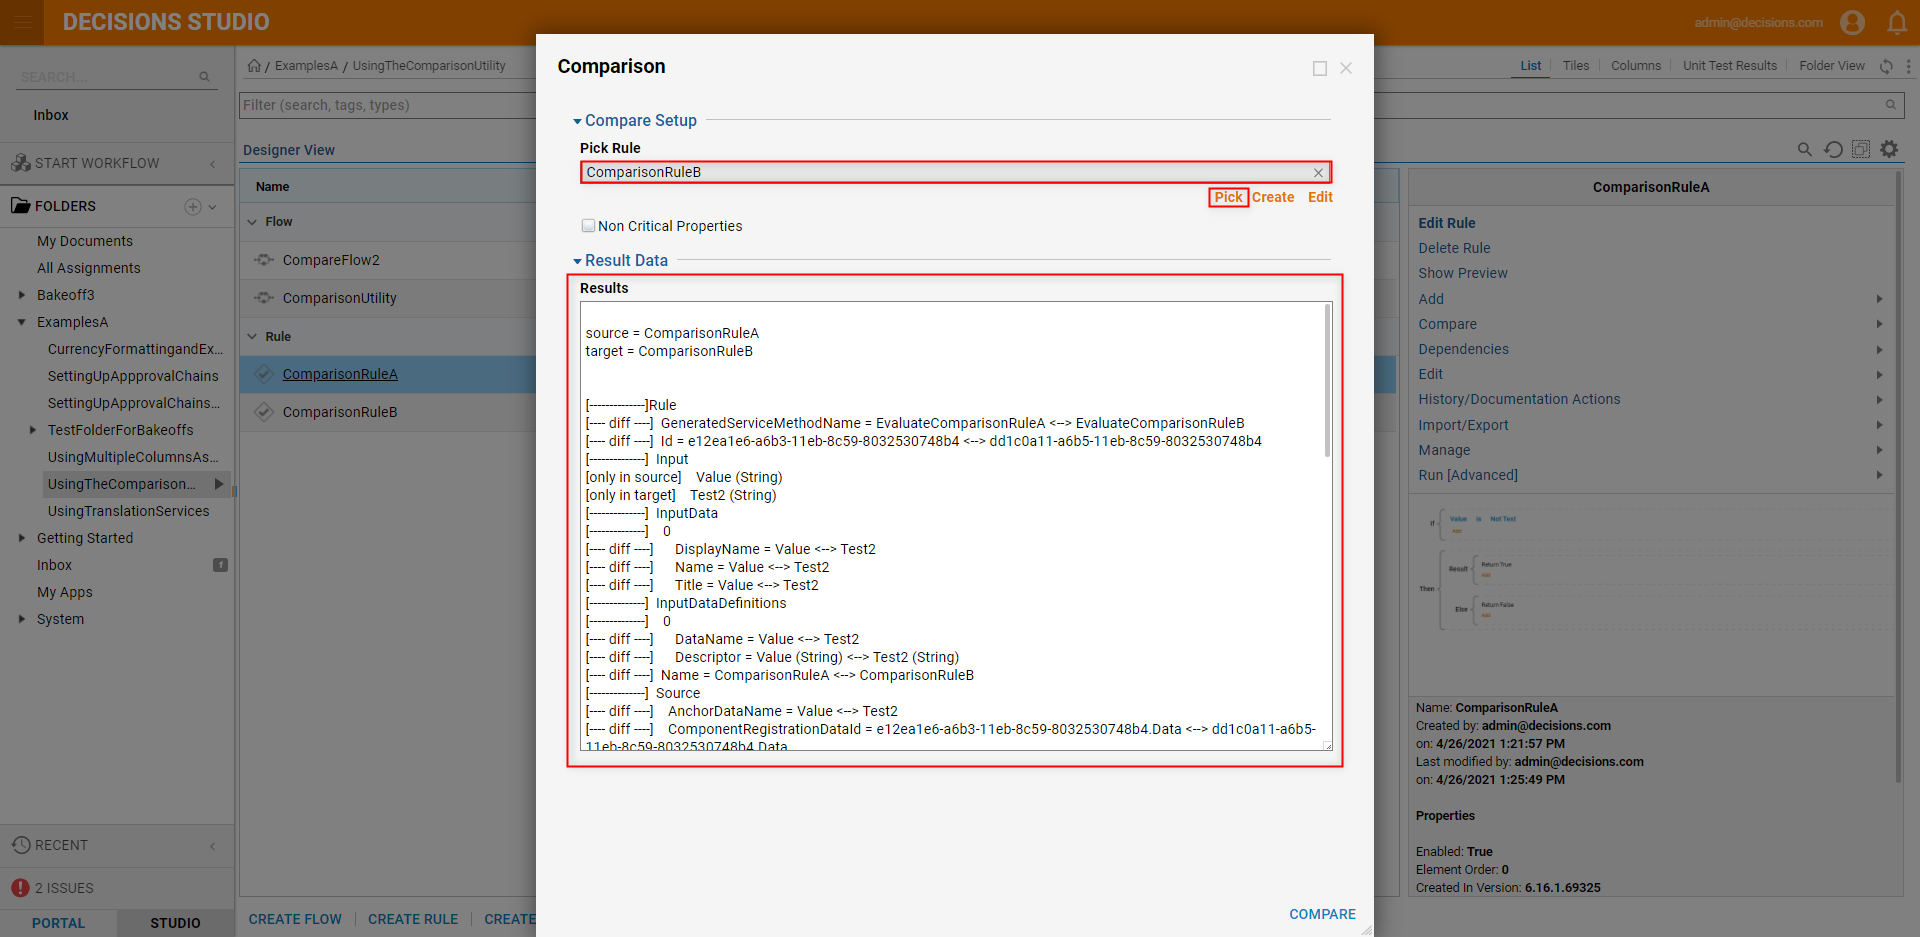
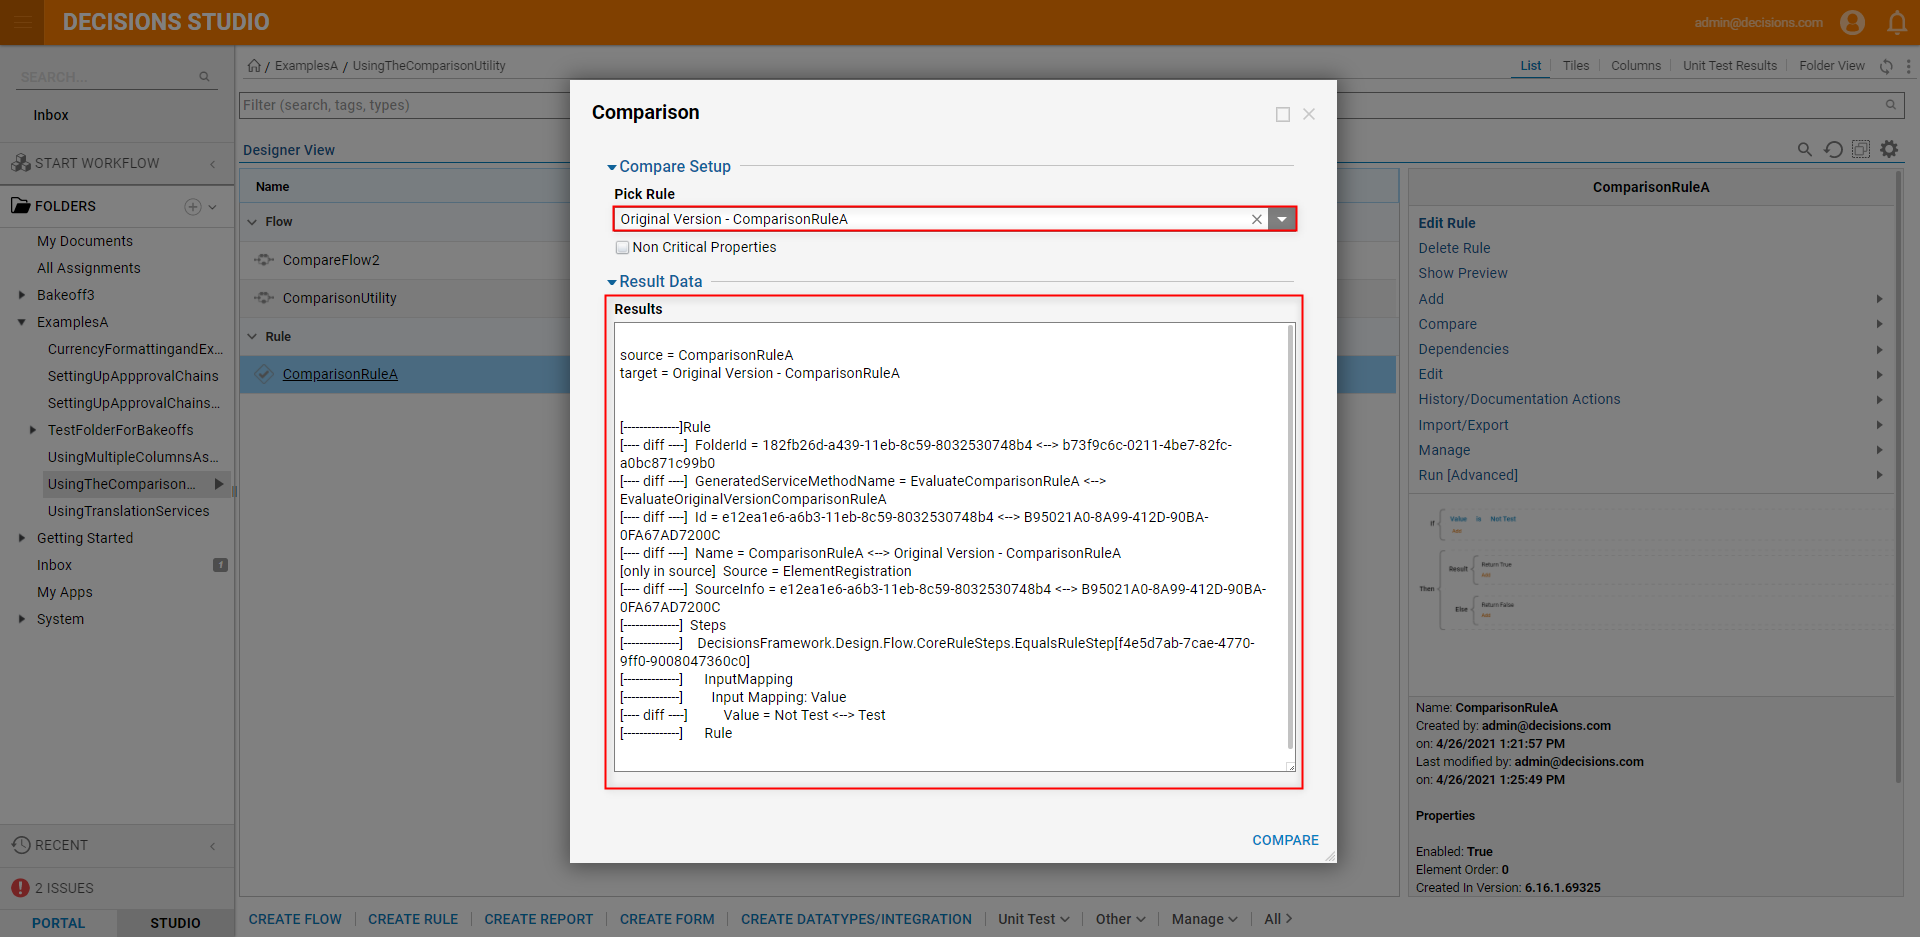
- Similar to the Flow Comparison utility, select Original Version from the Pick Rule dropdown. Then observe and analyze the Results. Close the window when complete. Note on changesIf the Input Value was changed, note any [----diff----] lines pertaining to Input Mapping or Value. This screenshot demonstrates that the Value changed from Test to Not Test.
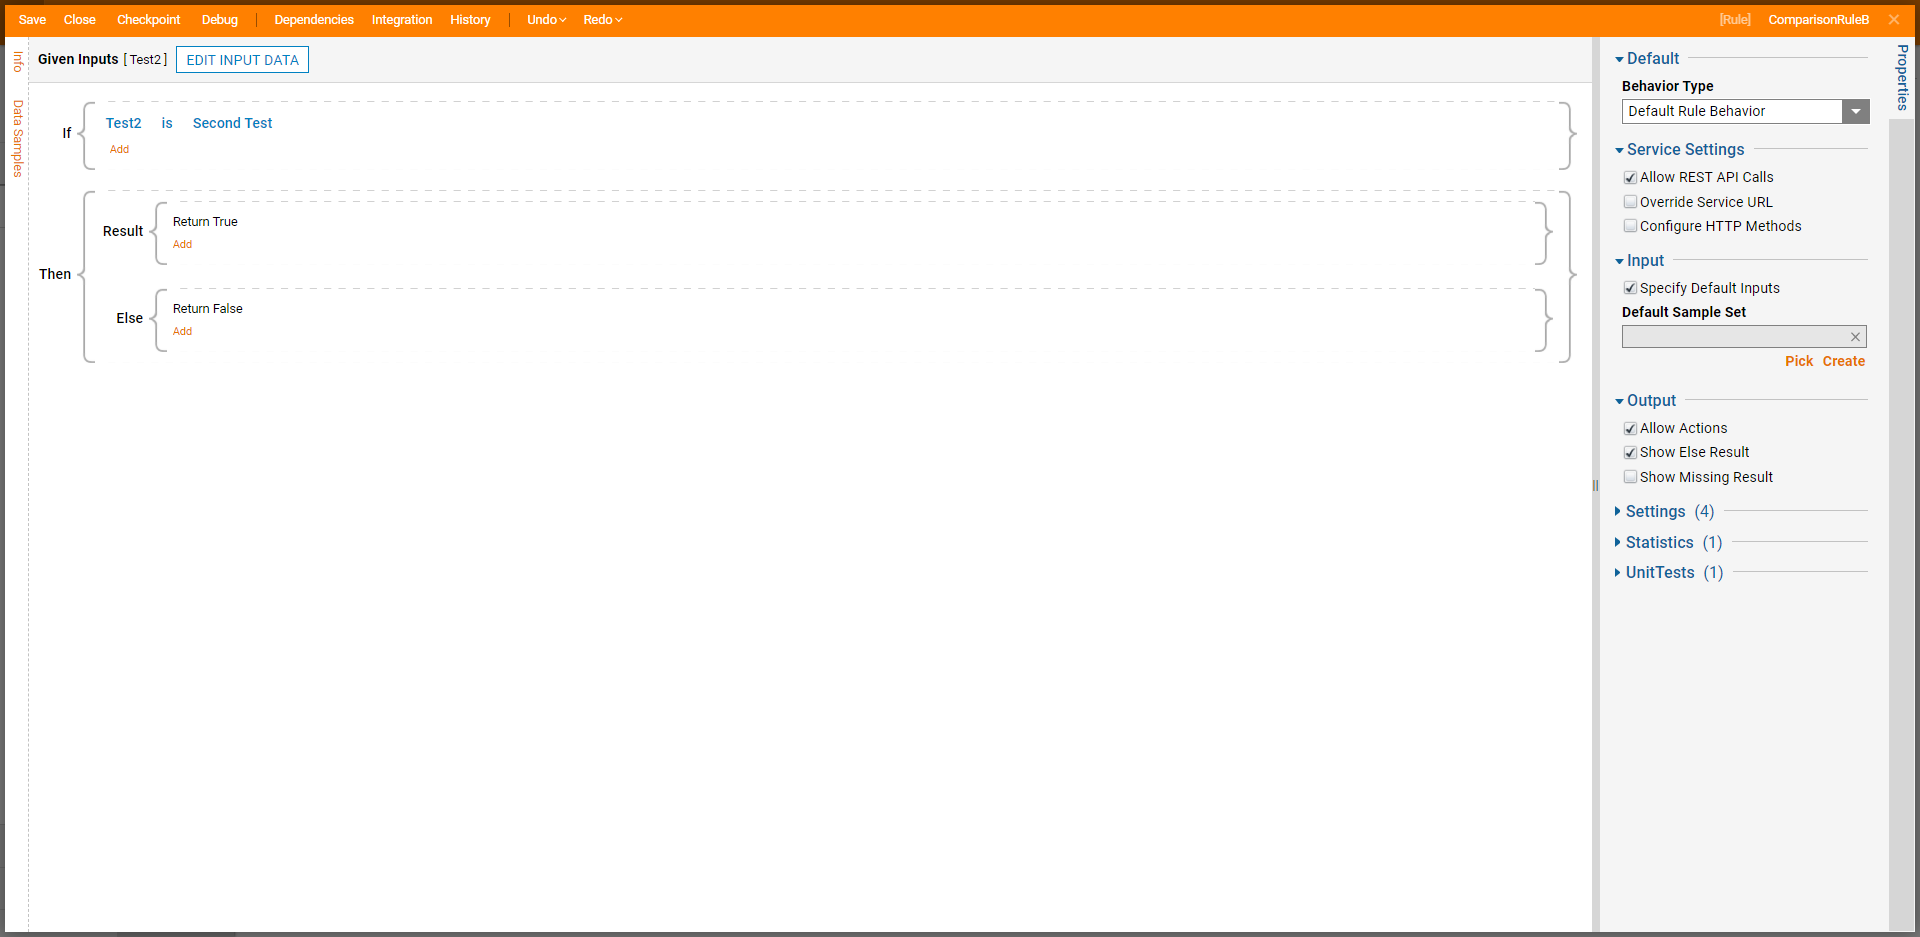
From the same Designer Folder, create another Rule. Then, Save the Rule and Close the Rule Designer.
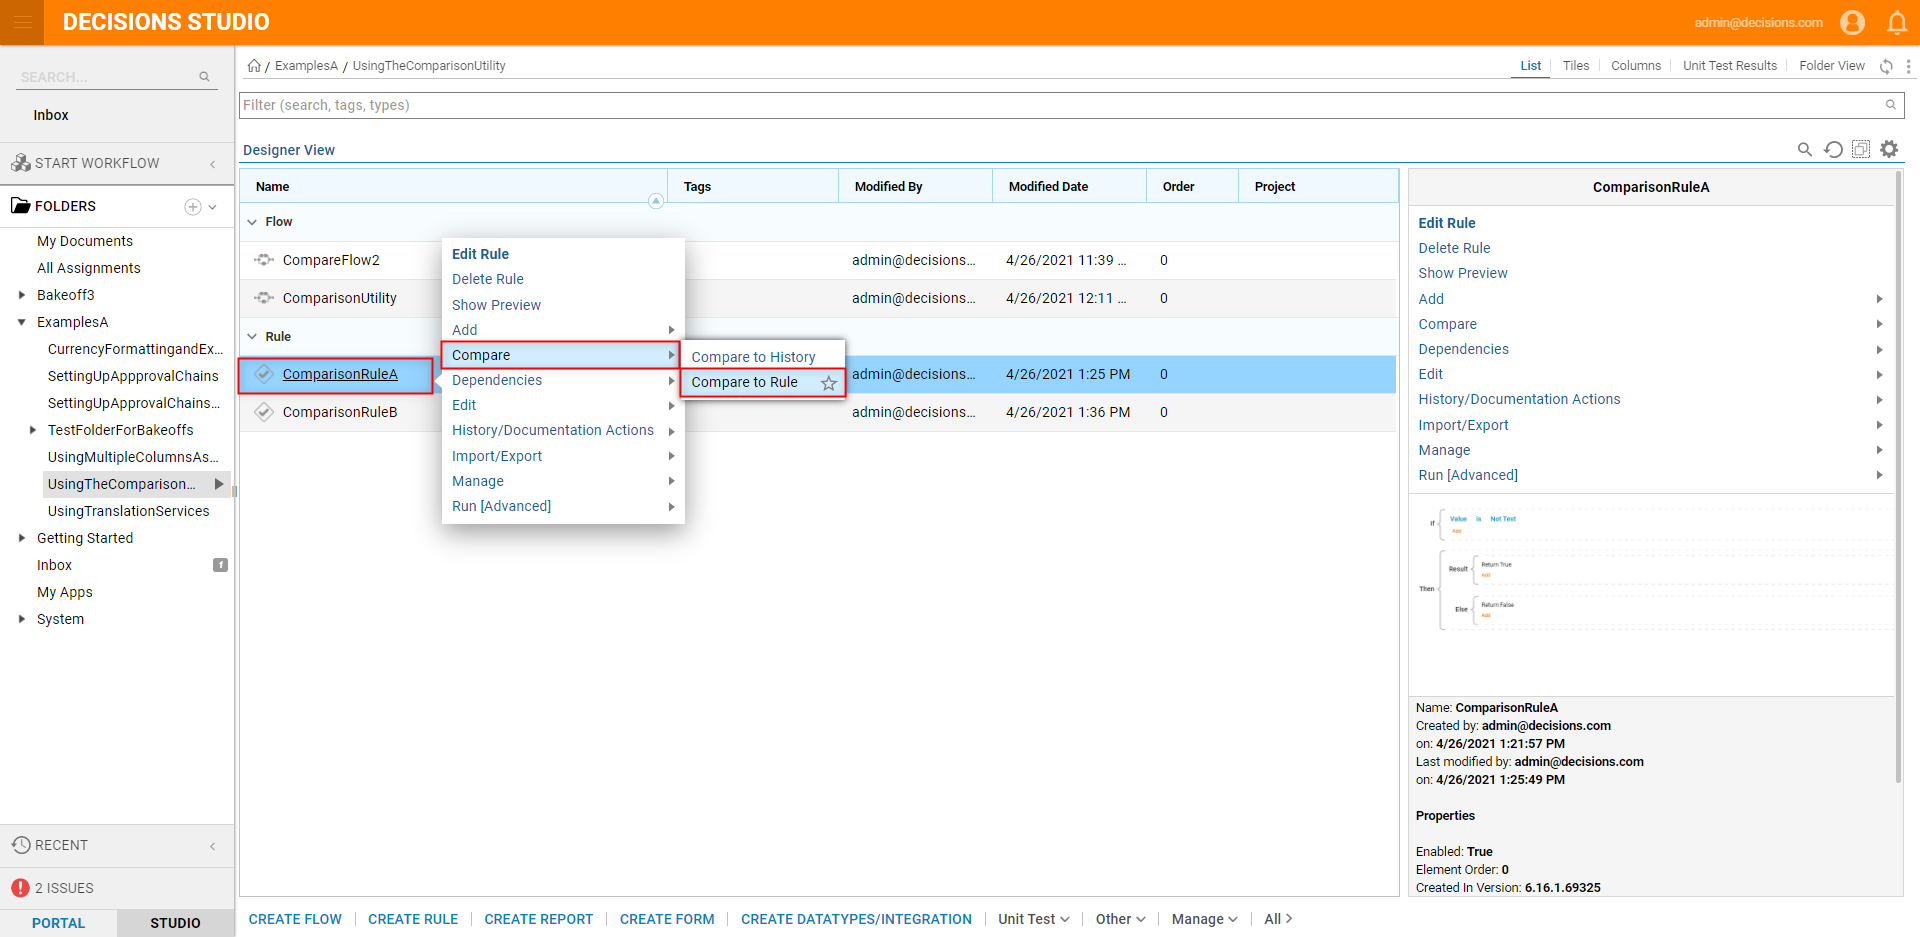
From the Designer Folder, right-click the first rule and select Compare > Compare to Rule.
From the Comparison window, Pick the second Rule, then observe and analyze any differences by comparing information on any [----diff----] lines in the Results panel.
