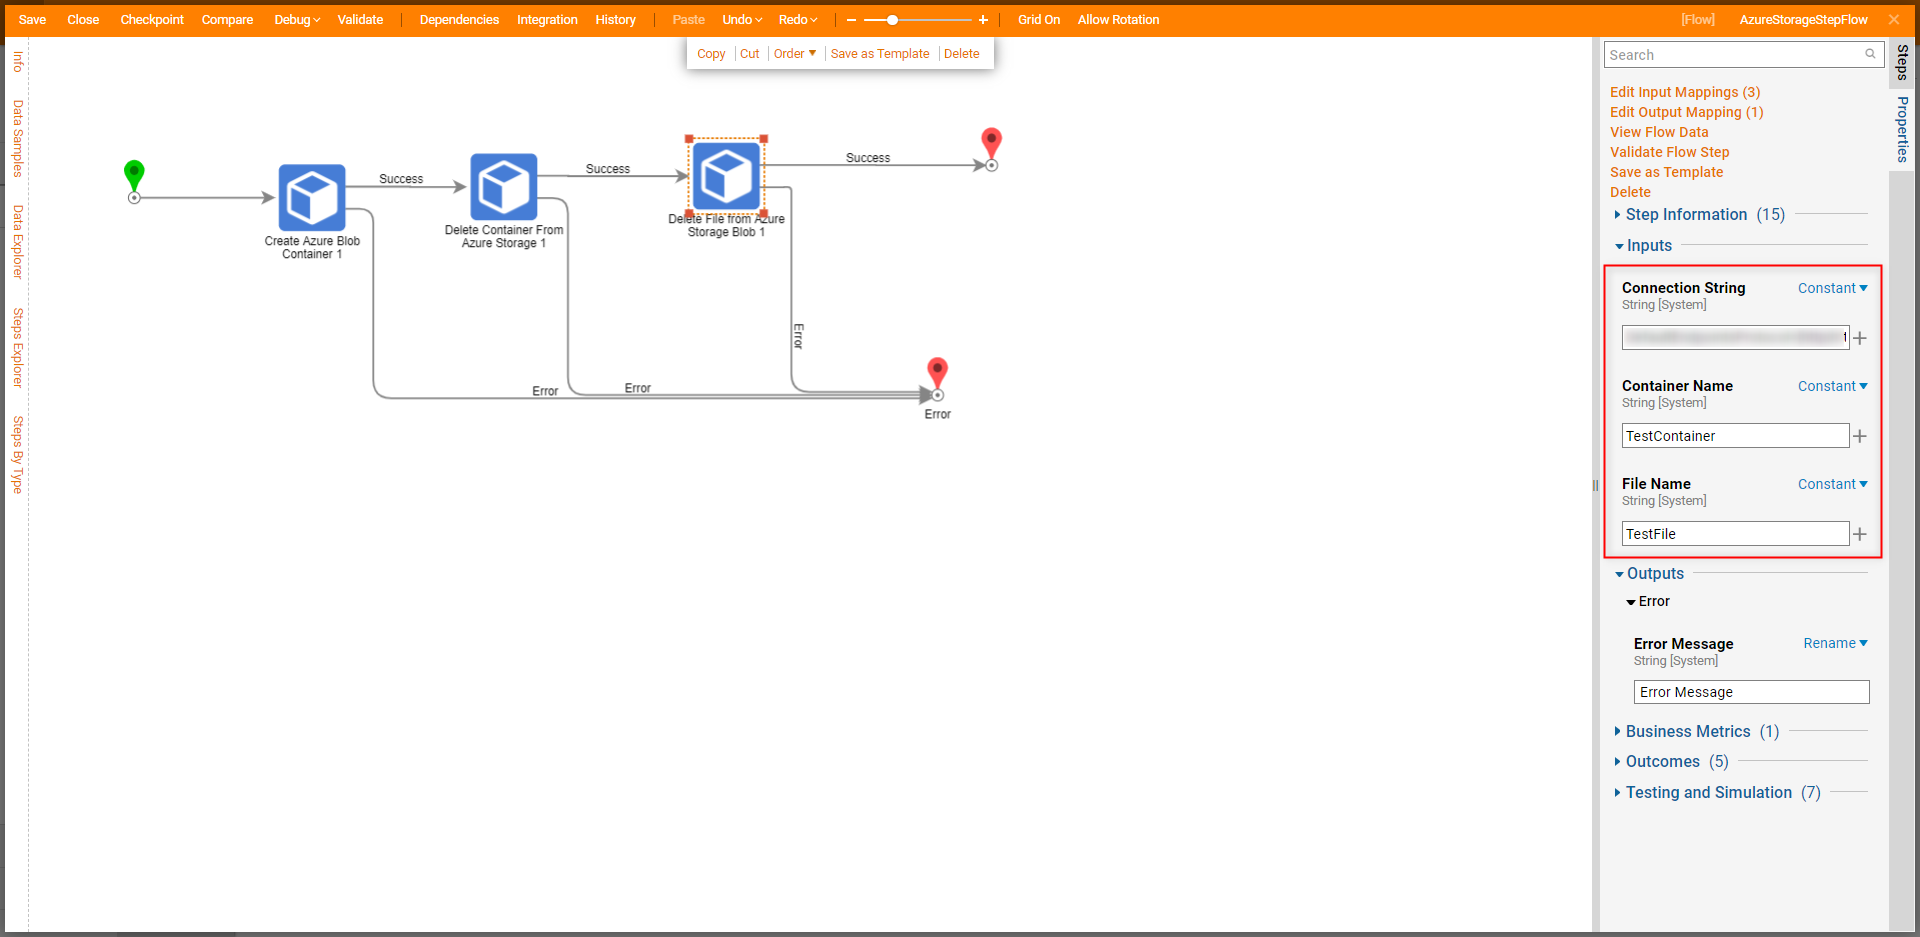
Overview
As part of the host of the services provided by the Azure Services Module, Decisions offers users the option to interact with Azure's storage system, Azure Storage Blob. This system allows users to store documents, unstructured data, and other forms of data, such as binary or text, within the Azure Cloud. This is accomplished using a properly formatted Connection String and the various steps found within the Azure Storage Folder in the Steps tab. The following document demonstrates how to set up these steps to upload and download data to and from an Azure Storage Container.
Connection String
To properly integrate with Azure Storage Blob steps, users need to map a Connection String that corresponds to a pre-existing Azure Storage Account. These are formatted as follows:
"DefaultEndpointsProtocol=[http|https];AccountName=[myAccountName];AccountKey=myAccountKey"
In this format, the user determines whether they want to connect to the Storage account via HTTP or HTTPS.
The second value dictated by the user is the Account Name; this value represents the Name of the Storage Account. Lastly, the Account Key value is the Account Access Key that corresponds with the Storage Account. This value can be found via the Security section of the Azure Portal.
Upload Azure Storage Blob
For more information on installing the AzureServices Module, see Azure Services and Installing Modules.
The following example demonstrates how to create an Azure Blob Container and Upload an Azure Storage Blob.
To do so:
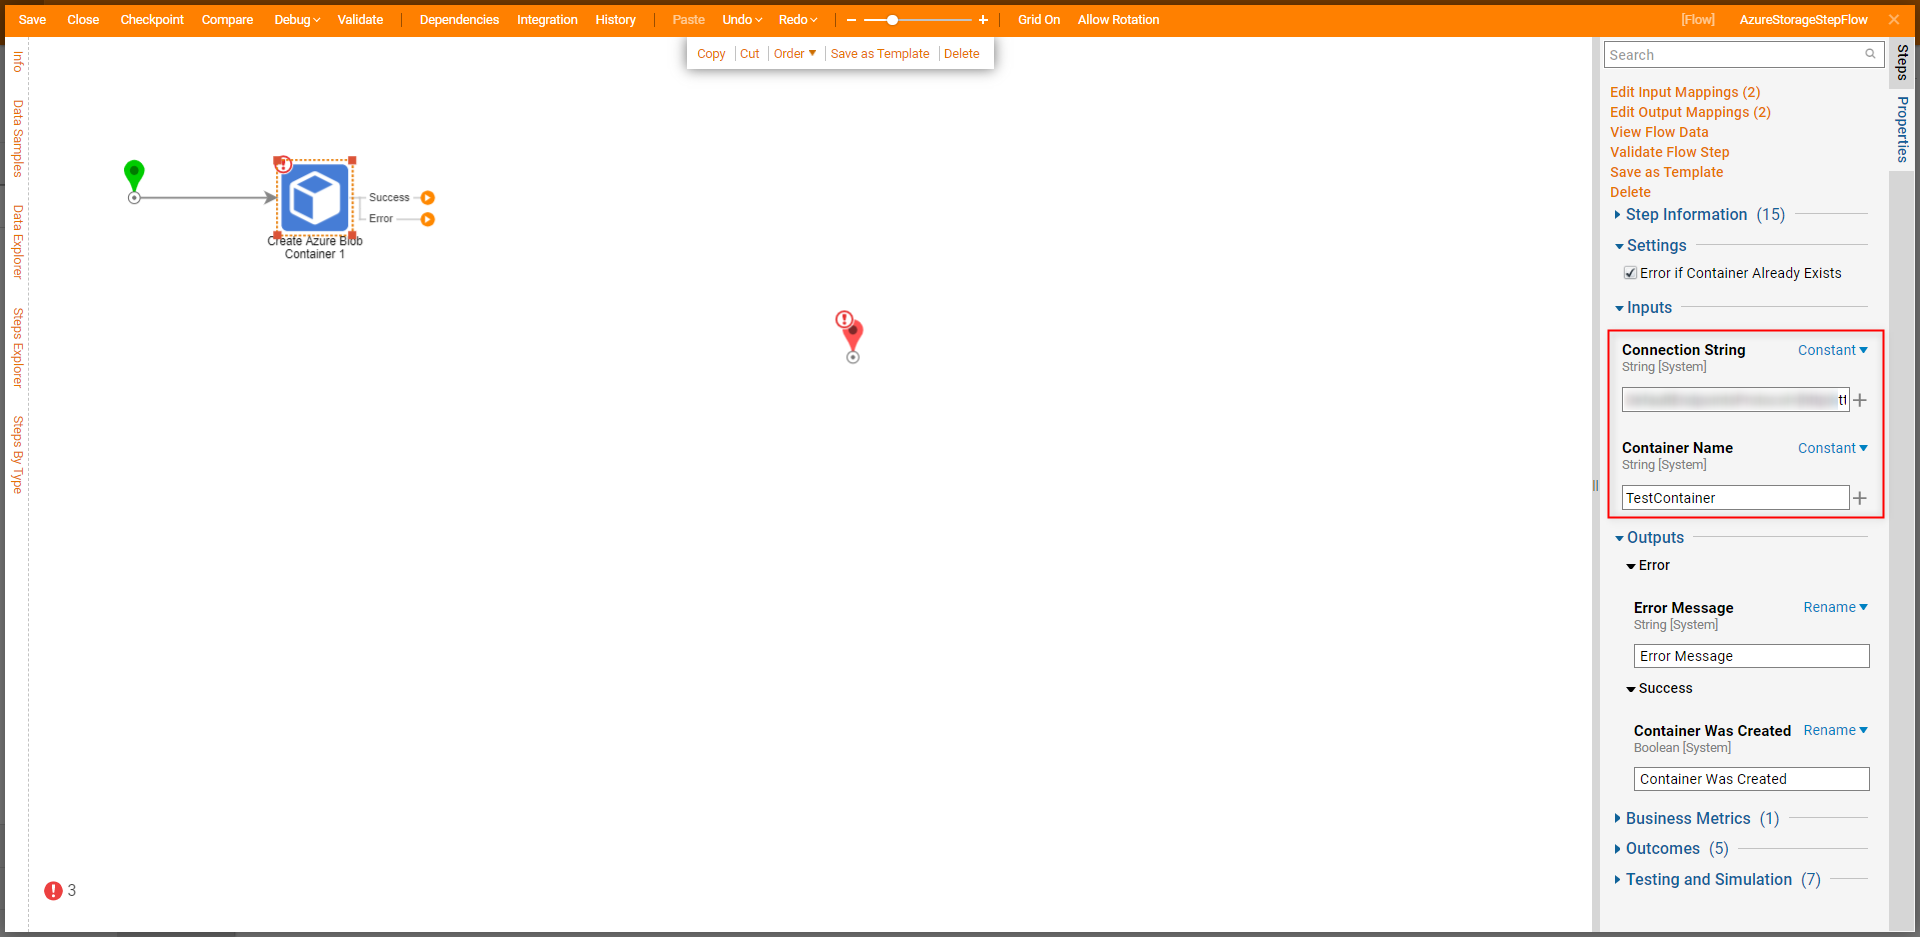
- From a new Flow within the Flow Designer, navigate to Steps > Integration > Azure Storage, and attach a Create Azure Blob Container step to the Start step.
- From the Properties tab of the Create Azure Blob Container step, Constant maps the Connection String for the Azure Account to its respective INPUT. Then, Constant map the desired name to Container Name. Additional info on Azure Blob ContainersAzure Blob Containers act as a sort of directory and point of organization for Azure Storage Blobs. The Create Azure Blob Container step is used to establish a location to place the Azure Storage Blobs created within Azure.
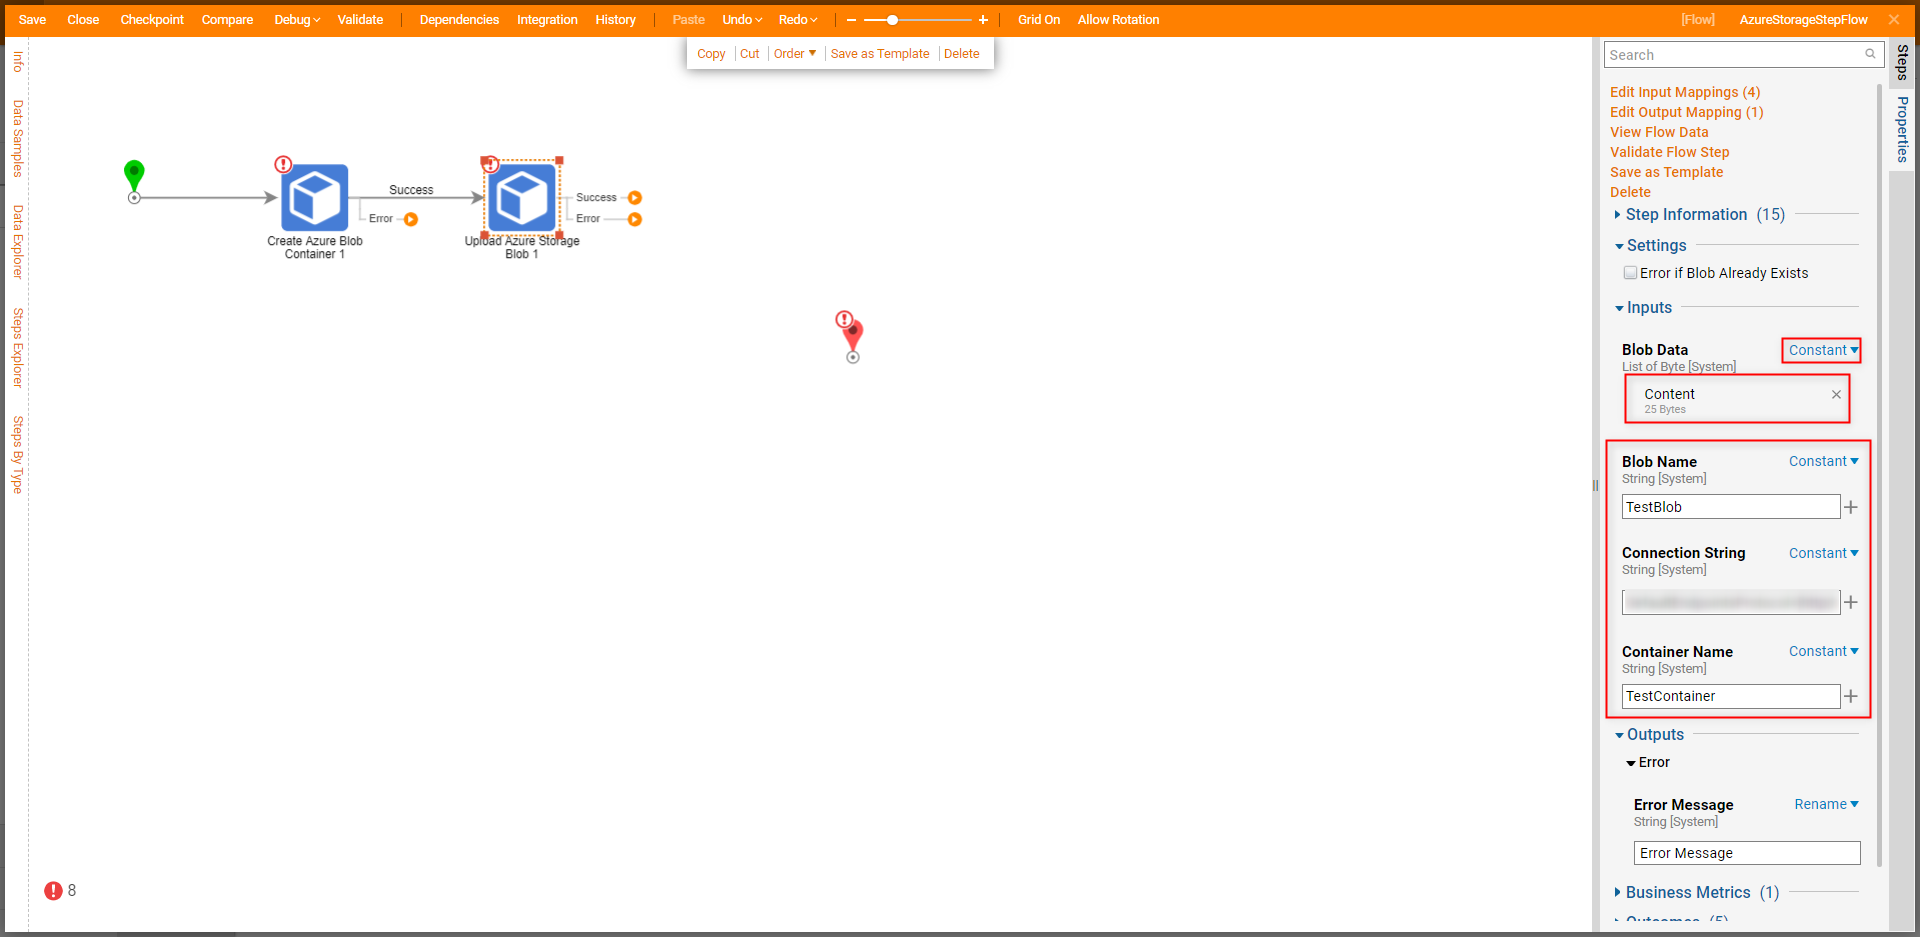
From the same Azure Storage category, attach an Upload Azure Storage Blob step to the Success path of the Create Azure Blob Container step.
From the Properties tab of the Upload Azure Storage Blob, map the Connection String and Container Name to their respective INPUTS. Then, Constant map the desired Blob Name, and set Blob Data to Constant. Utilize the file picker by selecting CHOOSE FILE, or drag the desired file to the Drag file here field.
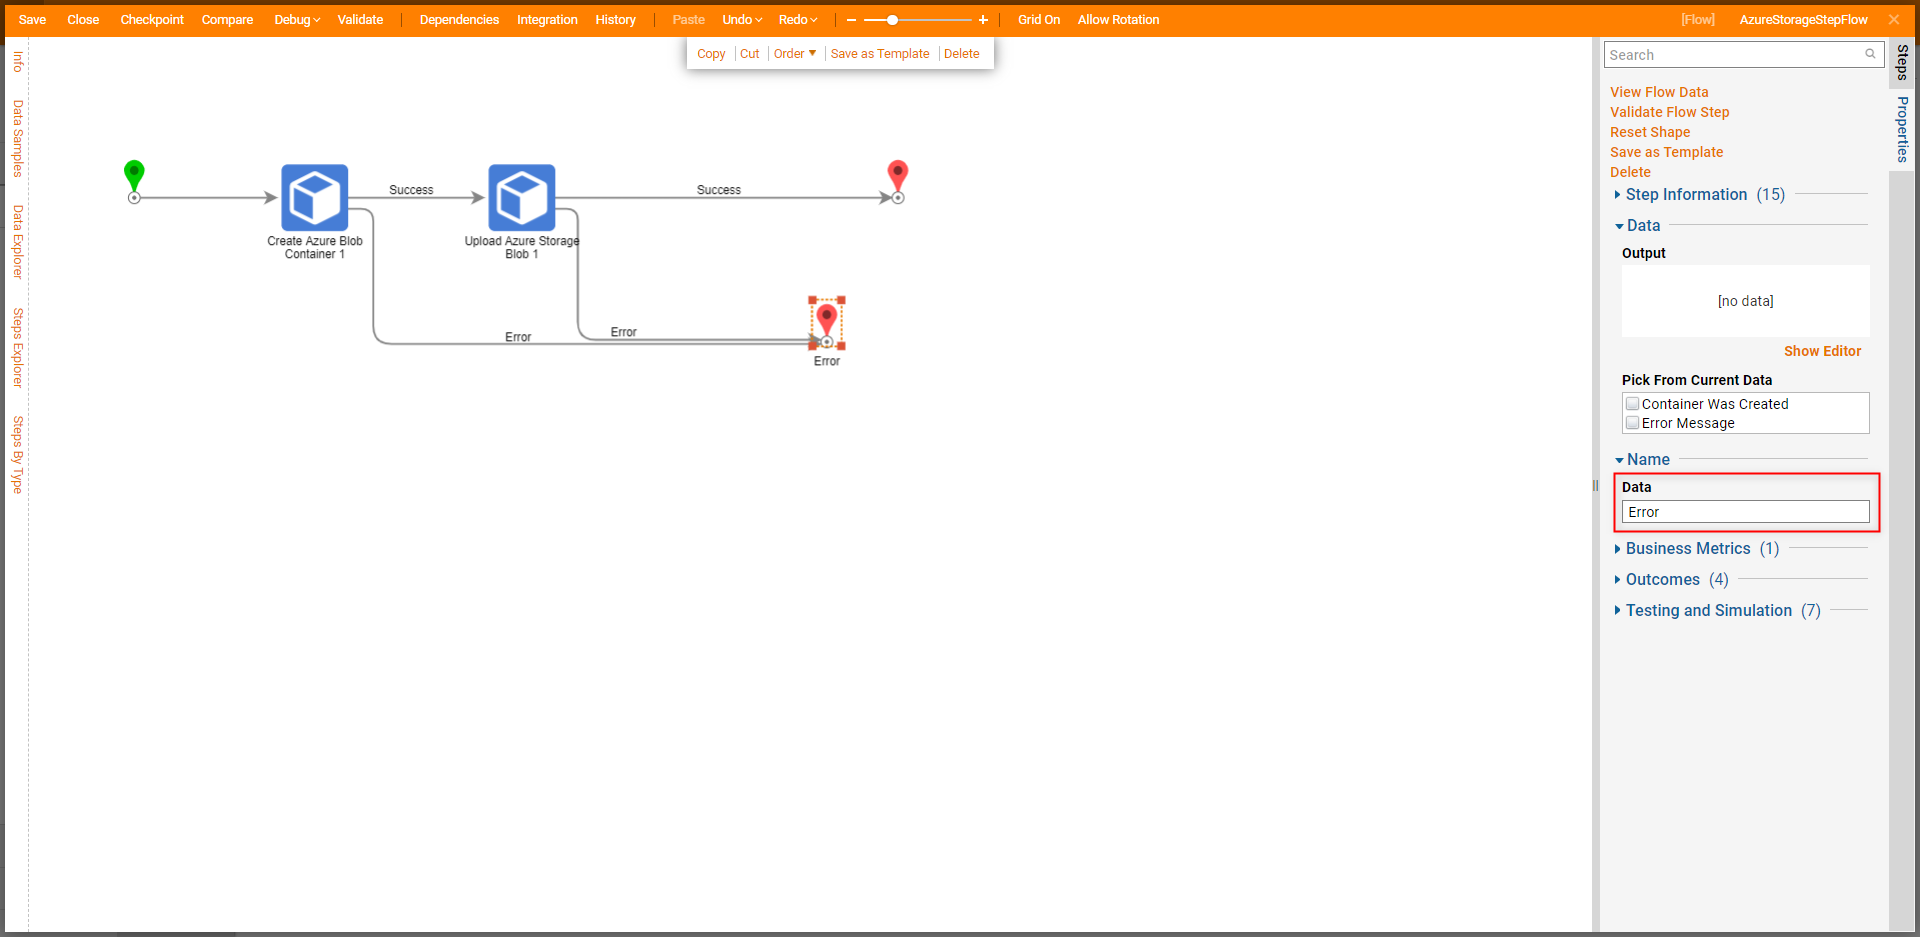
Attach the Success path to the End step. Then, from the Flow Management category of the Steps tab, add an additional End step to the workspace. From the newly added End step's Properties, map the desired value to Name > Data. Save the Flow, then if desired, close via X.
From the Flow Designer, select the Debug link from the top action bar; then, click START DEBUGGING.
Once the Flow runs, verify that the Azure Storage Blob Container and the Blob itself were added to Azure.
Example B: Get Azure Storage Blob
To pull an Azure Storage Blob into the previously created workflow:
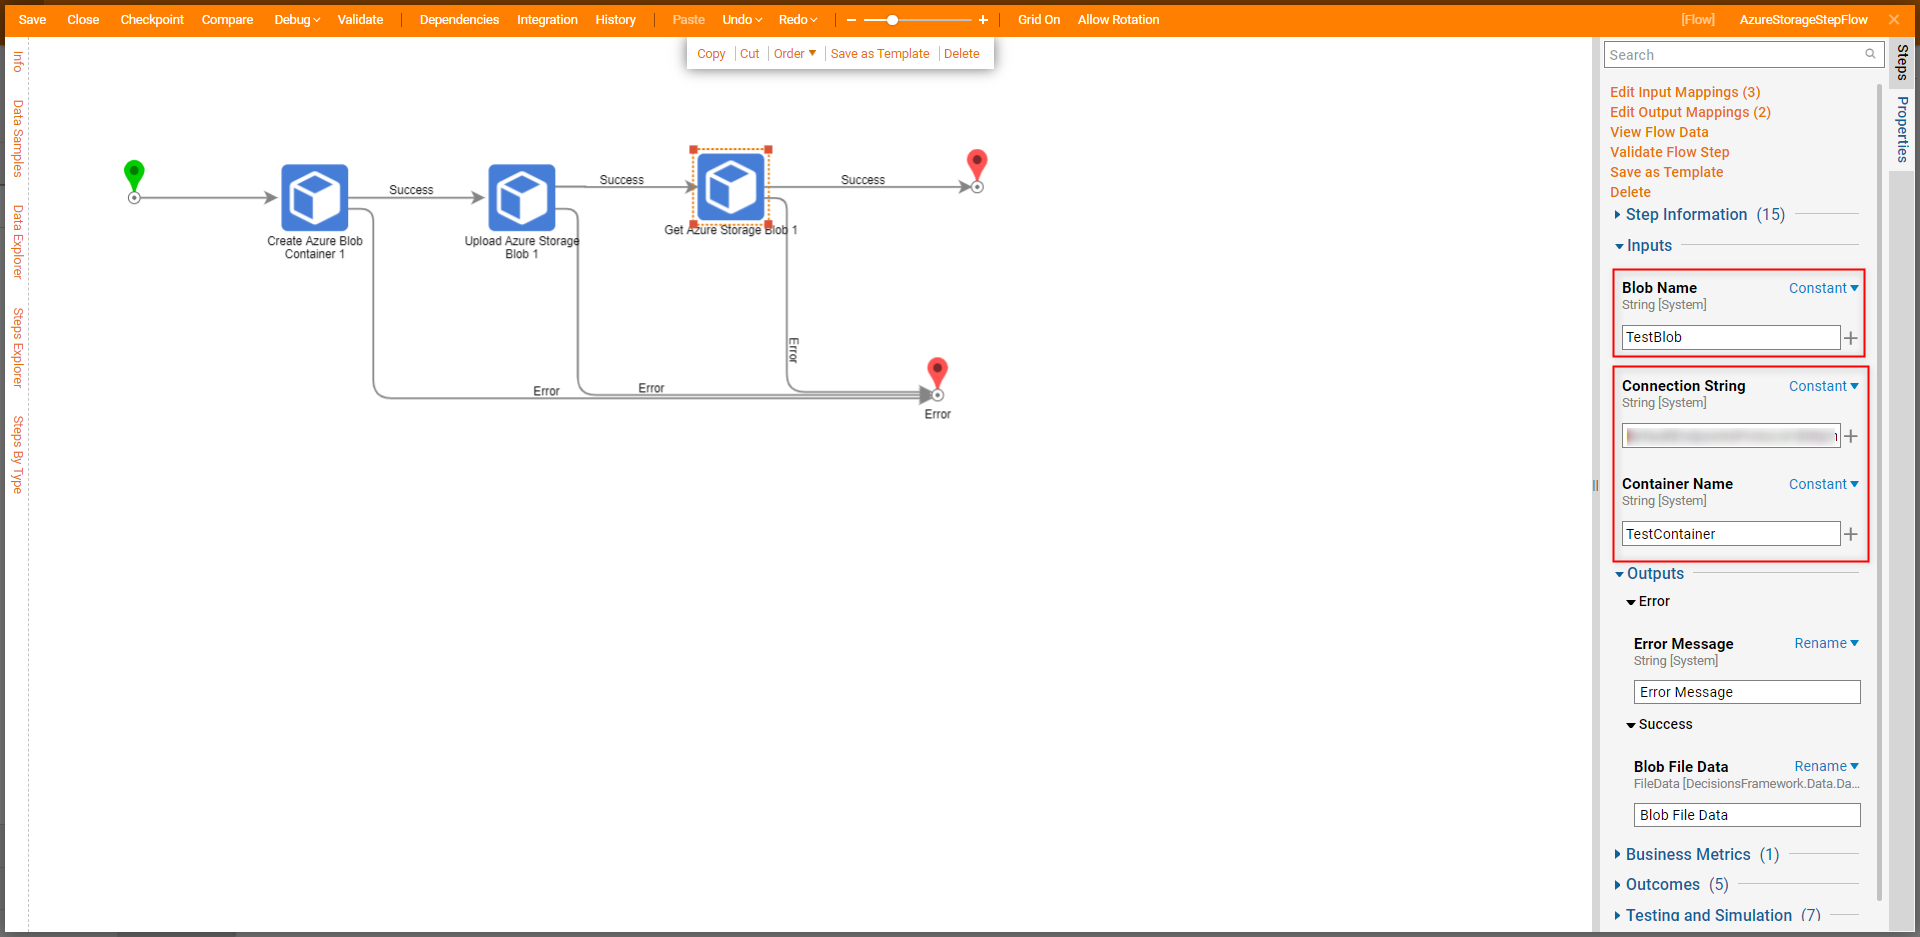
- From the Flow Designer, add a Get Azure Storage Blob step from the Integration > Azure Services category in the Steps tab.
- Attach the Success path to the original End step and the Error path to the second End step.
- From the Properties tab of the Get Azure Storage Blob step, Constant maps the desired Blob Name, Connection String, and Container Name to their respective Inputs. Additional Info on Get Azure Storage BlobThis step utilizes the defined Inputs to pull the Blob File Data contained within the respective Blob into the Flow. This data can then be mapped to additional steps and used throughout the Decisions environment.
- Save the Flow, then if desired close the Flow.
Delete Container and File Steps
As an additional means of Azure Storage Blob management, users may utilize the Delete Container and Delete File from Azure Storage steps to remove items from an Azure Storage Blob.
These steps behave similarly to the other Azure Storage Blob steps in that they both utilize the Connection String and Container Name Inputs to integrate with an Azure Storage Blob.
