Overview
Sub Dialog Data Flows show a smaller, more targeted informational view of another form component from the parent form. This can extend user interaction while preventing clutter.
Example
This example will display a Form with a Data Grid showing a list of all current accounts. There will be two buttons on the Form; one will be a Sub Dialog Button that will create a new account; the second button will close the Form.
- In a Designer Folder, select Create Flow from the bottom action panel.
- In the Create Flow dialog, select Default Flow. Name the flow “Main Flow”, select Create.
- In the Flow Designer, add a GetAll step from Integration > Internal Services > Account Service.
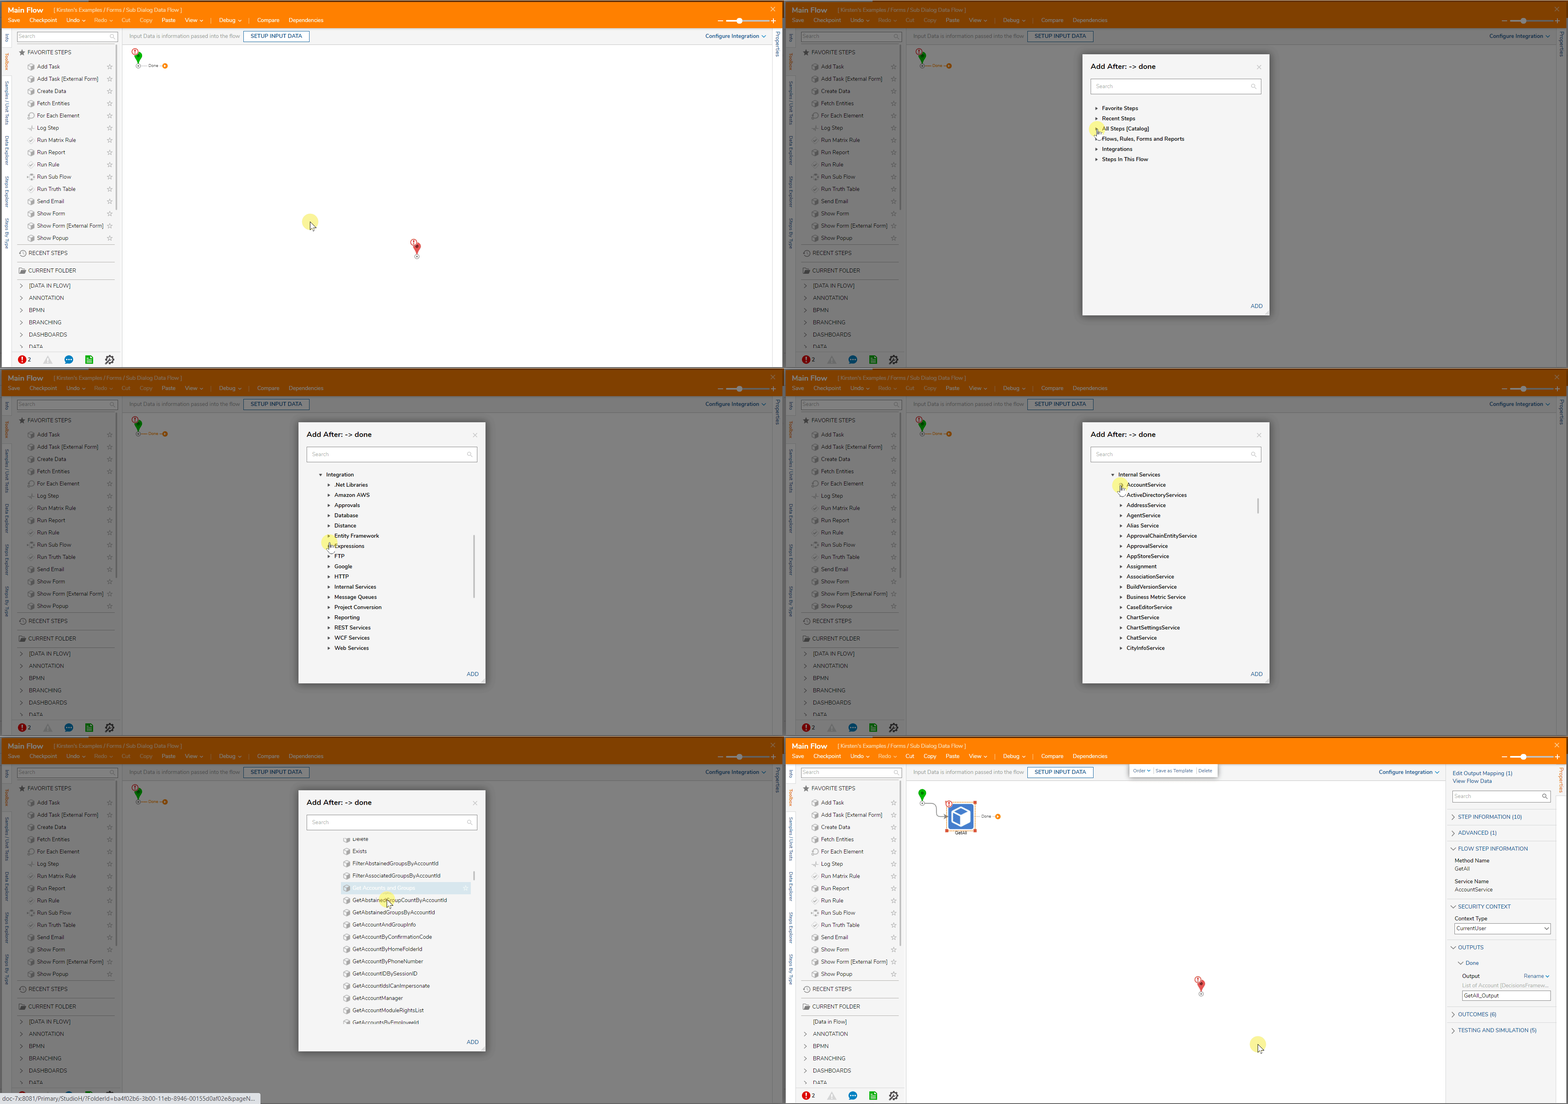
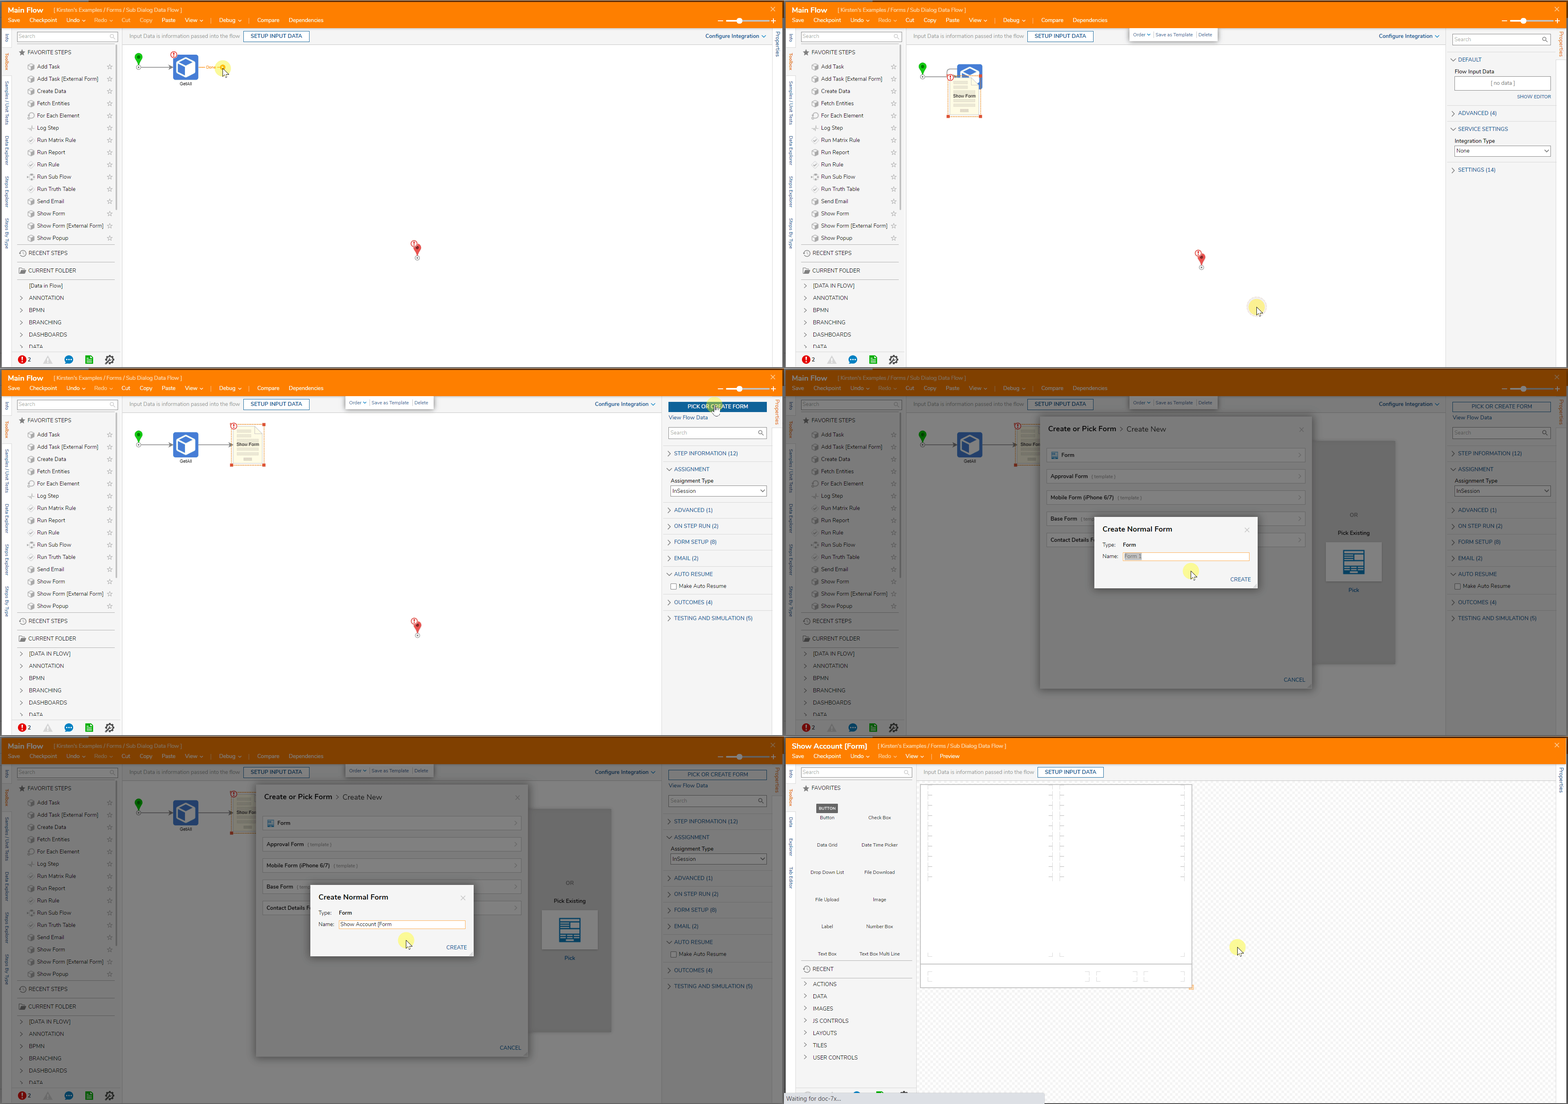
- Add a Show Form step from the Toolbox.
- Select the Show Form step, in the Properties panel, select PICK OR CREATE FORM.
- In the Pick or Create Form dialog, select Create New. Choose Form, name the Form and select CREATE.
- In the Form Designer, add a Button to the base of the Form. Name this button, “Submit”.
- Add a Data Grid to the Form, from Data > Data Grid in the Form Controlspanel.To learn more about Data Grids, navigate to "Displaying Lists of Objects in a Data Grid."
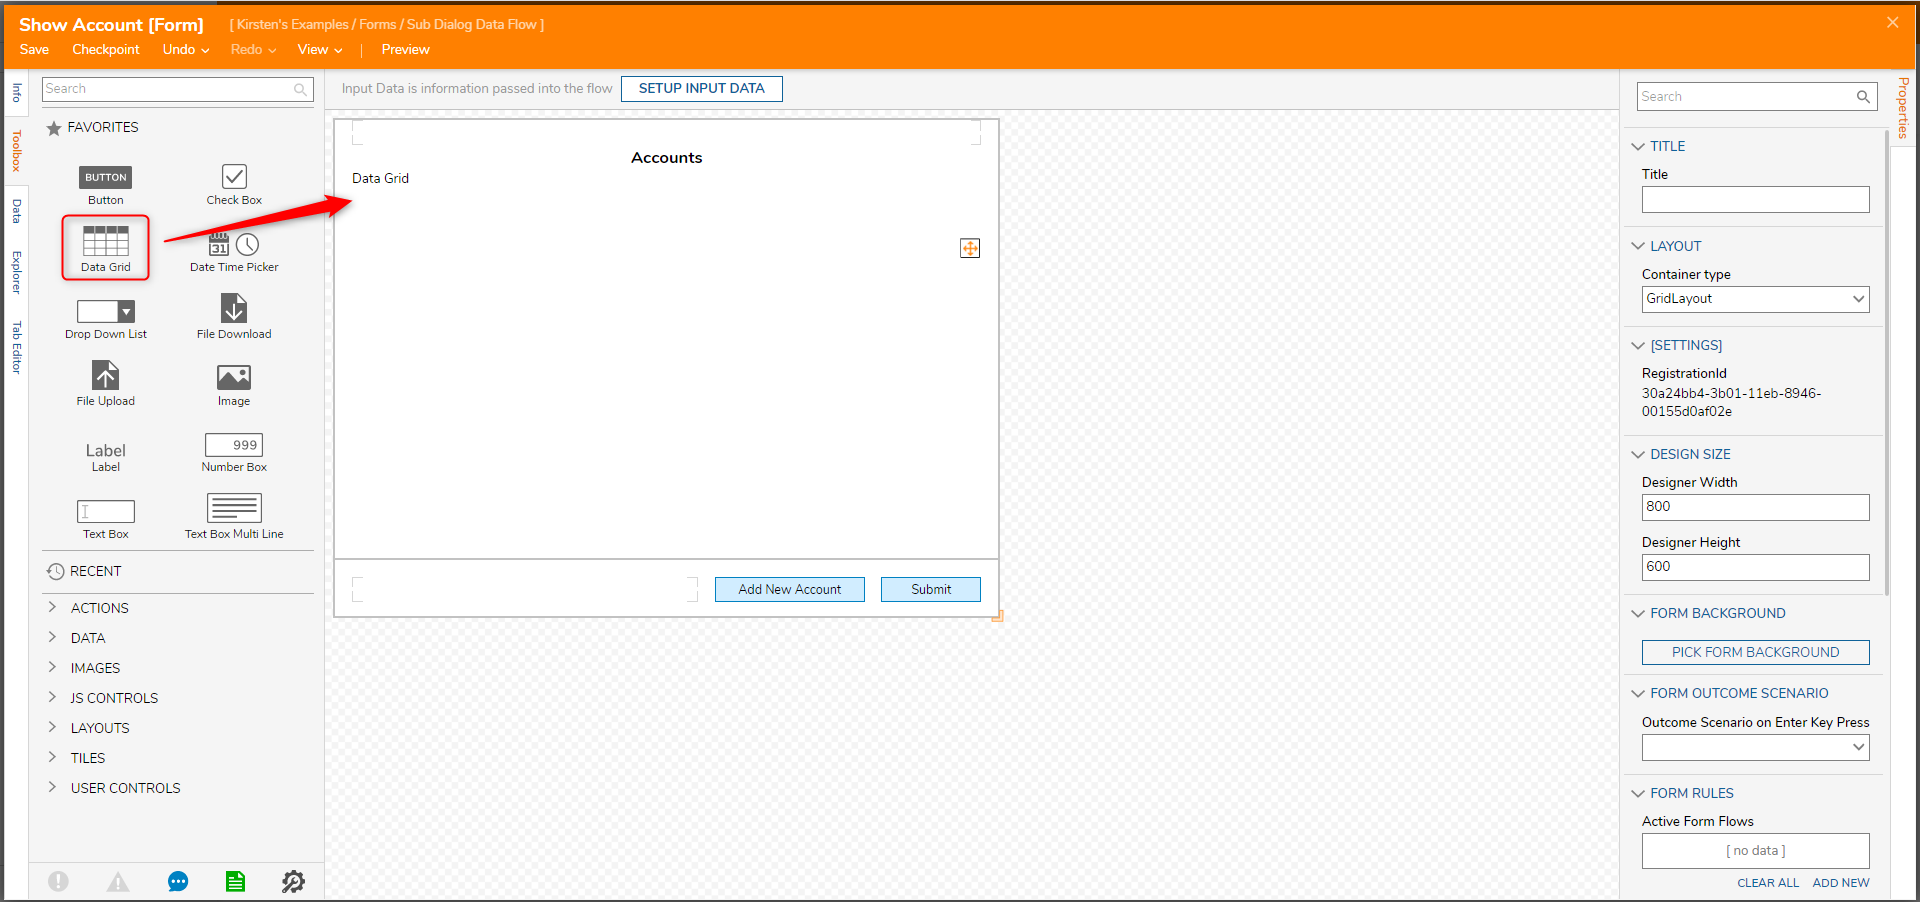
- Configure the Data Grid, with the control selected, navigate to the Properties panel.
- Under Input Data, choose Account [DecisionsFramework.ServiceLayer.Services.Accounts] as the Type.
- Type “Account” under Data Name.
- After the Type is chosen, Column Information > Columns will automatically update with the available fields. Delete all but EmailAddress, FirstName, and LastName.
.gif)
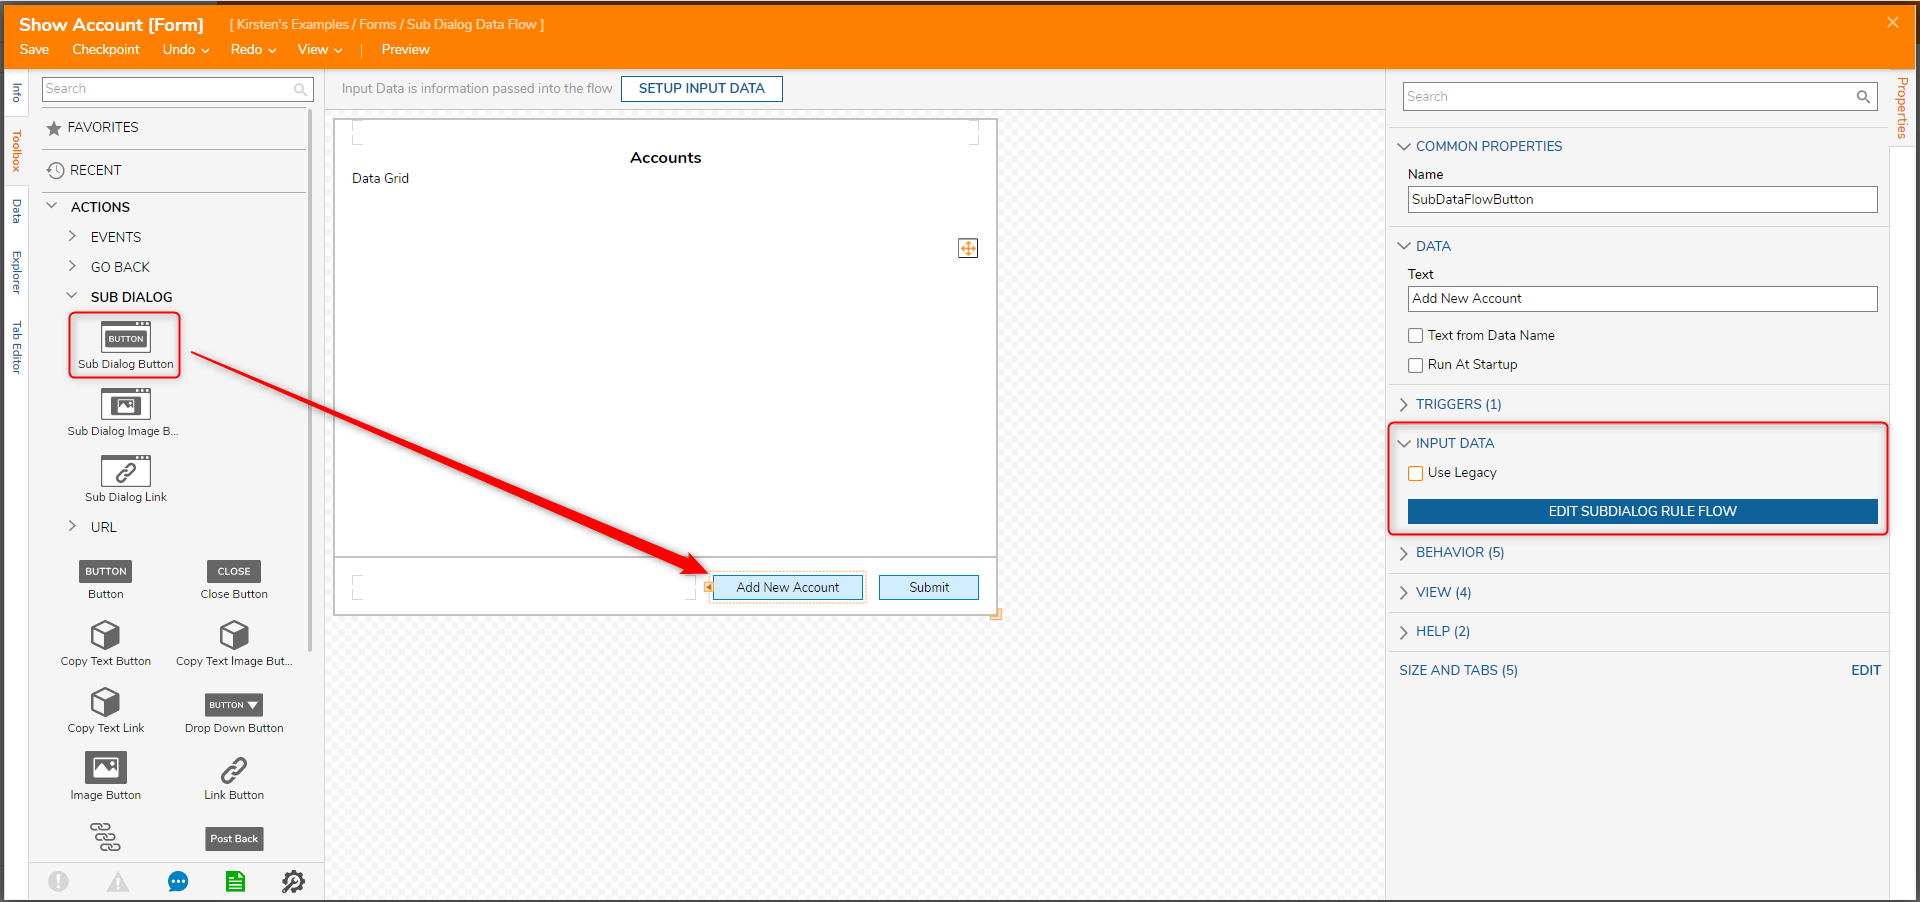
- In the Toolbox, expand Actions > Sub Dialog, drag and drop a Sub Dialog Button next to the “Done” button.
- Under Data > Text type “Add New Account” to name the Sub Dialog Button.
- Under Input Data select EDIT SUBDIALOG RULE FLOW.
- In the Flow Designer, select SETUP INPUT DATA.
- In the Data Definitions dialog, name the Input Data “List of Accounts” with the same Type used earlier: Account [DecisionsFramework.ServiceLayer.Services.Accounts]. Set the Is List to true.
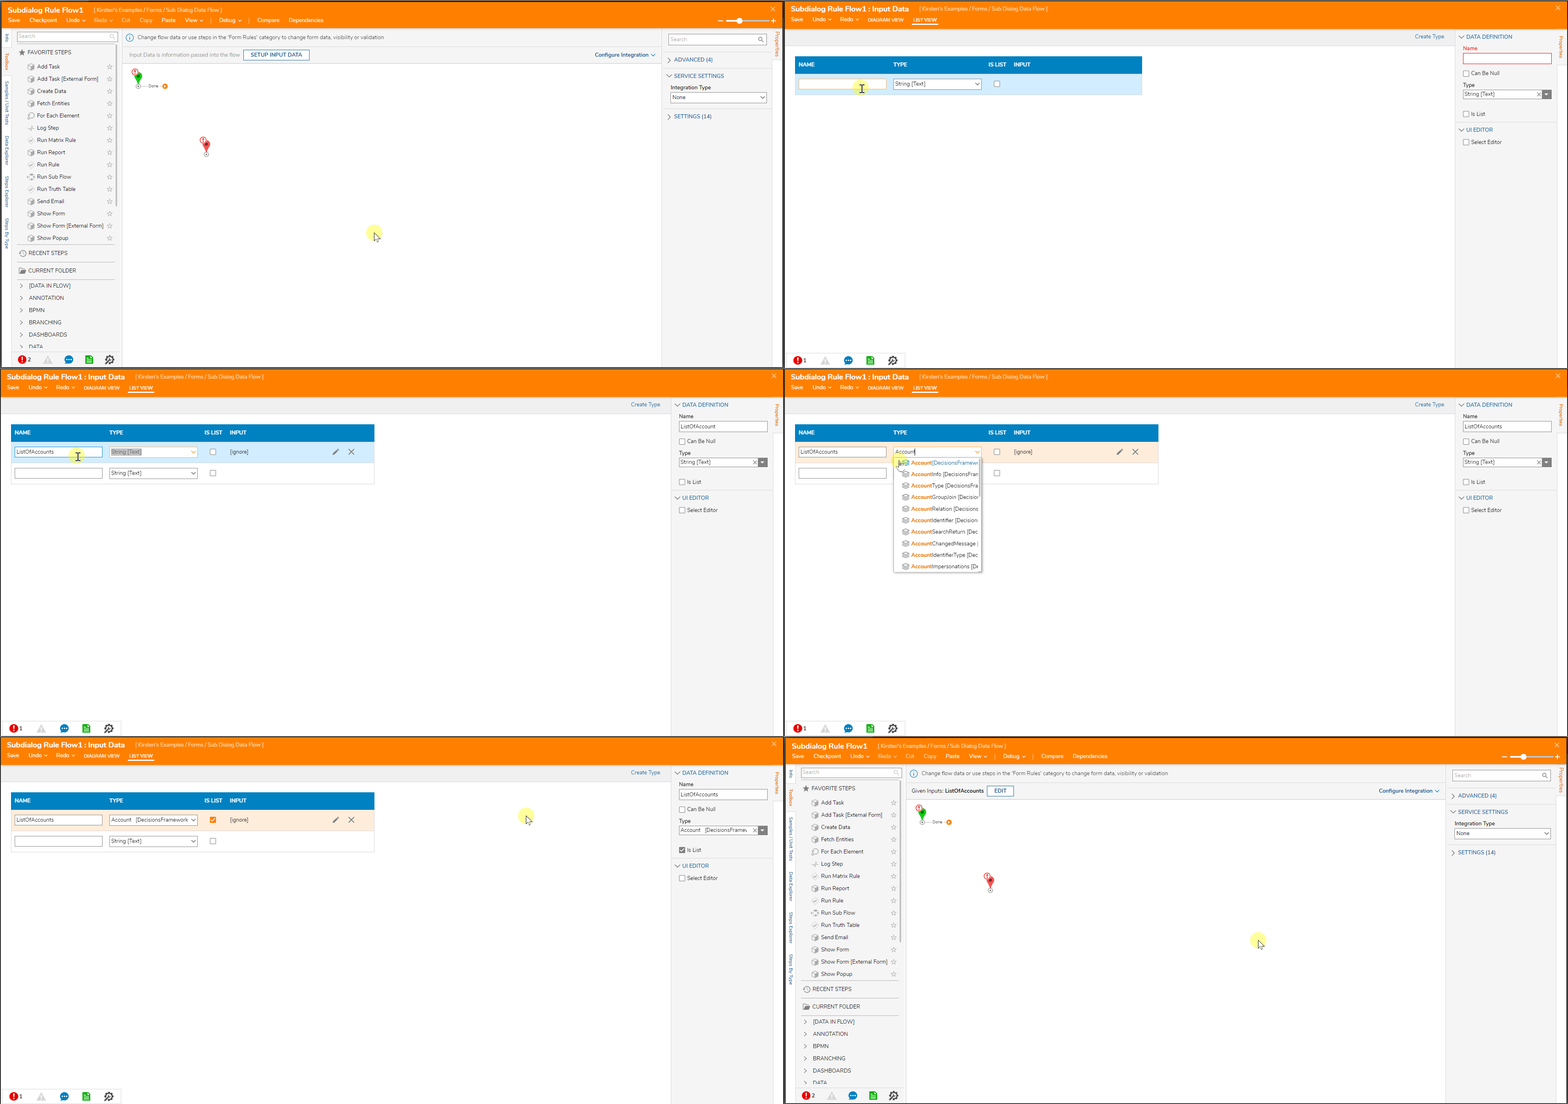
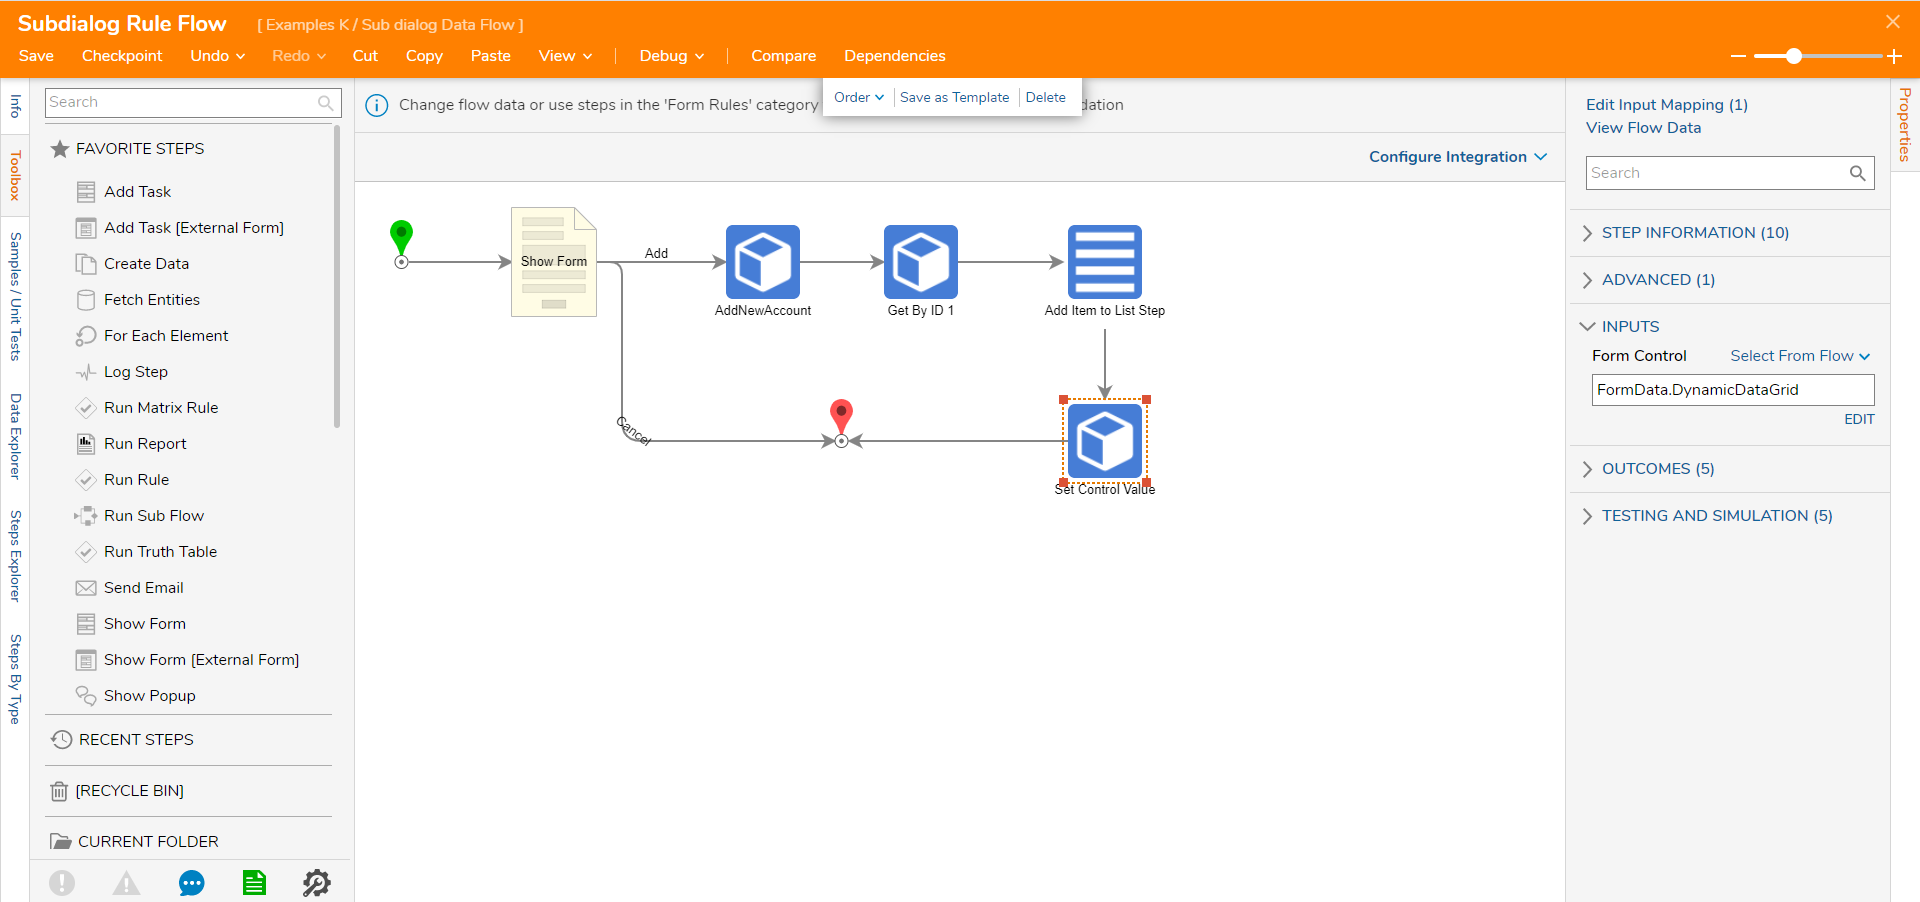
- Next, add a Show Form step from the Toolbox.
- Select the Show Form step, in the Properties panel, select PICK OR CREATE FORM.
- In the Pick or Create Form dialog, select Create New. Choose Form, name the Form and select CREATE.
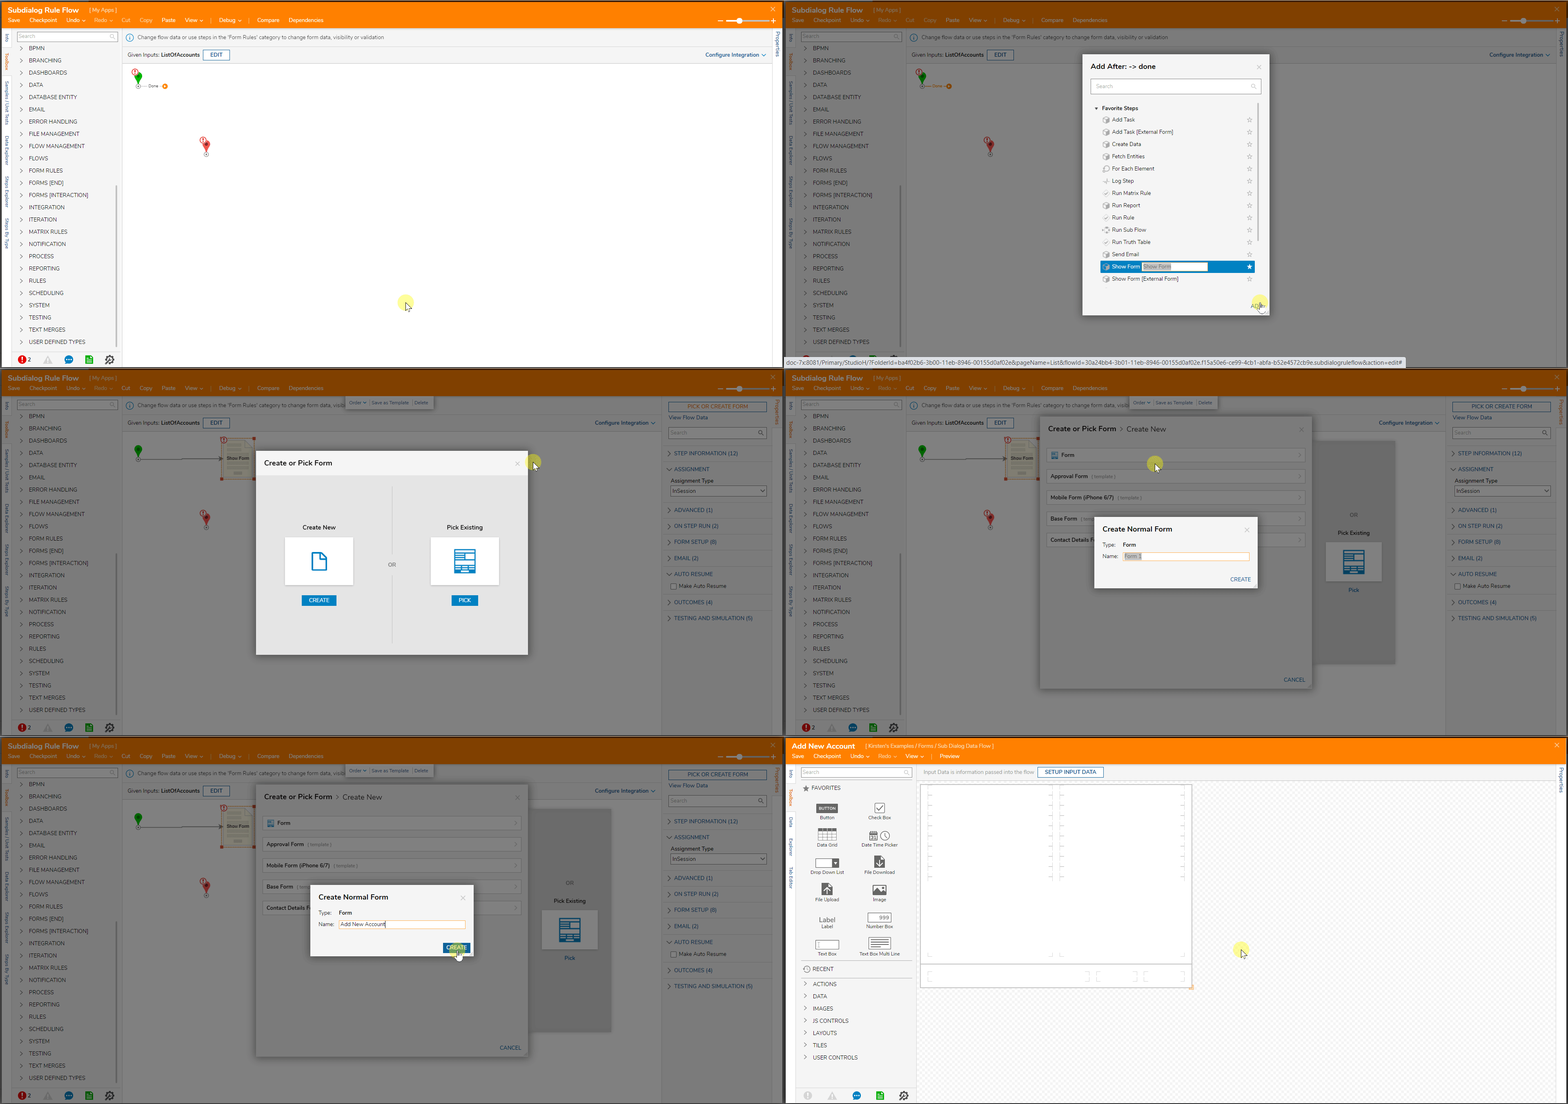
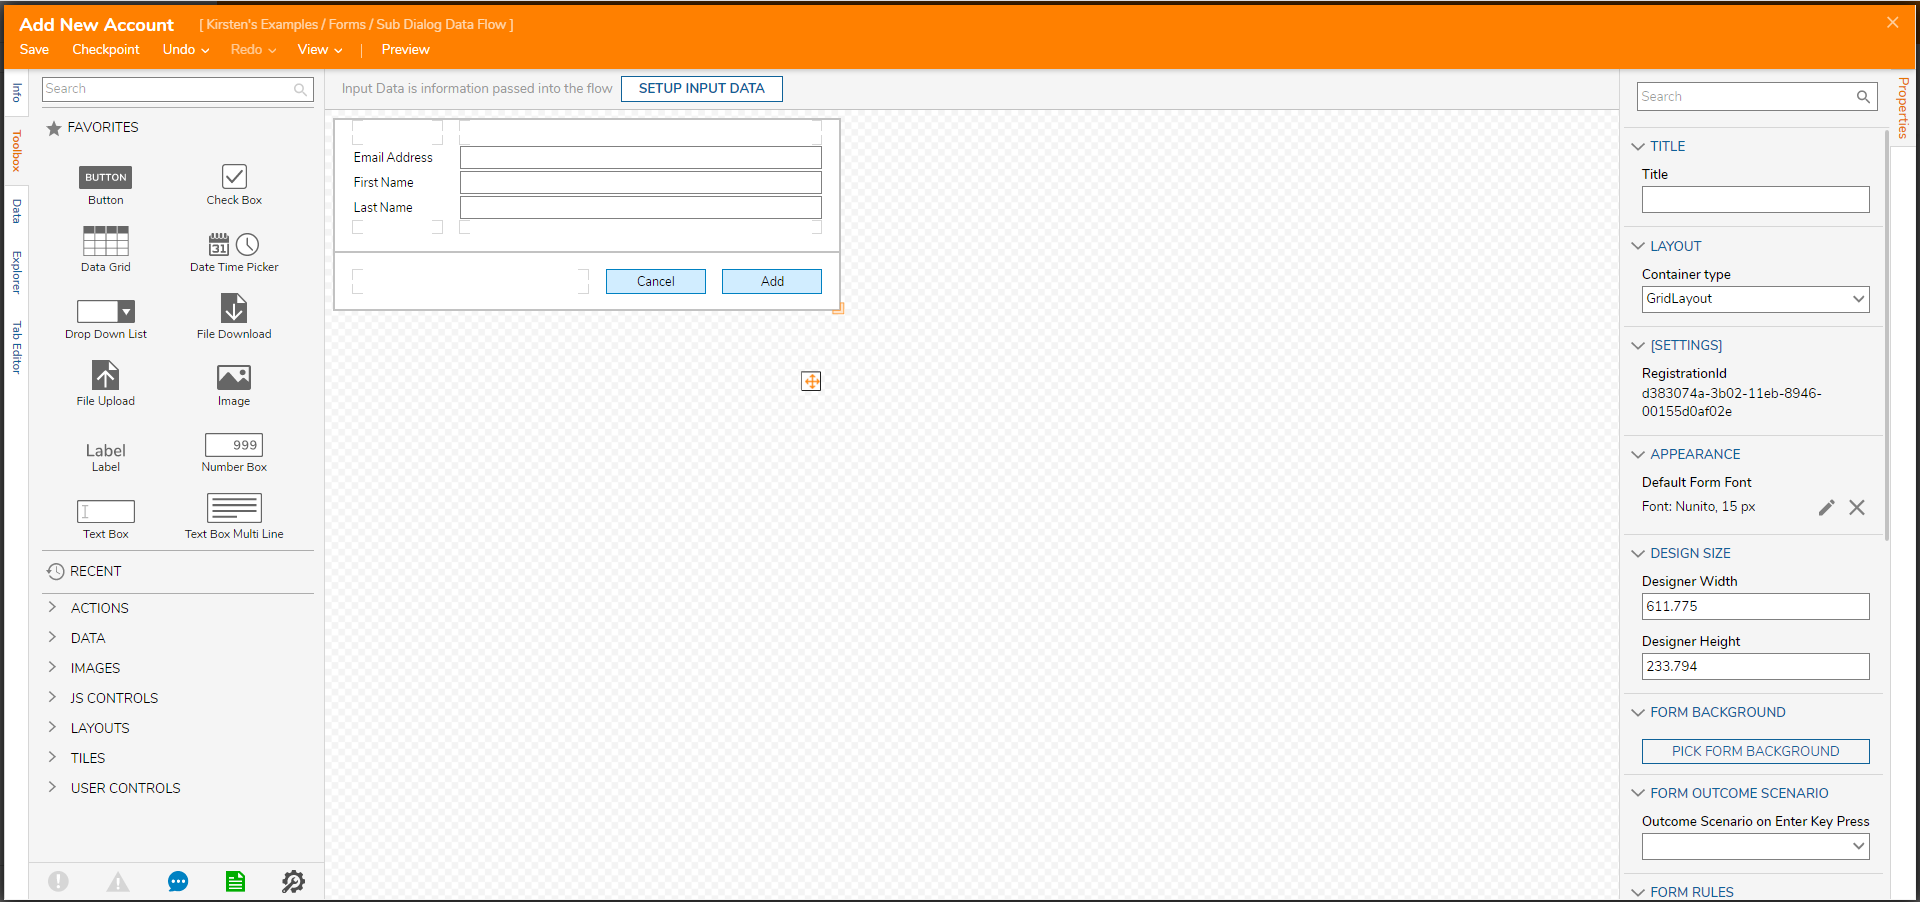
- This form will have three Labels, three corresponding Text Boxes, and two Buttons (Add and Cancel), as shown below. Be sure to name the TextBoxes accordingly (Email Address, First Name, Last Name) to make mapping the following steps easy.
- Save and Close the Form.
- Add an Add New Account step from Integration > Internal Services > Account Service in the Toolbox on the Add outcome path from the Form.
- In the Properties panel under Inputs for account, select Build Data. Select the pencil icon to choose which Properties to map. Choose Email Address, First Name, and Last Name. For each property, choose Select From Flow and choose the matching Text Box.
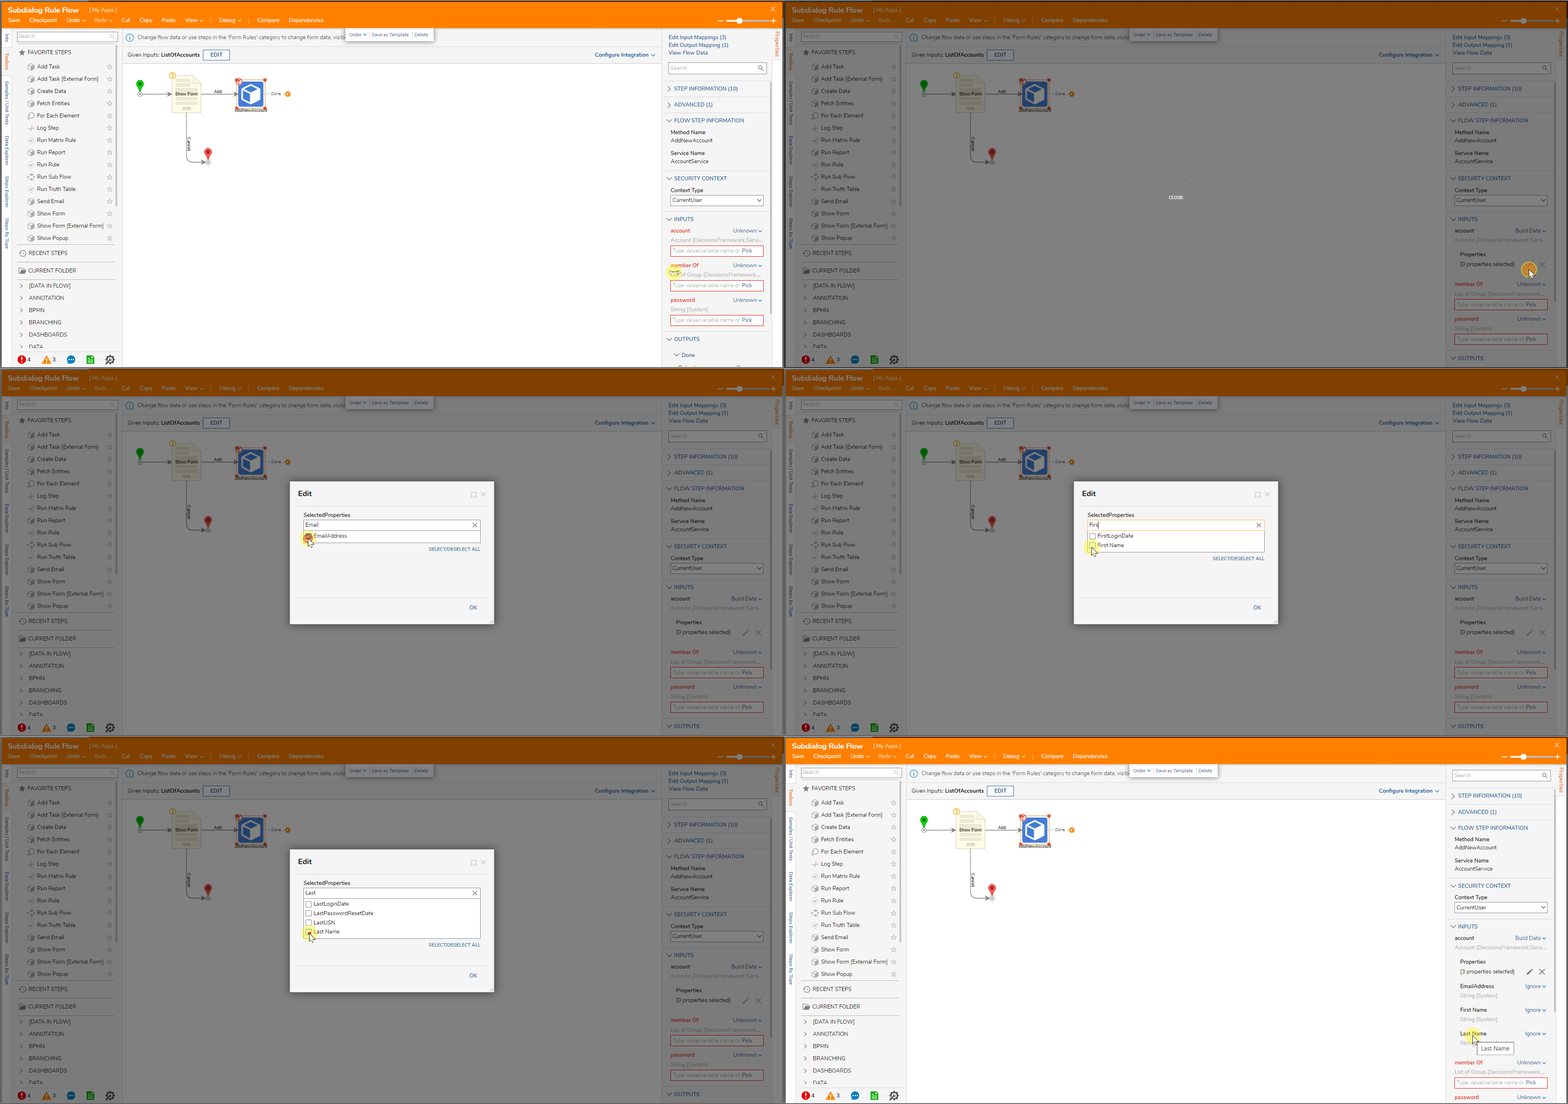
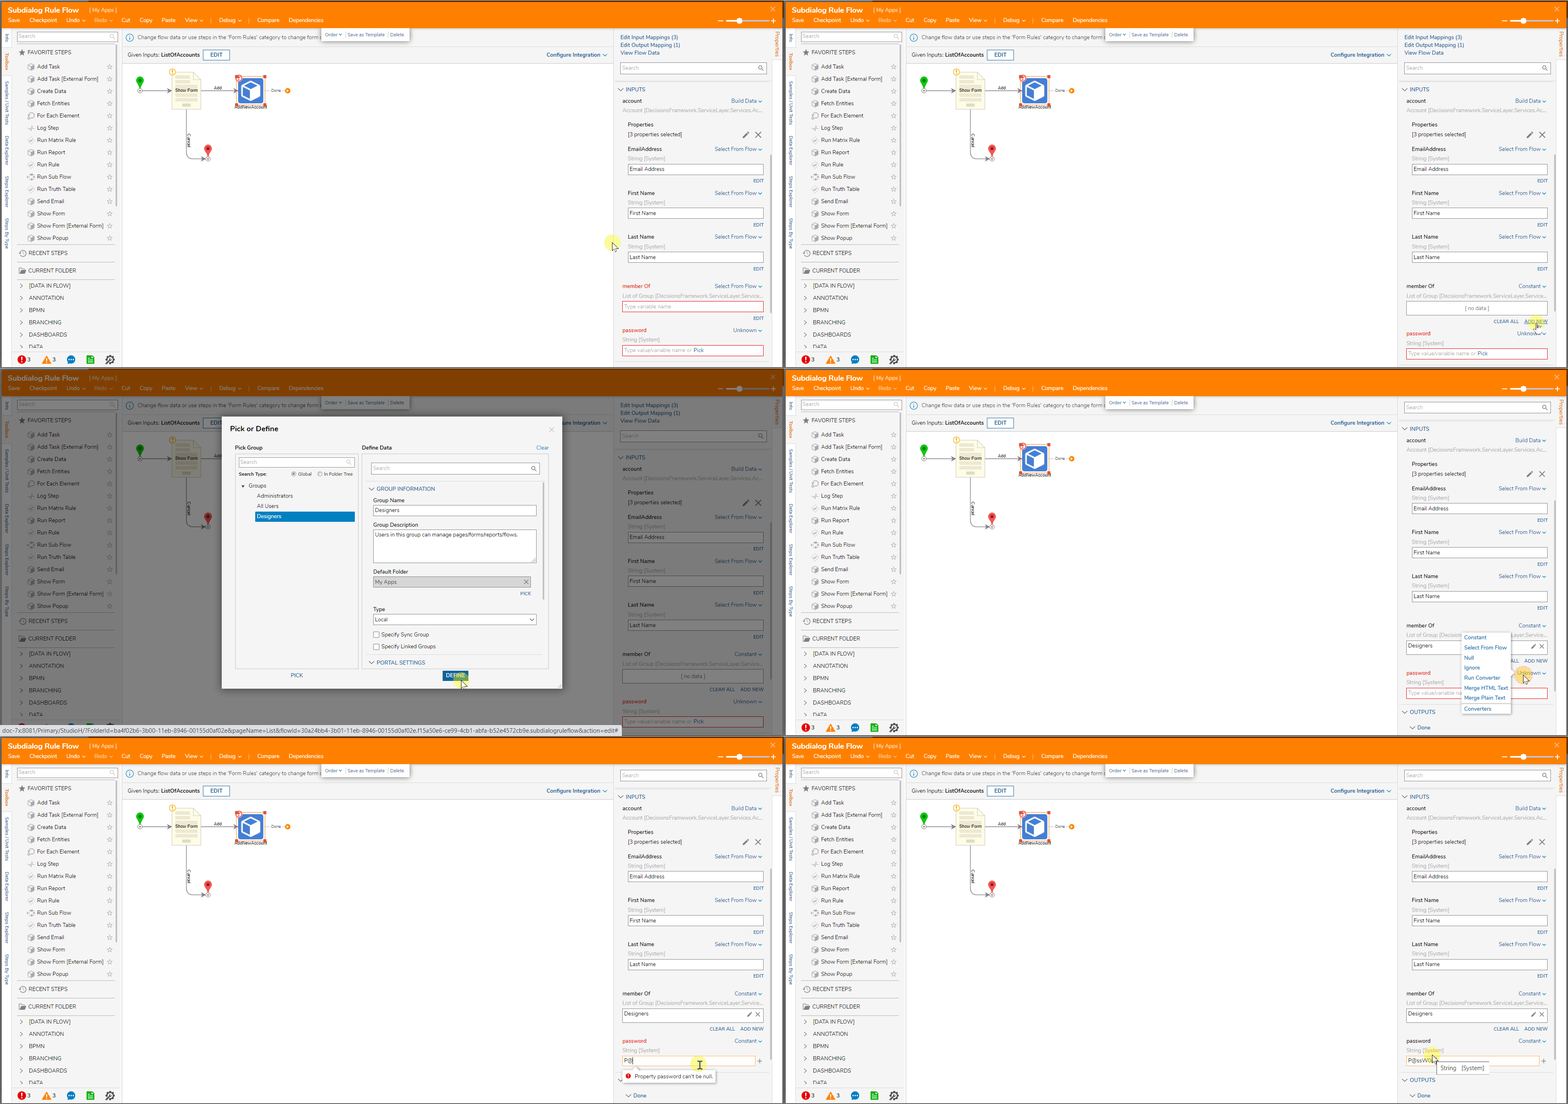
- For member Of select Constant and choose Add New to pick which group the new account will belong to.
- Type in a Constant password that the new account can change after logging in.
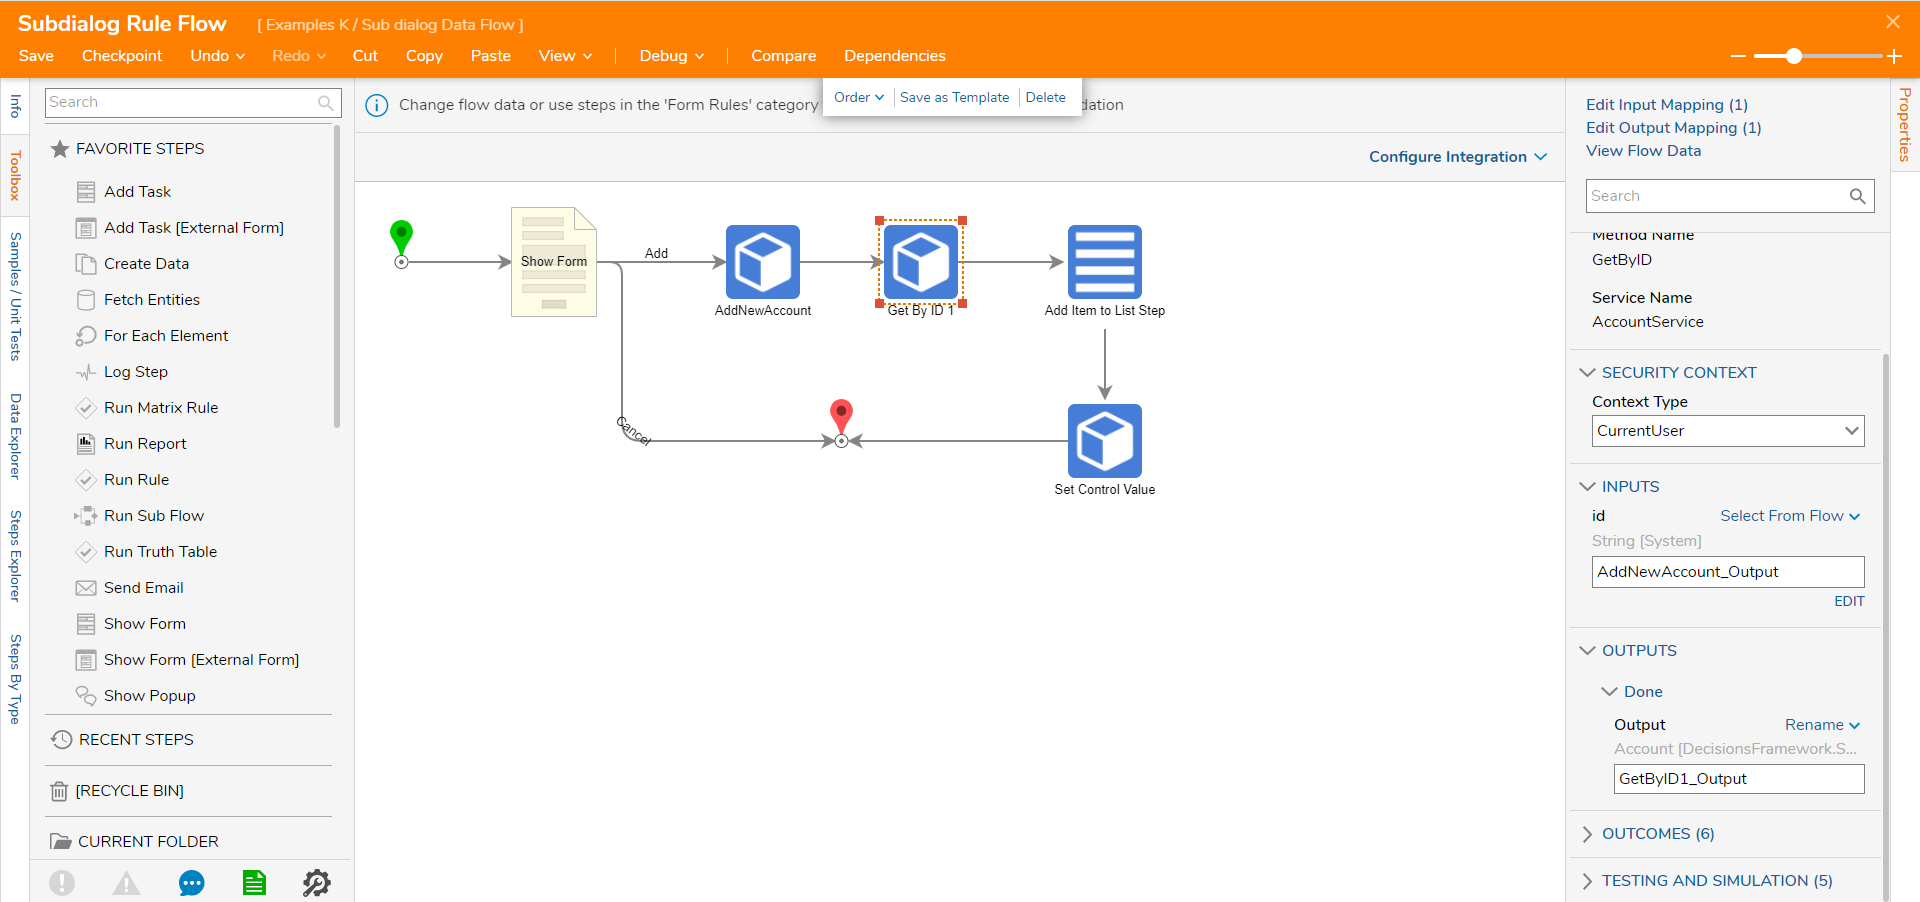
- Add a Get By ID step from Integration > Internal Services > Account Service in the Toolbox.
- Under Inputs > id, choose AddNewAccount_Output.
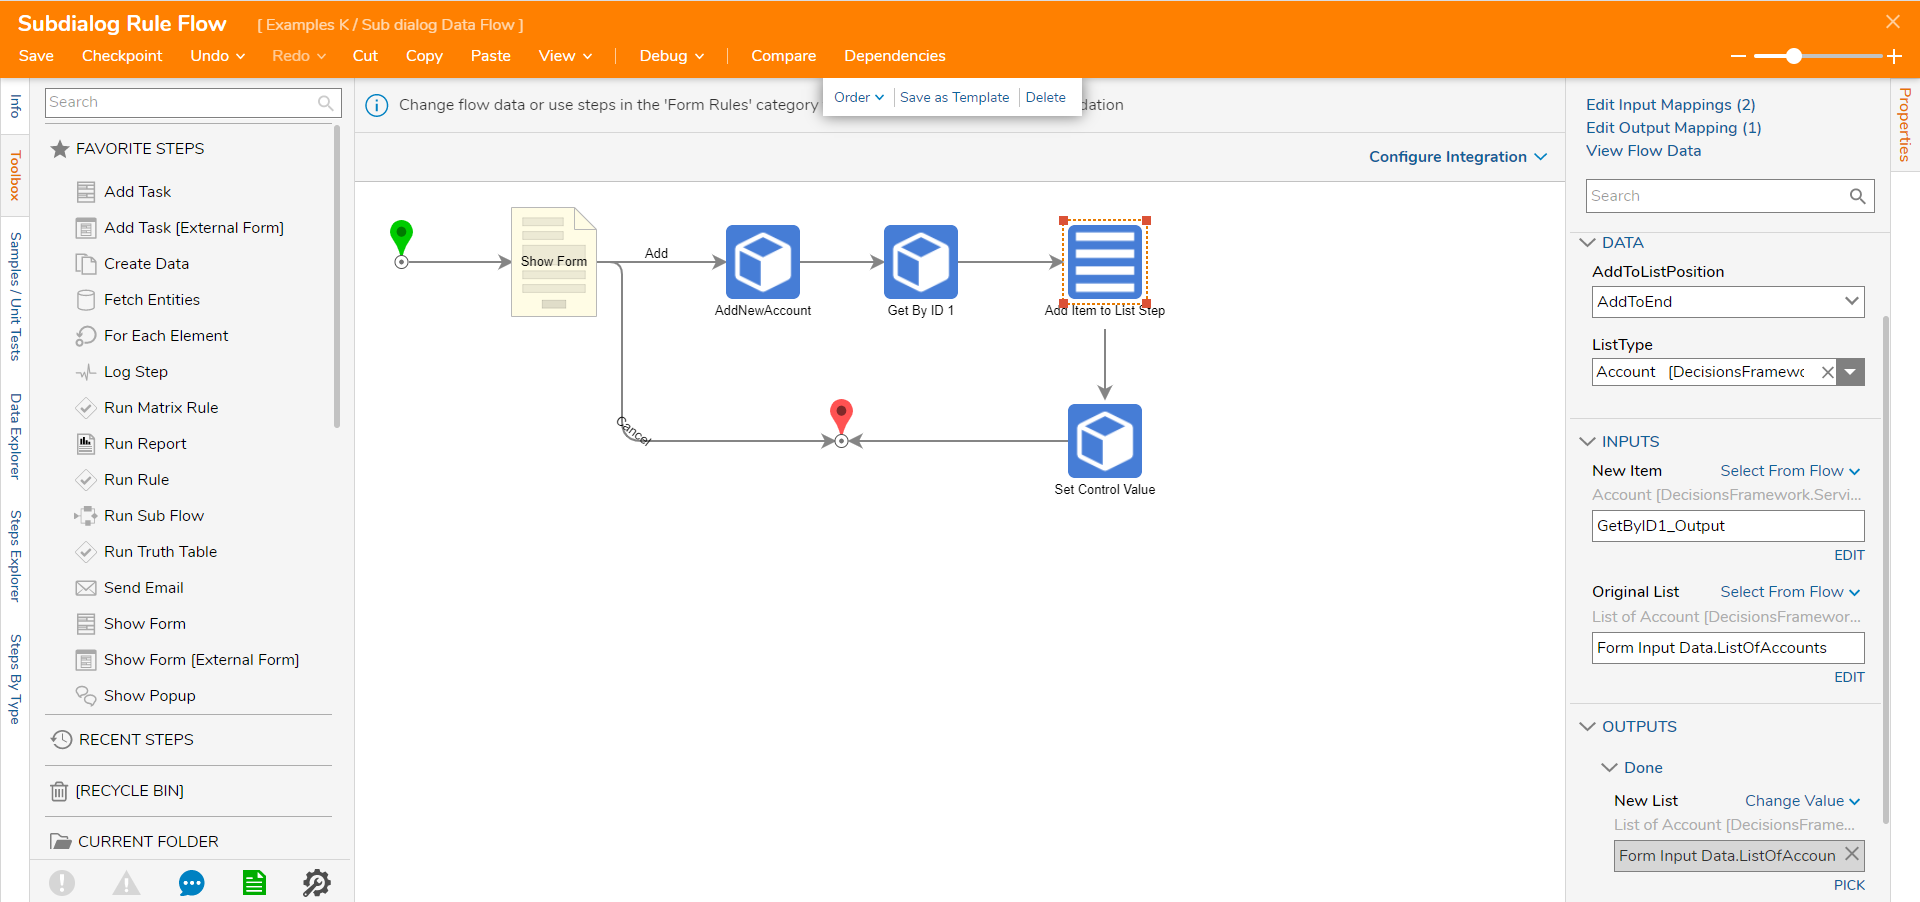
- On the outcome of the GetByID step, add an Add Item to List Step from Data > List in the Steps panel.
- Under Inputs for New Item, choose Select From Flow and choose GetByID1_Output.
- For Original List, select Form Input Data > ListOfAccounts from the Flow.
- On the Outputs of this step, Change Value of New List to Form Input Data > ListOfAccounts will update the old list on the first form to display the newly added account.
- Add a Set Control Value step from the Form Rules category in the Toolbox.
- Under Inputs > Form Control, select Form Data > Dynamic Data Grid.
- Save and close the Subdialog Rule Flow.
Debug
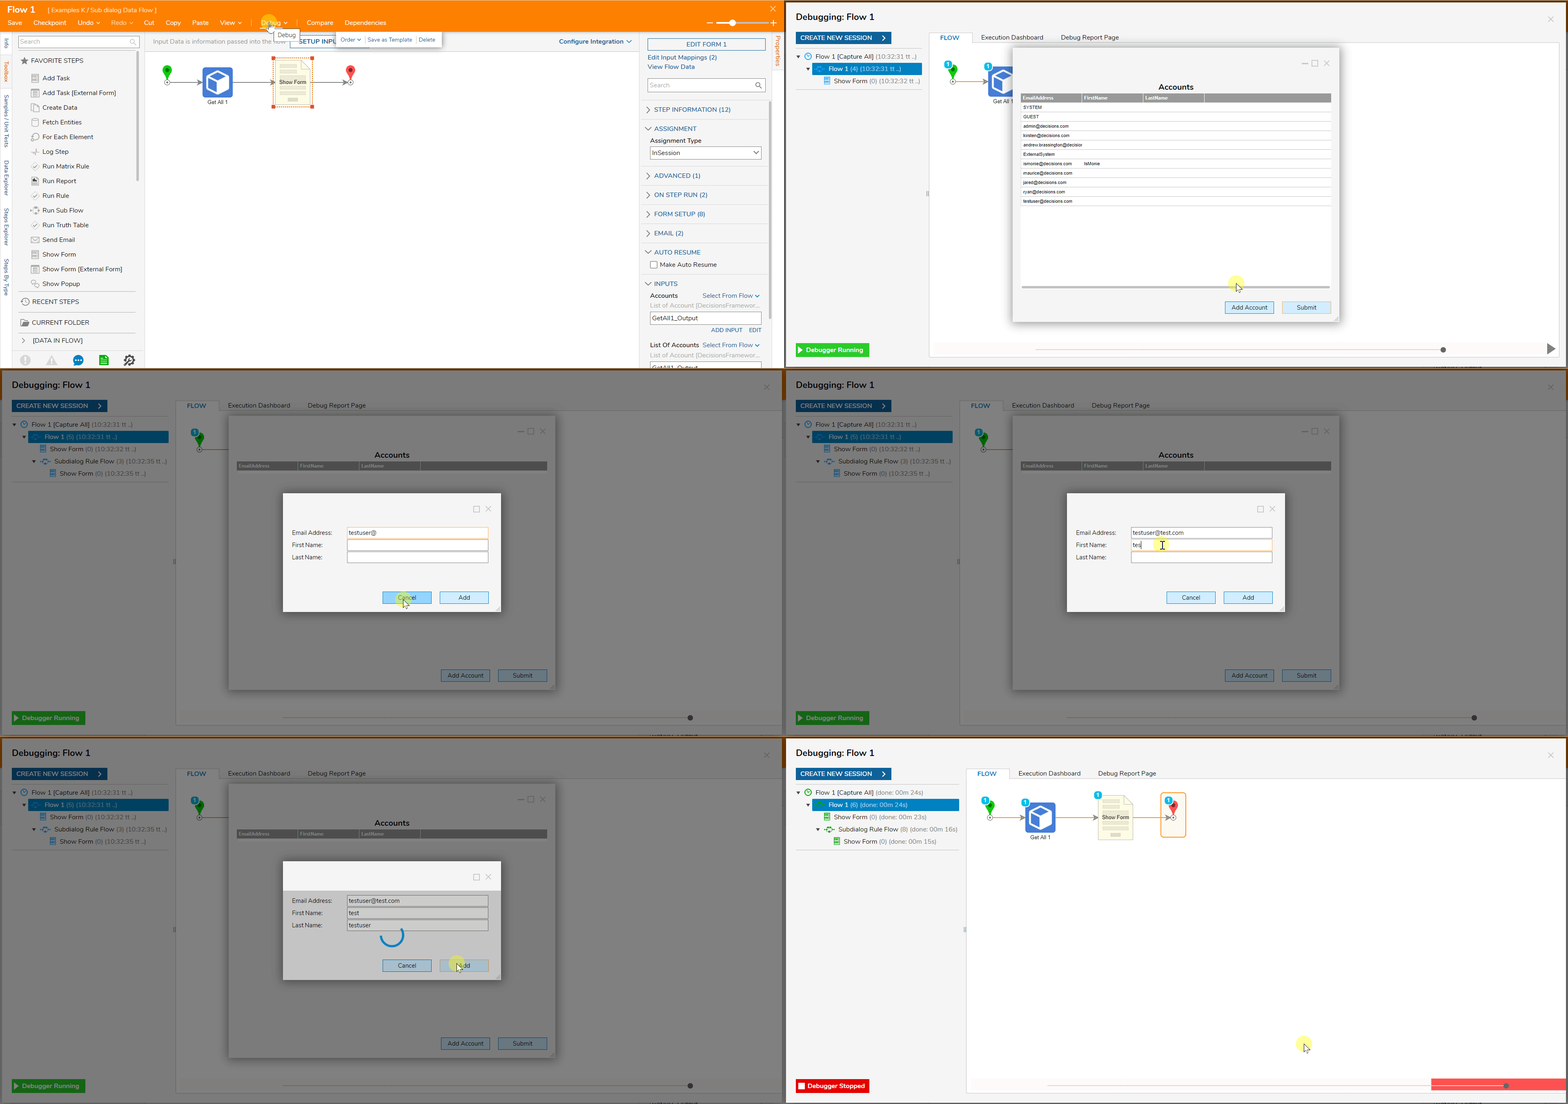
- Select Debug in the Flow Designer. Select START DEBUGGING.
- The Form displays showing the list of Accounts. Select the Add New Account button.
- The Sub Dialog Flow runs and displays the form. Fill in the TextBoxes and select Add.
- When the Sub Dialog closes, the Main Form is still displayed and will show the accounts' updated list.
