Overview
The AUTO LOCK section in Decisions' Portal Settings offers Administrators a configurable time duration before the Decisions environment performs a global lockout.
When Single Sign-On is enabled, the AUTO LOCK settings are hidden. Additionally, for Single Sign-On, Timeout/Inactivity will end the Decisions Session but not the identity provider's; a single log-out will end both.
The following example demonstrates how to use the Auto-Lock function in Decisions, to establish the Portal's lockout time.
Example
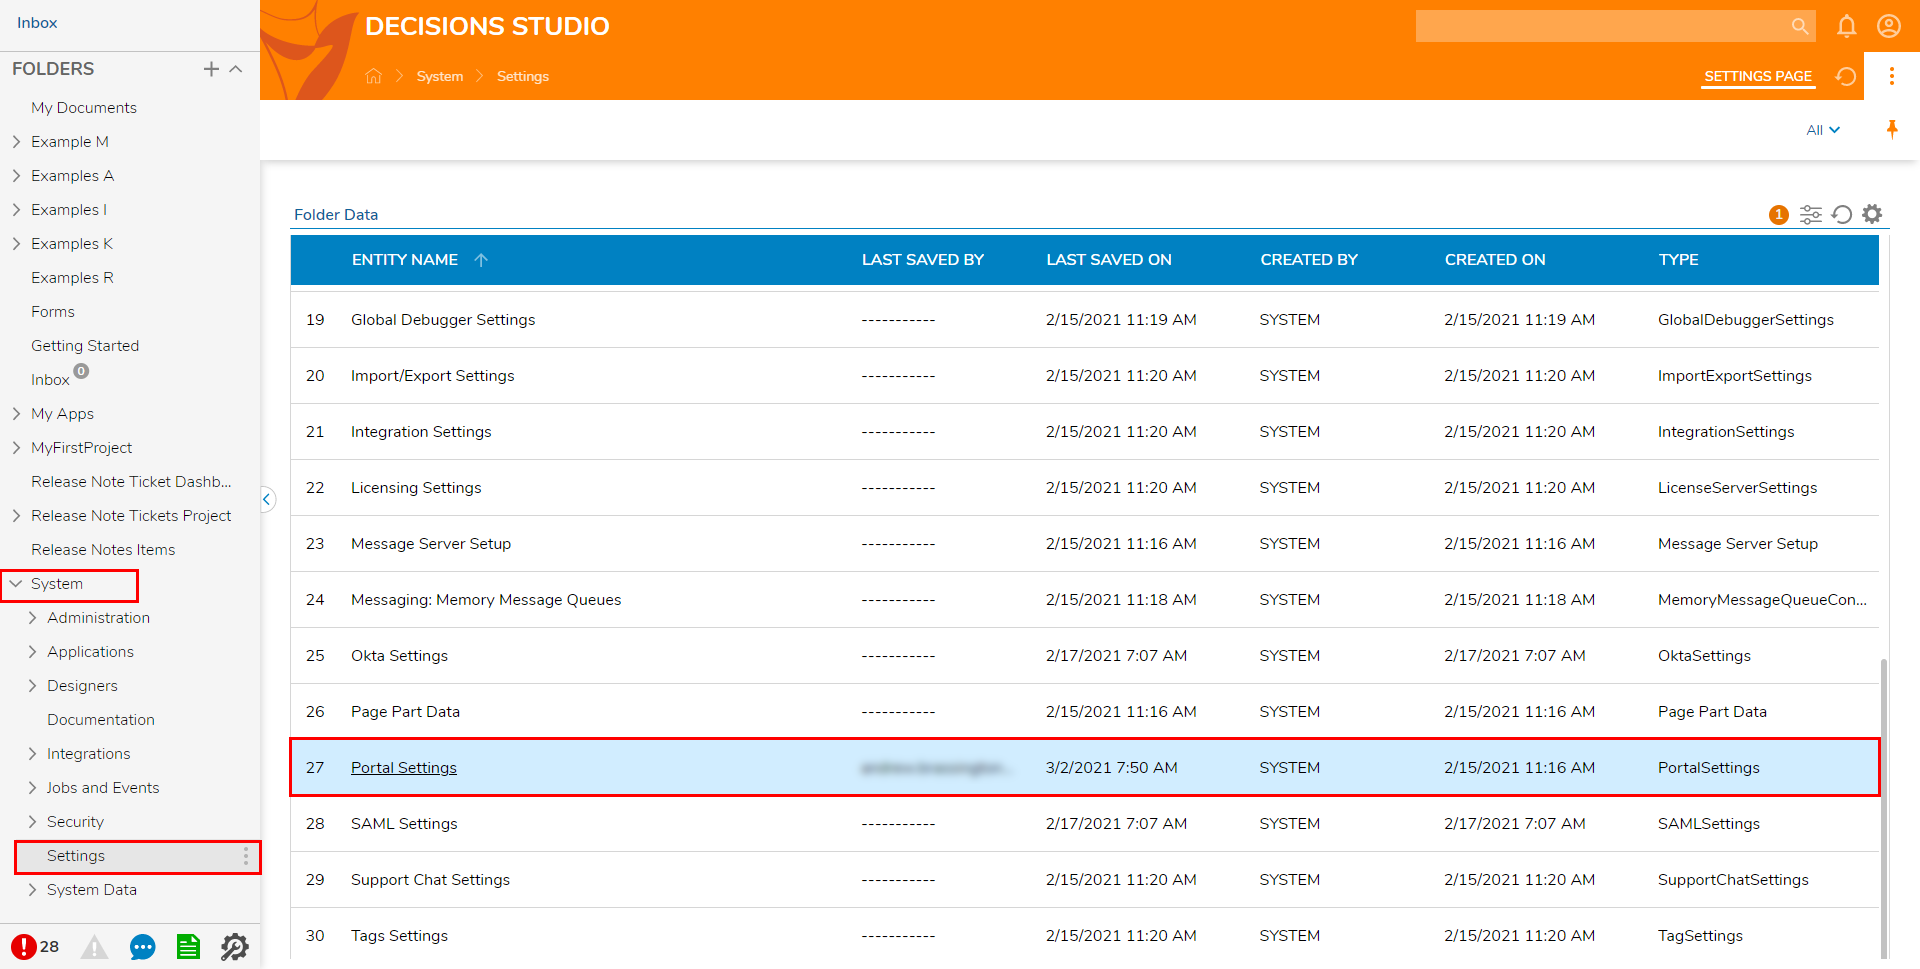
- From the Decisions Studio, navigate to System > Settings.
- Click Portal Settings.
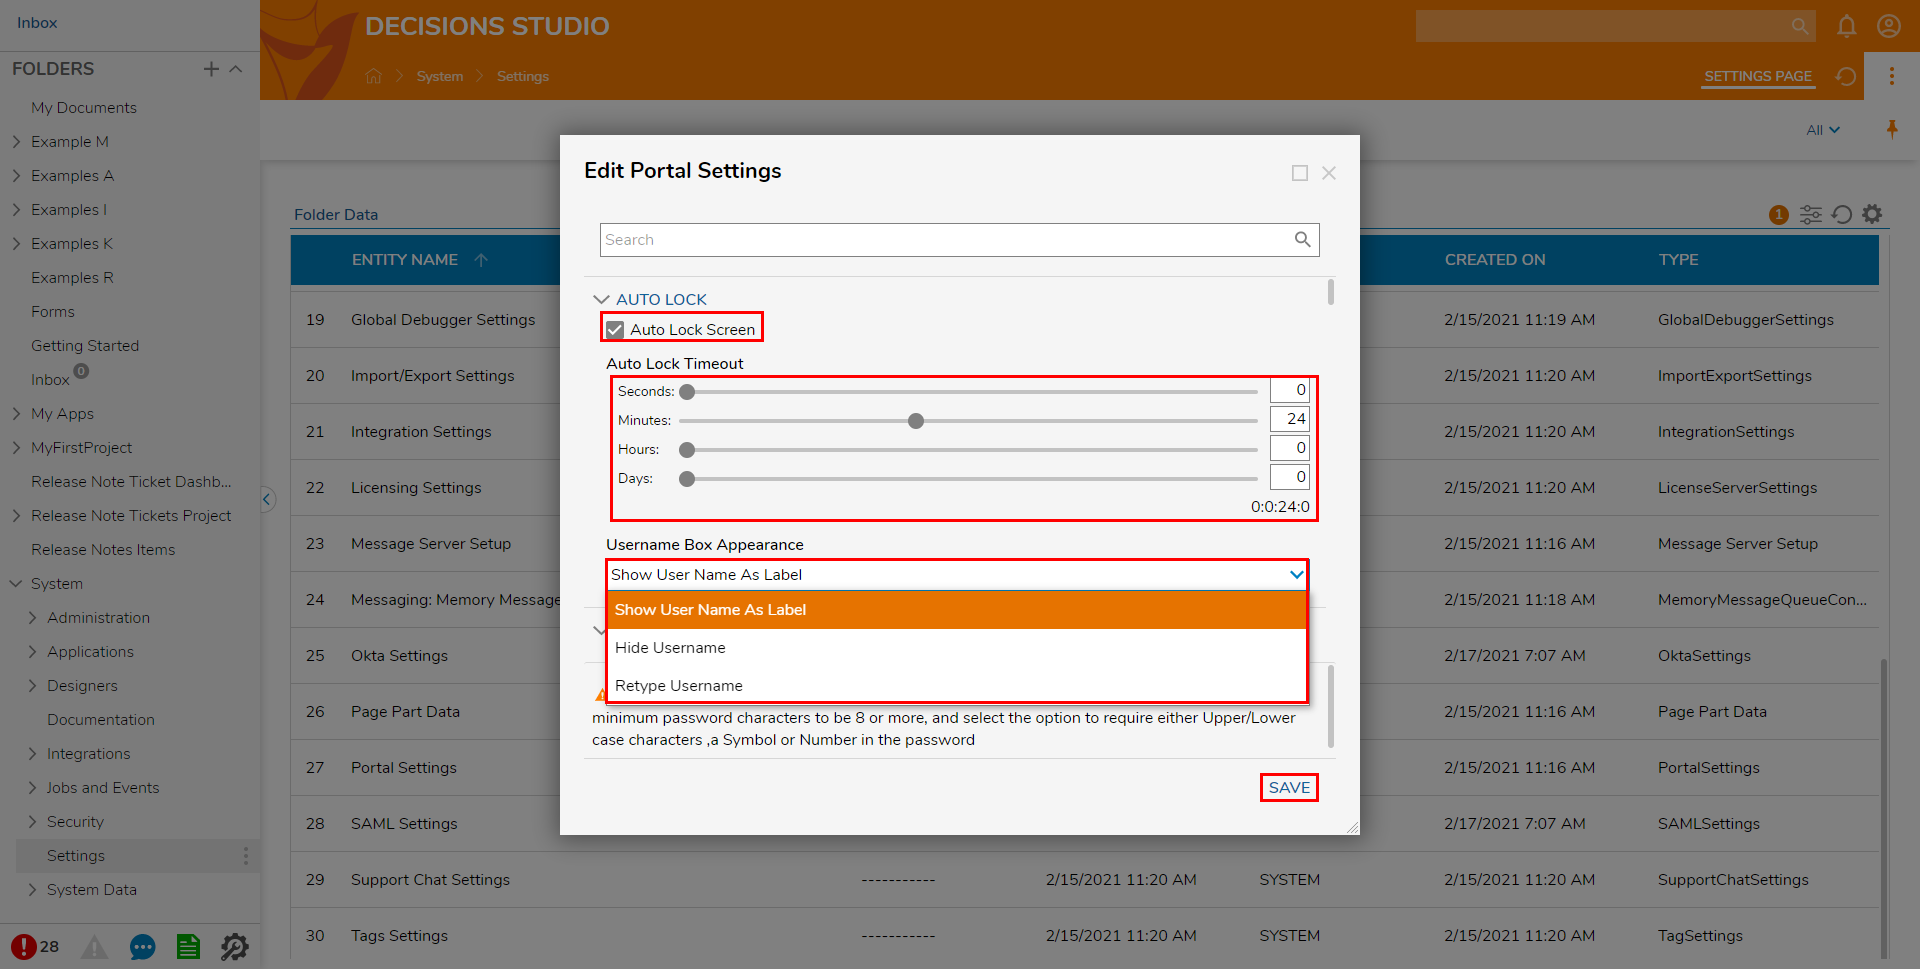
- From the Edit Portal Settings window, navigate to AUTO LOCK, and check the Auto Lock Screen box.
- Set the desired Auto Lock Timeout by adjusting via the slider or input boxes for each Time value. Note: The lockout will occur after a specified amount of User Inactivity on the Portal.
Be sure to set enough time to allow the Setting to be changed if desired/need be. Establishing a short time will make it difficult to alter the Portal Settings before Lockout. - Set the desired option under Username Box Appearance, then click SAVE to apply the changes.This option provides three options for display, Show Username As Label, Hide Username, Type Username. For this example, the Username of the locked-out Account will appear as a label on the password screen.
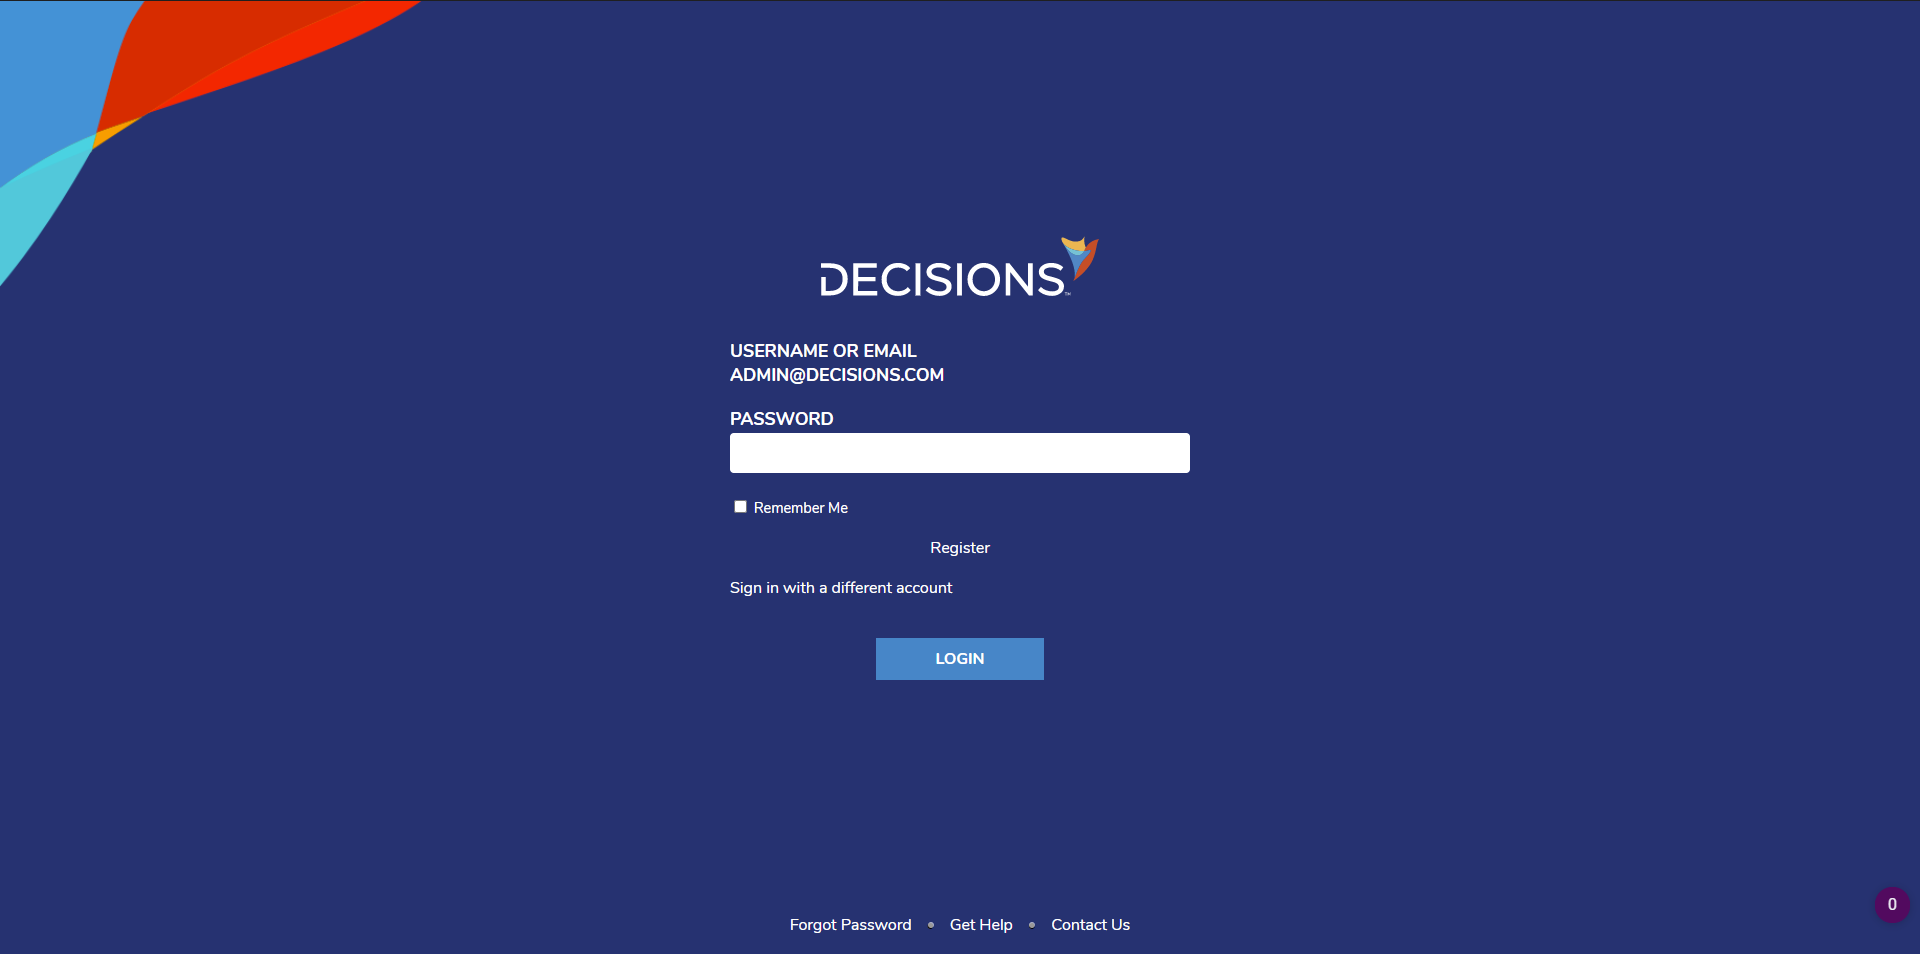
 ExpectUpon Lockout, these settings will display the Username as a Label on the Login Page. Users then have the option to enter the Password for this Account or to select the option to Sign in with a different account.