Overview
In Decisions, the Set Look and Feel settings allow the user to configure custom Icons and Thumbnails for each specific Folder Type; these settings can also be used to configure the background color for Designer Projects in the My Apps Folder.
Example
The following example will how to apply Set Look and Feel settings to a Designer Project, and then add it to the App Store.
Customizing Designer Project
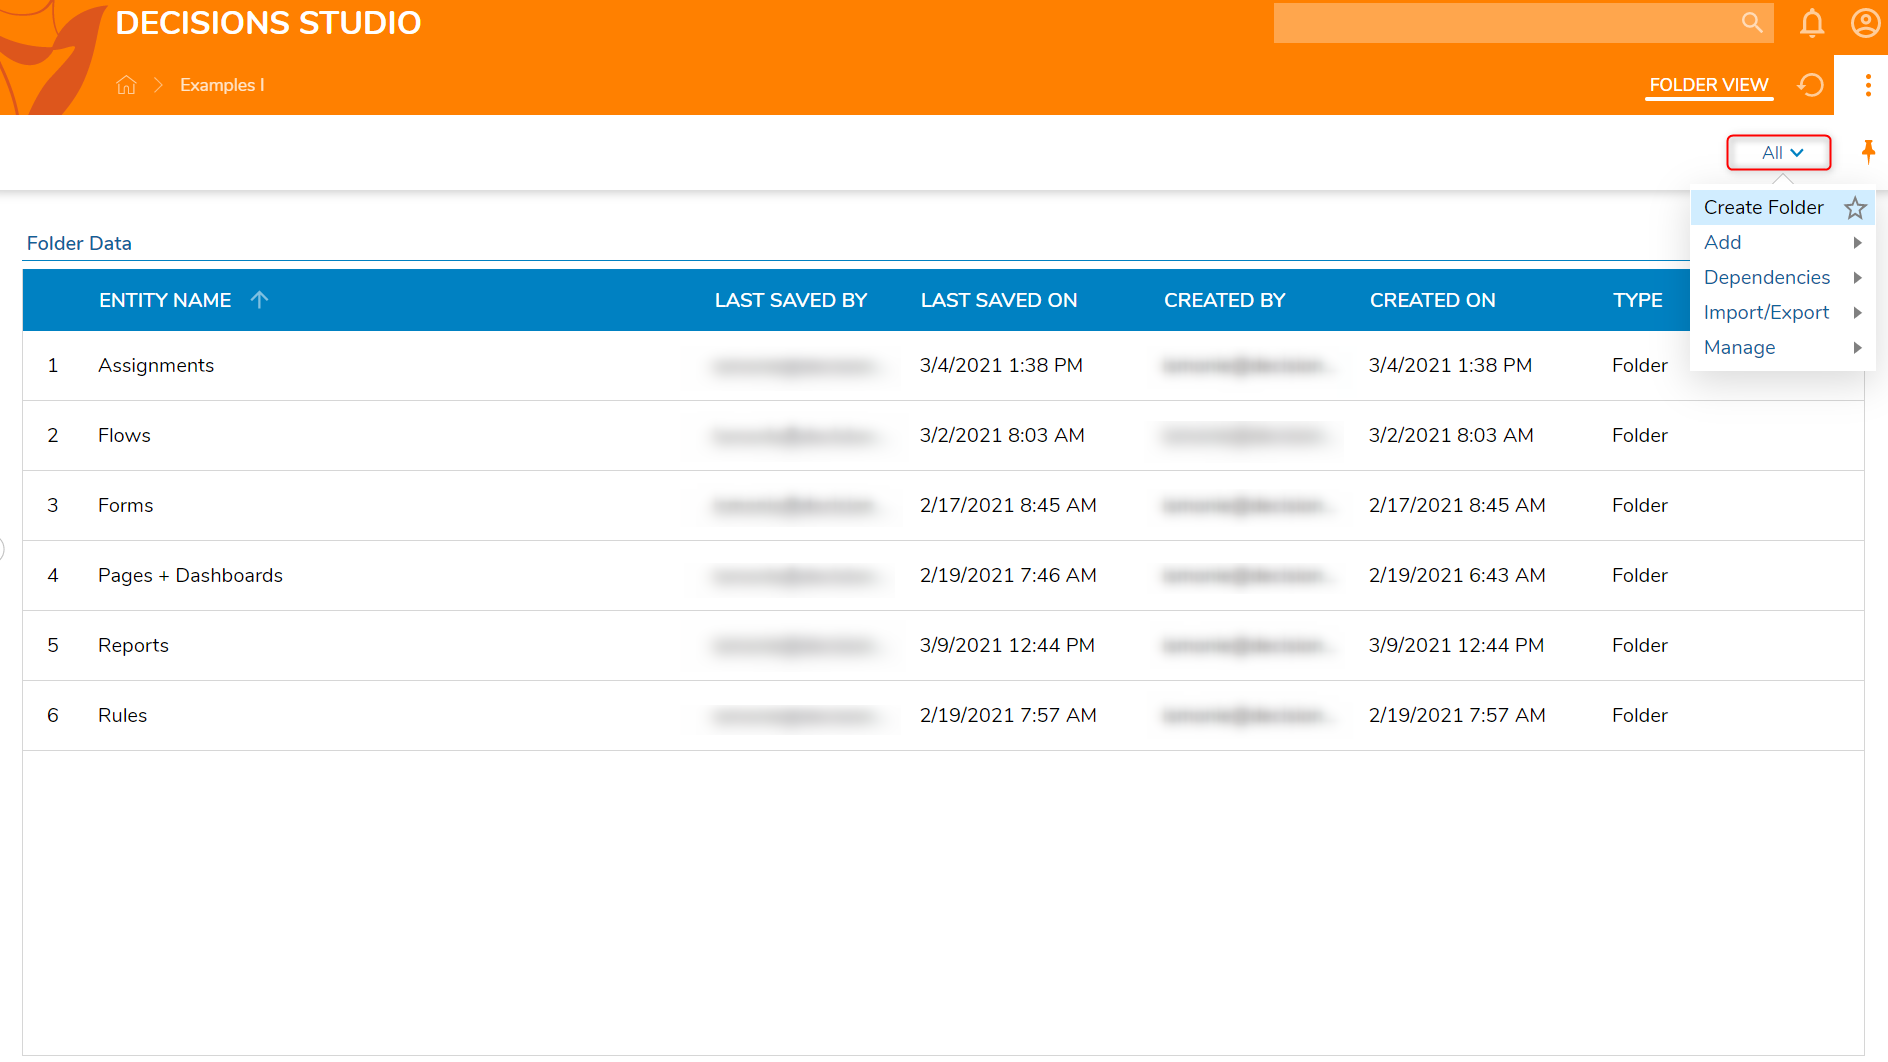
- In the Decisions Studio, create a Designer Project by navigating to All > Create Folder in the Global Actions Bar.
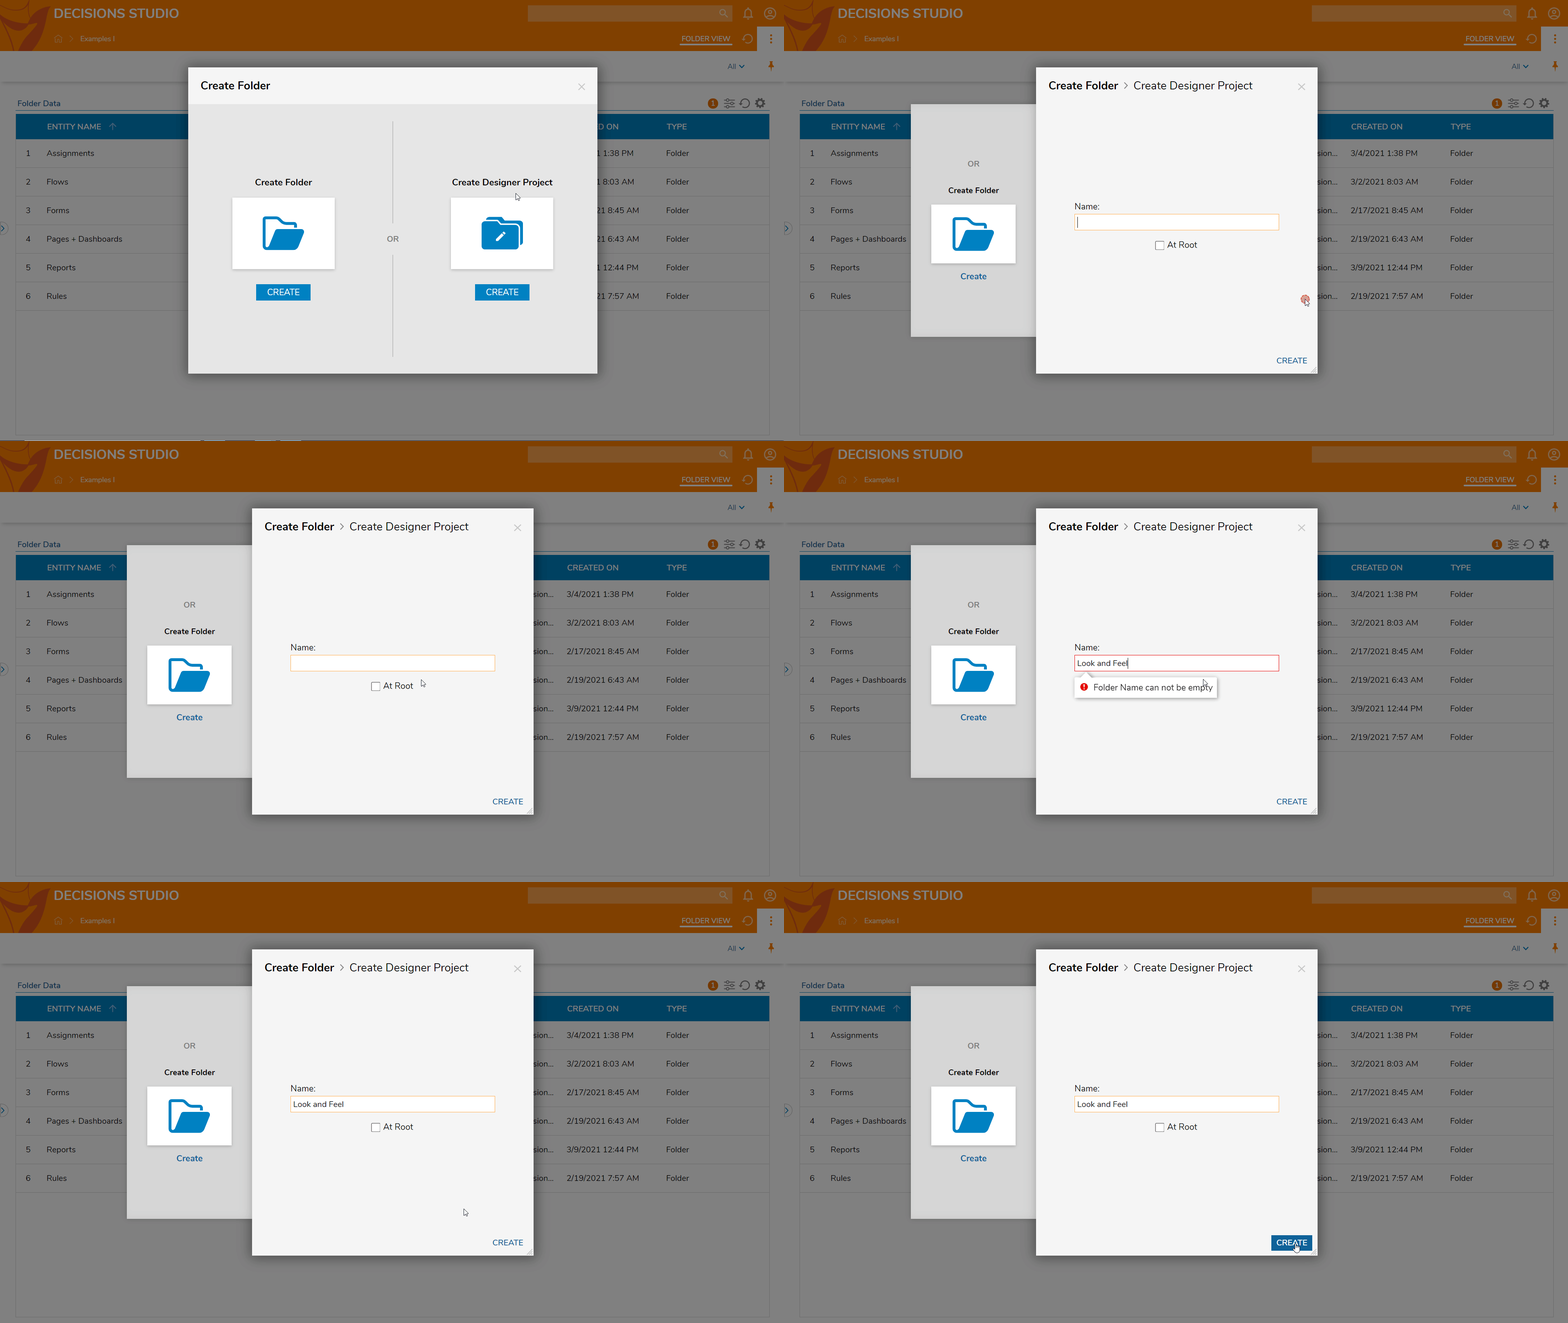
- In the resulting Create Folder window, select CREATE on Create Designer Project.
- Name the Designer Project "[Look and Feel]" and click CREATE.
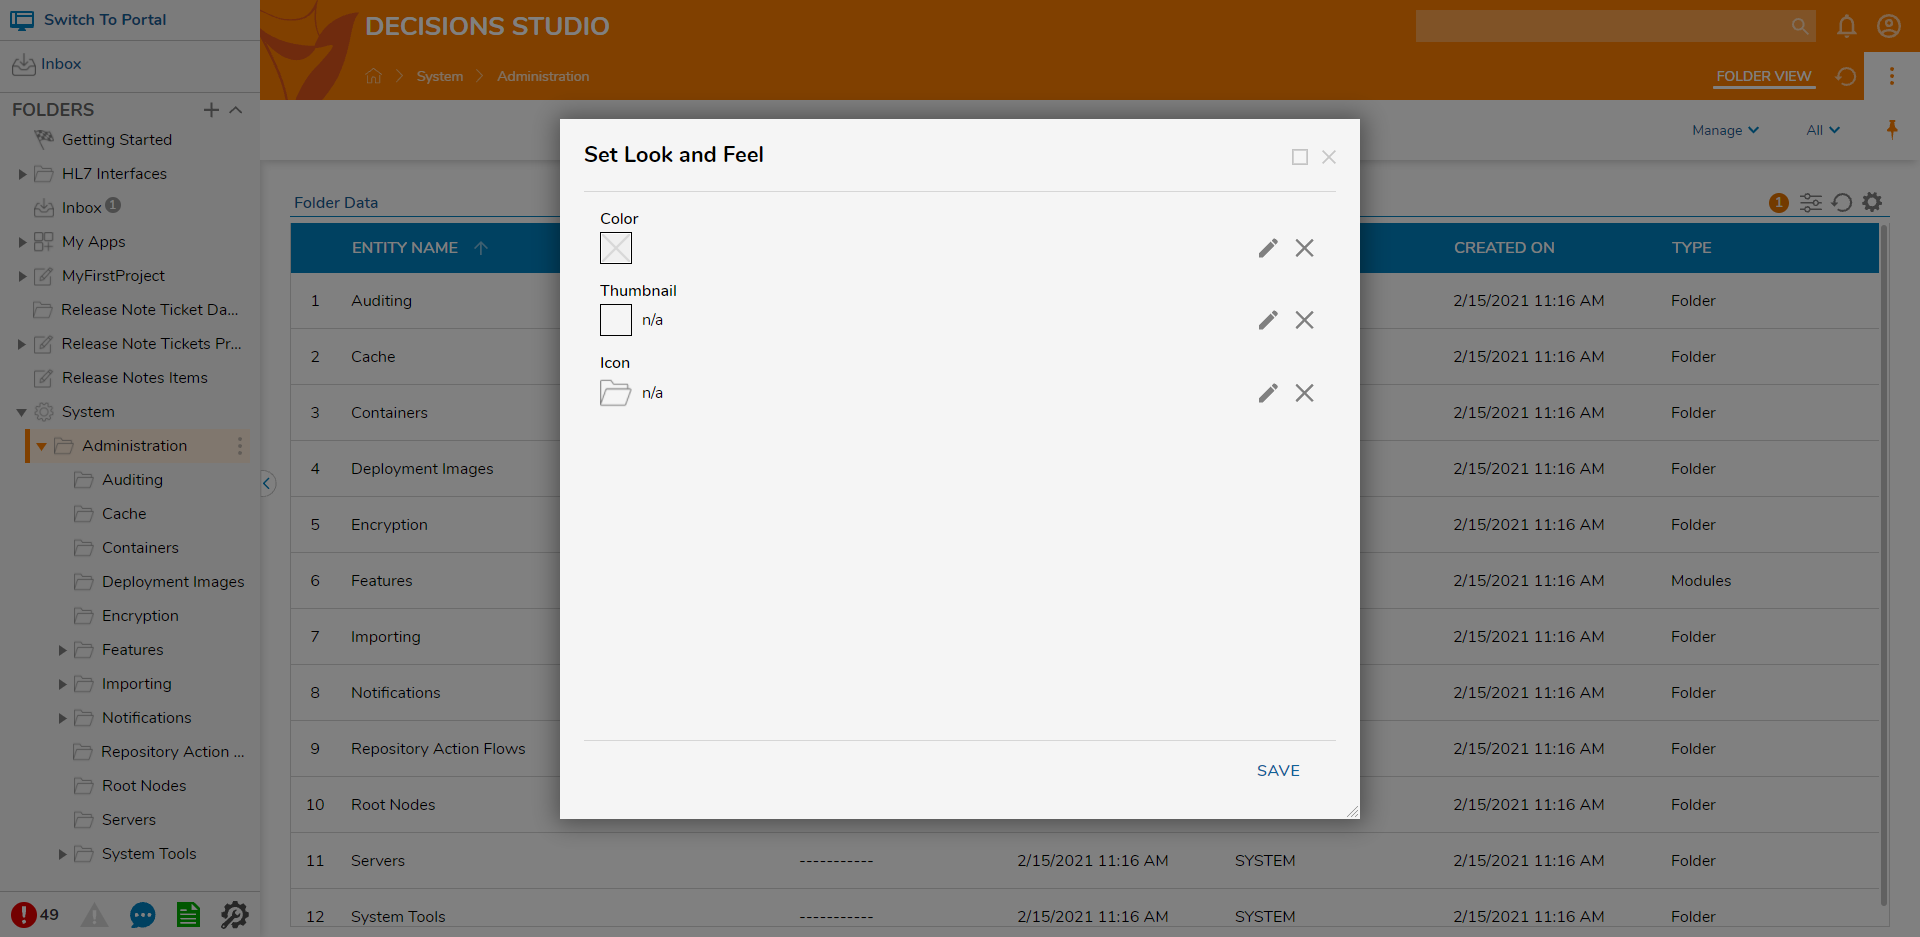
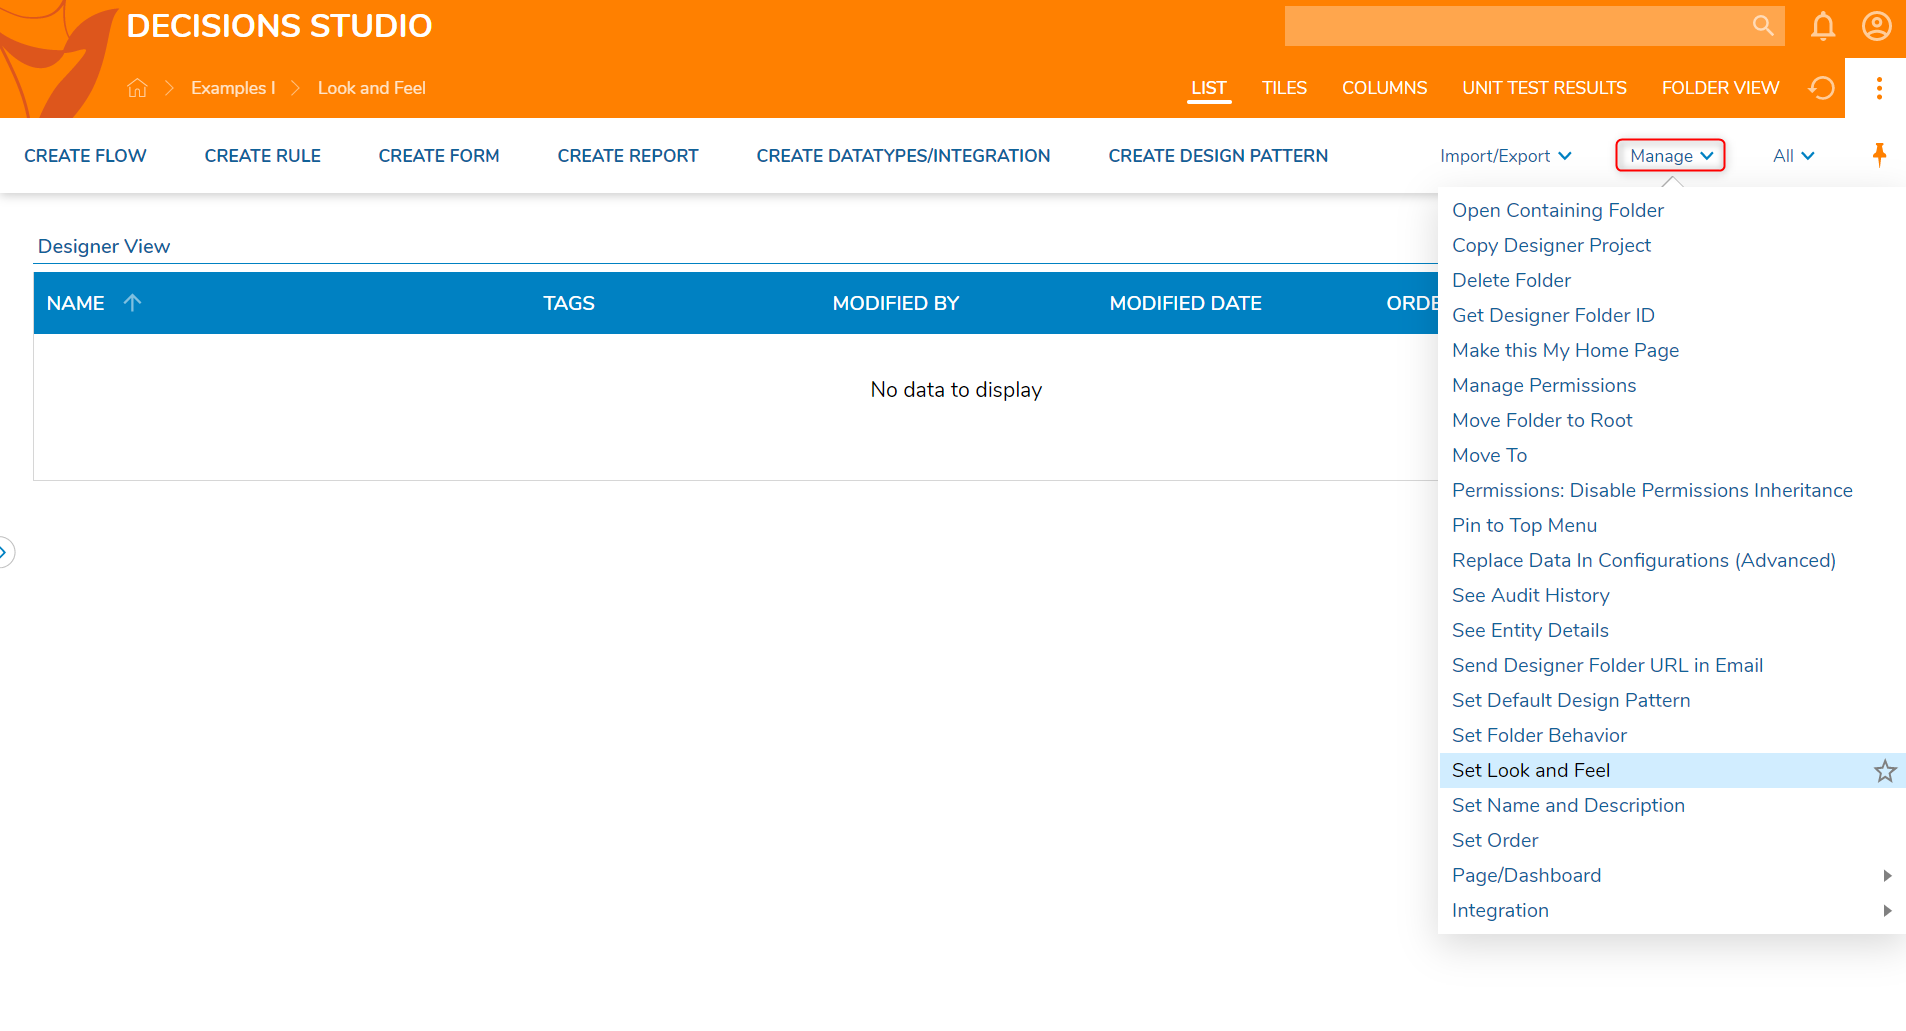
- In the new Designer Project, navigate to Manage > Set Look and Feel in the Global Action BarThis navigation can also be used to Set the Look and Feel of other existing Folders.
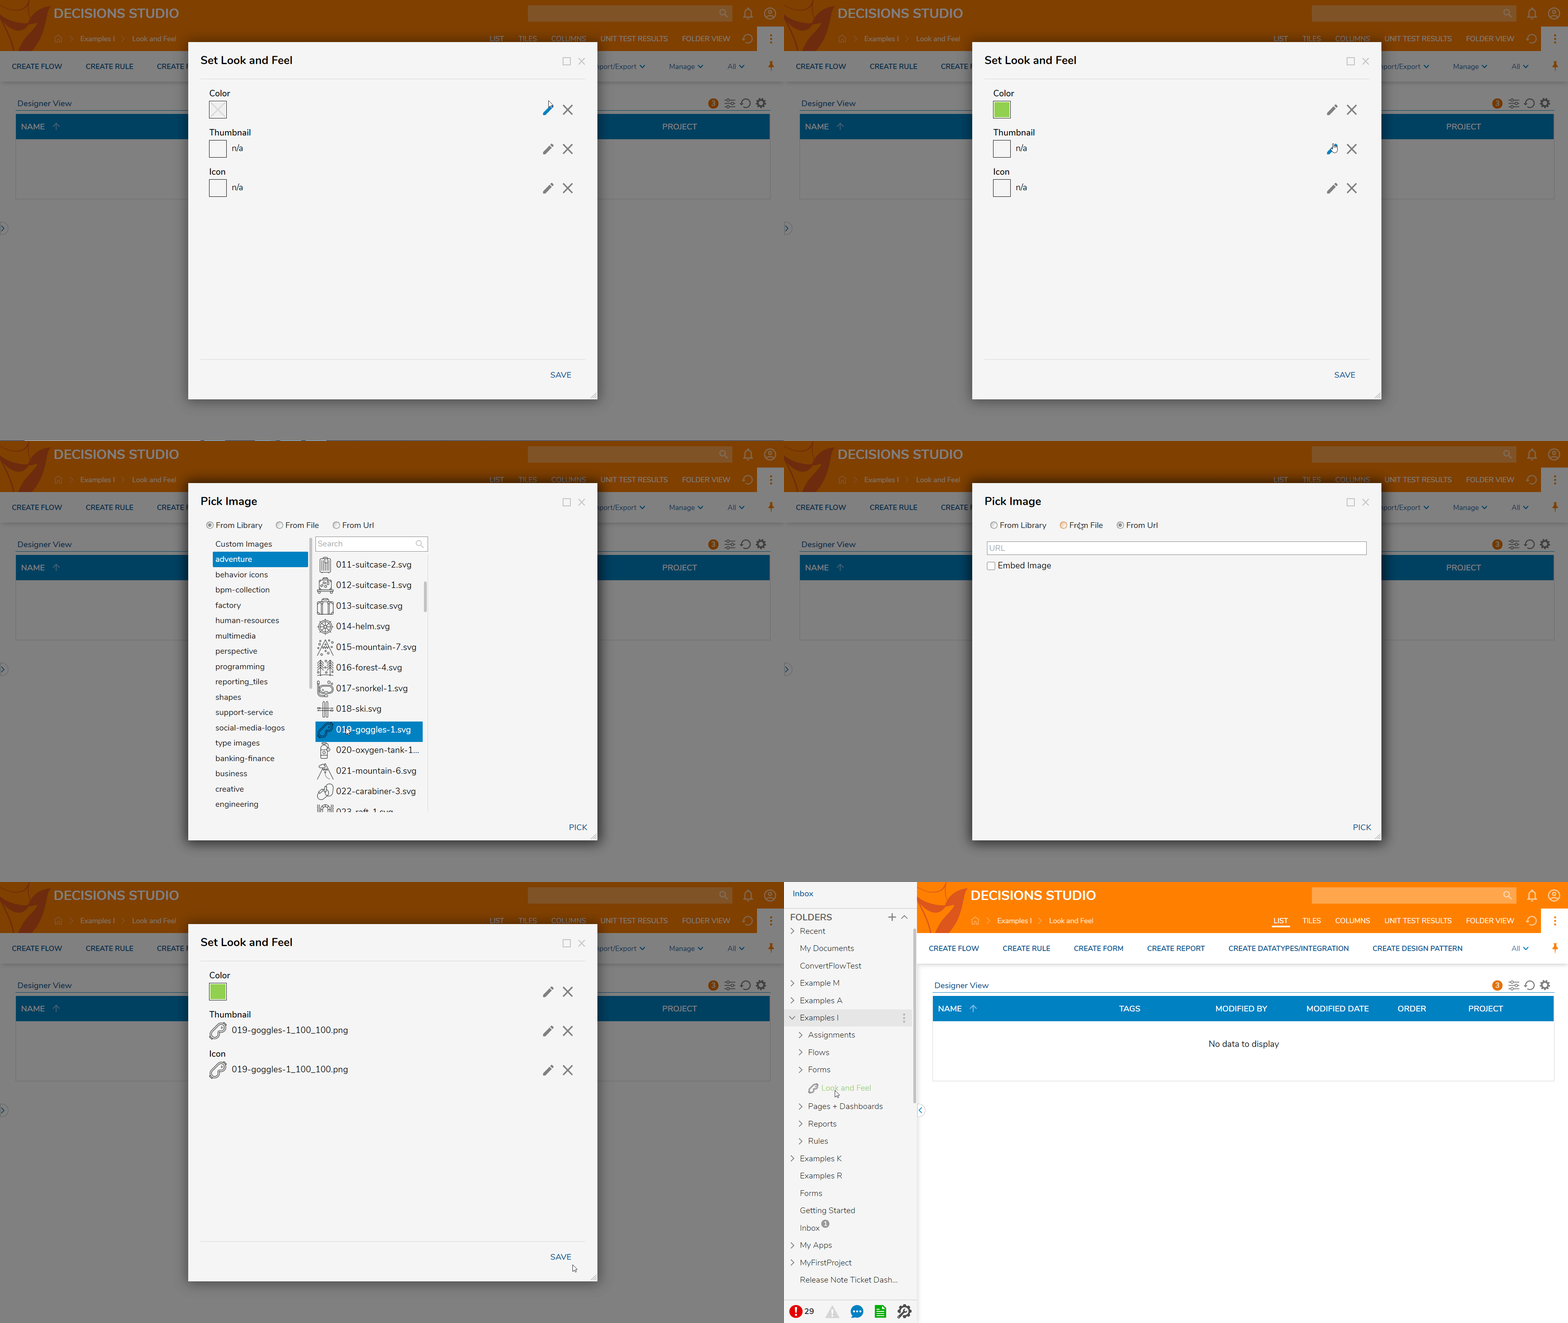
- In the resulting Set Look and Feel window, there are three configurable sections. Select the Edit button (pencil icon) next to a section to open its configuration options.
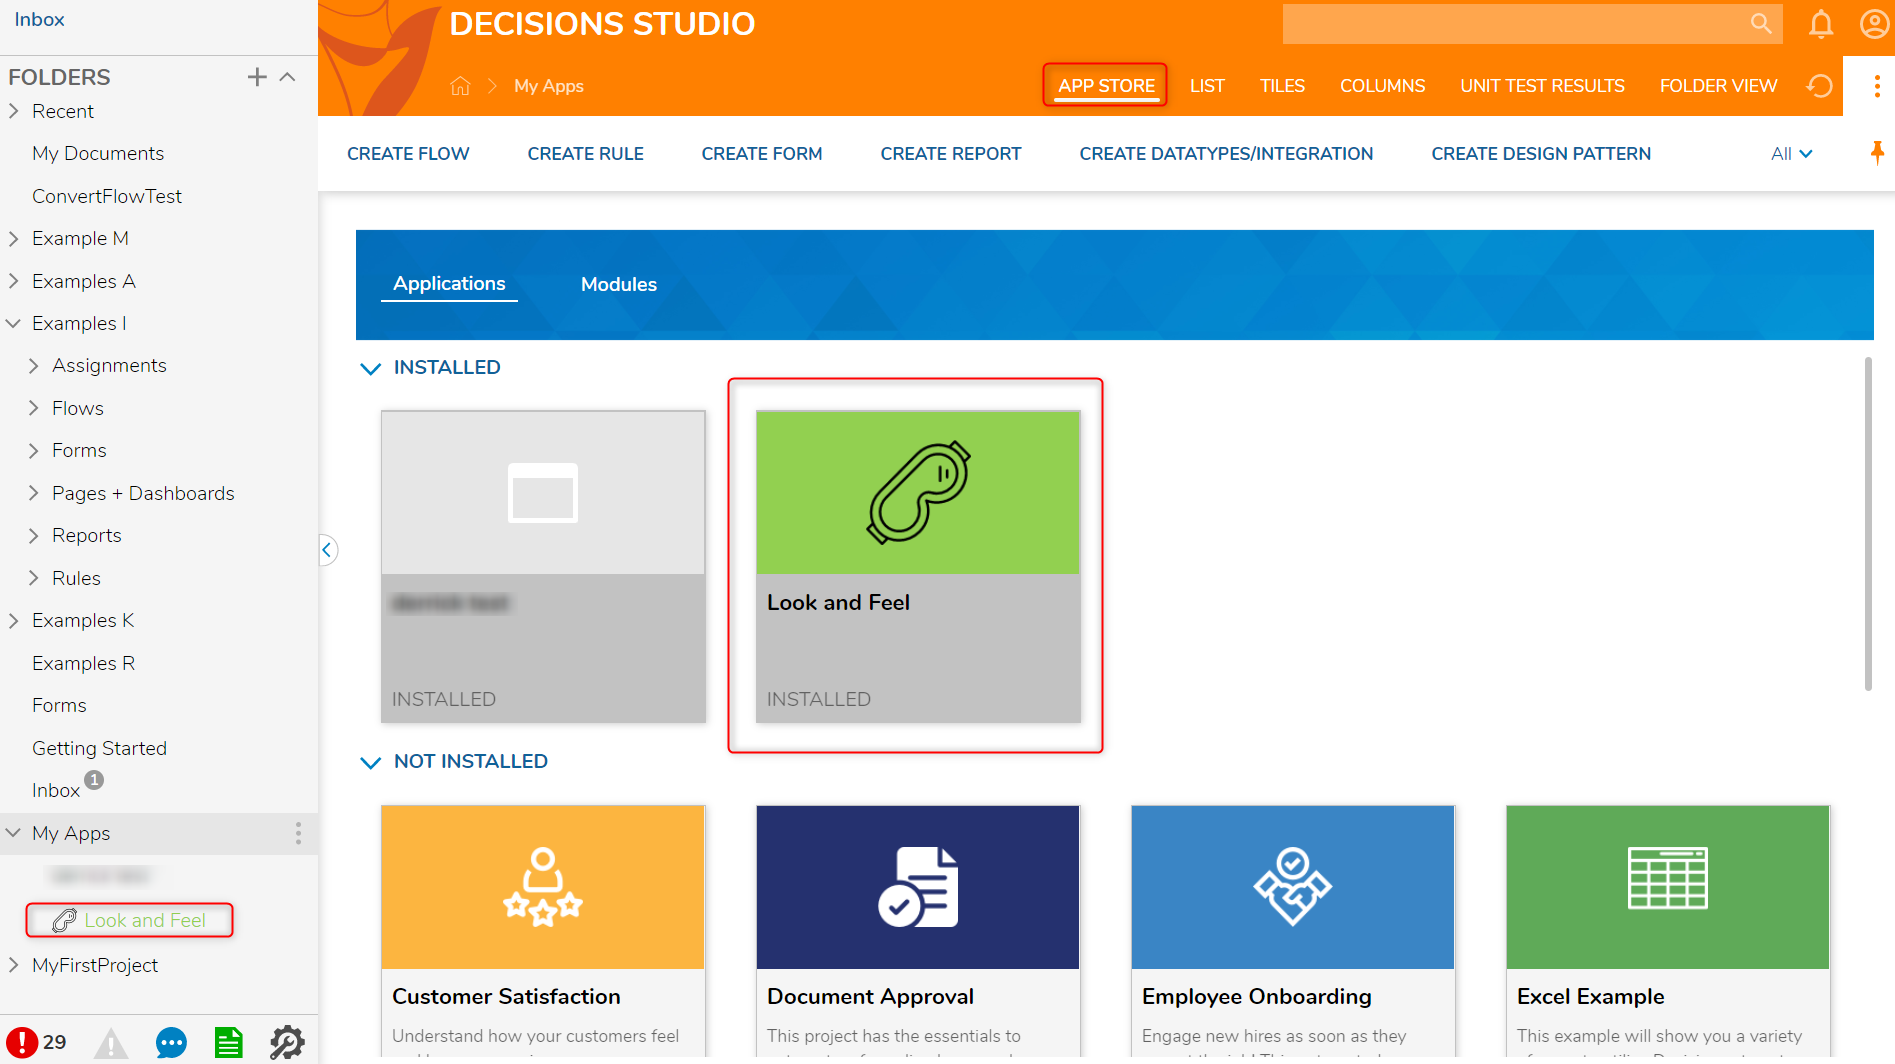
For this example, a default image was used for both the Thumbnail and the Icon.Configuration Properties Color This setting changes the color of the font used for the Folder name as it appears in the Folder List on the left side of the Portal or Studio. It also changes the background color for the Icon that will appear when the Folder is added to My Apps. In the Color Picker, a pre-set color can be selected or the Advanced section can be expanded to reveal additional color options. Thumbnail This setting applies a thumbnail next to the folder name as it appears in the Folder List on the left side of the Portal or Studio. In addition to default library images, a user can also upload these from a file or URL. Icon This setting applies an Icon for the Folder as it appears in the My Apps section. In addition to default library images, a user can also upload these from a file or URL. Once all desired changes have been made, click SAVE to observe the effect in the Folder List.
Adding Folder to My Apps
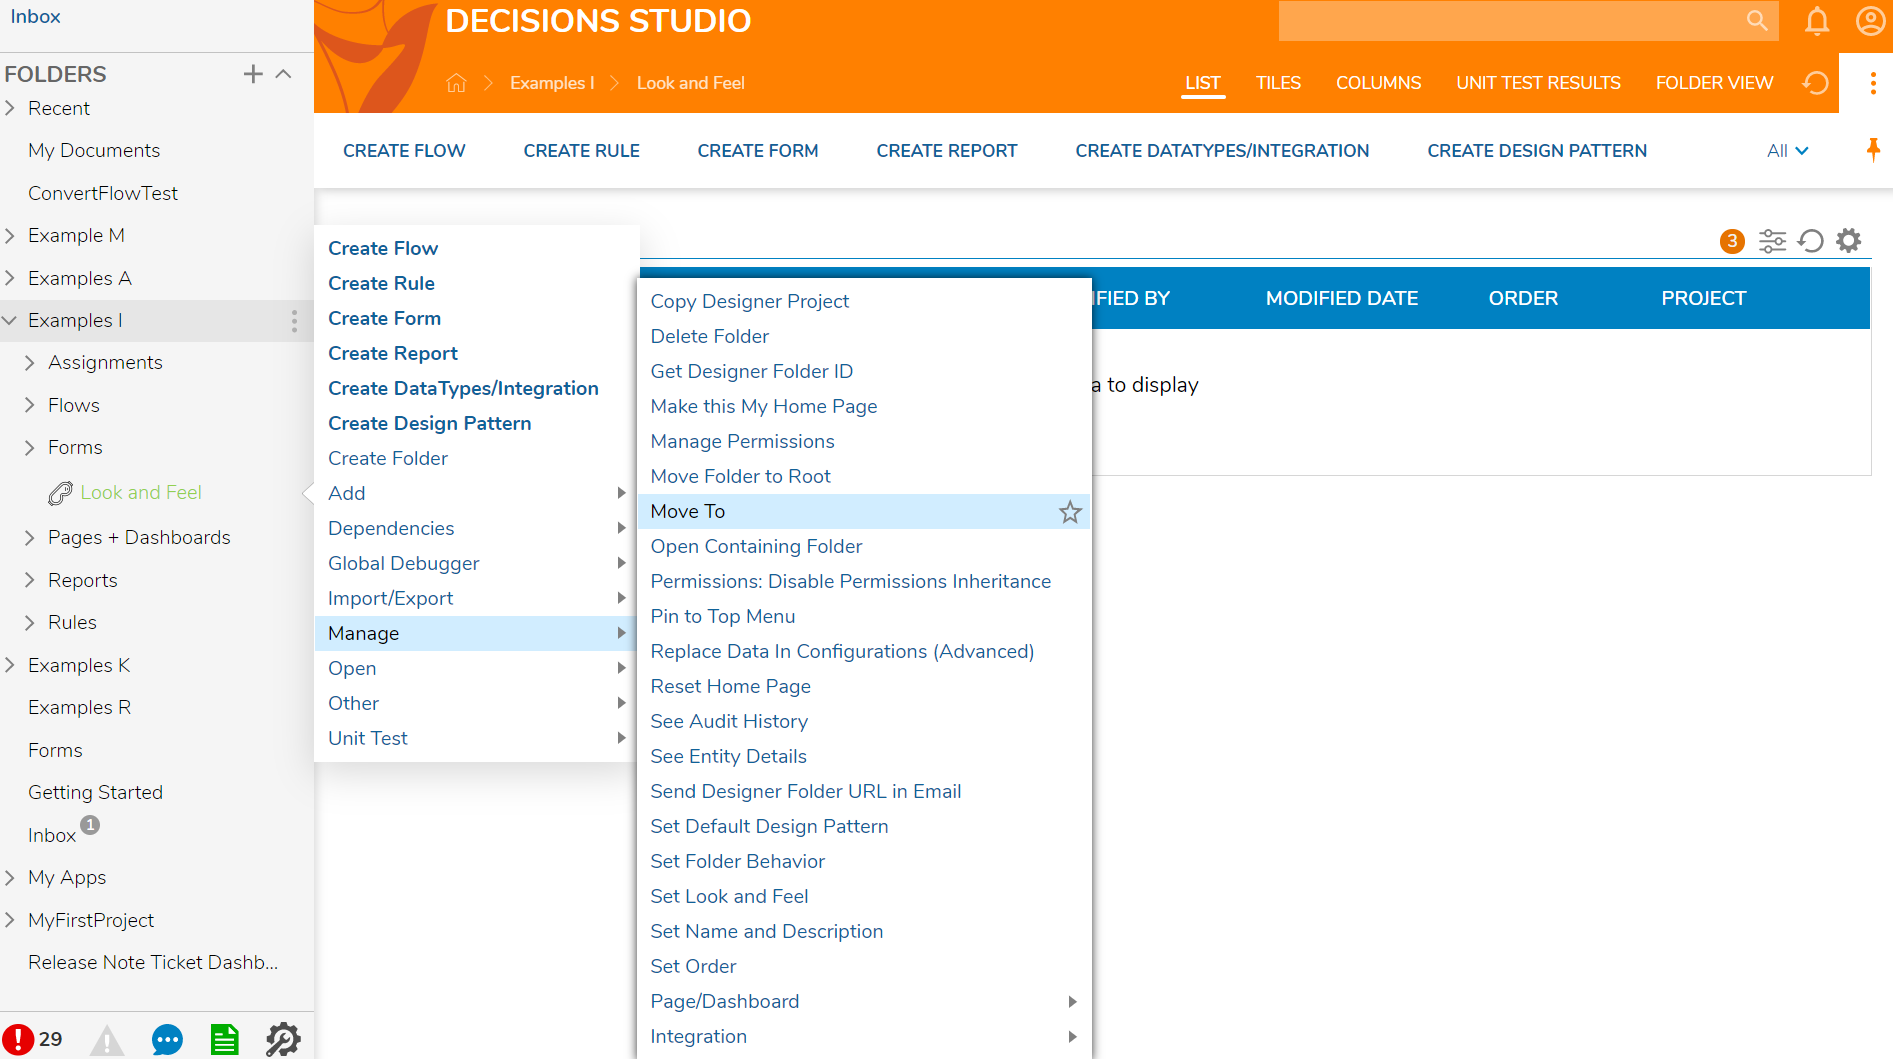
- Right-click on the Designer Project, navigate to Manage > Move To in the Action Menu.
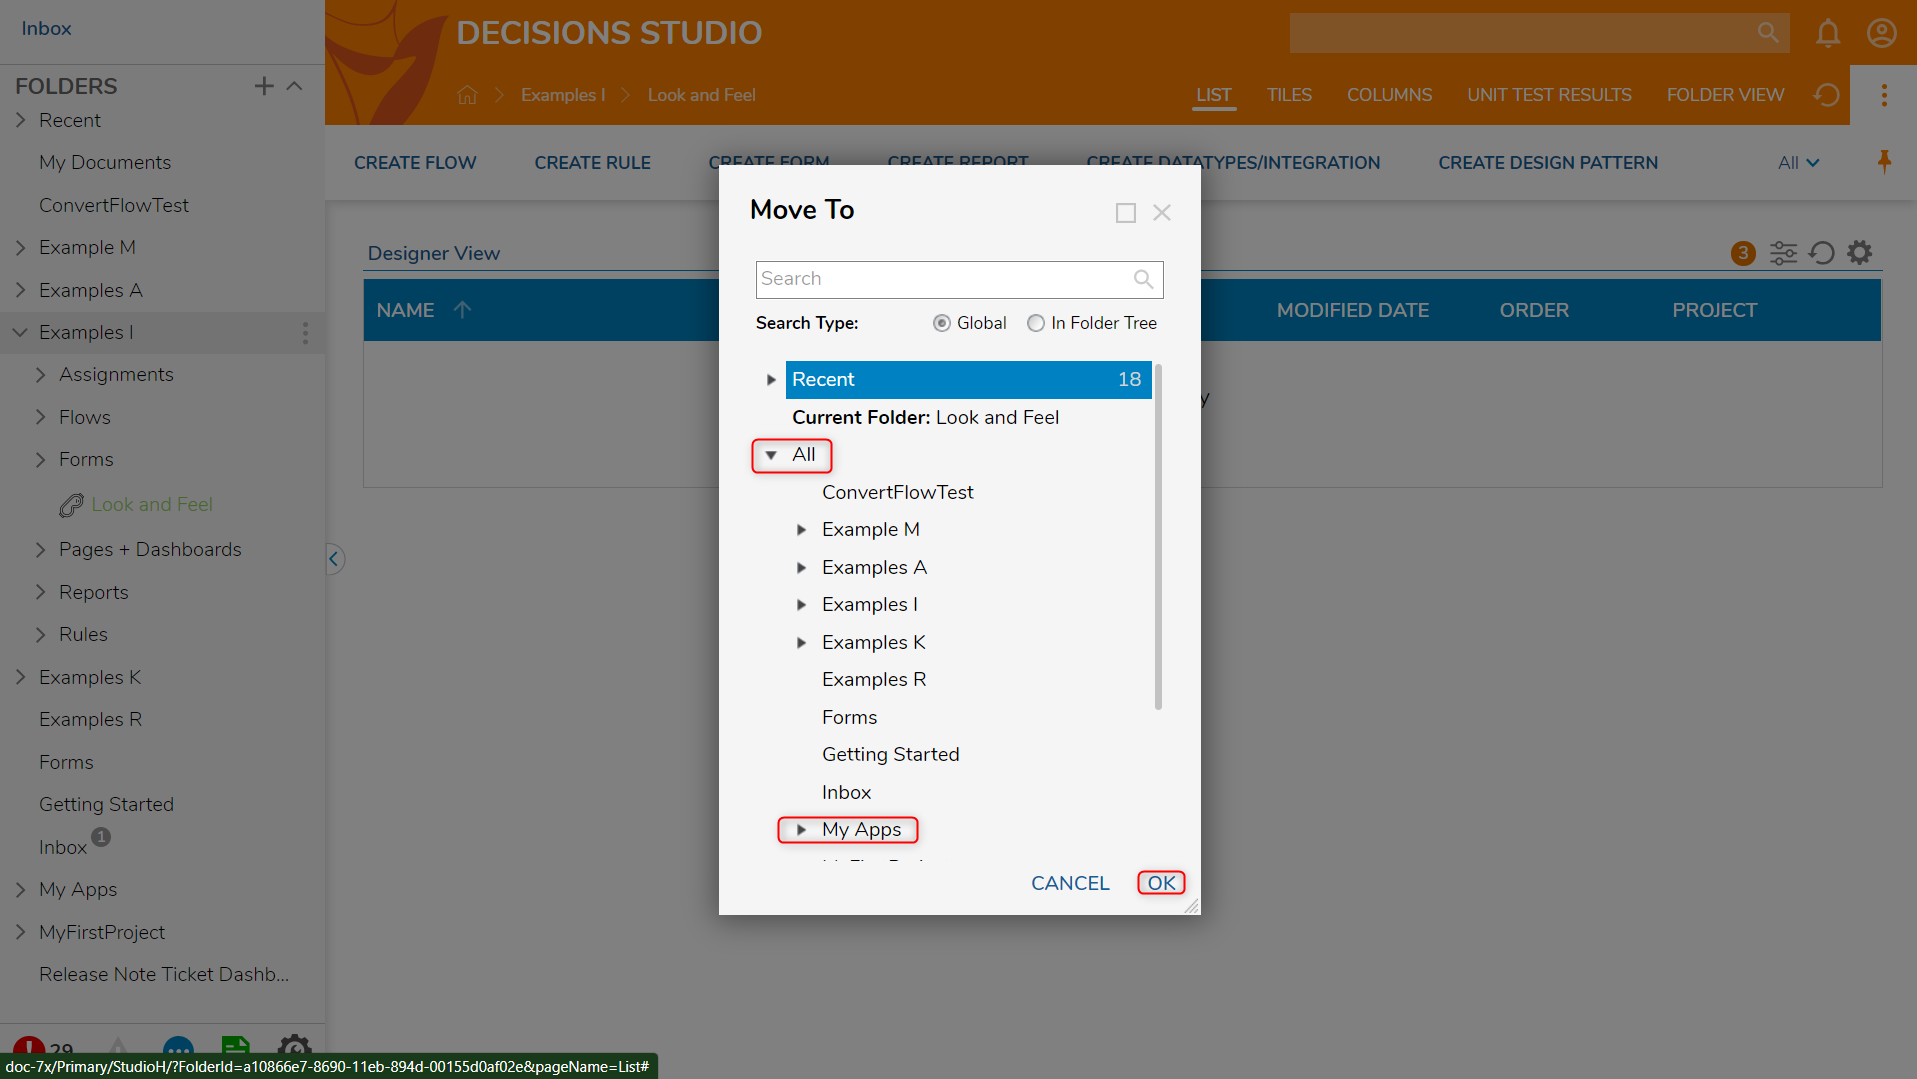
- In the resulting Move To window, navigate to All > My Apps. Click OK.
- Navigate to My Apps > APP STORE and notice the Designer Project with the applied background Color and Icon customizations.
Look and Feel (v.7.8+)
Note on 7.8 Update
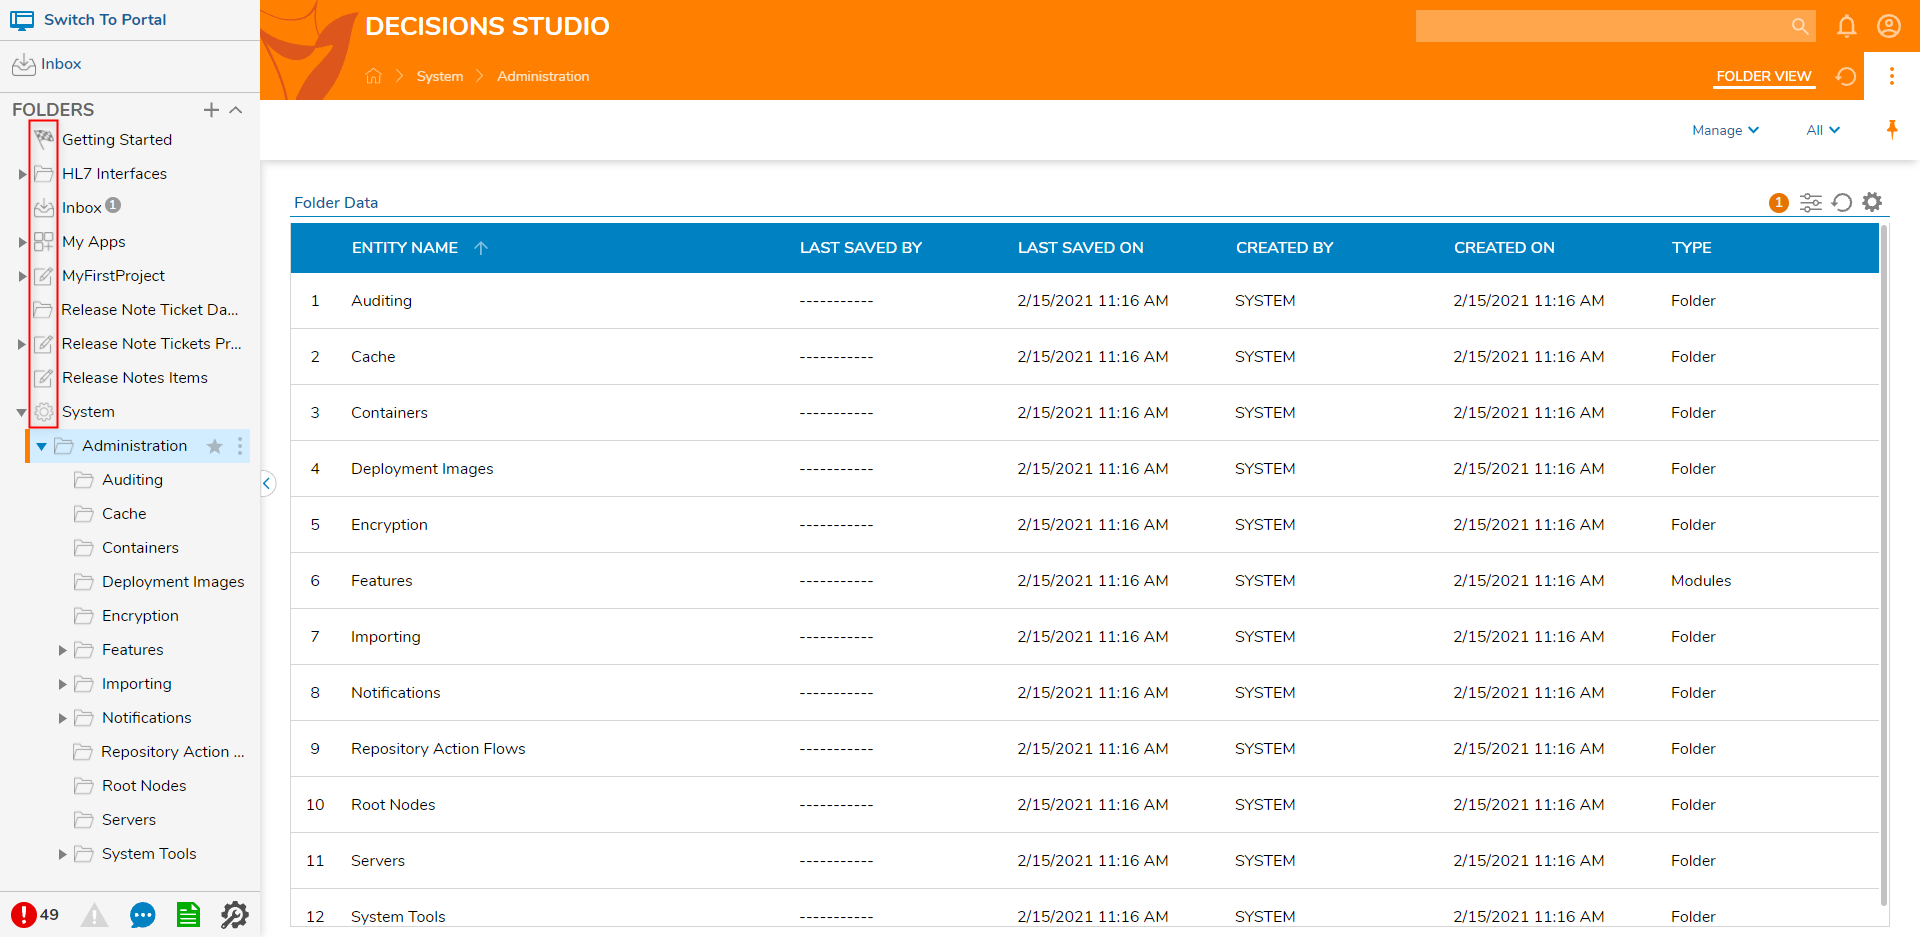
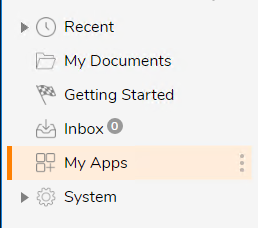
Note that as v.7.8+, Icons are automatically applied to each Folder in the Decisions Studio. The default Icon for each Folder is dependent upon the Folder Type of the Folder it is applied to.
Additionally, the following Default Folders have new Icons applied to them (see the screenshot below list to see the updated icons):
If desired, this Icon can still be altered, personalized, or removed via the same Look and Feel Settings.
Additionally, the following Default Folders have new Icons applied to them (see the screenshot below list to see the updated icons):
- Recent
- My Documents
- Getting Started
- Inbox
- My Apps
- System
If desired, this Icon can still be altered, personalized, or removed via the same Look and Feel Settings.
