Overview
Decisions allows users the ability to send email invitations from the Portal using the iCal module.
Example
In this example, a user will complete a Form with event information details to be sent to a recipient.
- In a Designer Project, click CREATE FLOW, select Default, and click CREATE. Name the Flow and click CREATE.
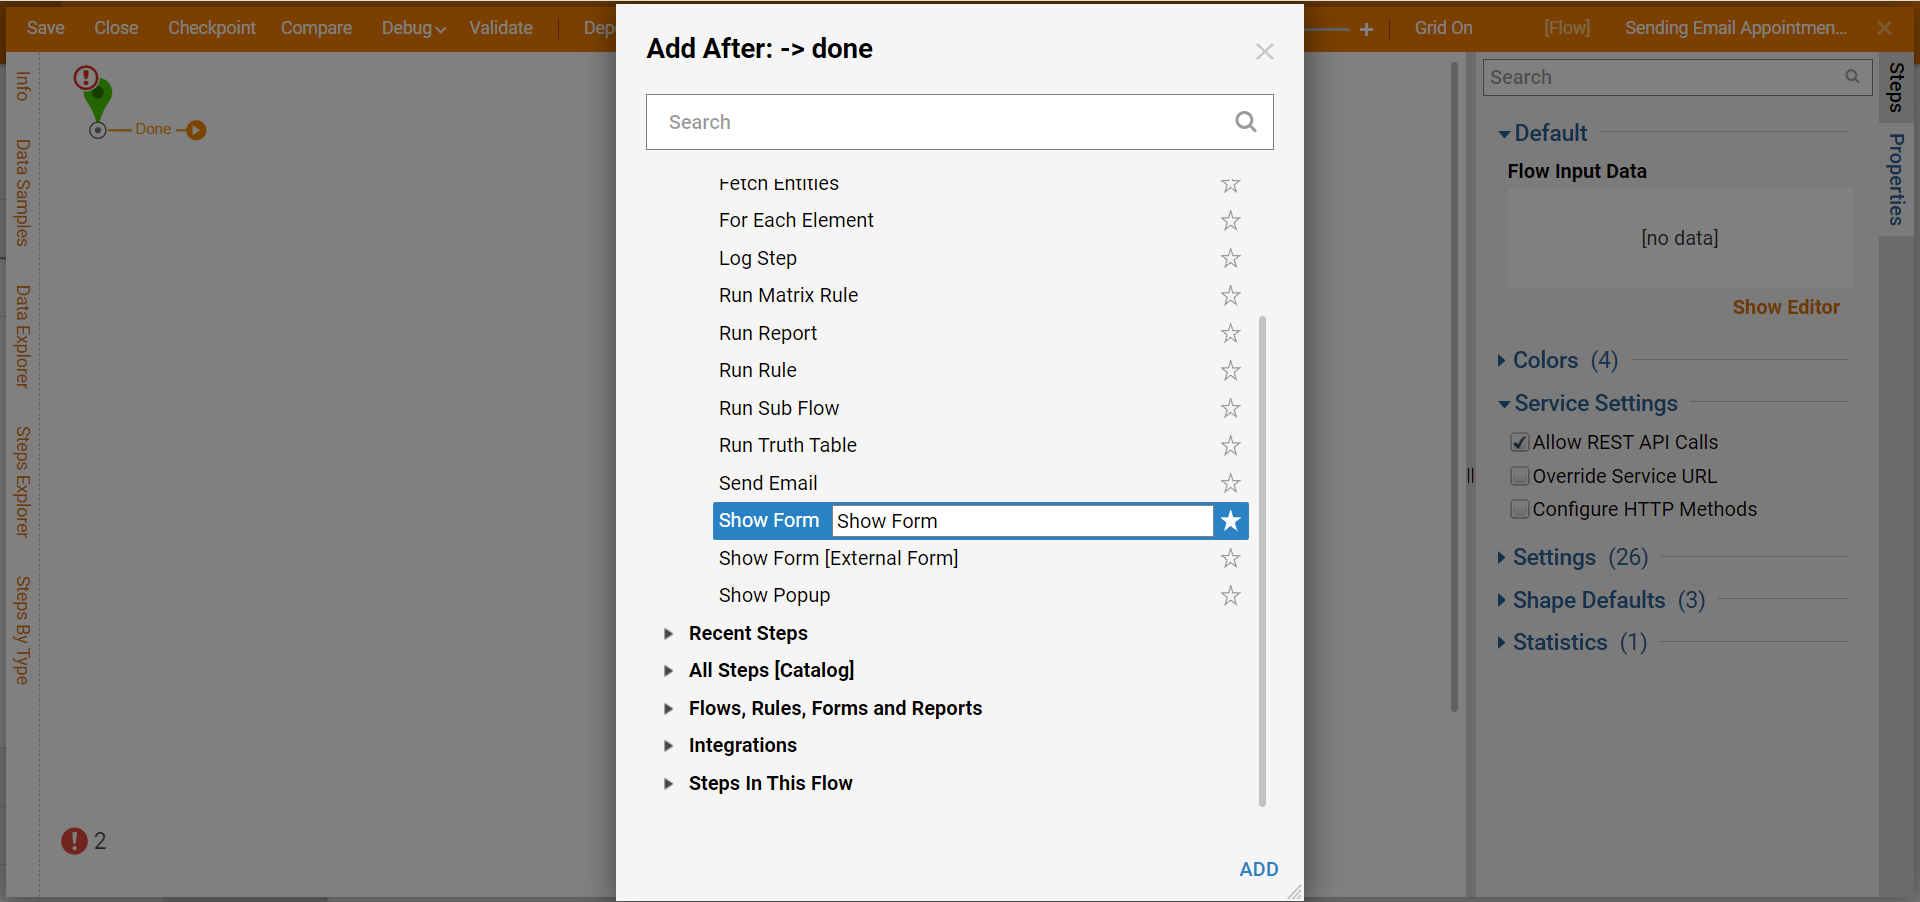
- Click the Done path on the Start step. Select the Show Form step and click ADD.
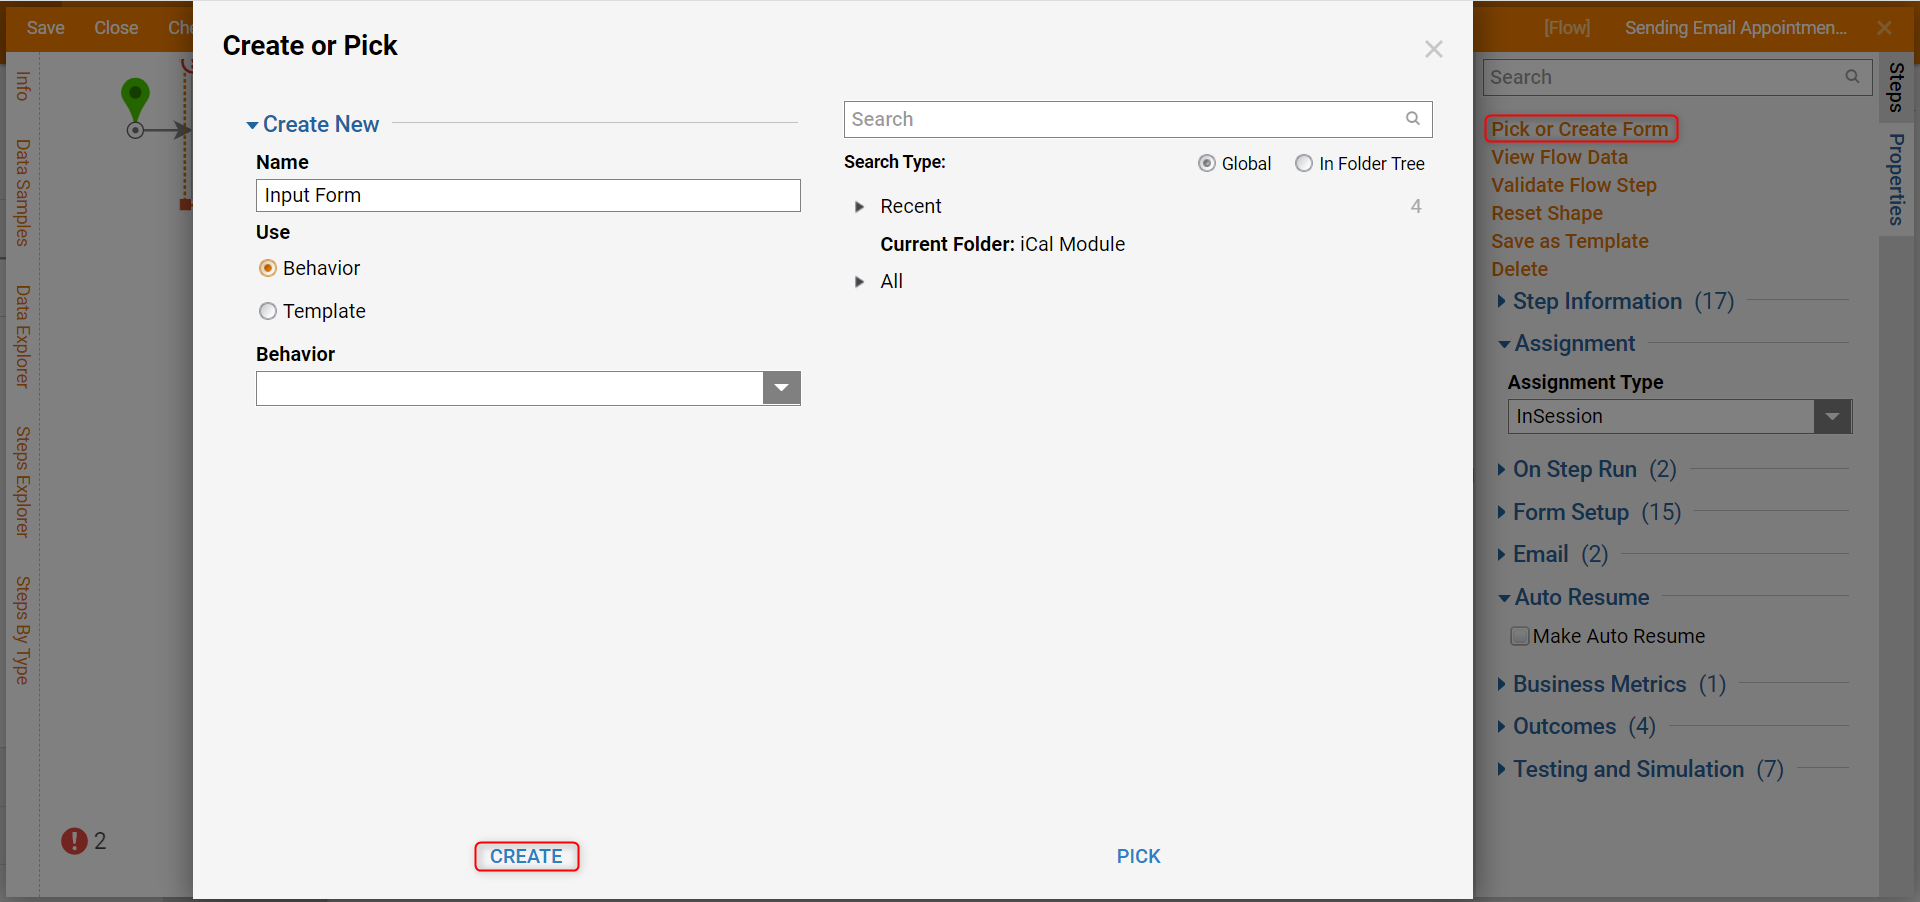
- Click Pick or Create Form on the Properties panel. Name the Form and click CREATE.
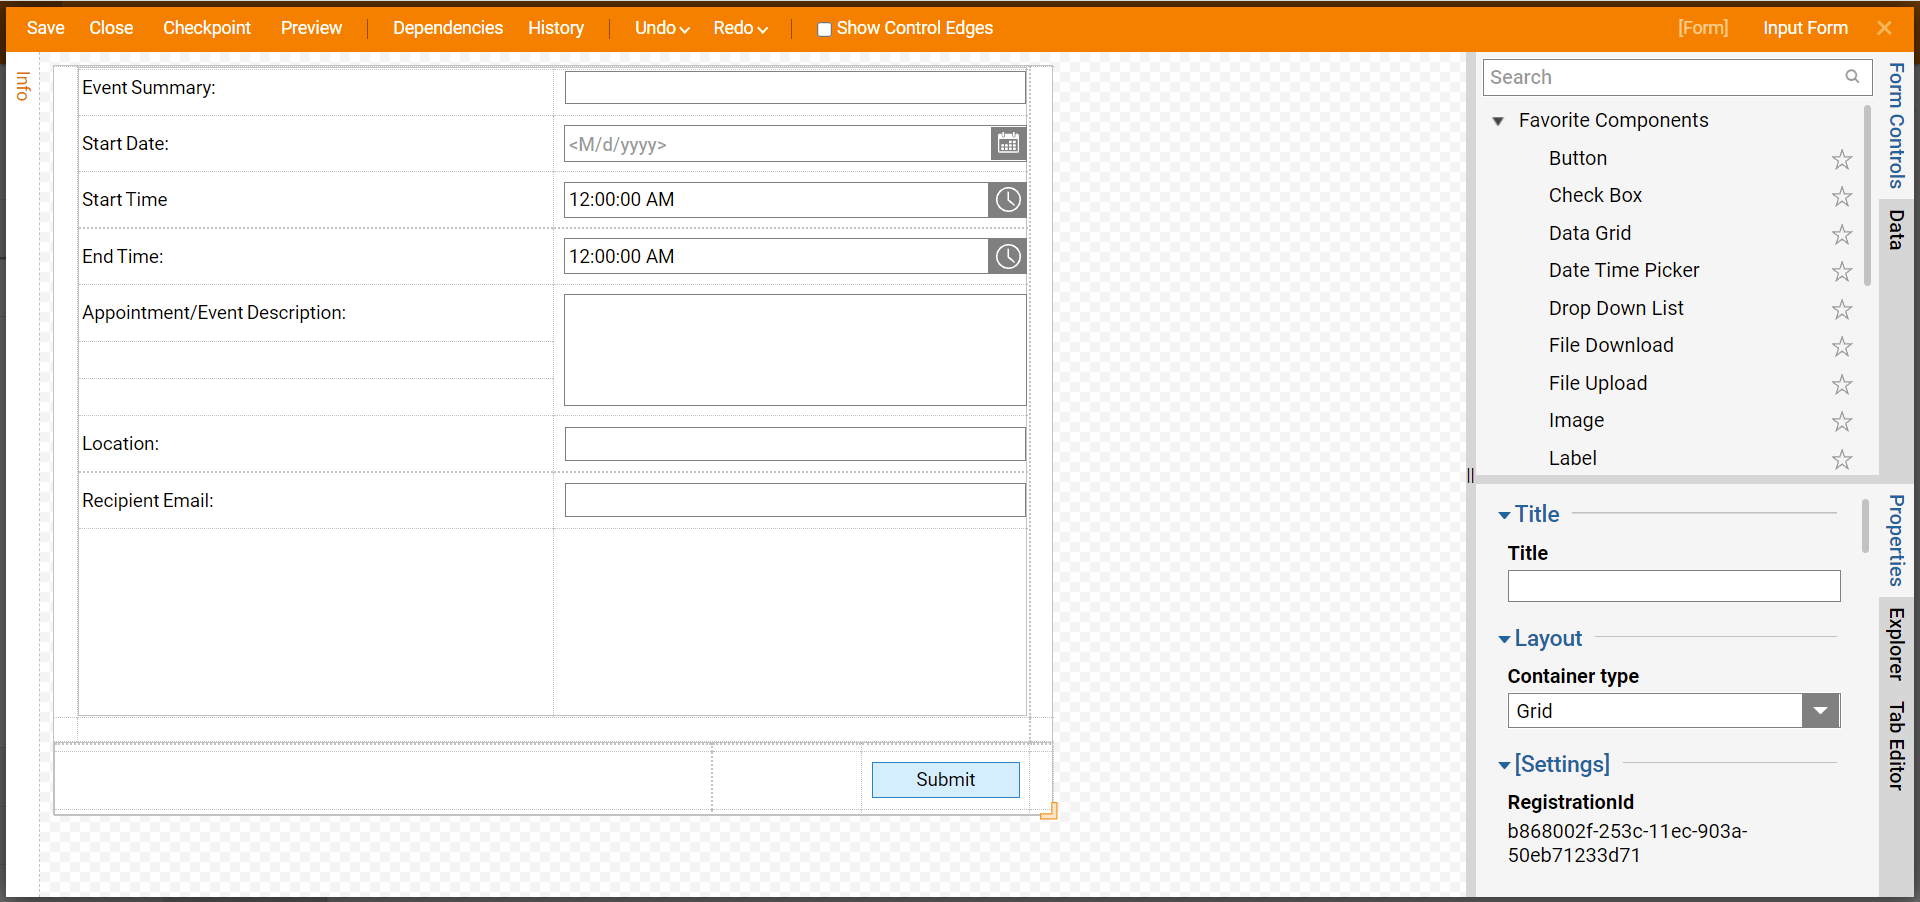
- Configure the Form with Labels (Event Summary, Start Date, Start Time, End Time, Appointment/Event Description, Location, Recipient Email), Text Box components (EventSummary, EventLocation, Recipient), Text Box Multi Line component (EventDescription), Date Picker (Date), Time Pickers (StartTime, EndTime), and Button component (Submit). Click Save and close the Form Designer.
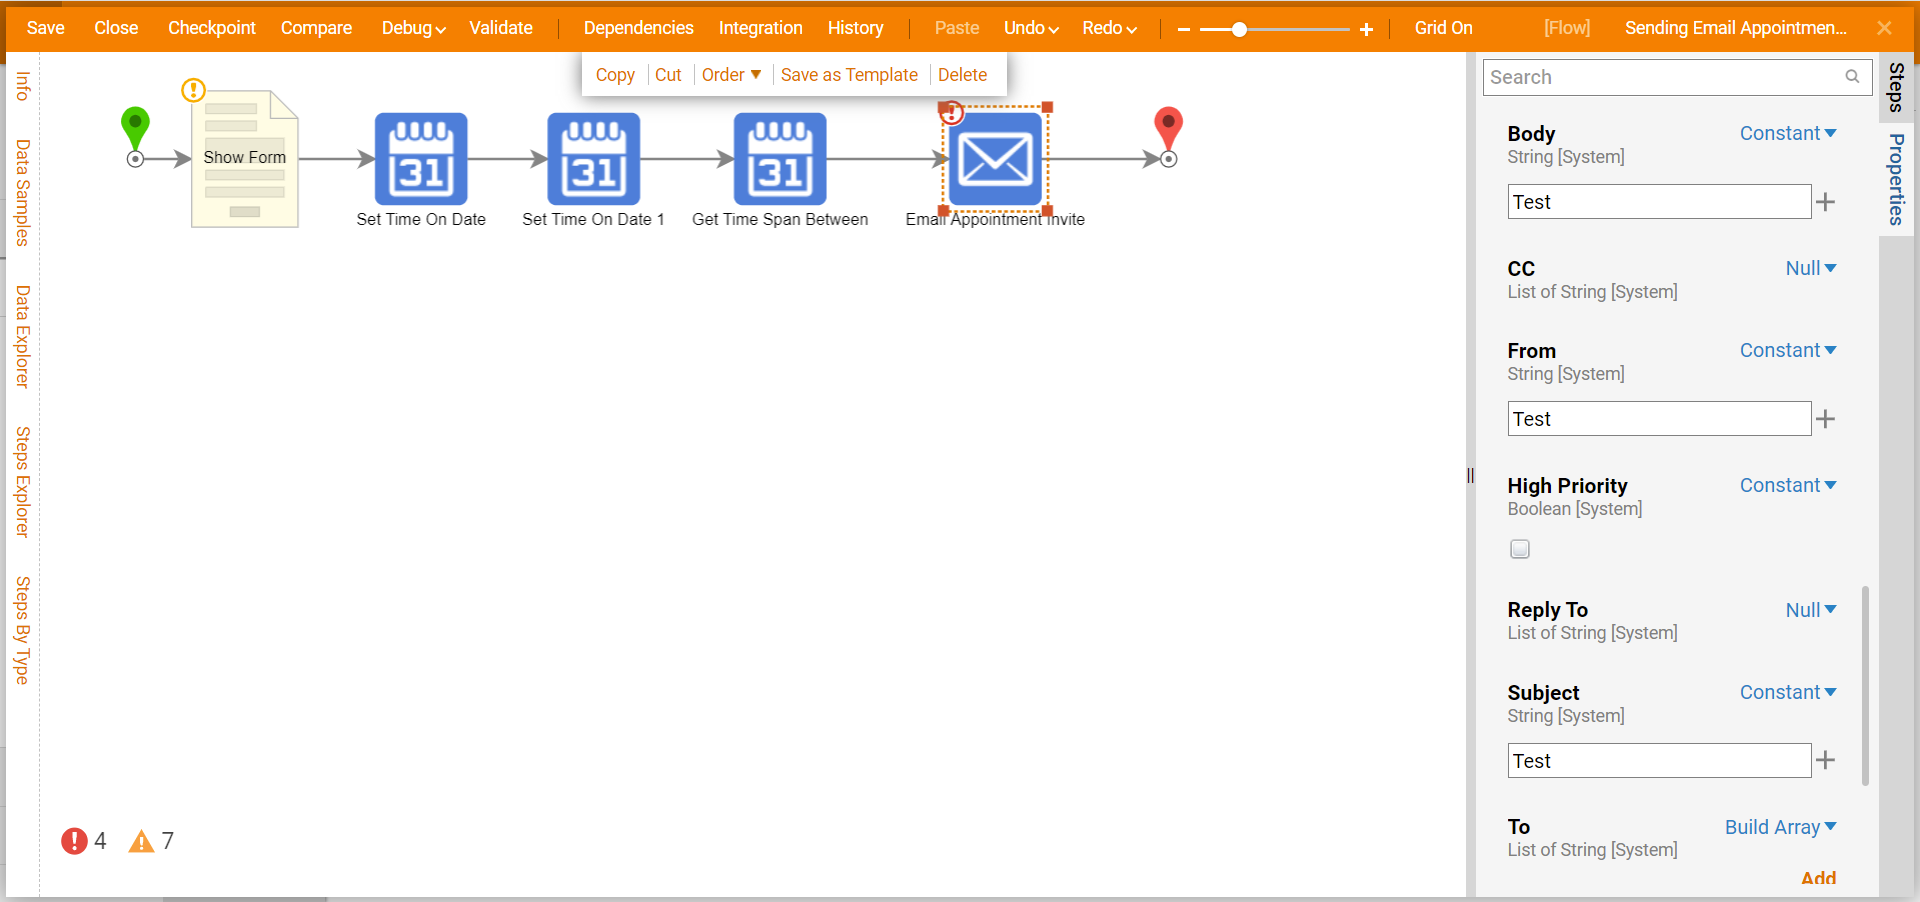
- Click the Submit path and navigate to All Steps [Catalog] > Data > Dates. Select Set Time On Date step and click ADD.
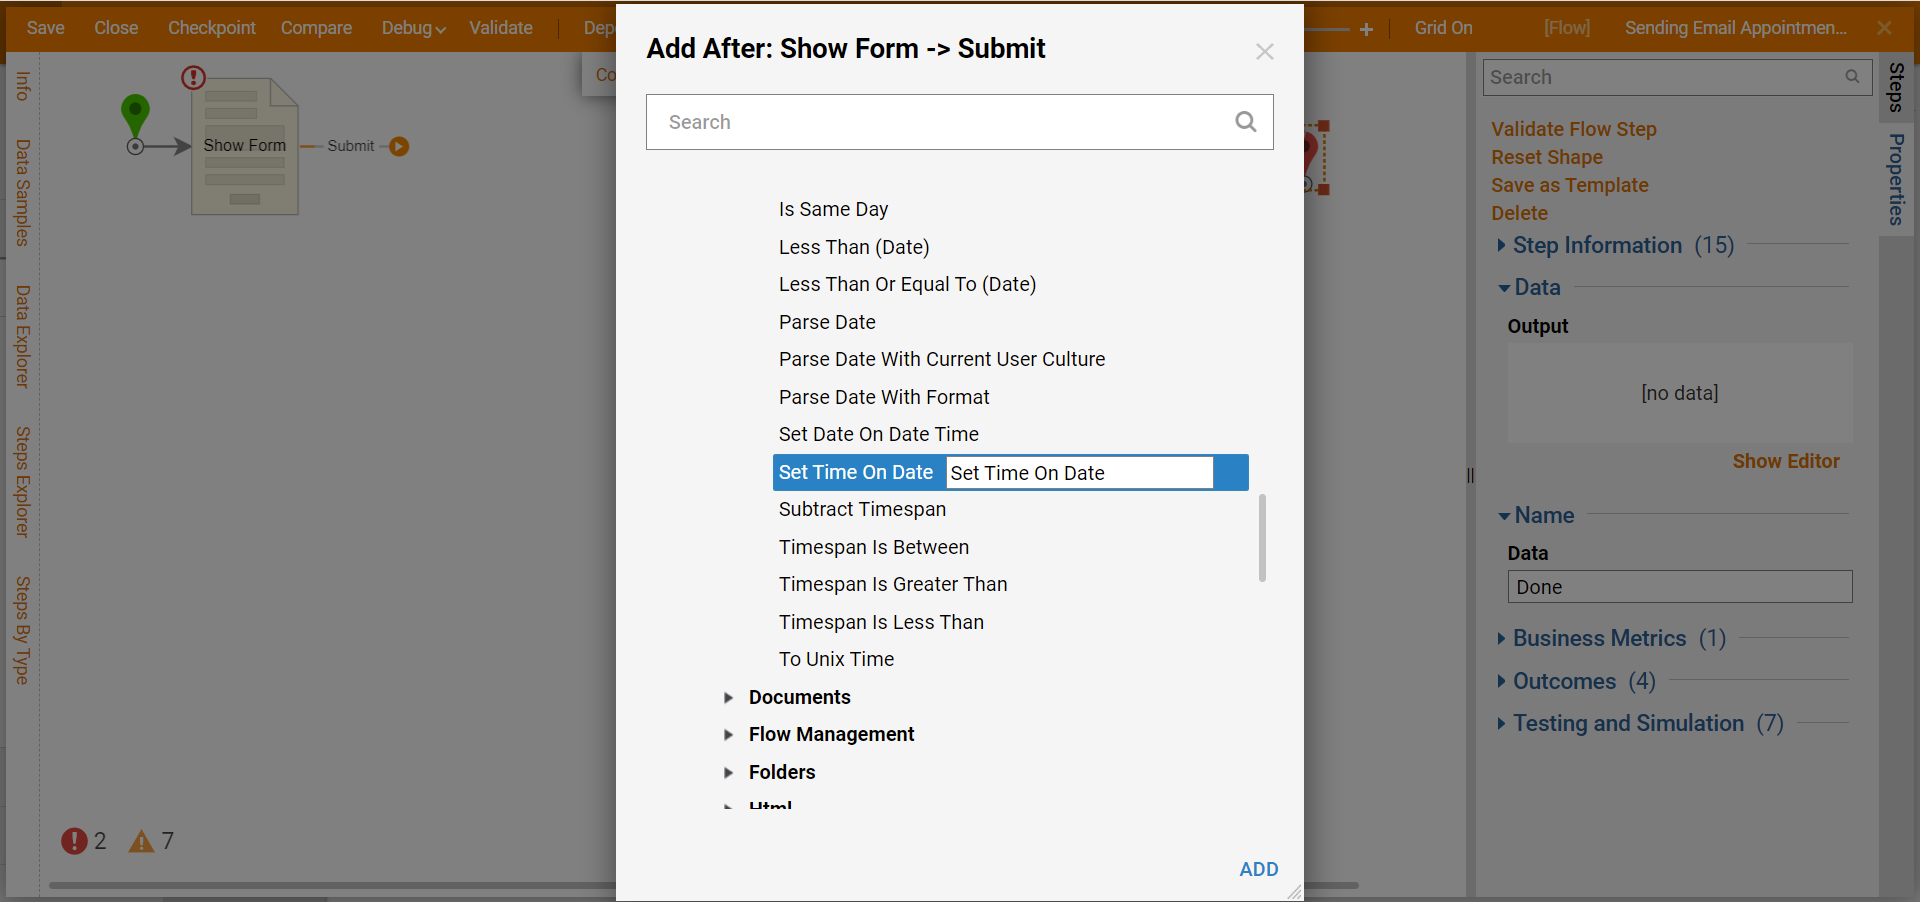
- On the Properties panel, click Edit Input Mapping.
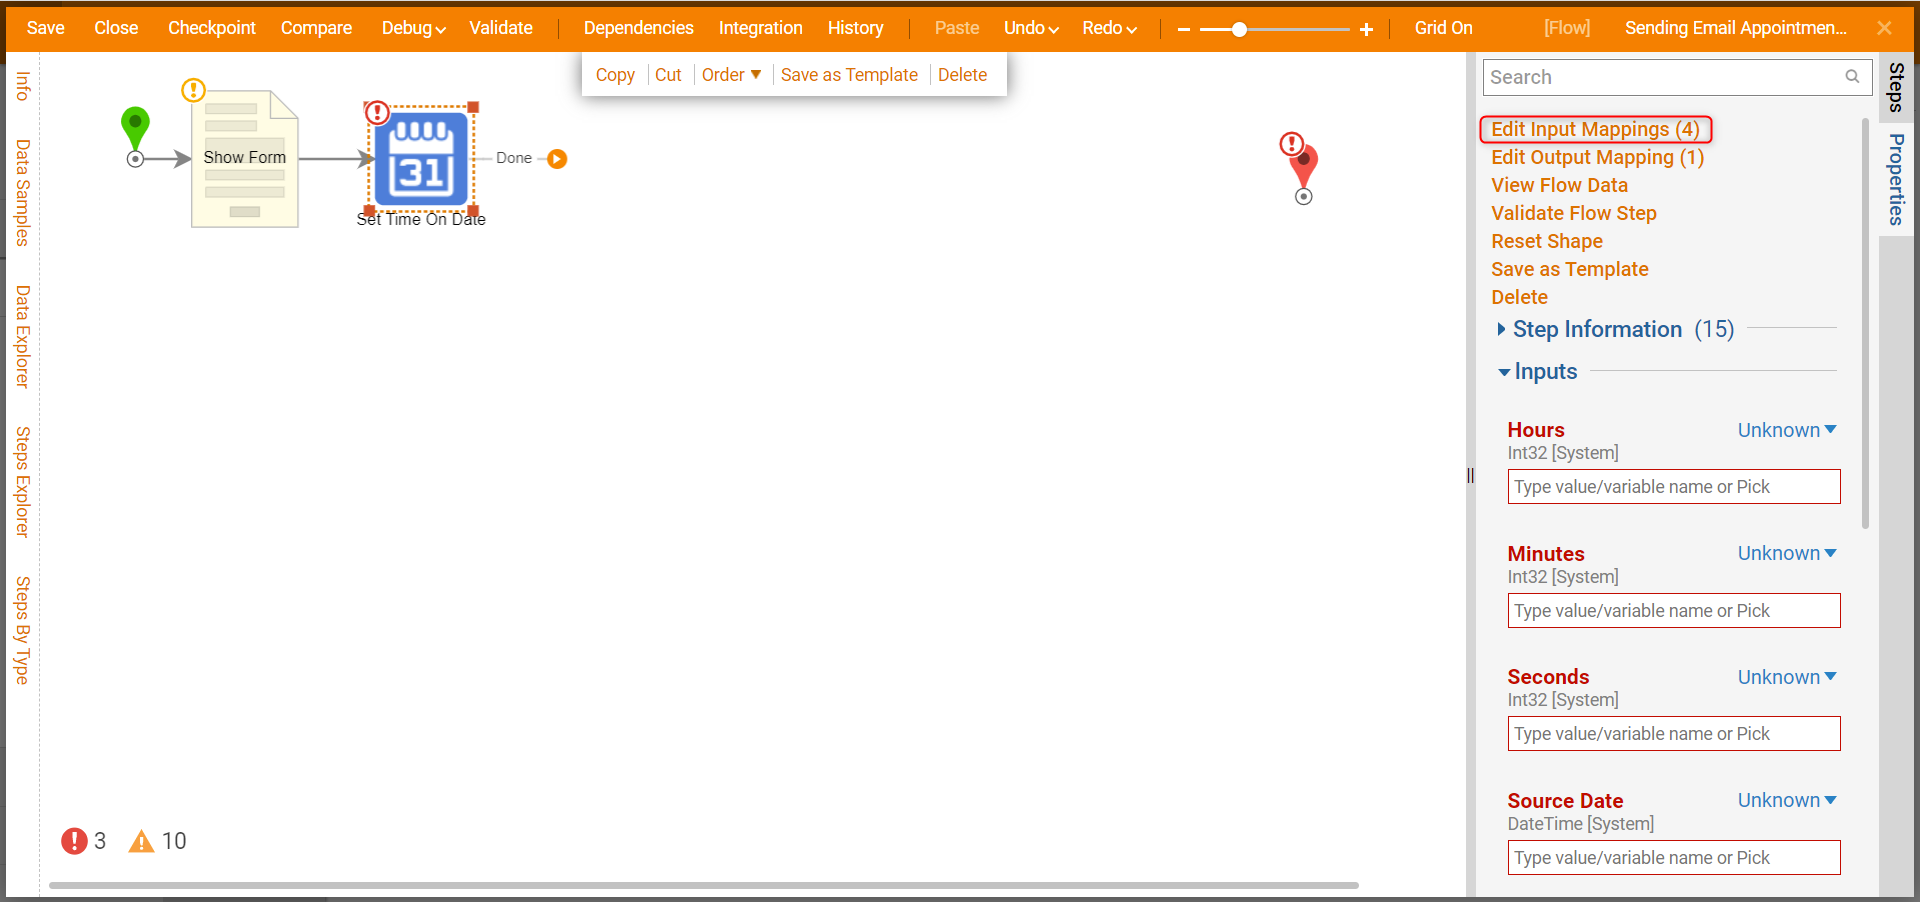
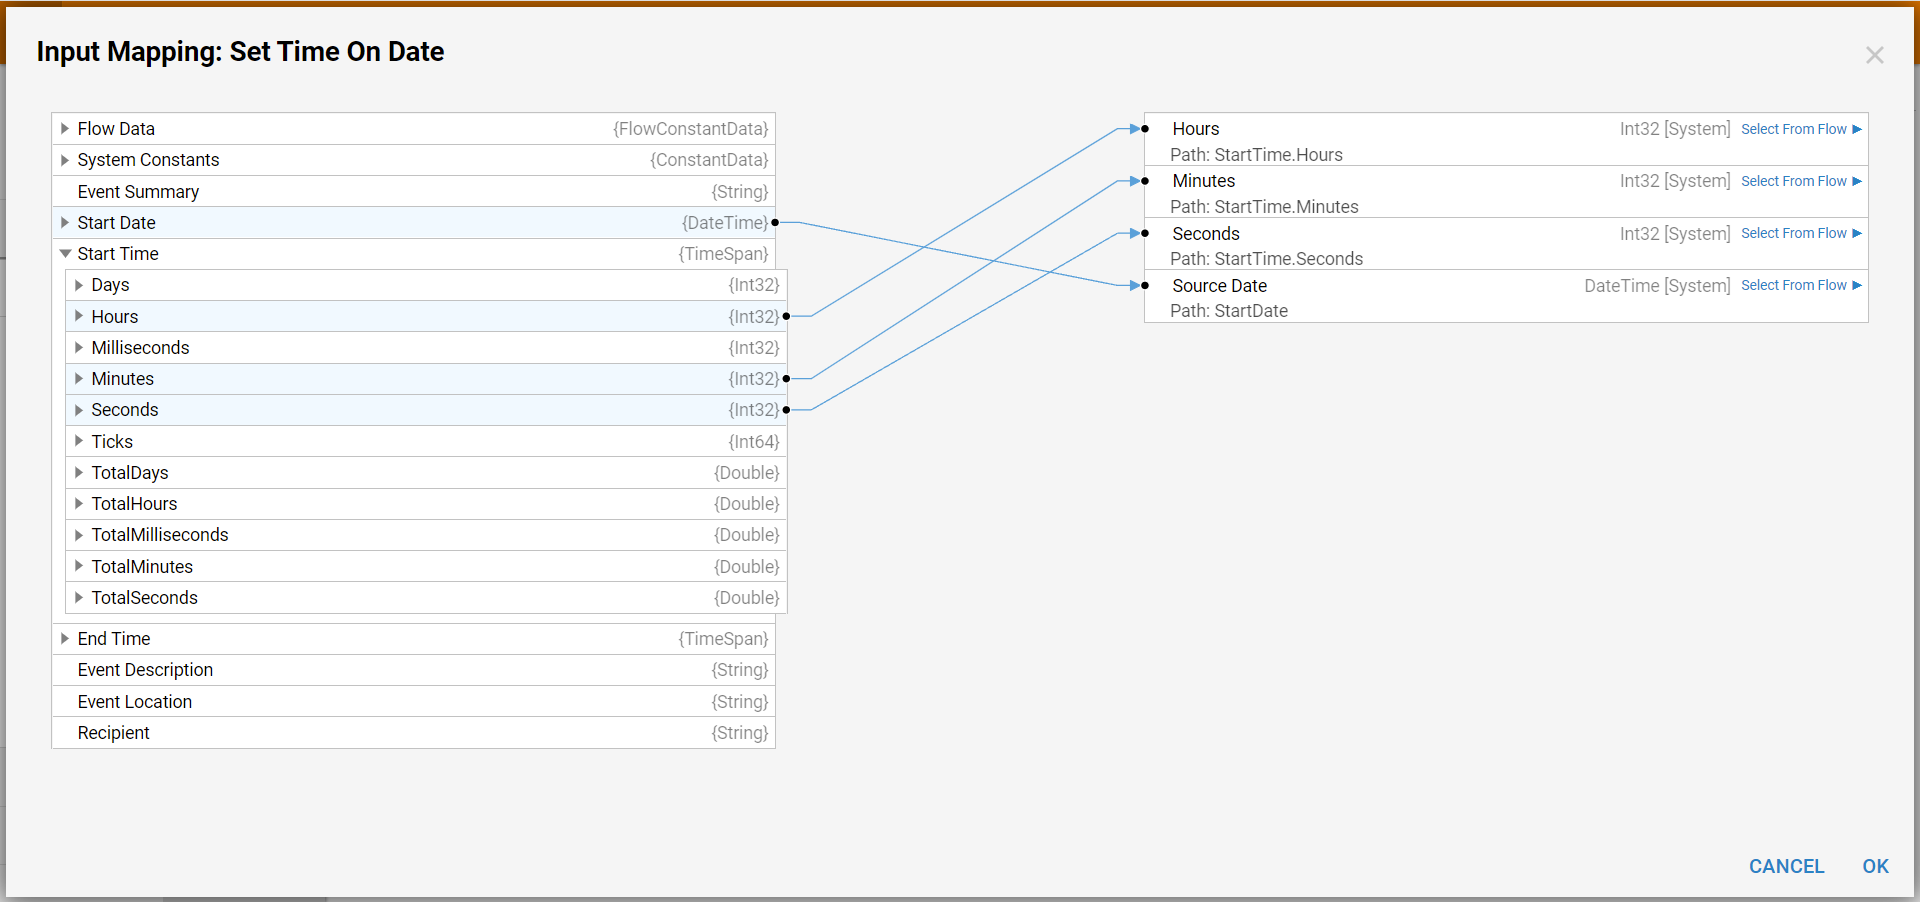
- Map the Date with the Source Date and the Start Time with the Hours, Minutes, and Seconds. Click OK.
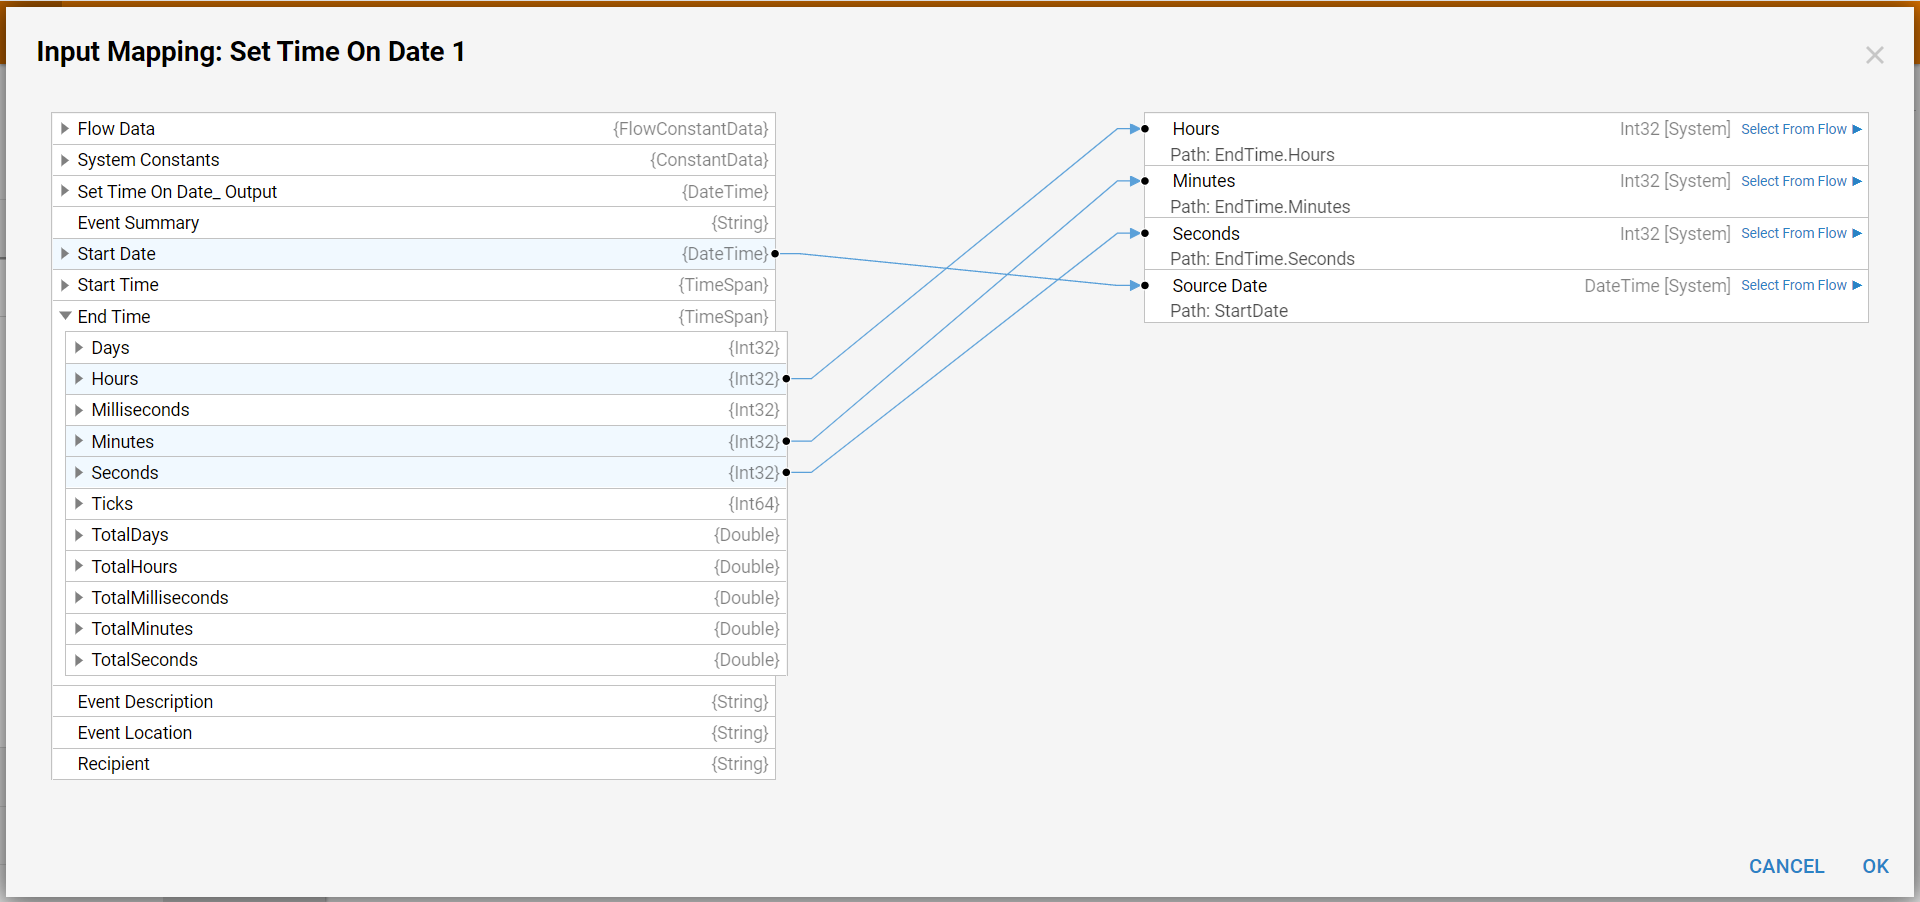
- Click the Done path and add another Set Time On Date step. Click Edit Input Mappings and map the EndTime to the Hours, Minutes, and Seconds. Click OK.
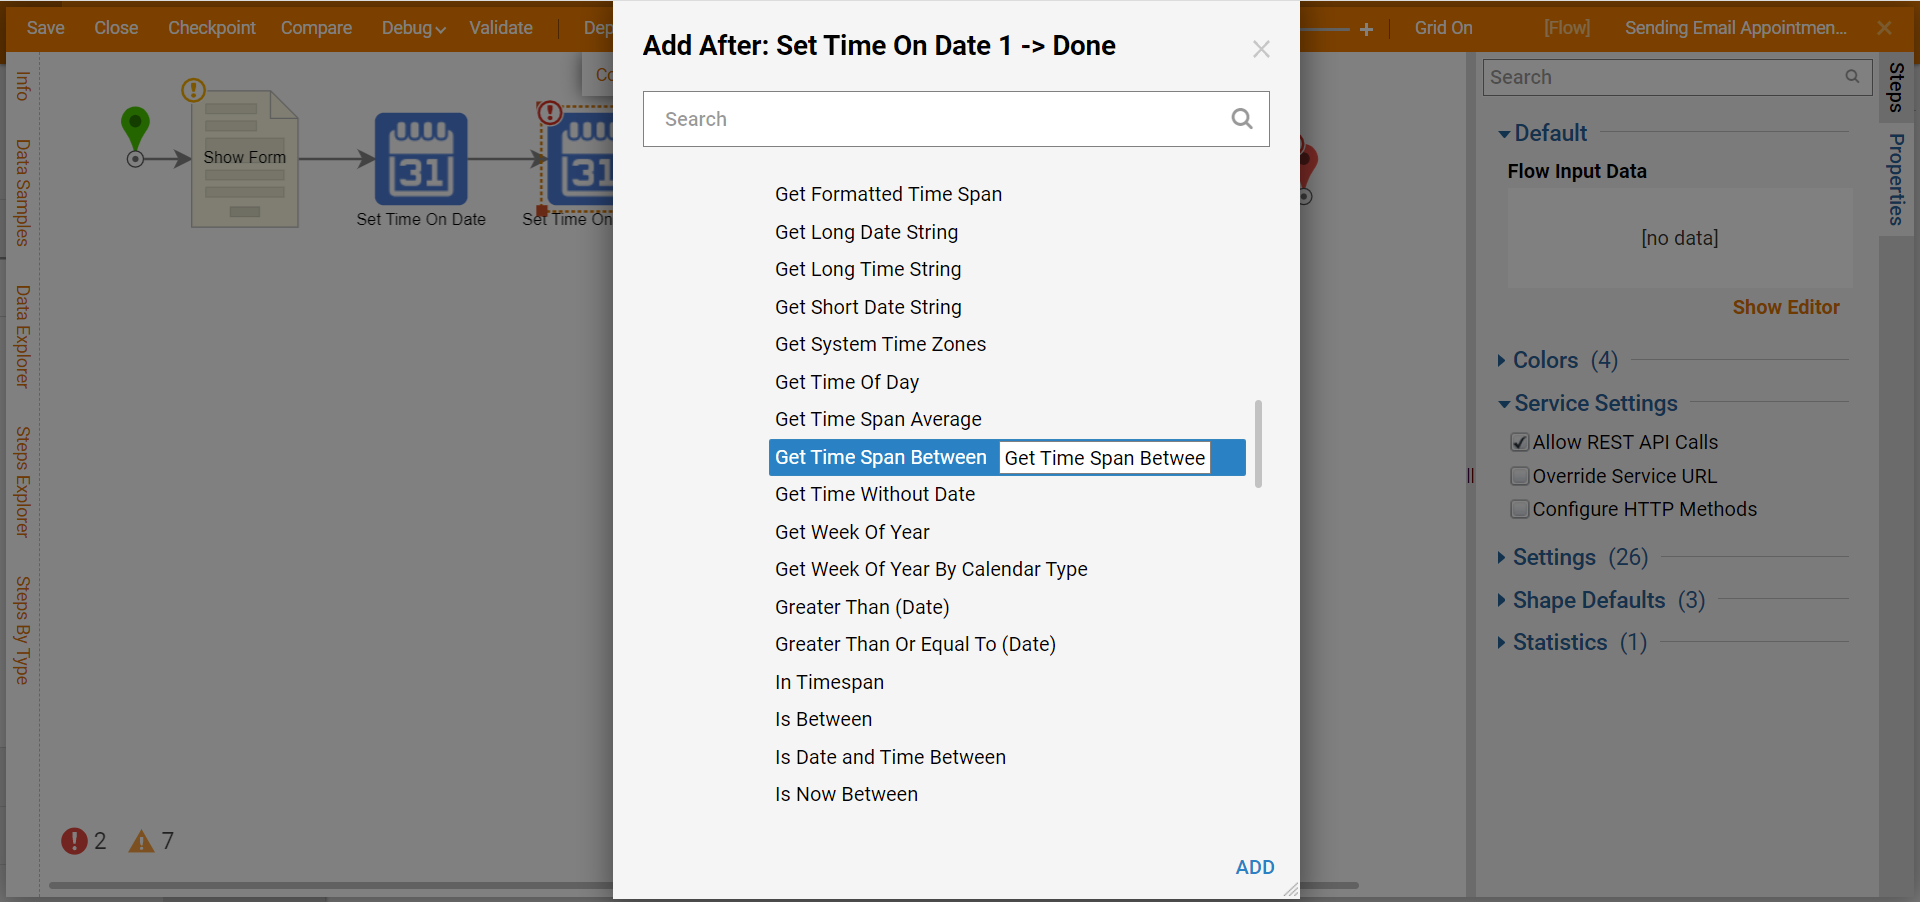
- Click the Done path and navigate to All Steps [Catalog] > Data > Dates. Select the Get Time Span Between step and click ADD.
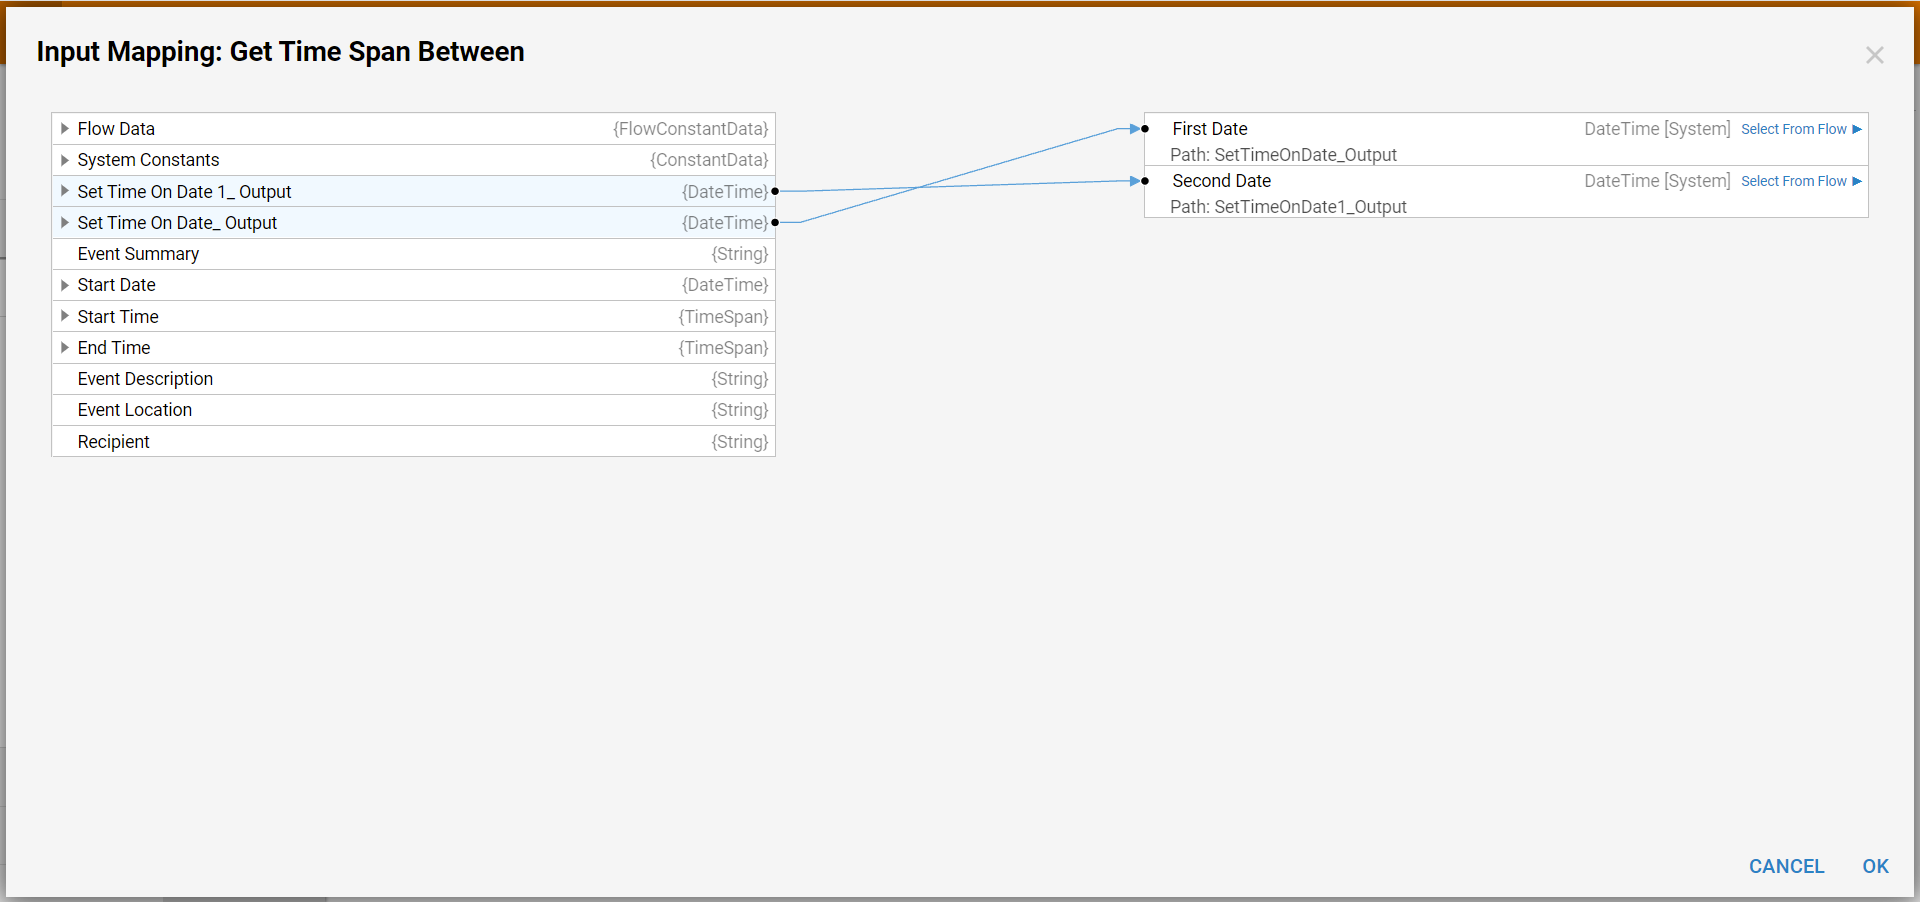
- Click Edit Input Mappings. Map Set Time On Date_ Output to First Date and Set time On Date 1_ Output to Second Date. Click OK.
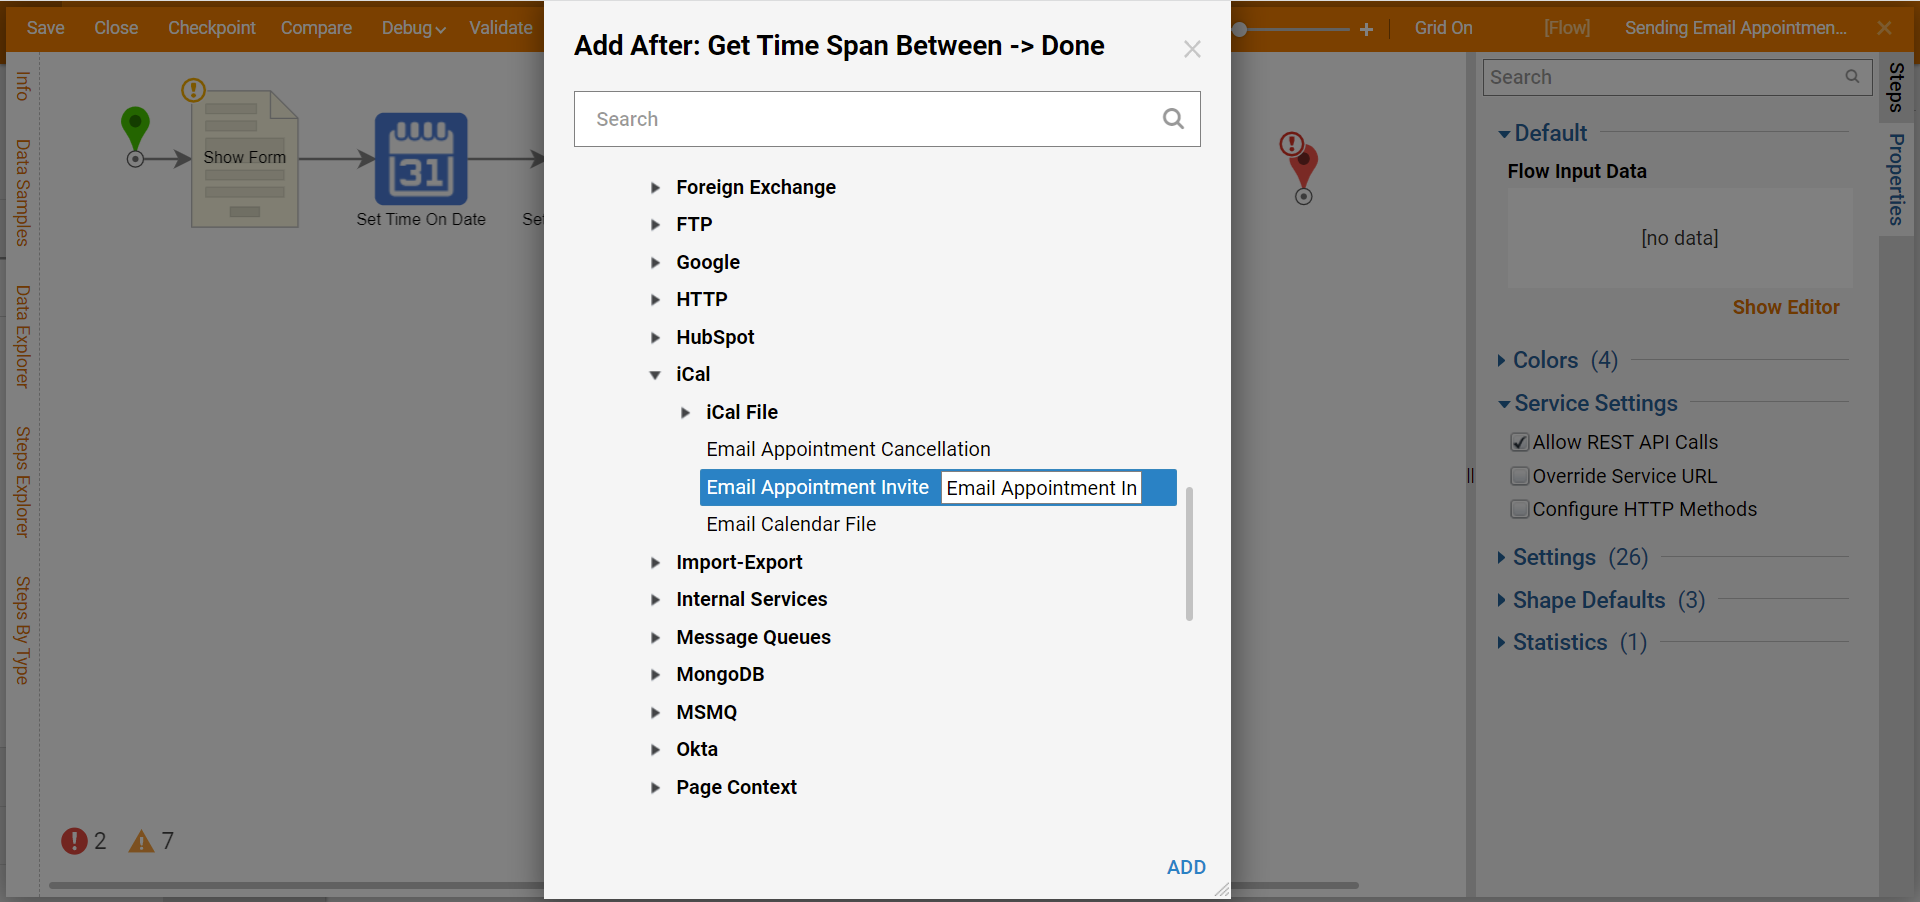
- Click the Done path. Navigate to Integrations > All Integrations > iCal. Select Email Appointment Invite and click ADD.
- Click Edit Input Mappings. Map the Event Summary to Summary, Get Time Span Between_ Output to Duration, Set Time On Date_ Output to Start Date/Time, Event Location to Location, and Event Description to Appointment Description. Click Constant next to the To field and select Build Array. Map Recipient to Item 0. Click the From field and enter a username. Click OK.
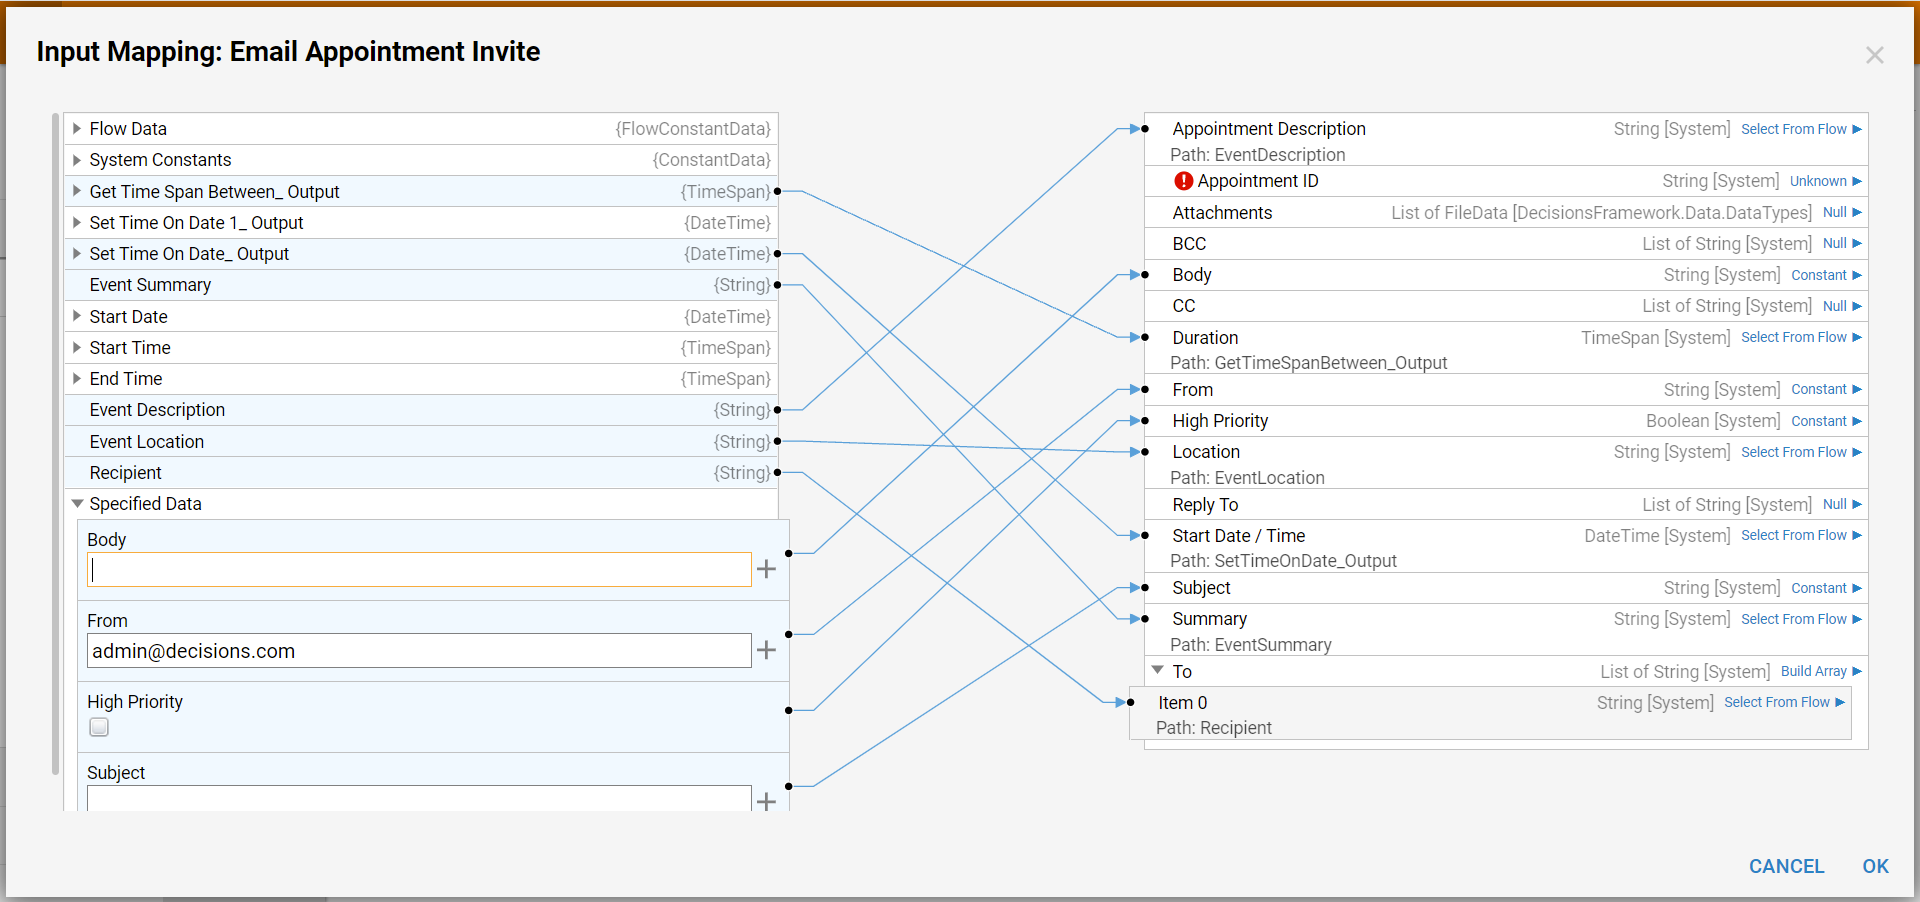
- Enter "12345" in the Appointment ID field. Enter "Test" in the Body and Subject field. Connect the Sent path to the End step. Click Save to save all changes to the Flow.
Debug
- Click Debug on the top action bar. Click FULL.
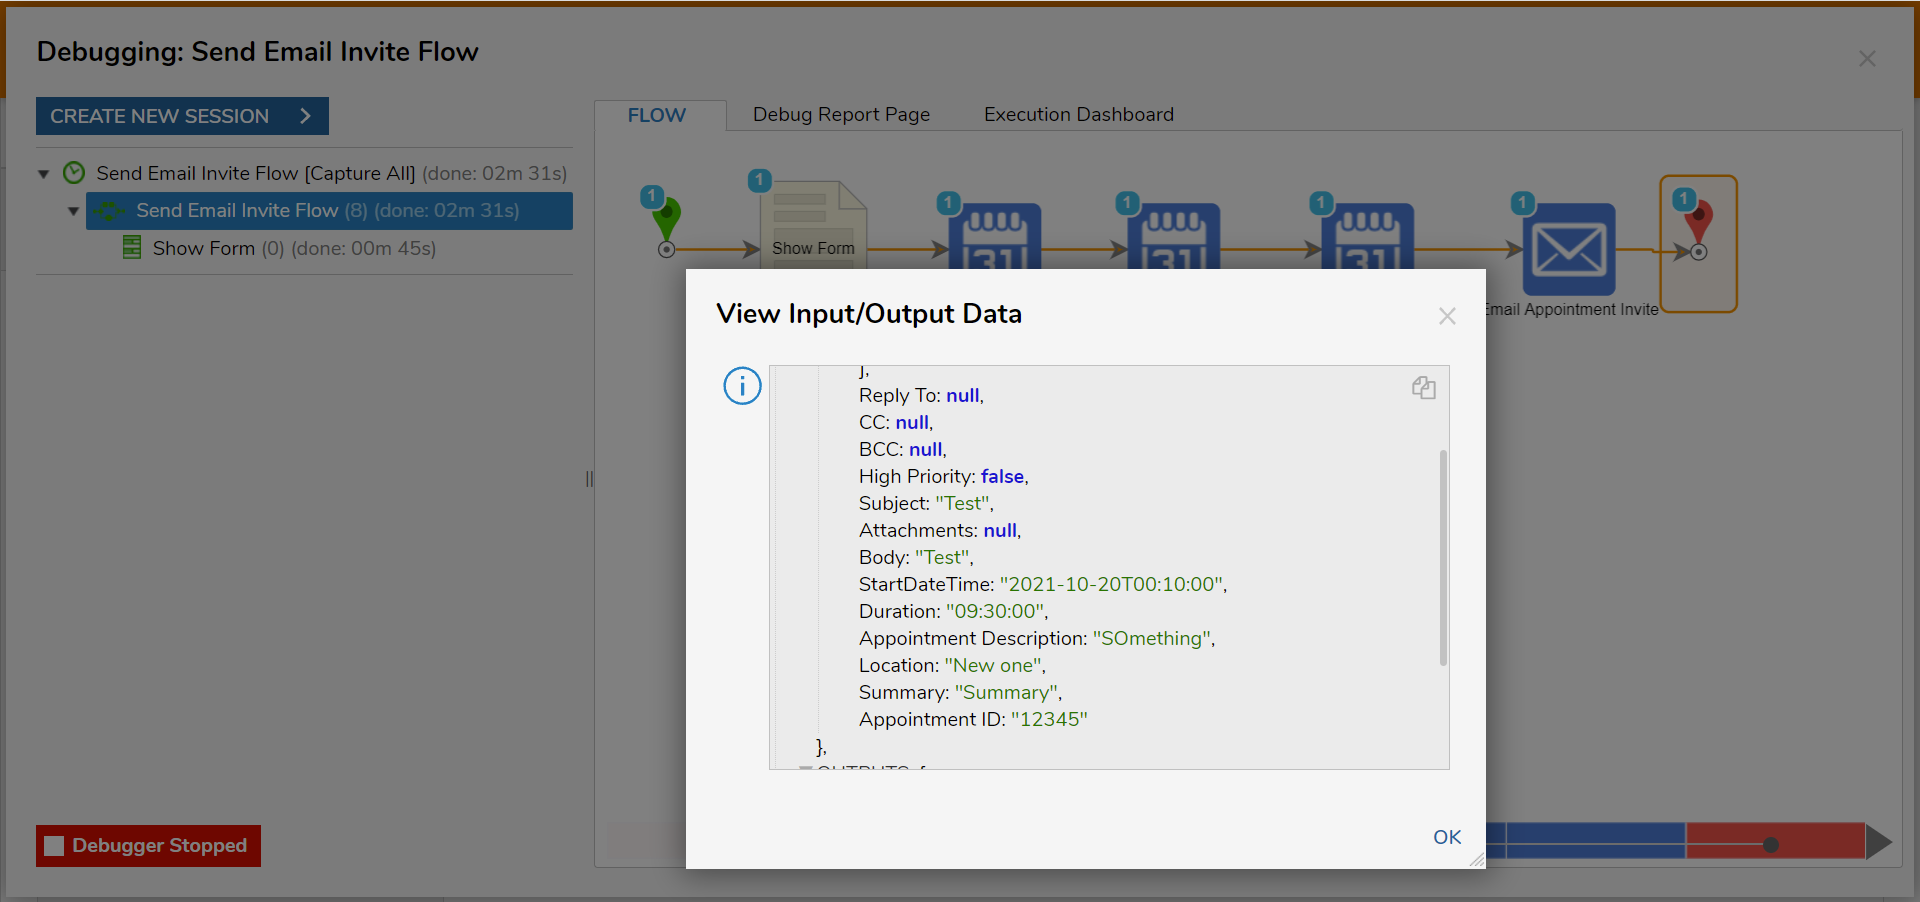
- Fill in the Form and click Submit. After the debugger runs, an email will get sent to the recipient specified with the event invitation. Click the Email Appointment Invite step, select Execution 1, and select View Input/Output Data.
