Overview
Through proper design and setup, a user can configure a Form to Assign it to a specific Account, Group, or Role. To avoid having to create a new Assignment with the same parameters for another user, Assigned Forms offer the ability to be Reused in future processes. The following tutorial demonstrates how to set up an Assignment in a manner where Dates (Warn Date, Late Date, etc...) do not change when the Assignment is Reassigned.
Example
- First, Create and Name a Flow with an Assigned Form.
- Once in the Flow Designer, search for and add the Add Task step from the Steps tab on the right.
- Select the Form and edit the Assignment Properties.
- Input the Assignee of the Form via Assign To, and create an Assignment Name and Assignment Action Name.
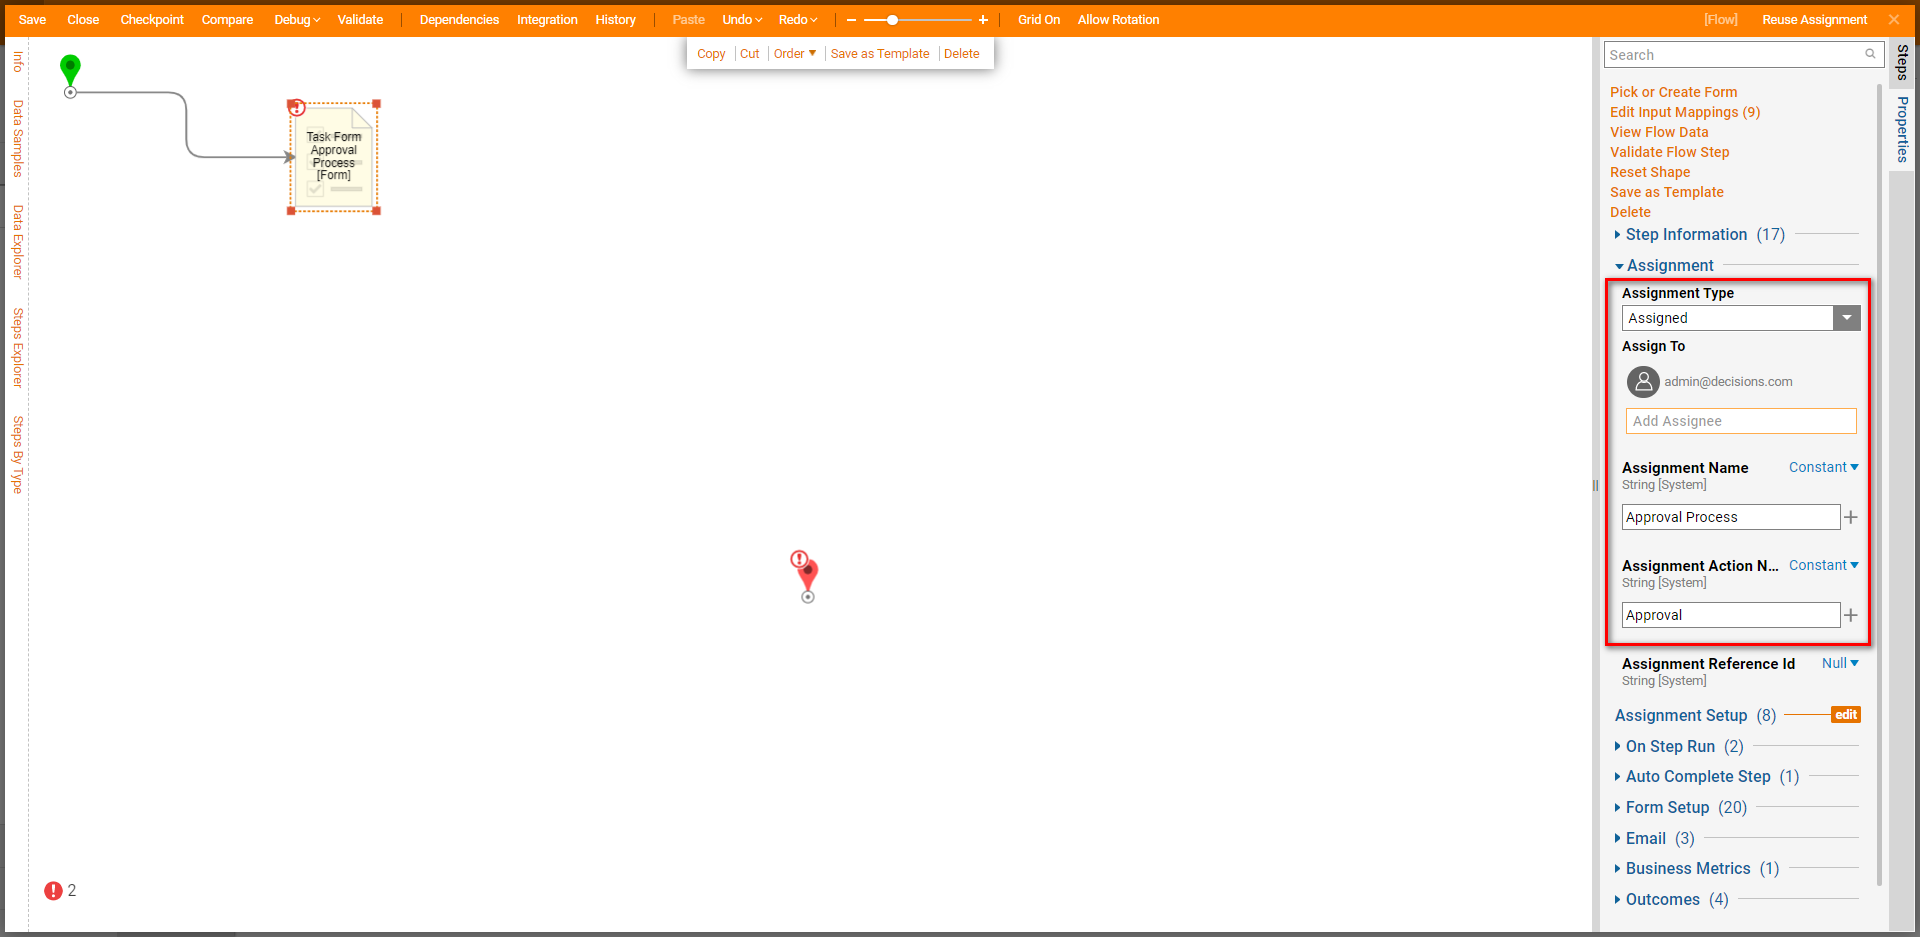
- With the Form still selected, click the Pick or Create Form link.
- Give the Form a Name and then select CREATE.
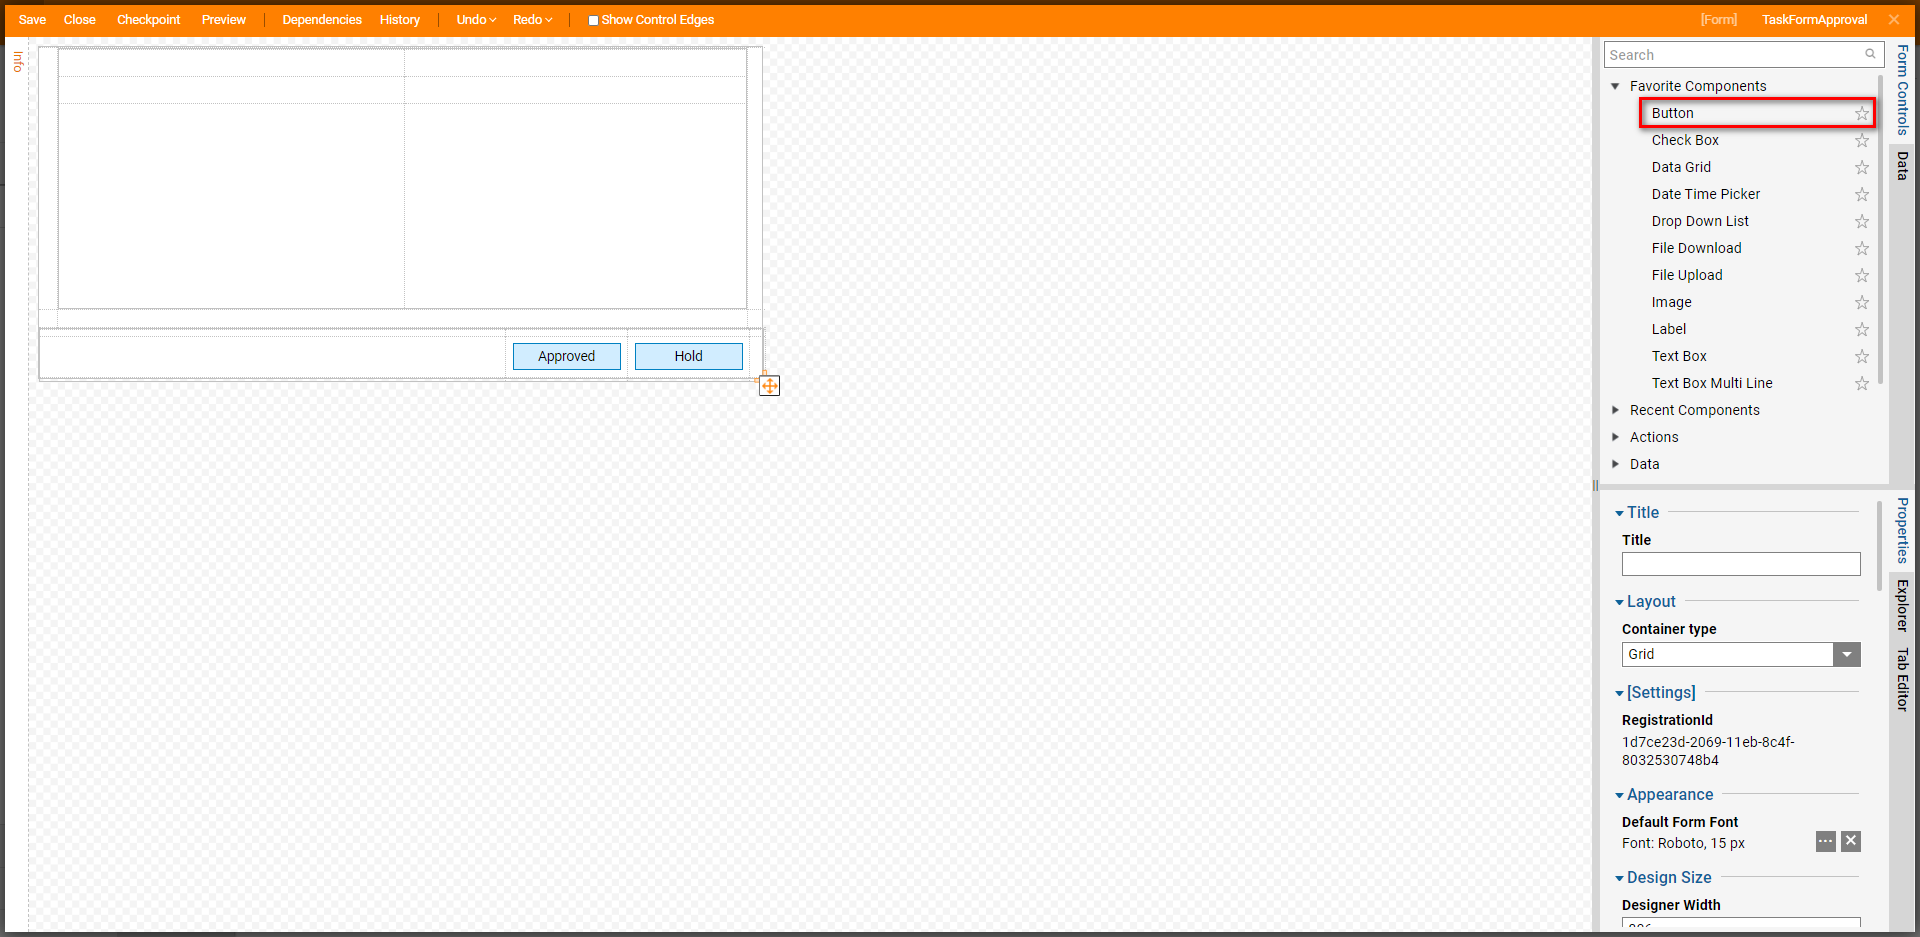
- Configure the Form for the Task. In this example, the Form is configured with two Button Components: one for the Approve path and one for the Hold path.
- This completes the Form's design. Save and Close to return to the Flow Designer. For simple demonstrative purposes, this Form contains two simple buttons. However, if required, Forms can be used to pass on such data as data from a filled out Form. For additional information on creating Forms and passing Flow data through them, see Displaying Flow Data on Forms.
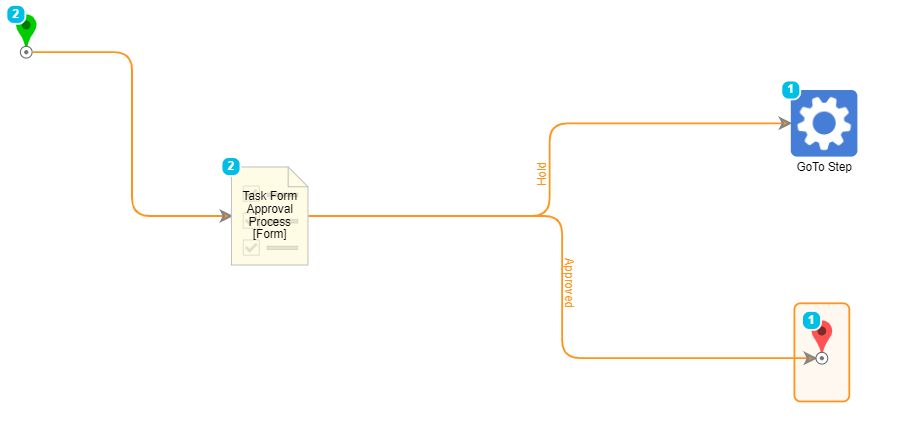
- Back in the Flow Designer, connect the Approved path to the End step.
- Navigate to the Flow Management Folder in the Steps tab and add a GoTo step component to the Flow. Connect it to the Hold path.
- With the GoTo Step selected, select [Start Step] from the GoToStepName drop down menu.
- Now, when a user selects Approved, the Flow runs to the End step and the Assignment clears out.
- Whenever they select Hold, the Assignment is Reassigned.
.png)
- Next, select the Task Form step and select the Edit button next to Assignment Setup to edit the Assignment's settings.
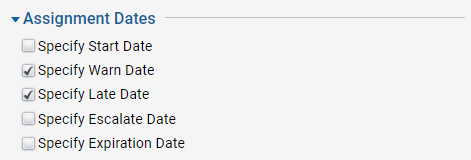
- Toggle the Specify Warn Date and Specify Late Date checkboxes.
- Then, select Compute Date for both the Form Assignment Warn Date and Late Date Inputs. Though this document discusses a number of Assignment Settings, it is not all-encompassing. For further information on Assignment Settings and Reuse configuration, see Assignment Settings and Configuration.
- Set up the Offset for Warn Date to be 10 minutes after the Start Date, and the Offset value for Late Date to be 10 hours after.
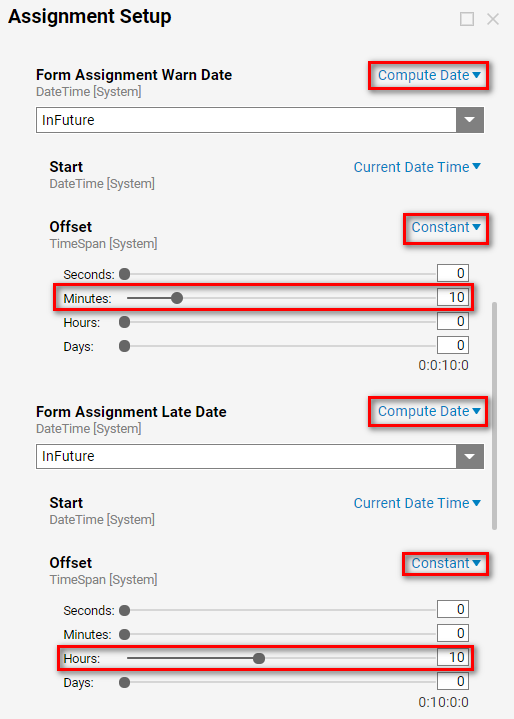
- Scroll down to Reuse Assignment and select If Same Assignee from the drop down; this reuses the Assignment upon Assignment to the same initial Assignee. Selecting a Reuse option will trigger additional Reuse settings to display that can be enabled via checkbox.
- Select DONE after configuring the Assignment Setup.
- Save and Close the Flow.

Debug
- From the Flow Designer, select the Debug link from the top toolbar.
- Then, run the Flow in FULL. An initial Assignment Notification will appear in the upper right-hand corner.
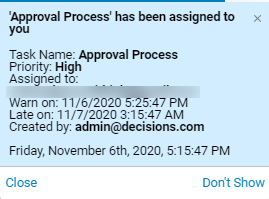
- Navigate to the Inbox to confirm that an Assignment was received displaying the proper Warn and Late Date.
- Right-click and work the Assignment.

- Complete the Assignment by selecting Hold. Doing so will trigger the Flow to navigate back to the Start step and rerun the Flow. As a result, an additional Assigned Form alert will appear.
- If the Assignment is properly setup, the Warn Date and Late Dates will stay the same. This indicates that the same Assignment was reused and Assigned to the same user.


- Select Approved this time and check to ensure that the Flow has completed both paths.
