Overview
This tutorial demonstrates how to configure the settings for Report Data to Output information onto an Excel Template. A Report should already be created to upload Report Data onto an Excel Template.
Example
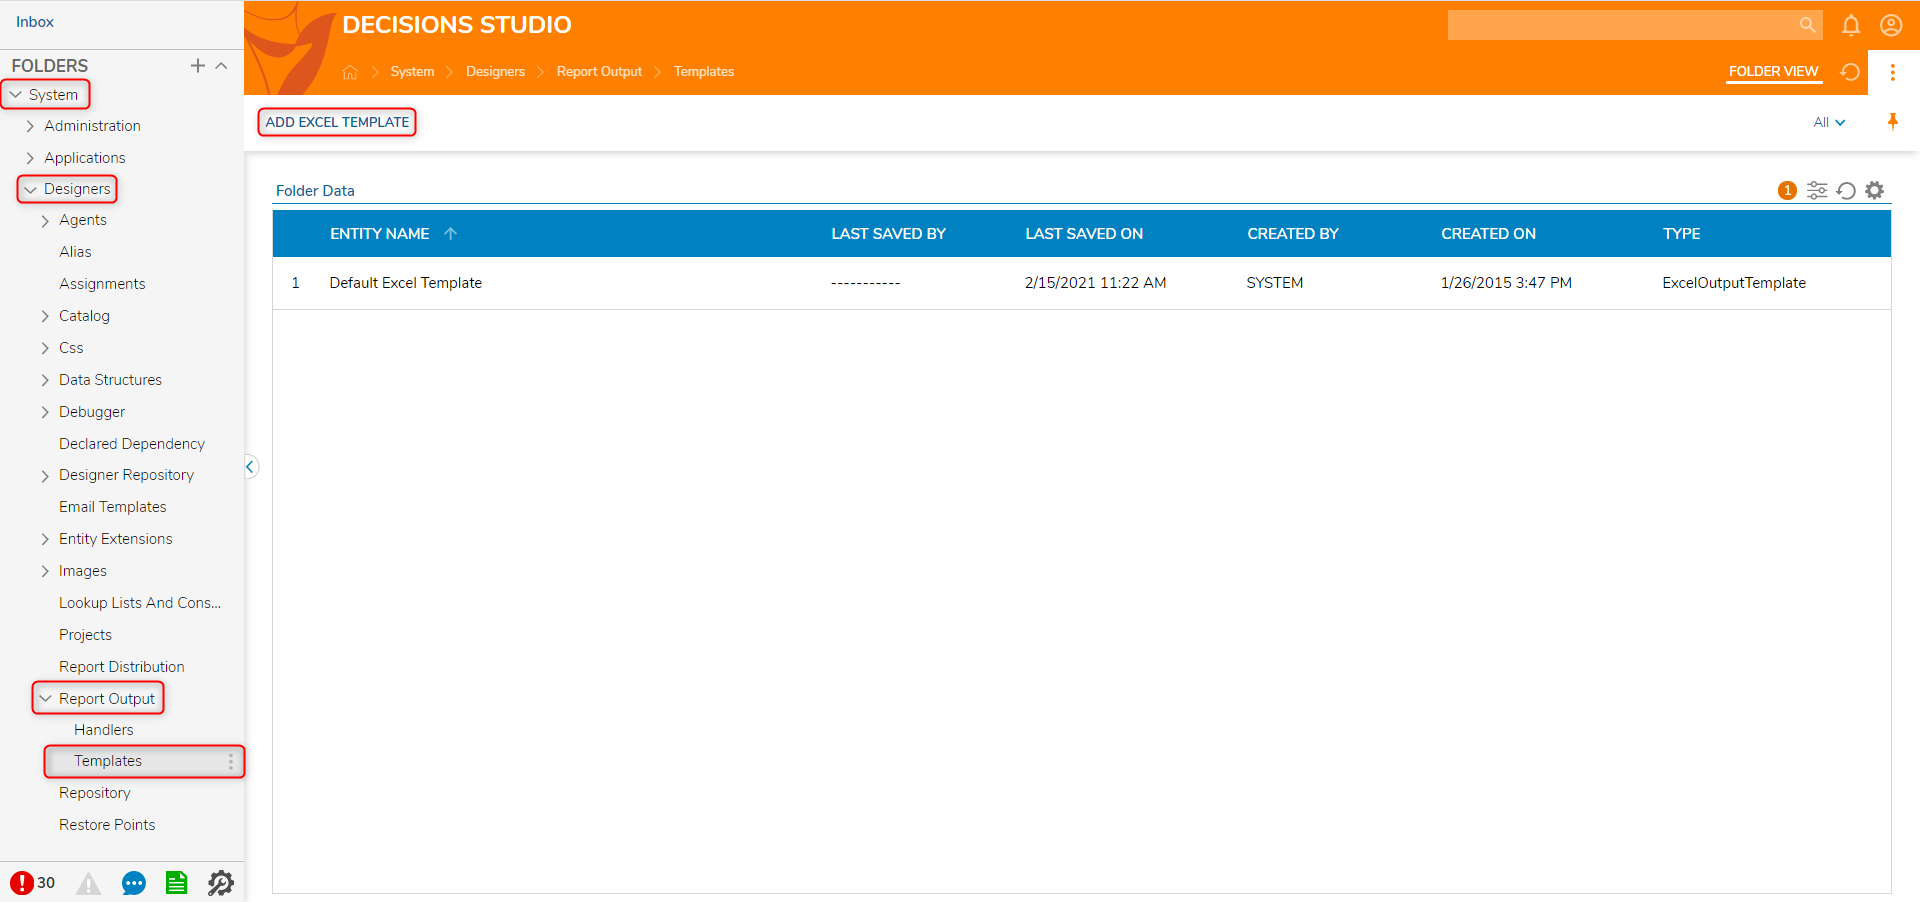
- Navigate to the System > Designers > Report Output > TemplatesFolder, select Add Excel Template from the Global Action Bar.
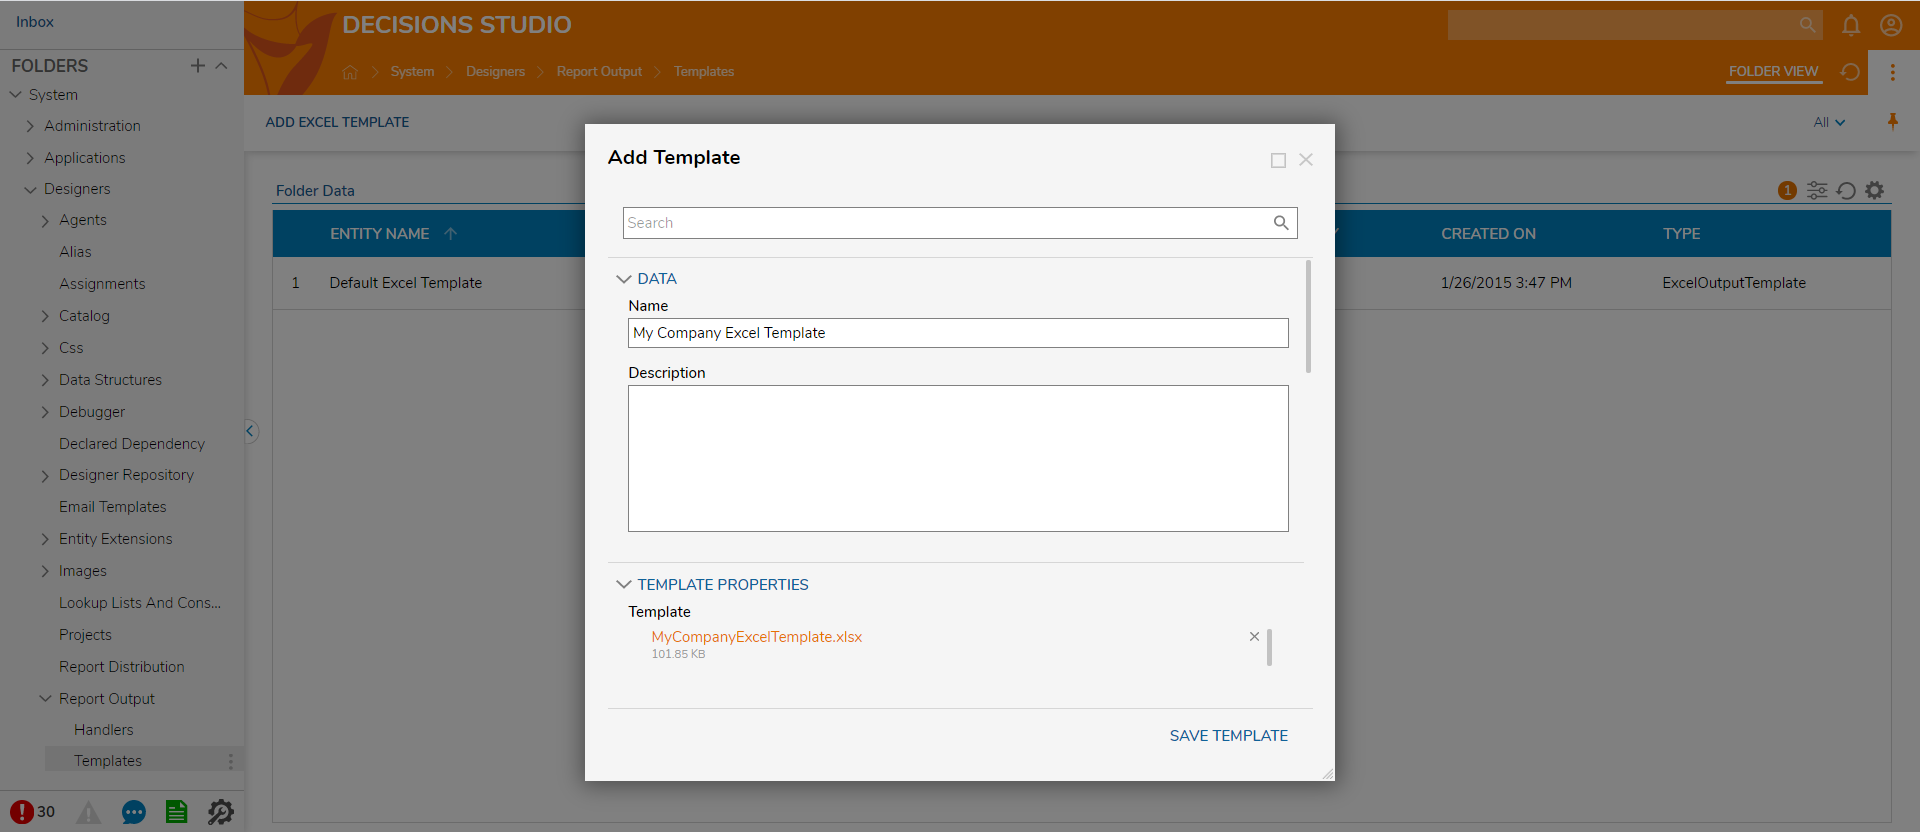
- In the Data section under Name, create the Template name.
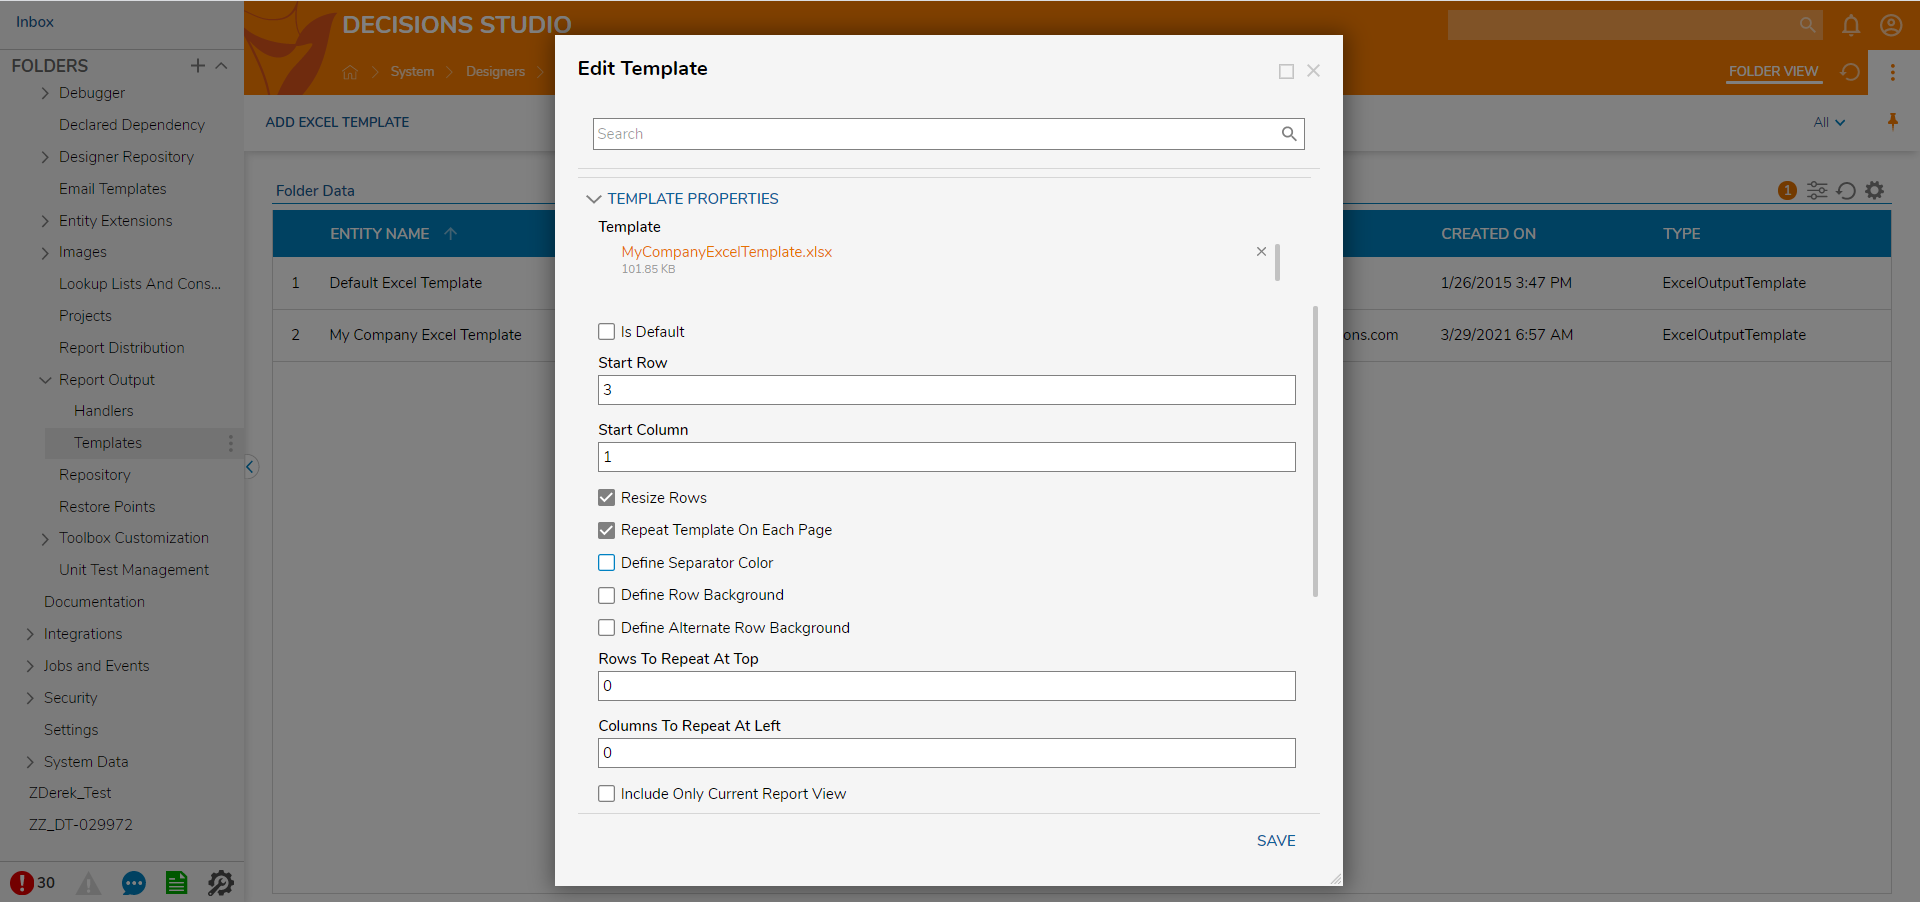
- In the Template Properties section under Template Drag or Choose the Excel File Template.
- This Excel File can contain any excel components like logos and column formatting.
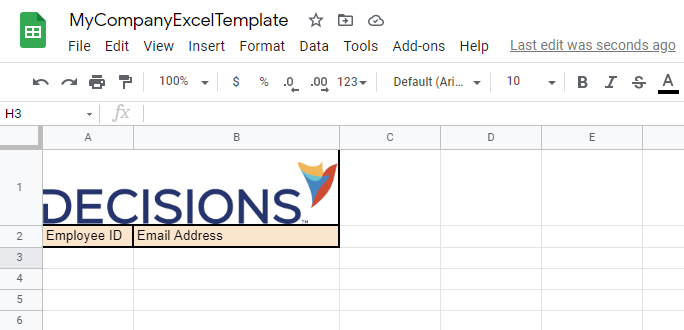
- Configure the Report Data to the Start Row and Start Column. The Report Data will populate starting at the specified rows and columns. This example starts in Row 3 and Column 1.
- Select SAVE to save the Excel Template.
- The new Excel Template is saved in the Templates folder and available in the drop-down to use when downloading the report to send.
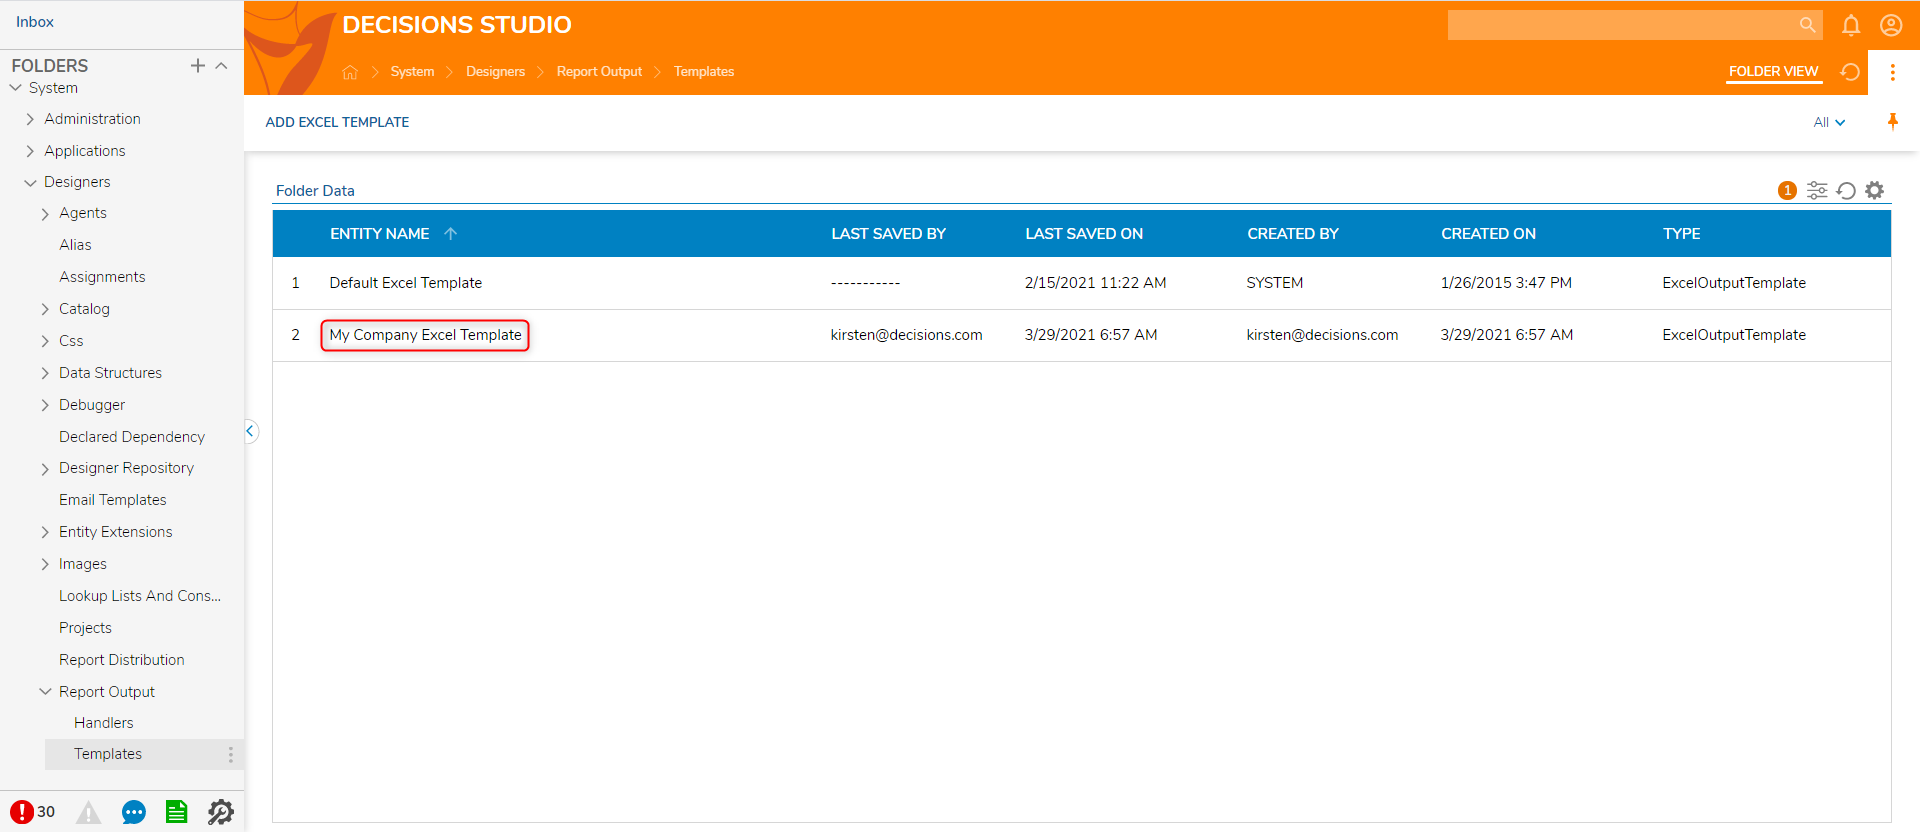
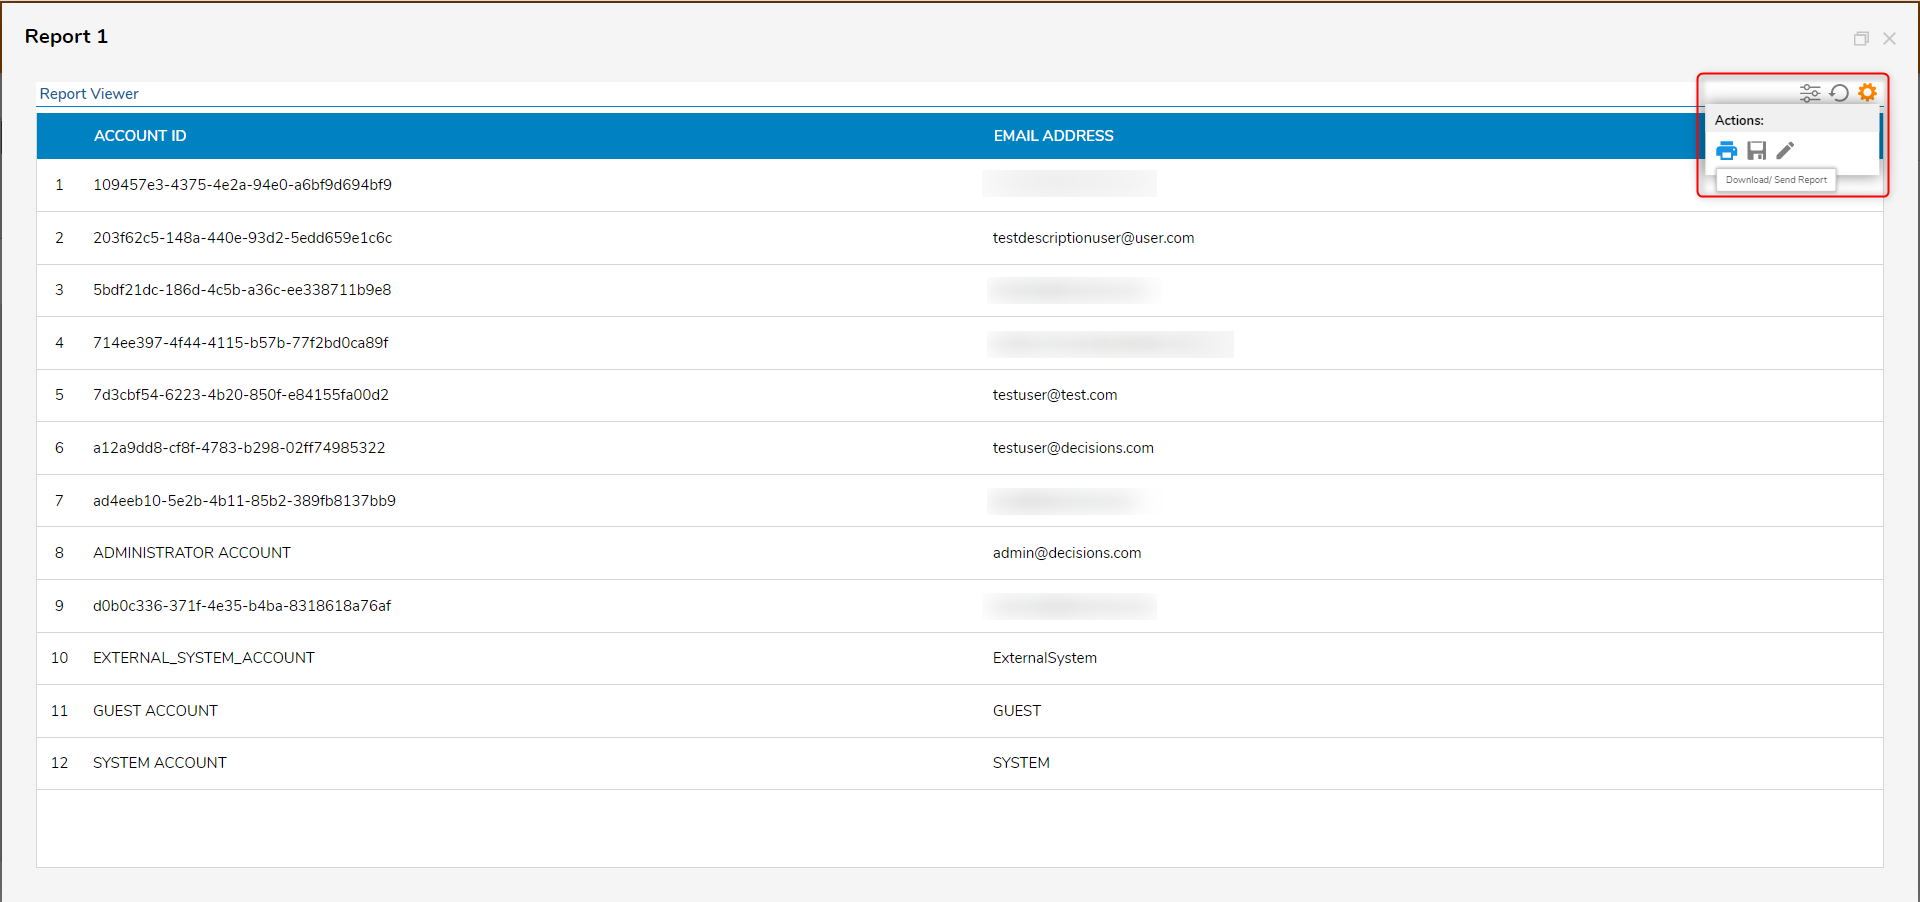
- After the Excel Template has been created, navigate to the Report that will populate the Excel File Template (My Company Excel Template).
- Select the gear icon to open the Report Actions. Select the Download/Send Report icon.
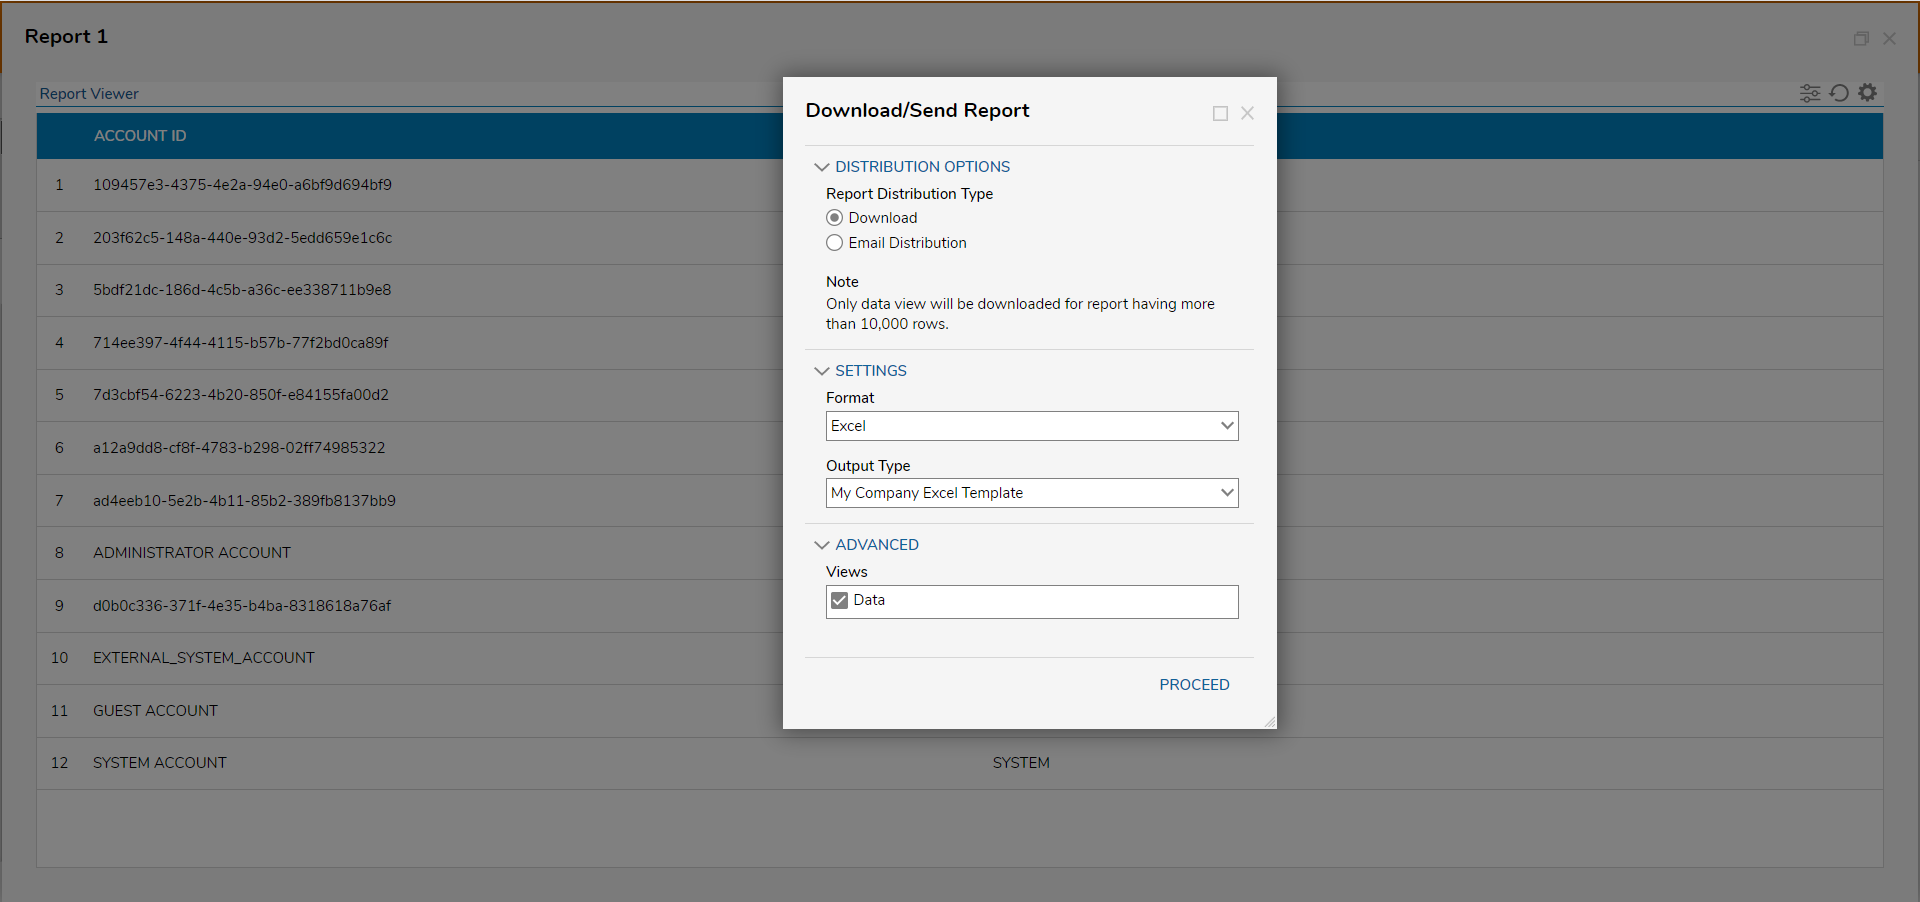
- In the Download/Send Report dialog, under Settings > Format, select Excel. Under Output Type, choose My Company Excel Template.
- Select Proceed to continue and download.
- Select the Download Exported Report link to save the Report.
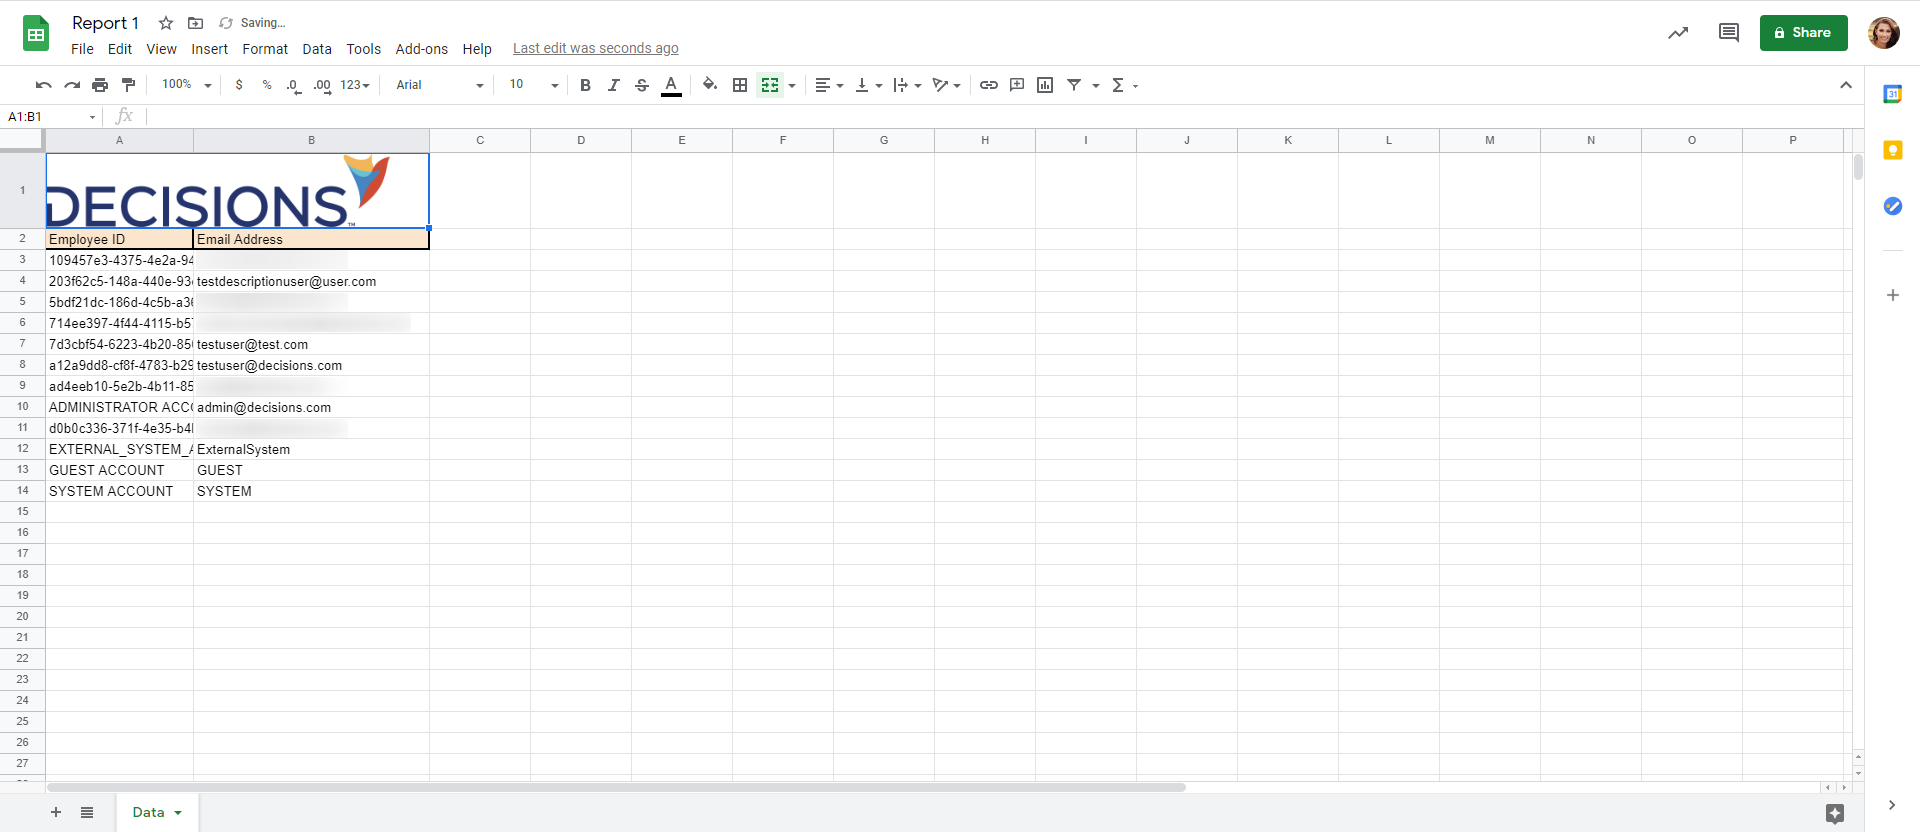
- Now open the Report Excel File in Excel, Google sheets, or any other compatible software. The Report will now be completely uploaded to the custom Excel Template.
