Overview
Post to Flow Handler is a behavior type that allows arbitrary data to be sent to a Flow via REST Integration by POST or GET methods.
Data utilized in a Post to Flow Handler does not nave have to conform to the contract obtained via the View Integration Details page. Flows using this Behavior can operate as a Named User; therefore, calls utilizing the Flow circumvent the need for specification of user credentials.
Typically, the REST Service API shows instructions for calling the Flow, as well as the Output. Post to Flow Handlers simply provide a URL for users to call on the Flow via API. Additionally, Post to Flow Handlers are designed to be very flexible; usually REST service calls require passing parameters to a Flow in a strictly structured XML encoded way. By contrast, Post to Flow Handlers are designed to post data into the Flow in a more simplistic "query key=value style", or through plain text format. As a Flow Designer, users handle the "Call Data" variable and make use of it in their Flow.
Example
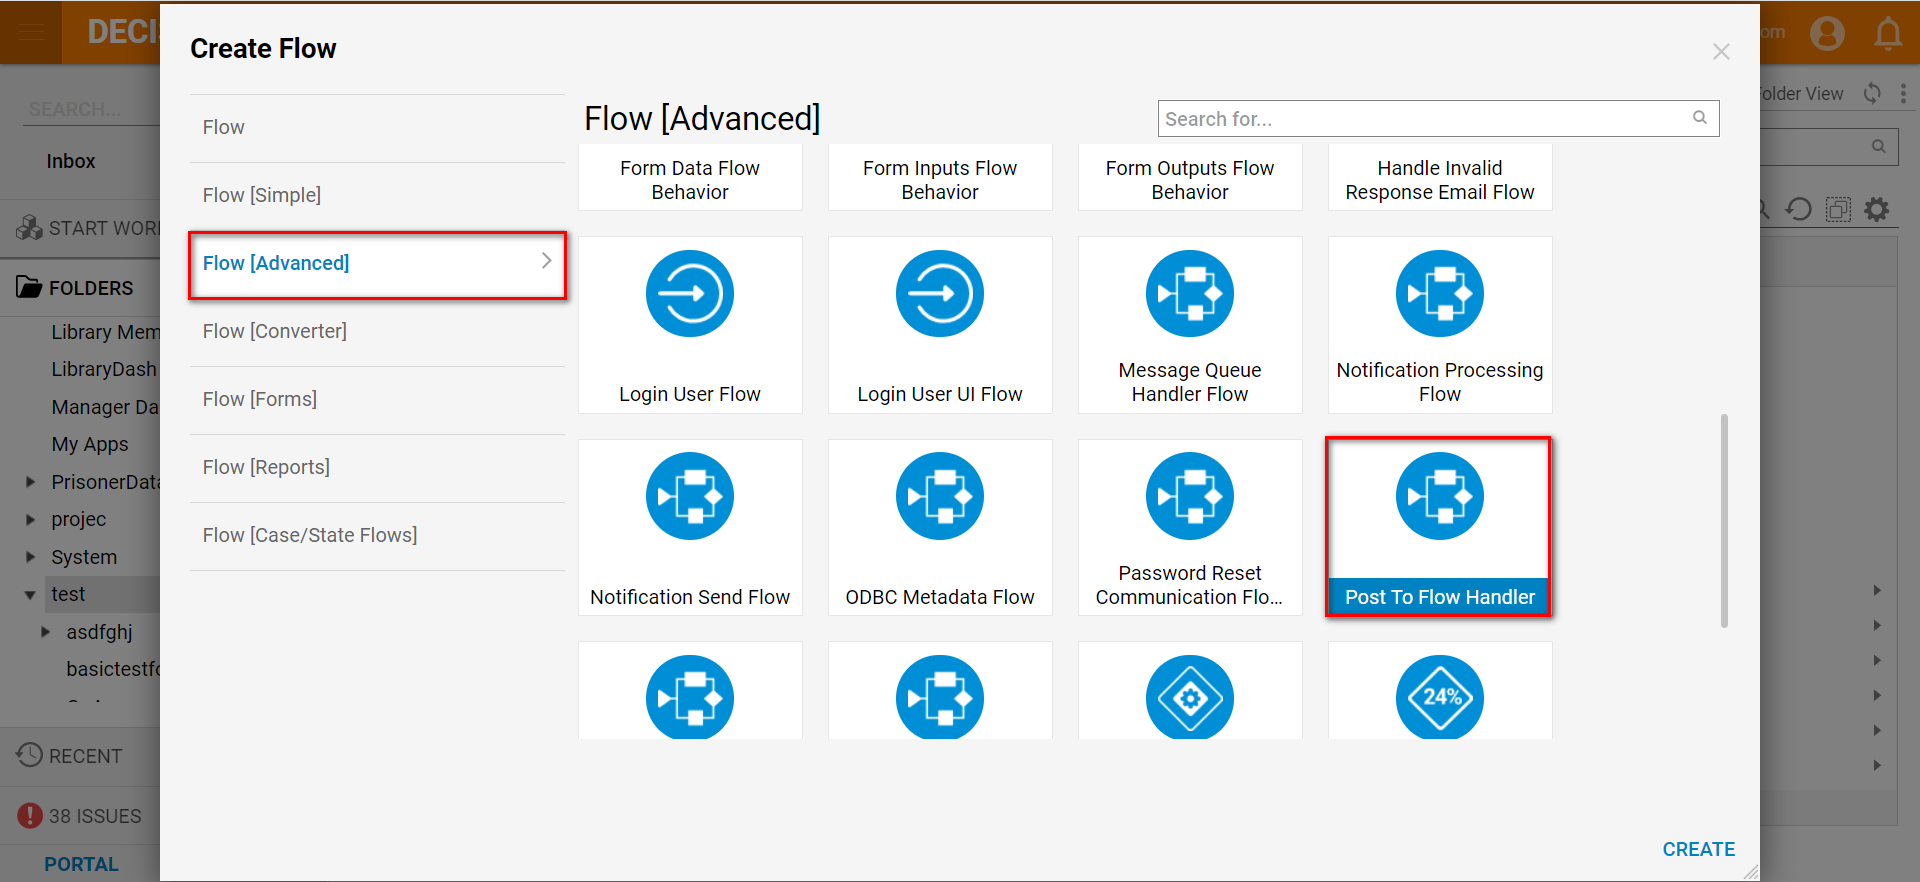
Begin in a Designer Folder by clicking Create Flow to create a new flow. From the 'Create Flow' panel, select Flow [Advanced], search for a Post to Flow Handler, and click 'Create'. Name the Flow, then click the 'Create' button to begin.
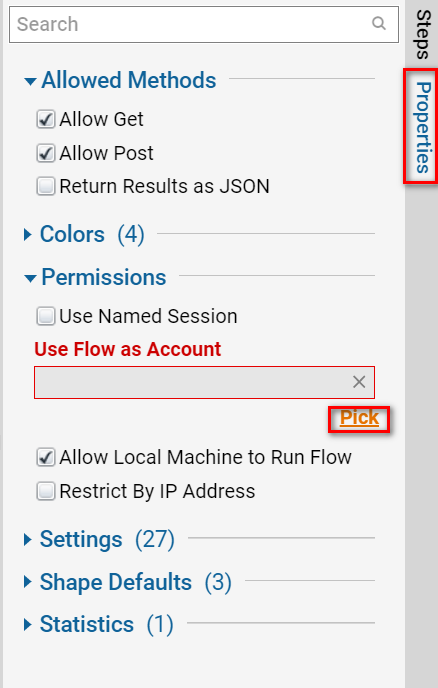
 After creating the Flow, begin by connecting the Start Step to the End Step. Then, navigate to the Properties tab on the right to find the Use Flow as Account setting. Click Pick and select an account to pass the desired authorization level to the API call.
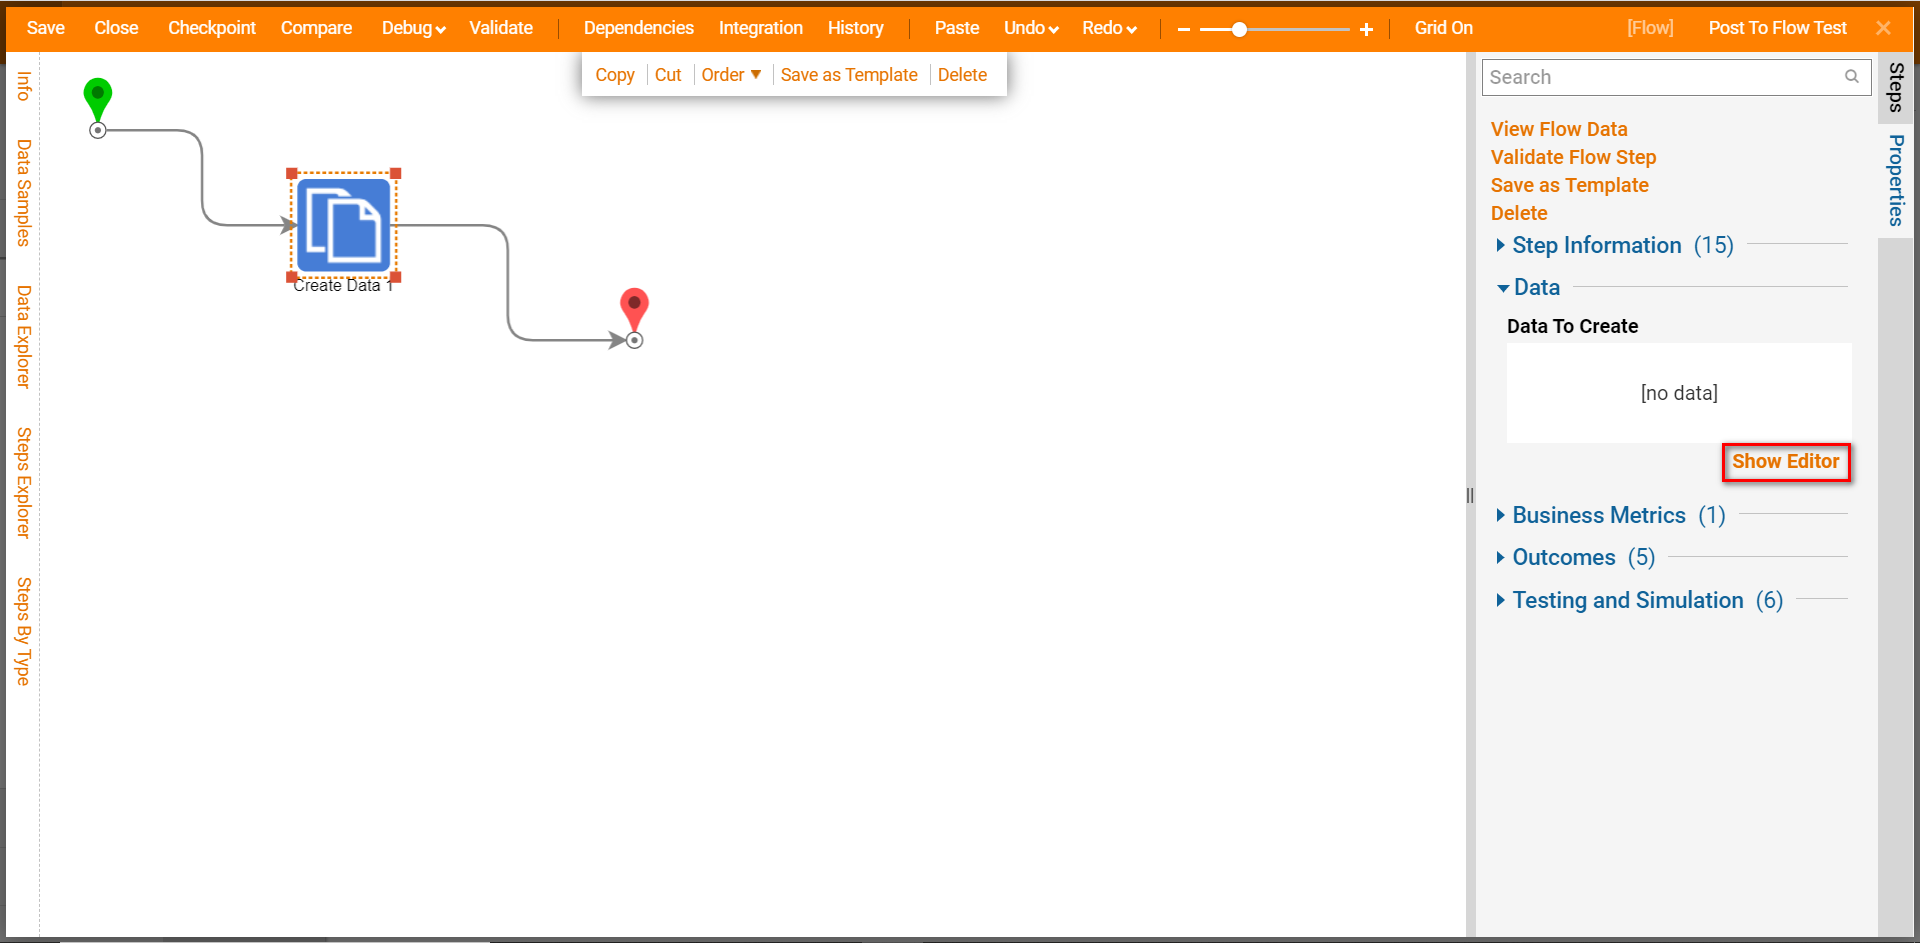
Search for and drag and drop in a Create Data step. Then, navigate to the Properties panel for this step and click Show Editor under Data to Create.
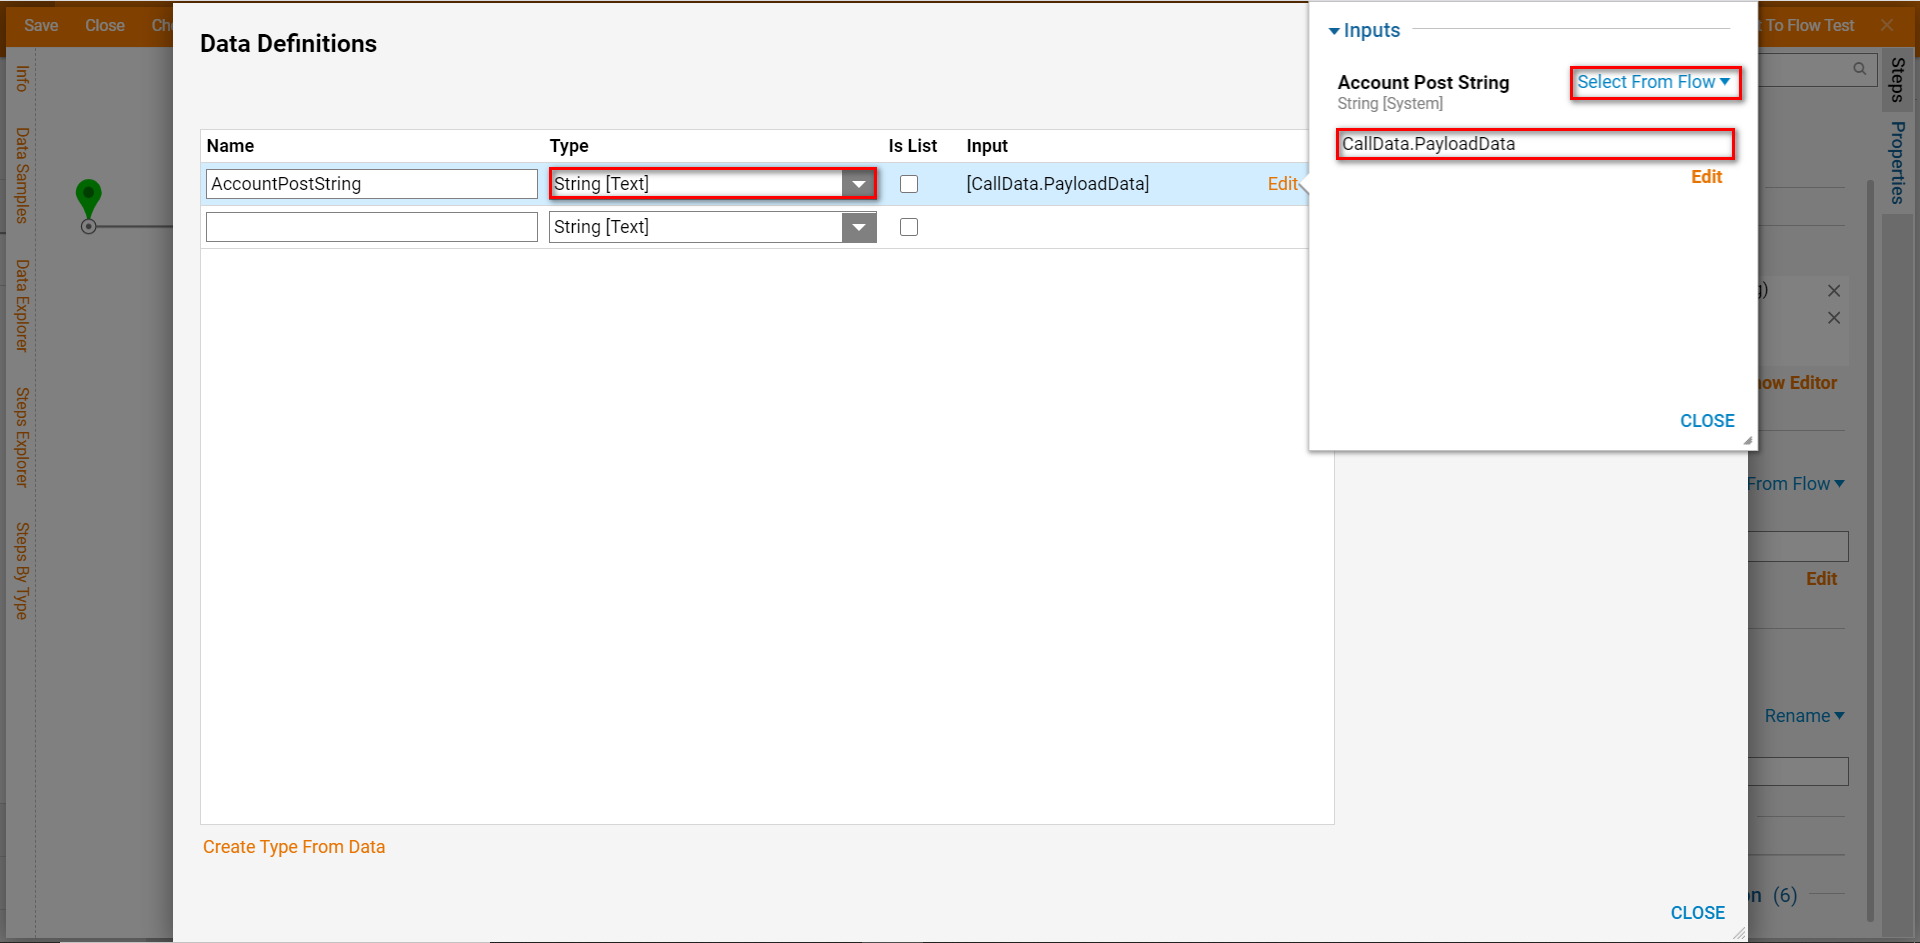
First name the Data Definition, then select String [Text] from the Type drop-down. Select From Flow map CallData.PayloadData to this data. This mapping will deserialize the body text from a Post call and turn it into a string that can be used in Decisions. 'Close' twice to save and exit the data editor.
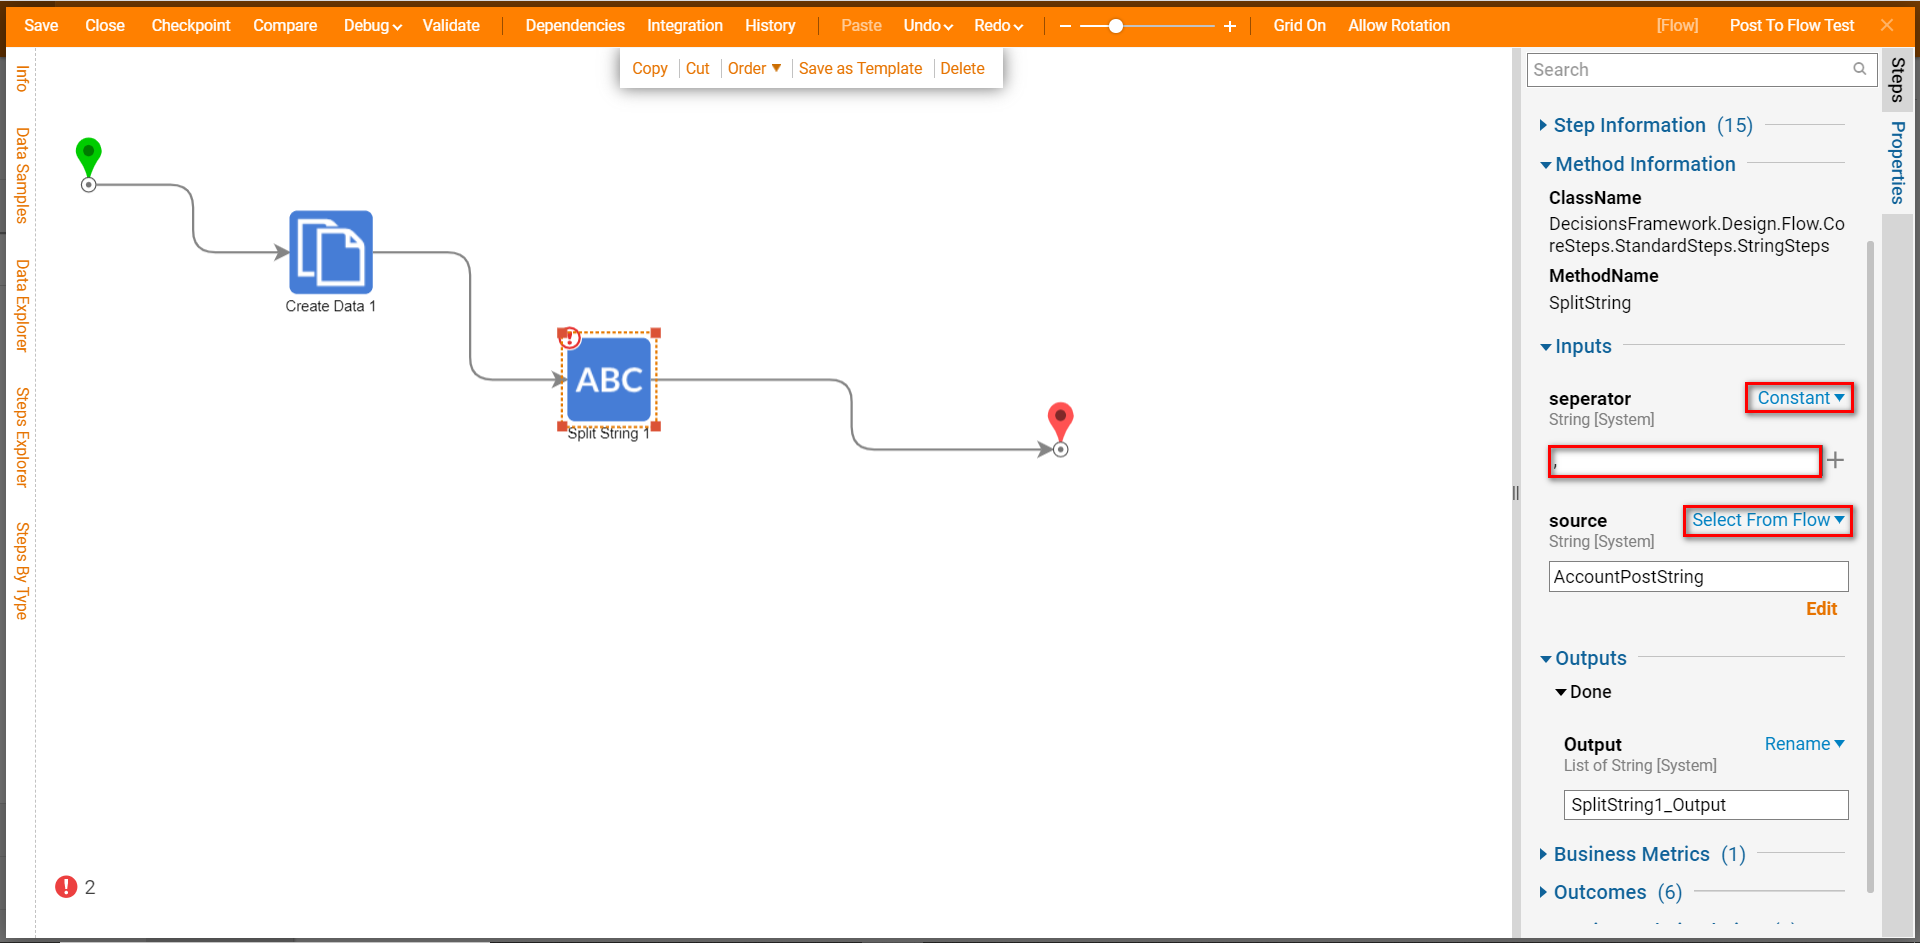
Next, search for and add a Split String step; this step will serve as a way to separate data received from Post so that it can be used for individual parts of a data type. To configure the separator, select this step to navigate the Properties tab. Then, Constant map a comma as the separator, and Select From Flow map the output of the Create Data step to the Input for source.
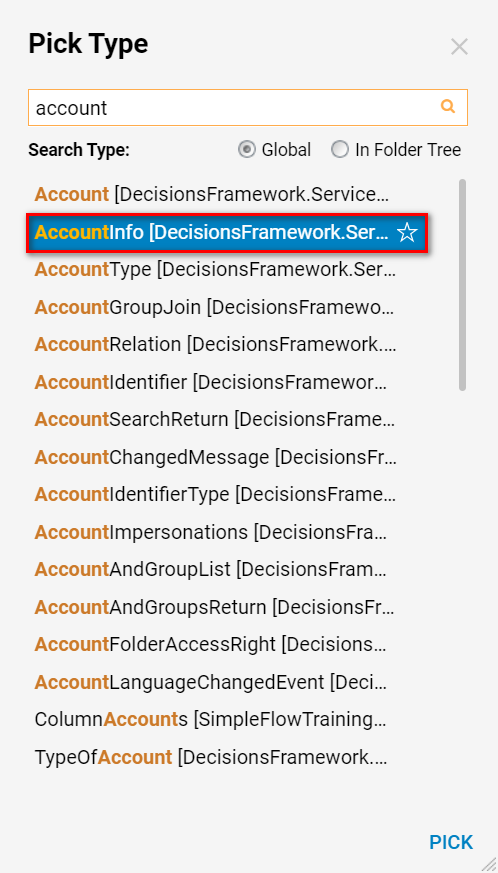
Next, add another Create Data step after the Split String step; this step will act as a method of creating Account Info data that can be used in Decisions from the divided received Payload data. After adding this step, access the Data Definitions panel and create an AccountInfo [DecisionsFramework.ServiceLayer.Services.Accounts] data type.
Next, define the Input for this Datatype. From the Data Definitions panel, select Edit besides 'Input'. Then, click the drop-down arrow besides 'Ignore' and choose Build Data.

Select From Flow map the Name property as SplitString1_Output.First, and the EmailAddress property as SplitString1_Output.Last. Mapping these properties will pass information from the Split up string into the newly created AccountInfo data type.
To ensure that the Flow is working as intended, add a Send Notification (Communication) step. From the Properties tab, click AddNew under NotifyUser to choose an account to receive the notification.
.png)
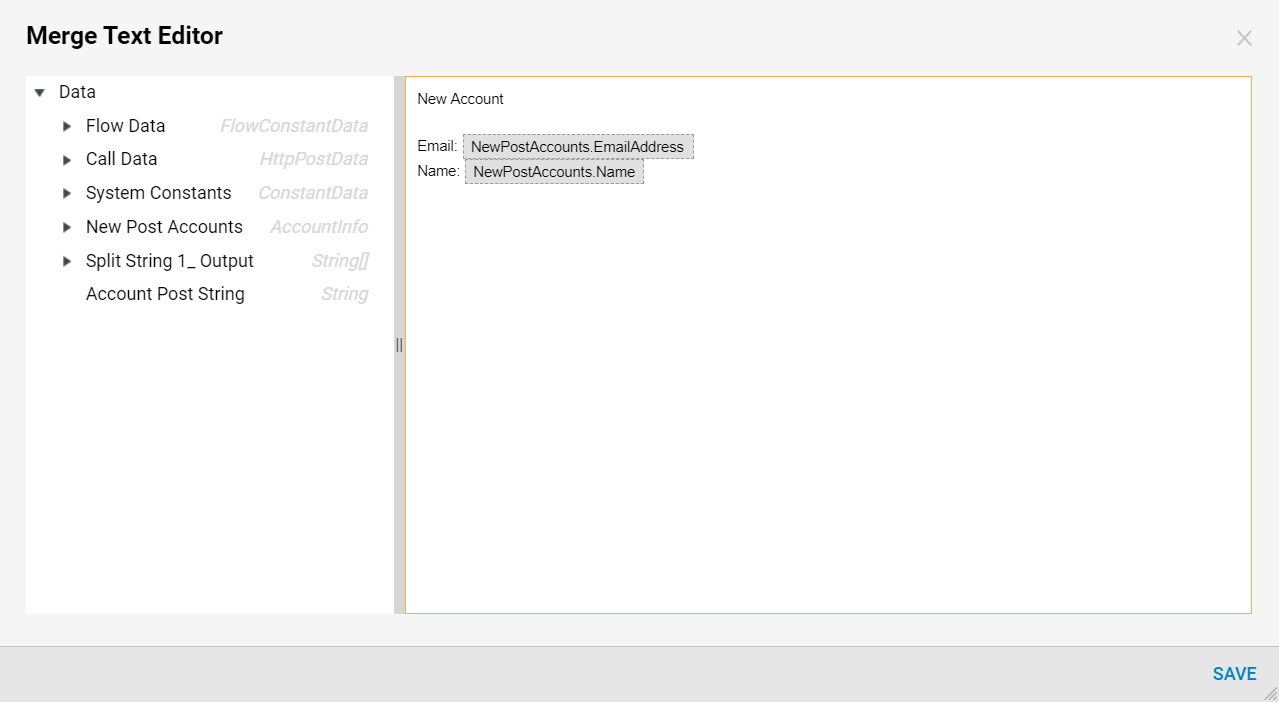
Merge Plain Text the Input for Message with the following parameters by adding the the data through way of the data panel on the left.
Save to save changes and close the editor; you may ignore the inputs for Accounts and Groups, and Subject.
'Save' and 'Close' the Flow.
Integration
To begin configuring a Postman call, access the Integration Details for the Post Handler. From the Flow Designer, click the Integration button located in the top tool bar.

From this screen, change the HTTP Method from GET to POST. Afterward, click Show Service API. This will display the URL required to make a call via Postman.
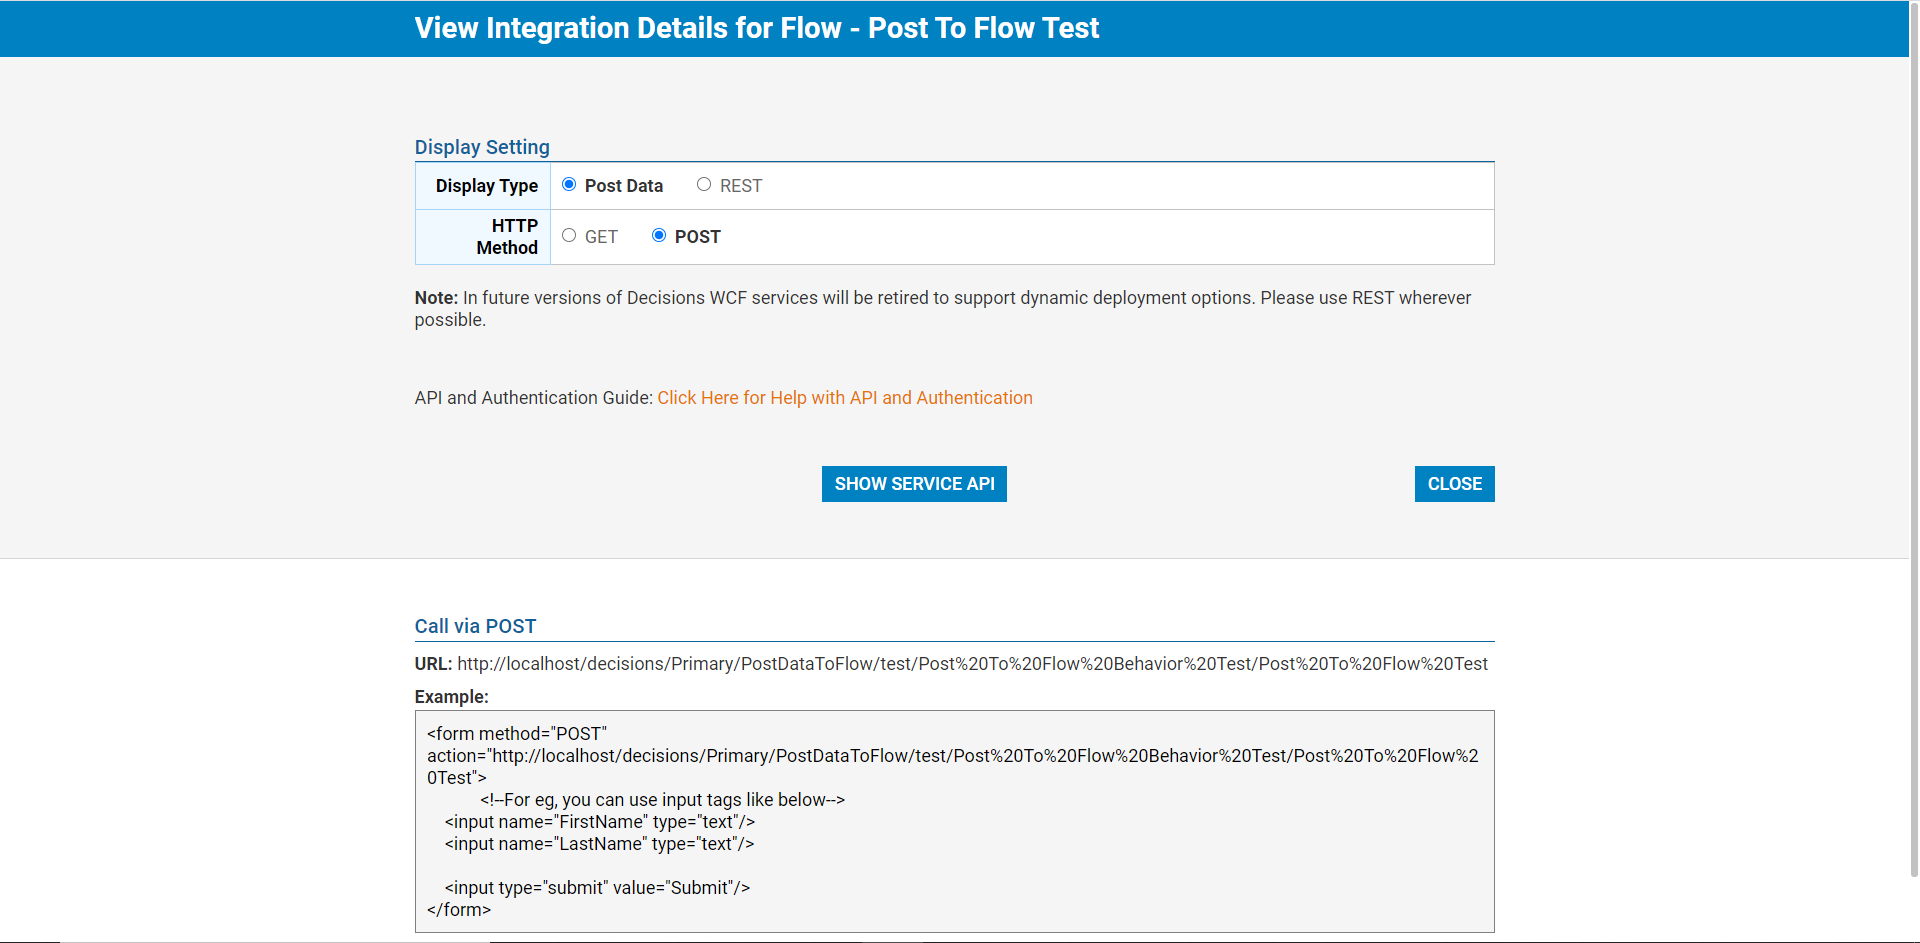
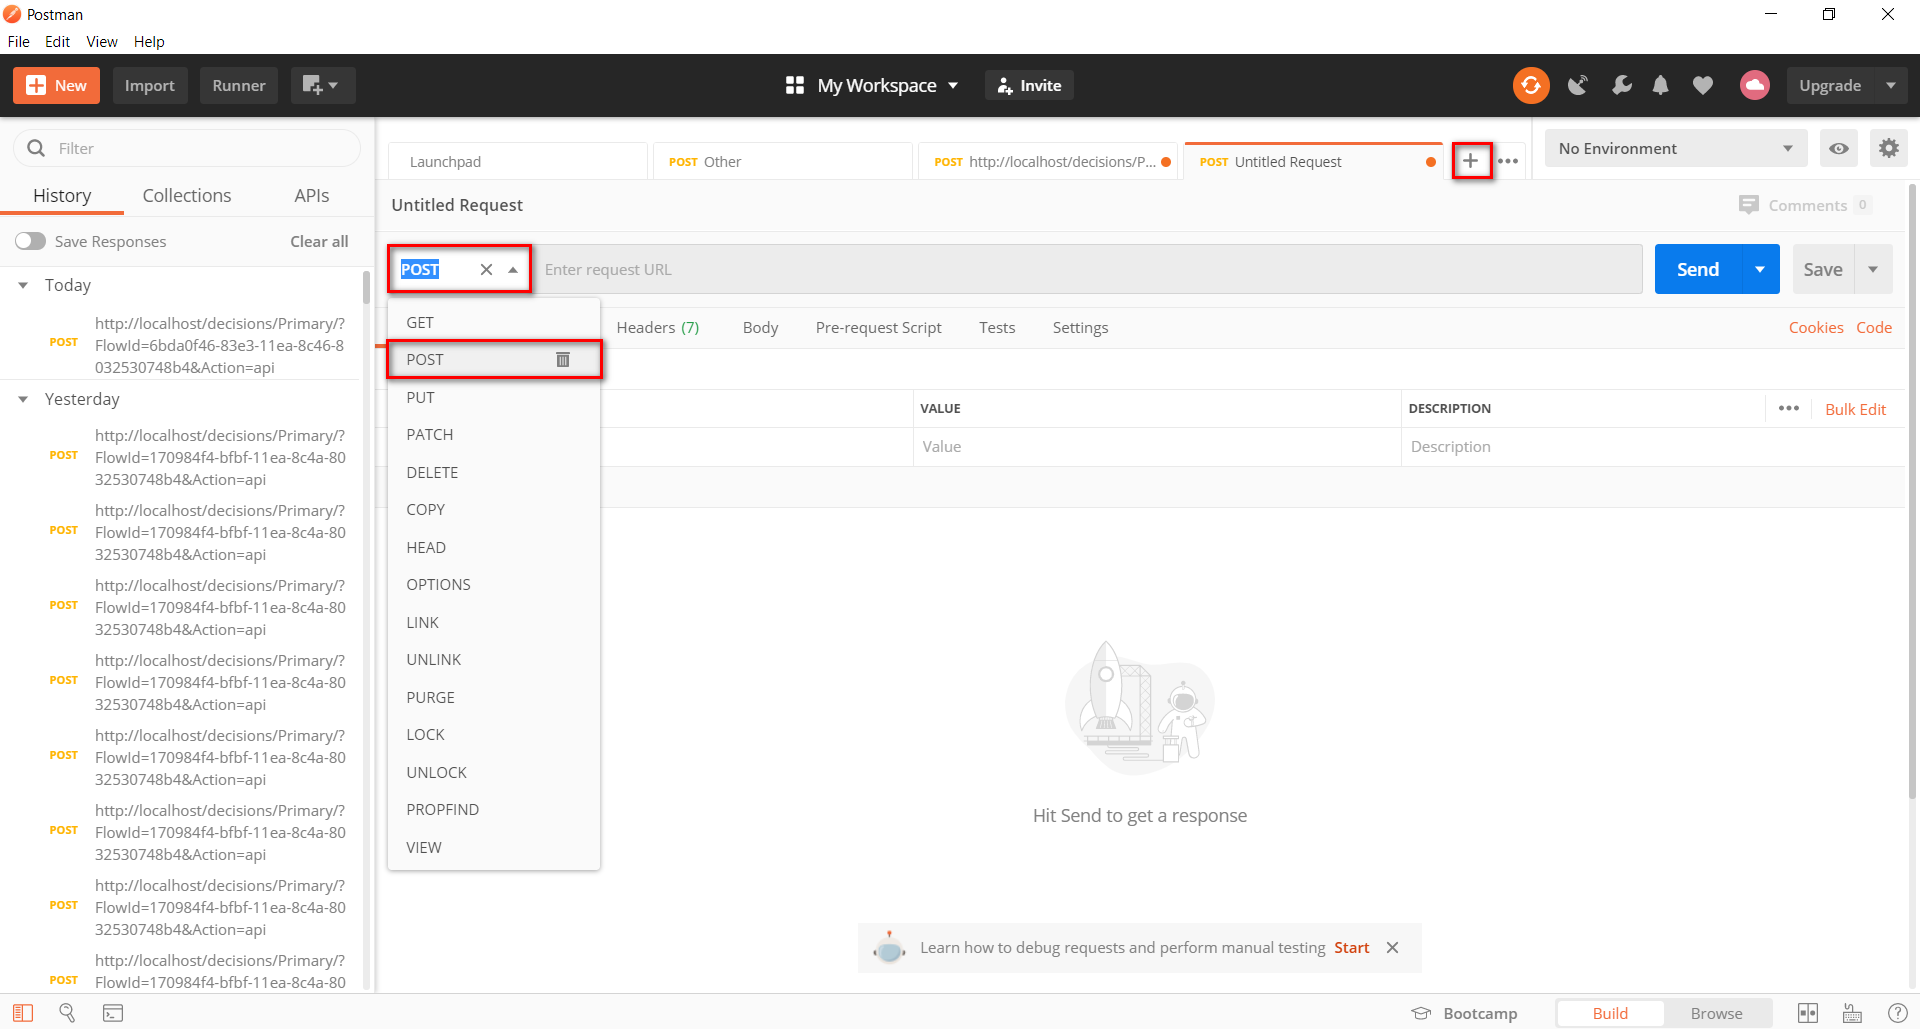
Copy this URL and open Postman. Click the Add button to create a new request in Postman. Next, to the left of the URL box, click the drop-down arrow and select the POST type. Afterwards, paste the corresponding URL to the Post handler, into the URL box.

Next, configure the POST body by clicking Body. After selecting Body, select raw from the input toolbar located underneath the URL toolbar.

Since this example only deals with the Payload data, the body only has to be a simple text input and does not require any further Postman configuration. In the input text field type a user's name and a comma. Then on a separate line of text, type in the user's email. Finally, click Send to submit the POST call.
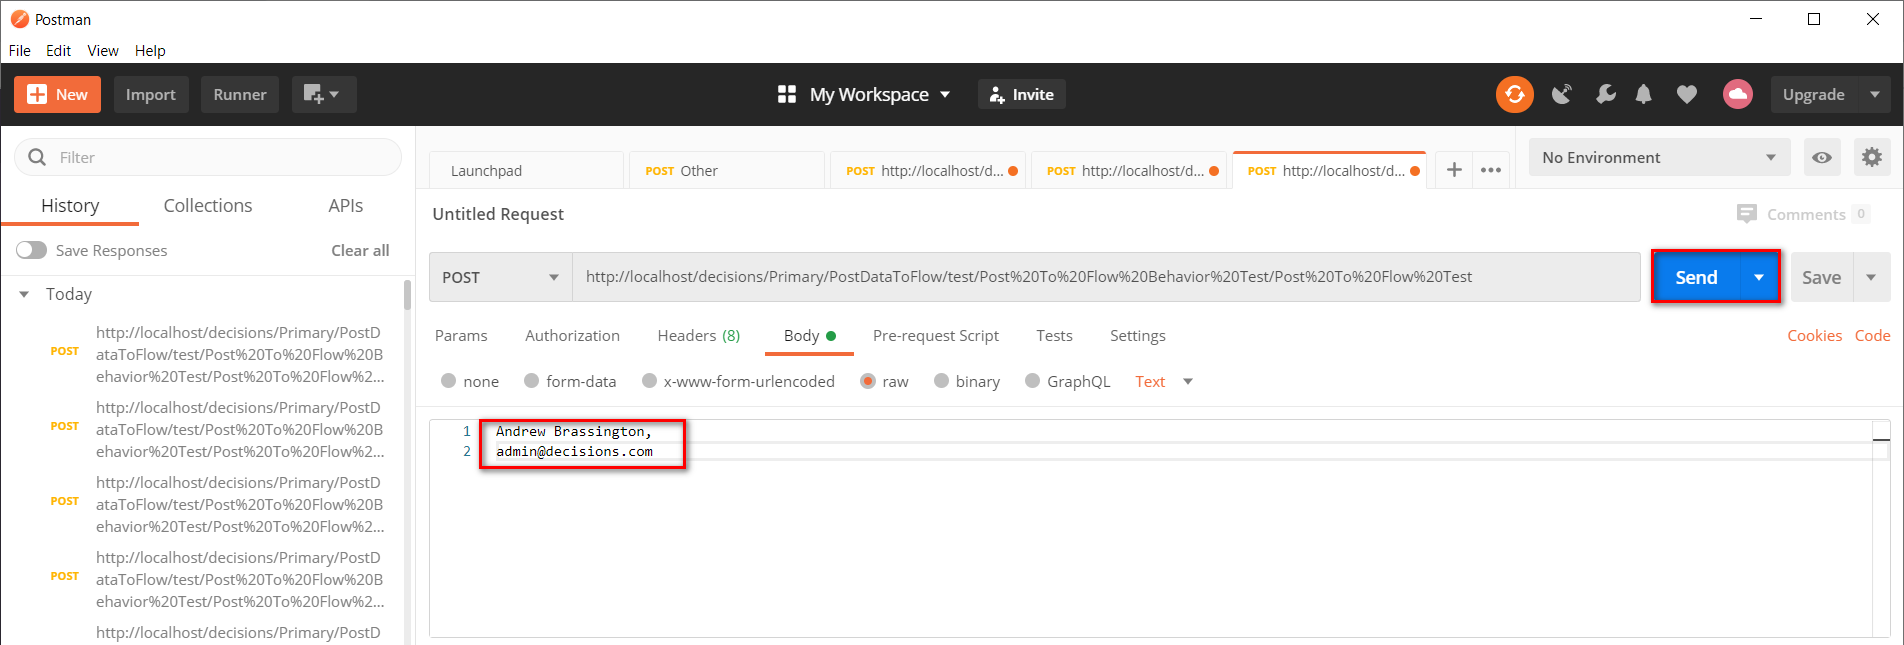
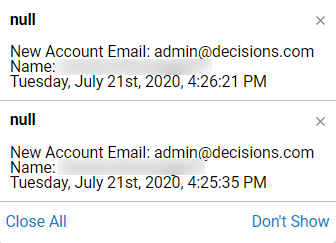
Submitting the POST call will return a result for the Output underneath the Input box. Given that the Flow is configured to create AccountInfo data for Decisions, the output will return as DecisionsFramework.ServiceLayer.Services.Accounts.AccountInfo; to verify the information is being received by the Flow, return to Decisions to see the notification received by the user. As configured, the notification displays the inputted email first, and the user's name second, demonstrating that Decisions has created the AccountInfo data.
