Overview
The following document covers two different methods for setting up true Multi-Threading. Multi-Threading in Decisions refers to instances wherein the system executes multiple Threads simultaneously to process batches of Items within a Flow.
Typically, Asynchronous processes are created to run multiple independent processes. However, not all Async processes run on different Threads; some merely run multiple Synchronous processes in Parallel.
- Technical Multi-Threading Overview
- Run Flows For List Step
- Batch Insert Step
- About Sync and Async Sub Flows (See Start Linked Flow Async section).
Run Flows For List [Batch Processing]
The Run Flows For List step utilizes a built-in Flow to process a List of Items using backend Parallel-Processing.
To create true Multi-Threading with the Run Flows For List step:
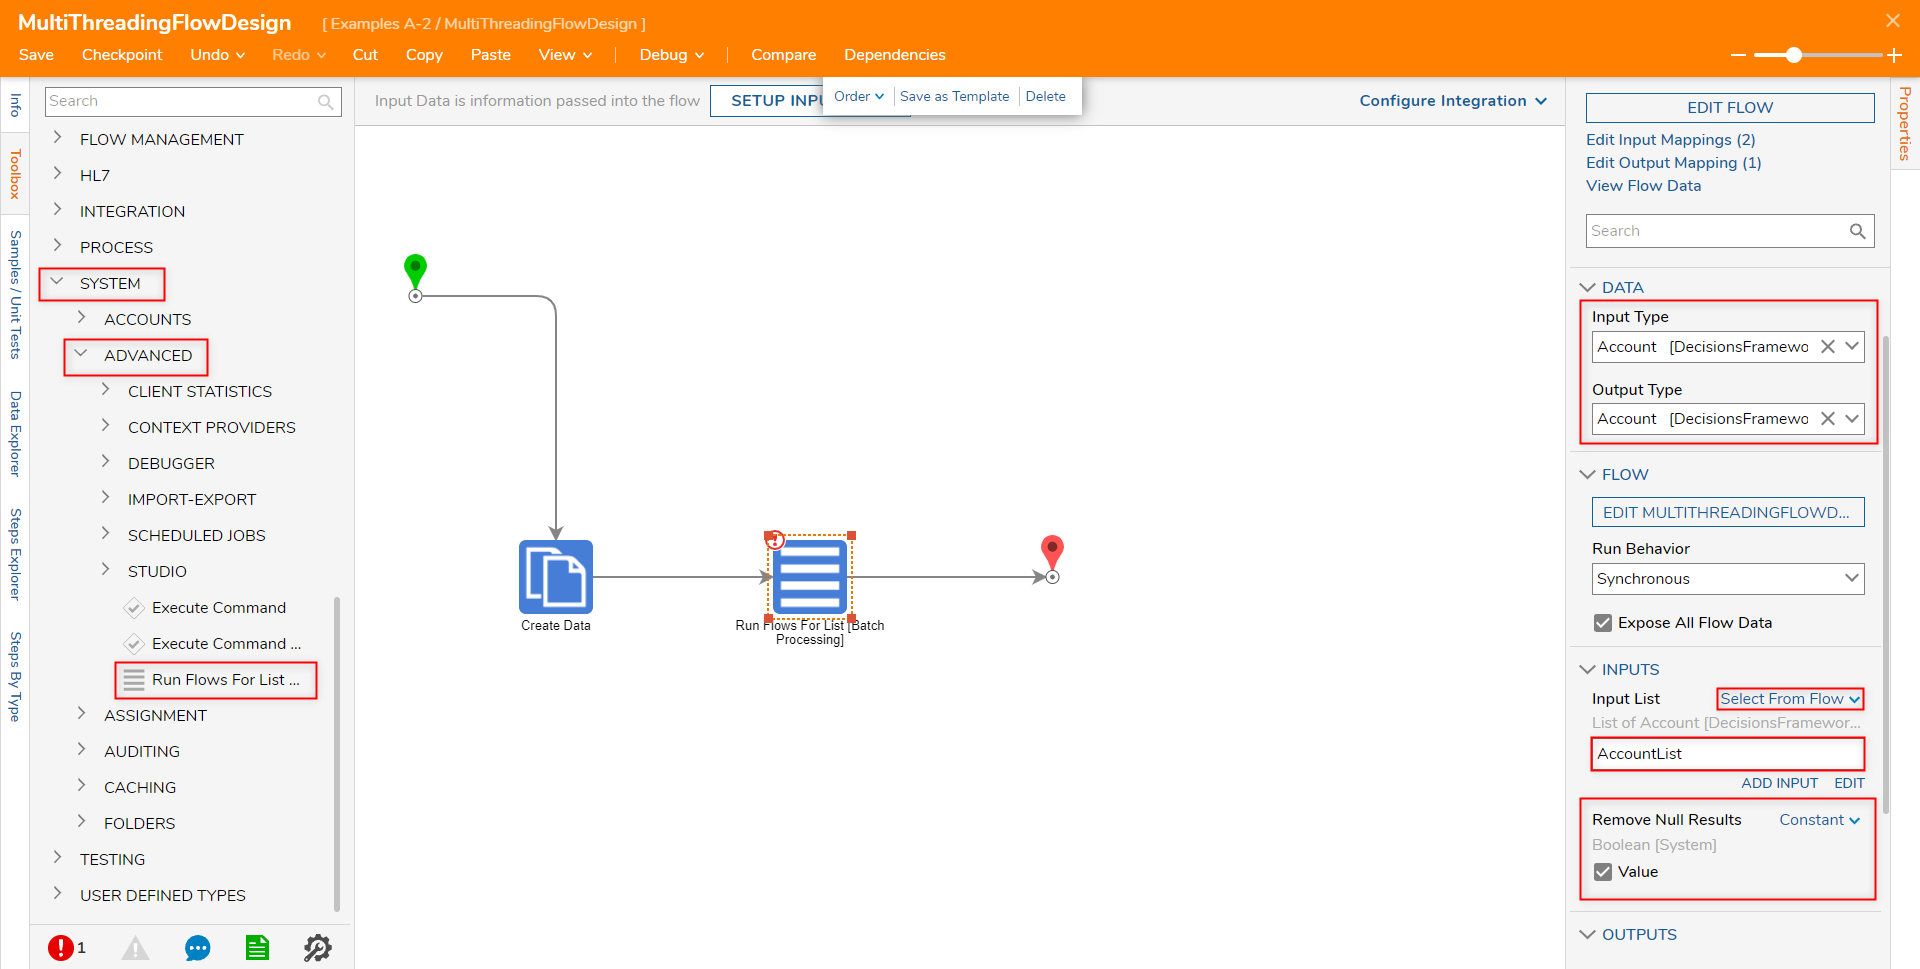
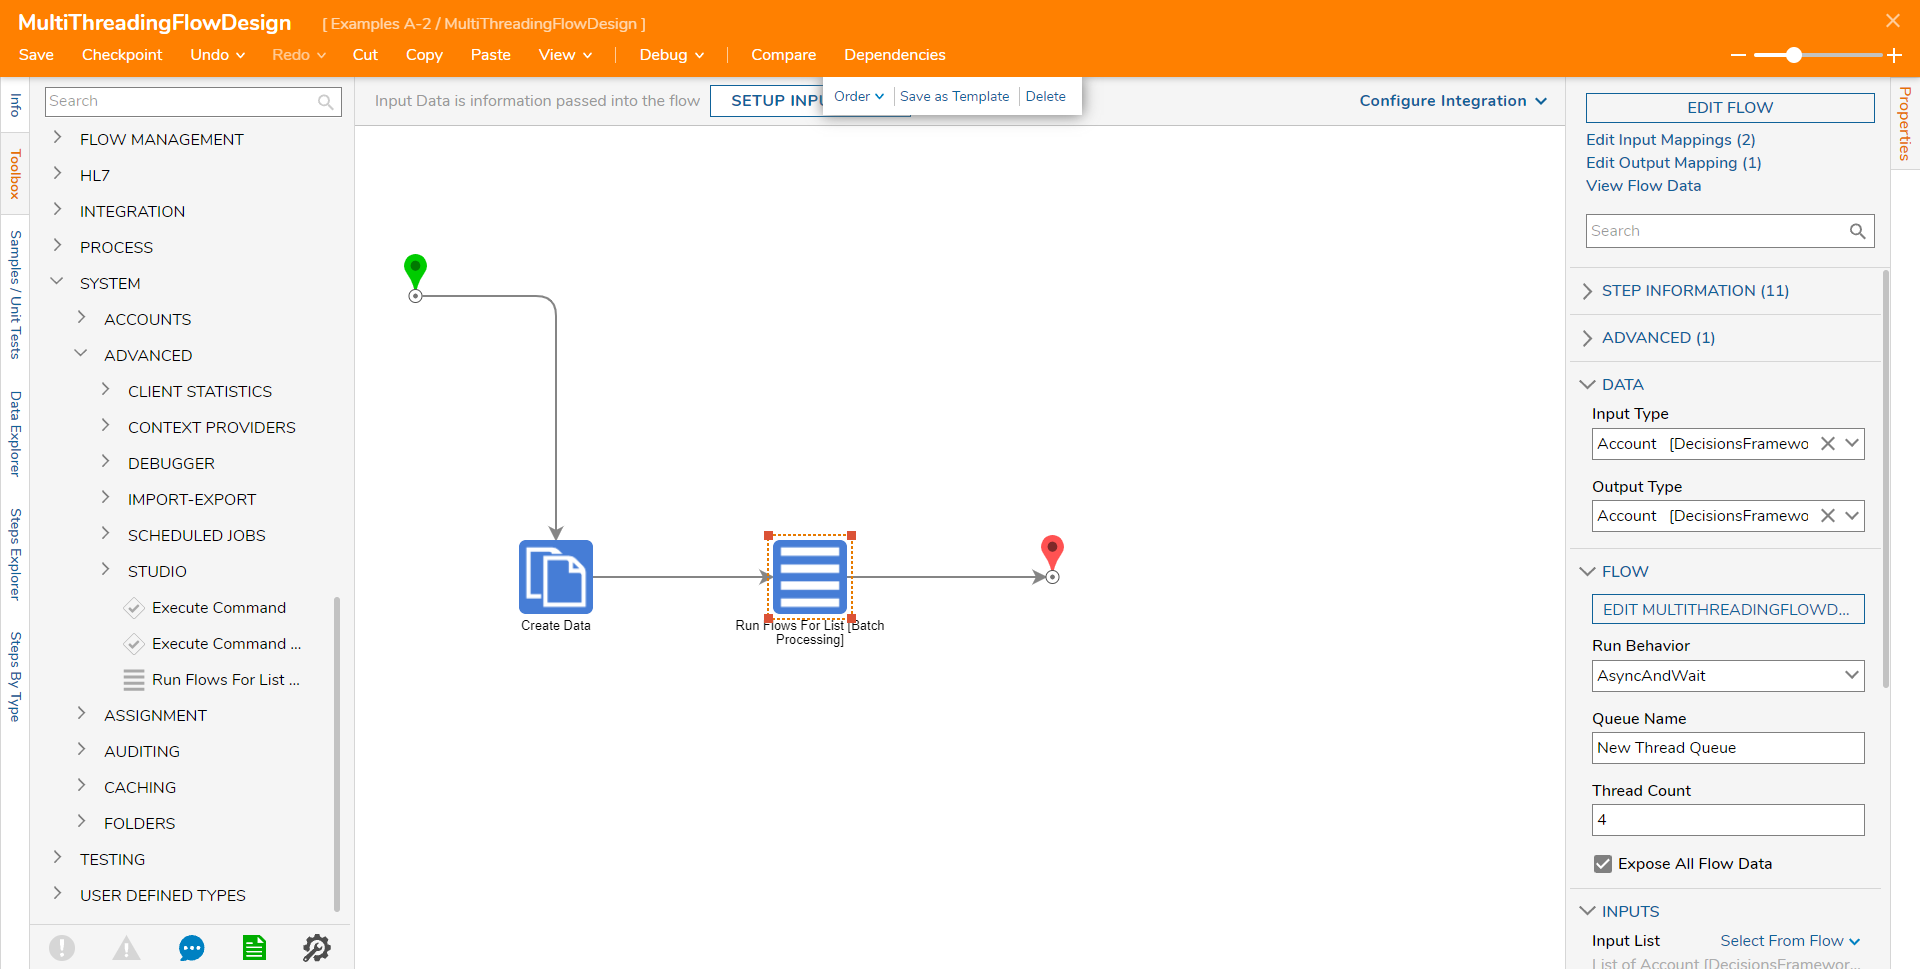
- From the Flow Designer add a Run Flows For List [Batch Processing] step from Toolbox > SYSTEM > ADVANCED to the Flow.
- Navigate to the newly added step's Properties tab.
- Click the step to navigate to its Properties tab.
- Under DATA > Input Type, select the desired DataType that matches the Input Data (in this case Account). Then, select the desired Output Type.
- Under the INPUTS section, map the desired List to Input List. If desired, Constant map a value for the Remove Null Results Boolean.
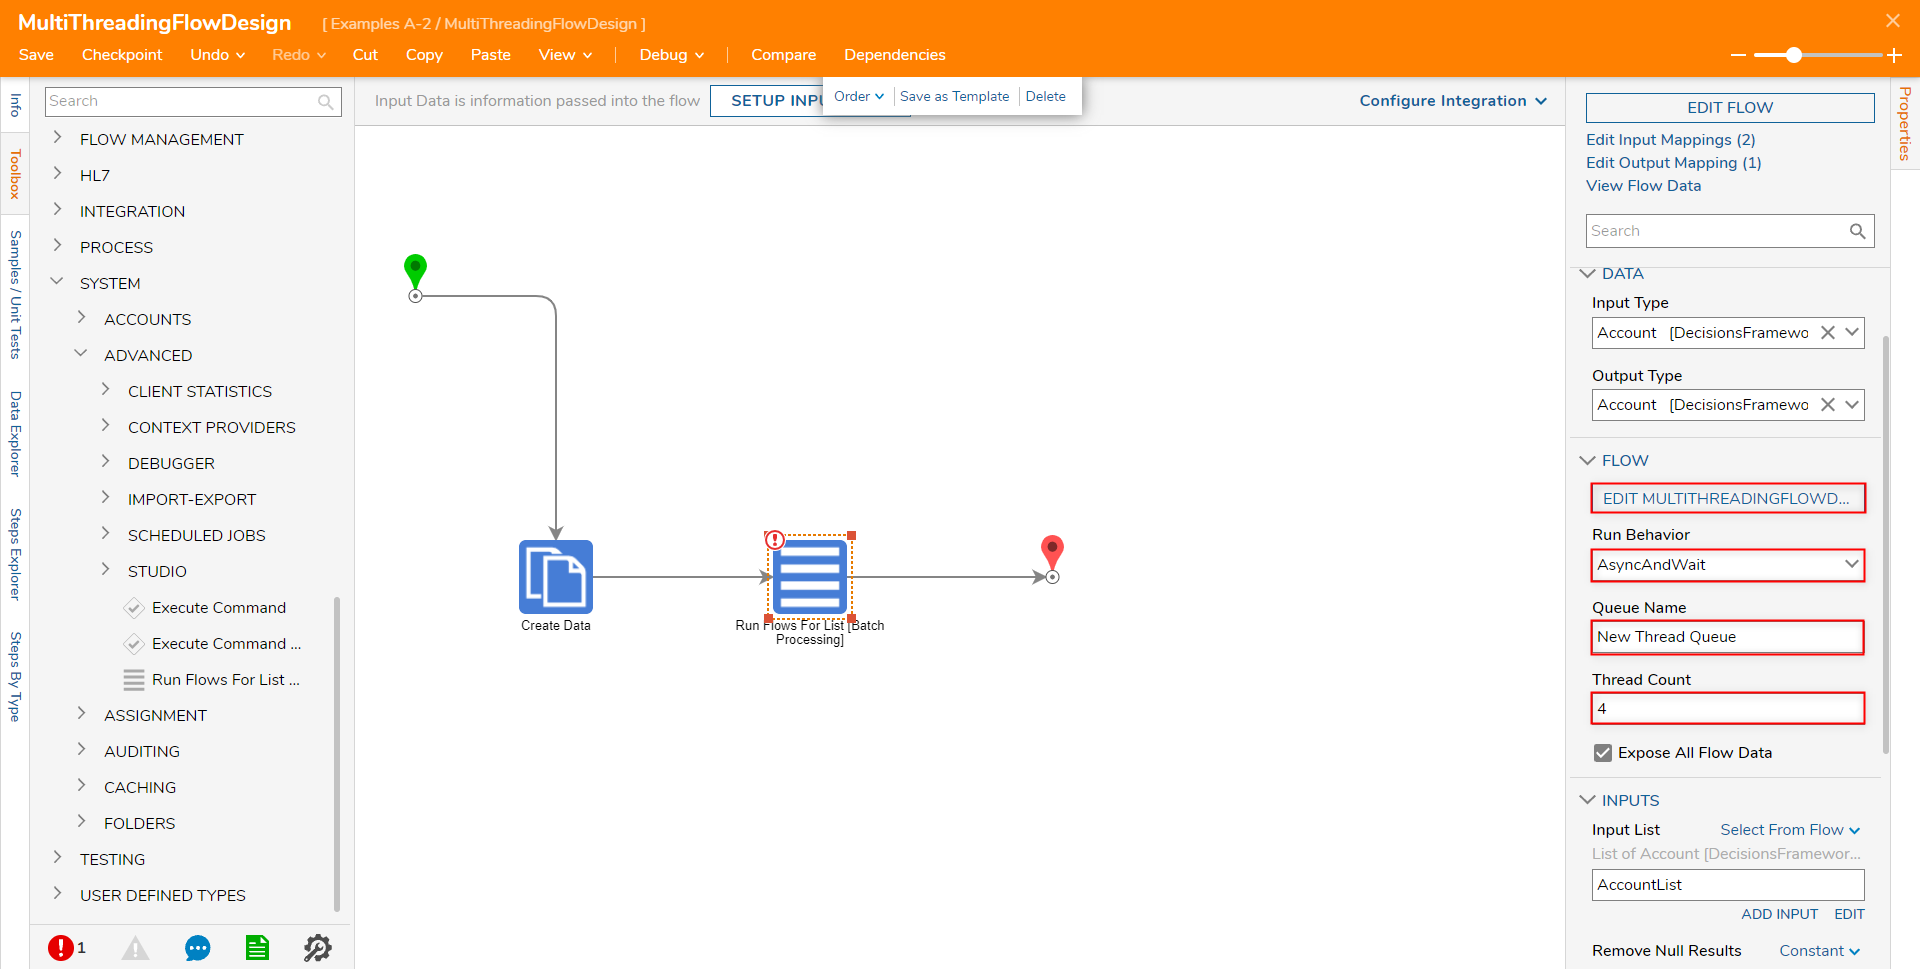
- Under the FLOW category, change Run Behavior to ASyncAndWait.
- Declare a Queue Name that differs from the default name (ex: NewThreadQueue).
- Under Thread Count, define the desired number of Threads for the step to utilize in parallel. Then click the EDIT [THREAD FLOW NAME] button. Note on Thread CountNote that since each individual Thread on the Run Flows For List step is a separate Flow process, running too high of a number may impact System performance. It is advised to use a lower Thread Count number such as "4" to test the impact of the step on the System.
From the newly opened Flow Designer, define the desired process logic; map the resulting value to INPUTS > Output Data on the End step.
About Process LogicAs the description underneath the Action Bar suggests, the Thread processing Flow takes in the Input defined on the Run Flows For List step and processes through them to return a value for each item.
For this example, a Fetch Entities step is used to obtain Account items.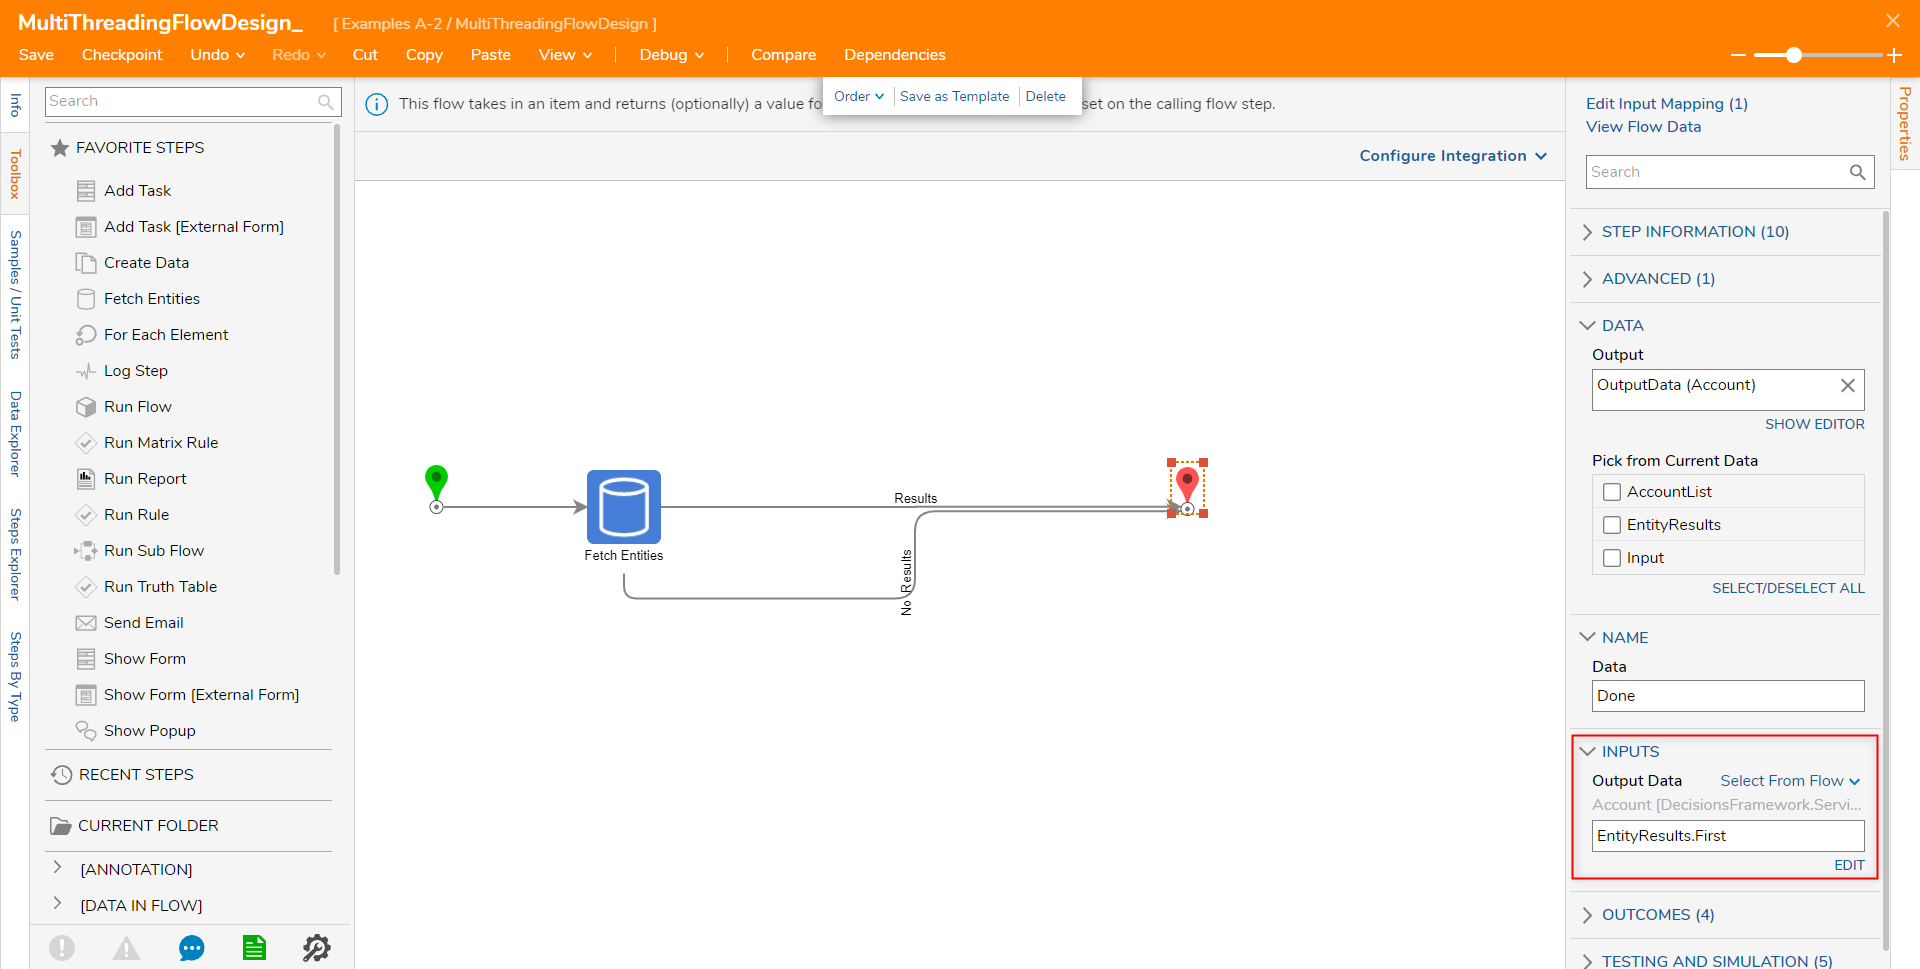
- Save and close the Flow to return to the Parent Flow.
- Finish the Flow design as desired.
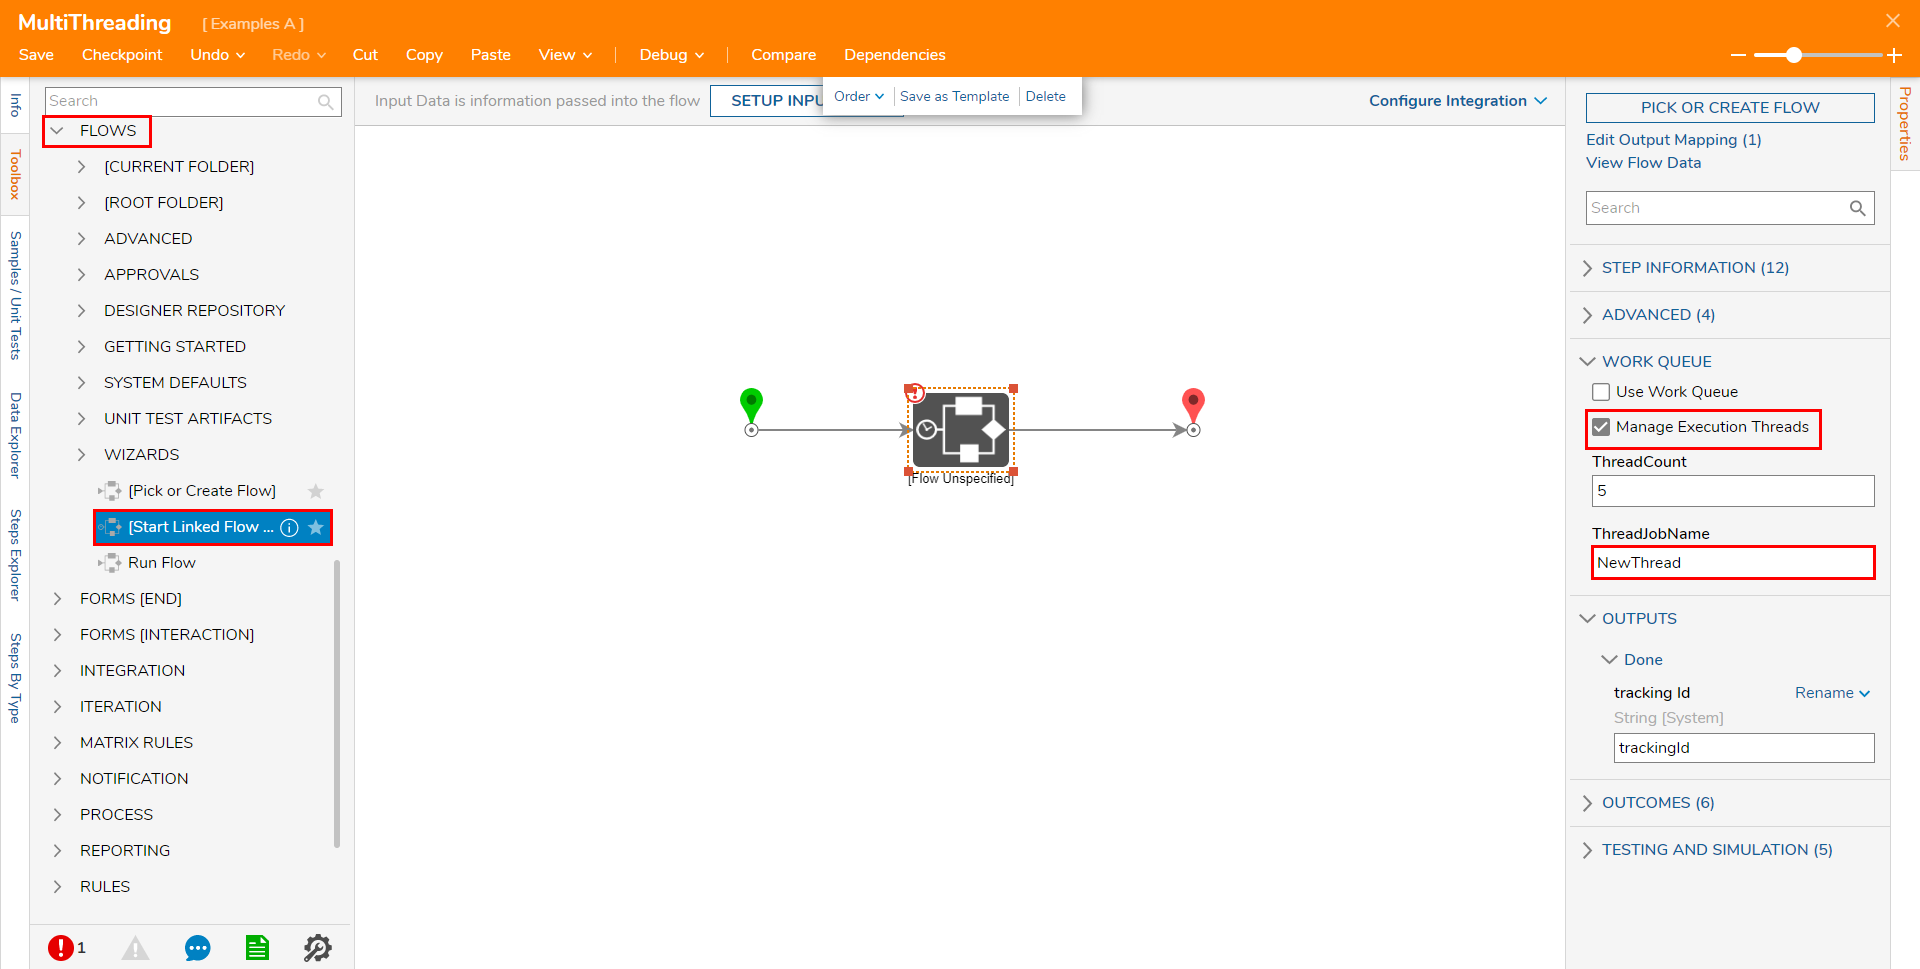
[Start Linked Flow Async]
The Start Linked Flow Async step is one of the most commonly utilized steps in Decisions that is used to achieve Asynchronous behavior. By properly configuring the step, users may achieve Multi-Threaded processing through the use of Job Queues on the step.
To enable Multi-Threaded behavior on the Start Linked Flow Async step:
- From the Flow Designer, add a [Start Linked Flow Async] step from the FLOWS category of the Toolbox tab.
- Click the step to navigate to its Properties tab.
- Under WORK QUEUE, check the Manage Execution Threads box.
- Define a new ThreadJobName that differs from the default (ex: NewThread).
